Deployment Options in Apache Axis2

- Deepal Jayasingha
- - WSO2
Adding them together, we have the following deployment options.
- Archive-based deployment
- Directory-based deployment
- Deploying a service programmaticaly using archive files
- Programmaticaly making a Java class into a Web service
- POJO (Plain Old Java Object) deployment support along with annotation
- Deploying and starting Axis2 in one line
Archive-based Deployment
The most common and recommended approach of deploying a service in Axis2 is the Archive-based deployment. Here we get many configuration options and more flexibility compared to the other types. In this type of deployment, we have to write a services.xml file, and the service classes. Then we need to create a service archive file bundling all together. The service archive file is nothing but a zip file, which renames the .zip extension into .aar Then the created archive file needs to be dropped into the repository/services directory of the Axis2 binary distribution or the WEB-INF/services directory of the Axis2 war distribution.
The Axis2 distribution comes with IDE plug-ins (both Eclipse and IntelJ Idea) for creating a service archive file. These plug-ins will guide us to create the service archive file when we have a service implementation class. This will create the services.xml file for us.
Directory-based Deployment
Directory based deployment is almost equal to archive based deployment. The only difference is rather than creating the archive file, we can deploy the service as a directory. The structure of the directory is equal to the structure of an archive file.
Deploying the Service Programmatically
Deploying the service programmatically using the archive file is not really a user requirement. Rather it is the module author's requirement, where some modules require to deploy a Web service in order to provide the full functionality of that particular module.
To create a service programatically, we need to have the file object representing the service archive file, and a pointer to an Axis2 run time or to ConfigurationContext. Once we have these two, we can create a Web service as shown in the code fragment below. The advantage of this approach is that you do not need to copy your service archive file into the repository, and your service will be visible only at runtime .
//Need to have a reference to ConfigurationContext
ConfigurationContext configContext = getConfigurationContext();
File serviceArchiveFile = new File("Location of the file");
//Now let's create AxisServiceGroup which contains the service we want to have
AxisServiceGroup serviceGroup = DeploymentEngine.loadServiceGroup(
serviceArchiveFile,
configContext);
Once we have created the service, the next step is to add the service into the system. We can do that as follows.
//Getting a pointer to AxisConfiguration
AxisConfiguration axisConfiguration = configContext.getAxisConfiguration();
//Adding the created service
axisConfiguration.addServiceGroup(serviceGroup);
POJO Deployment
To discuss about the other options, we first need to create a Java class that will be exposed as a service. Assume that we have a Web service with the two methods 'sayHello' and 'add'. Then the service Java class will look as follows.
public class MyService {
public String sayHello(String name) {
return "Hello " + name;
}
public int add(int a, int b) {
return a + b;
}
}
Making a Java class into a Web service is a very handy feature in Axis2, and it is very useful when debugging and developing a Web services. In this case, we do not need to know anything about the archive file concept, services.xml. We just need to have a pointer to AxisConfiguration. Then we can create a Web service using the above Java class as follows.
//Need to have a pointer to AxisConfiguration
AxisConfiguration axisConfiguration = getAxisConfiguration();
//Creating a service using java class
AxisService service = AxisService.createService(
MyService.class.getName(),
axiConfiguration);
// Adding the created Service in to AxisConfiguration
axisConfiguration.addService(service);
The above deployment mechanism can be considered as a POJO deployment as well - where we make POJO into a Web service. However, we can deploy a service as above only if we have a pointer to an AxisConfiguration. However, when we do not have a pointer to an AxisConfiguration we cannot use the above mechanism. Then we need to find some other way of achieving our goal. The other type of POJO deployment will help us in this case, where we can deploy .class files into a directory called 'pojo' in the Axis2 repository. Then Axis2 will process that .class file and make it into a Web service.
Now let's compile our Java class to get the MyService.class file. We first need to create a directory inside the repository (where the Axis2 binary distribution is unpacked) called 'pojo', on the same level as the services and modules directories. Now we have the repository as follows;
- Axis2-1.2
- repository
- services
- modules
- pojo
- repository
Now let's drop the MyService.class file into the pojo directory. If the server is not running, we need to start it (we can do that by running either the .bat or .sh file) and then type the following URL in the browser, and see the result.
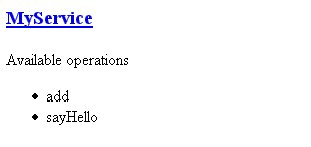
We will see the following:
MyService
Available Operations
- add
- sayHello
This gives us a hint that our service is up and running. Now let's try to invoke the service and see whether it is working. Since we have not learnt about the Axis2 client programming model yet, let's try to invoke the service using the REST method. Type the following in the browser and see what you get.
https://localhost:8080/axis2/services/MyService/sayHello?name=Axis2
We will see the following:
<ns:sayHelloResponse>
<return>Hello Axis2</return>
</ns:sayHelloResponse>
This tells us that we have actually invoked the service. Let's try to invoke the add method.
https://localhost:8080/axis2/services/MyService/add?a=10&b=15
<ns:addResponse>
<return>25</return>
</ns:addResponse>
That is exactly the addition of the above two numbers, now we are sure that we exposed and invoked our Java class as a Web service.
If we want to test this with the Axis2 Web distribution, then we can do that by copying the MyService.class file into
TOMCAT_HOME/webapps/axis2/WEB-INF/pojo
Then we need to follow the above steps and see what we get.
Deploying and Running a Service in One Line
Among all the above deployment options, this option can be considered as the most convenient way of deploying a service and starting the server. We do not need to have a repository or services.xml. The only thing we need to have is the Axis2 library file (axis2-1.2.jar) and its dependent libraries. Then we can deploy and start the Axis2 server as follows. This method of deploying and running the server is very useful when we are debugging and developing a service.
new AxisServer().deployService(MyService.class.getName());
When we start the AxisServer, it will start up the SimpleHttpServer in the port specified in the Axis2 default configuration file - which is port 6060.
Now type https://localhost:6060
Then we will see the following.
Now if we run the following URLs in the browser, then we will get the same result as above.
https://localhost:6060/axis2/services/MyService/sayHello?name=Axis2
https://localhost:6060/axis2/services/MyService/sayHello?name=Axis2
Author
Deepal Jayasinghe, Senior Software Engineer, WSO2. deepal AT wso2 DOT com