---
title: "Create REST API Proxy from GitHub"
description: "Create and auto-build a REST API proxy from a GitHub repository using a component.yaml file in WSO2 API Platform."
canonical_url: https://wso2.com/api-platform/docs/cloud/create-api-proxy/my-apis/http/import-api-from-github/
md_url: https://wso2.com/api-platform/docs/cloud/create-api-proxy/my-apis/http/import-api-from-github.md
tags:
- cloud
- api-proxy
- github
author: WSO2 API Platform Documentation Team
last_updated: 2026-06-18
content_type: "how-to"
---
# Create an API Proxy from a GitHub Repository Source
An API proxy acts as an intermediary between an existing API and API Platform, intercepting all requests made to the API. It also functions as a managed API, allowing you to apply essential API management features such as security policies and rate limiting.
## Prerequisites
1. If you're signing in to the API Platform Console for the first time, create an organization:
1. Go to [API Platform Console](https://console.bijira.dev/) and sign in using your preferred method.
2. Enter a unique organization name. For example, `Stark Industries`.
3. Read and accept the privacy policy and terms of use.
4. Click **Create**.
This creates the organization and opens the **Project Home** page of the default project created for you.
2. Fork the [API Platform samples repository](https://github.com/wso2/bijira-samples), which contains the [sample proxy source](https://github.com/wso2/bijira-samples/tree/main/reading-list-api).
## Configure component.yaml
When creating an API proxy from a GitHub repository, you must include a `component.yaml` configuration file in your repository. This file must be located at `.choreo/component.yaml` within your API directory.
### Required Configuration
The `component.yaml` file for API proxies must include the following structure:
```yaml
proxy:
type: REST
schemaFilePath: openapi.yaml
```
### Configuration Fields
| **Field** | **Required** | **Description** |
|-----------|--------------|-----------------|
| `proxy.type` | Required | The type of API proxy. Supported values are:
- `REST` - For REST APIs (uses OpenAPI specification)
- `WS` - For WebSocket APIs (uses AsyncAPI specification) |
| `proxy.schemaFilePath` | Required | The path to your API specification file relative to the API directory. For REST APIs, this should point to your OpenAPI specification file (e.g., `openapi.yaml`). For WebSocket APIs, this should point to your AsyncAPI specification file (e.g., `asyncapi.yaml`). |
!!! note
The `component.yaml` file must be present in the `.choreo` directory within your API directory for API Platform to successfully build and deploy your API proxy from GitHub.
## Step 1: Create an API proxy
You can create an API proxy either by selecting the source from a GitHub repository, uploading an OpenAPI specification file, or providing an OpenAPI specification URL. This guide demonstrates how to create an API proxy using a GitHub repository as the source.
1. Go to the [API Platform Console](https://console.bijira.dev/) and sign in. This opens the project home page.
2. If you already have one or more components in your project, click **+ Create**. Otherwise, proceed to the next step.
3. Select Import API Contract and click on GitHub tab.
4. Click on **Authorize With GitHub** card under **Connect a Git Repository** section to connect your GitHub account.
- If you haven’t connected your GitHub repository to API Platform, enter your GitHub credentials and select the repository you forked in the prerequisites section to install the [API Platform GitHub App](https://github.com/marketplace/choreo-apps).
!!! note
The **API Platform GitHub App** requires the following permissions:
- Read and write access to code and pull requests.
- Read access to issues and metadata.
You can [revoke access](https://docs.github.com/en/authentication/keeping-your-account-and-data-secure/reviewing-your-authorized-integrations#reviewing-your-authorized-github-apps) if needed. Write access is only used for sending pull requests; API Platform will not push changes directly to your repository.
!!! note
If you are the owner of the GitHub organization and need to authorize the API Platform GitHub App on behalf of your collaborators, you can install the API Platform GitHub App directly in your organization via [install App](https://github.com/marketplace/choreo-apps).
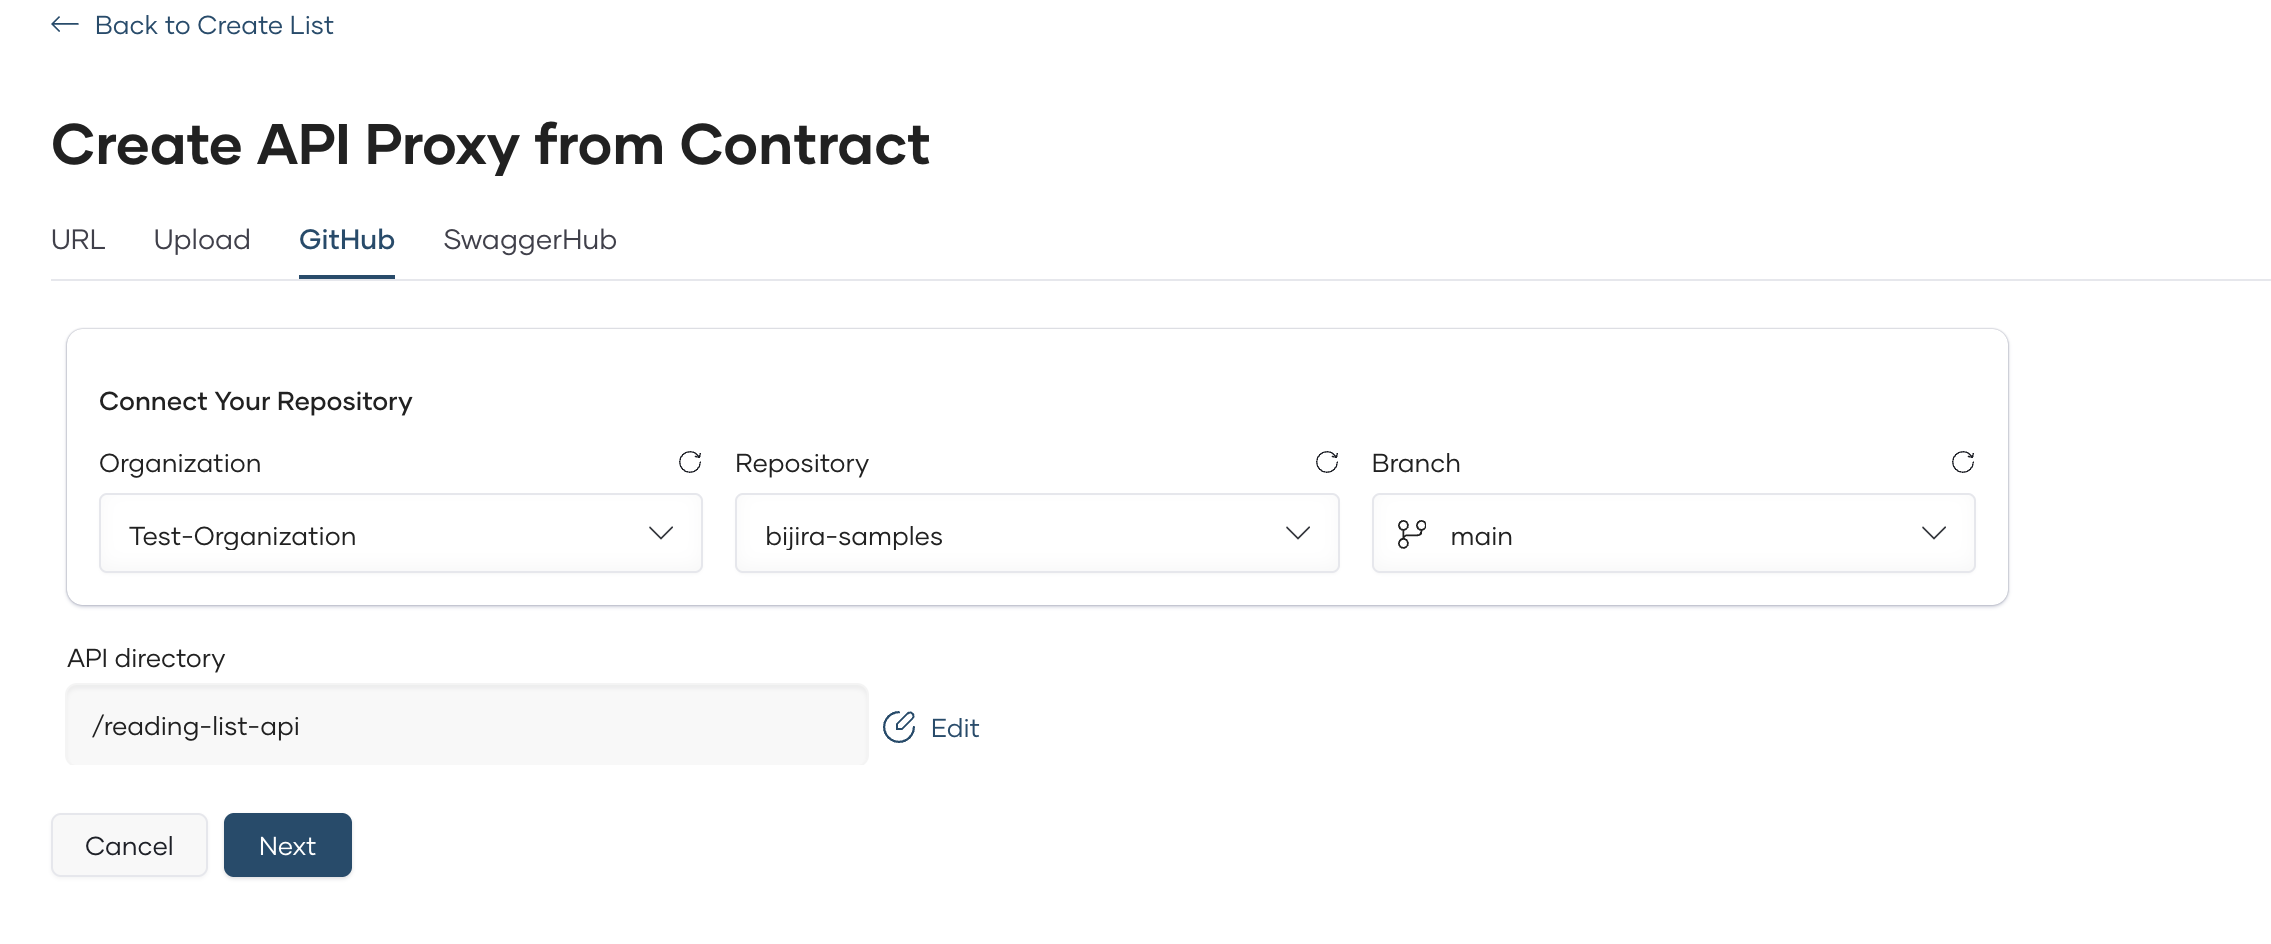
5. Enter the following repository details:
| **Field** | **Value** |
|------------------------|--------------------|
| **Organization** | Your GitHub account|
| **Repository** | bijira-samples |
| **Branch** | **`main`** |
| **API Directory** | /reading-list-api |
!!! note
To select the relevant directory, click on the **Edit** action next to the **API Directory** input field. Then, enter `reading-list-api` as the directory name to quickly search and locate the correct directory.
6. Specify the following values as Proxy Metadata:
| **Field** | **Value** |
|-----------------|--------------------------------------------|
| **Name** | `Reading List API` |
| **Version** | `1.0` |
| **Target** | `https://apis.bijira.dev/samples/reading-list-api-service/v1.0`|
7. Click **Create**. This creates the API proxy component and takes you to the **Overview** page.
!!! note
The API contract cannot be modified after proxy creation. Therefore, any changes to the API contract in the GitHub repository will not apply to the created proxy.
## Step 2: Build and Deploy the API proxy
!!! info
A build starts automatically when you create the API proxy, and you will be redirected to the **Overview** page.
1. In the left navigation menu, click **Deploy**.
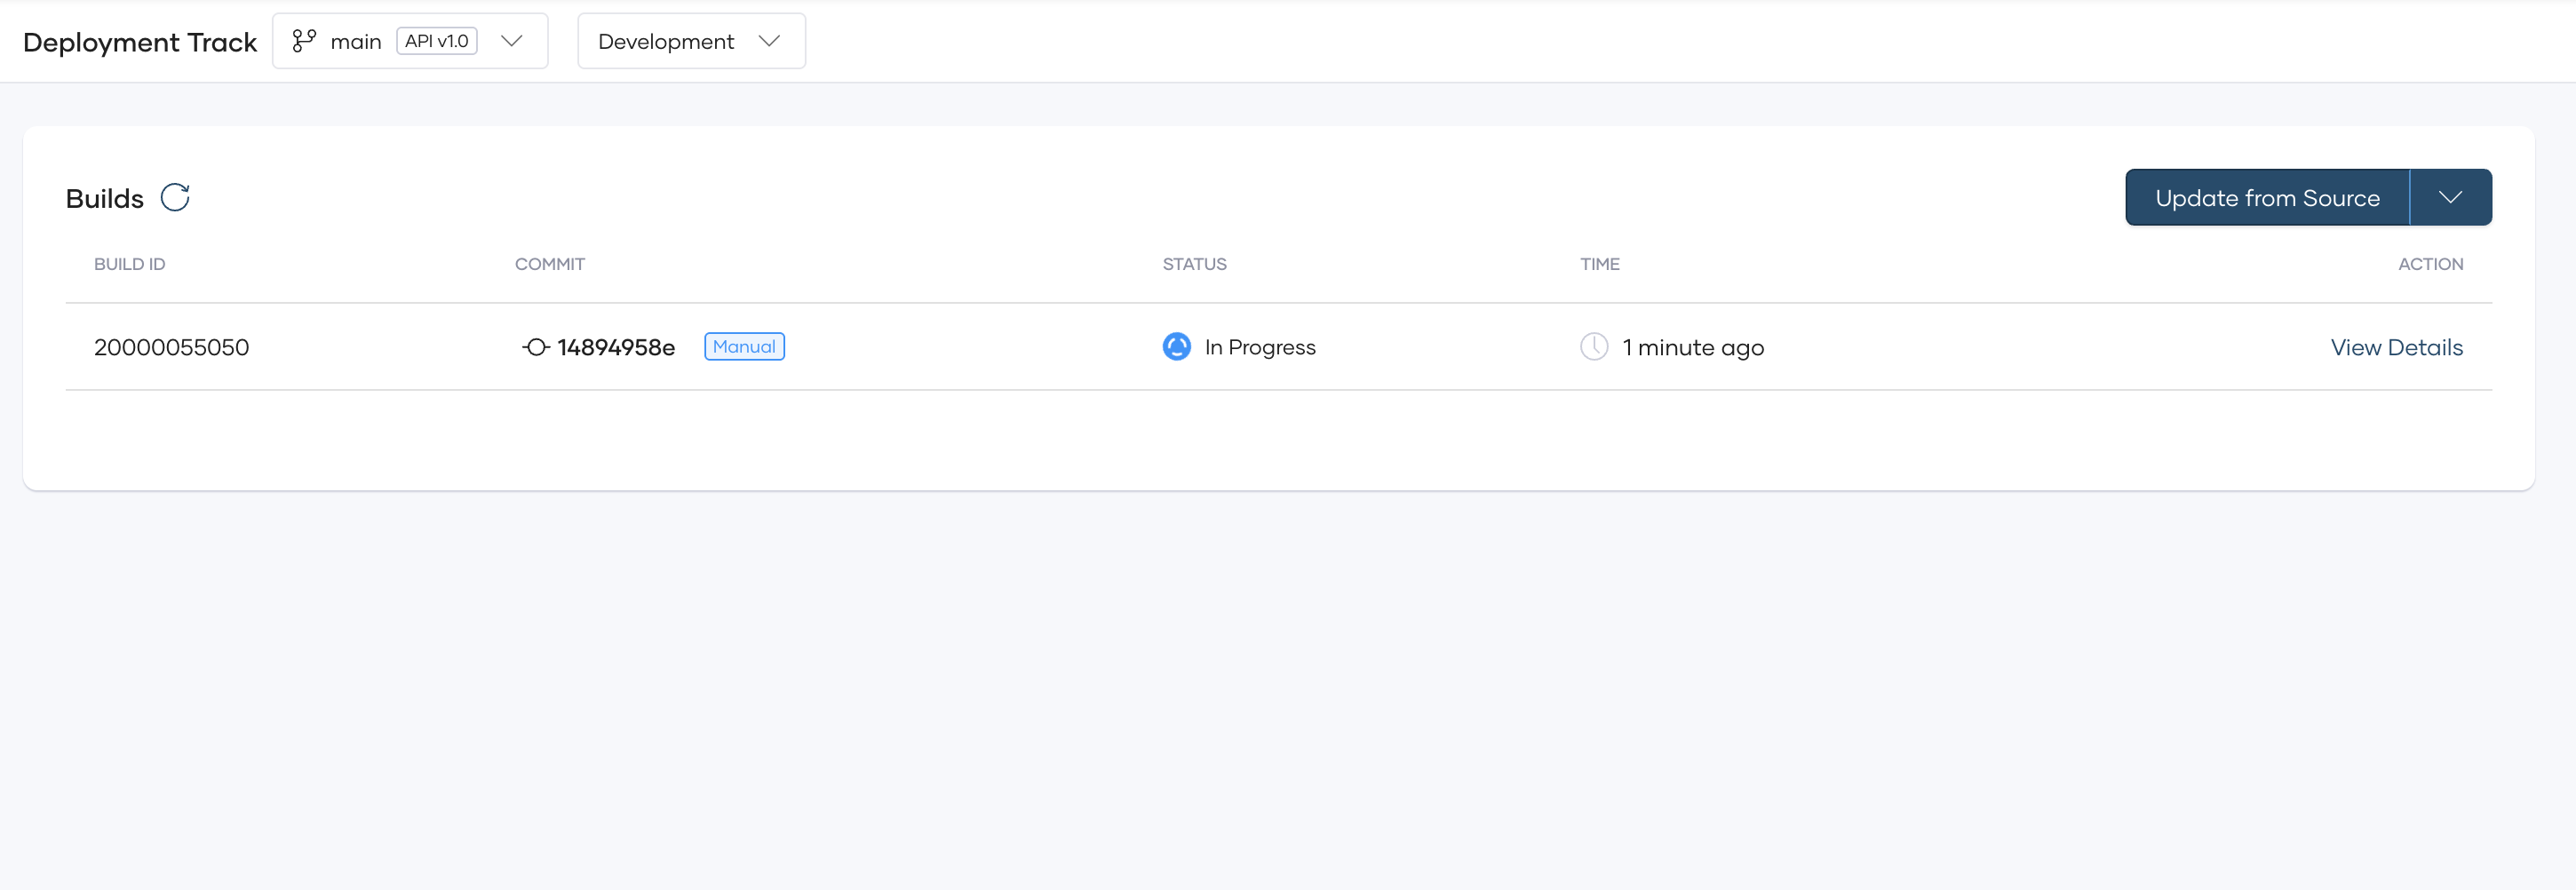
2. If the build is in progress, you can view the Build information.
!!! note
You can enable **Auto Build on Commit** using the toggle switch available on the API proxy. When enabled, any commit pushed to the connected GitHub branch automatically triggers a new build, keeping your proxy up to date without manual intervention.
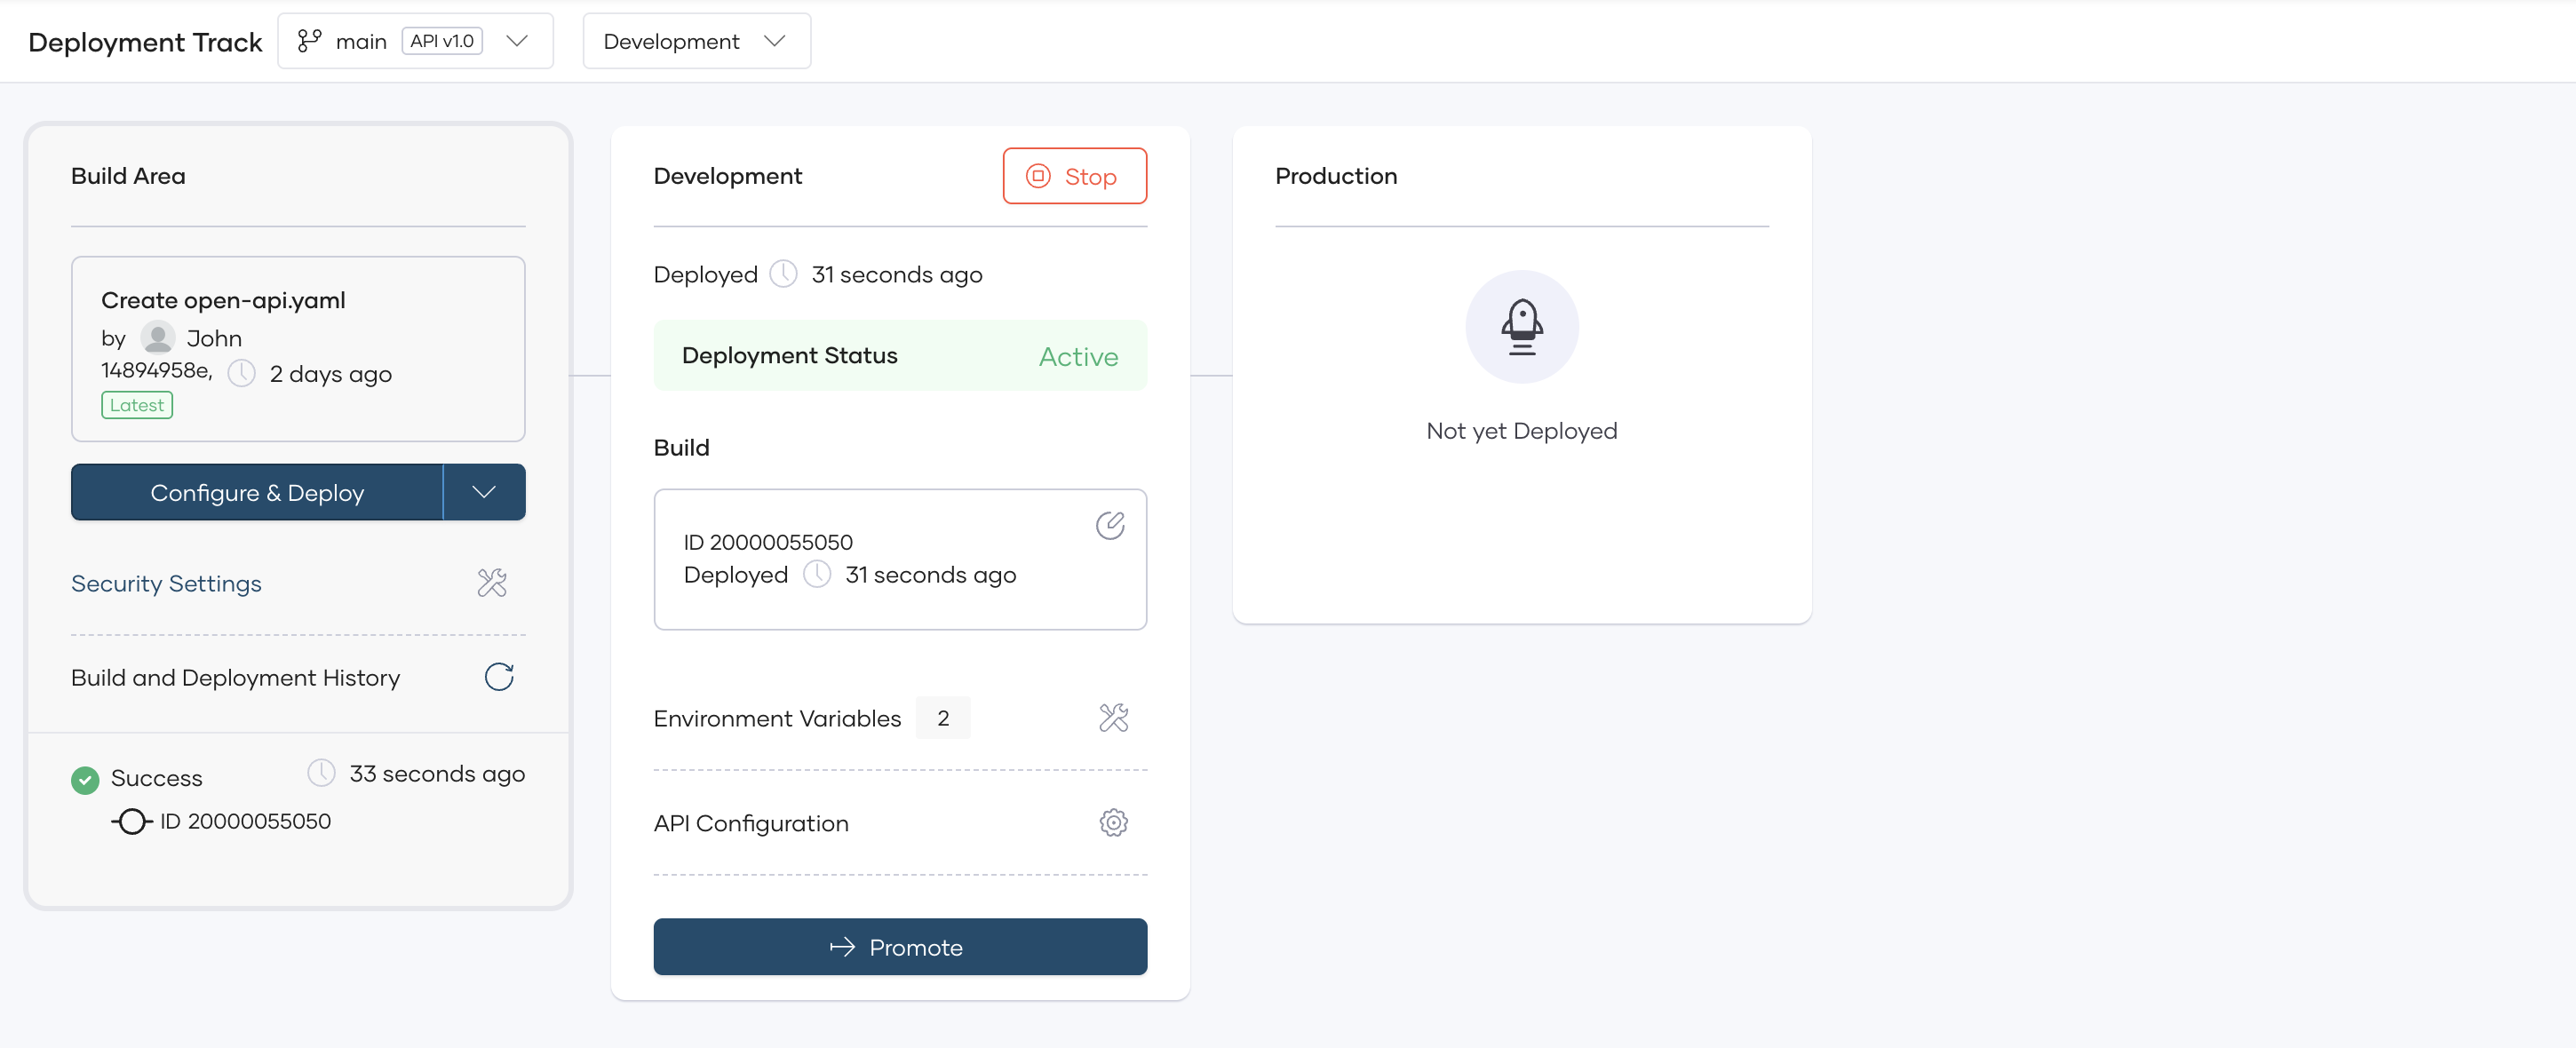
3. Once the build is completed, in the deploy navigation menu, in the **Build Area** card, click **Configure & Deploy**.
This opens the **Configure & Deploy** pane.
4. Select **External** as the **API Access Mode** and click **Deploy**. The **Development** card indicates the **Deployment Status** as **Active** when the API proxy is successfully deployed.
!!! note
You can enable **Auto Deploy** using the toggle switch available on the API proxy. When enabled, the proxy is automatically deployed to a lower, non-critical environment once the proxy build completes successfully, without requiring manual intervention.
Now, you are ready to test the API proxy. You can test the API via the [OpenAPI Console](../../../test-api-proxy/openapi-console.md) provided in API Platform