Skip to content

Manage attributes

An attribute encapsulates a single, identifiable characteristic of a user. They may range from basic identifiers such as first name, last name, home address to dynamic properties like membership status.

Attributes play a crucial role in managing user information within an organization and enables applications to access the required data seamlessly. Additionally, attributes are used to manage and display user information in user profiles.

The following guides explain how you may manage attributes of an organization.

View attributes

To view attributes available for your organization:

  1. On the Asgardeo Console, go to User Attributes & Stores > Attributes.

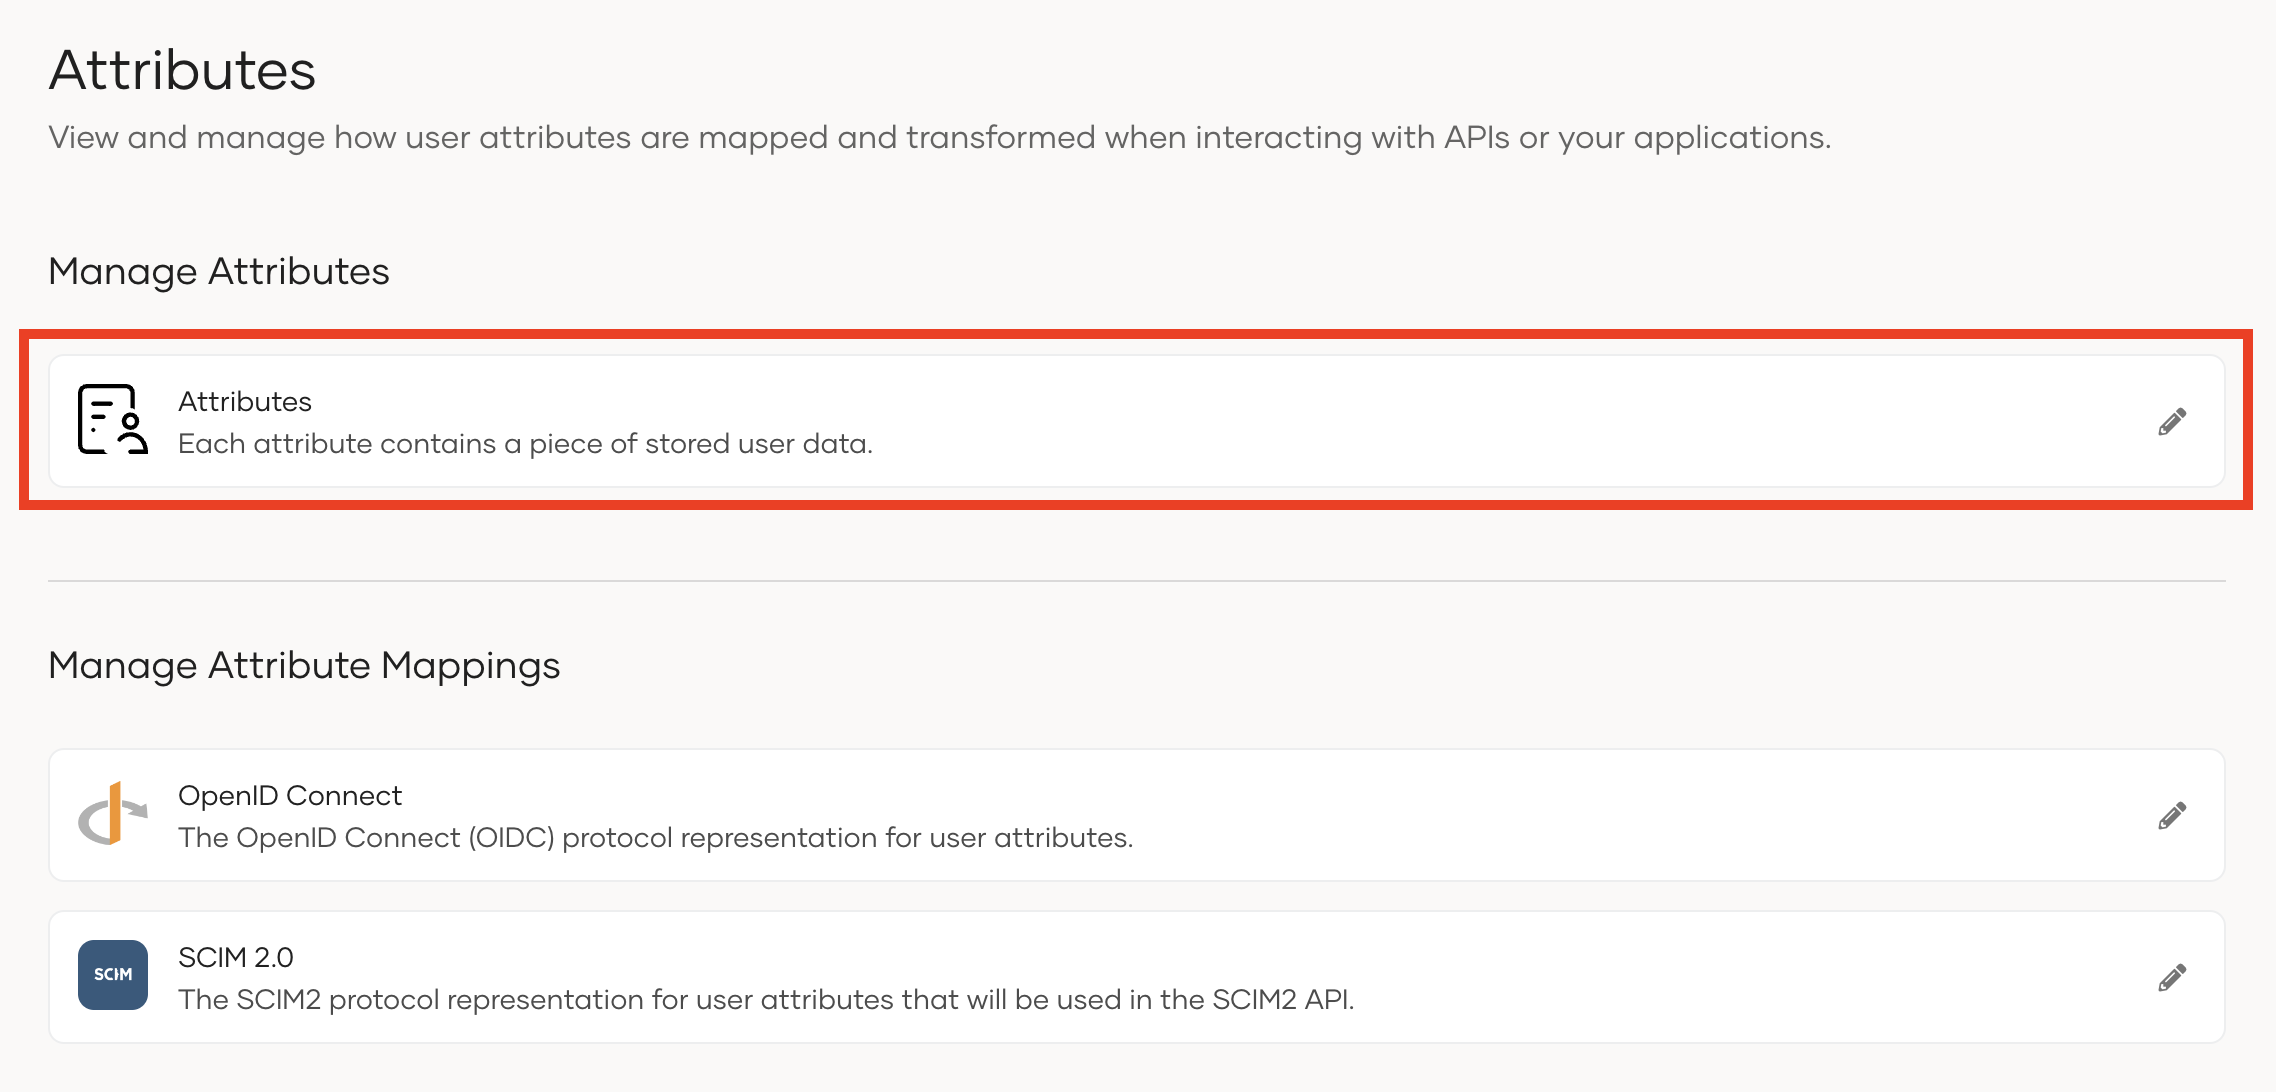
  2. Under Manage Attributes, click Attributes.

    Attributes

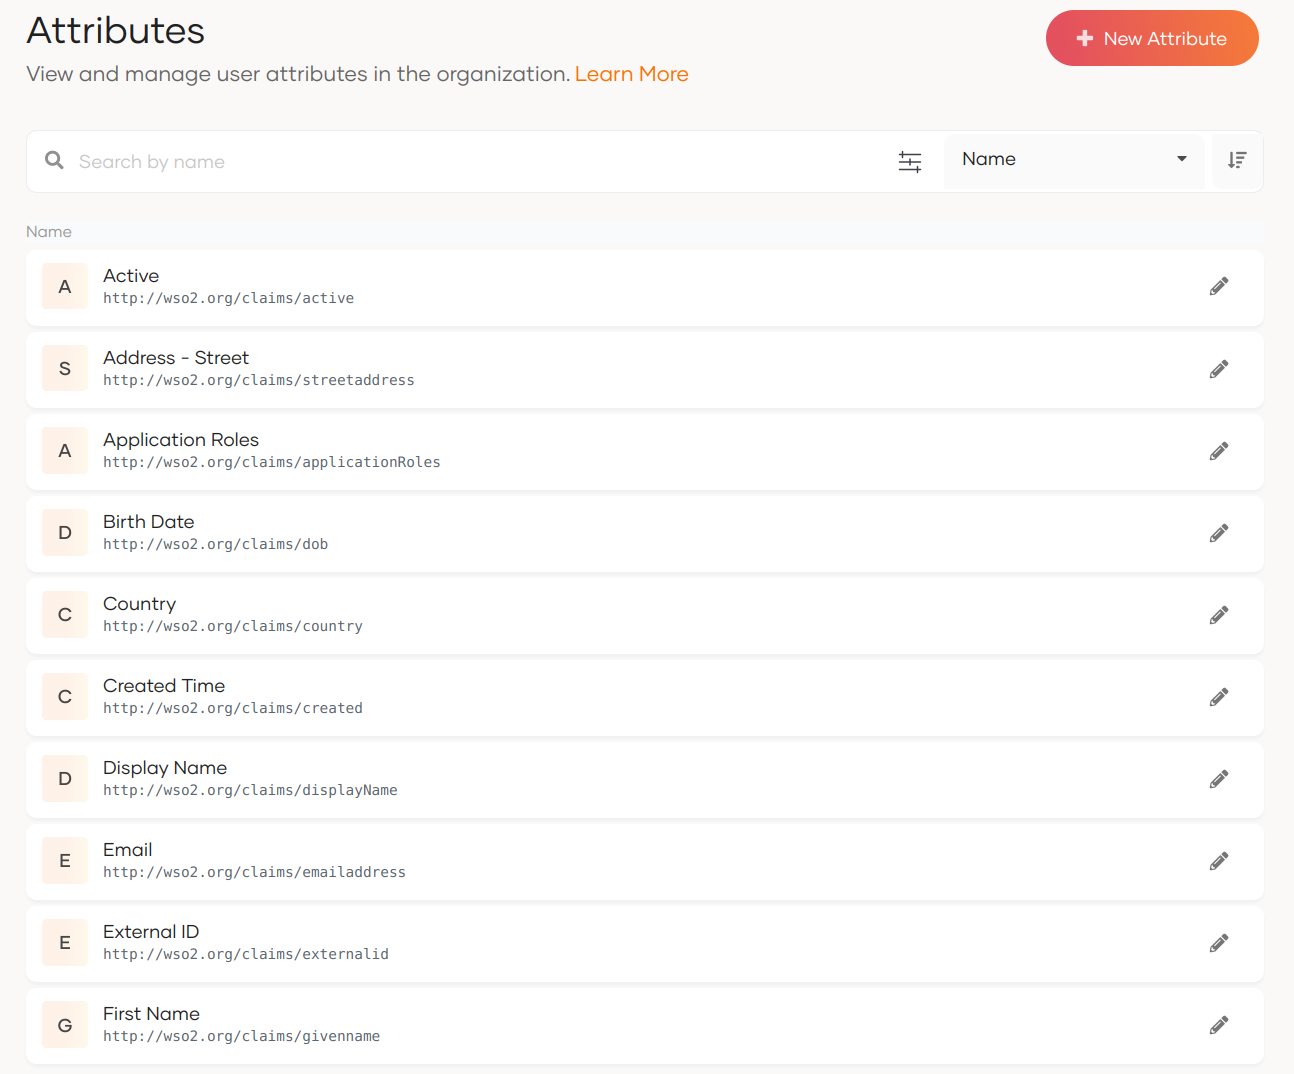
    This page displays all the attributes available in your organization.

    View attributes

Add custom attributes

Apart from the default attributes, you may define your own custom attributes by following the steps below:

  1. On the Asgardeo Console, go to User Attributes & Stores > Attributes.
  2. Under Manage Attributes, click Attributes to view the list of all attributes
  3. Click New Attribute and enter values for the following properties:
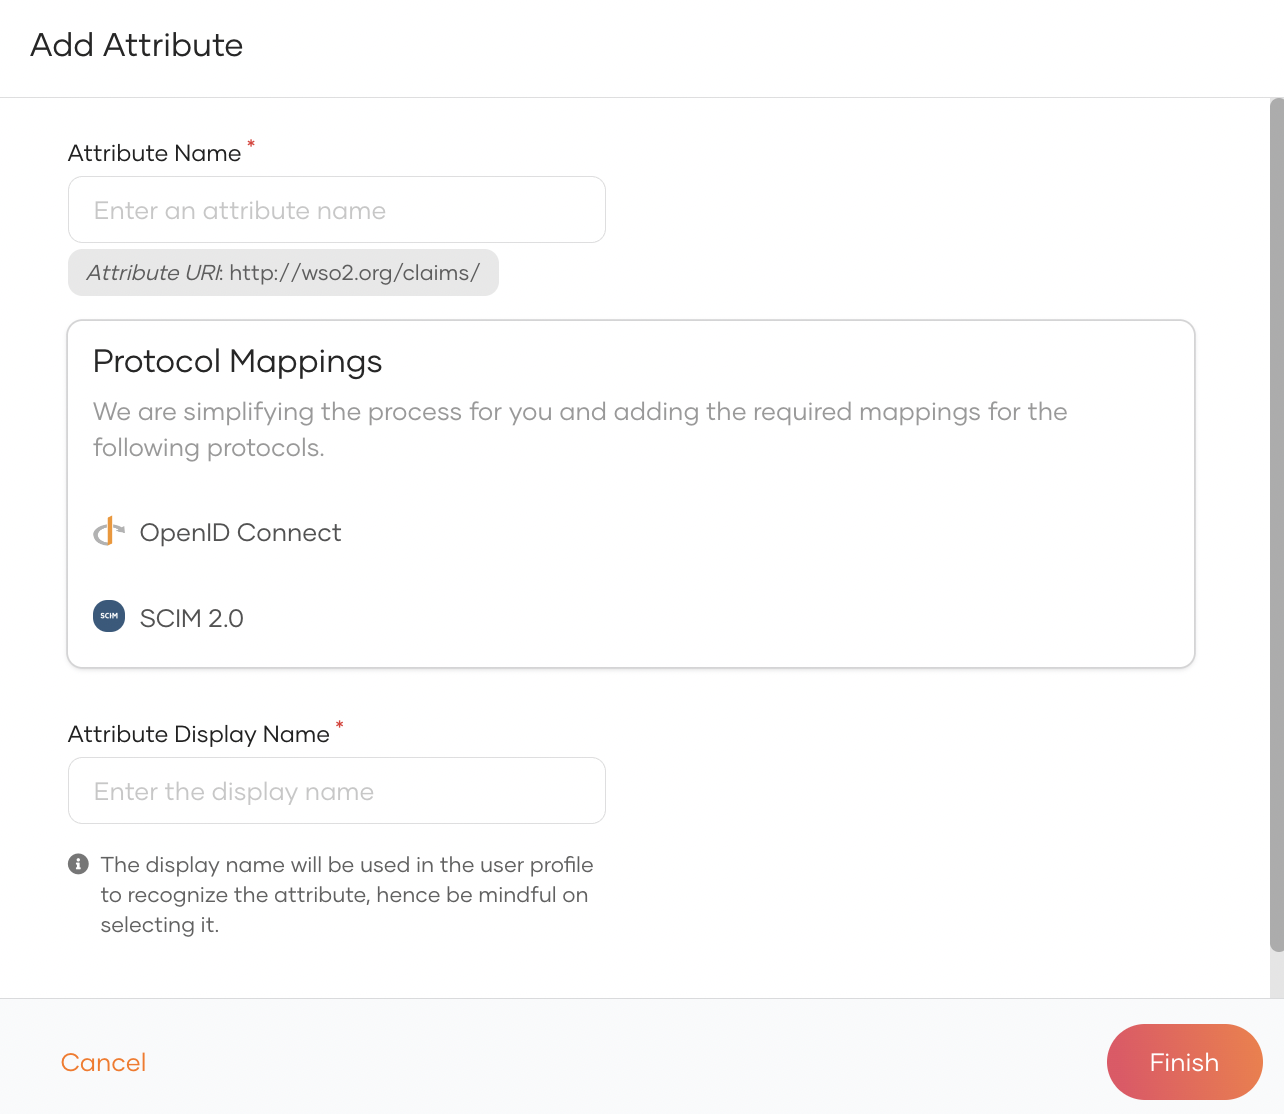
    Custom attribute

    Attribute Name The name that will be shared with applications.
    Protocol Mappings Mappings for each protocol are generated automatically based on the attribute name. You may also customize them here.
    Attribute Display Name The name of the attribute that will be displayed in users' profiles.
    Regular expression The value of the attribute will be validated against the regex pattern specified here.

  4. Click Finish.

Configure attributes

To configure properties of user attributes:

  1. On the Asgardeo Console, go to User Attributes & Stores > Attributes.
  2. Under Manage Attributes, click Attributes to view the list of all attributes.
  3. Click Edit for the attribute you want to update.
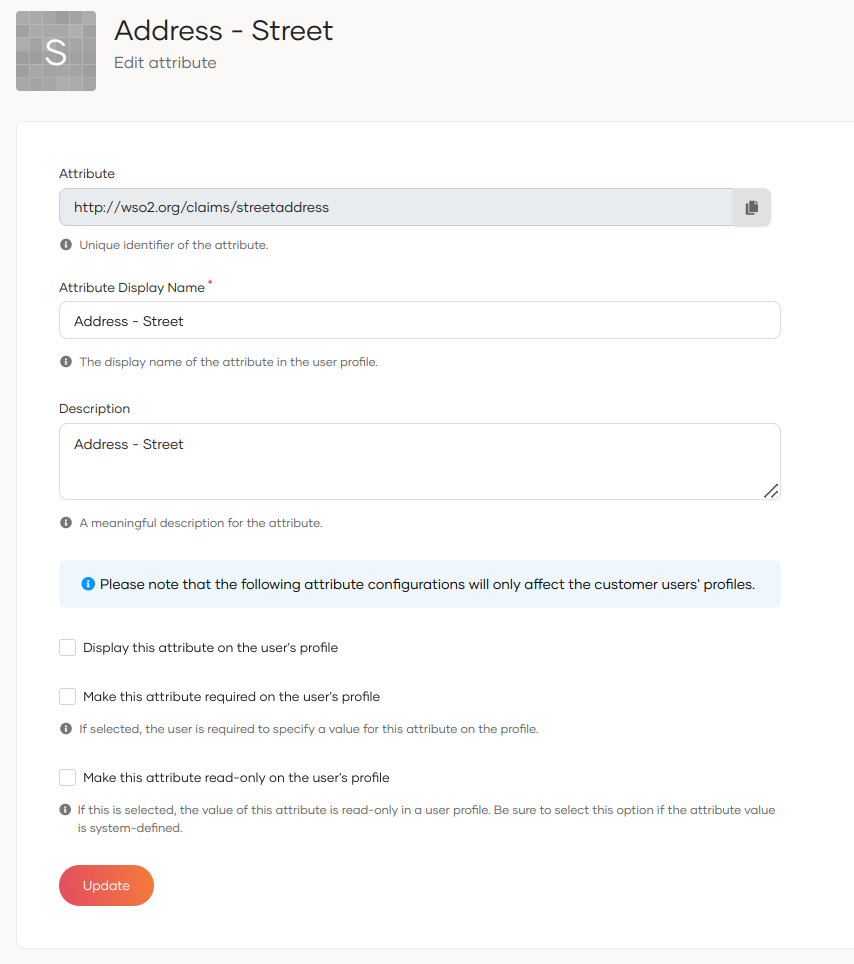
    Edit attributes

    Note

    The Attribute field specifies the unique identifier of the attribute. It always starts with http://wso2.org/claims. This cannot be edited.

  4. In the General tab, update the following values.

    Attribute Display Name Update the display name of the attribute that will show in user profiles.
    Description Update the description for the attribute.
    Regular expression The attribute value will be validated against the regex pattern specified here.
    Select Source for Attribute Value of Shared Users When a user's profile is shared across multiple organizations, the value of this attribute will be taken from the selected source.
    • From Origin: The attribute value is inherited from the original organization which manages the user's profile.
    • From Shared Profile: The attribute value is taken from the shared user profile in the respective organization.
    • From First Found in Hierarchy: The attribute value is retrieved from the first organization in the hierarchy that has assigned a non-null value to the attribute.
    At the moment, you can only configure this option for custom attributes.
    Uniqueness Validation Select one of the following scopes to validate attribute uniqueness:
    • None: No validation is applied. Users can have duplicate values for the selected attribute.
    • Within User Store: Users within the same user store cannot have duplicate values for the selected attribute. However, users in other user stores may have duplicates.
    • Across User Stores: Attribute values are unique across all user stores preventing duplicates throughout the organization.

  5. Under Attribute Configurations, use the table to configure how attributes are handled for each entity.

    Edit attributes

    The table contains the following entities:

    • Administrator Console: User profiles as seen from the administrator's Console.
    • End-User Profile: User profiles as seen from the users' My Account portal.
    • Self-Registration: The form presented to users during self-registration.

    For each of these entities, you can configure the following properties:

    Display If selected, the attribute is displayed in the entity.
    Required If selected, the entity must contain a value for this attribute.
    Read-only If selected, the value will be read-only for the entity and cannot be modified.

  6. Go to the Attribute Mappings tab and enter the attribute from each user store that you need to map.

    Edit attribute mappings

Delete attributes

Before you proceed

Attributes cannot be deleted if it has any associations with external schema. If you have attribute mappings, make sure you delete these associations before attempting to delete an attribute.

Refer to Delete an OpenID Connect attribute and Delete a SCIM2 attribute to delete any existing associations.

To delete an attribute:

  1. On the Asgardeo Console, navigate to User Attributes and Stores > Attributes.
  2. Under Manage Attributes, click Attributes to view the list of all attributes.
  3. Select the attribute you wish to delete.
  4. Click Delete attribute within the Danger Zone.
  5. Select the checkbox to confirm your action.
  6. Click Confirm.

Note

Only custom attributes can be deleted.

Assign multiple email addresses and mobile numbers to a user

Asgardeo allows users to associate multiple email addresses and mobile numbers with their profiles. For users with multiple values, they may also select a primary email address and a primary mobile number.

The following attributes are used for this purpose:

  • Email Addresses
  • Verified Email Addresses
  • Mobile Numbers
  • Verified Mobile Numbers

Enable/Disable multiple emails and mobile numbers feature

Unless you have configured remote user stores, the email address/mobile number-related attributes are already enabled to new and existing organizations.

To manually enable or disable this feature, you must update all related attributes by following these steps:

  1. On the Asgardeo Console, navigate to User Attributes and Stores > Attributes.
  2. Under Manage Attributes, click Attributes to view the list of all attributes.
  3. Click Edit next to the corresponding attribute.
  4. Enable/Disable the Display this attribute on the user's profile checkbox.
  5. Click Update to save the changes.

Exclude these attributes from a user store

For non-JDBC remote user stores, you must ensure proper mapping of these attributes in the user store. If mapping is not feasible, you can disable support for these attributes in that user store by following the steps below.

  1. On the Asgardeo Console, navigate to User Attributes and Stores > Attributes.
  2. Under Manage Attributes, click Attributes to view the list of all attributes.
  3. Click Edit for the attribute you wish to modify.
  4. Go to the Attribute Mappings tab.
  5. Find the corresponding user store and uncheck the Enable for this user store checkbox.
  6. Click Update to save the changes

Enable for user store