Everything you need to provide awesome experiences for your healthcare customers under one umbrella; Pre-built healthcare APIs, the Choreo Internal Developer Platform, Asgardeo’s CIAM capabilities and on-premises software, enables healthcare app-dev teams to kick start their digital healthcare experience development.
Contact Us FHIR ToolsA powerful platform available as software or as a service, with pre-built API level abstractions for rapid application development in healthcare. Build FHIR APIs with pre-built templates to any implementation guide, use transformation accelerators from HL7v2 to FHIR and CCDA to FHIR, and make connections to source systems faster using pre-built connectors.
Elevate patient, member or provider experience with a powerful CIAM strategy. Handle single login, multi-step and adaptive authentication for patients and apps, and support B2B CIAM for multi-network providers. FHIR-based patient consent management is included out of the box.
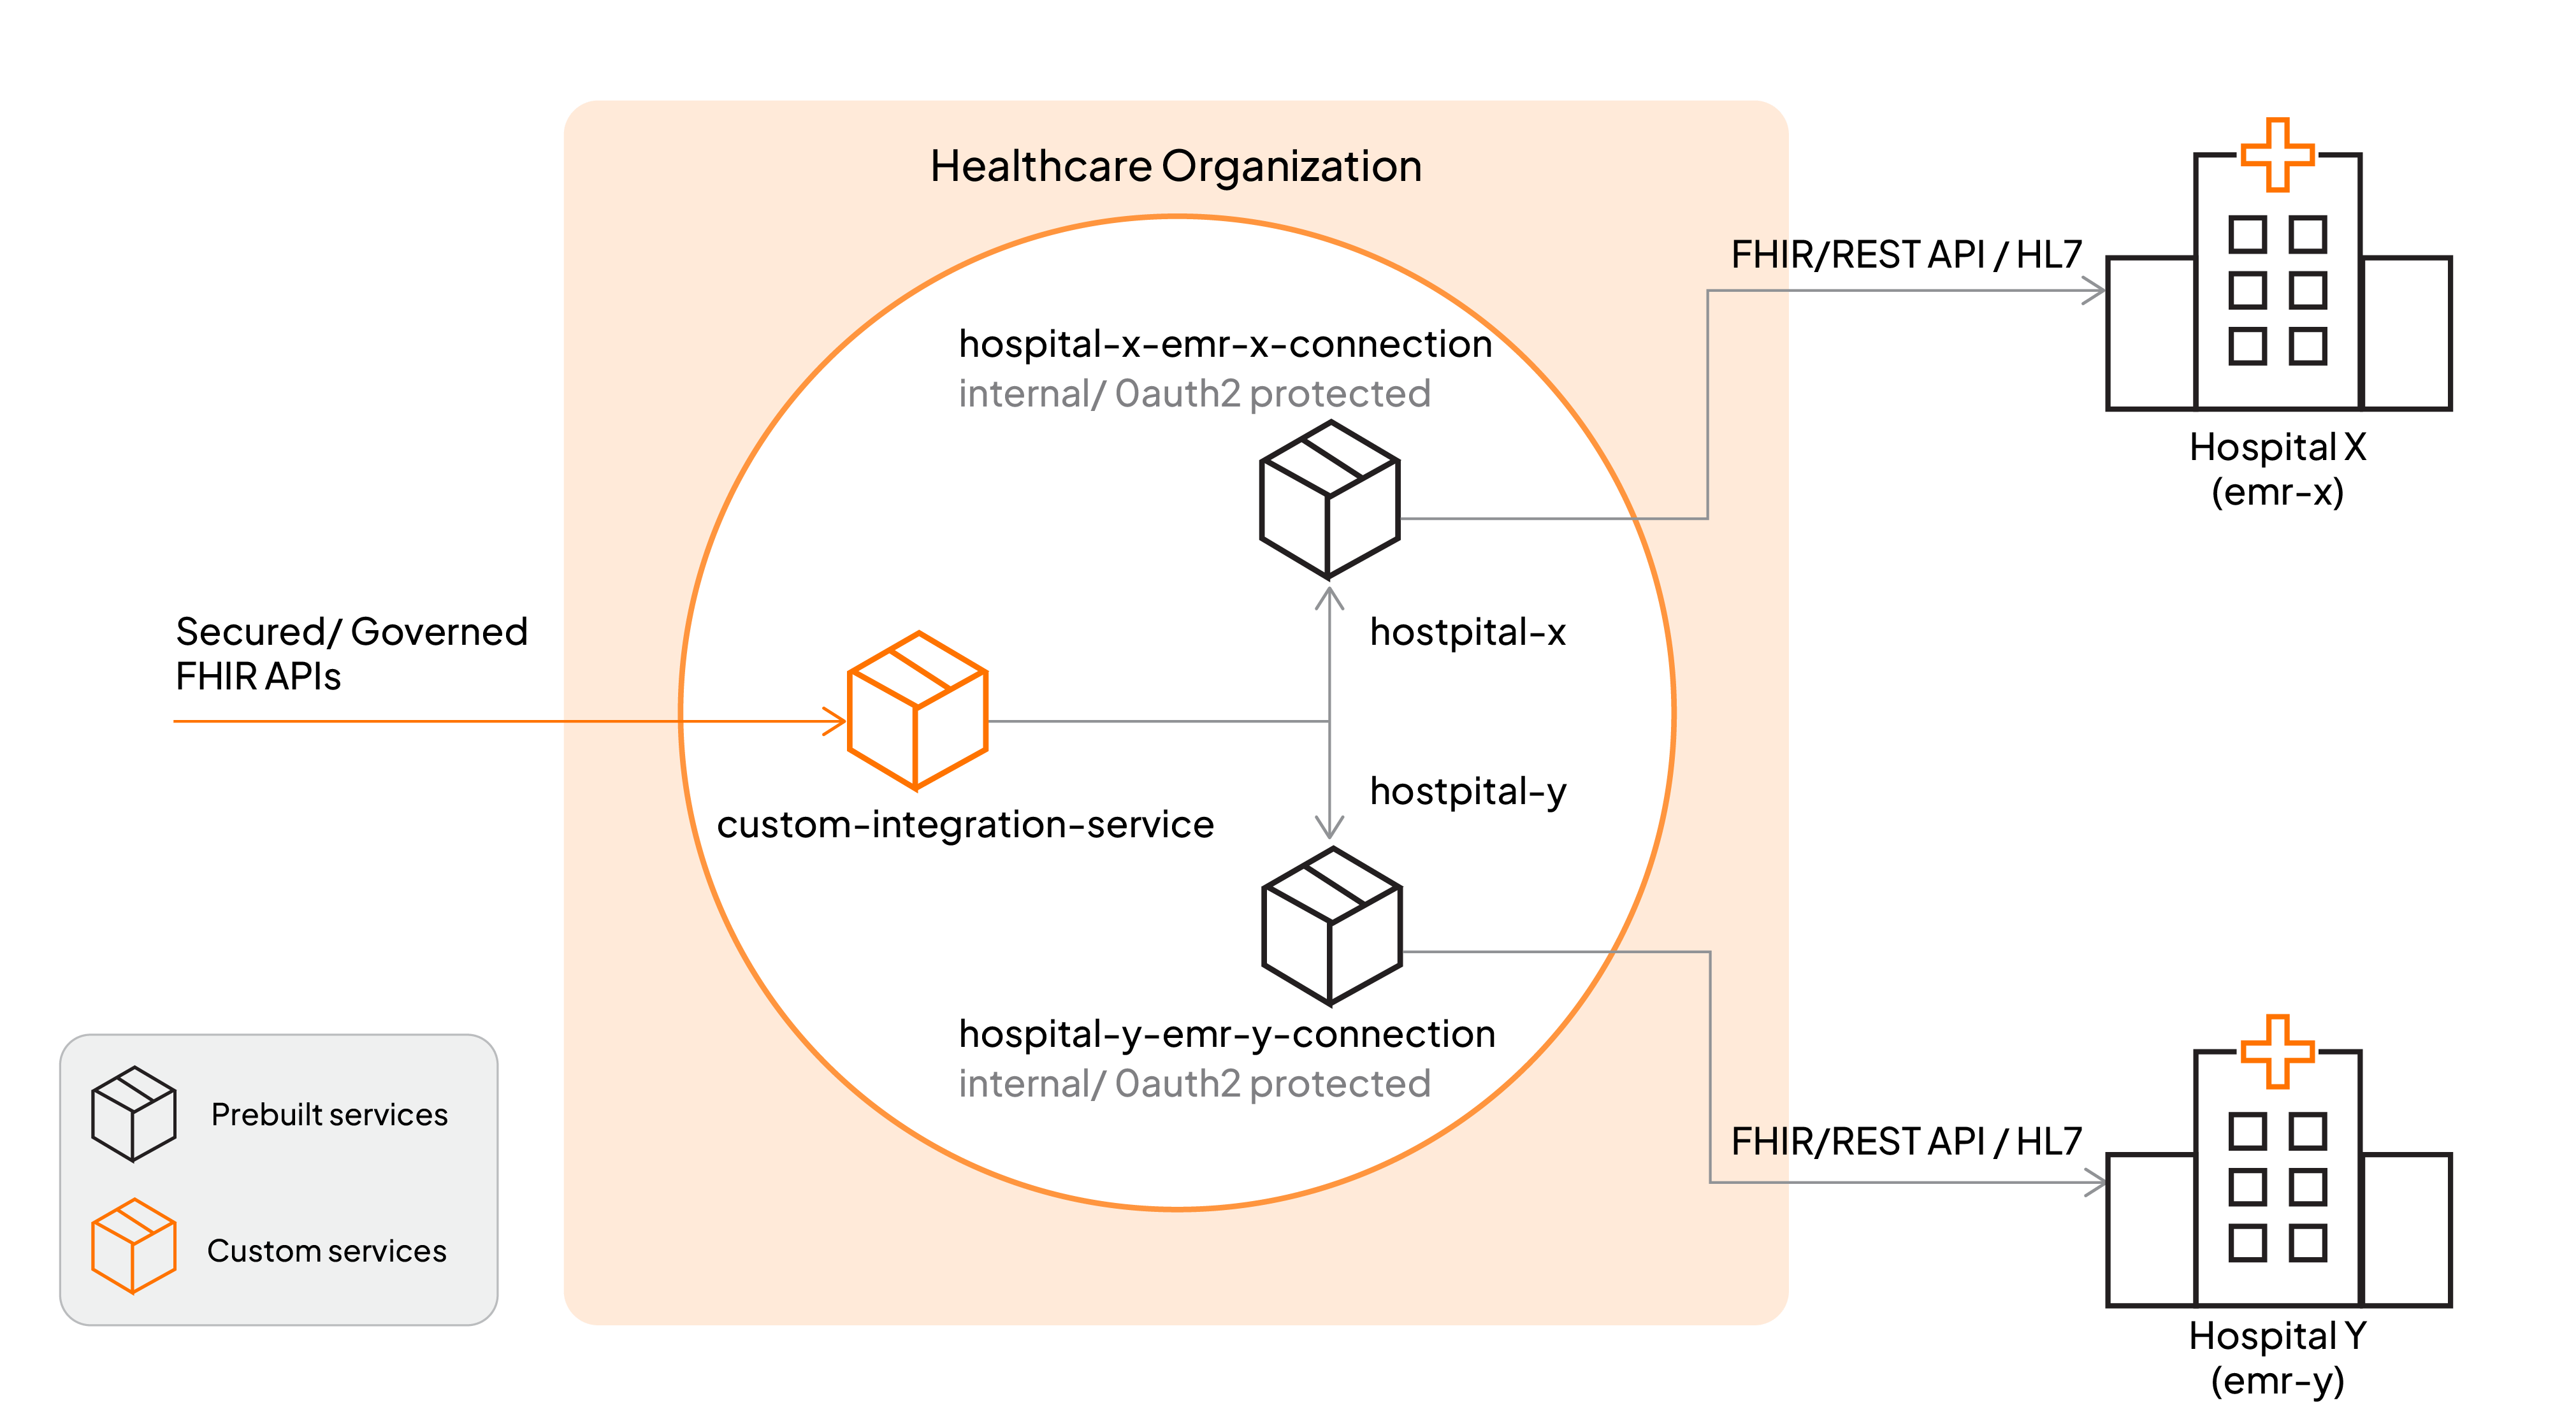
Learn MorePre-built, deployable EHR/EMR connectors for healthcare organizations to integrate their EHR systems with other systems and applications, enabling them to exchange clinical data in a secure, standardized, and interoperable format.
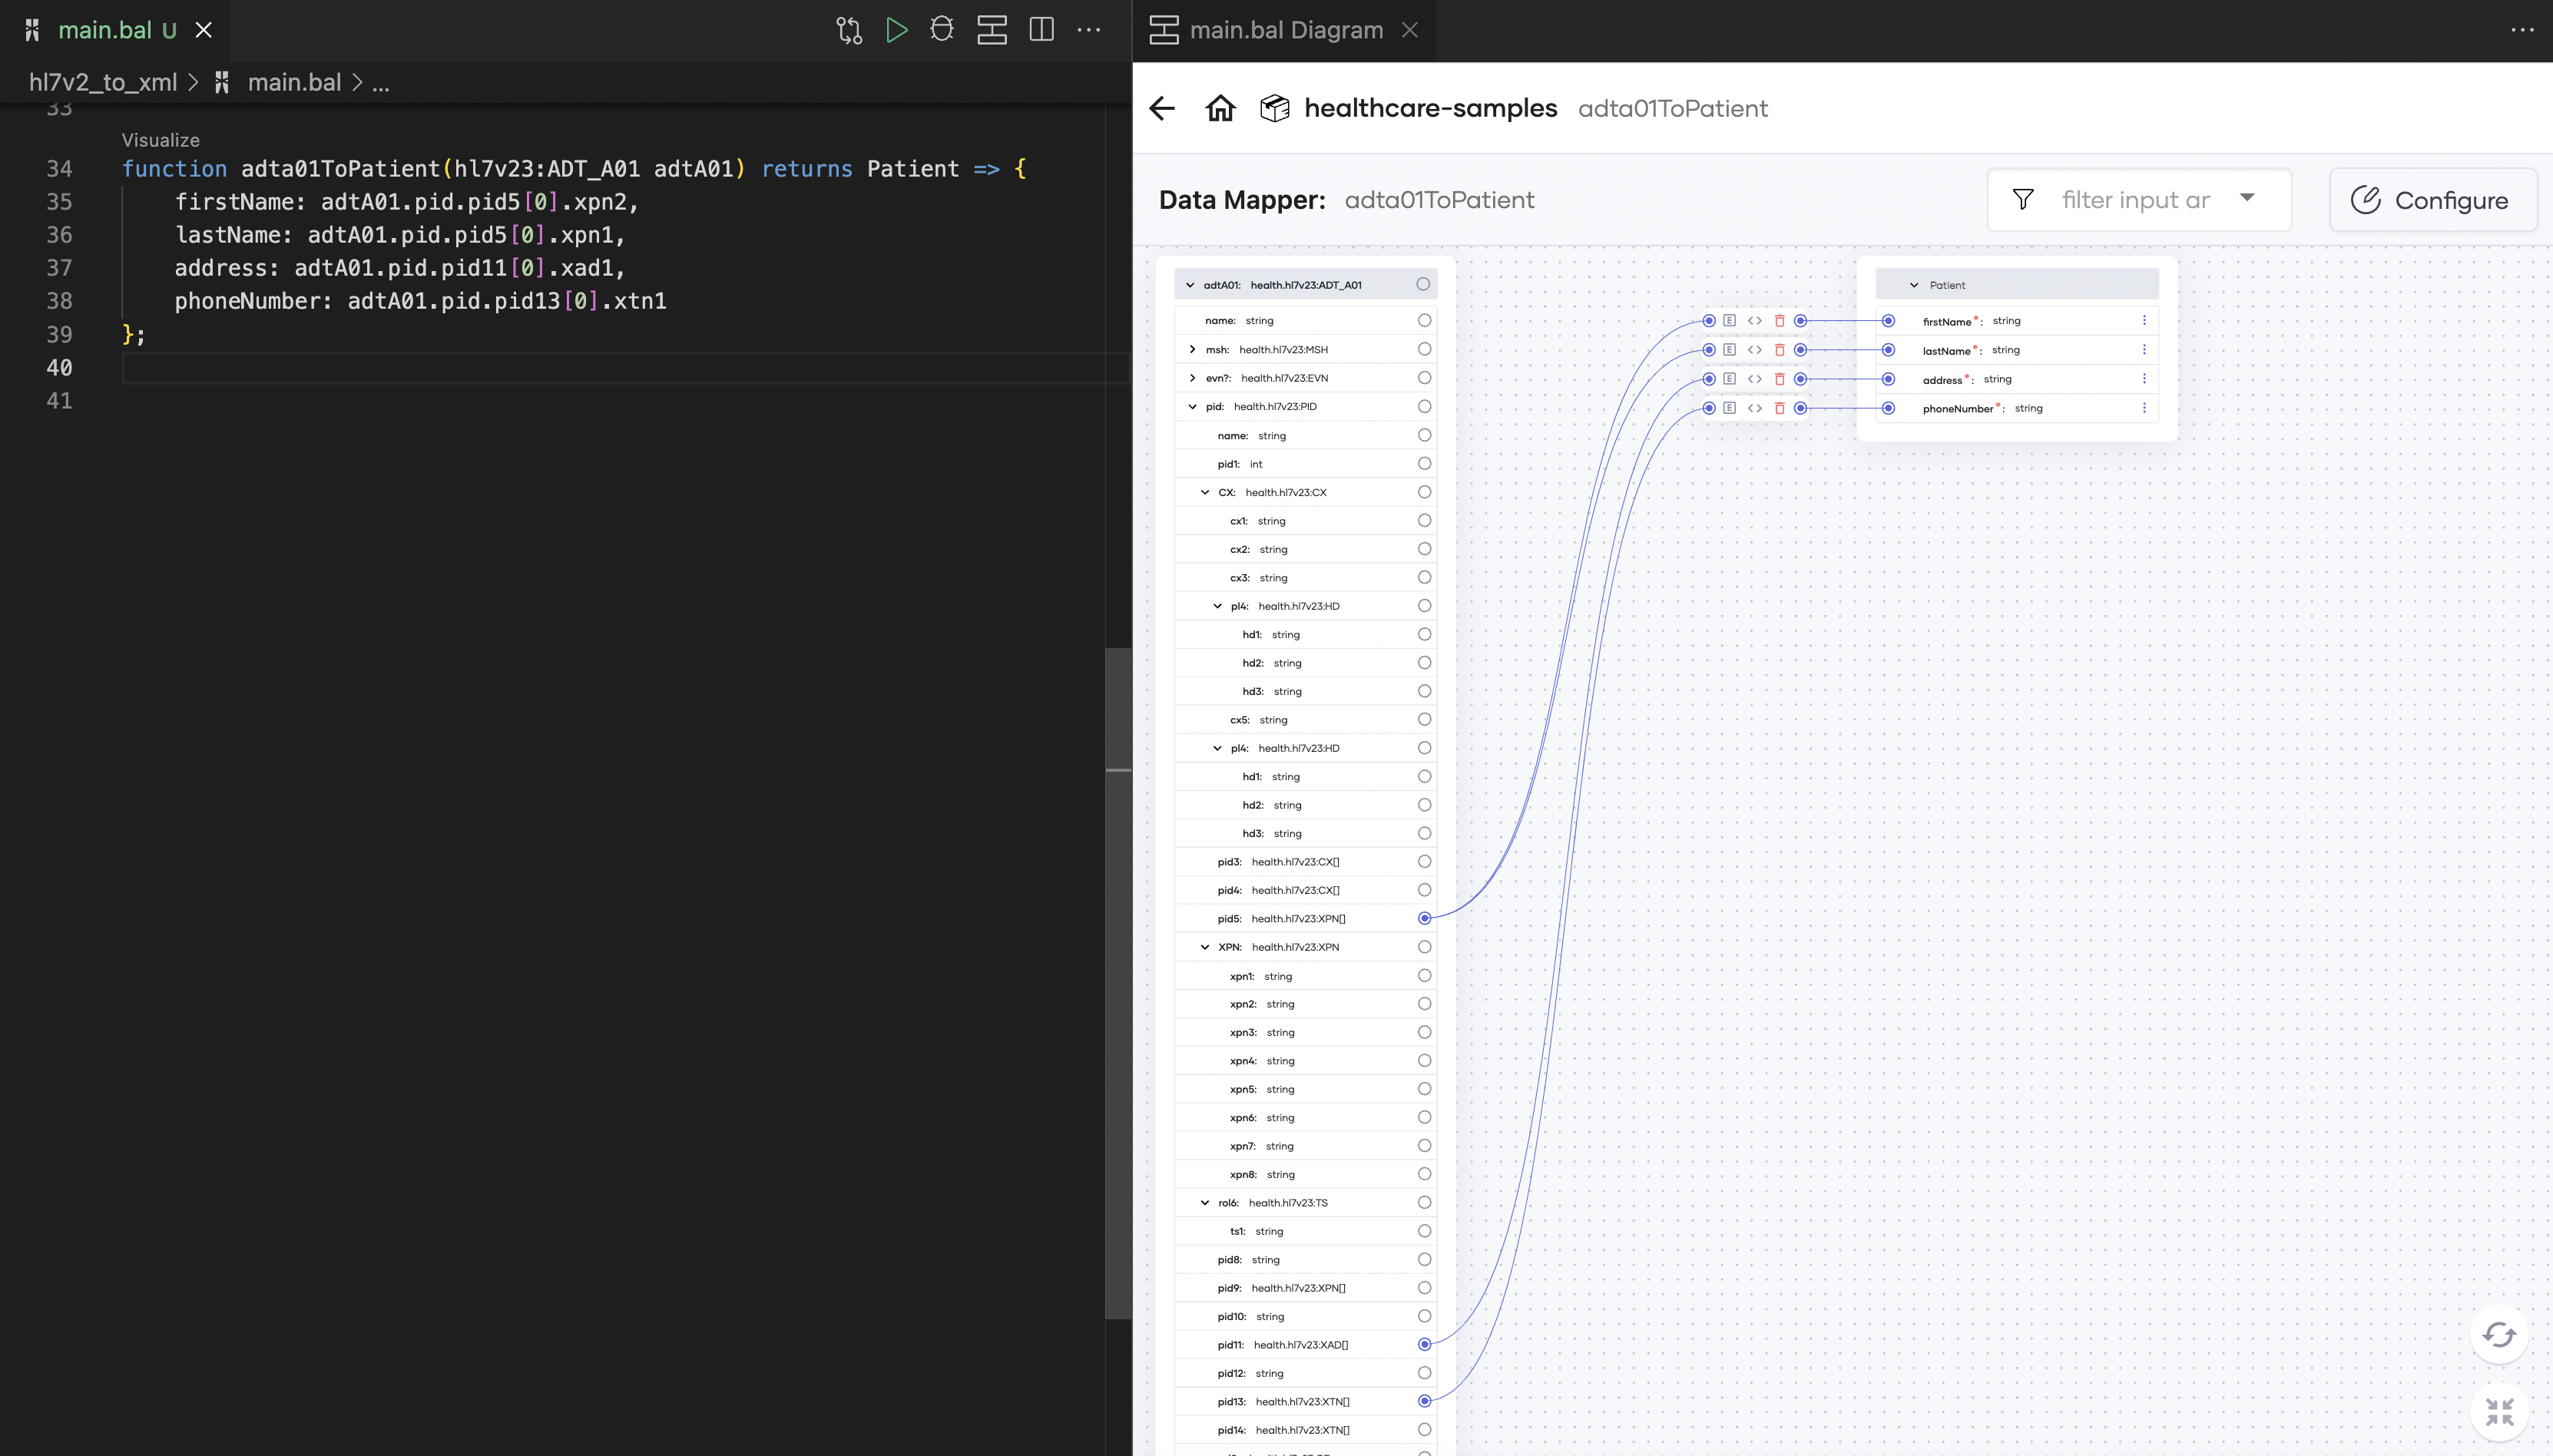
Ballerina is the only integration language built for healthcare. With its native support for healthcare standards like FHIR, HL7, and X12, Ballerina enables rapid health tech application development
Learn MoreIT Project Manager

Technical Lead