Add login and logout
10 min
Asgardeo SDK provides SignInButton, SignOutButton components to handle user sign-in and sign-out. You can use these components along side SignedIn and SignedOut components to conditionally render content based on the user's logged in state.
First of all before moving into the implementation of the Login and Logout let's make sure you have given the user that is logging into the application the necessary permissions to manage teams via the 'TEAM_ADMIN' role we created using the adaptive scripts feature in Asgardeo.
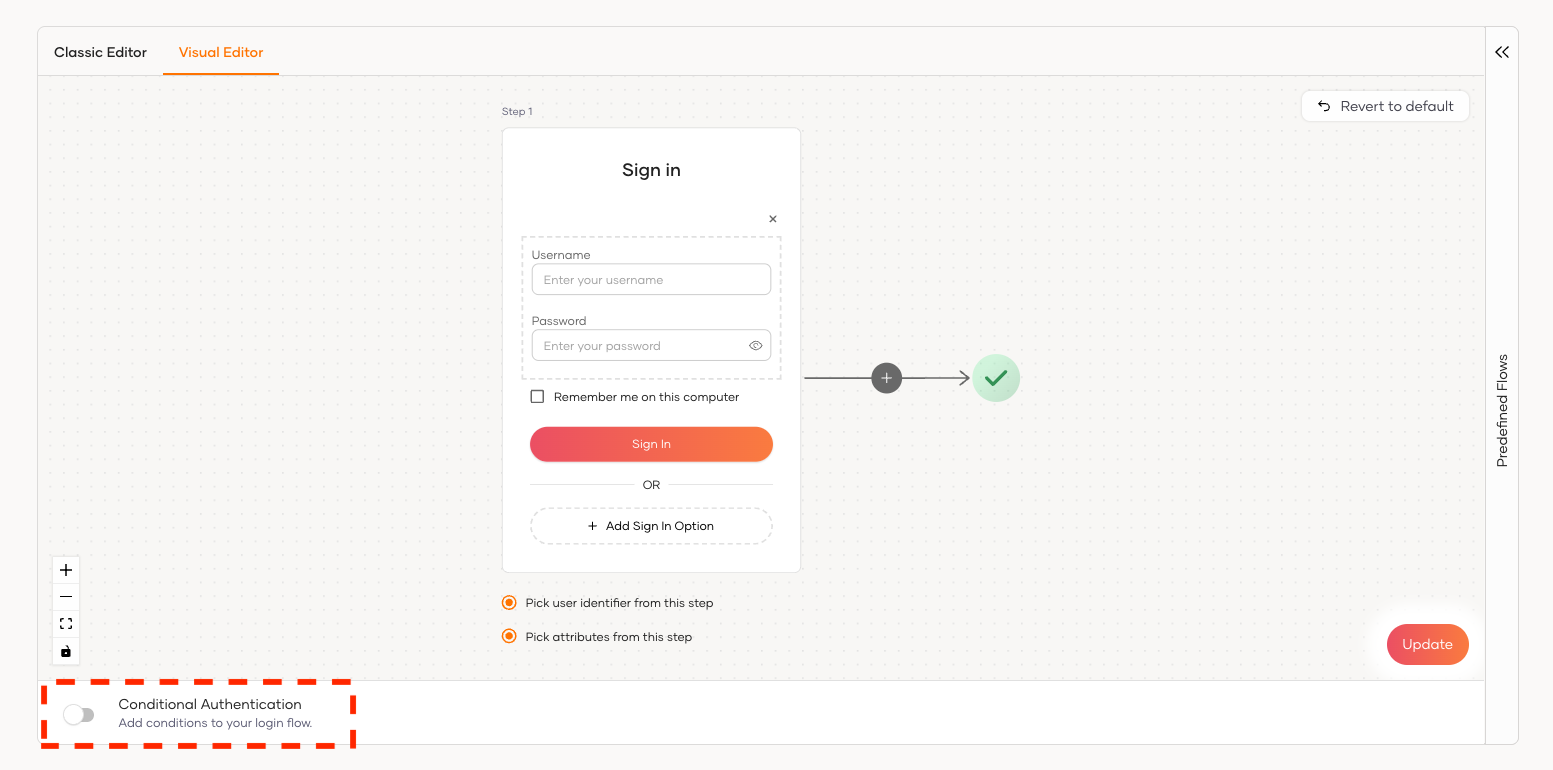
- In the Asgardeo console, navigate to the TeamSpace Application we created with the path Applications > TeamSpace > Edit > Login Flow
- Scroll to the bottom of the page and you will notice a section called Conditional Authentication.
- Scroll to the bottom of the page and you will notice a section called Conditional Authentication.
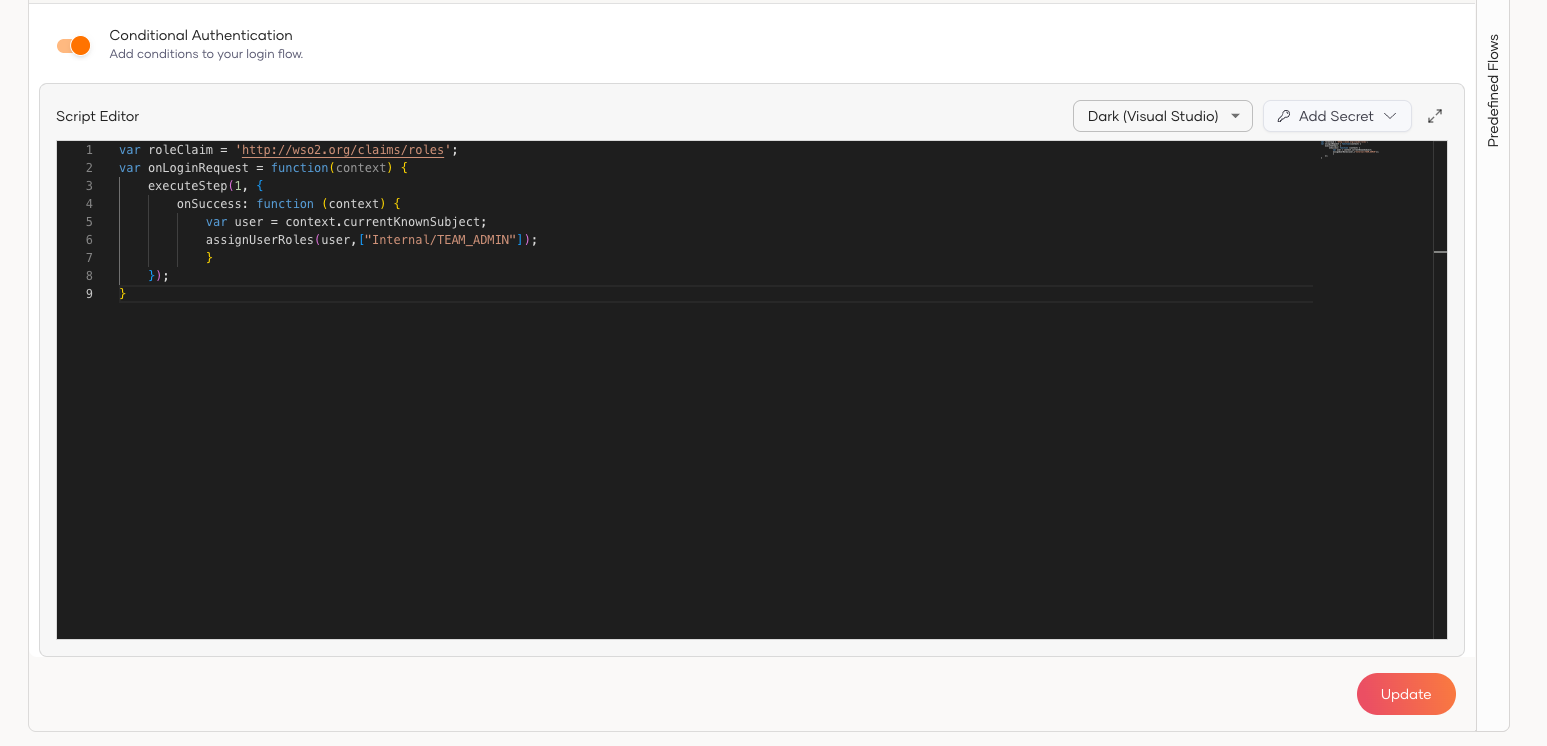
- Enable this toggle and add the following JavaScript code to the section as follows. With this you can assign the Role we created which is 'TEAM_ADMIN' to the user that is logging in.
var roleClaim = 'http://wso2.org/claims/roles';
var onLoginRequest = function(context) {
    executeStep(1, {
        onSuccess: function (context) {
            var user = context.currentKnownSubject;
            assignUserRoles(user,["Internal/TEAM_ADMIN"]);
            }
    });
}
It should appear as shown below.
- Save the changes by clicking 'Update'
Let's move on the application implementation of the Login and Logout flow.
The Next SDK has components can be used to display user information as well. You can use the User, UserProfile, or UserDropdown components to access and display user profile information in a declarative way.
User: TheUsercomponent provides a render prop pattern to access user profile information:UserProfile: TheUserProfilecomponent provides a declarative way to display and update user profile information.UserDropdown: TheUserDropdowncomponent provides a dropdown menu with built-in user information and sign-out functionality.
Replace the existing content of the app/page.tsx file with following content.
'use client'
import { SignedIn, SignedOut, SignInButton, SignOutButton, User, UserDropdown, UserProfile, SignUpButton } from '@asgardeo/nextjs';
export default function Home() {
return (
<div className="flex flex-col min-h-screen">
{/* Header */}
<header className="bg-white border-b border-gray-200 sticky top-0 z-50">
<div className="max-w-7xl mx-auto px-4 sm:px-6 lg:px-8">
<div className="flex justify-between items-center h-16">
{/* Left - Branding or Nav (can add logo here) */}
<div className="flex items-center space-x-4">
<SignedIn>
{/* Add logo or navigation for signed-in users if needed */}
<span className="text-sm text-gray-600">Welcome to Team Space</span>
</SignedIn>
<SignedOut>
<span className="text-sm text-gray-600">Team Space</span>
</SignedOut>
</div>
{/* Right - User Actions */}
<div className="flex items-center space-x-3">
<SignedIn>
<UserDropdown />
<SignOutButton />
</SignedIn>
<SignedOut>
<SignInButton />
<SignUpButton />
</SignedOut>
</div>
</div>
</div>
</header>
{/* Main Content */}
<main className="flex-grow flex flex-col items-center justify-center text-center px-4 py-12 gap-6 bg-gray-50">
<SignedIn>
<User>
{(user) => (
<div className="text-lg font-medium text-gray-800">
Welcome back, {user.userName || user.username || user.sub}
</div>
)}
</User>
<div className="mt-4">
<UserProfile />
</div>
</SignedIn>
<SignedOut>
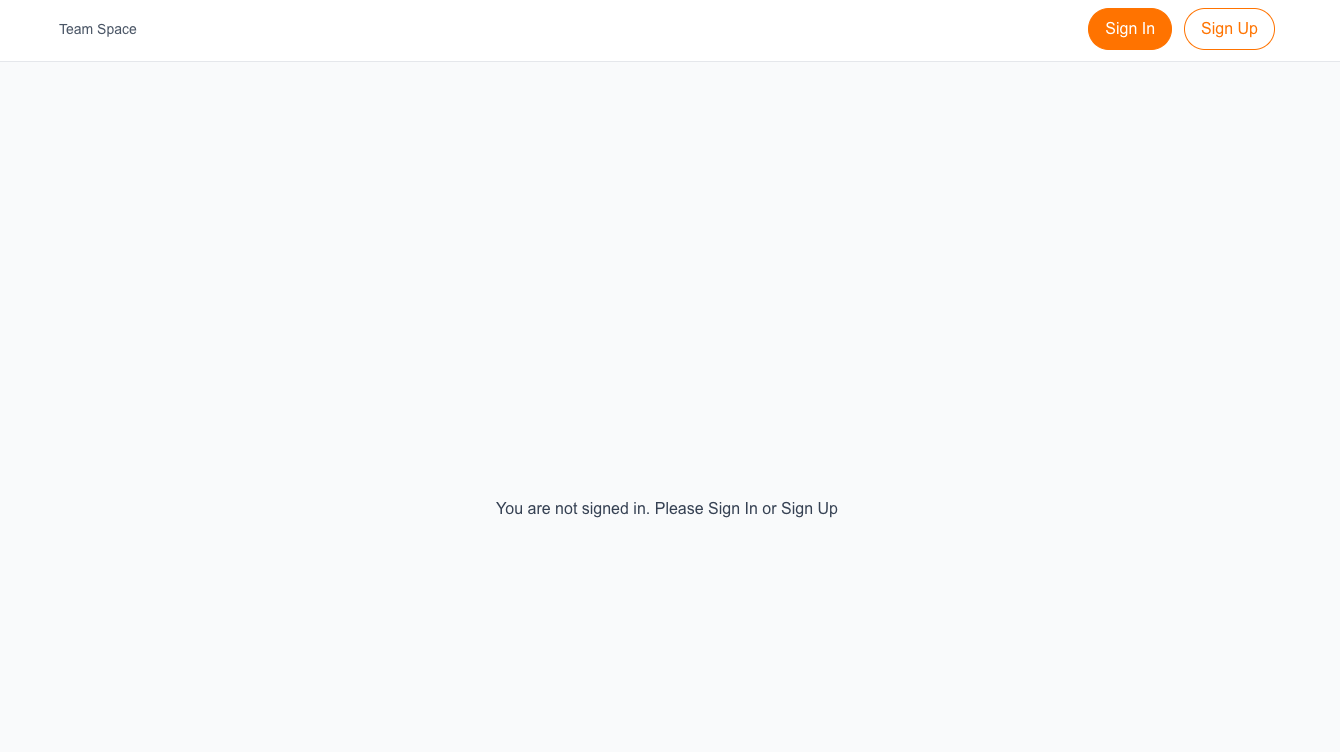
<p className="text-gray-700">You are not signed in. Please Sign In or Sign Up</p>
</SignedOut>
</main>
</div>
);
}
This code snippet adds a Sign In button in the application that triggers the signIn function from @asgardeo/nextjs when the user clicks it. The button uses an asynchronous action to securely initiate the login process with Asgardeo. When the user clicks the button, the app redirects them to the Asgardeo login page, and once logged in, they are returned to the app with their session established.
Save the changes and re-run the application in development mode if it is not running already.
Once the application is started, you will see the homepage of the application with the changes we made.
Initiate Sign In
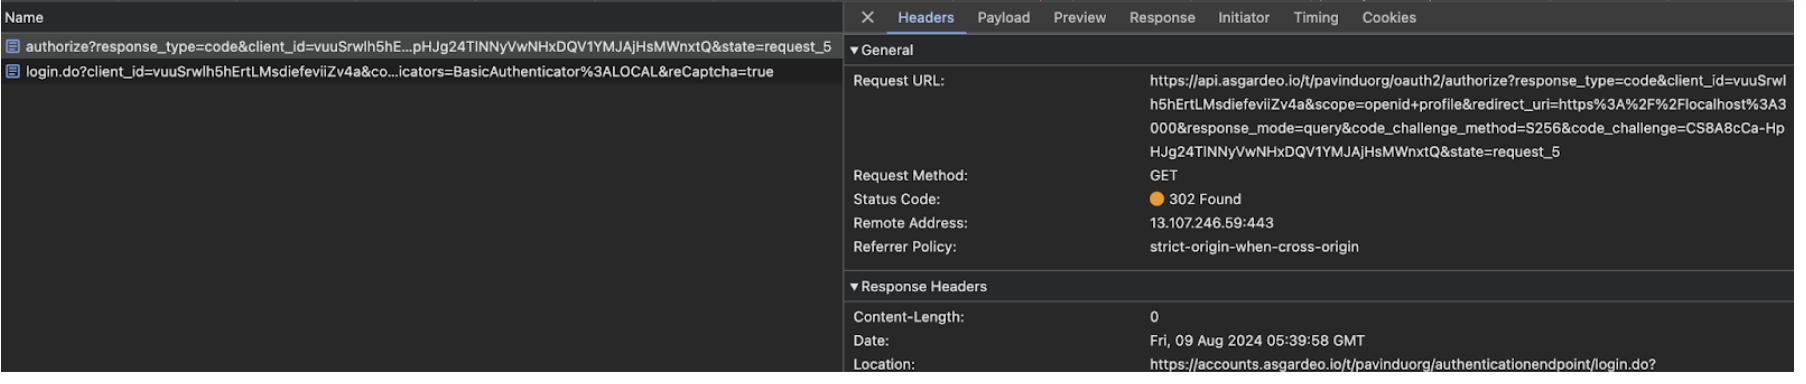
Clicking on the login button will initiate an OIDC request. You will be able to observe the authorize request in the browser devtools as follows. To see this, right click on the application and click inspect and switch to the network tab. In the filter input, type “authorize”, and click on the sign in button.
Tip
The OpenID Connect specification offers several functions, known as grant types, to obtain an access token in exchange for user credentials. This example uses the authorization code grant type. In this process, the app first requests a unique code from the authentication server, which can later be used to obtain an access token.
Asgardeo will receive this authorization request and respond by redirecting the user to a login page to enter their credentials.