Sample OIDC Java EE web app
By following this guide, you will be able to deploy a Java EE web application locally and secure it with OpenID Connect.
Prerequisites
-
Apache tomcat 9.x or 8.x
If you don't have it, install Apache tomcat.
-
A user account in Asgardeo
If you don't already have one, create a user account in Asgardeo.
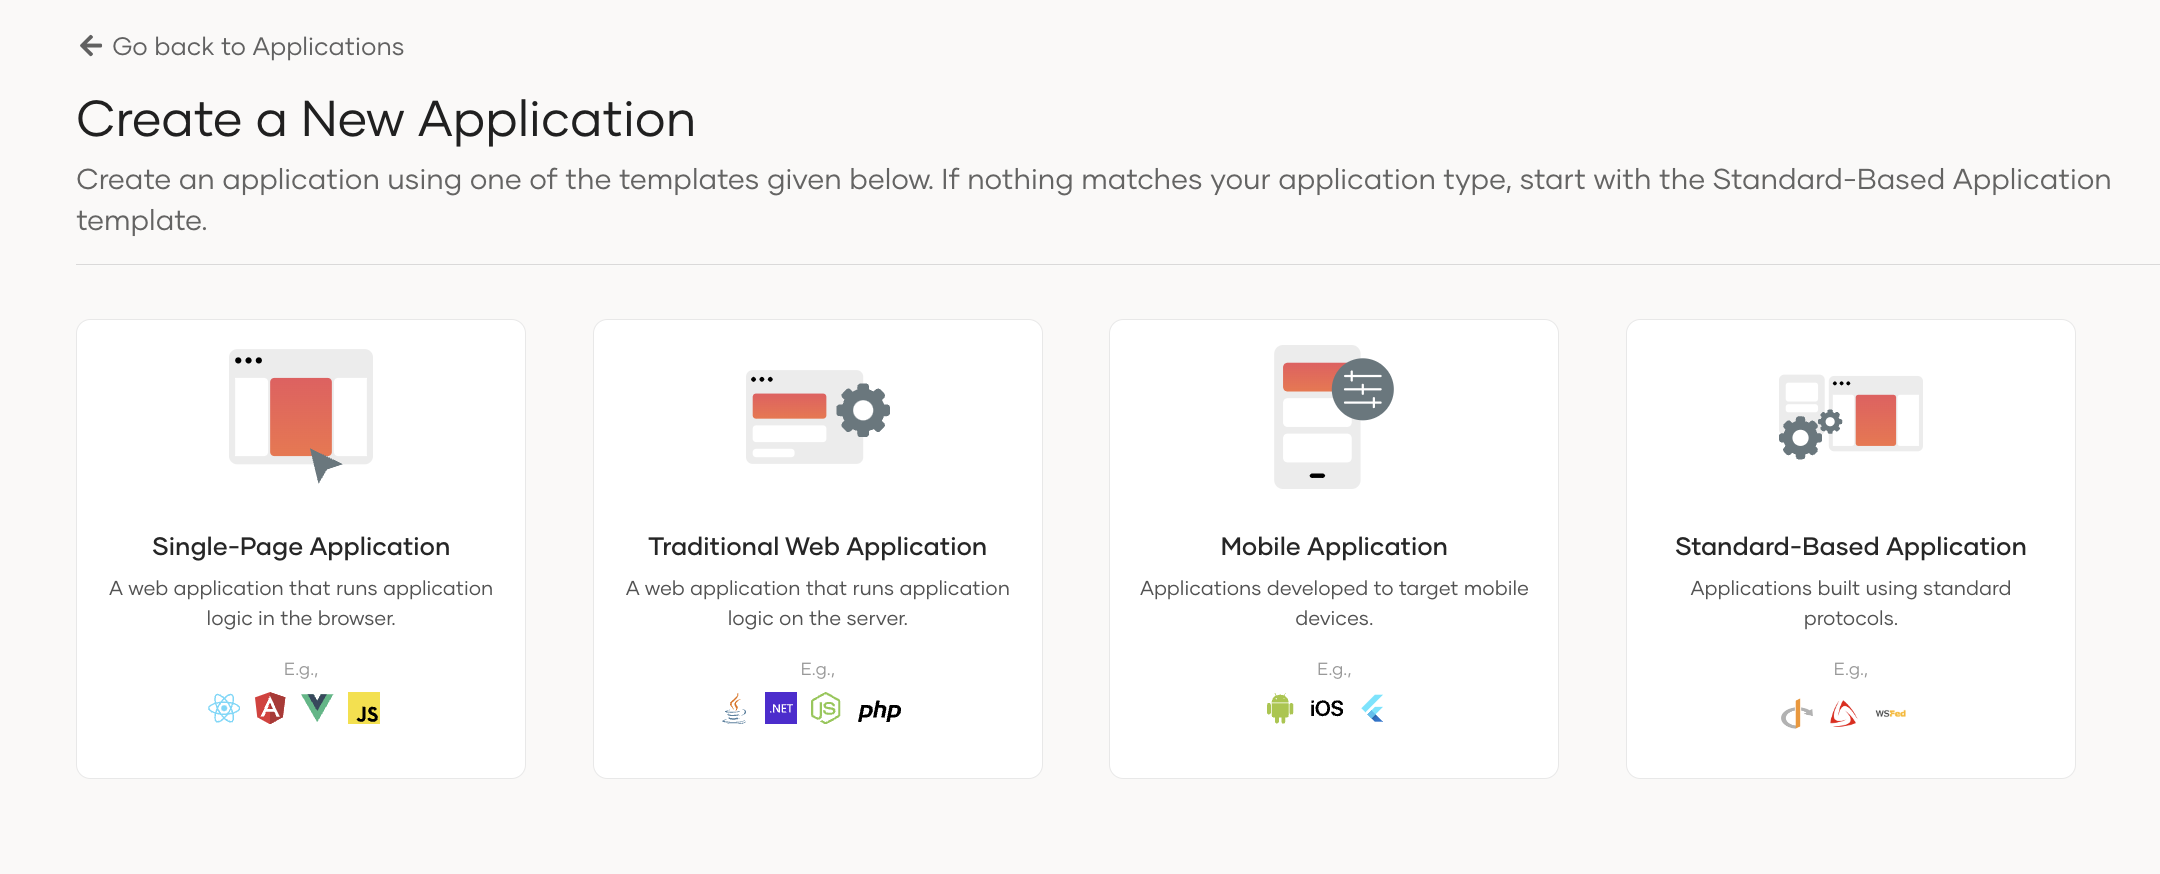
Register the app
Follow the steps given below to register the sample Java EE web application in Asgardeo.
-
On the Asgardeo Console, go to Applications.
-
Click New Application and select Traditional Web Application:
-
Enter the following details:
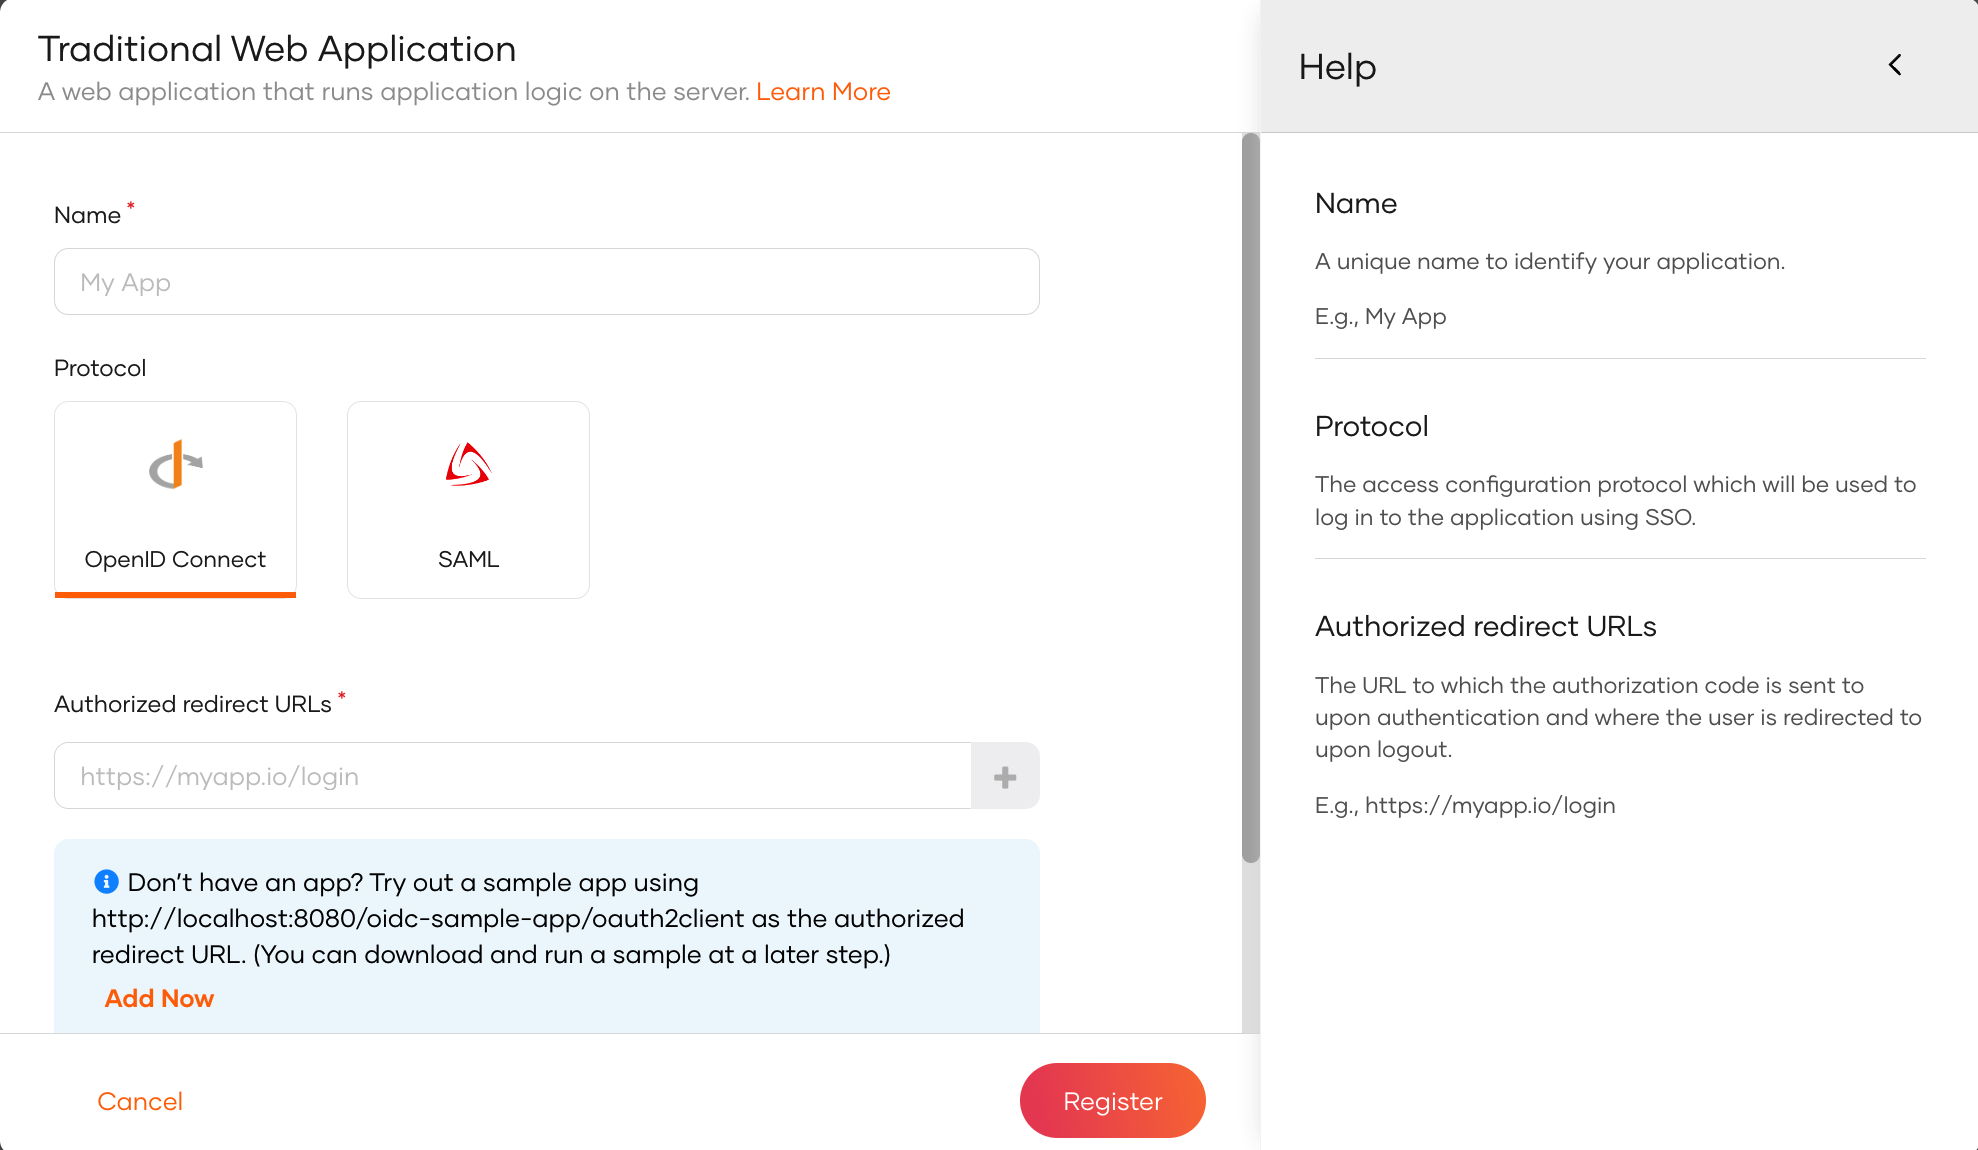
Name Give a unique name to identify your application. Protocol Select OpenID Connect. Authorized redirect URLs The URL to which the user is redirected after a successful login. Use the following URL for this sample app: http://localhost:8080/oidc-sample-app/oauth2client -
Click Register to complete the registration.
-
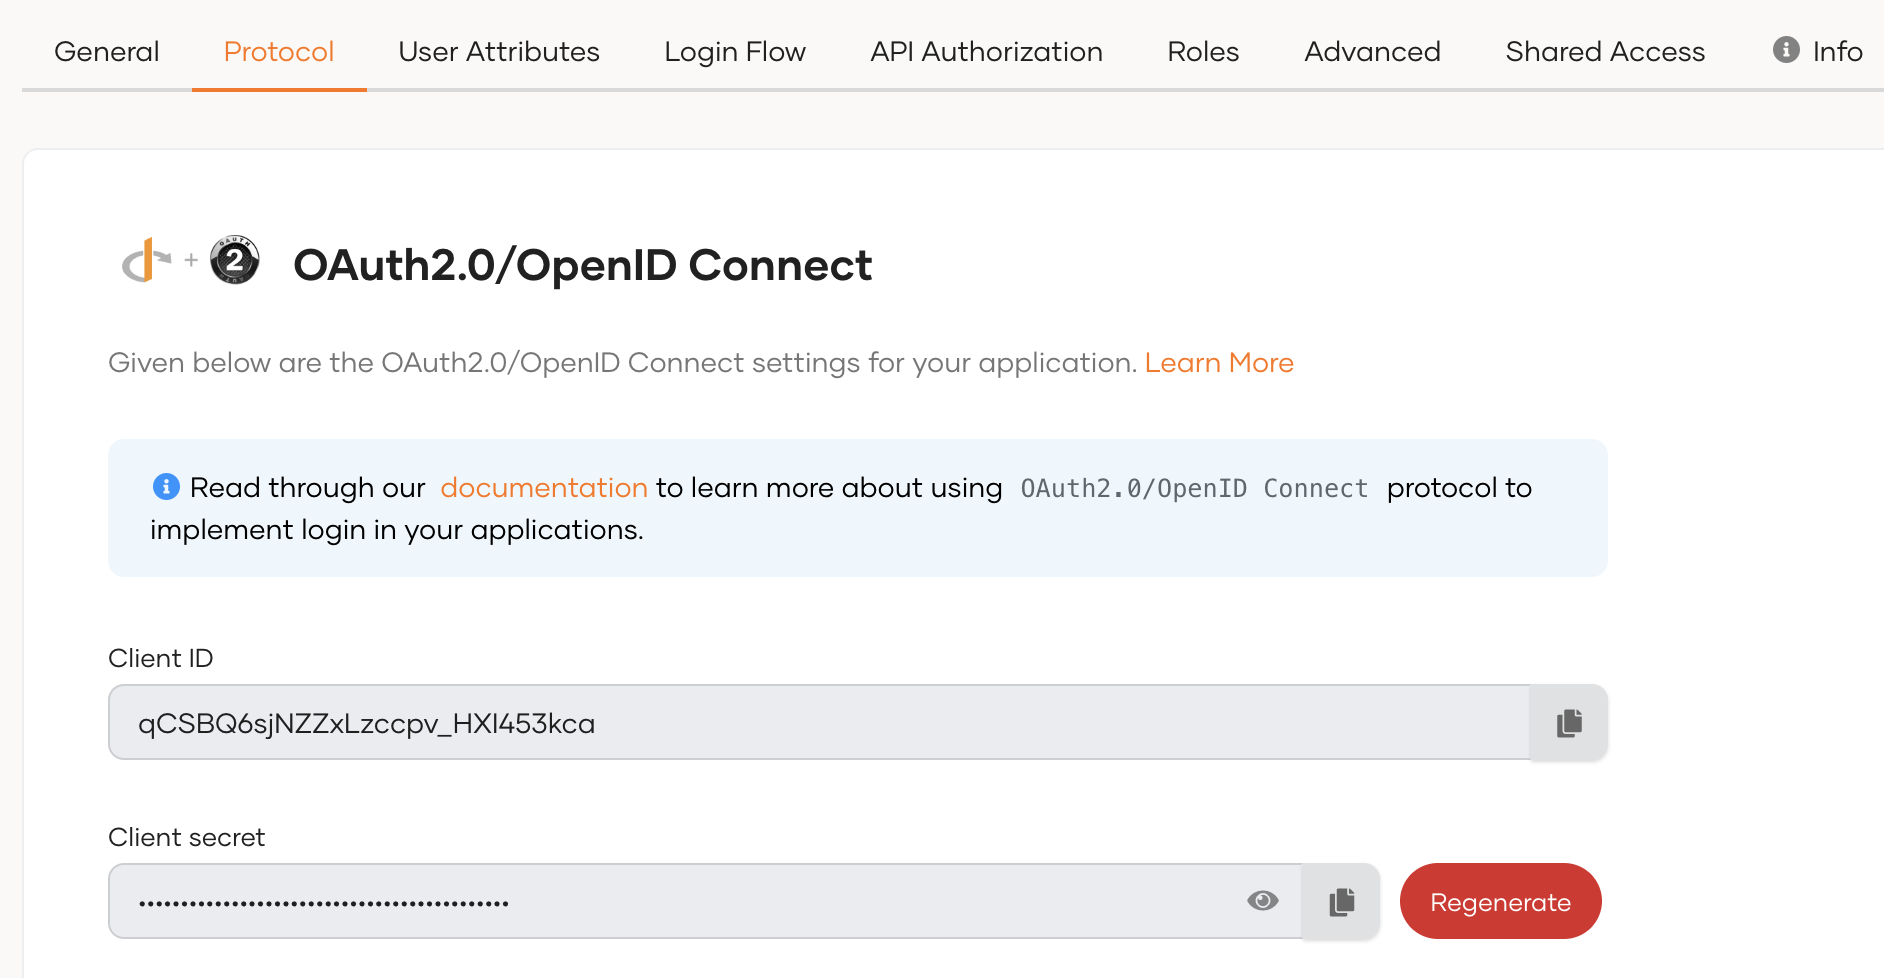
Go to the Protocol tab and take note of the Client ID and the Client secret. You will need them to configure the application later.
Tip
To provide a better experience for the user, it is recommended to configure an access URL for the application. You can set an access URL from the General tab of the application. (For this sample application, the access URL is https://localhost:8080/oidc-sample-app).
The access URL is used,
- in the application catalog and discovery flows.
- to redirect the user back to the application in the following scenarios.
- if the login page times out
- after a password reset
- after the self sign-up verification
- to re-initiate the login flow if the login flow fails.
Download the sample
Click the button below to download the sample. You can also choose to view the source before doing so.
Configure the sample
Follow the steps given below to configure the sample app.
-
Move the war file that you downloaded to the
<TOMCAT_HOME>/webappsfolder where<TOMCAT_HOME>is the home directory of your Tomcat server. -
Open a terminal, navigate to the
<TOMCAT_HOME>/binfolder, and start the Tomcat server using the following command:Note
This will extract the contents of the war file. If your Tomcat server is set to auto-deploy applications, you can skip this step.
-
Go to the
<TOMCAT_HOME>/webapps/oidc-sample-app/WEB-INF/classesfolder and open theoidc-sample-app.propertiesfile in a text editor. -
Update the following in the
oidc-sample-app.propertiesfile:consumerKey={client ID} consumerSecret={client secret} scope=openid,address,email,profile callBackURL=http://localhost:8080/oidc-sample-app/oauth2client trustedAudience=http://localhost:8080/oidc-sample-app issuer=https://api.asgardeo.io/t/{organization_name}/oauth2/token authorizeEndpoint=https://api.asgardeo.io/t/{organization_name}/oauth2/authorize logoutEndpoint=https://api.asgardeo.io/t/{organization_name}/oidc/logout tokenEndpoint=https://api.asgardeo.io/t/{organization_name}/oauth2/token jwksEndpoint=https://api.asgardeo.io/t/{organization_name}/oauth2/jwks #sessionIFrameEndpoint=https://api.asgardeo.io/t/{organization_name}/oidc/checksession skipURIs=/oidc-sample-app/index.html indexPage=index.html logoutURL=logout errorPage=error.jspConfiguration Description consumerKeyThe client id of the registered application. consumerSecretThe client secret of the registered application. scopeThe list of OIDC scopes that are used for requesting user information. You can add OIDC scopes such as
profileandemailin a comma-separated list as follows:scope=openid,address,email,profileissuerIssuer endpoint of Asgardeo used for id token validation: https://api.asgardeo.io/t/{organization_name}/oauth2/tokenauthorizeEndpointThe authorization endpoint of your Asgardeo organization: https://api.asgardeo.io/t/{organization_name}/oauth2/authorizelogoutEndpointThe logout endpoint of your Asgardeo organization: https://api.asgardeo.io/t/{organization_name}/oidc/logouttokenEndpointThe token endpoint of your Asgardeo organization: https://api.asgardeo.io/t/{organization_name}/oauth2/tokenjwksEndpointThe jwks endpoint of your Asgardeo organization: https://api.asgardeo.io/t/{organization_name}/oauth2/jwks -
On your terminal, navigate to the
<TOMCAT_HOME>/binfolder and run the following commands to restart the Tomcat server for the configurations to take effect:
Run the sample
Follow the steps given below to run the sample.
-
Access the application using the following URL:
http://localhost:8080/oidc-sample-app/index.html. -
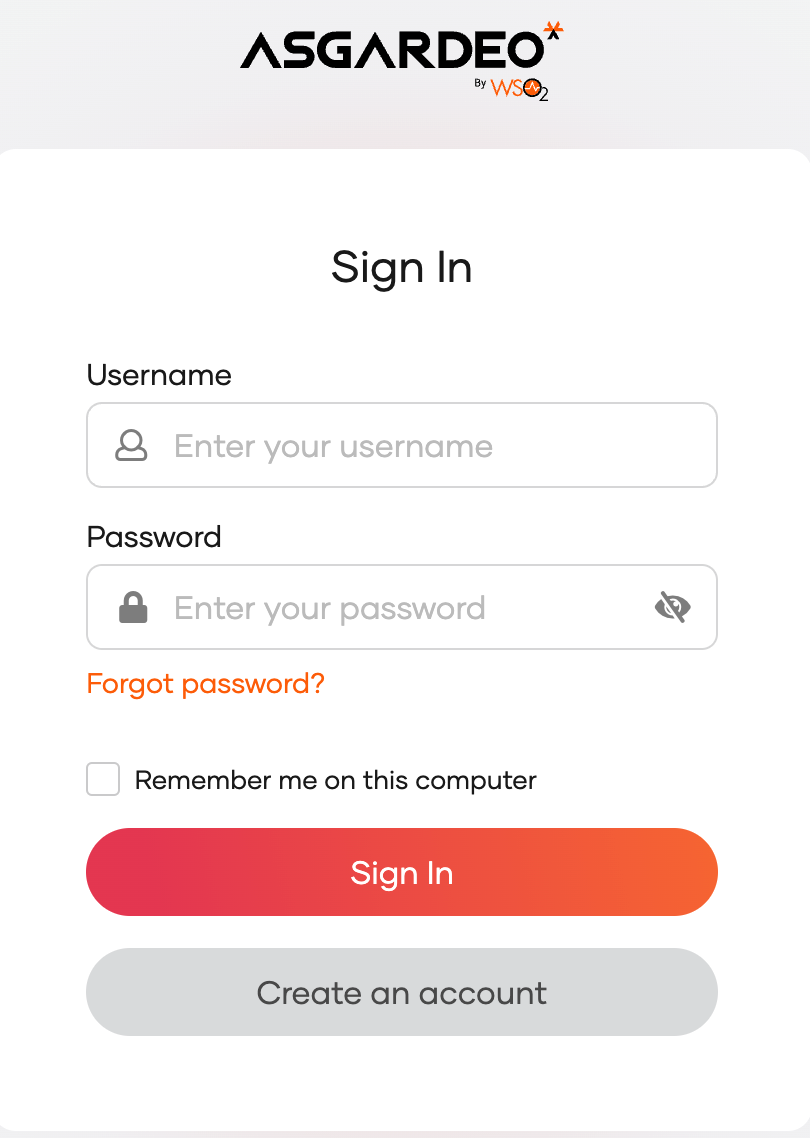
Click Login. You will be redirected to the Asgardeo login page.
-
Enter the credentials of your user account and click Sign In.