Sample React SPA
By following this guide, you will be able to deploy a React single-page application (SPA) locally and secure it with OpenID Connect.
Prerequisites
-
npm with Node.js
If you don't have it, install npm and node in your local environment.
-
A user account in Asgardeo
If you don't already have one, create a user account in Asgardeo.
Register the app
Follow the steps given below to register the sample React SPA in Asgardeo.
-
On the Asgardeo Console, go to Applications.
-
Click New Application and select Single-Page Application
-
Enter the following details:
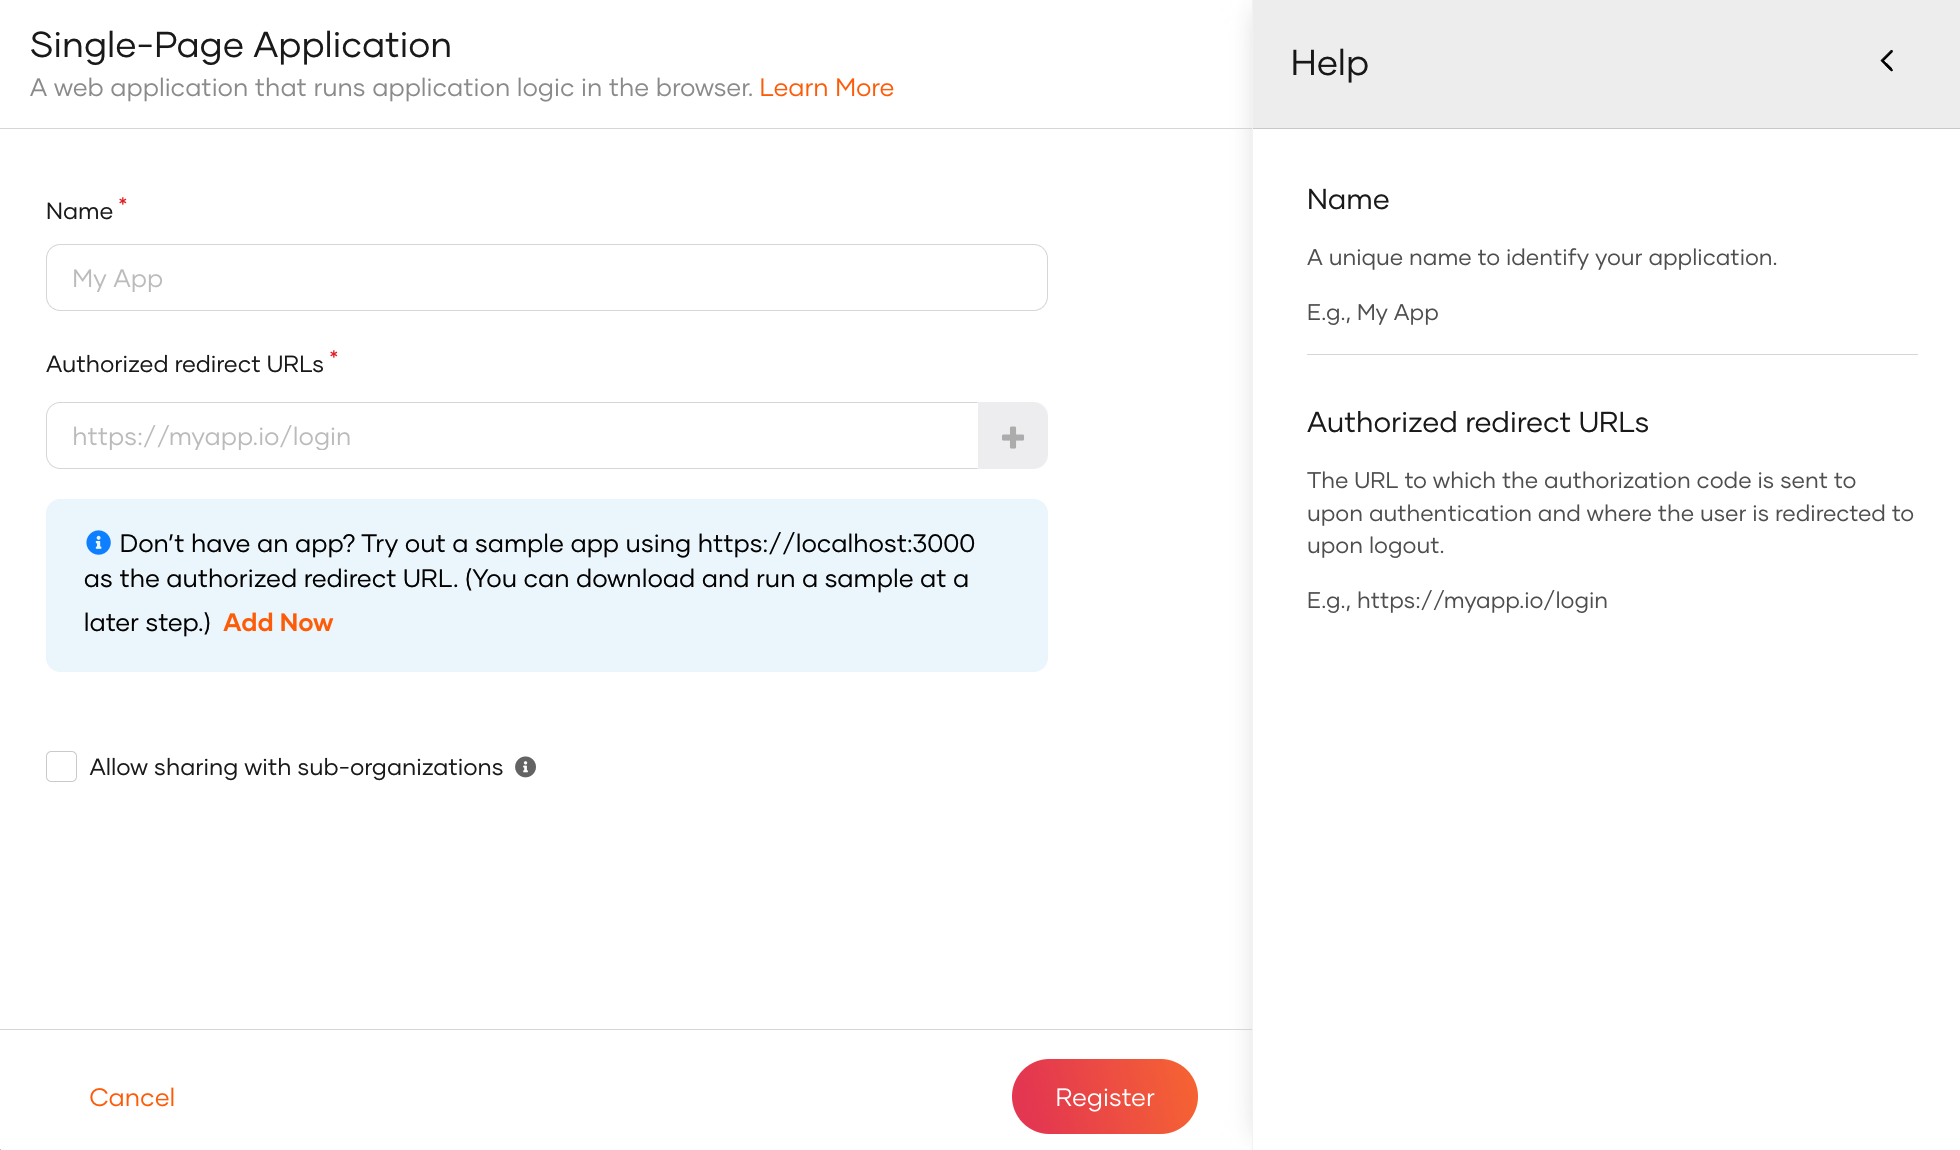
Name Give a unique name to identify your application. Authorized redirect URLs The URL to which the user is redirect to after a successful login. Use the following URL for this sample app:
https://localhost:3000Allow sharing with organizations Enable this to share the new application with all or any selected B2B organizations that belong to your primary organization. -
Click Register to complete the registration.
-
Go to the Protocol tab and take note of the Client ID. You will need it to configure the application later.

Tip
To provide a better experience for the user, it is recommended to configure an access URL for the application. You can set an access URL from the General tab of the application. (For this sample application, the access URL is https://localhost:3000).
The access URL is used,
- in the application catalog and discovery flows.
- to redirect the user back to the application in the following scenarios.
- if the login page times out
- after a password reset
- after the self sign-up verification
- to re-initiate the login flow if the login flow fails.
Download the sample
Click the button below to download the sample. You can also choose to view the source before doing so.
Configure the sample
Follow the steps given below to configure the sample app.
-
Unzip the application folder.
-
Go to the
asgardeo-react-app/src/folder and open theconfig.jsonfile in a text editor. -
Update the following in the
config.jsonfile:{ "clientID": "{client ID}", "baseUrl": "https://api.asgardeo.io/t/{organization_name}", "signInRedirectURL": "https://localhost:3000", "signOutRedirectURL": "https://localhost:3000", "scope": [ "profile" ] }Configuration Description
clientIDThe client id that you received when you registered the application in Asgardeo. baseUrlAll authentication requests that the client application makes to Asgardeo will be appended to this base URL.:
https://api.asgardeo.io/t/{organization_name}scopeThe list of OIDC scopes that are used for requesting user information. You can add OIDC scopes such as
profileandemailin a comma-separated list as follows:"scope": ["profile", "email"]Learn more about [OIDC scopes in Asgardeo](/asgardeo/docs/guides/users/attributes/manage-scopes/).
Run the sample
Follow the steps given below to run the sample.
-
On your terminal, navigate to the root of the project and run the command given below to start the sample application:
-
Once the app is successfully compiled, it is accessible at
https://localhost:3000. -
Click Login. You will be redirected to the Asgardeo login page.

-
Enter the credentials of your user account and click Sign In.
Extend your login session
By default, the user login session is active for only
15 minutes. You can extend the session to14 daysby selecting the Remember me on this computer option provided at the login screen of your application.