Invited user registration
Invited User Registration allows users to securely set their credentials after an administrator registers them in Asgardeo.
Once an admin creates the account, the user receives an email to complete the registration. The user clicks the link in the email, verifies their identity with a one-time code sent to the same email address, and then sets their password.
In the Flow Builder, you can create the invited user registration journey in two ways:
- Use a starter template – Load a ready-made flow and customize it to your needs.
- Build from scratch – Take full control by designing every step yourself.
Sample use case
Imagine you want to verify the user’s identity via Email OTP before allowing them to set their password. The flow works as follows:
- The user clicks the link in the invitation email.
- Asgardeo sends a one-time code to the user's registered email address.
- The user confirms their identity by entering the code.
- The user sets their password.
This ensures that only the user with access to the registered email address can complete the registration, enhancing security.
Build the flow
To build the sample use case, start from the Invited User Registration template and adjust it to use Email OTP for identity verification.
Follow the steps below to configure this flow.
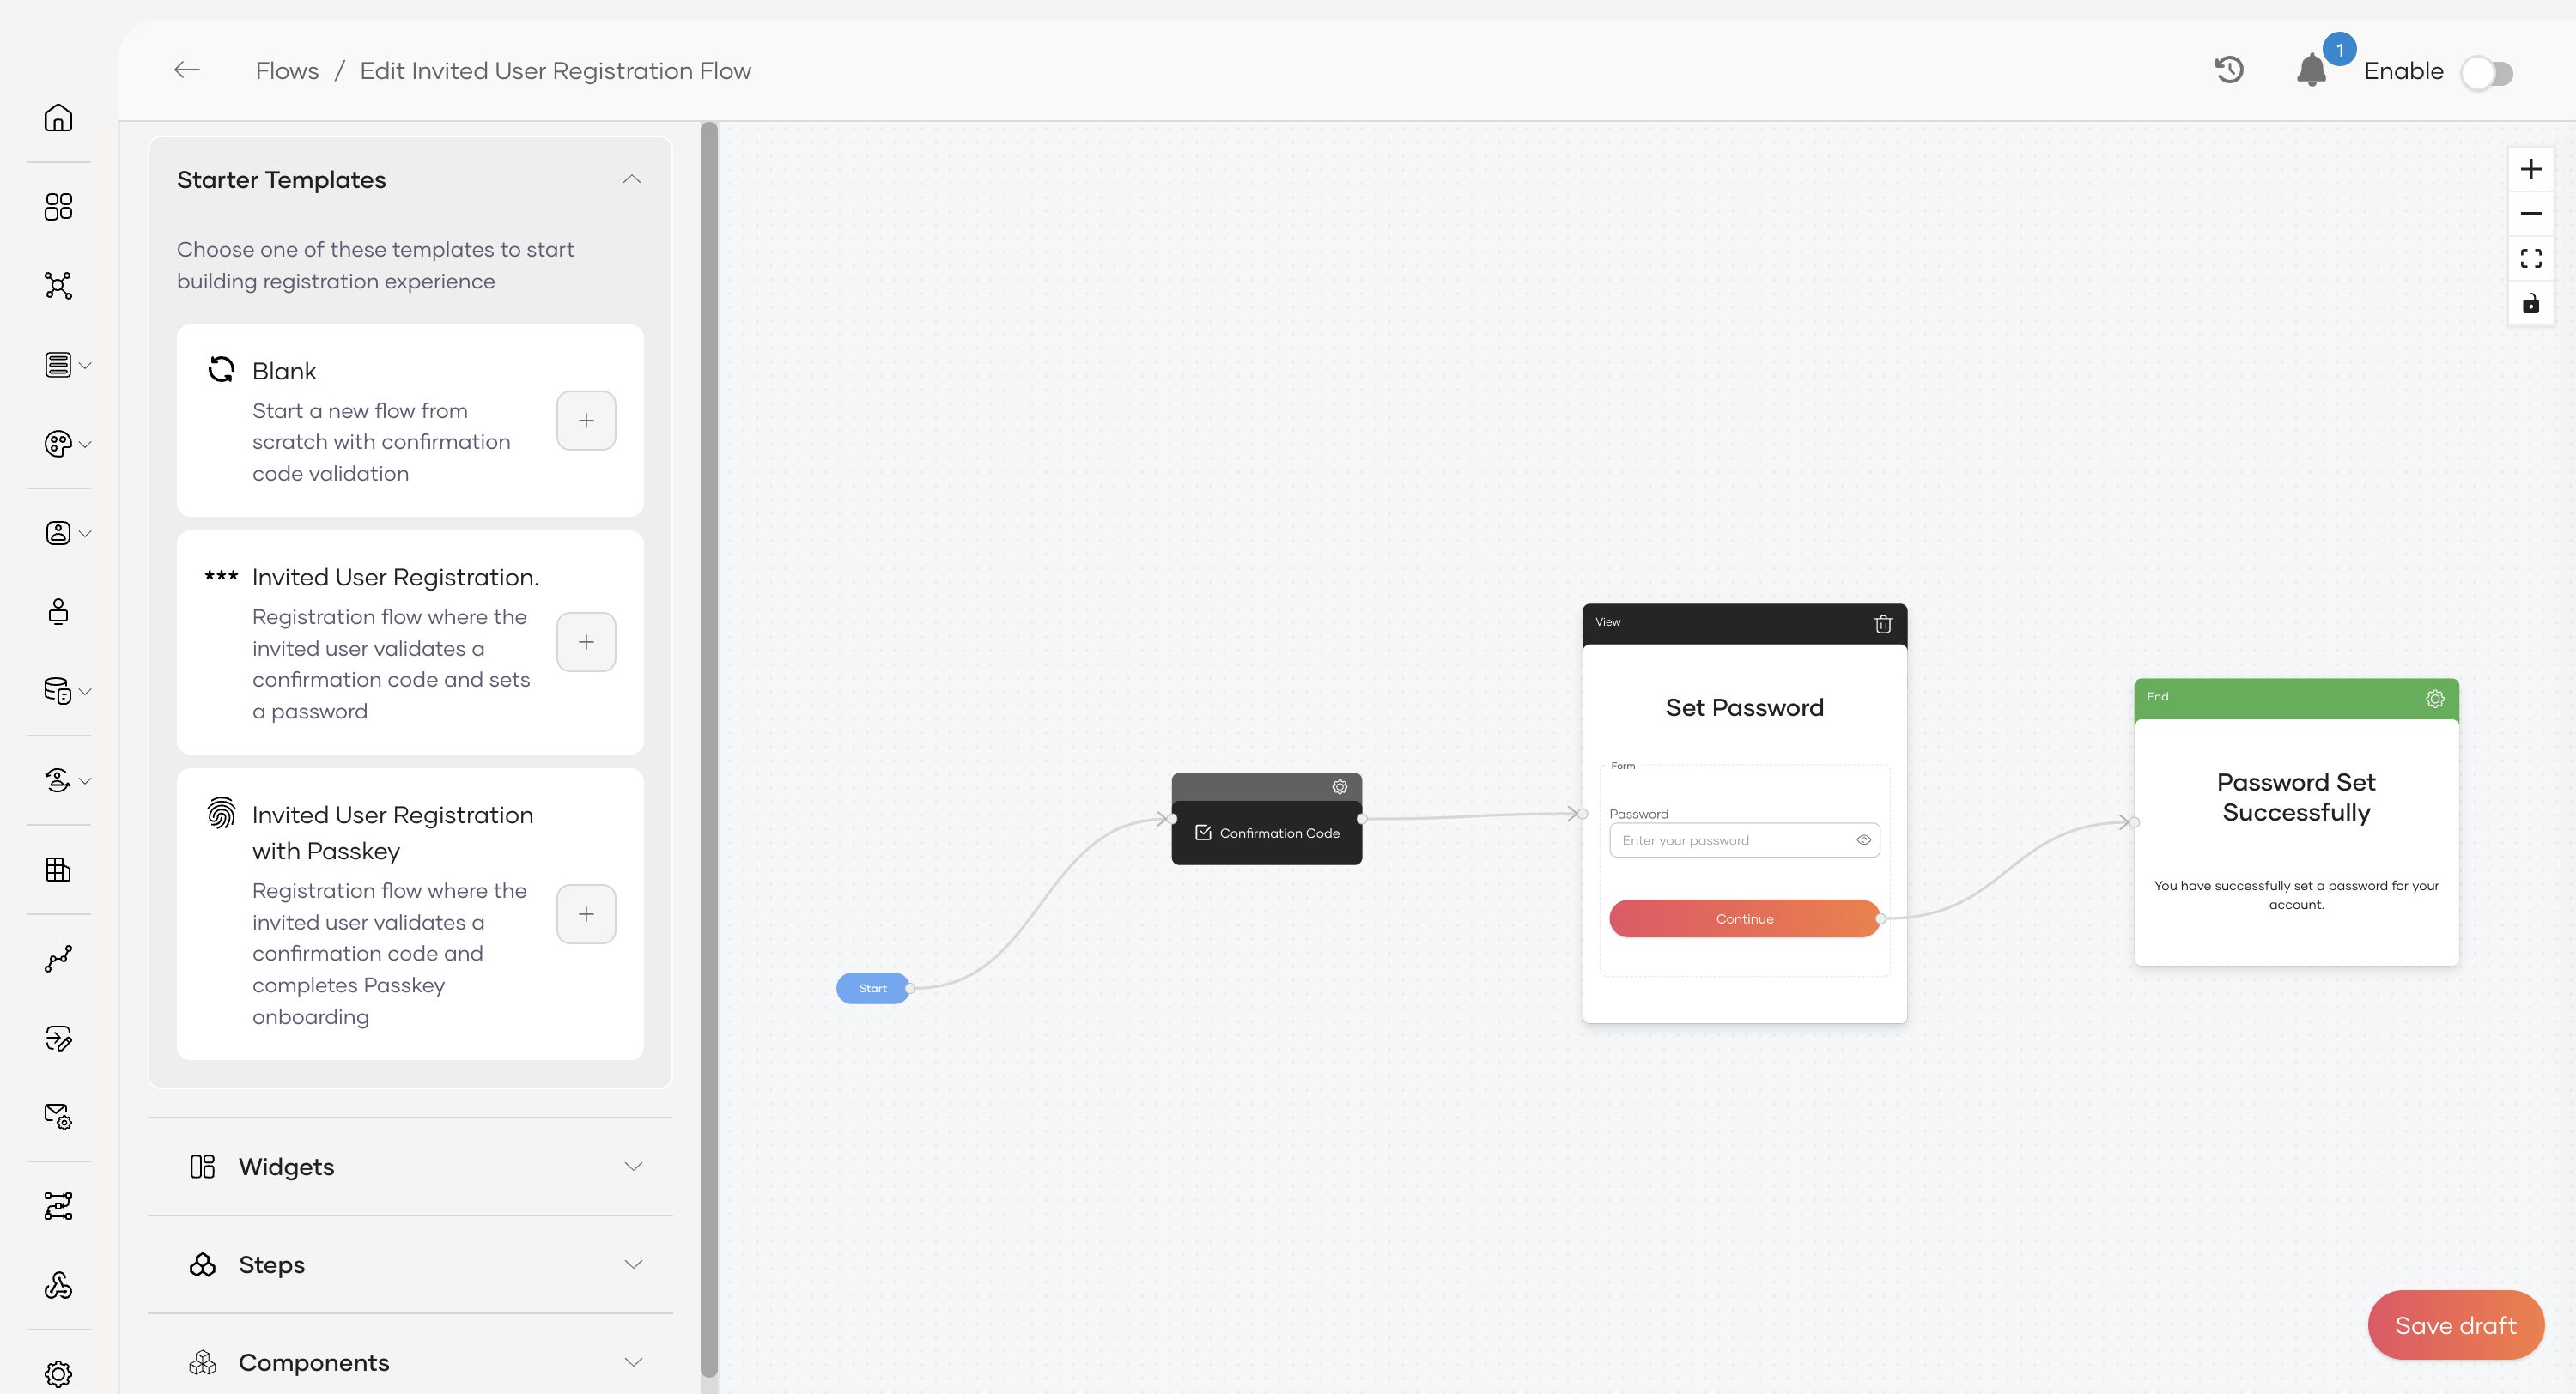
Step 1 - Load the template
To load the template:
- On the Asgardeo console, navigate to Flows.
- Click on the Invited User Registration card.
- Click the + button next to the Invited User Registration template to load it onto the canvas.
Step 2 - Configure Email OTP verification
By default, the template uses a simple password setup link. You can easily switch this to a more secure Email OTP verification.
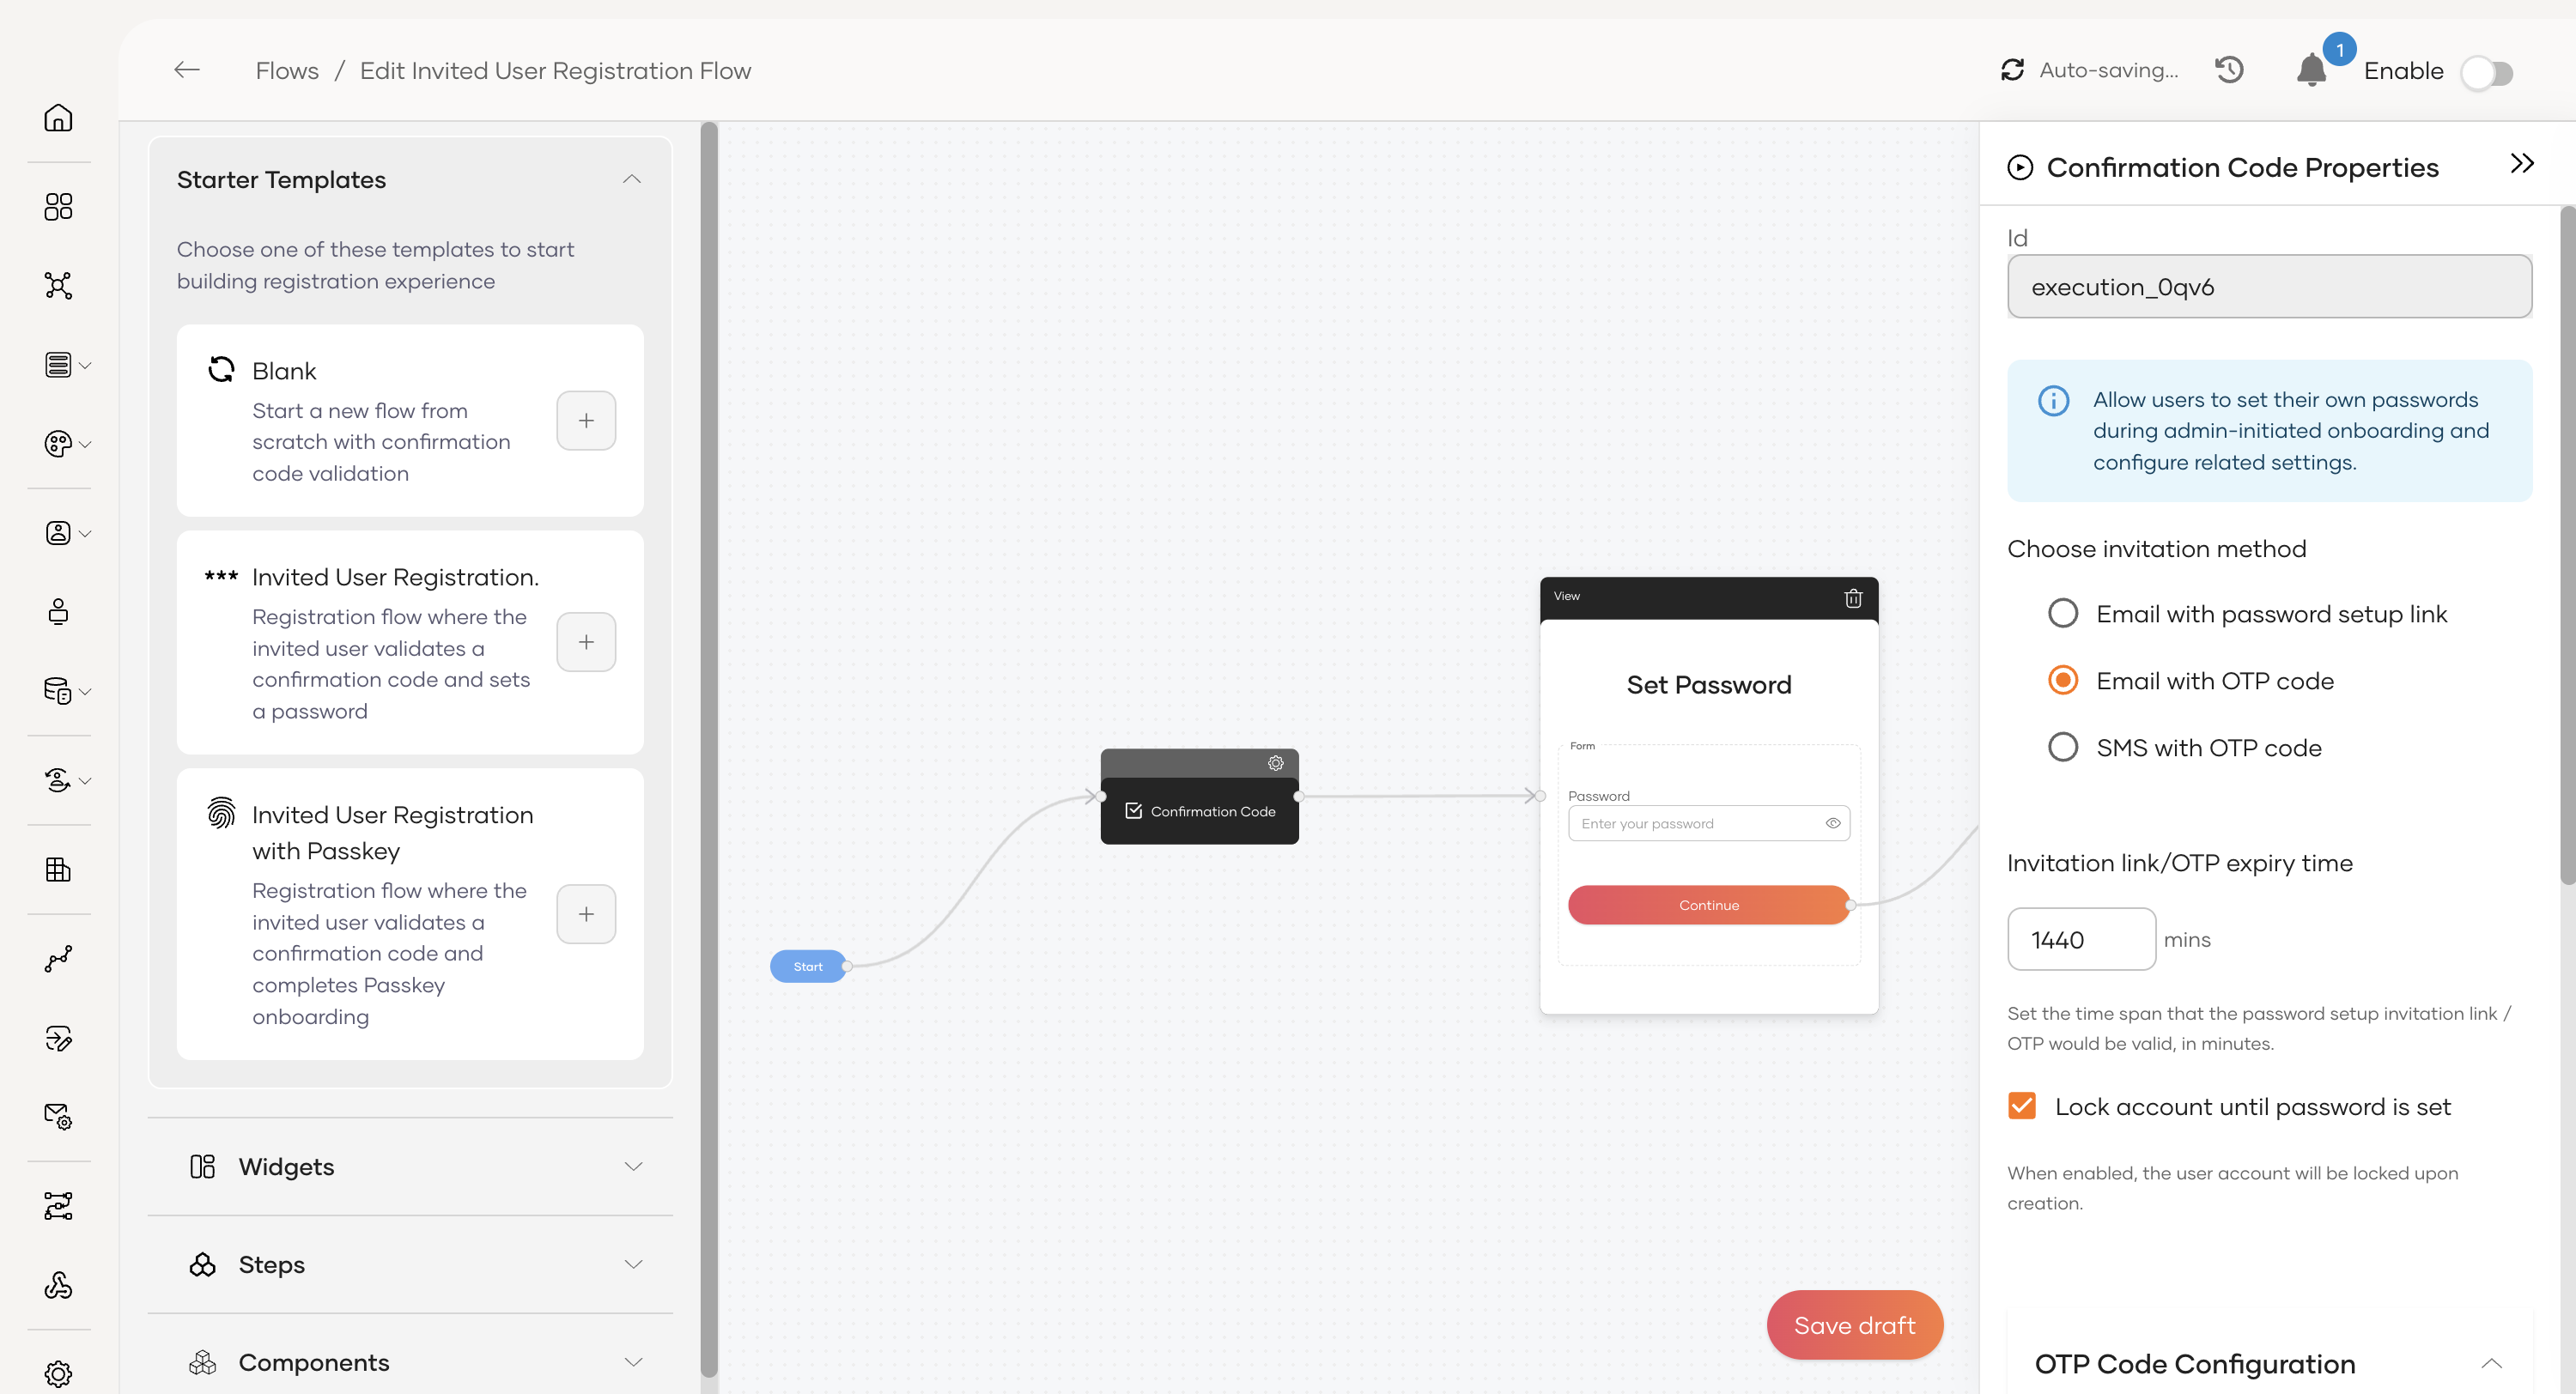
- Click on the Confirmation Code node on the canvas.
- In the Confirmation Code Properties pane on the right, under Choose invitation method, select Email with OTP code.
- (Optional) You can further customize the OTP's format under OTP Code Configuration, such as its length or character types.
Step 3 - Enable the flow
Once the flow has been fully configured and is ready for users:
- Click Save Draft to save all your changes.
- On the top-right corner of the Flow Builder, turn the toggle ON to publish the updated flow.
Now that these changes are in place, you have built a secure invited user registration flow that uses Email OTP for identity verification.
Reference
This section provides details on the configuration options available in the Invited User Registration flow.
Confirmation code properties
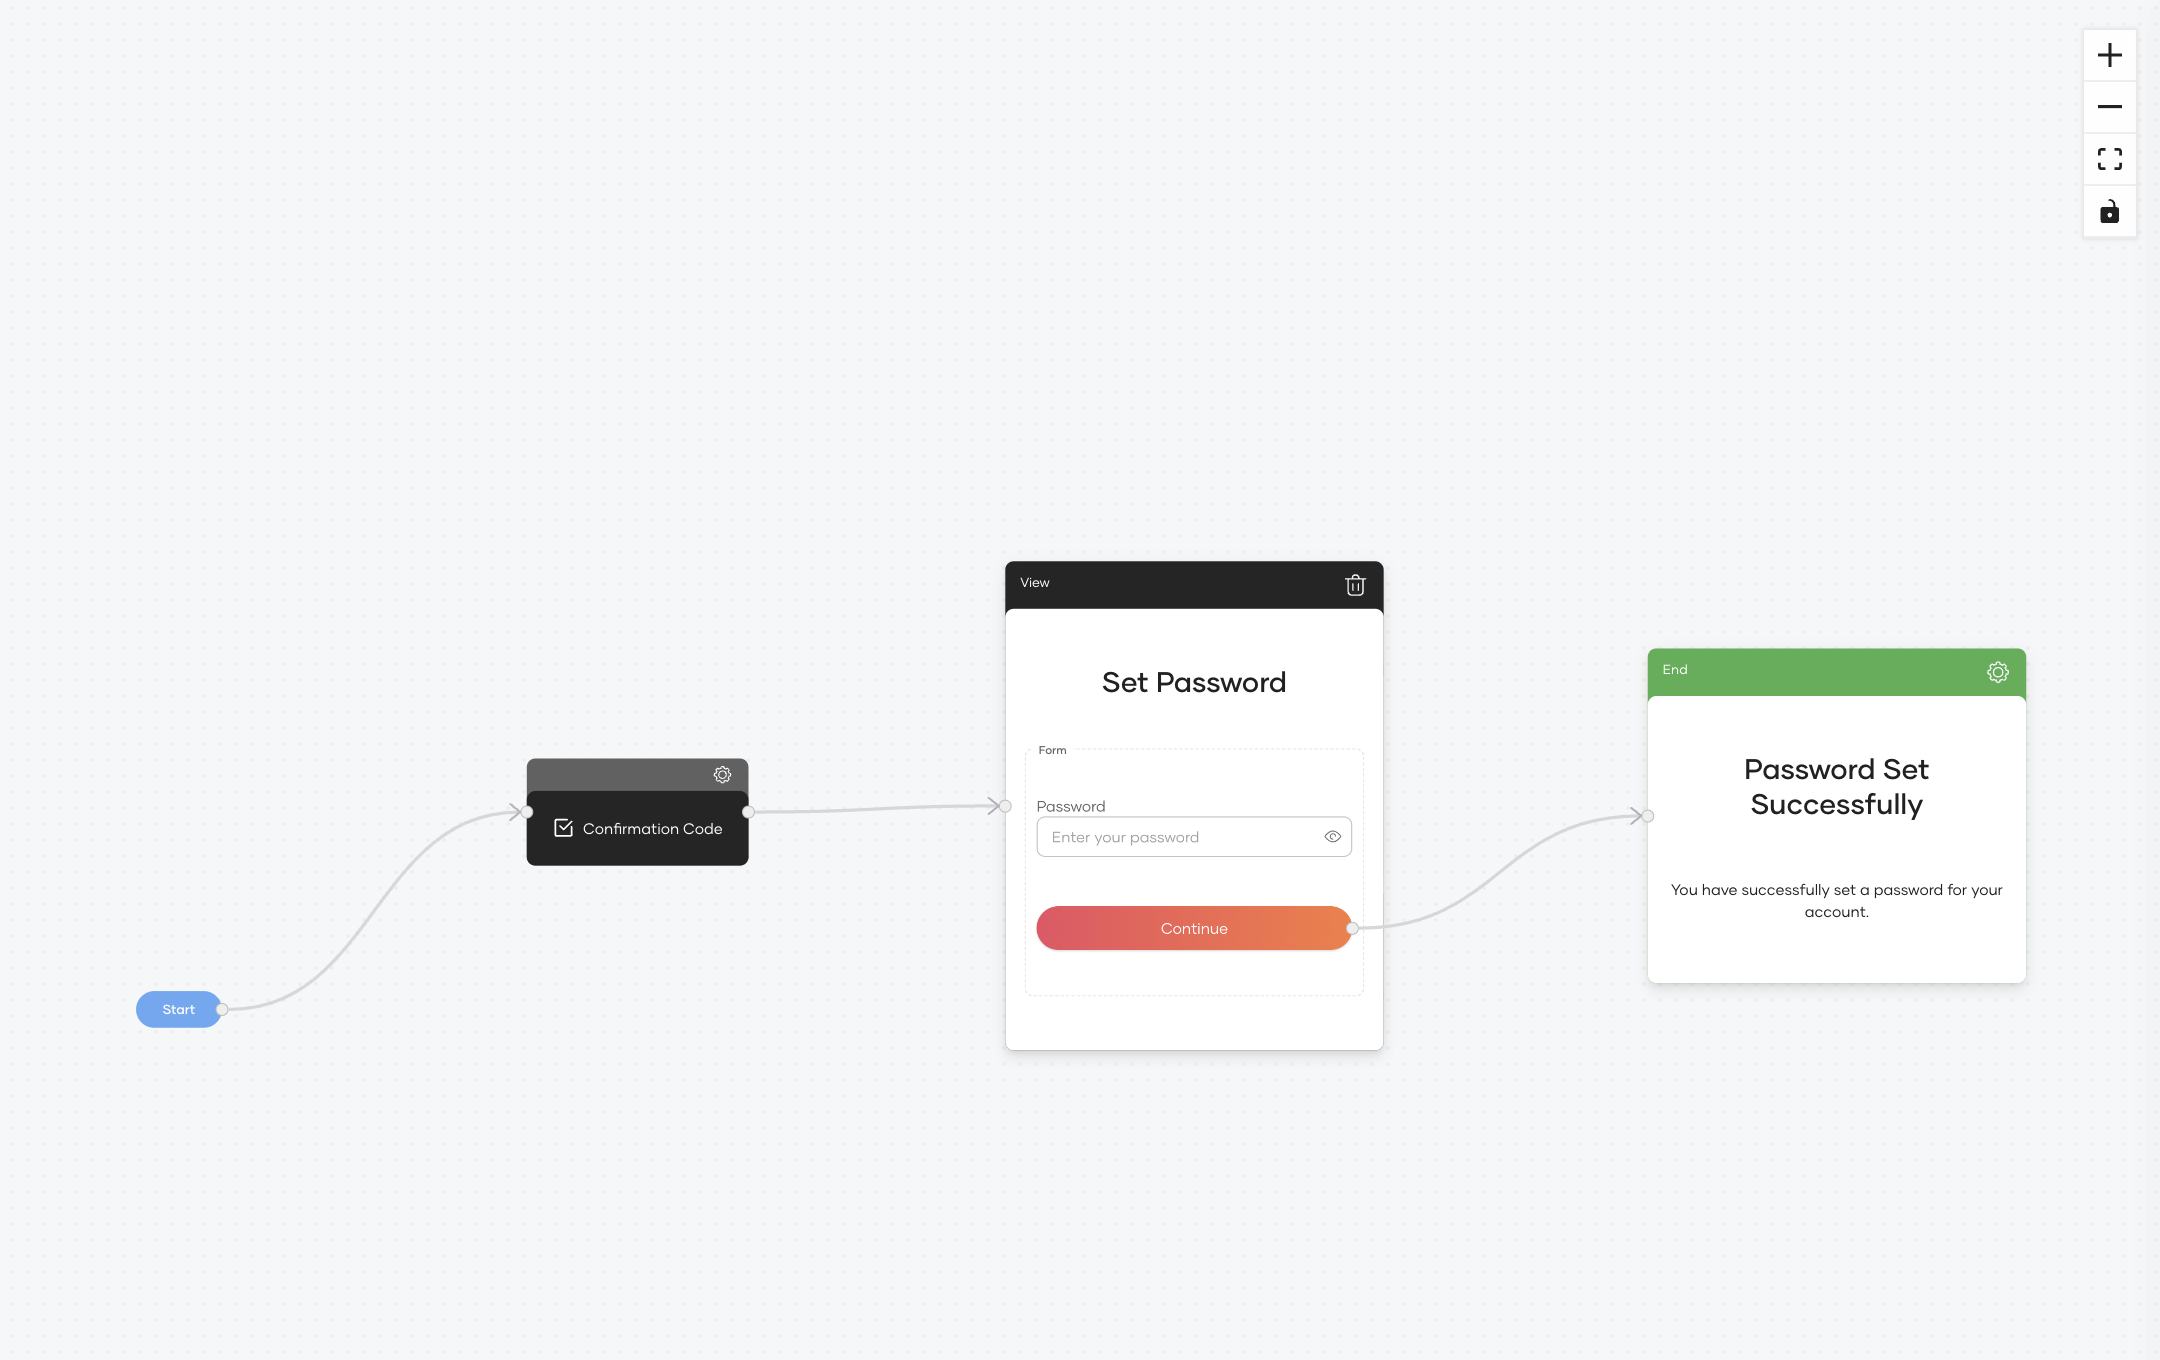
The Confirmation Code node is the first step in the flow, where you define how the invited user will verify their identity to set their password.
Choose invitation method: Select the method for user verification.
- Email with password setup link: Sends the user an email containing a direct link to the password creation screen.
- Email with OTP code: Sends a one-time code to the user's email that they must enter to proceed.
- SMS with OTP code: Sends a one-time code to the user's mobile number.
Invitation link/OTP expiry time: Set the duration (in minutes) for which the invitation link or OTP will be valid.
Lock account until password is set: If enabled, the user's account will remain locked and inaccessible until they complete the registration and set their password.
OTP Code Configuration: If using an OTP method, you can customize the generated code.
- Character types: Choose to include uppercase letters (A-Z), lowercase letters (a-z), and numbers (0-9) in the OTP.
- OTP code length: Define the total number of characters for the OTP.
Flow completion properties
The Flow Completion Properties, configured on the End node, define the final actions that occur after a user successfully sets their password.
- Send a notification email on flow completion: When enabled, the user will receive an email confirming that their registration is complete and their account is ready to use.