Integrating WSO2 Identity Platform with WSO2 AI Gateway for Agent Identity Management
In this tutorial, we explore how enterprises can securely scale multi-agent AI systems using WSO2 Identity Platform and the WSO2 AI Gateway. As AI adoption grows, organizations often rely on multiple AI agents, some optimized for speed and cost, others designed for deep reasoning and critical decision-making. Without proper governance, this can quickly lead to security risks, runaway costs, and uncontrolled model access. By combining WSO2 Identity Platform’s identity and access management for non-human agents with the WSO2 AI Gateway’s intelligent routing, scope-based authorization, and token-aware rate limiting, teams gain precise control over who can access which AI models and at what cost.
Let’s dive in and see how this architecture brings security, efficiency, and confidence to enterprise-grade AI deployments.
The use case: Enterprise support system
Imagine a global software provider facing a 40% year-over-year increase in support tickets. To scale without bloating the budget, they have deployed a Multi-Agent AI System. Instead of a single general-purpose agent, they use multiple specialized agents:
- The Coordinator Agent: A fast, cost-effective agent that classifies incoming tickets.
- The Expert Agent: A "deep thinking" agent reserved for critical, complex infrastructure outages.
The agents in action
| Agent | Model | Role | Primary Goal |
|---|---|---|---|
| The Coordinator Agent | OpenAI GPT-4o mini | Support-Coordinator | Instant triage and categorization. |
| The Expert Agent | OpenAI GPT-5 | Technical-Specialist | Deep reasoning and code fixing. |
Example scenario
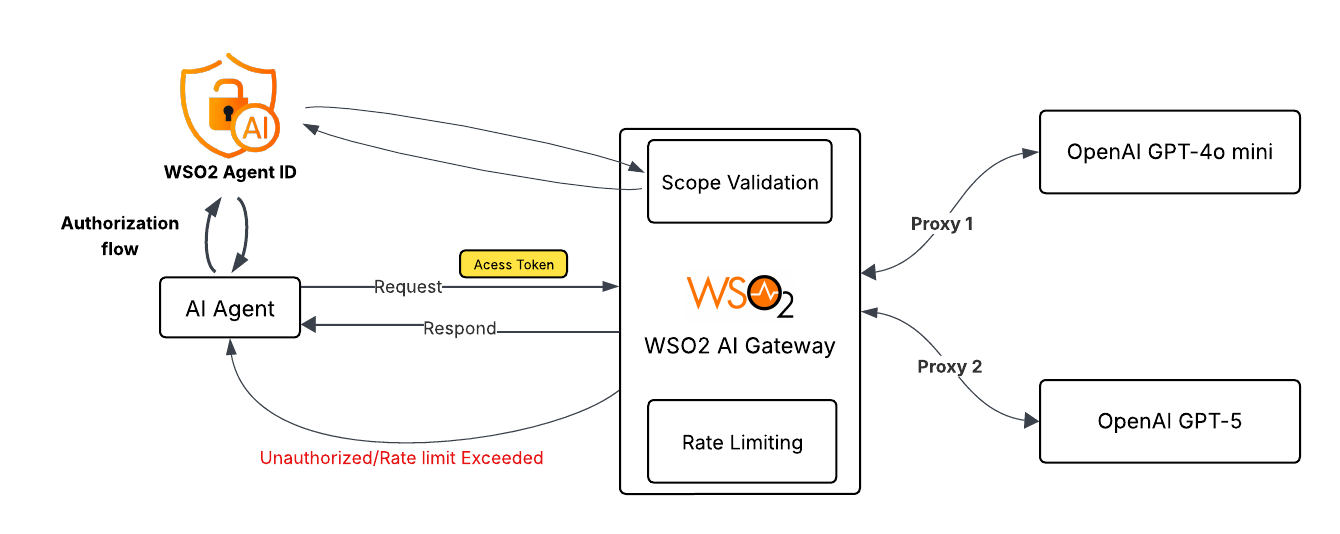
- Intake & Triage: A customer reports "Server down, error 503." The application invokes the Coordinator Agent. The agent authenticates via WSO2 Identity Platform, receiving a token with the
Support-Coordinatorrole. WSO2 AI Gateway validates this role and the specific rate limit before routing the request to the cheaper mini model. - Escalation & Reasoning: Identifying a "Critical" flag, the system wakes up the Expert Agent. This agent authenticates as a
Technical-Specialist. WSO2 AI Gateway verifies the role and applies a strict rate limit to prevent recursive loops from draining the cloud budget on the expensive reasoning model.
Below is a high-level conceptual overview of the architecture we plan to explore.
WSO2 Identity Platform configuration
We begin by establishing the "Digital Identities" for our non-human agents. WSO2 Identity Platform handles the authentication, issuing secure tokens that define exactly what each agent is allowed to do.
Register an application
- Log in to the WSO2 Identity Platform Console.
- Go to Applications > New Application.
- Select Standard-Based Application.
- Configure the application:
- Name:
Enterprise Support System - Protocol: OpenID Connect.
- Tick Allow AI agents to sign into this application.
- Name:
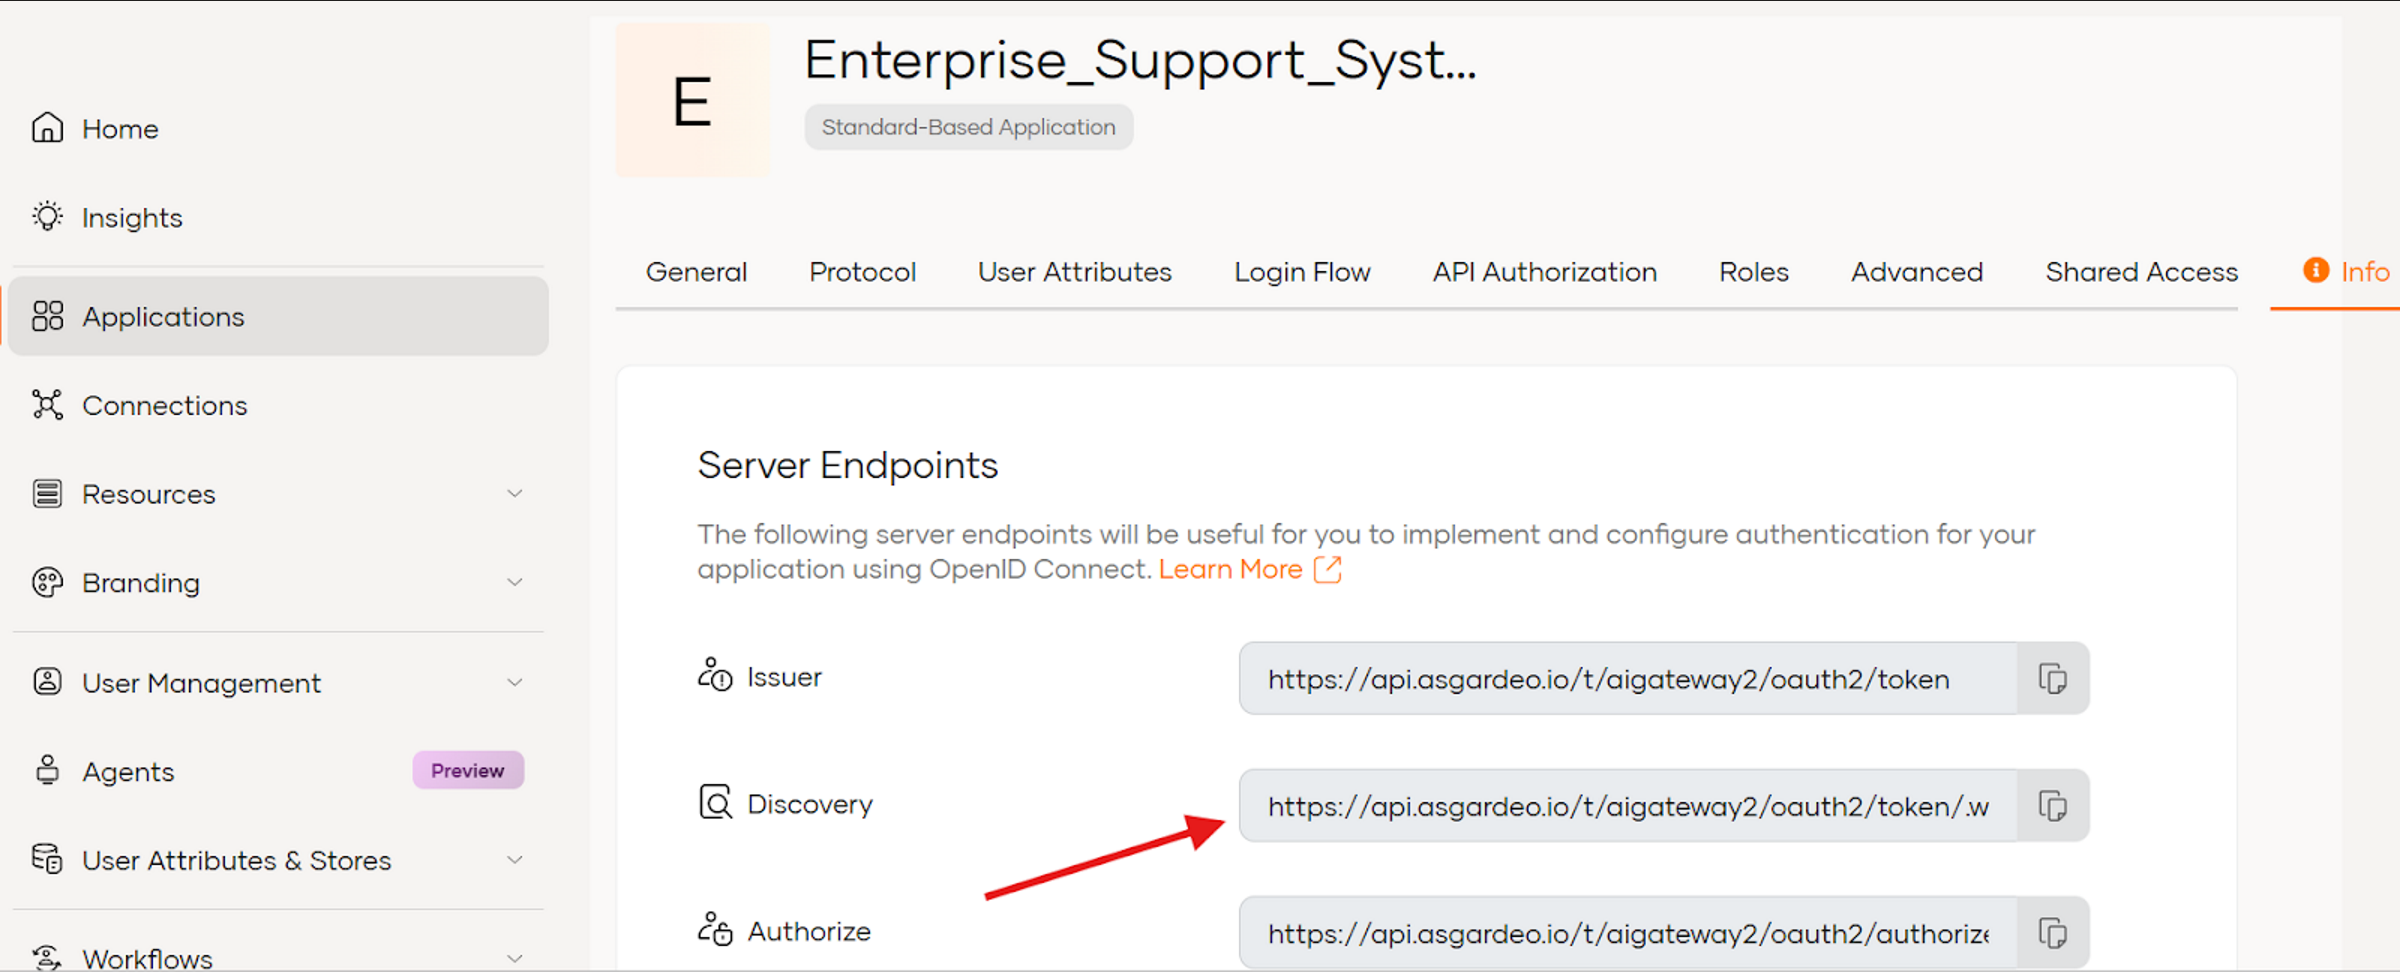
- After Creation, in the Protocol tab:
- Add Allowed grant types: Code.
- For Authorized redirect URLs, add the callback URL of your application. (For agent auth, this is not really needed, so you can use
http://localhost:3000/callback). - Enable the public client in Client Authentication.
- Set the Access Token type to JWT and add roles to Access Token Attributes.
Create the scopes
- Navigate to Resources > API Resources.
- Click + New API Resources.
- Configure the resource:
- Identifier:
https://agent-identifier(Doesn't need to be publicly accessible, just an identifier). - Display Name:
agent-identifier.
- Identifier:
- In the Scopes, add:
Technical-SpecialistSupport-Coordinator
- Click Next and Create.
Add API resource permissions to the application
- Go to the
Enterprise Support Systemapplication you created and navigate to the API Authorization tab. - Click Authorize API resource, search for the
agent-identifierresource you created, and select all scopes. - Click Finish.
Create the roles
- Navigate to User Management > Roles.
- Click + New Role.
- Configure the role:
- Role Name:
Support-Coordinator - Assign application:
Enterprise Support System. - In Permission Selection, select the
agent-identifierresource and theSupport-Coordinatorscope.
- Role Name:
- Click Finish.
- Repeat the process for the
Technical-Specialistrole.
Register AI agents
Since these are autonomous agents, we create "Auth Identities" for them. WSO2 Agent Identity is a great way to do this.
- Go to Agents.
- Create the Coordinator Agent:
- Name:
coordinator-agent - Make a note of the Agent ID and Agent Secret.
- Go to User Management > Roles and assign this agent to the
Support-Coordinatorrole.
- Name:
- Create the Expert Agent:
- Name:
expert-agent - Make a note of the Agent ID and Agent Secret.
- Go to User Management > Roles and assign this agent to the
Technical-Specialistrole.
- Name:
WSO2 AI Gateway configuration
Now we configure the AI Gateway. WSO2 AI Gateway will sit in front of the AI models, checking the ID cards (tokens) issued by WSO2 Identity Platform and routing traffic to the correct model.
Create an AI API Proxy in Bijira
- Log in to WSO2 Bijira.
- Create a project and then create a new AI API by selecting:
- API Proxy → Third Party APIs (Egress) → AI APIs.
- After creation, configure it and deploy it to Development and Production Environments. For a detailed guide, refer to the Docs-ai-apis.
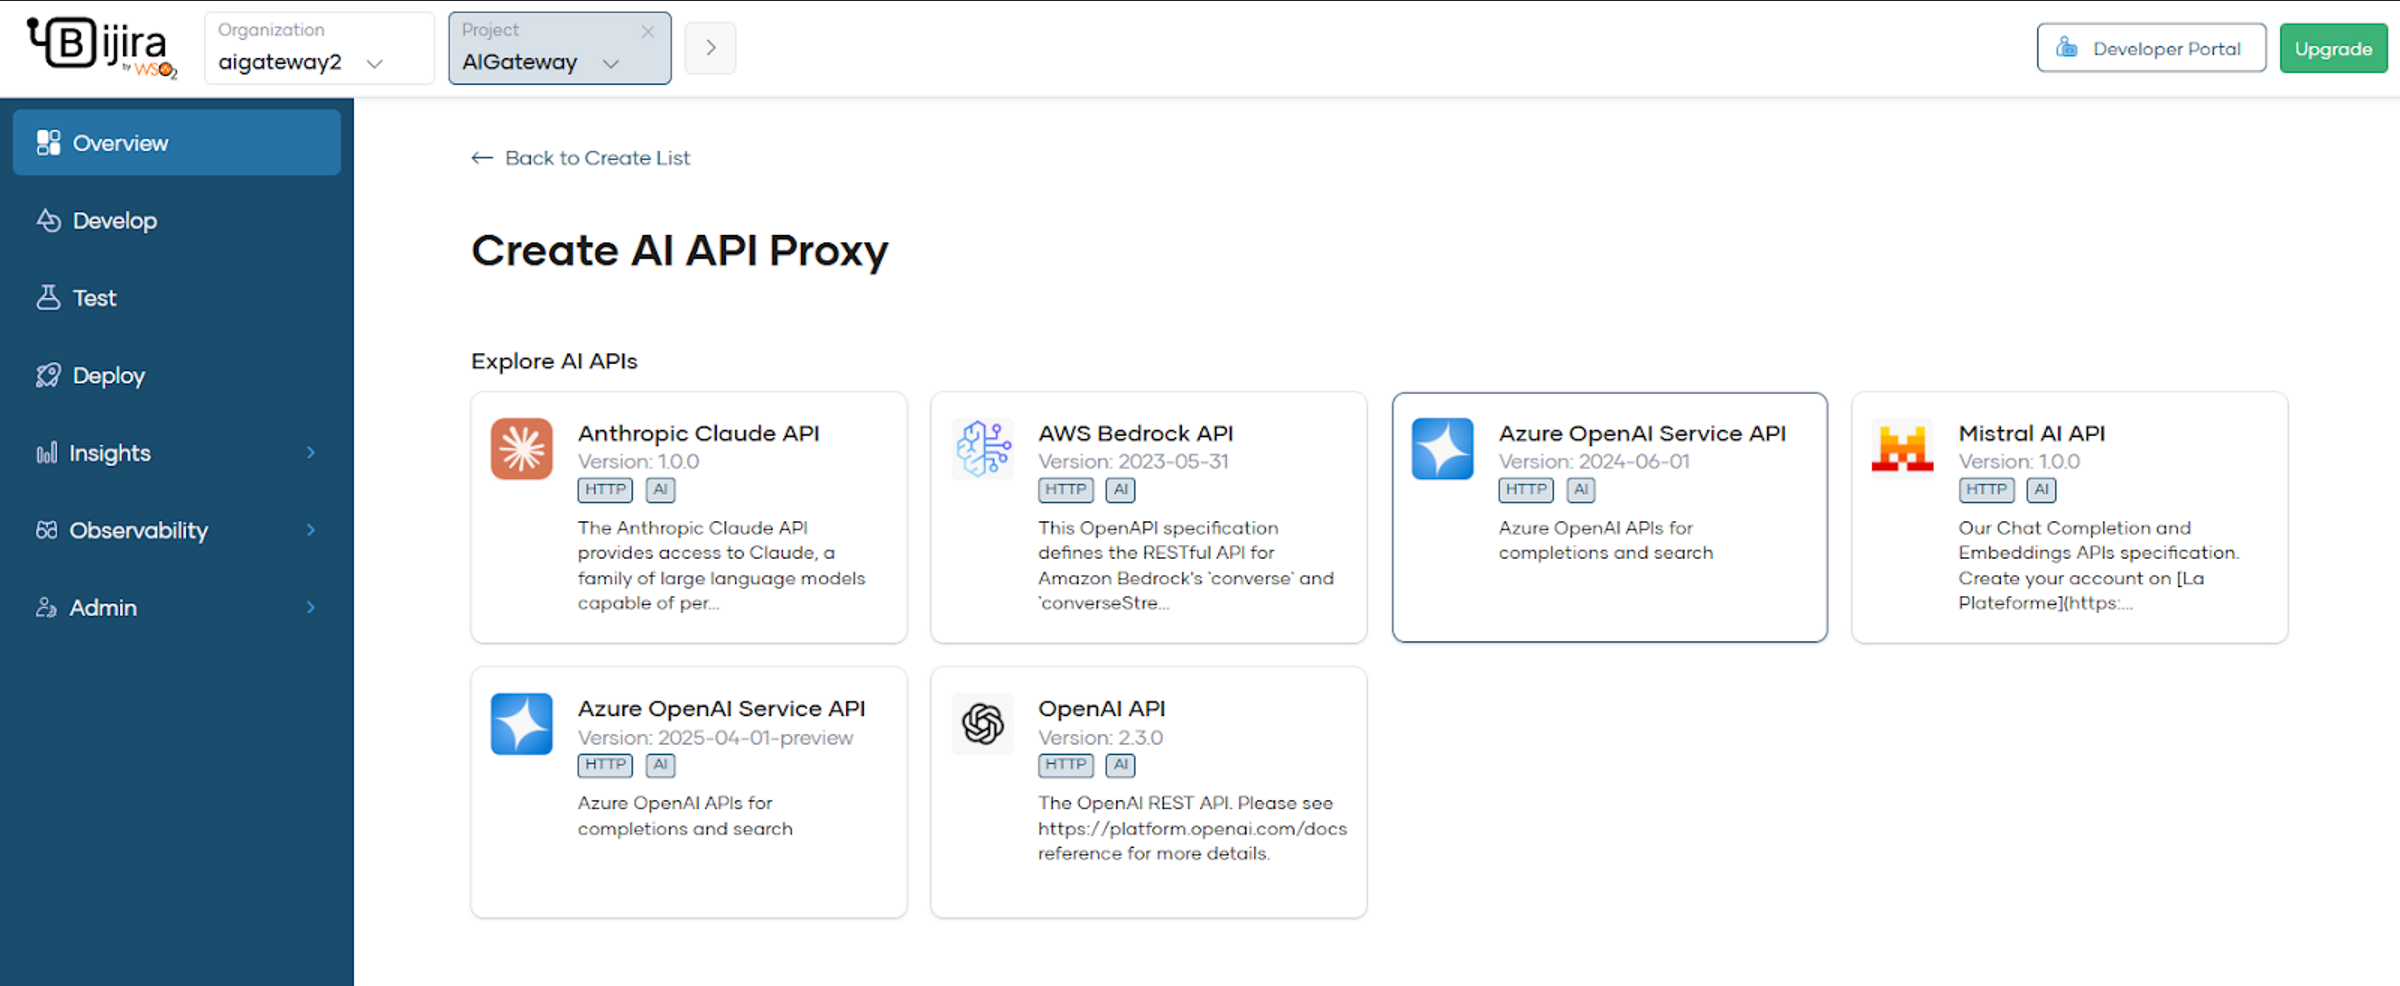
For this tutorial, we create two API proxies using Azure OpenAI Service API and deploy them.
gpt-4o minigpt-5
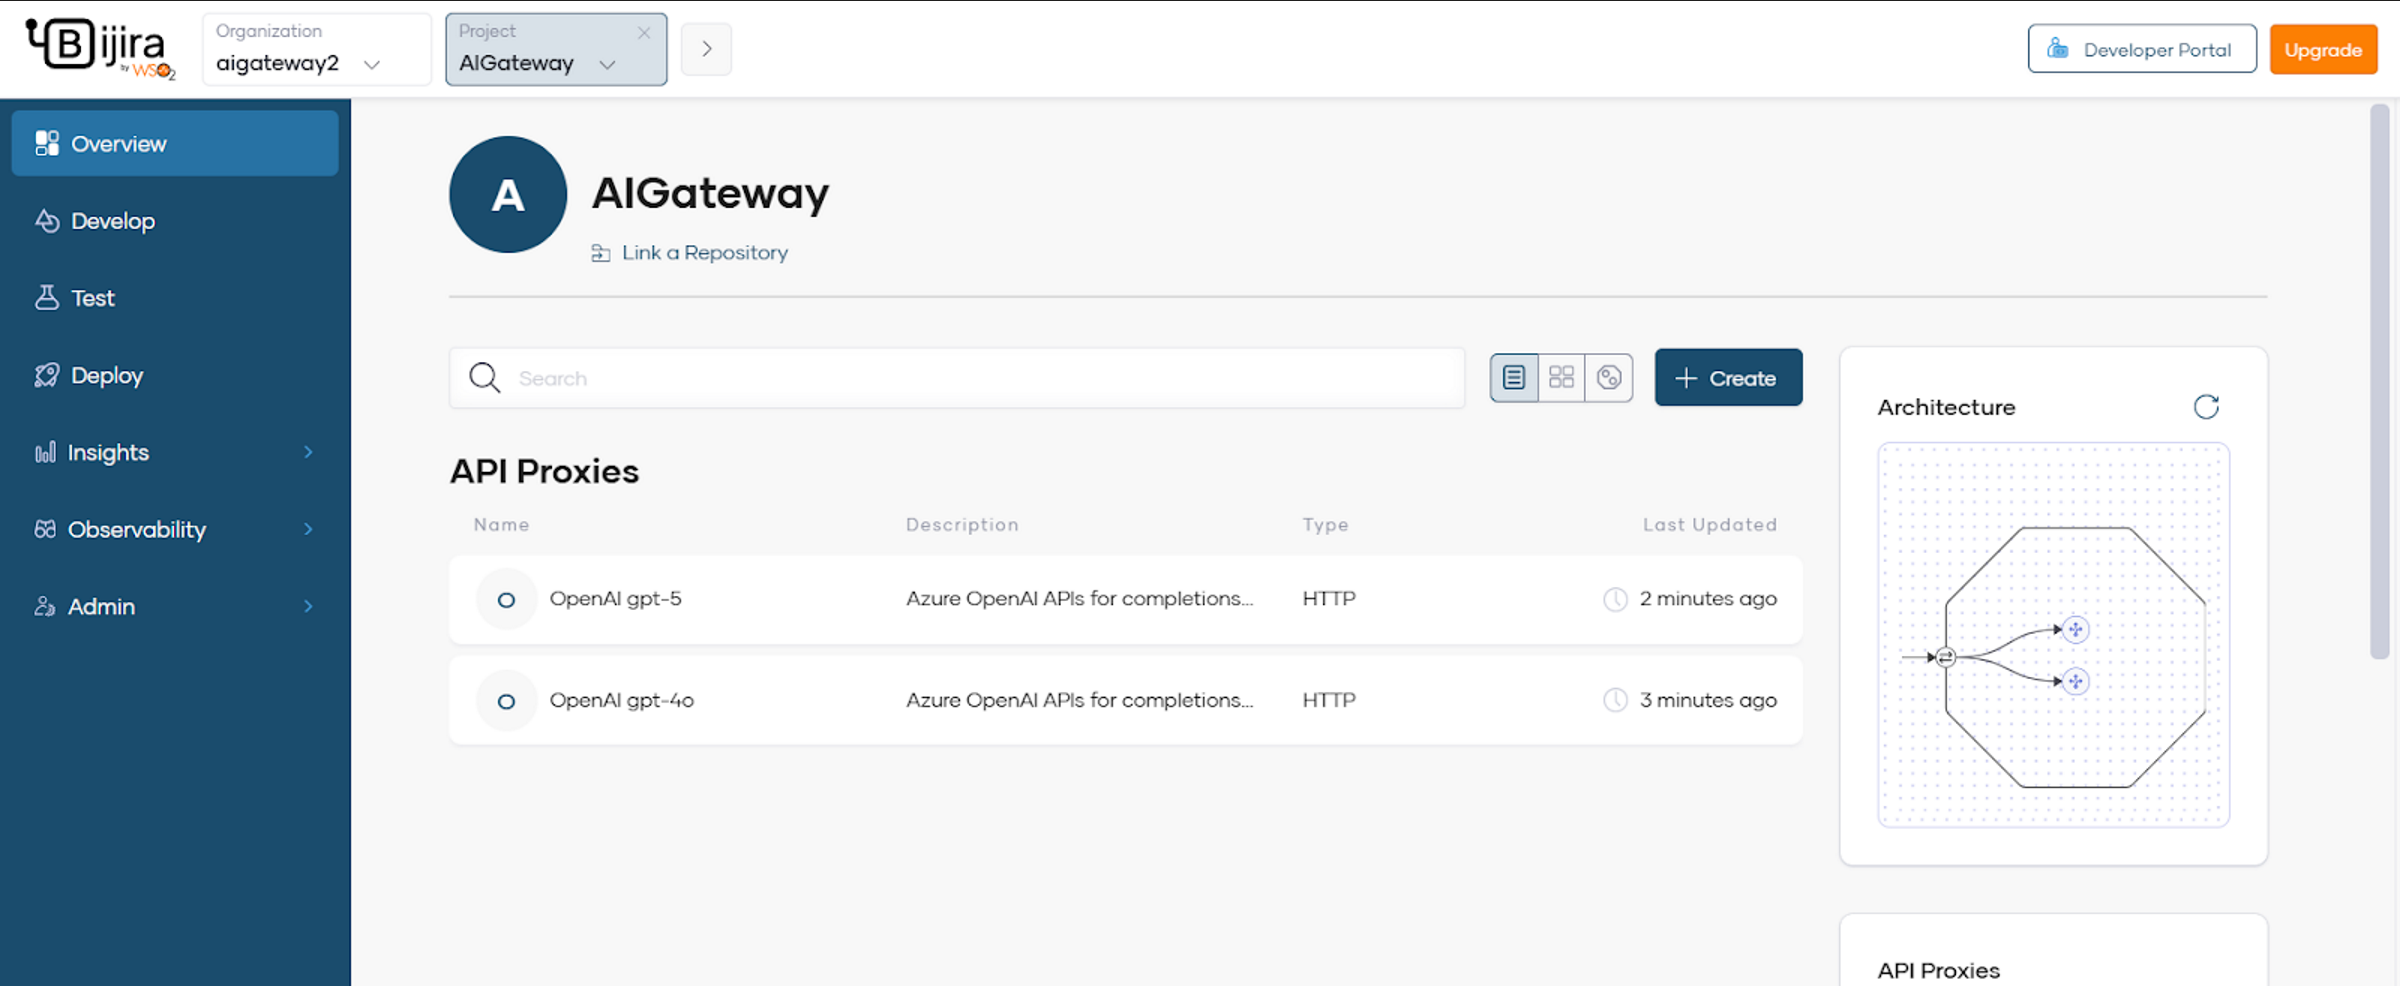
Make sure you configure them and Deploy both proxies to development and Production Environments.
Add WSO2 Identity Platform as an external IdP in Bijira
Go to the Organization level and in the left navigation menu, click Admin > Settings.
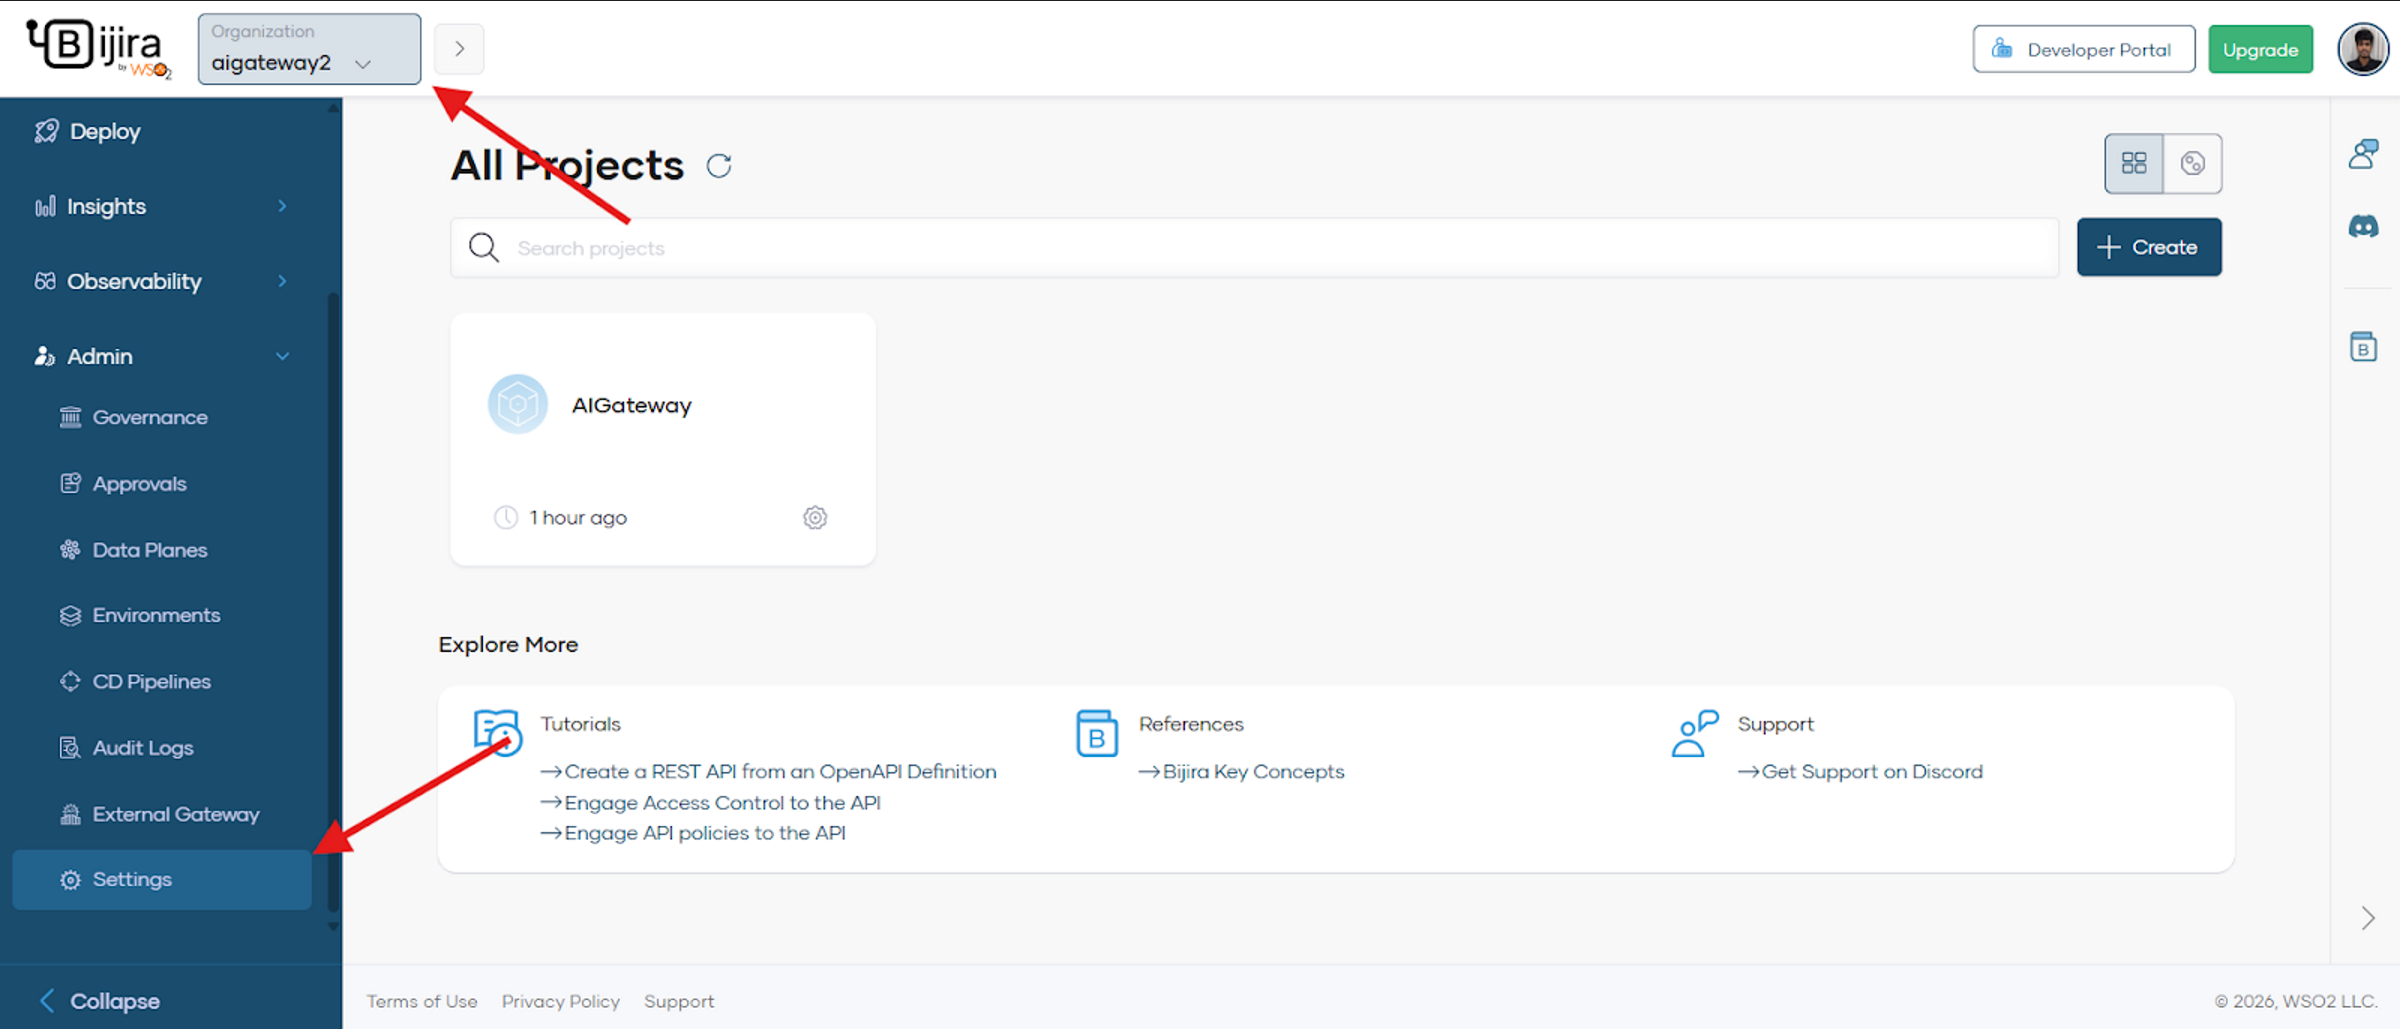
- Click the Key Managers tab.
- To add an identity provider, click + Key Manager.
- Select WSO2 Identity Platform.
- In the dialog that opens, specify:
- Name and Description for the IdP.
- Well-Known URL: Paste the well-known URL from your WSO2 Identity Platform instance.
Leave the Apply to all environments checkbox selected. This allows you to use the tokens generated via this IdP to invoke APIs across all environments. Then click Next and Add.
Configure permissions (scopes) policy
Following your deployment, we need to restrict access to the specific AI API proxies.
- Select one API proxy you created.
- In the left navigation menu, click Develop > Policy.
- In the API Proxy Contract view, locate your available resources.
- For each specific AI resource (e.g.,
/chat/completions):- Click the Edit Resource-Level Policies icon.
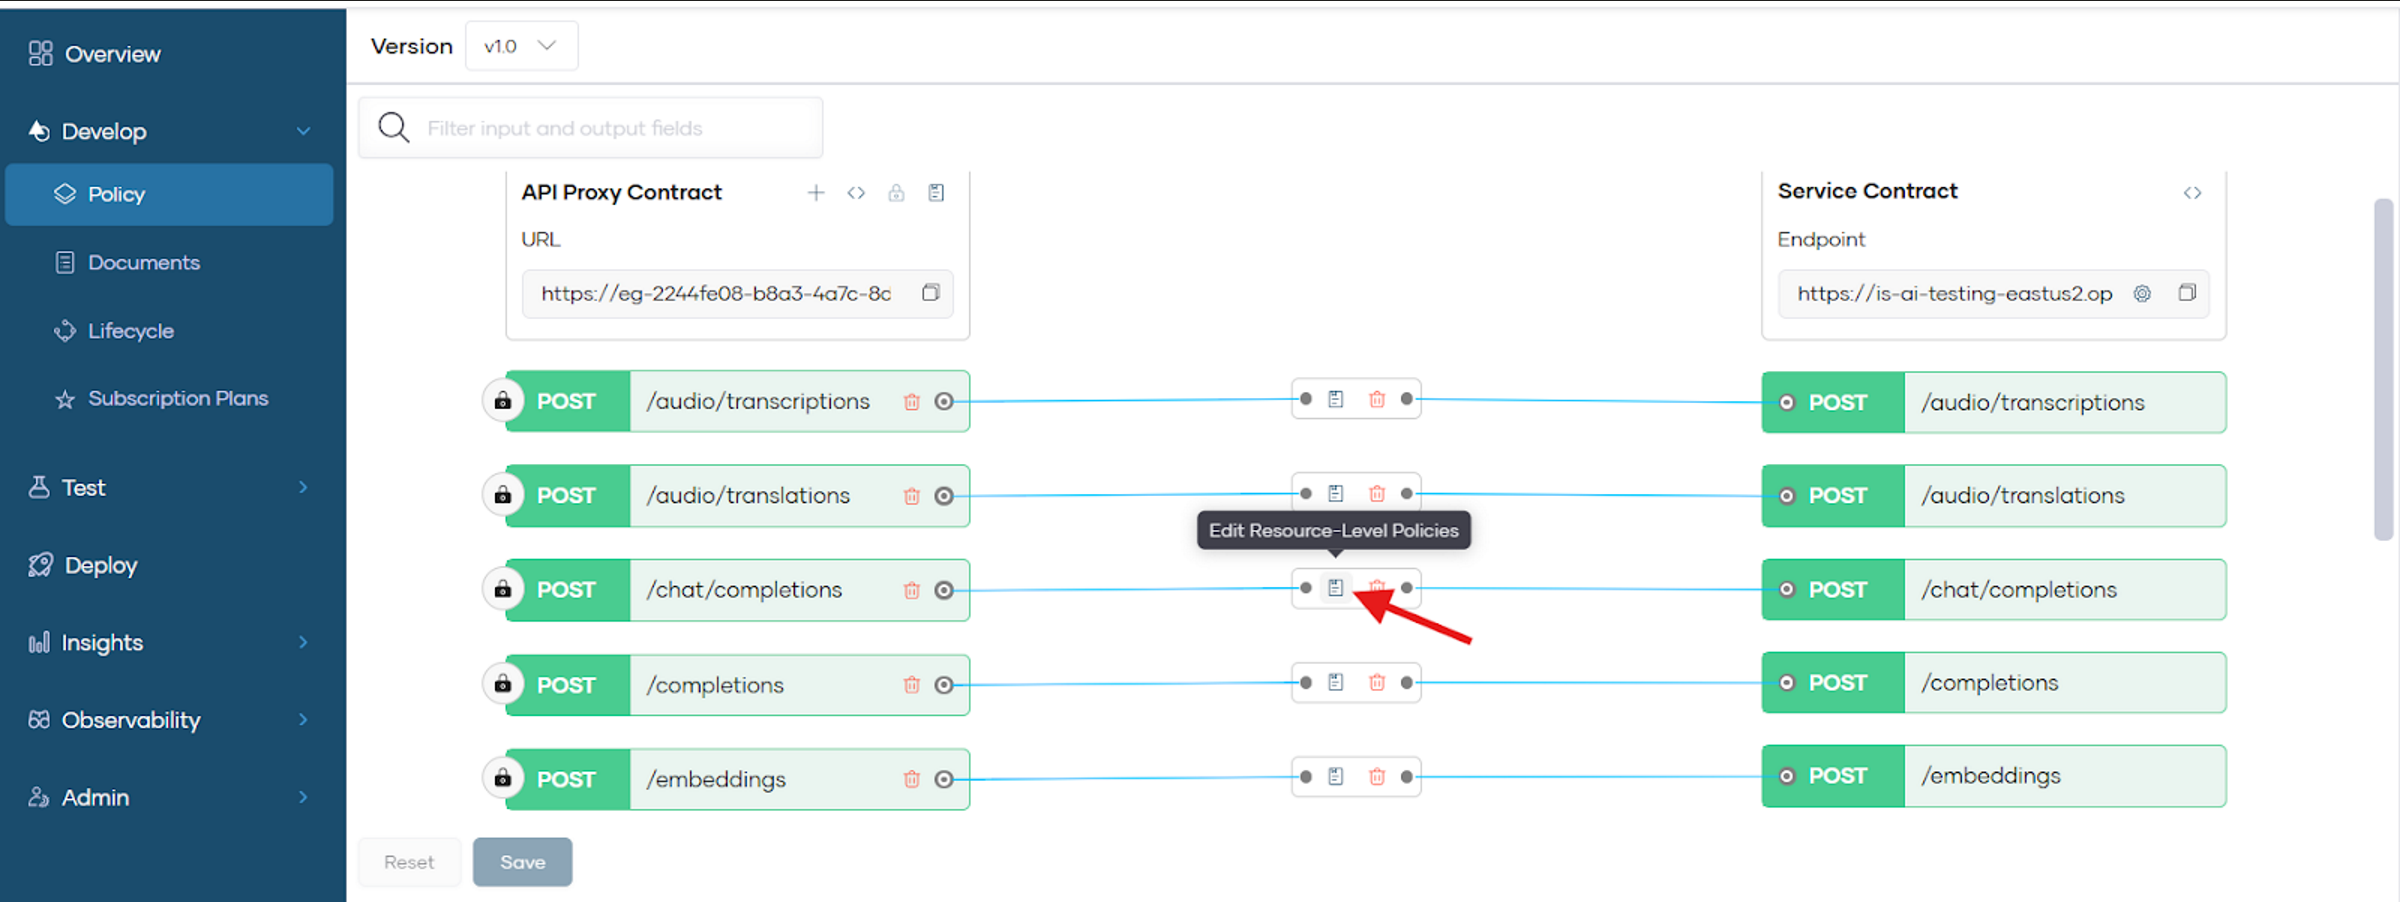
- Select Attach Policy in the Request Flow and go to Permissions (Scopes).
- For OpenAI gpt-4o Proxy, add the
Support-Coordinatorpermission. - For OpenAI gpt-5 Proxy, add the
Technical-Specialistpermission.
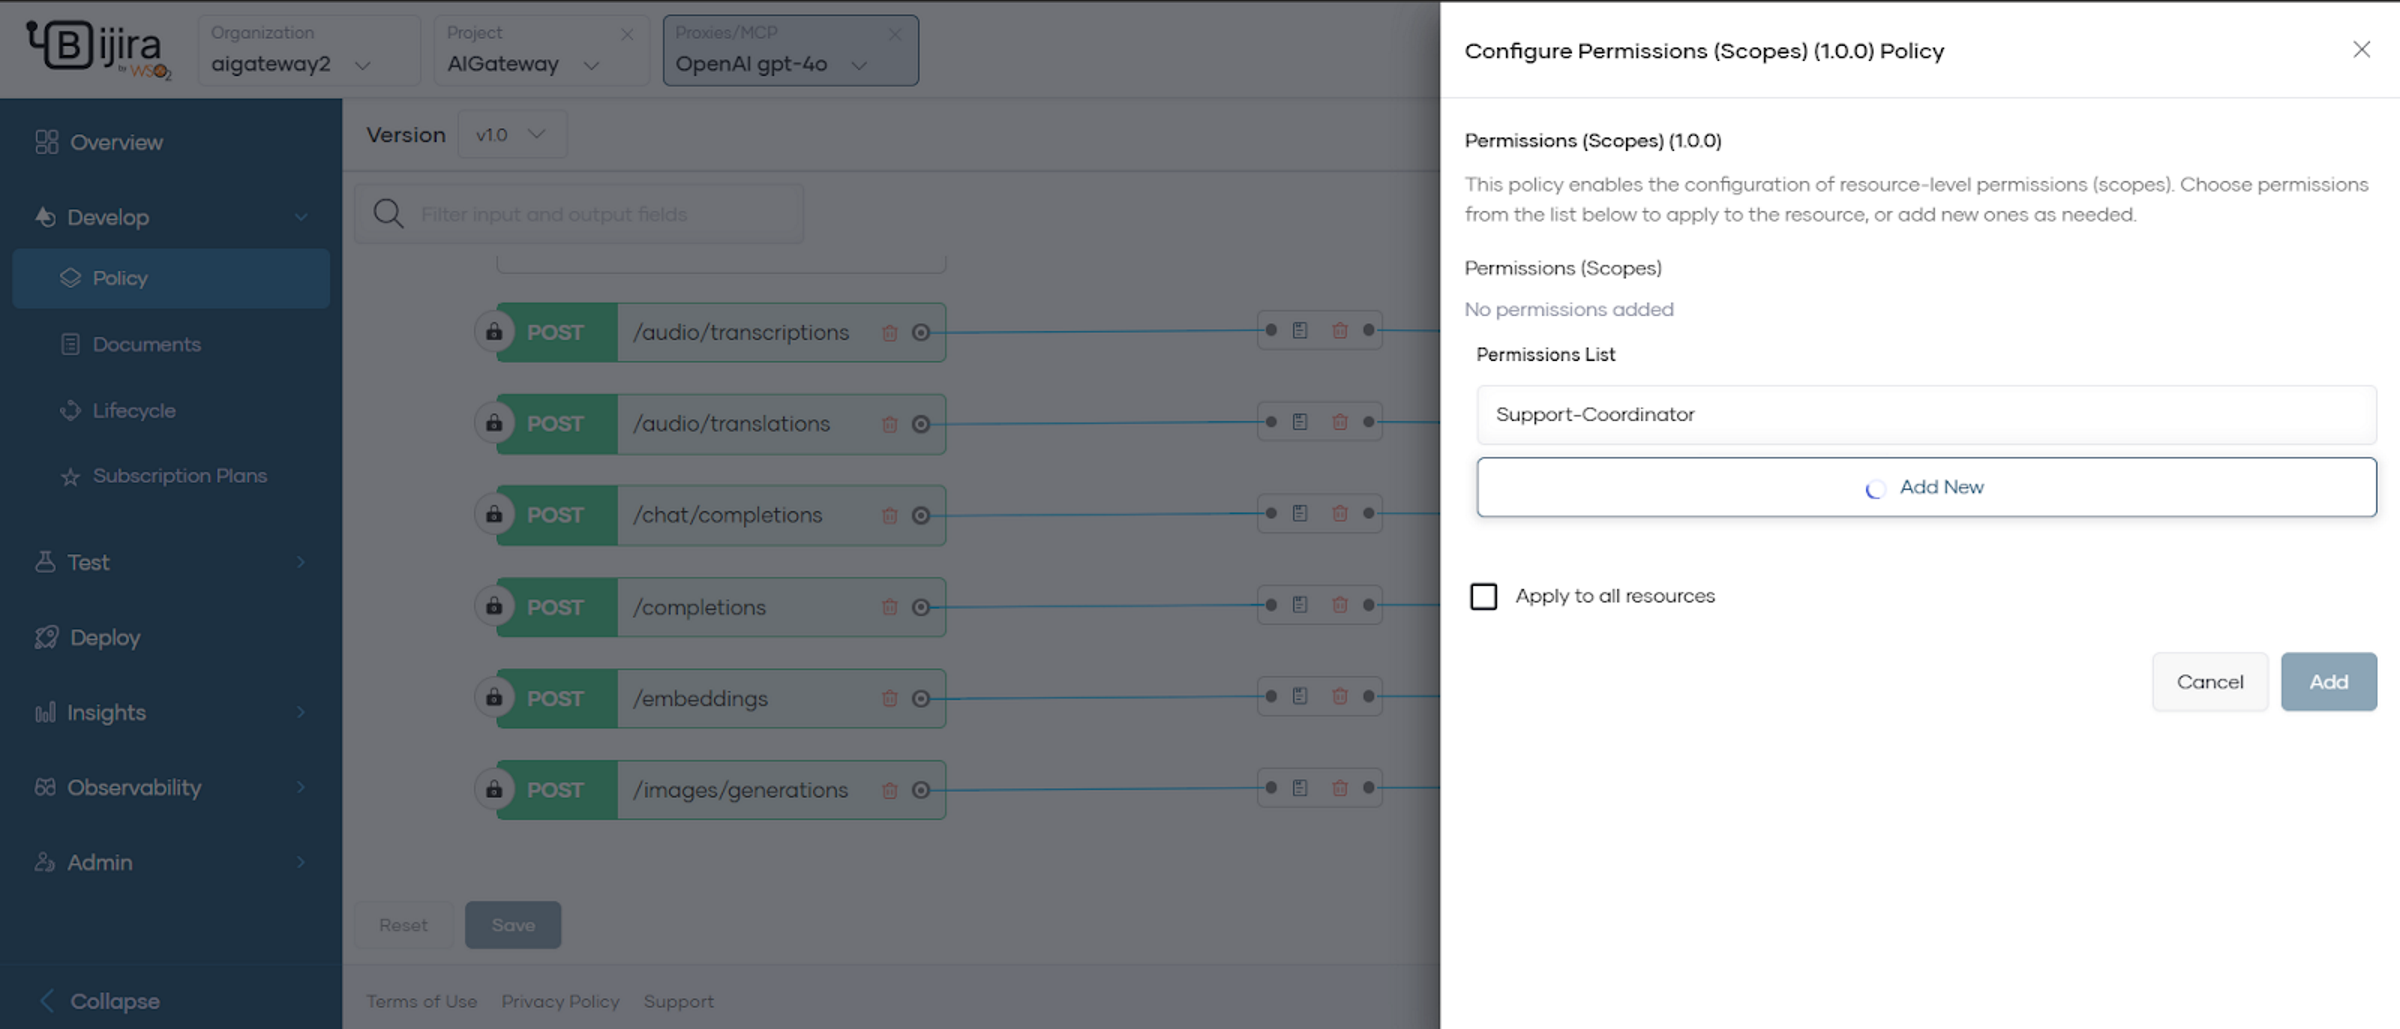
Make sure you select the permissions and save the changes in the policy tab and redeploy to apply them.
Configure token-based rate limiting policy
In this step, you will implement Token-Based Rate Limiting. Unlike standard APIs that limit by request count, AI Gateways allow you to control usage based on actual token consumption (input and output), which is essential for managing LLM costs and preventing overload.
In the Policy tab, select Add API-level Policies.
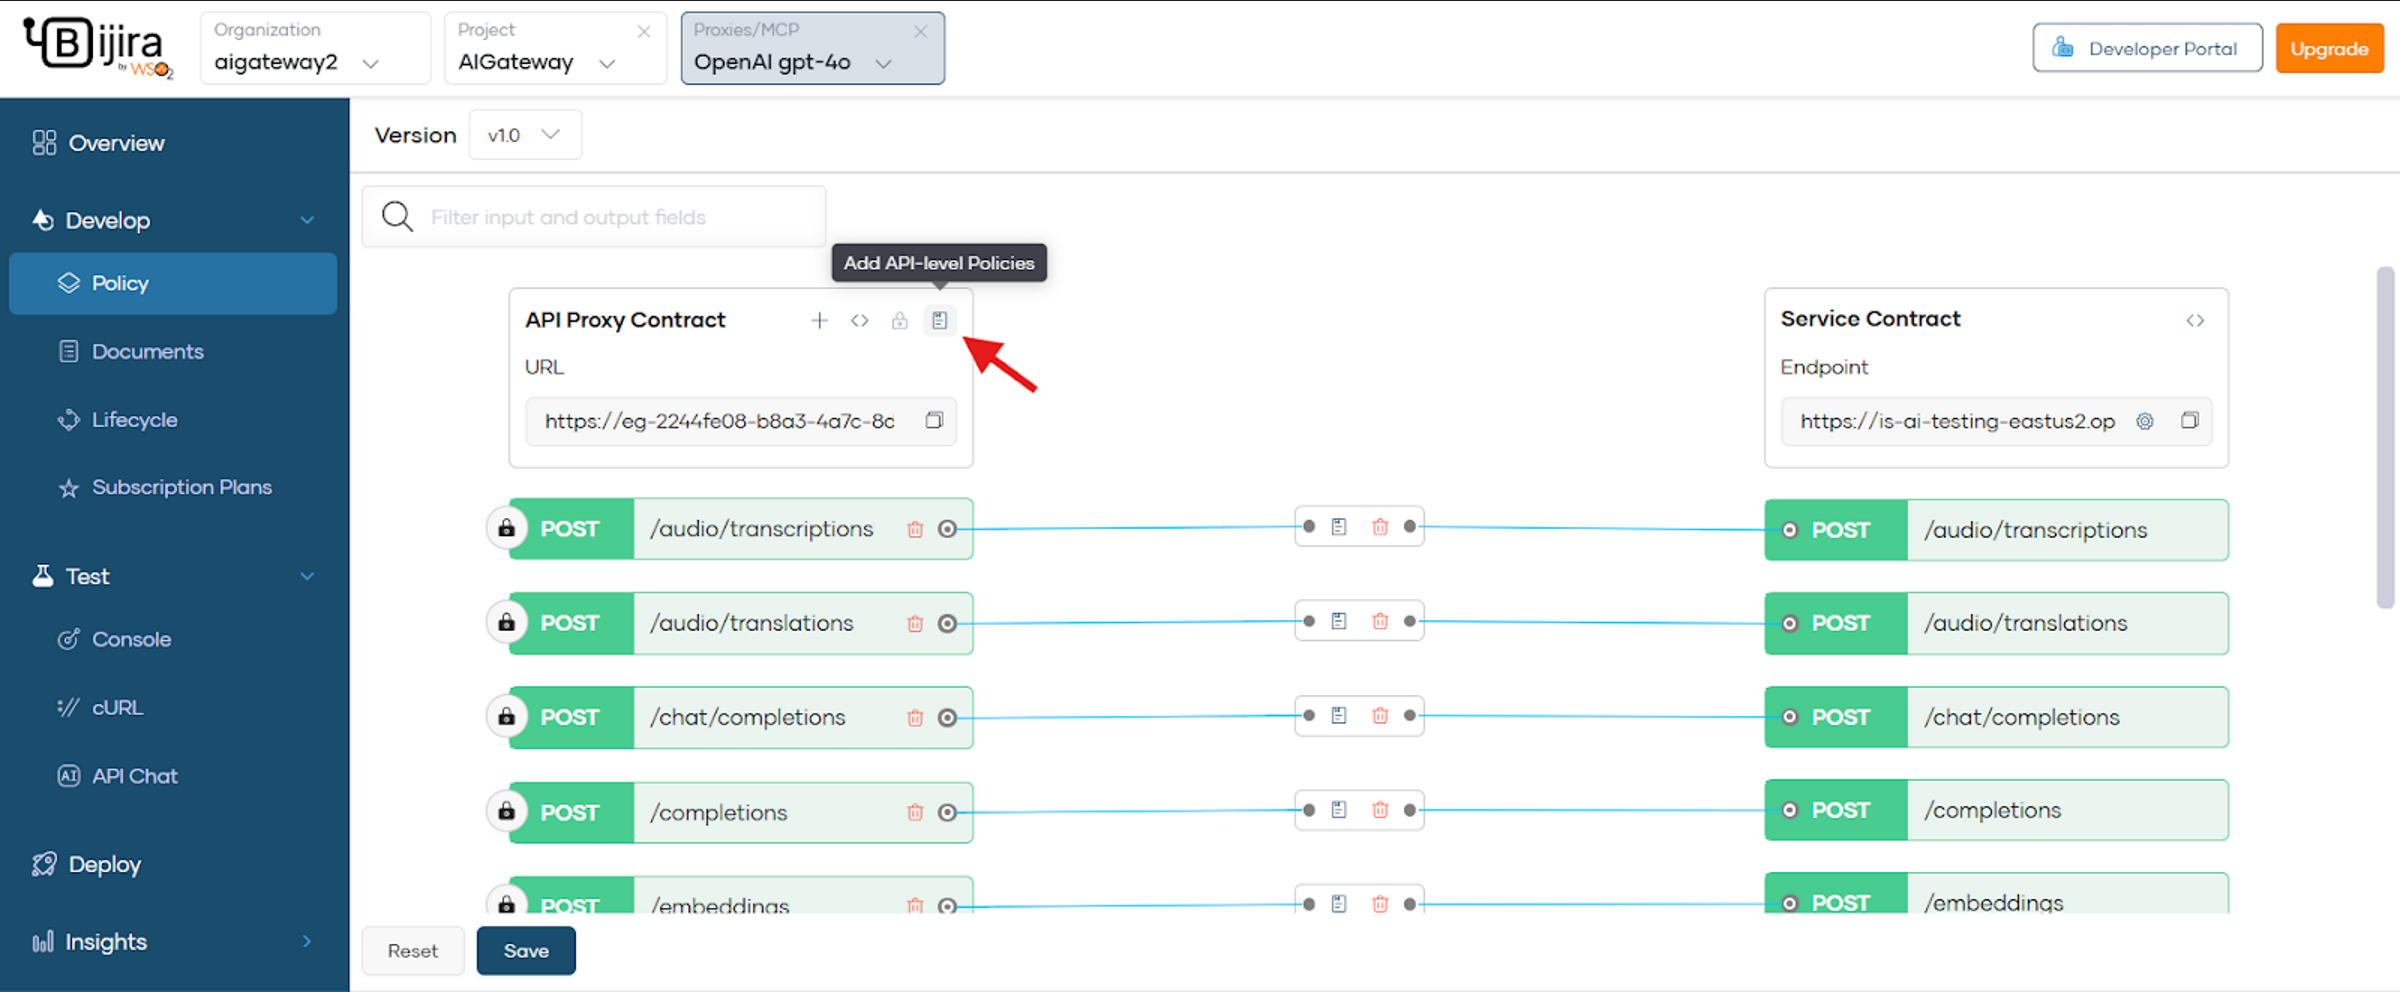
- Select Attach Policy in the Request Flow and go to Token-Based Rate Limiting.
- Configure the fields based on your requirements.

Save the changes and redeploy to apply them.
After configuring your security and rate-limiting policies, verify that your AI gateway is functioning correctly using the built-in testing tools in the Bijira Console.
For a comprehensive list of additional AI Guardrails and to customize your own, refer to the AI Guardrails documentation.
Trying out the AI Gateway
Once you have successfully completed the configuration steps outlined above, you can try out your AI gateway interactions by cloning this sample repository.