Integrate Choreo with Moesif
Moesif is an API analytics and monetization service that helps you grow your API products. You can integrate Choreo with Moesif and gain valuable insights into your API's usage. While Moesif's API analytics capabilities empower you to make informed decision-making on behalf of your organization, its monetization options simplify revenue generation from your APIs, eliminating the need for complex coding.
In this guide, you will:
- Generate a key in Moesif.
- Configure Choreo to connect to Moesif.
- Invoke an API and observe the insights on the Moesif dashboard.
Step 1: Generate an API key in Moesif
Let's generate an API key in Moesif. If you're an existing Moesif user with a registered organization, proceed to step 1.2.
Step 1.1: Generate a key in Moesif as a new user
If you are a new user, follow the steps below to register an organization and generate a key:
- Go to https://www.moesif.com/.
- Click Sign Up and select an authentication option and proceed.
-
On the Get Started page, enter meaningful values for the fields and create a new organization.
Field Description Organization Name The name of your company or team. Application Name The name of your application that represents one project or environment. -
Click Next.
-
On the Overview page, click Next.
This opens the Quick Install page. As there is no data, you cannot proceed. Let's configure Moesif to receive data from Choreo.
-
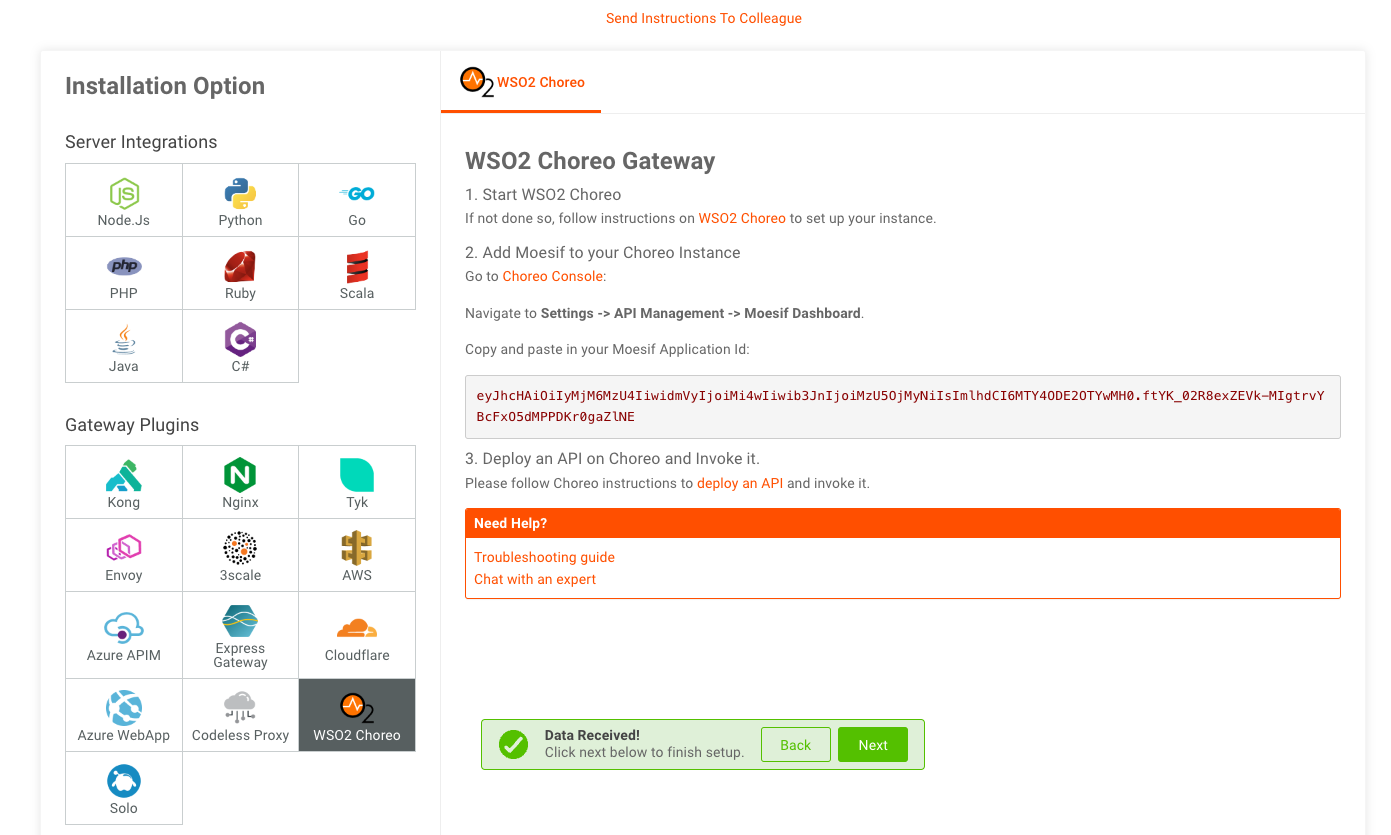
Select a WSO2 Choreo as the Server Integration
-
Copy the Application Id.
Step 1.2: Access the API key in Moesif as an existing user
If you are an existing user with a registered organization, or you do not have an API key for the organization you created, follow the steps below to access the generated API key:
- Go to https://www.moesif.com/.
- Click on your profile in the bottom left corner, and navigate to the API Keys page.
- Copy the Collection Application Id.
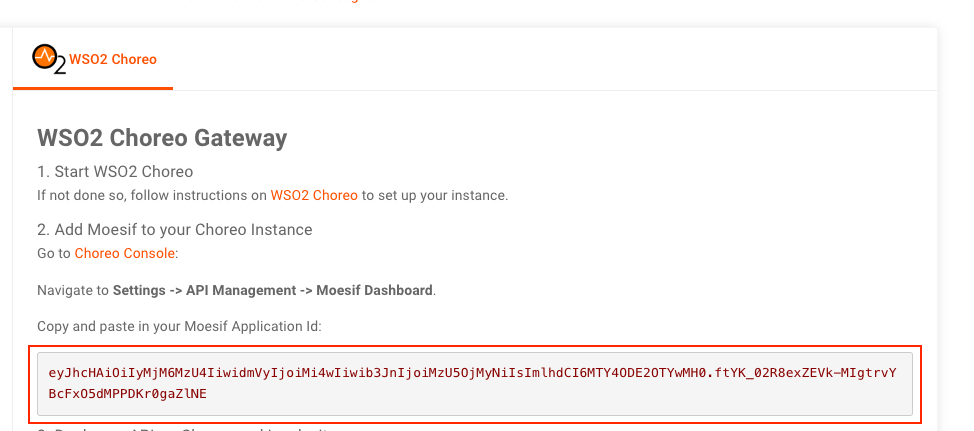
Step 2: Integrate Choreo with Moesif
Let's configure Choreo to publish events to Moesif.
- Sign in to Choreo.
- In the top navigation menu, click the Organization list and select your organization.
- On the left navigation, click API Management and then and click Moesif Dashboard.
- Select the environment you want to publish data for.
- Paste the Application Id you copied.
- Click Add.
Once you successfully add the key, you will see a delete option next to it. Currently, you can only configure one API key. If you need to add a new API key, you need to delete the existing key and add the new one.
Note
Once you configure the Moesif API key on Choreo, wait for five minutes before you publish any data to the Moesif API analytics platform.
Step 3: Invoke an API and observe the data on the Moesif Dashboard
-
Invoke your API using a CLI command or a REST client.
Tip
- If you don't have any APIs deployed on Choreo, you can request your developers set up a component or switch to the Developer View on the Choreo console and follow the create and deploy a REST API guide to get started.
-
Once you publish data, your Moesif dashboard will receive events. Once Moesif receives events, you will see a notification on Moesif confirming that it received data.
-
Click Next on the notification. This will take you to the final step, where you can opt to add team members. In this guide, let's skip this step.
- Click Finish.
You can now view your API's insights in the Moesif dashboard.