Asgardeo MCP Server Preview
The Asgardeo MCP Server helps you manage identity and access management tasks using natural language prompts. It connects your code editor or AI tool to Asgardeo’s Management APIs, letting you automate common identity management operations—such as listing applications, updating application settings, or managing users—without going through UI interfaces or needing to write API calls.
You can use the Asgardeo MCP Server with popular editors and tools like VS Code, Claude Desktop, Cursor, Windsurf, and others. The MCP server acts as a bridge between your editor and Asgardeo, handling authentication and API requests for you. This quickstart explains how to set up the server, connect it to your Asgardeo organization, and verify your setup.
Note
The Asgardeo MCP Server is currently in Preview. Some features may be subject to changes in future releases.
On Asgardeo
The Asgardeo MCP Server communicates with the Asgardeo Management APIs to perform the actions required by each MCP tool. To make this work, it must first get an access token with the appropriate scopes. This requires configuring access to your Asgardeo organization by creating a Machine-to-Machine (M2M) application and authorizing API Resources and Scopes to access the necessary APIs.
-
Sign into Asgardeo console and navigate to Applications > New Application. Then, select M2M Application and complete the wizard popup by providing a suitable name.
Example
name: Asgardeo-MCP-Server
Note down the following values from the Protocol tab of the registered application. You will need them in step-3.
client-idfrom the Protocol tab.client-secretfrom the Protocol tab.- The name of your Asgardeo organization
-
Authorize the API resources and corresponding scopes required for the actions performed by the MCP tools. The following table includes the required API resources and scopes for all currently supported tools.
| Asgardeo Management API | Required scopes |
|---|---|
Application Management API (/api/server/v1/applications) |
internal_application_mgt_view, internal_application_mgt_update, internal_application_mgt_create |
API Resource Management API (/api/server/v1/api-resources) |
internal_api_resource_update, internal_api_resource_create, internal_api_resource_view |
Identity Provider Management API (/api/server/v1/identity-providers) |
internal_idp_view |
Authenticators Management API (/api/server/v1/authenticators) |
internal_authenticator_view |
Claim Management API (/api/server/v1/claim-dialects) |
internal_claim_meta_view |
SCIM2 Users API (/scim2/Users) |
internal_user_mgt_create |
OIDC Scope Management API (/api/server/v1/oidc/scopes) |
internal_oidc_scope_mgt_view |
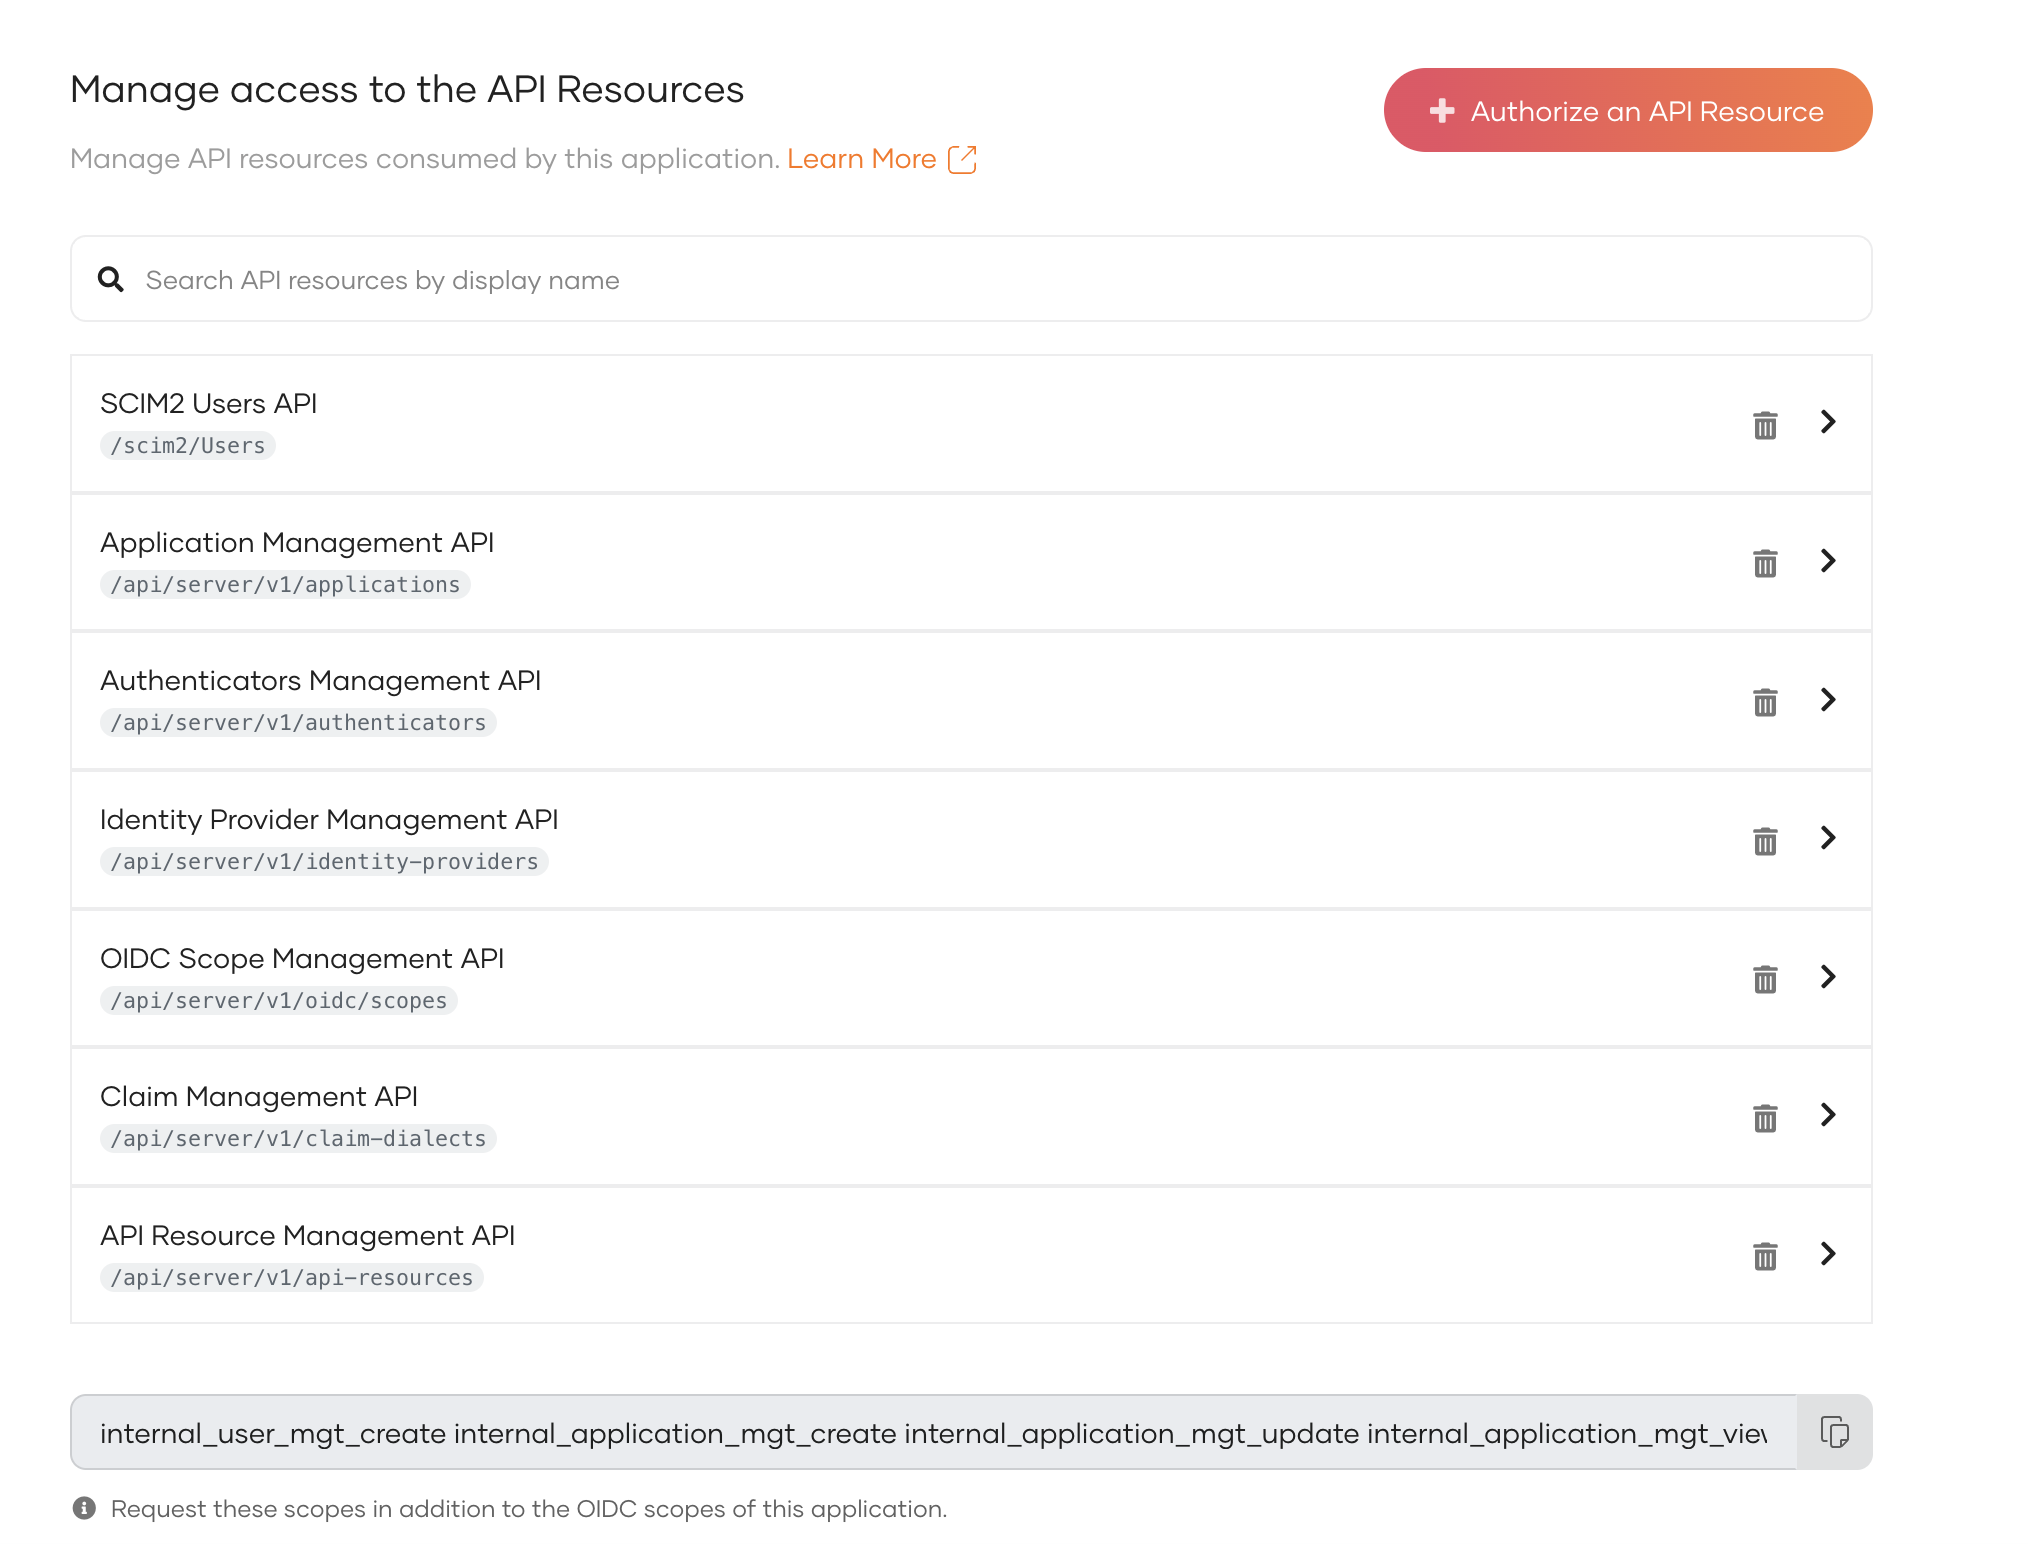
To authorize API resources, navigate to the API Authorization tab within your Asgardeo application settings and click the Authorize an API Resource button. In the pop-up window that appears, use the dropdown to search and select the necessary API Resources from the Management APIs and authorize necessary scopes.
Note
You can selectively authorize API Resources and scopes based on the specific MCP tools you plan to use. For detailed guidance on which API Resources and Scopes are needed by each tool, see the API resources and scopes required for MCP tools section.
Once completed, your API Authorization configuration should look as follows.
Configure your code editor
- Open VS Code.
- Press
Ctrl+Shift+P(orCmd+Shift+Pon Mac). - Type "Preferences: Open Settings (JSON)" and select it.
Append the following configuration to settings.json file. Replace the <ABSOLUTE-PATH>, <client-id>, <client-secret> and <organization> values from the values you copied from the previous steps.
- Open Cursor.
- Click on Cursor > Settings > Cursor Settings.
- Switch to MCP tab.
- Click on Add new global MCP server button. This will open
mcp.jsonfile in the editor itself.
Append the following configuration to settings.json file. Replace the <ABSOLUTE-PATH>, <client-id>, <client-secret> and <organization> values from the values you copied from the previous steps.
- Open Windsurf.
- Click on Windsurf > Windsurf Settings > Cursor Cascade.
- Switch to MCP tab.
- Click on Add Server button next to Model Context Protocol (MCP) Servers. Then click the Add custom Server button will open
mcp_config.jsonfile in the editor itself.
Append the following configuration to mcp_config.json file. Replace the <ABSOLUTE-PATH>, <client-id>, <client-secret> and <organization> values from the values you copied from the previous steps.
- Open Claude Desktop.
- Click on Claude Desktop > Settings > Developer.
- Click on Edit Config button. This will open
claude_desktop_config.jsonfile location and you can open this file using an text editor.
Append the following configuration to claude_desktop_config.json file. Replace the <ABSOLUTE-PATH>, <client-id>, <client-secret> and <organization> values from the values you copied from the previous steps.
Use the following settings to configure your MCP-compatible client application.
Make sure to replace the <ABSOLUTE-PATH>, <client-id>, <client-secret> and <organization> values from the values you copied from the previous steps.
Verify Asgardeo MCP server setup
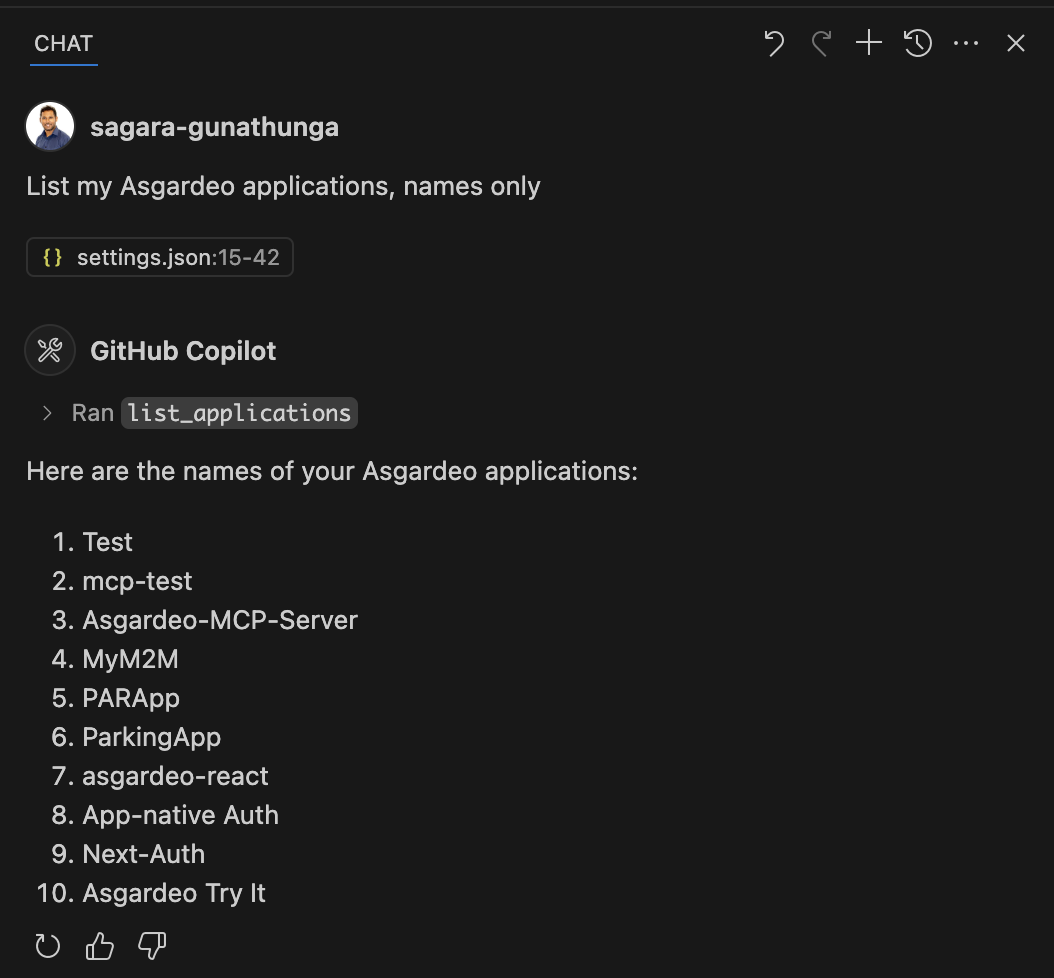
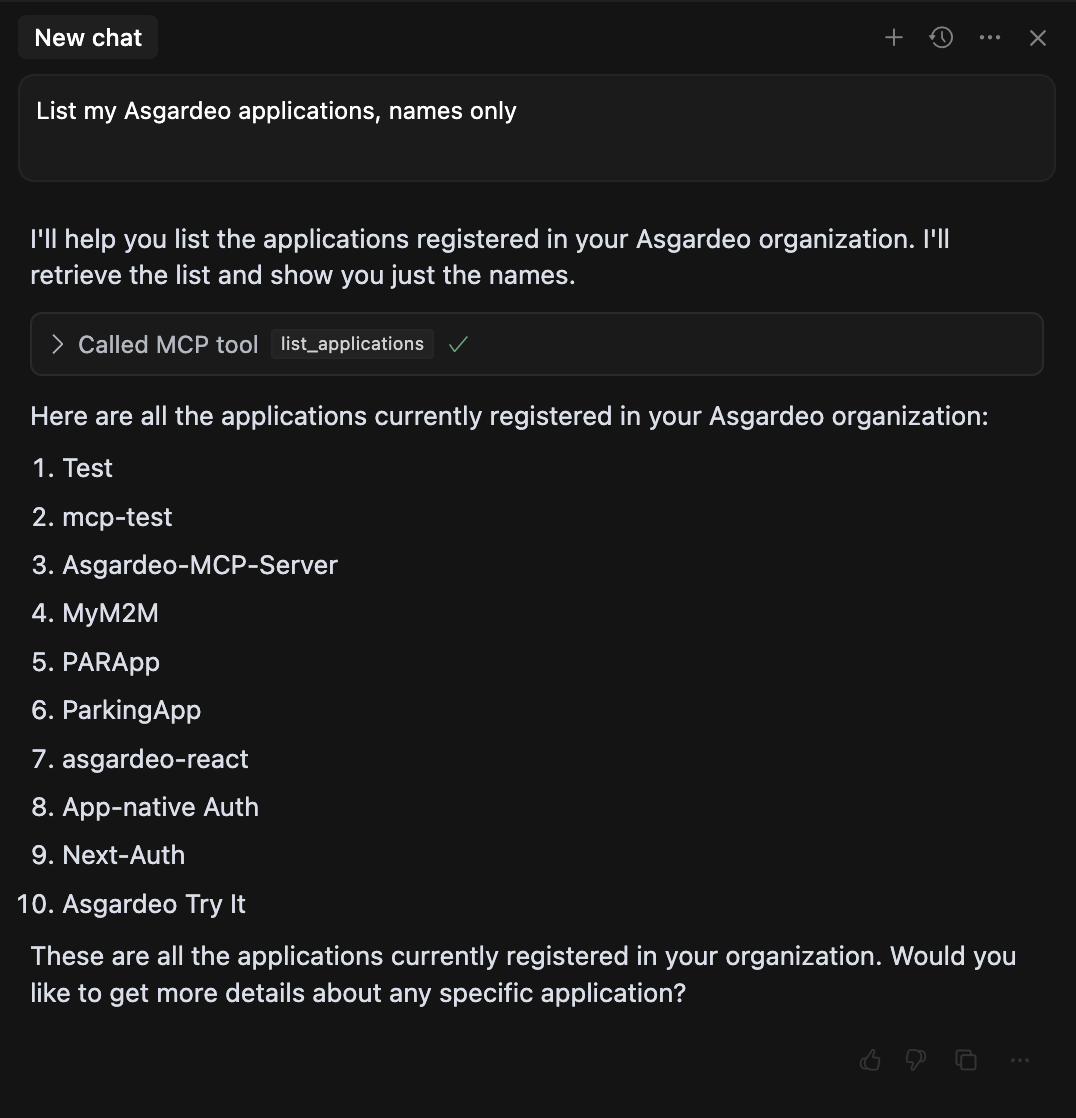
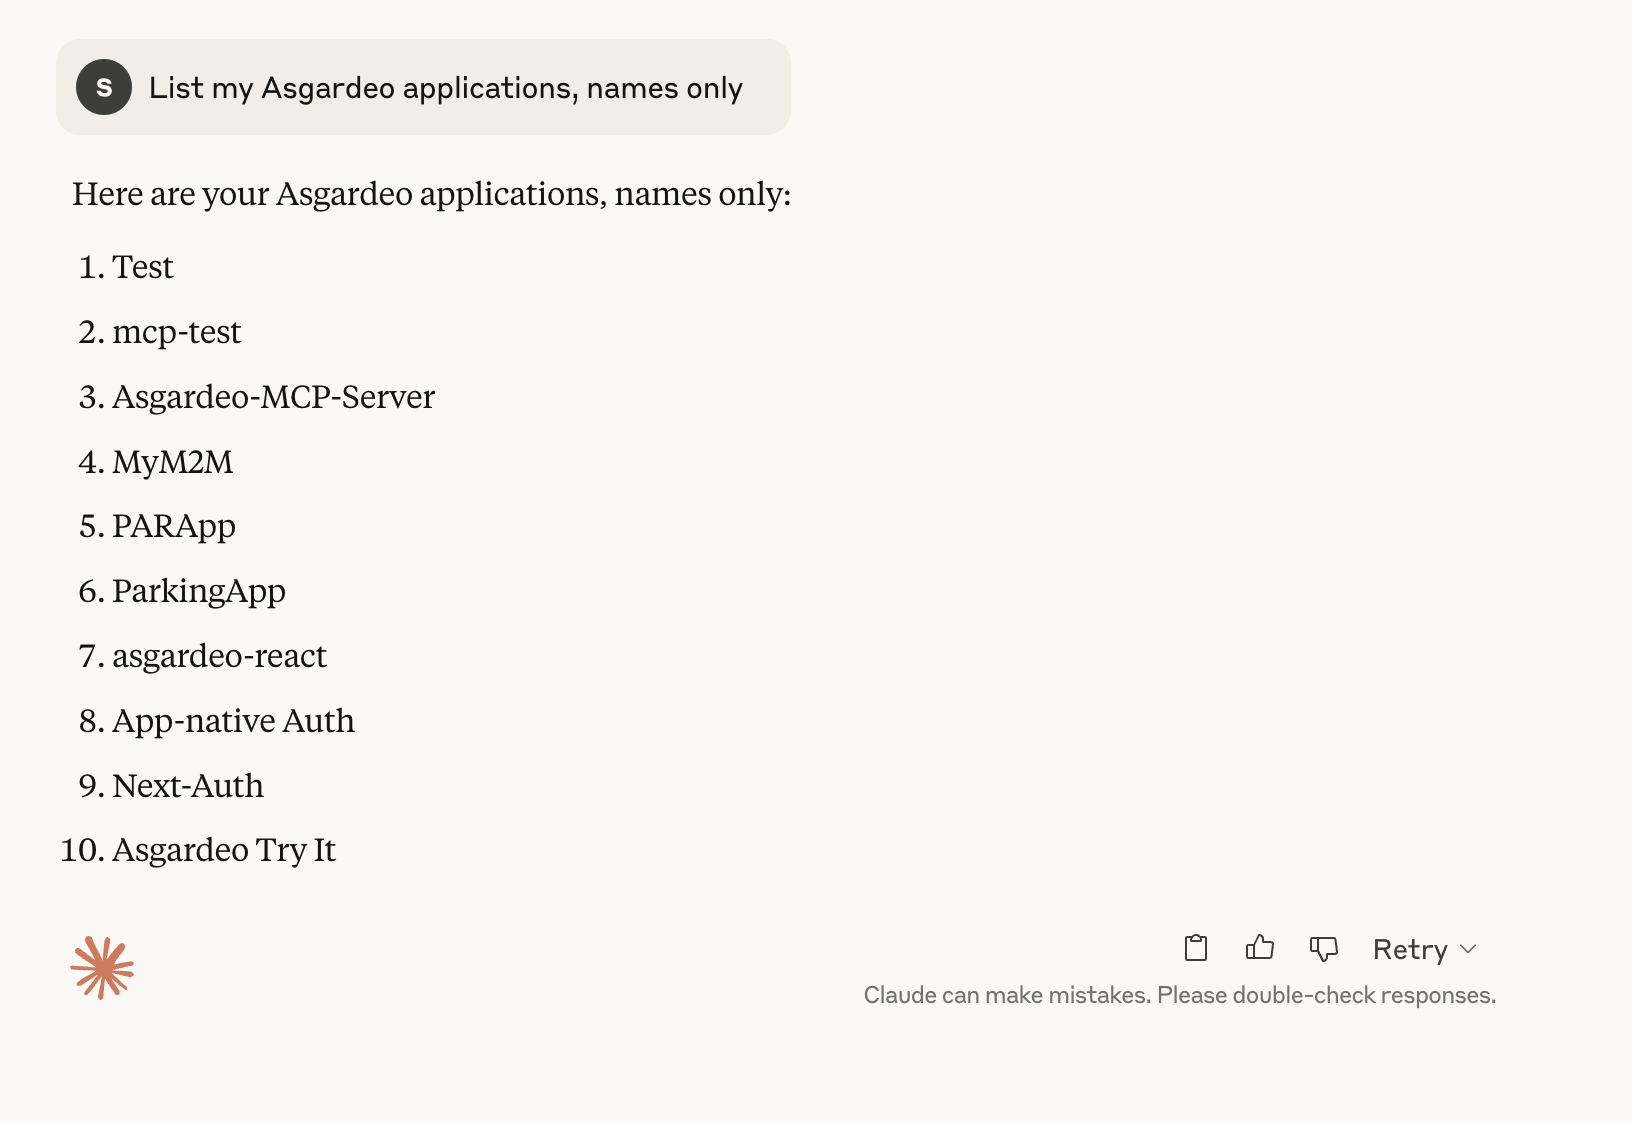
Use the following simple prompt to verify whether you have configured Asgardeo MCP Server successfully.
Depending on the code editor you're using, you should see a list of results. The output may vary based on the number of applications you've created in Asgardeo, but you should see at least one application name listed.
Asgardeo application list displayed in VS Code.
Asgardeo application list displayed in Cursor.
Asgardeo application list displayed in Windsurf.
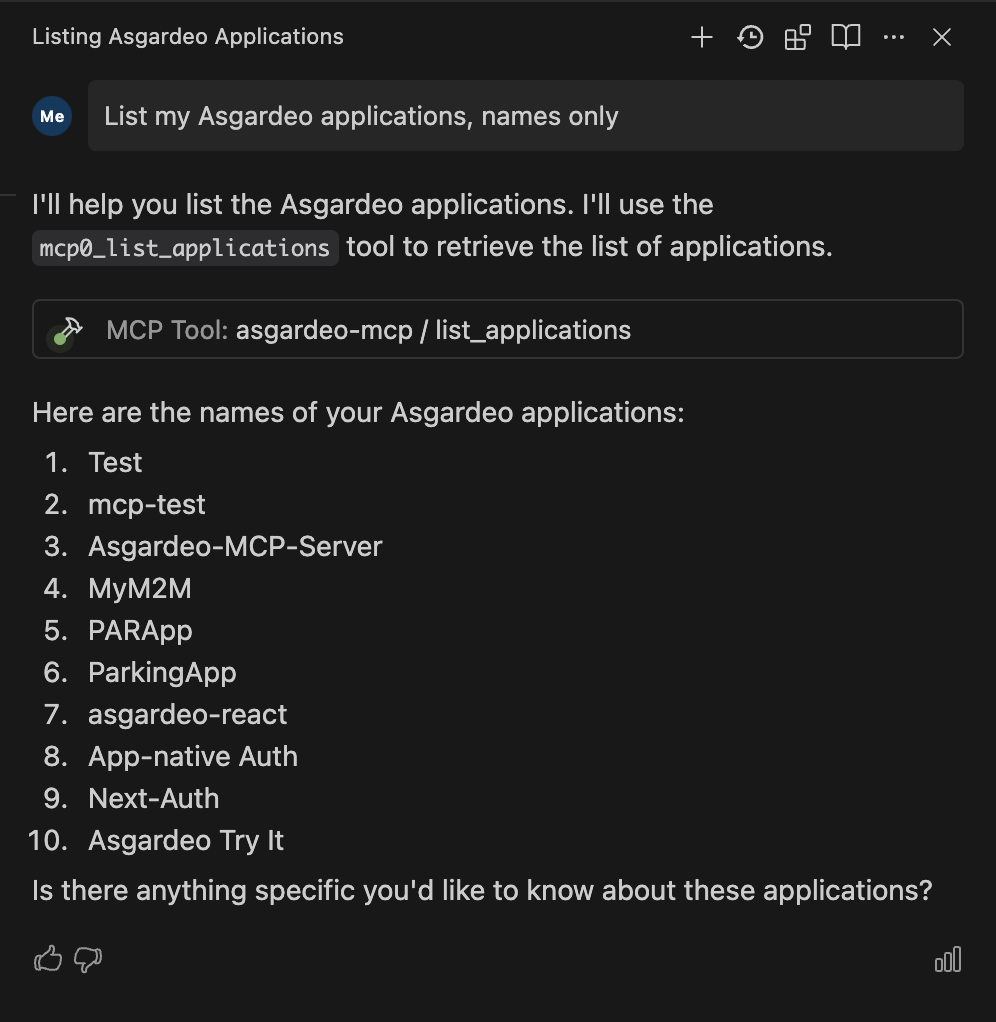
Asgardeo application list displayed in Claude Desktop.
Build a real-world sample
Now that you’ve configured and verified the Asgardeo MCP Server with your preferred code editor, it’s time to build a real-world example. The following quickstarts are great starting points to try out the Asgardeo MCP Server alongside your AI toolkit:
Explore these guides to put your setup into action and see how natural-language-powered identity management can accelerate your development workflow.
Note
During tool execution, you will be prompted to give explicit consent for the action. It’s recommended to approve actions with "Approve Once" option rather than selecting "Approve Always" option so you retain full control and visibility over the operations performed in your Asgardeo organization.