Create a Project
A project is a workspace that organizes multiple agentic integrations and libraries in a single repository with shared dependencies. Use projects when you need to manage related packages together.
Open project creation form
To start creating a new project:
- Open WSO2 Agent Builder.
- Locate the Start Building your Agent card on the home page.
- Click Create to open the project creation form.
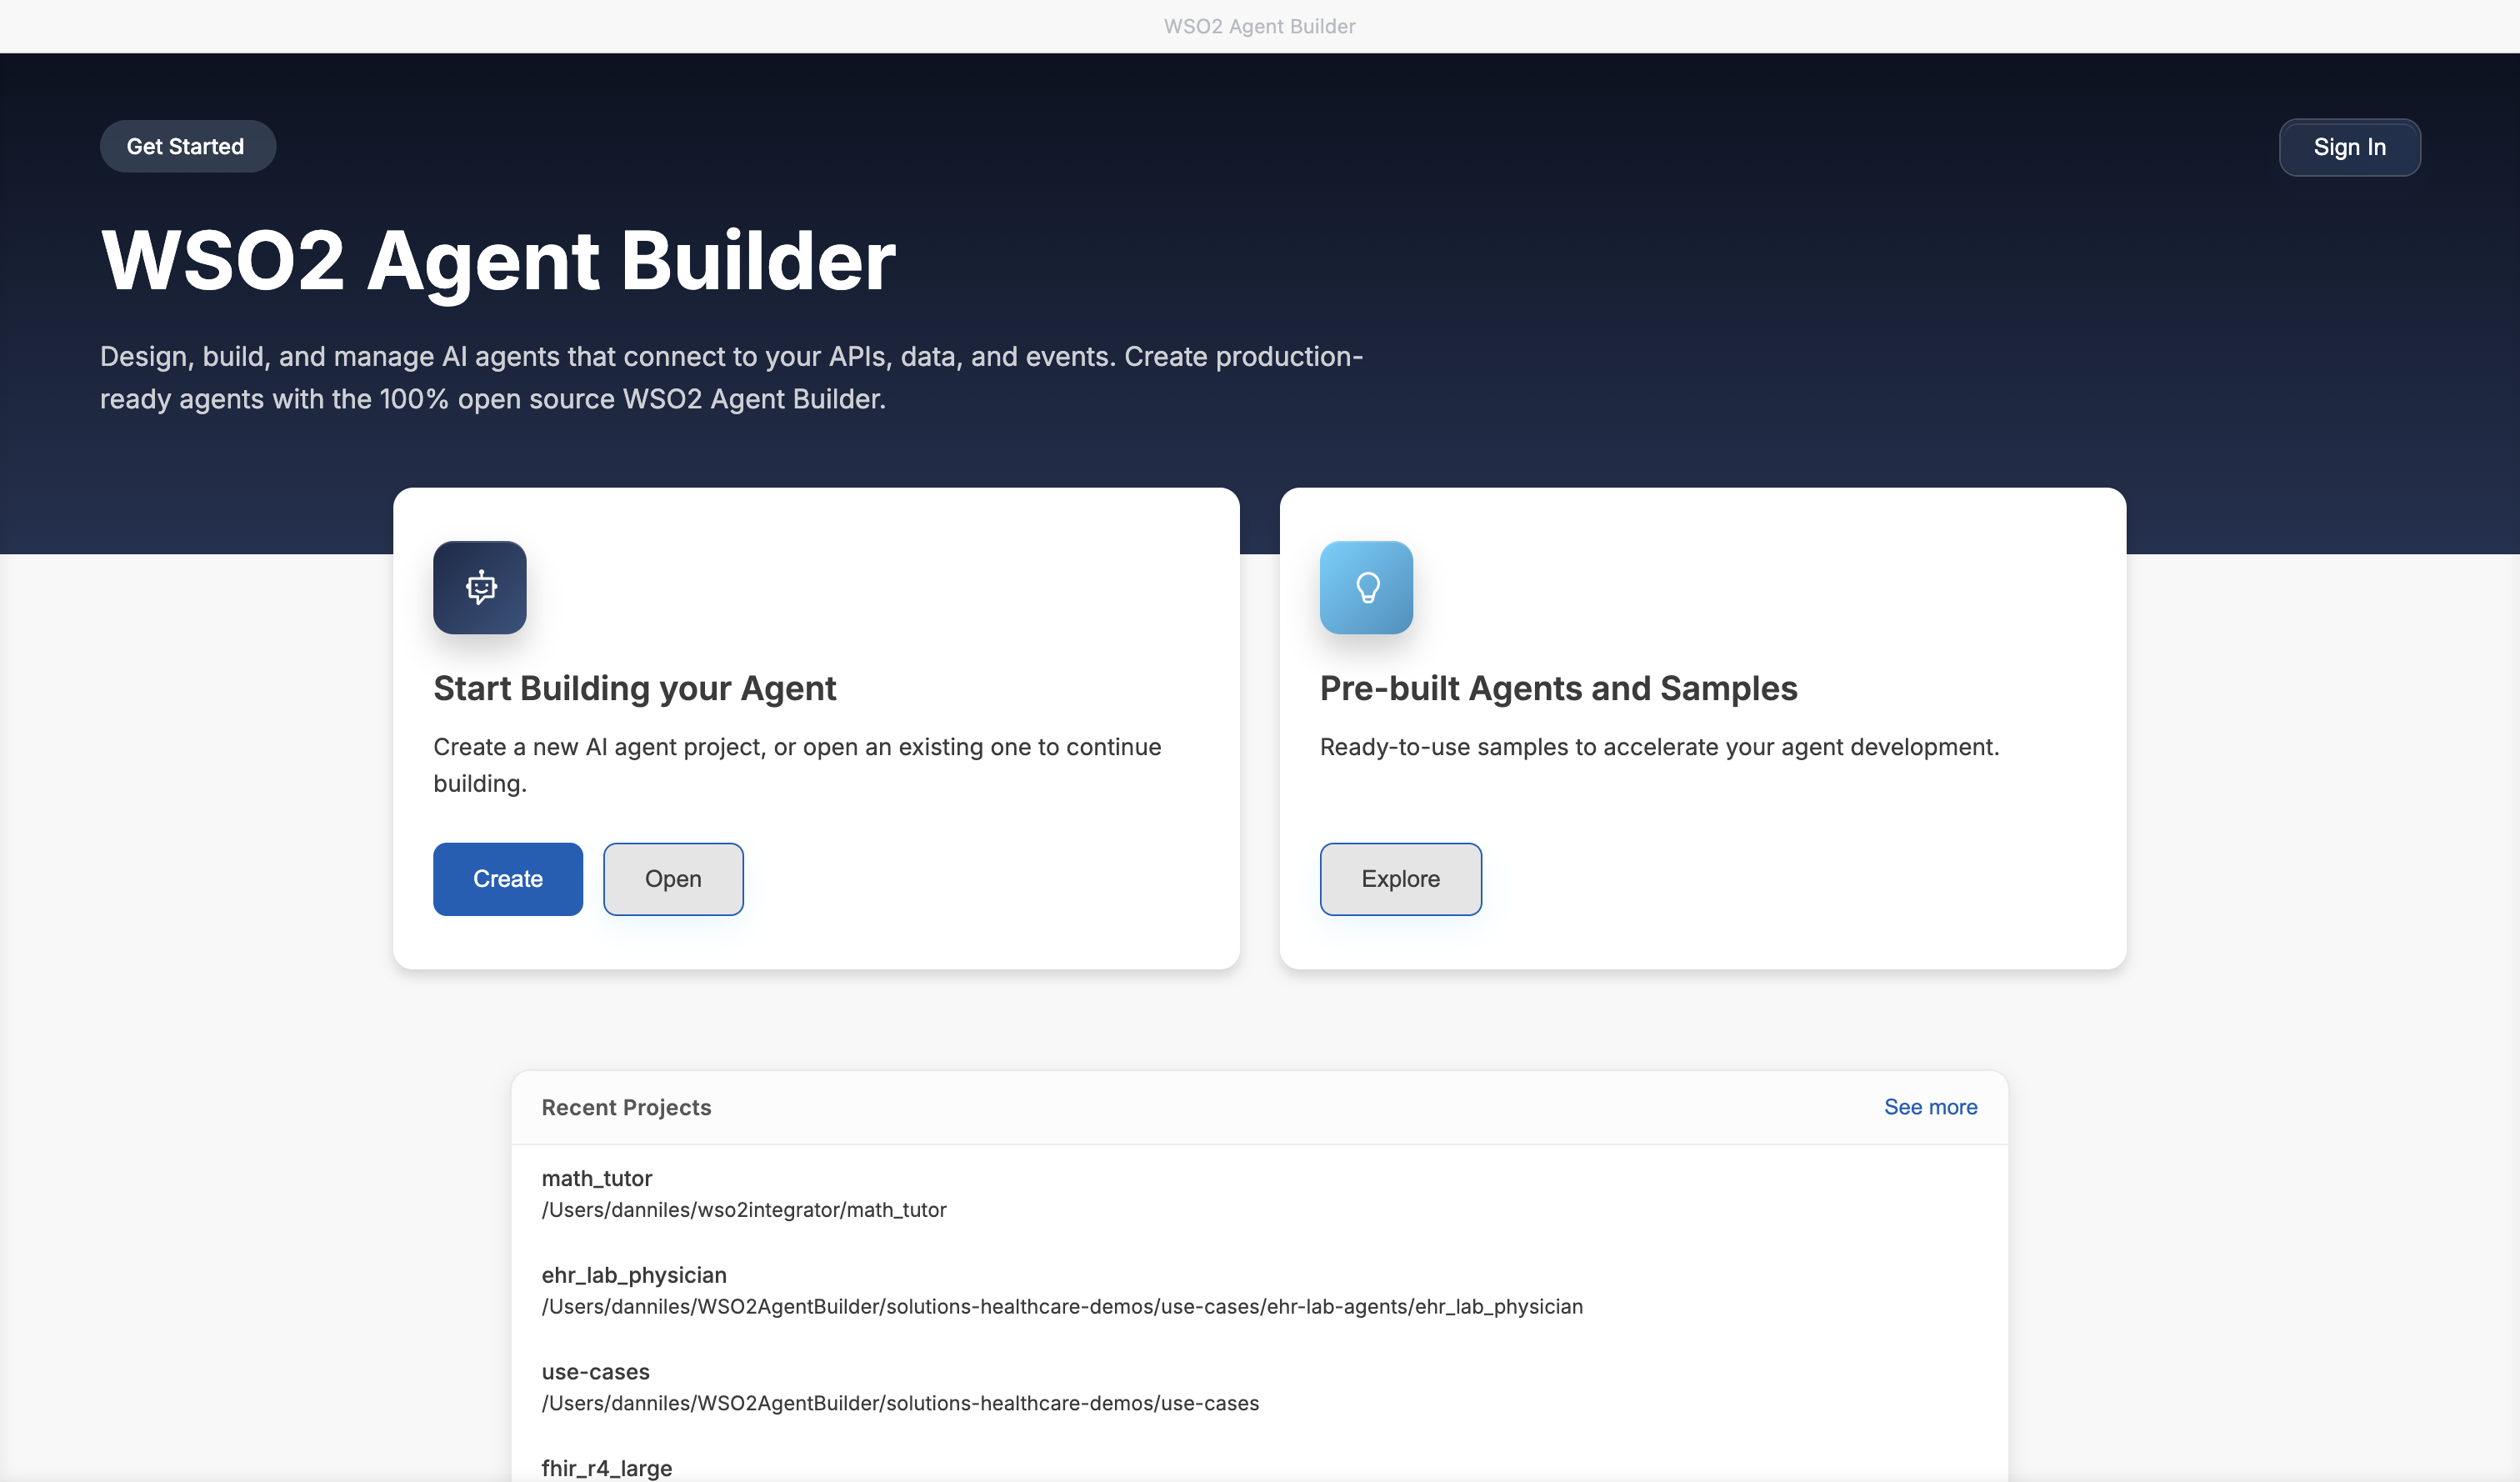
If you have an existing project, click Open on the Start Building your Agent card or select the project from the Recent Projects list. For details, see Open a project.
Configure the project
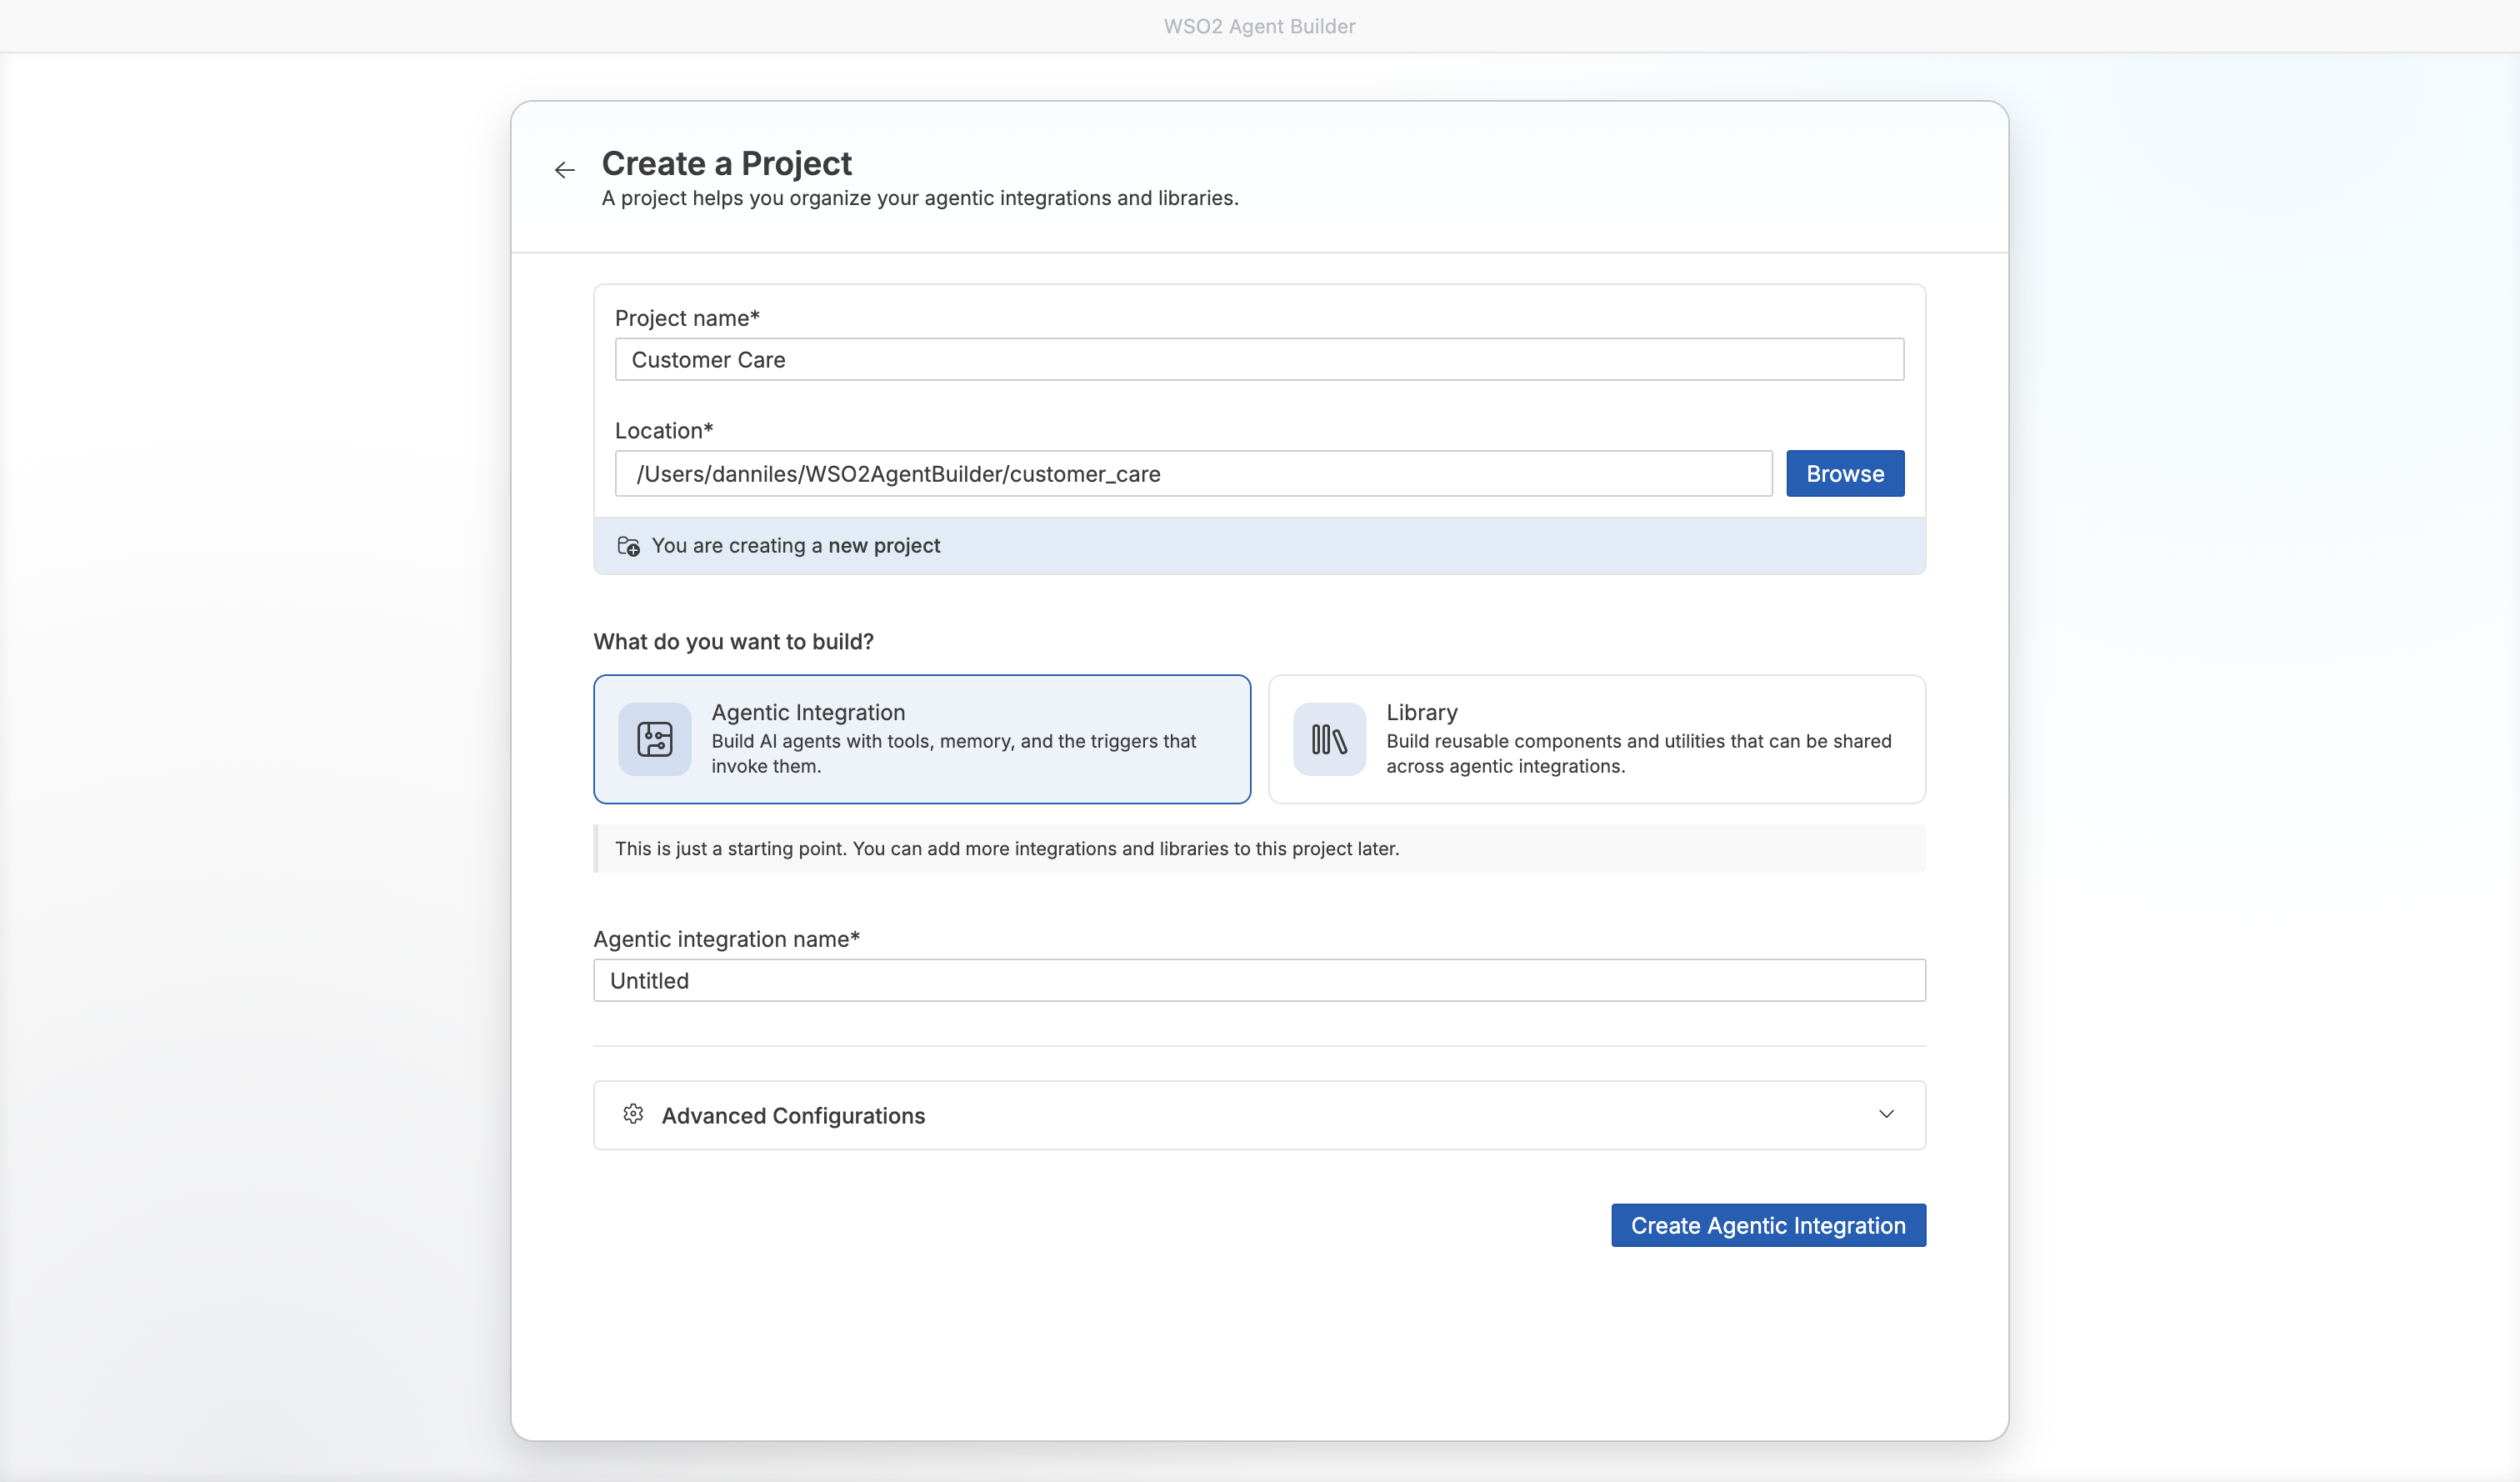
In the Create a Project form, define the core properties of your workspace and select your starting component.
- Add the project details:
| Field | Description | Default |
|---|---|---|
| Project name | A name for your project. | Default |
| Location | The directory where the project will be created. Click Browse to select a specific folder. | ~/WSO2AgentBuilder |
- Under the What do you want to build? section, select your starting component:
- Agentic Integration: Build AI agents with tools, memory, and the triggers that invoke them.
- Library: Build reusable components and utilities that can be shared across agentic integrations.
Note: This initial selection is just a starting point. You can add more agentic integrations and libraries to this project later.
- Enter a name for your initial component in the Agentic integration name (or Library Name) field.
Advanced configurations
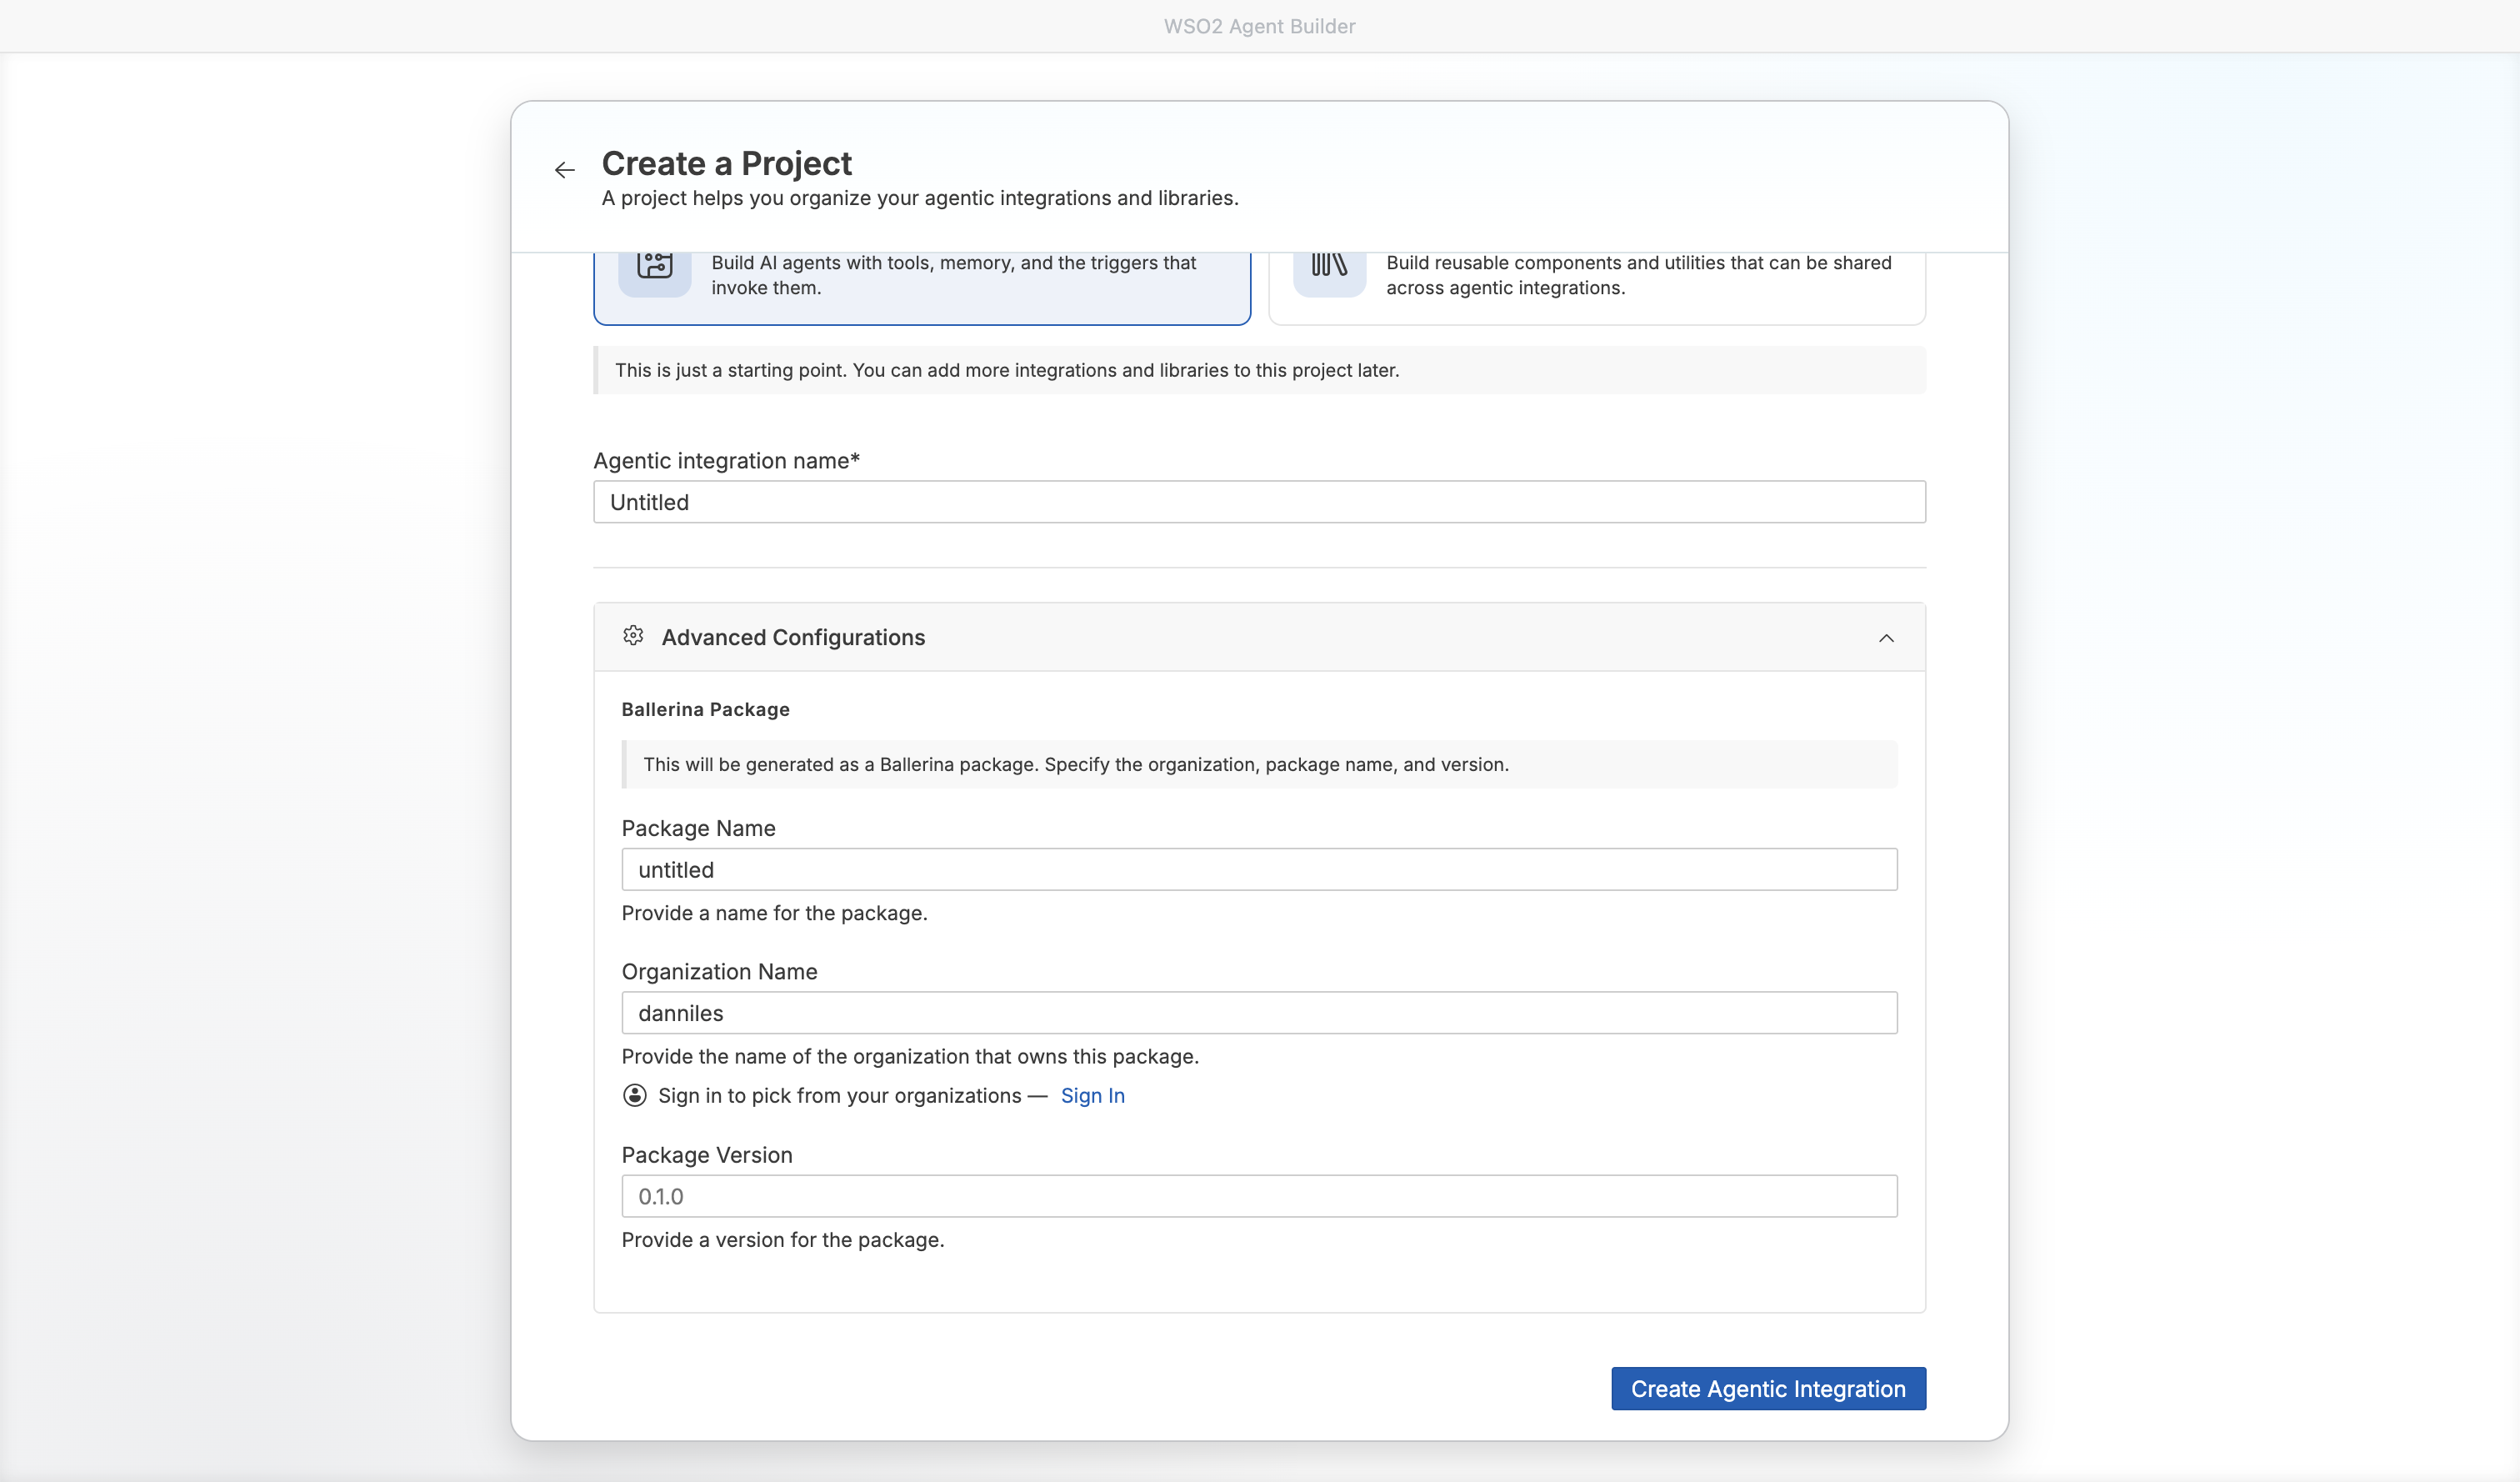
Expand the Advanced Configurations panel to specify the Ballerina Package details. This section defines how the underlying Ballerina package is generated:
| Field | Description |
|---|---|
| Package Name | Provide a name for the package. |
| Organization Name | Provide the name of the organization that owns this package. Sign in to pick from your organizations. |
| Package Version | Provide a version for the package. |
- Click Create Agentic Integration (or Create for a library) to generate the project. The project opens in the view of the new agentic integration or library.
Add more integrations and libraries
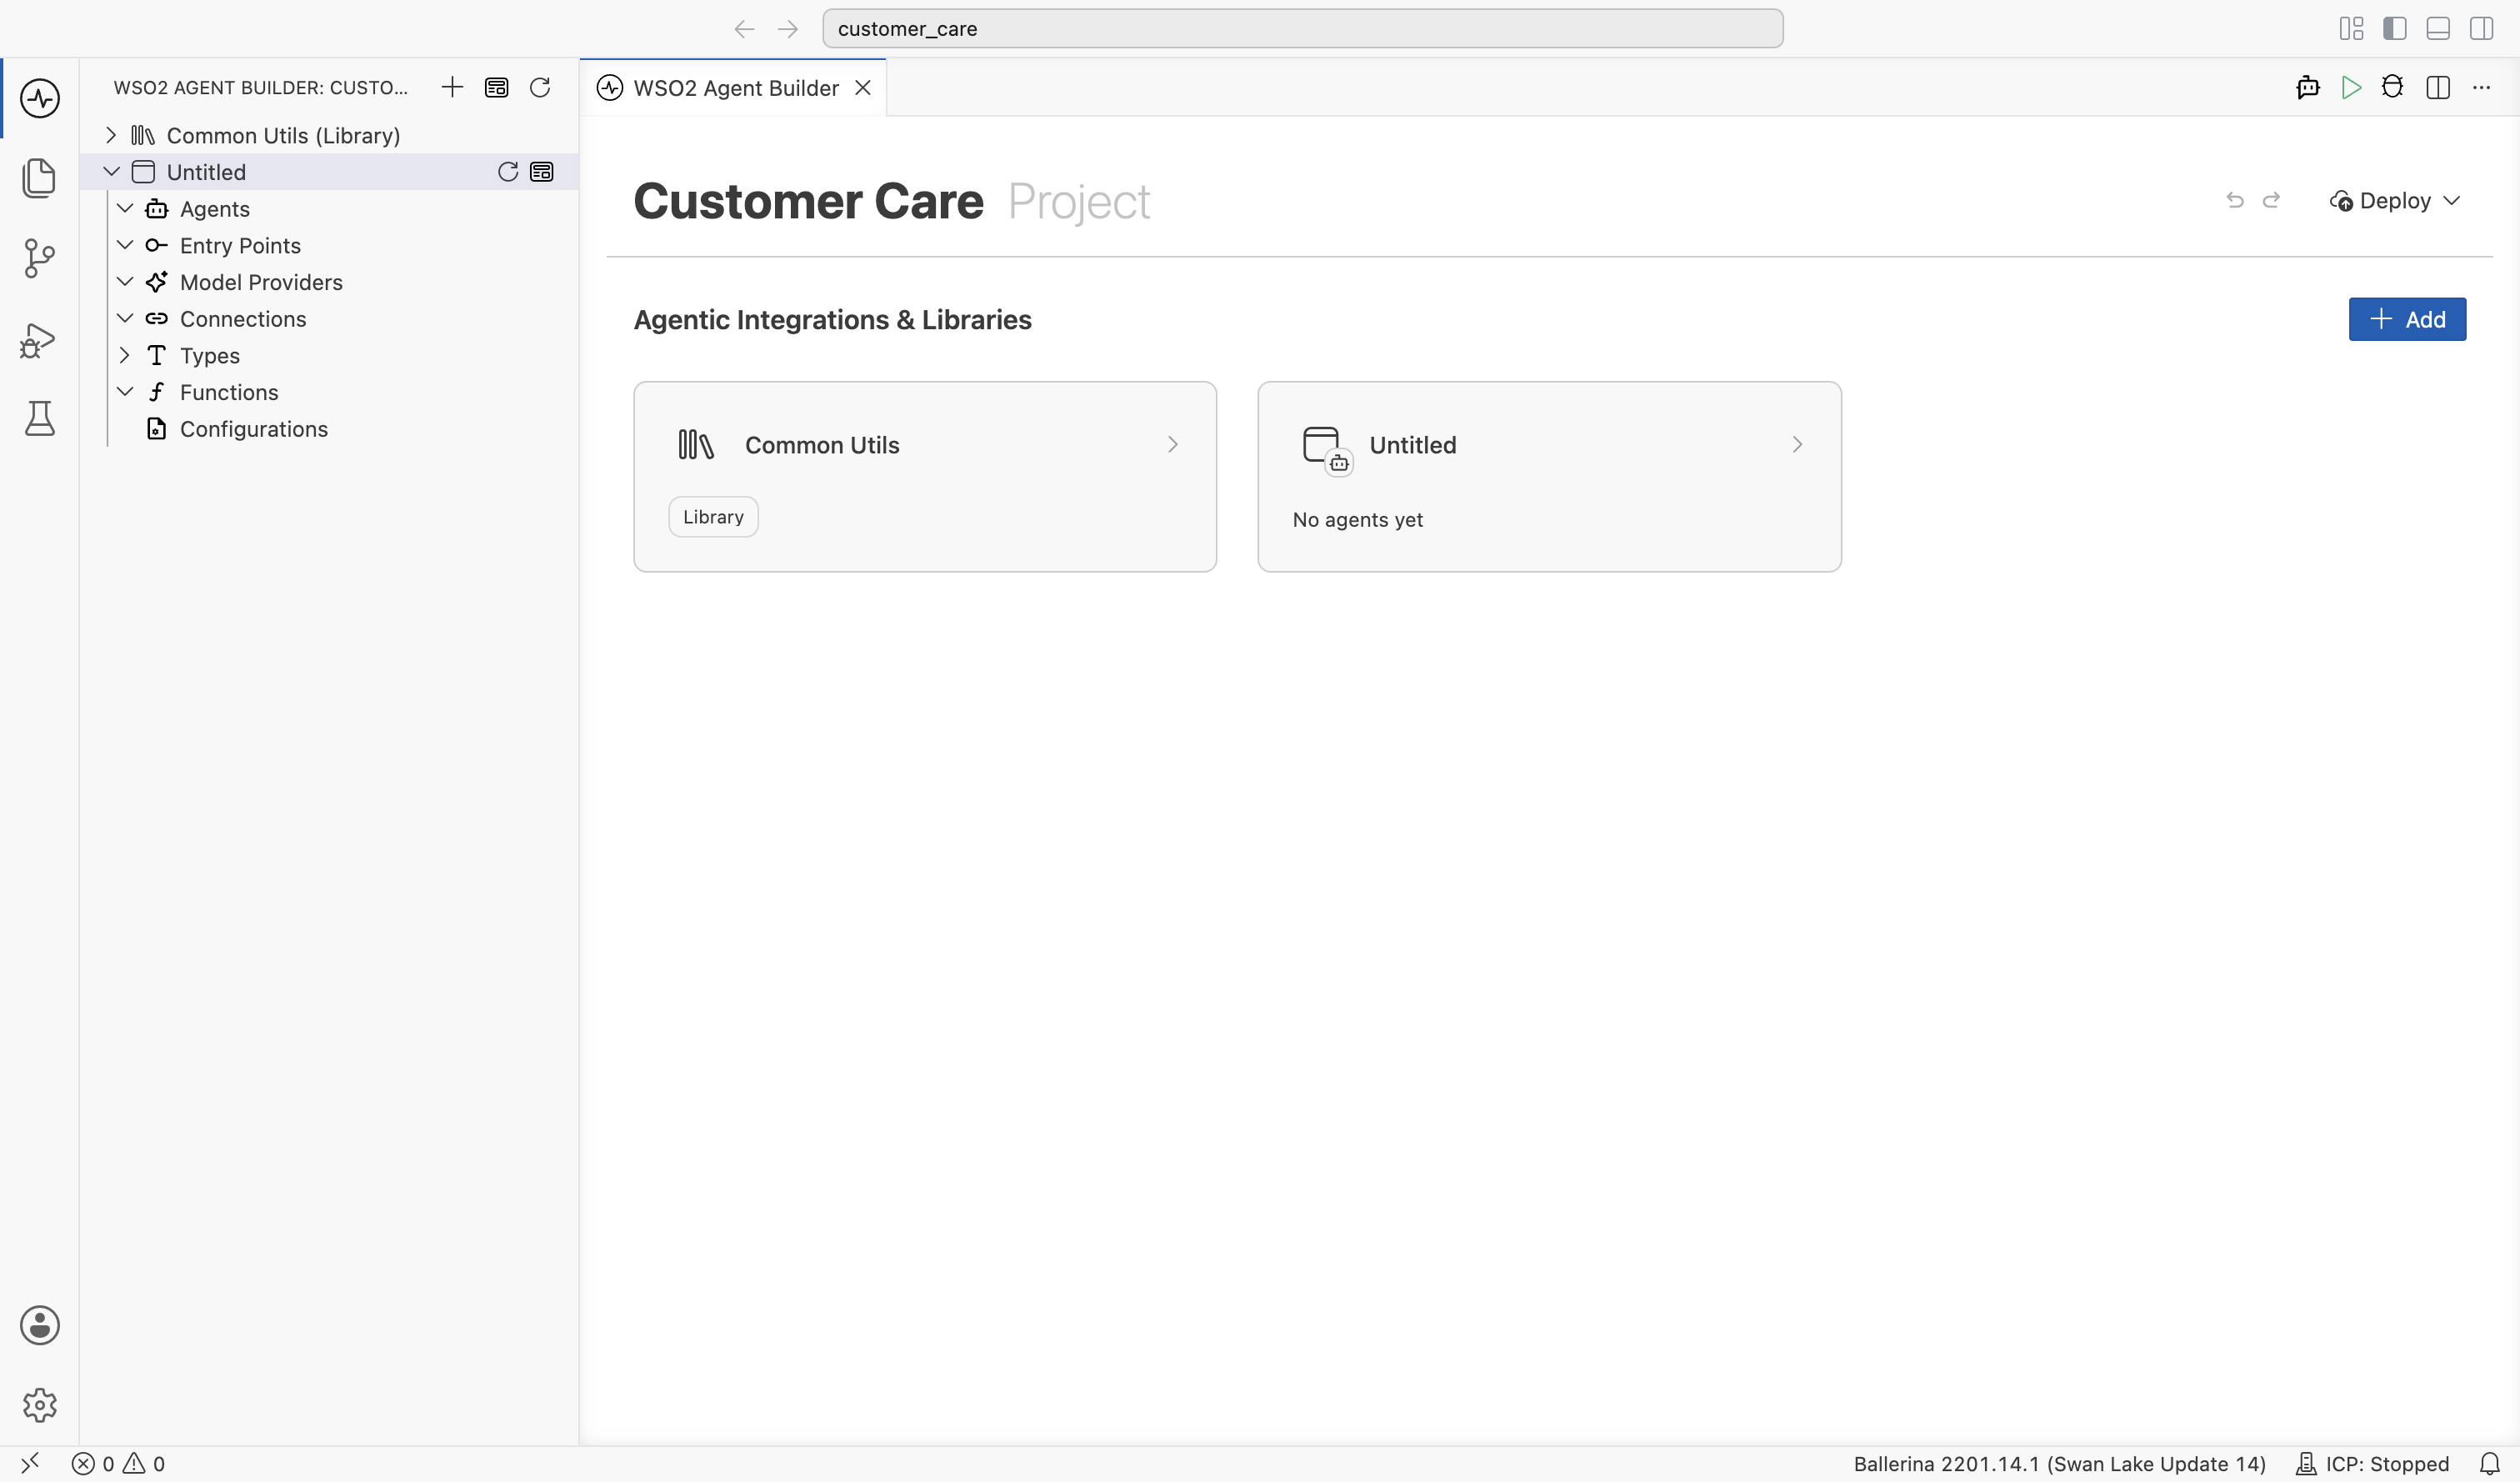
To add more components, switch to the Project view by clicking the home icon at the top left of the editor. The project view lists all agentic integrations and libraries in the project.
Click + Add in the Agentic Integrations & Libraries section. The Add an Integration or Library form opens.
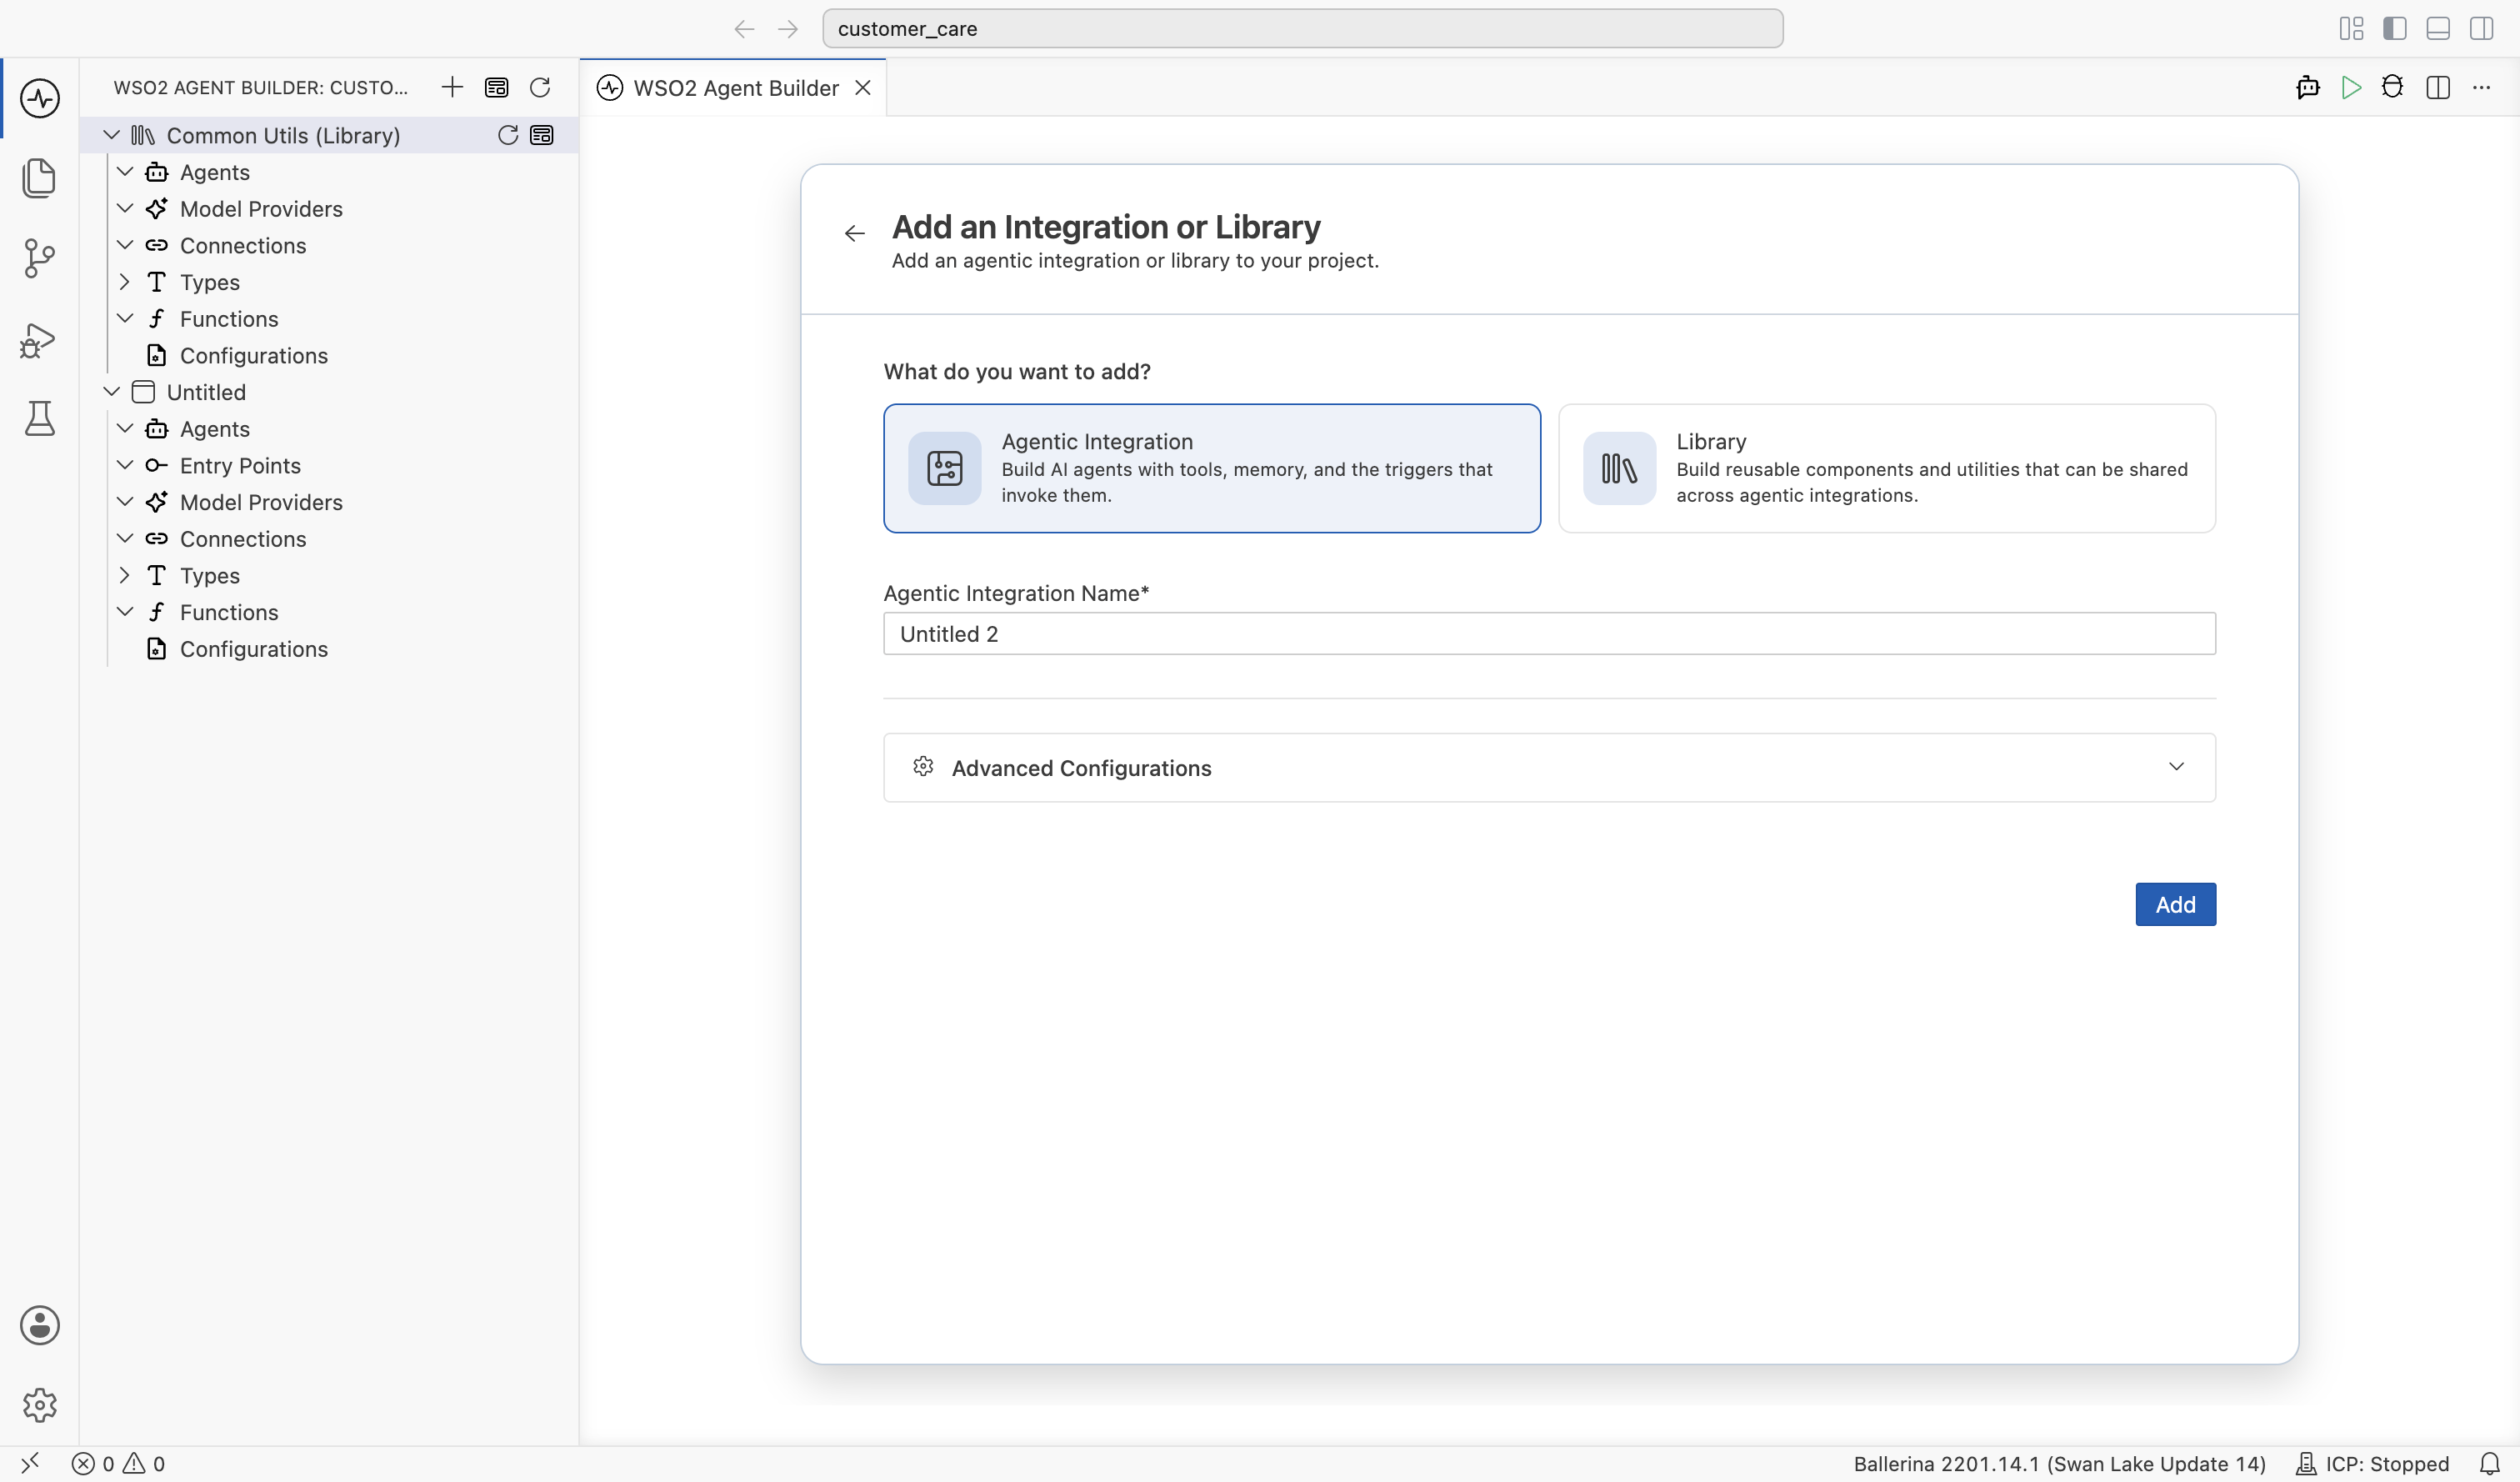
Add an integration
-
Select Agentic Integration as the type.
-
Enter an Agentic Integration Name (defaults to
Untitled). -
Optionally expand Advanced Configurations to set Ballerina package details:
Field Description Package Name The Ballerina package name. Defaults to the integration name (for example, untitled).Organization Name Inherited from the parent project and shown as read-only. Package Version The initial version of the package. Defaults to 0.1.0. -
Click Add.
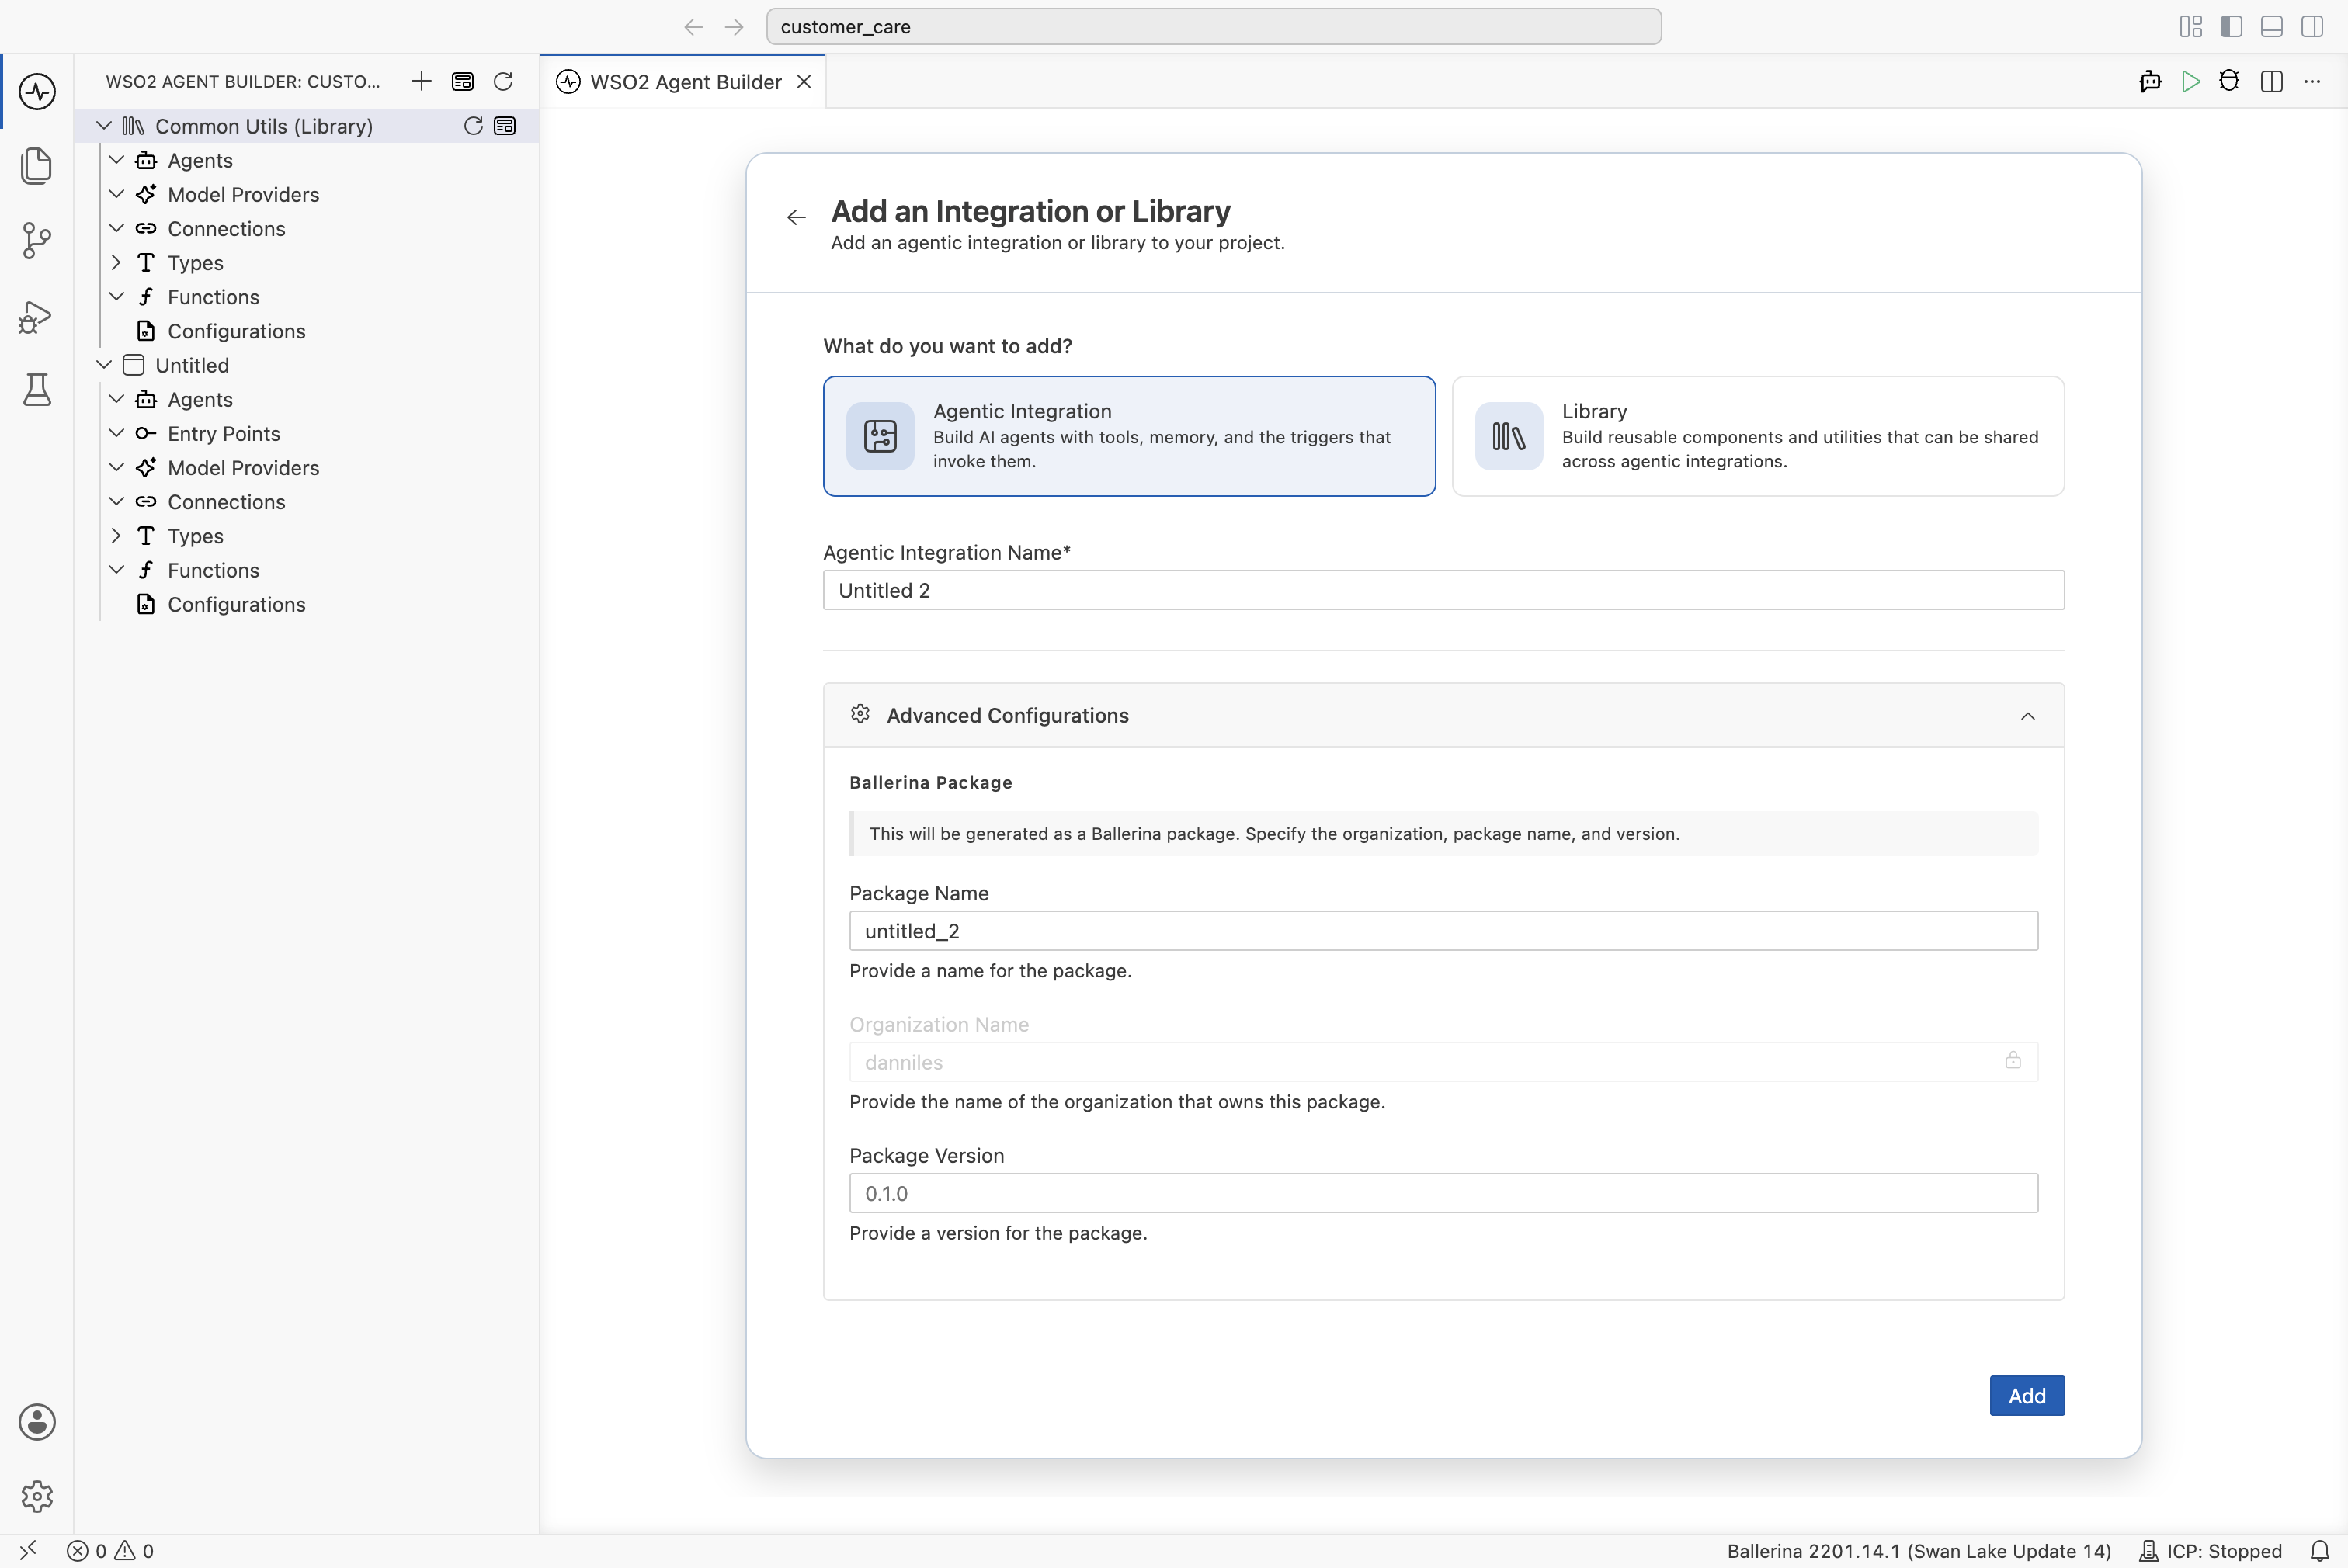
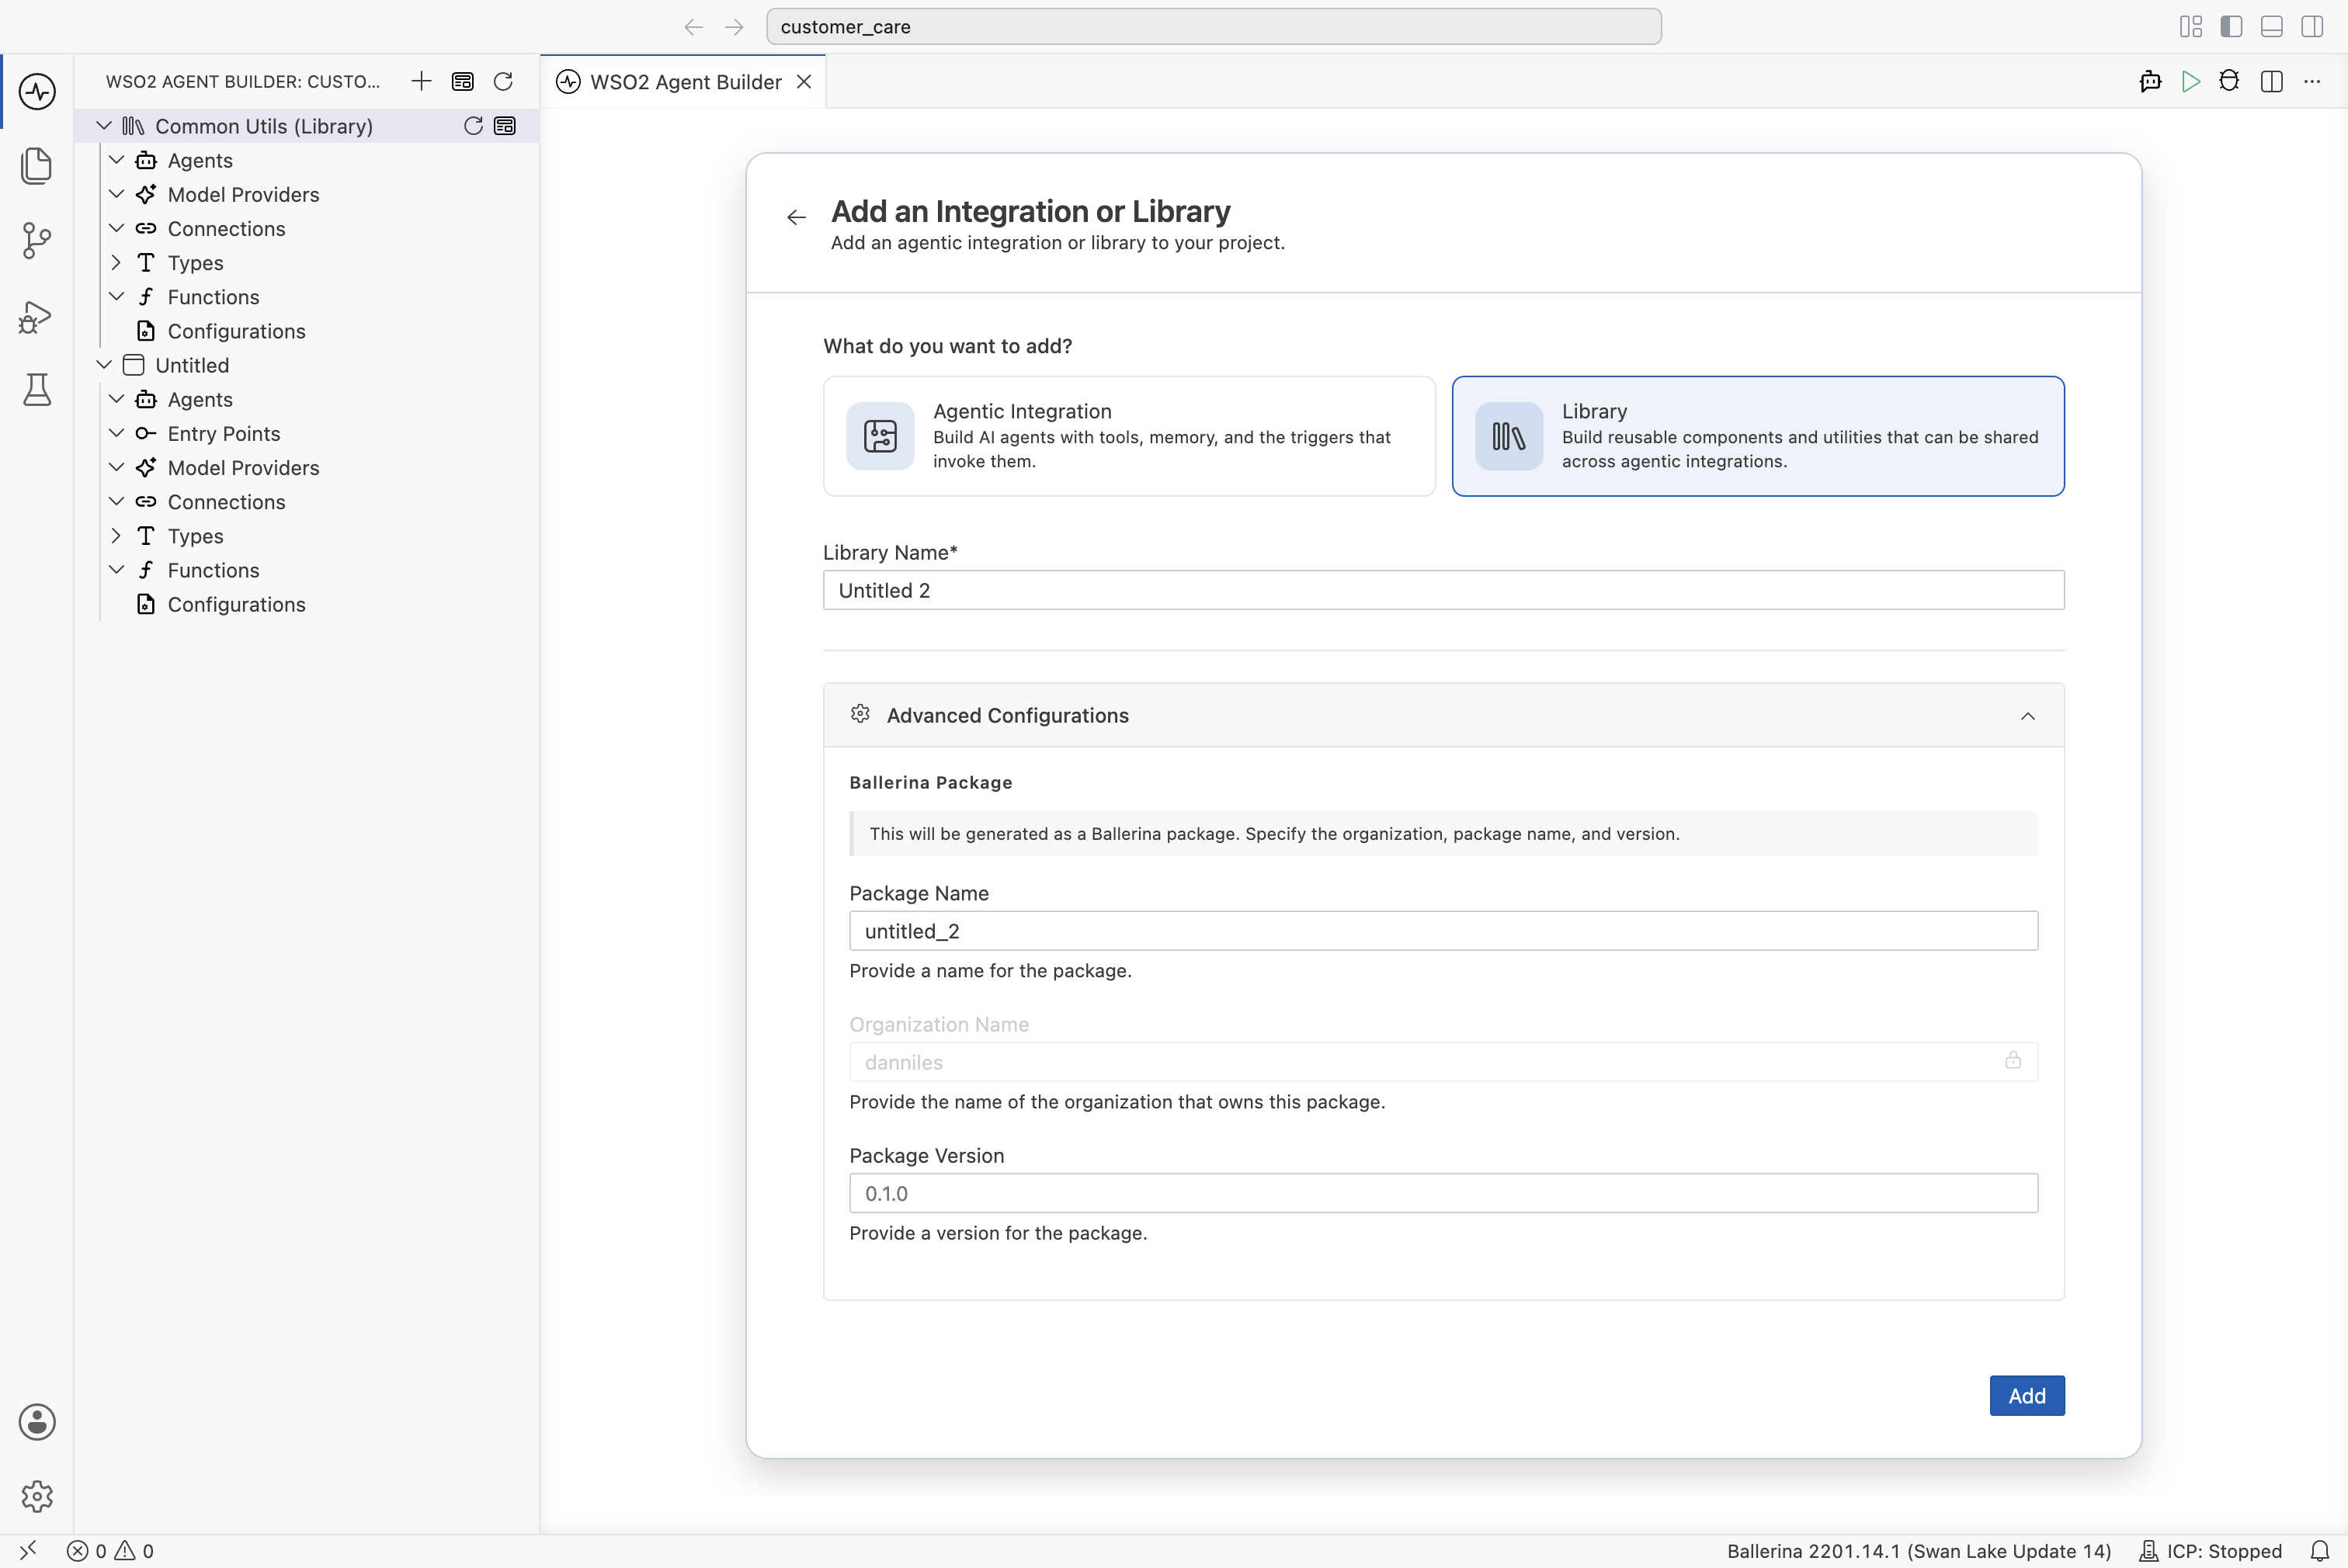
Add a library
-
Select Library as the Type.
-
Enter a Library Name (defaults to
Untitled). -
Optionally expand Advanced Configurations to set the same Ballerina package fields as above. Organization Name is inherited from the parent project.
-
Click Add.
What's next
- Open a project — Open an existing project
- Explore sample integrations — Start from a pre-built agent or sample