Explore Sample Integrations
WSO2 Agent Builder includes a curated collection of pre-built agent samples that you can download and open as ready-to-use projects. Use these samples to learn common agent patterns or as starting points for your own projects.
Open the sample gallery
On the WSO2 Agent Builder home screen, click Explore on the Pre-built Agents and Samples card.
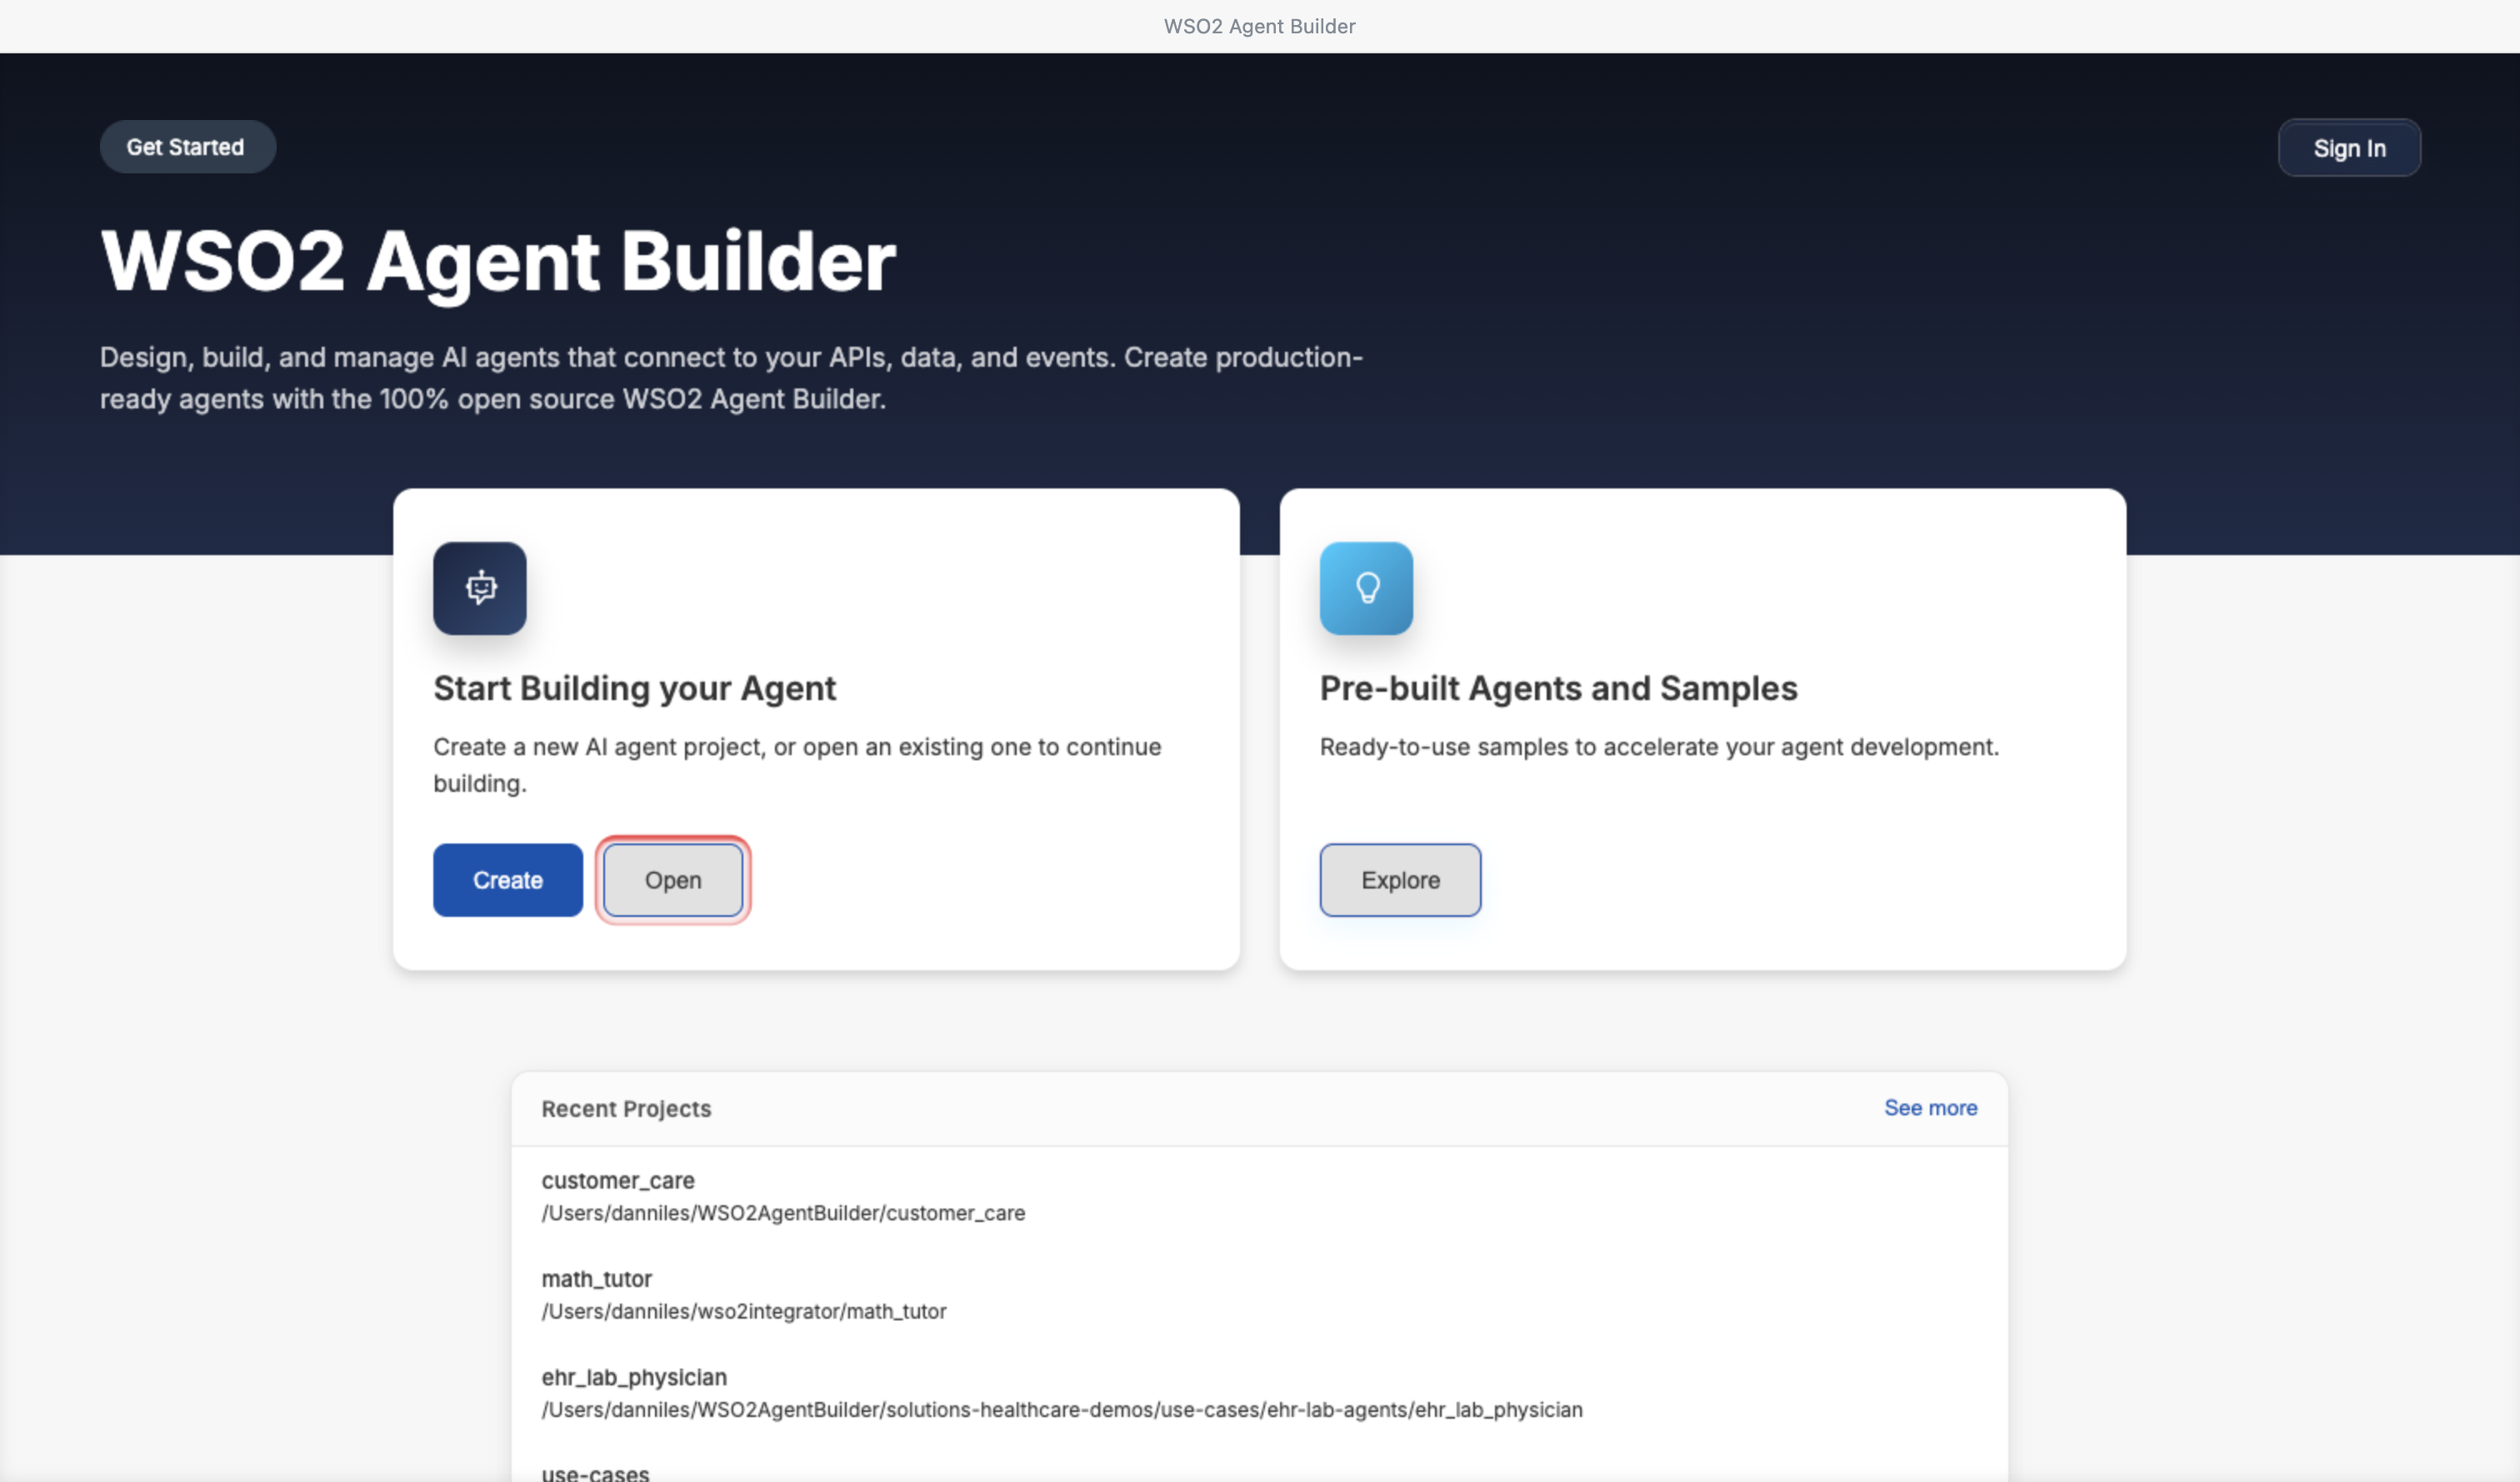
The home screen also shows the Start Building your Agent card, along with a Recent Projects list for projects you've opened recently.
Browse samples
The Browse Samples view opens with the prompt Start quickly by downloading a curated integration sample for your selected profile. Each card shows the sample name, a type tag (for example, ai-agent), a brief description, and a Use this action.
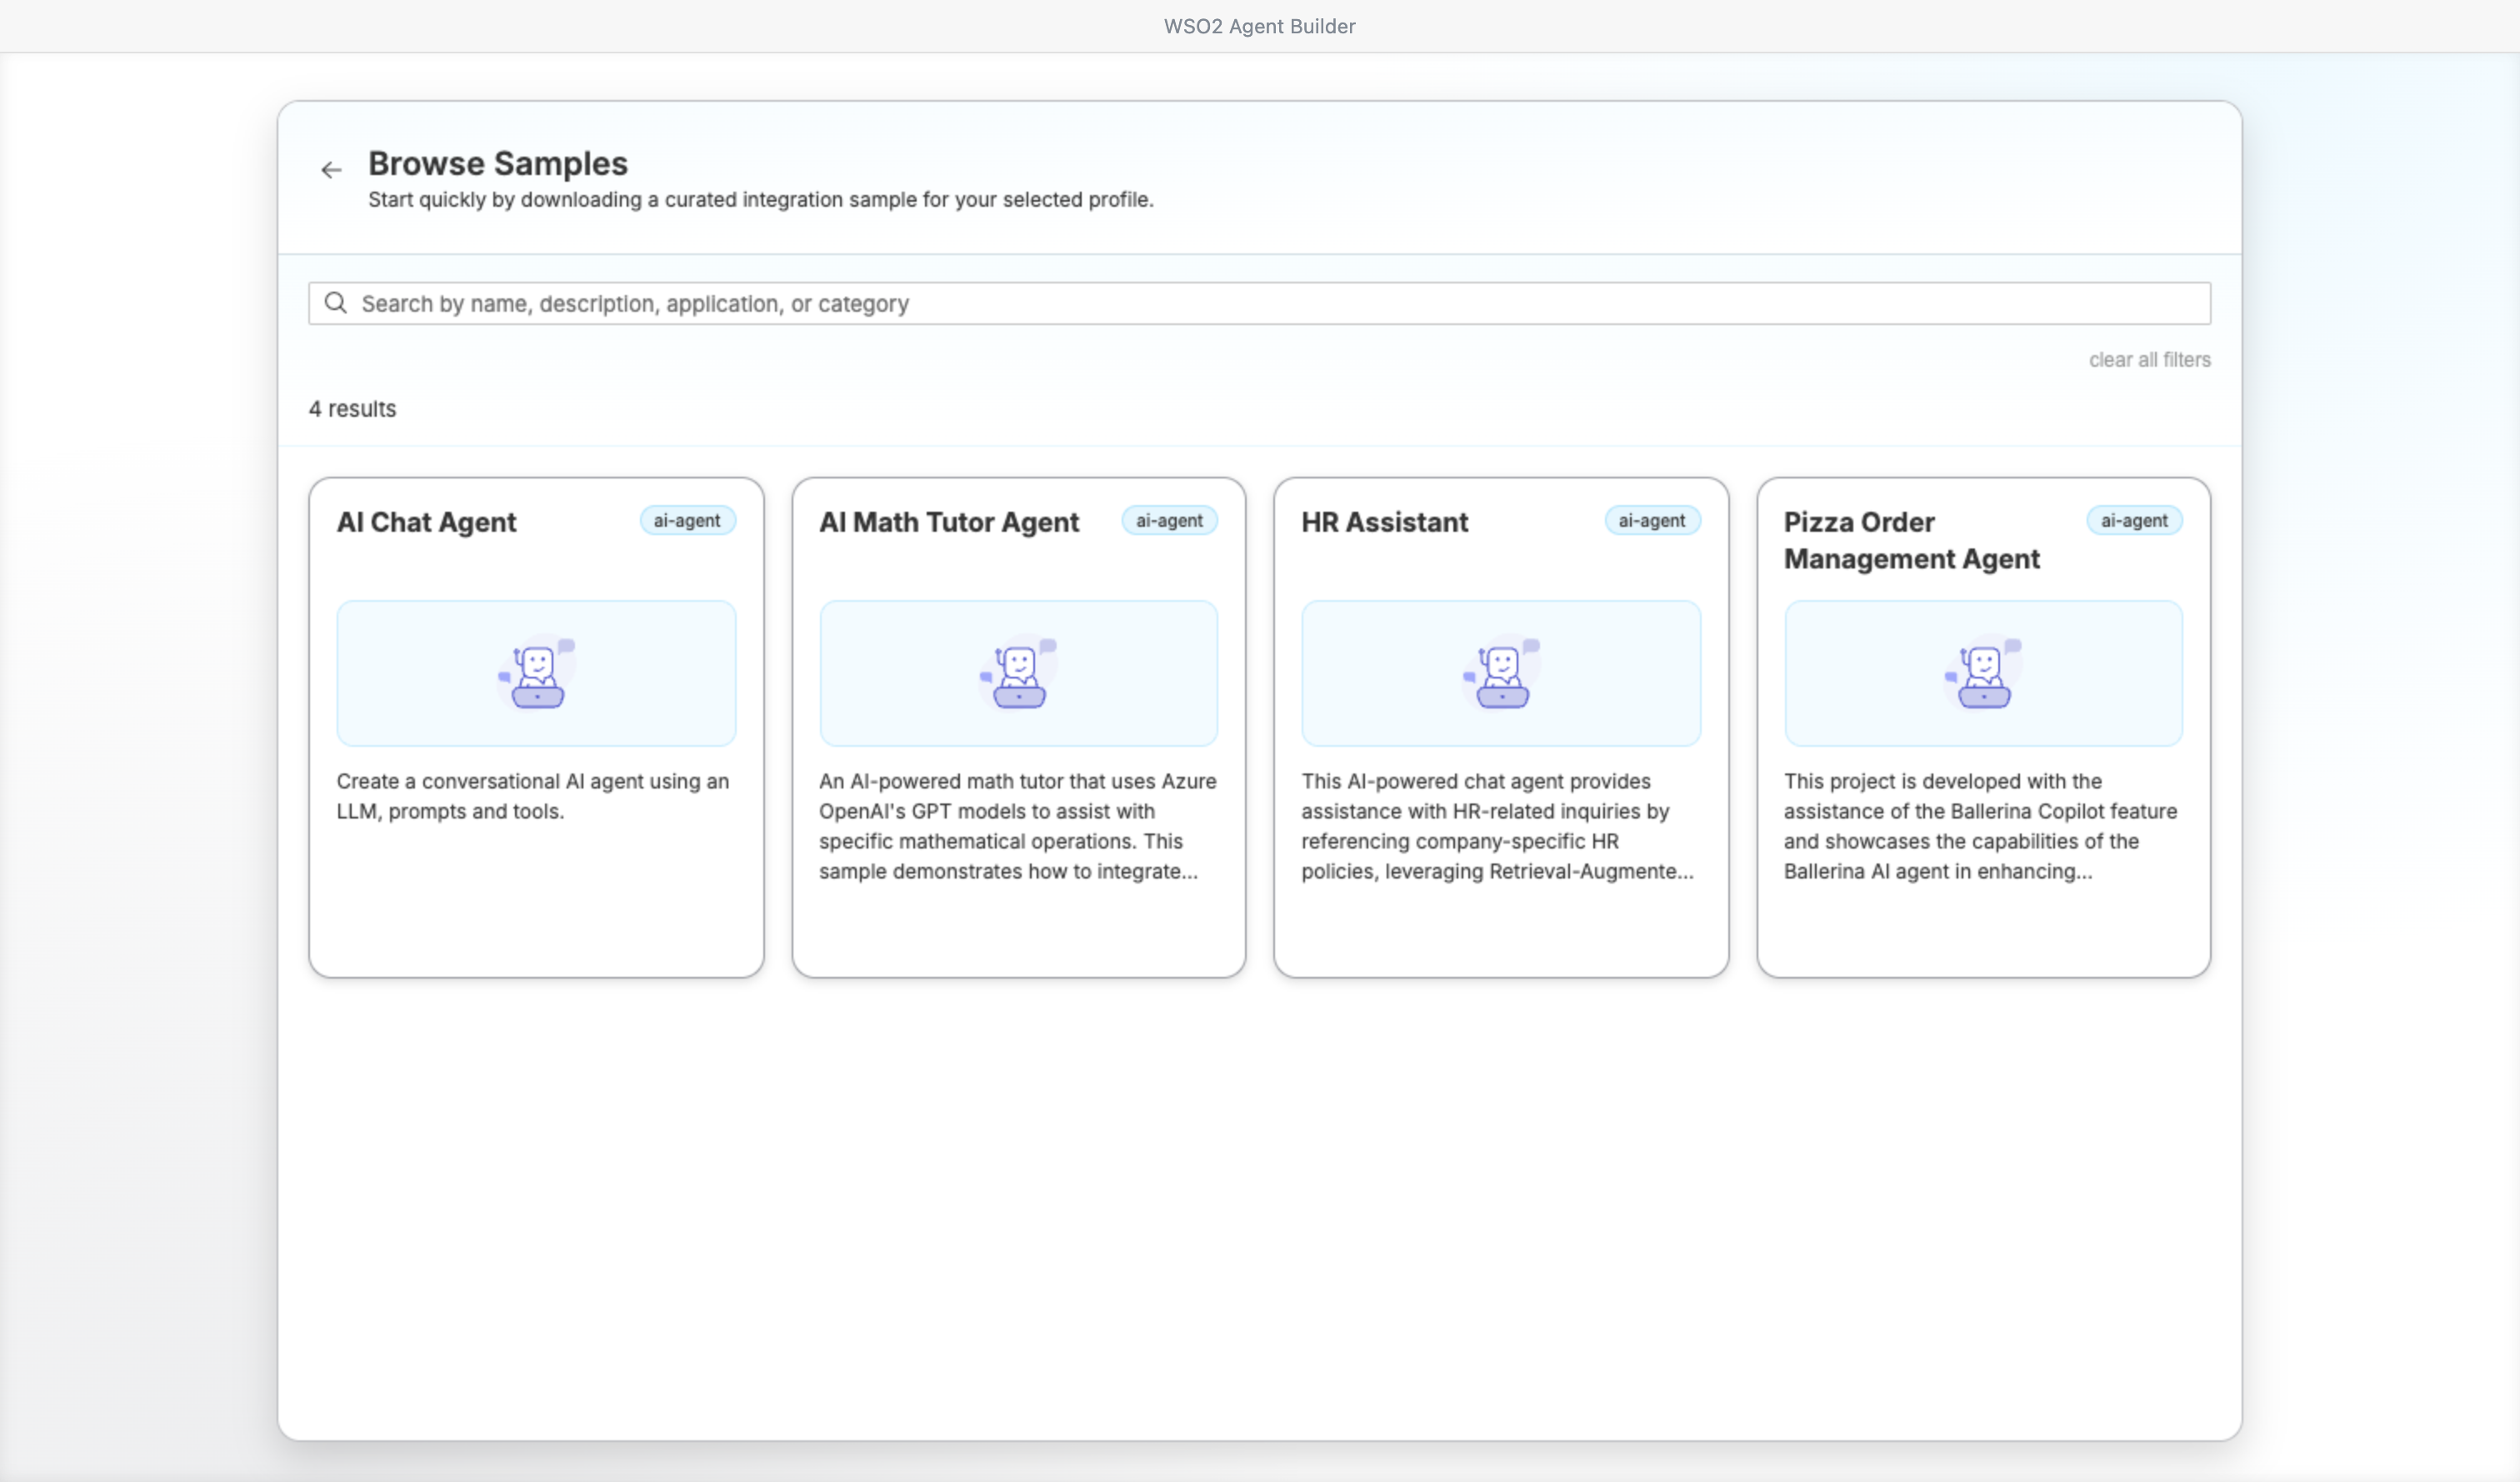
Use the controls at the top of the view to find samples:
- Search bar — Search by name, description, application, or category.
- Clear all filters — Reset the search term.
The result count appears below the controls (for example, 4 results).
Use a sample
Click Use this on a sample card. A native file browser appears so you can choose the directory where the sample project will be created.
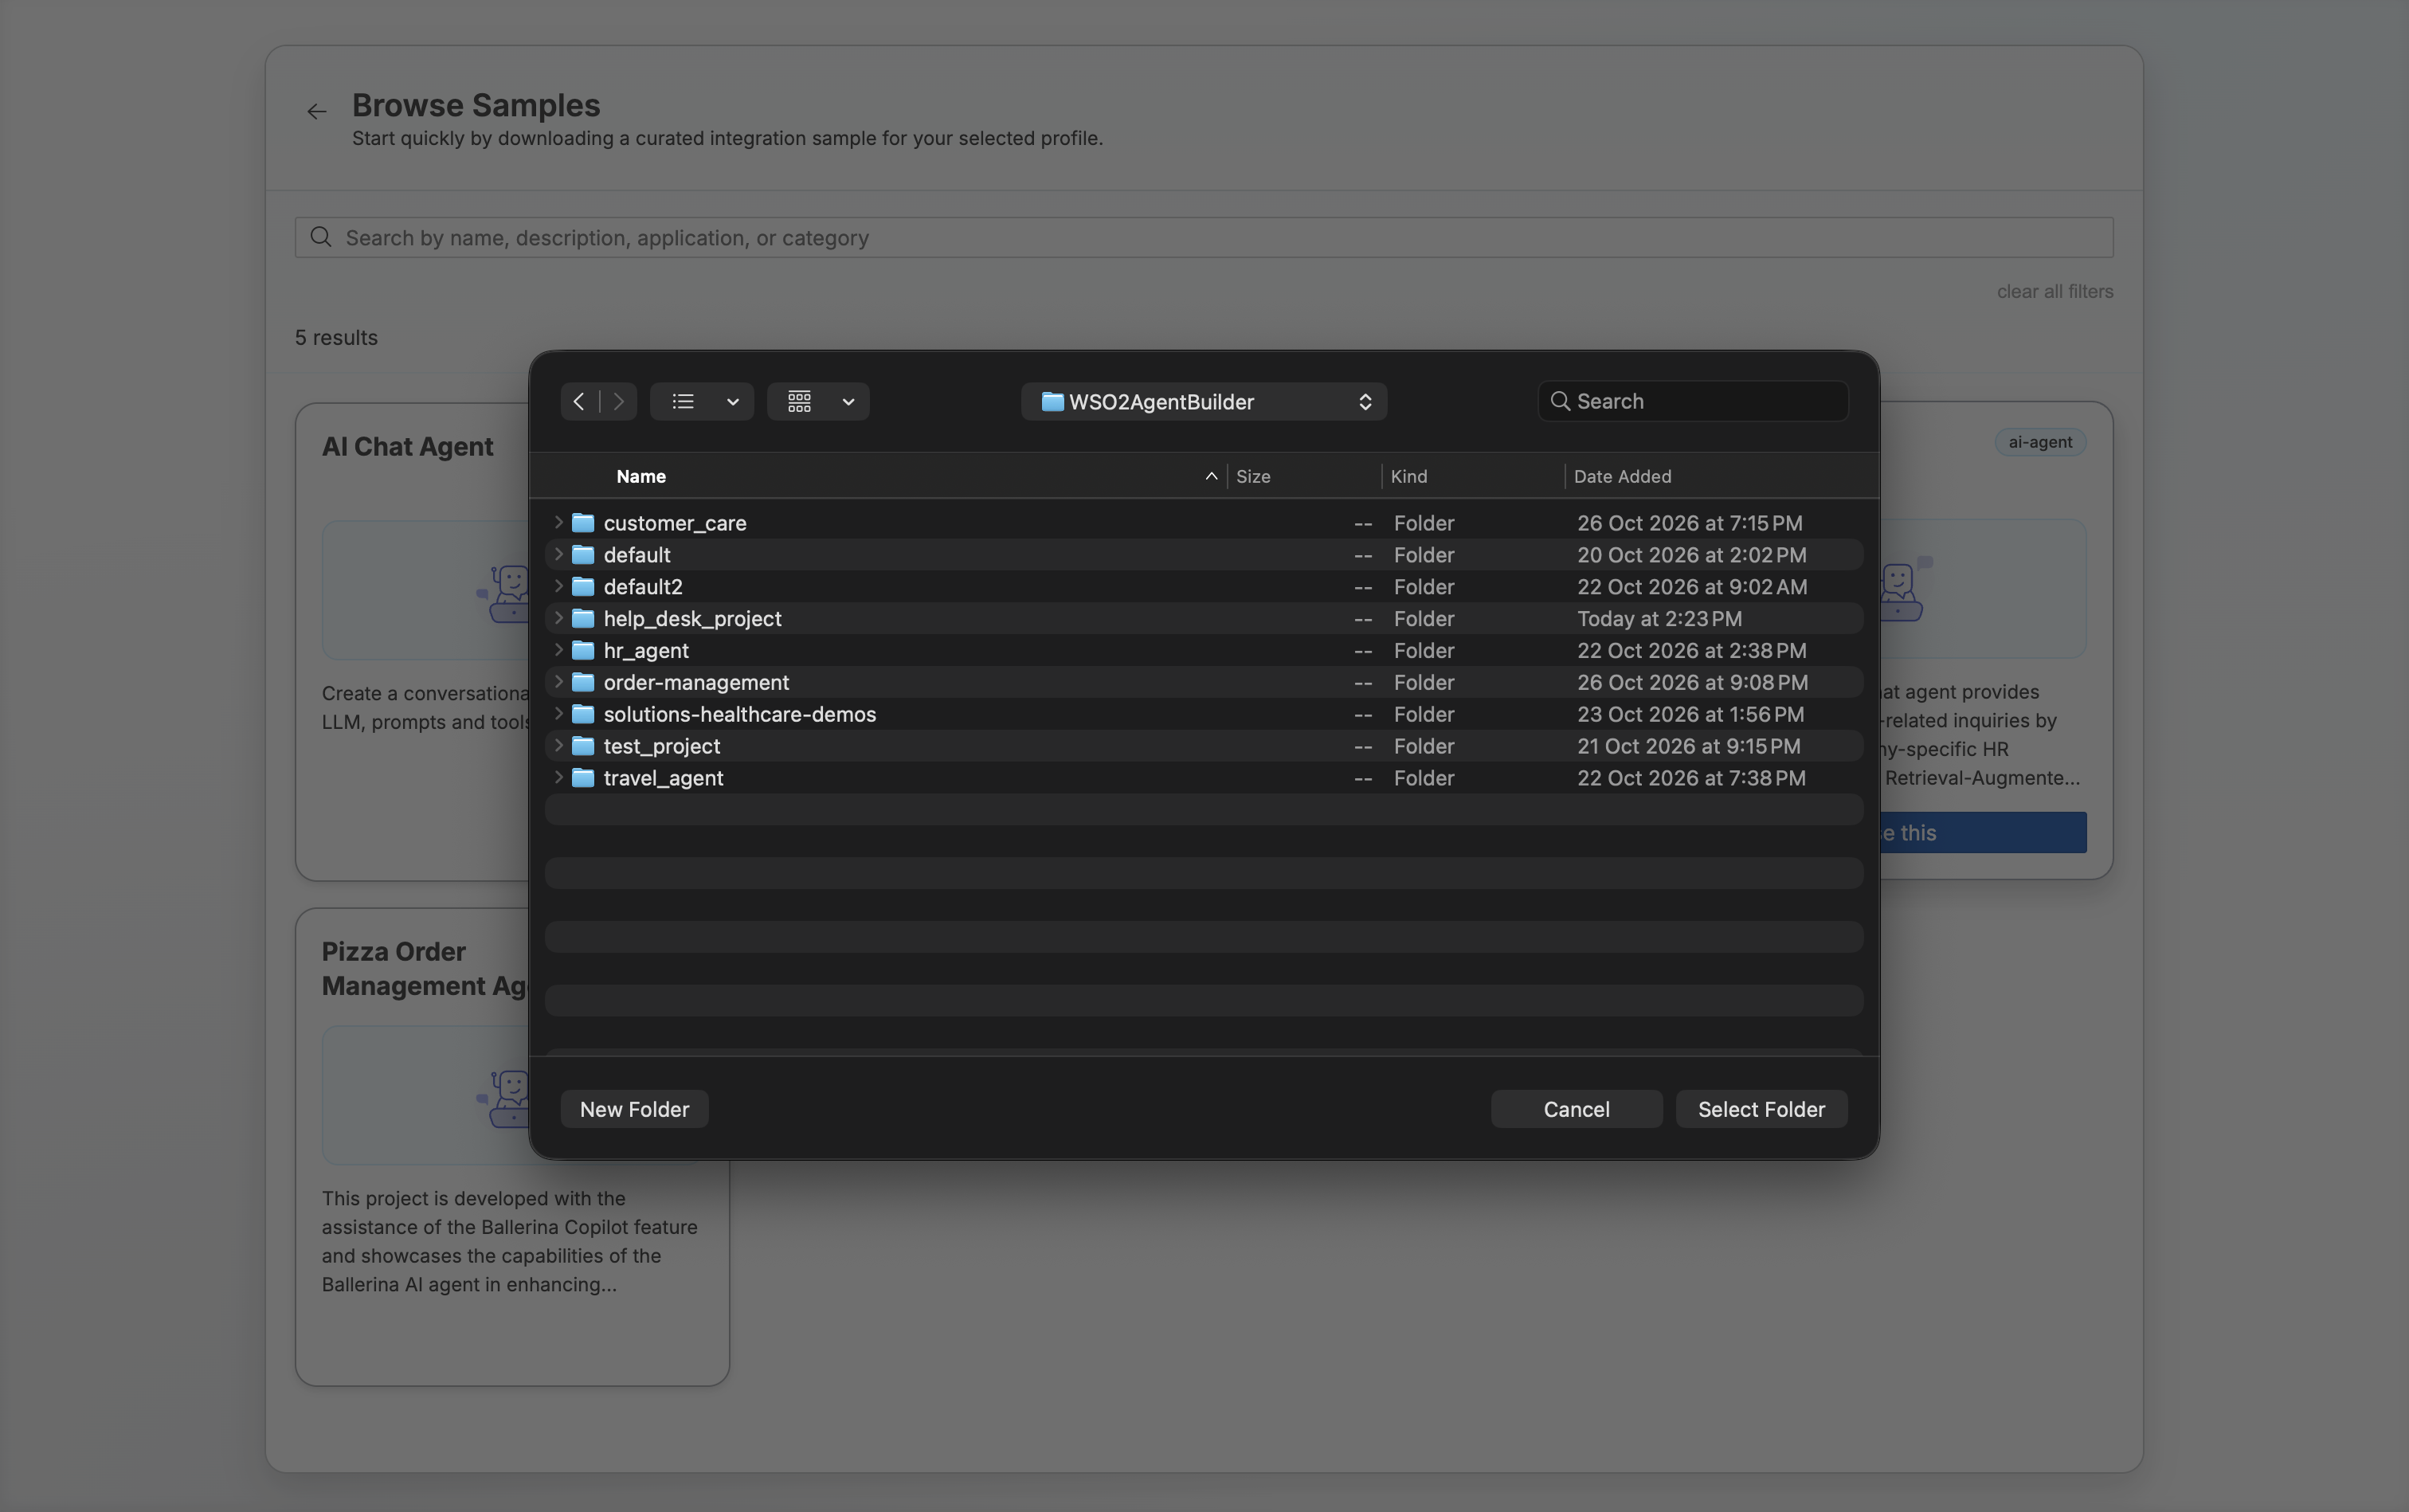
Select a folder and click Select Folder. WSO2 Agent Builder downloads the sample and opens it as an agentic integration.
What you do next depends on where you saved the sample.
Save the sample inside the folder of an existing project, or outside any project. Each sample is a single agentic integration, so saving it inside another sample or agentic integration isn't supported. In that case, move the sample to a project's folder, or outside any project, first.
Add the sample to an existing project
If you saved the sample inside the folder of an existing project (a project you created with Create a Project), the sample isn't part of that project yet.
-
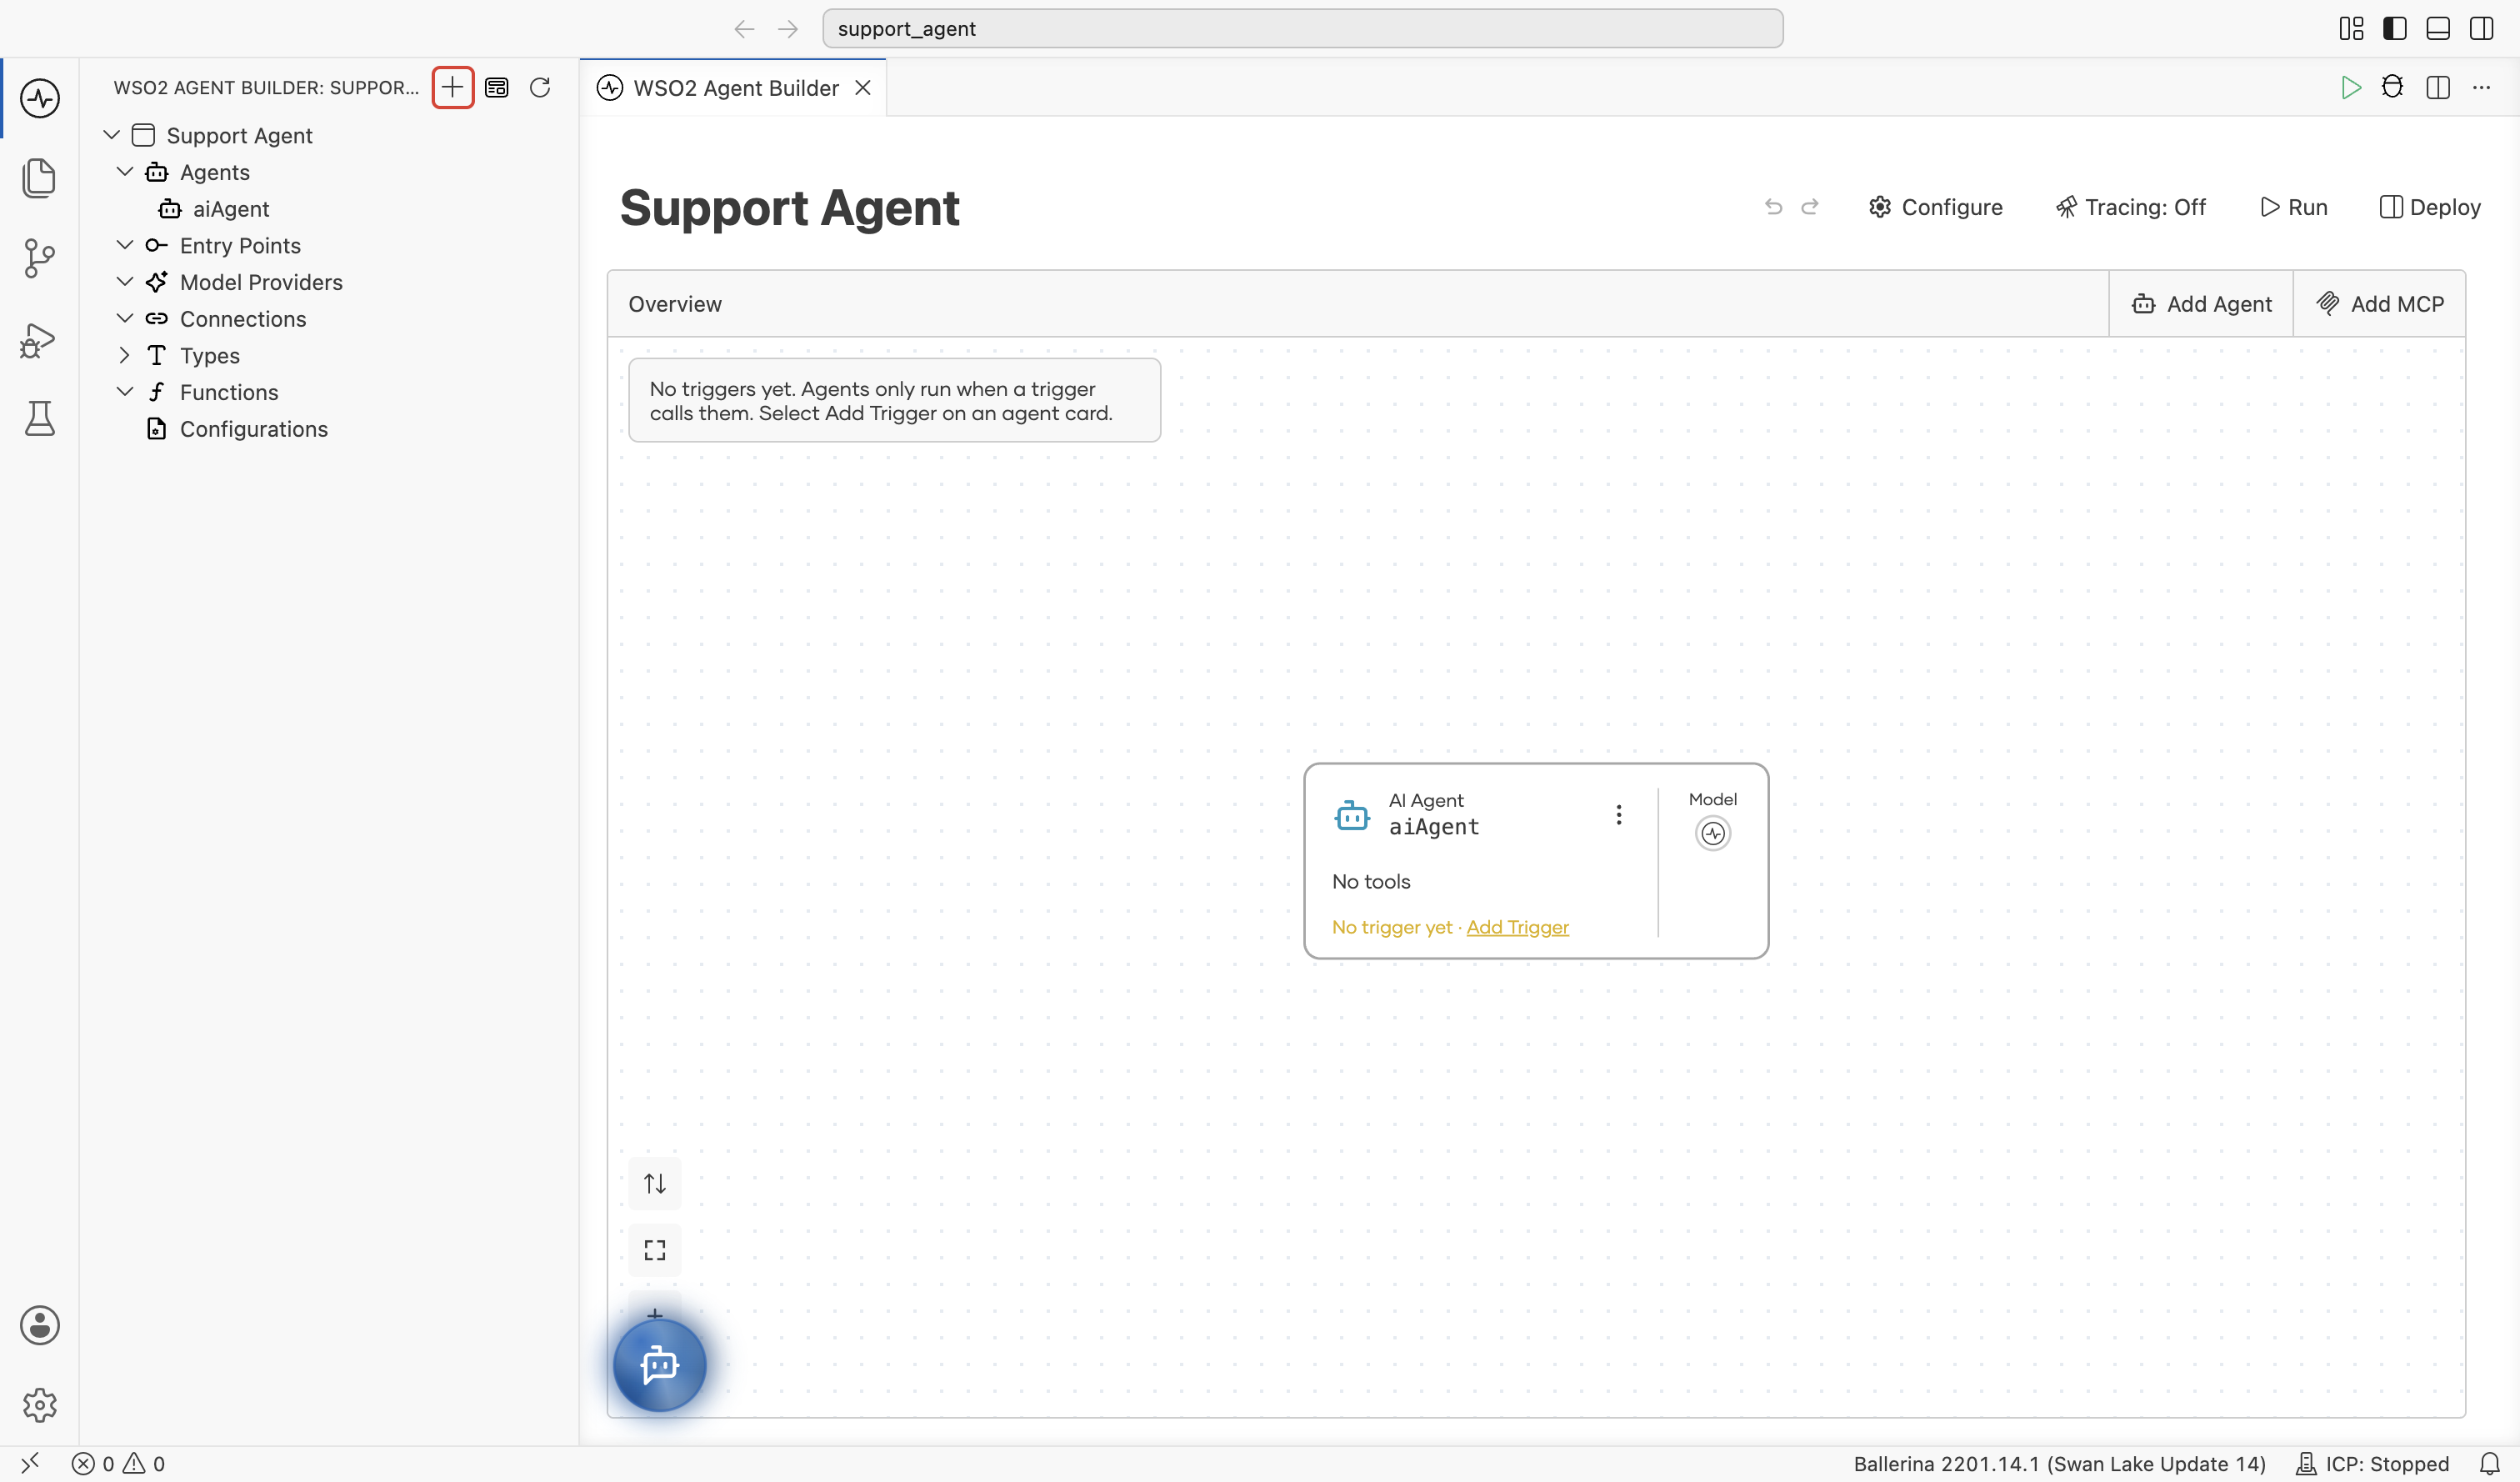
In the side panel, click the Add to Project (+) icon next to the integration name.
-
A dialog says the integration is located inside the project but isn't part of it yet, and asks whether to add it to that project instead of creating a new one. Click Add to Project.
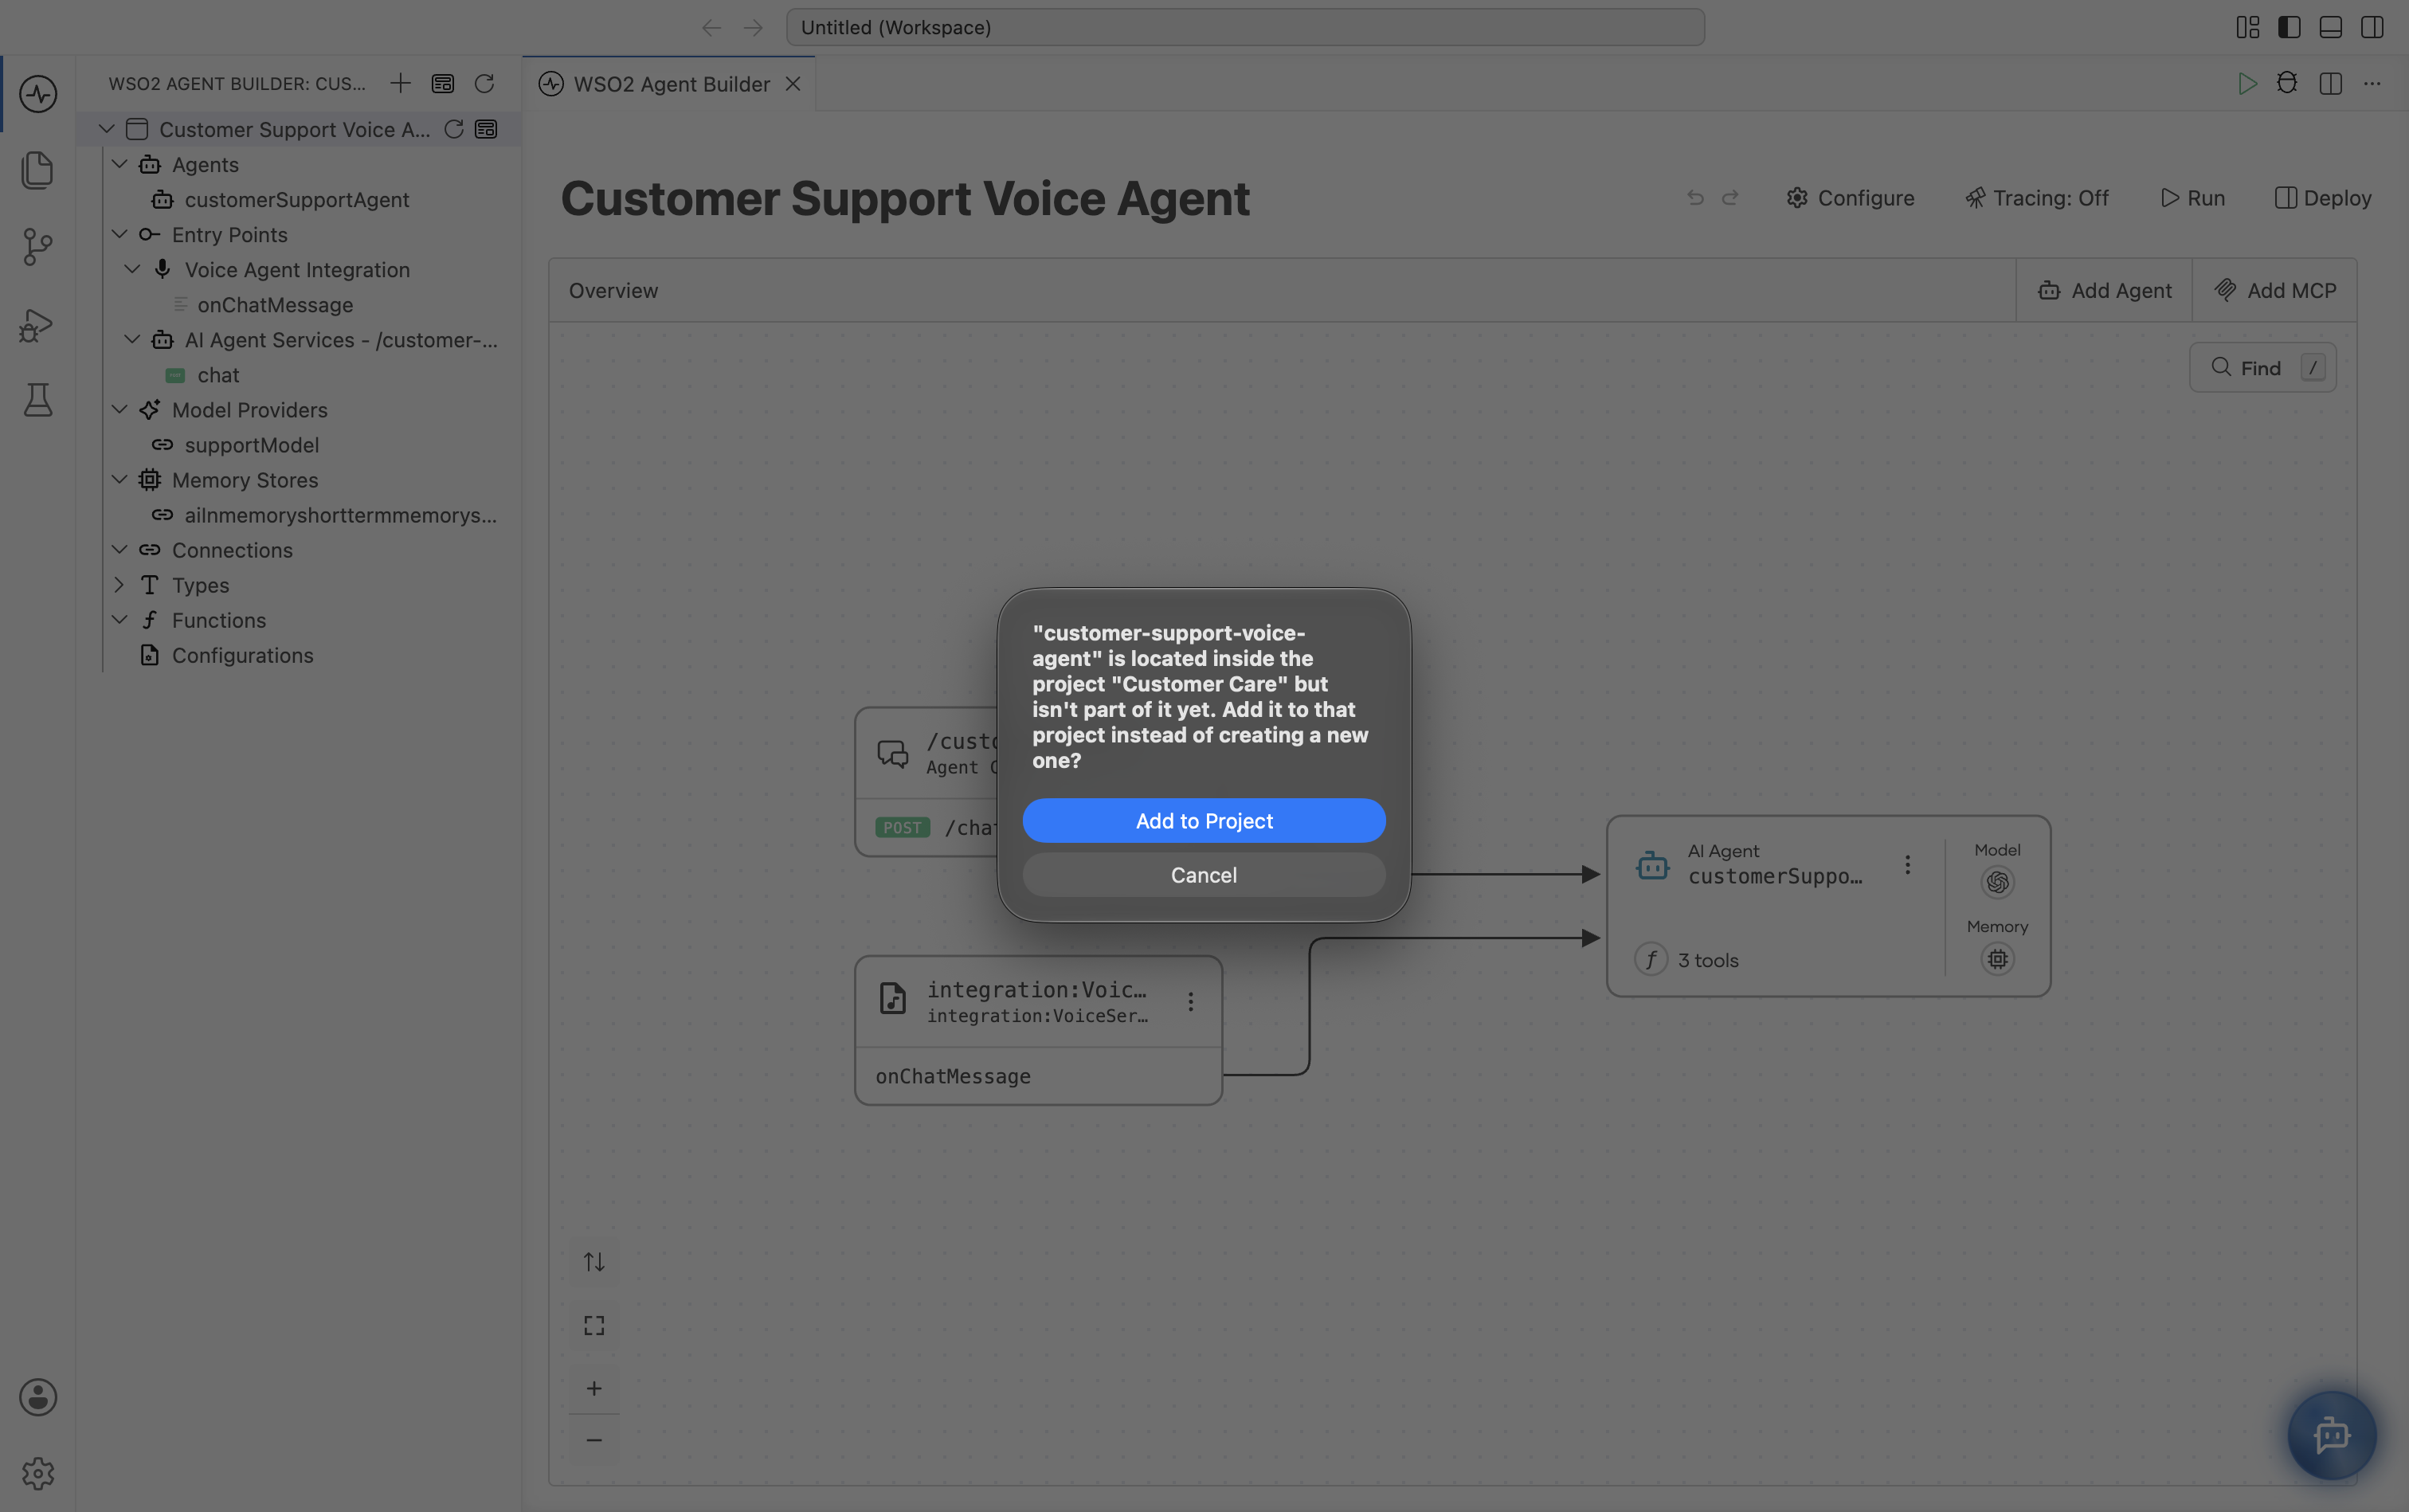
The integration becomes a member of that project.
Convert the sample to a new project
If you saved the sample outside a project, convert it to a new project.
-
In the side panel, click the Convert to Project icon next to the integration name.
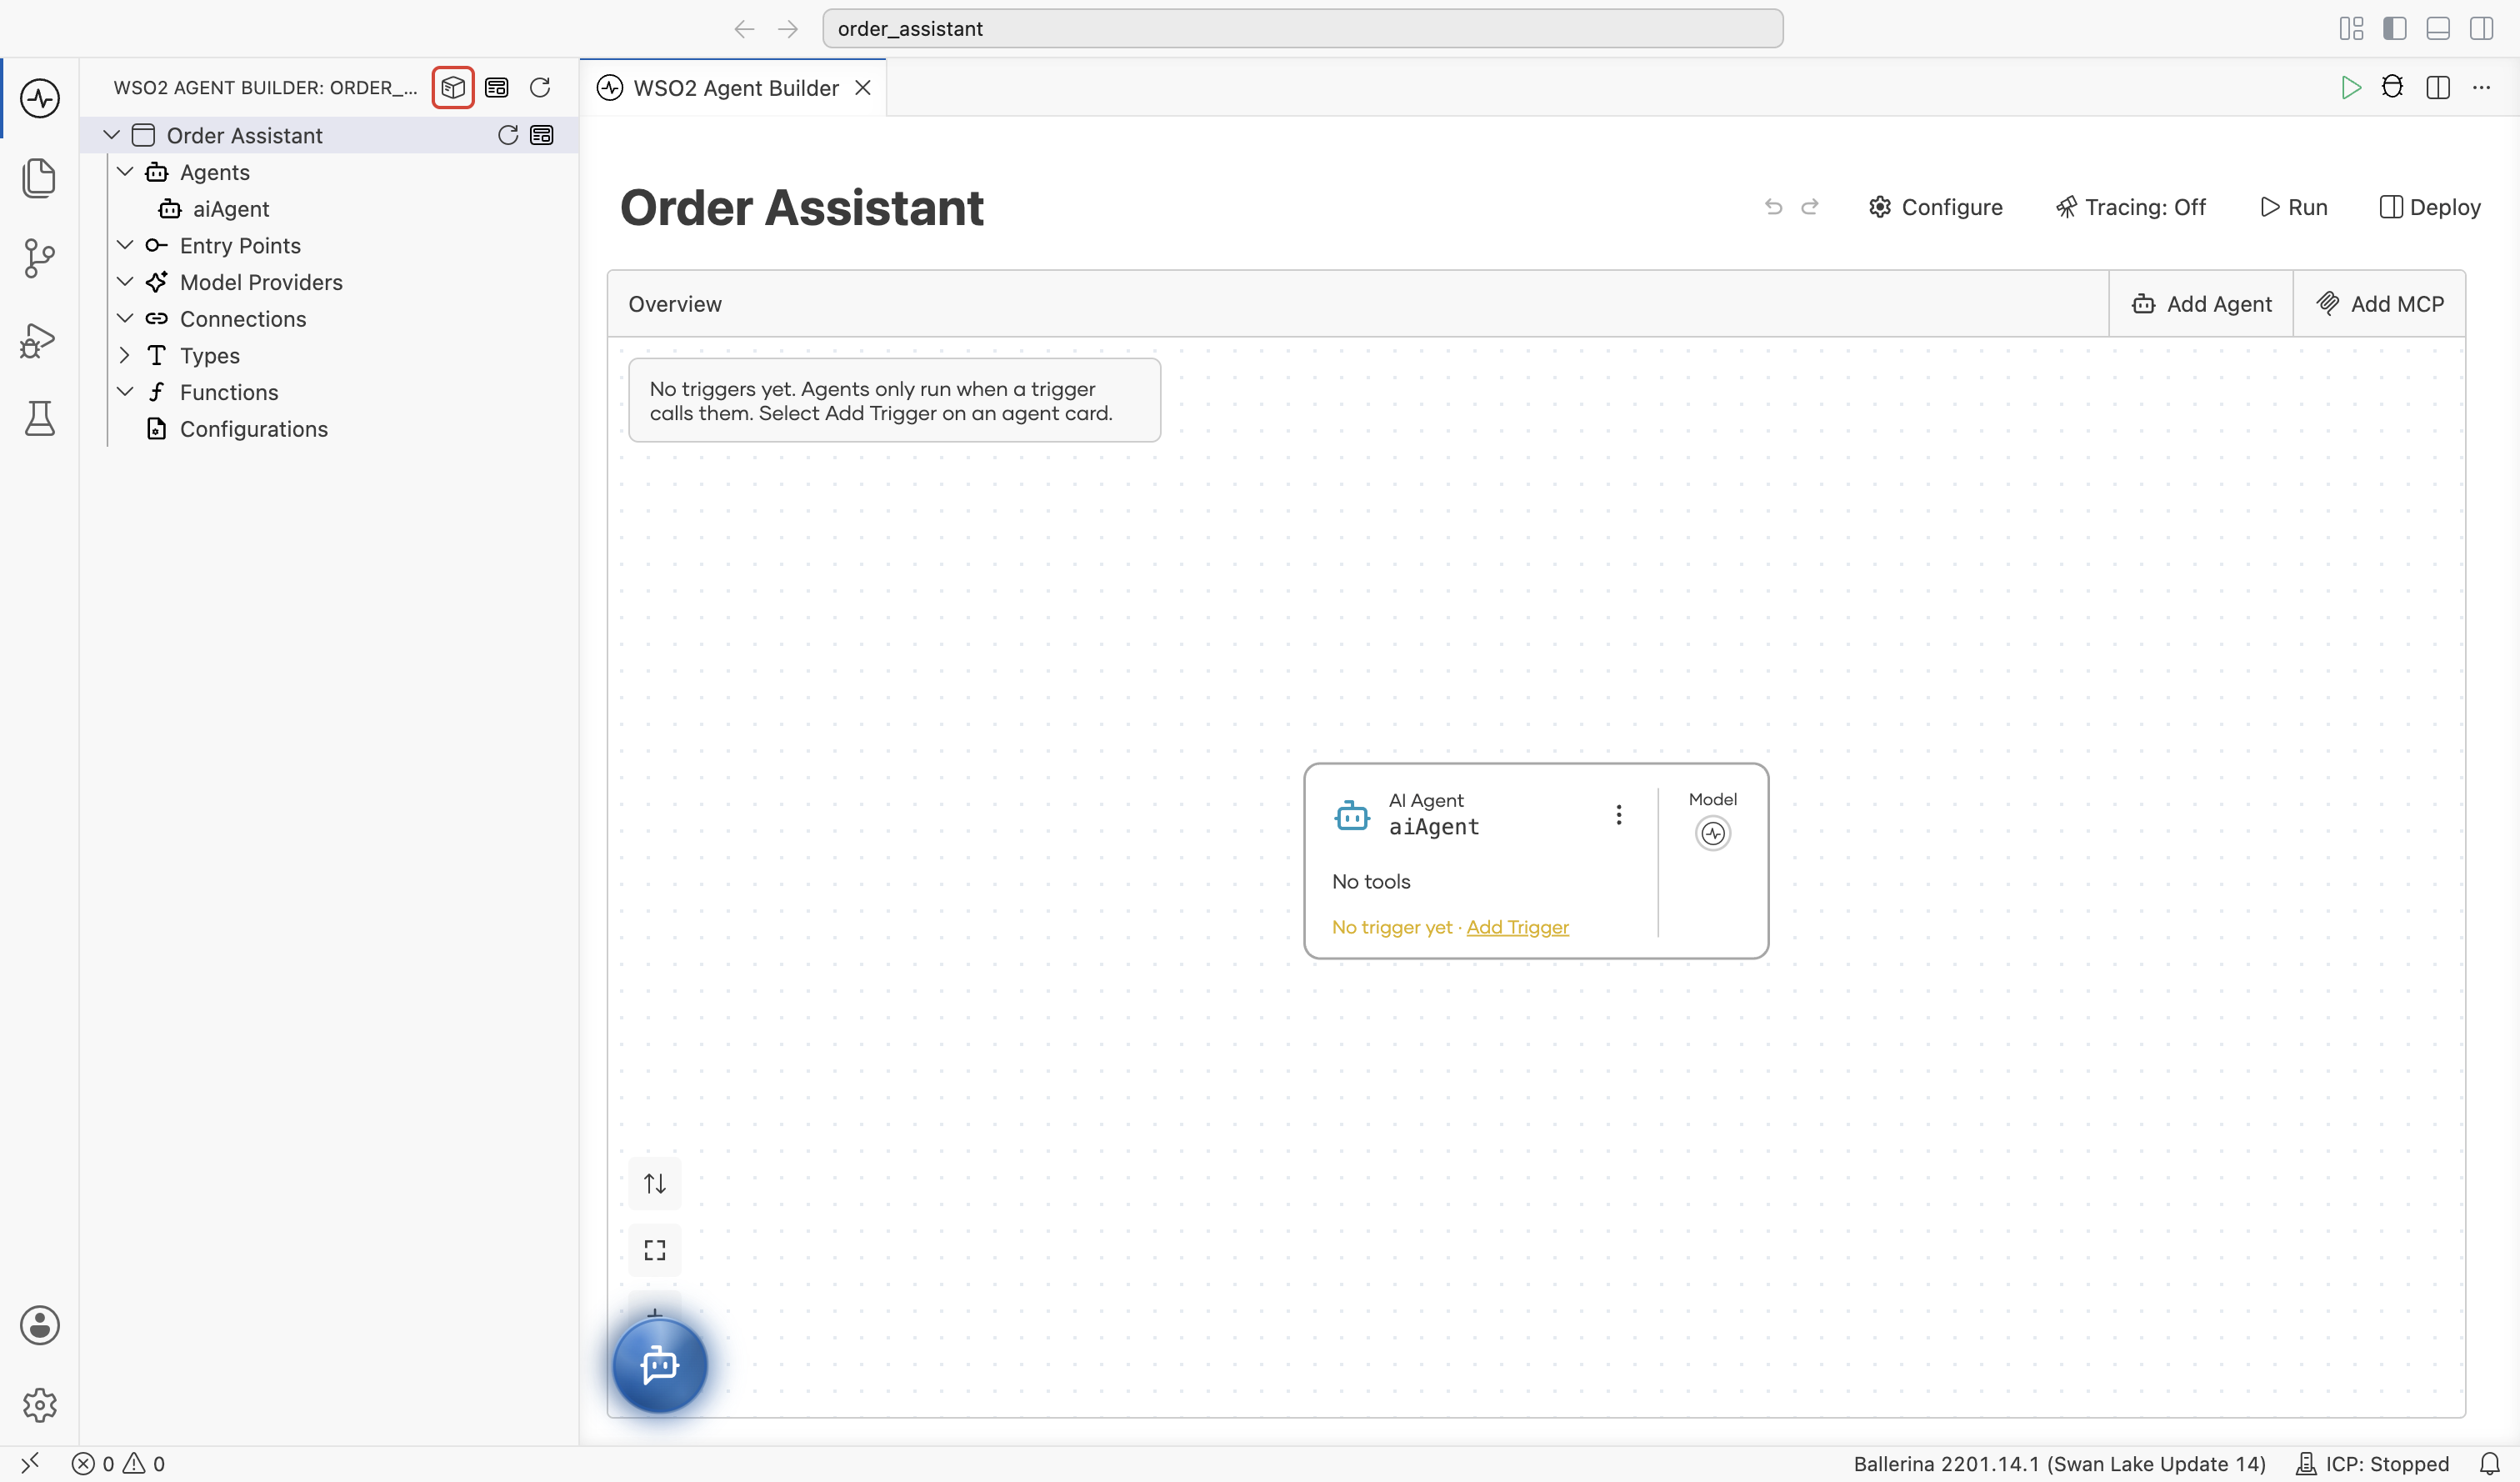
-
In the Convert to Project form, enter the following details:
Field Description Project Name The name of the new project. Your current integration becomes the first member of this project. Project Location The directory where the project folder is created. Click Browse to select a location. Your current integration is moved into this folder. -
Optionally, check the Also add a new agentic integration or library checkbox to add another integration or library to the project at the same time.
-
Click Convert to Project.
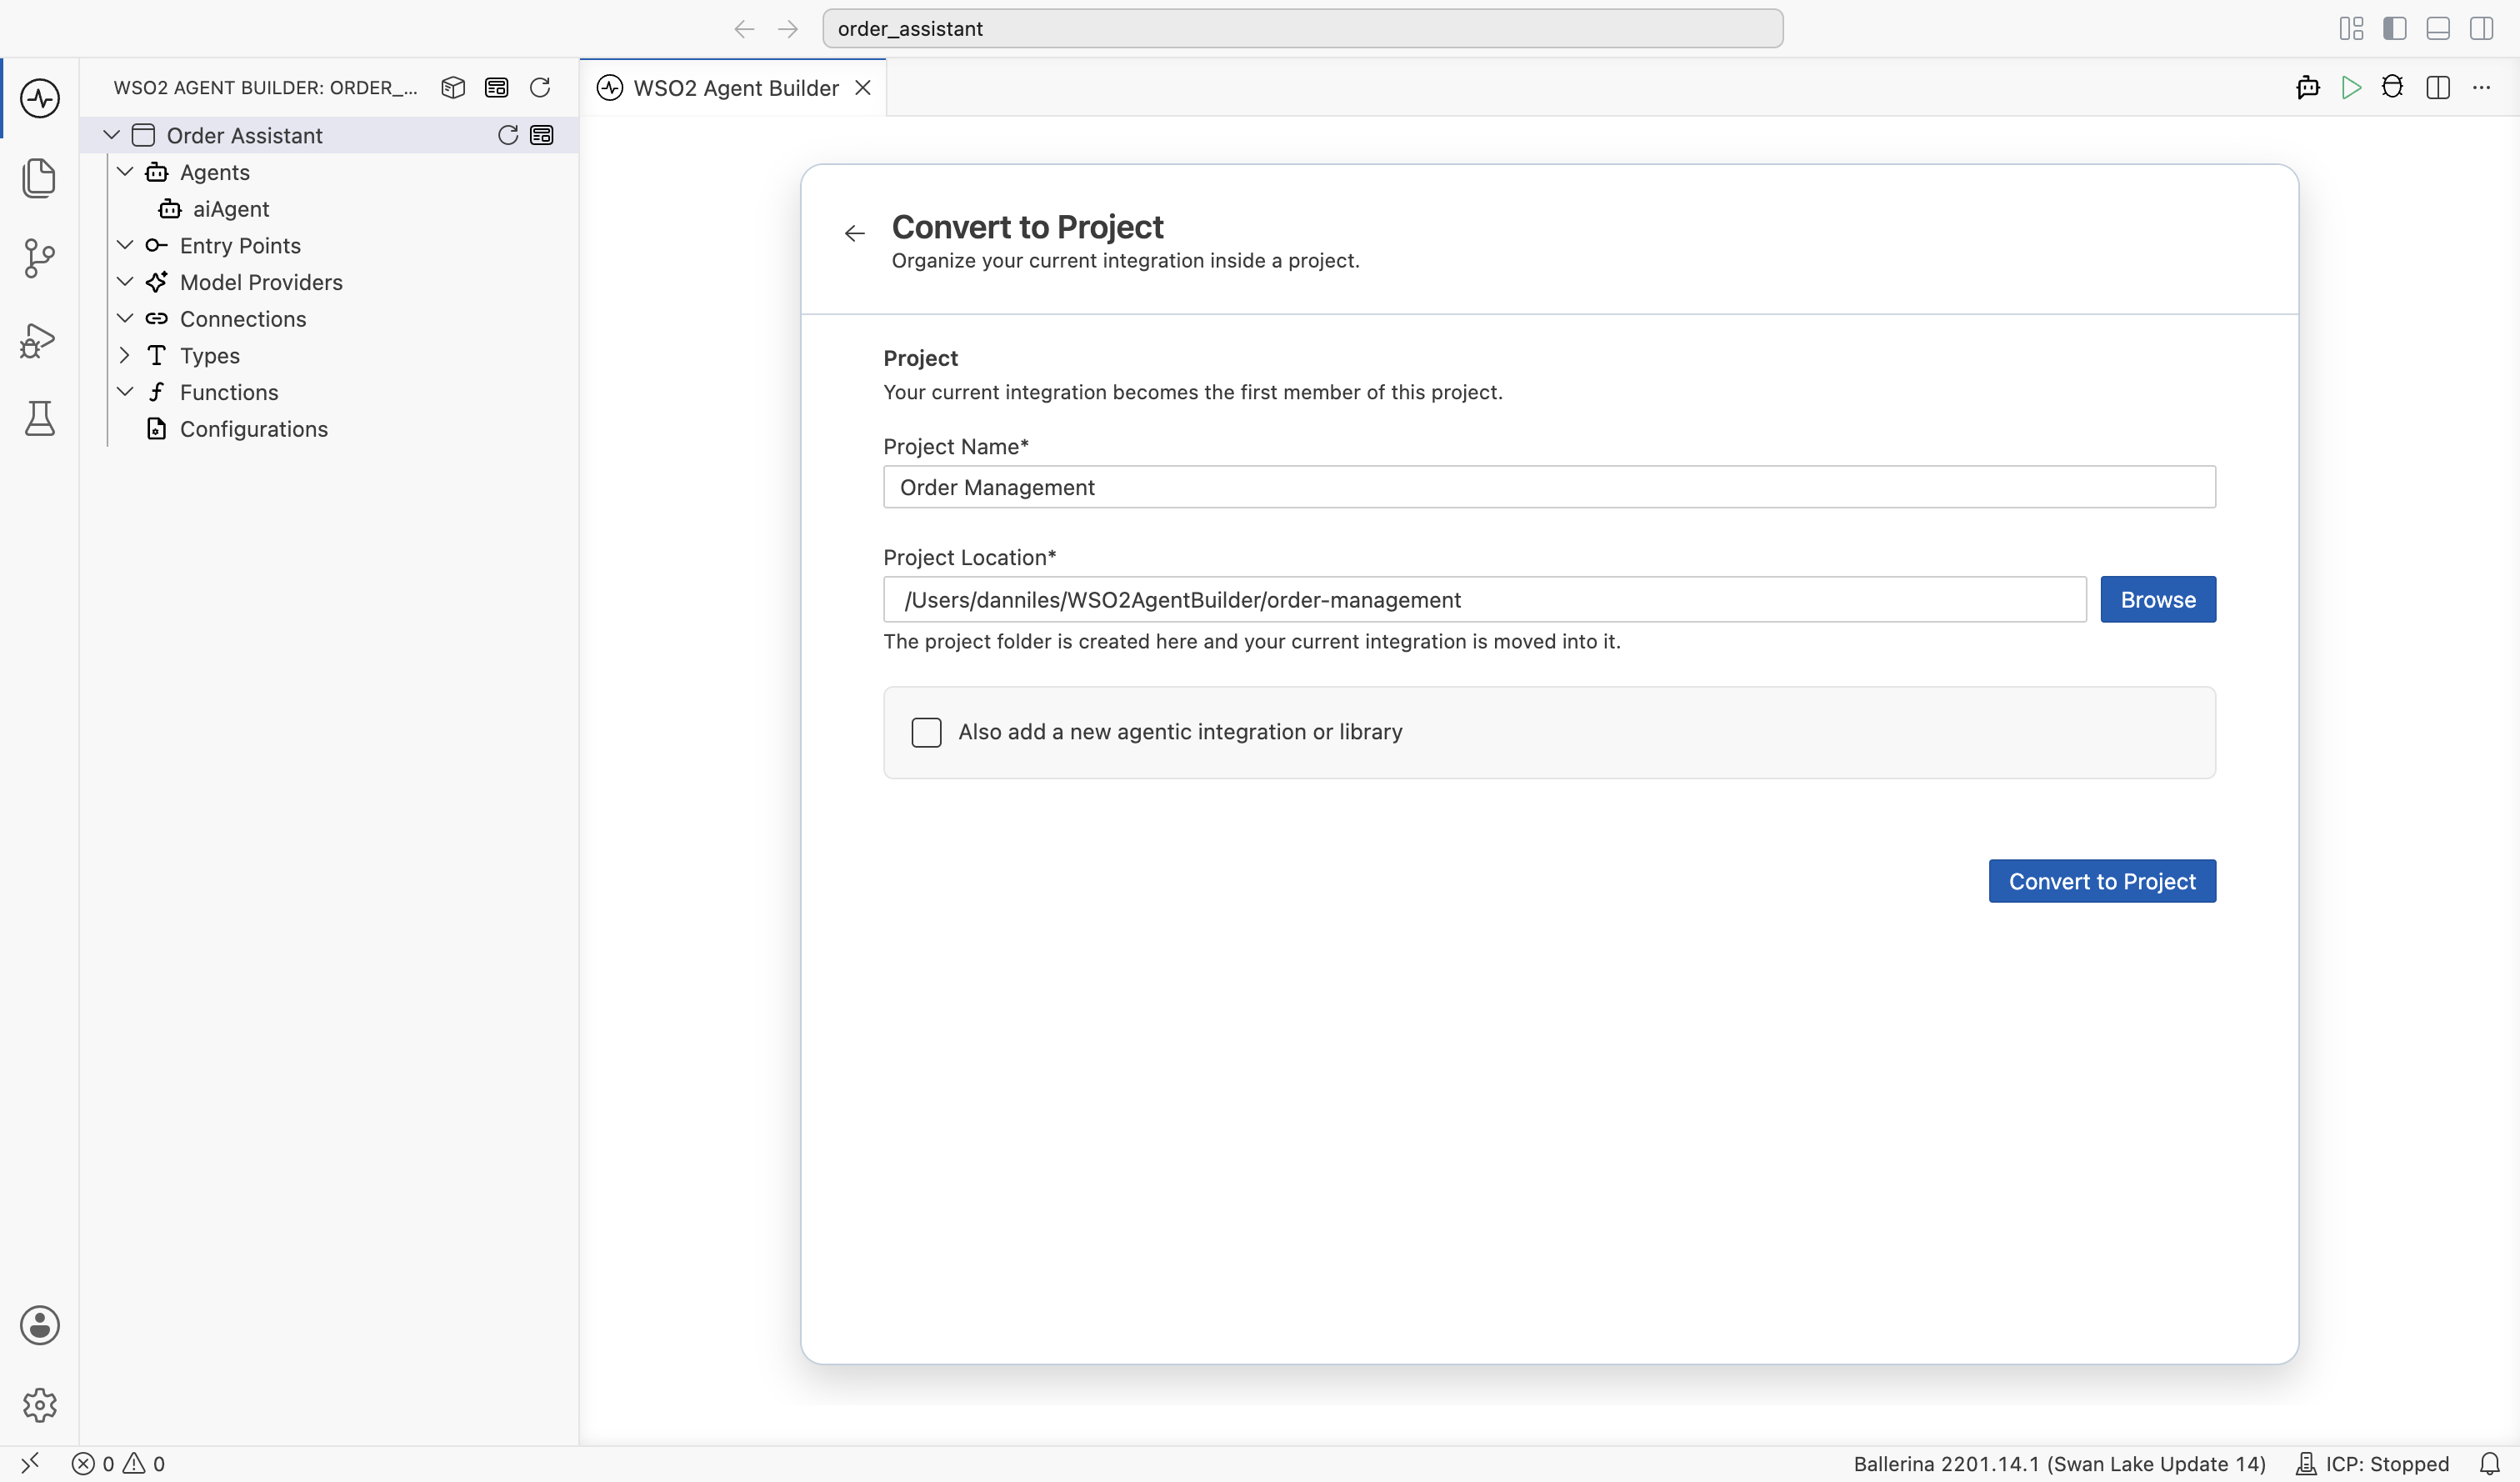
The integration now opens inside the new project. A home icon appears at the top of the view, which takes you to the project view. From there, you can add more agentic integrations and libraries.
What's next
- Project view — Run, edit, and debug your sample project
- Create a project — Start a new project from scratch
- Integration artifacts — Understand the artifact types used in samples