Data Mapper
The Data Mapper is the visual surface you open for any data transformation in WSO2 Agent Builder. It shows the source types on the left, the target type on the right, and the mapping area between them, so you can map fields by creating links or filling expressions instead of writing the conversion function manually. A data mapper is a typed function with one or more inputs and a single output. Every change you make here is reflected in the underlying source.
Create a data mapper
In WSO2 Agent Builder, you create a data mapper from a flow, for example the flow of a resource behind an agent's HTTP trigger.
- In the Flow Canvas, select + where you want the mapping, then select Map Data under Statement.
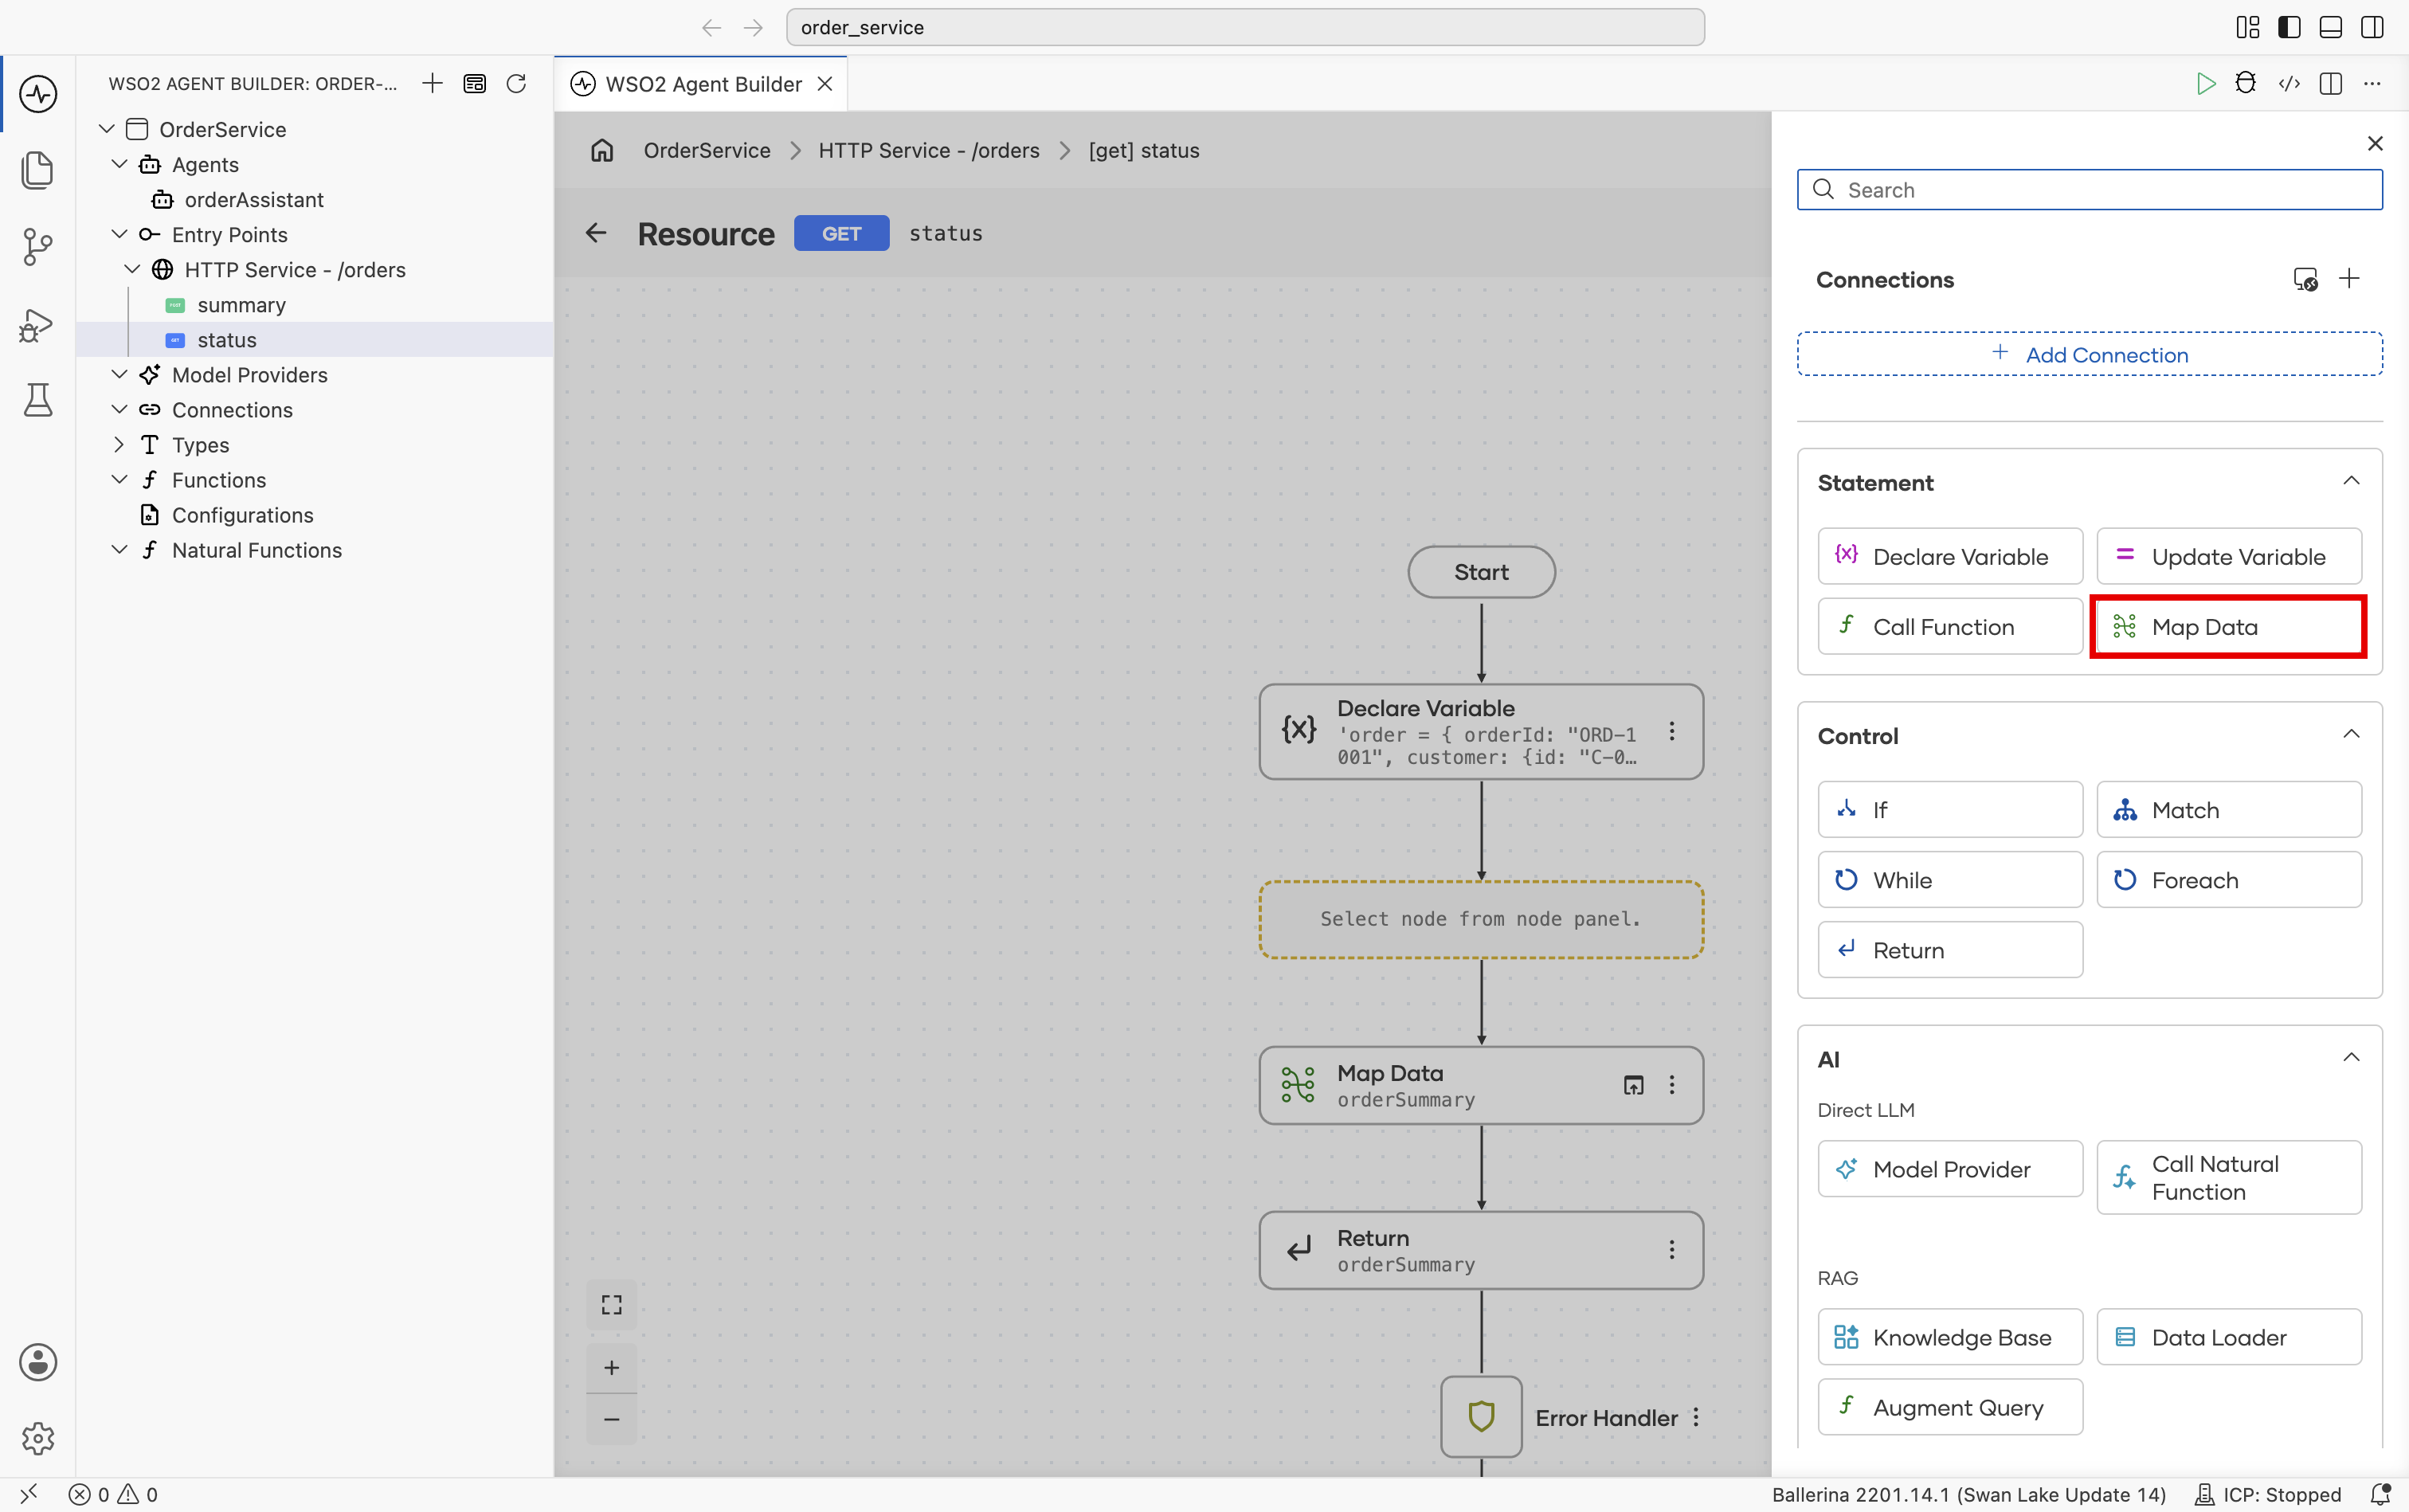
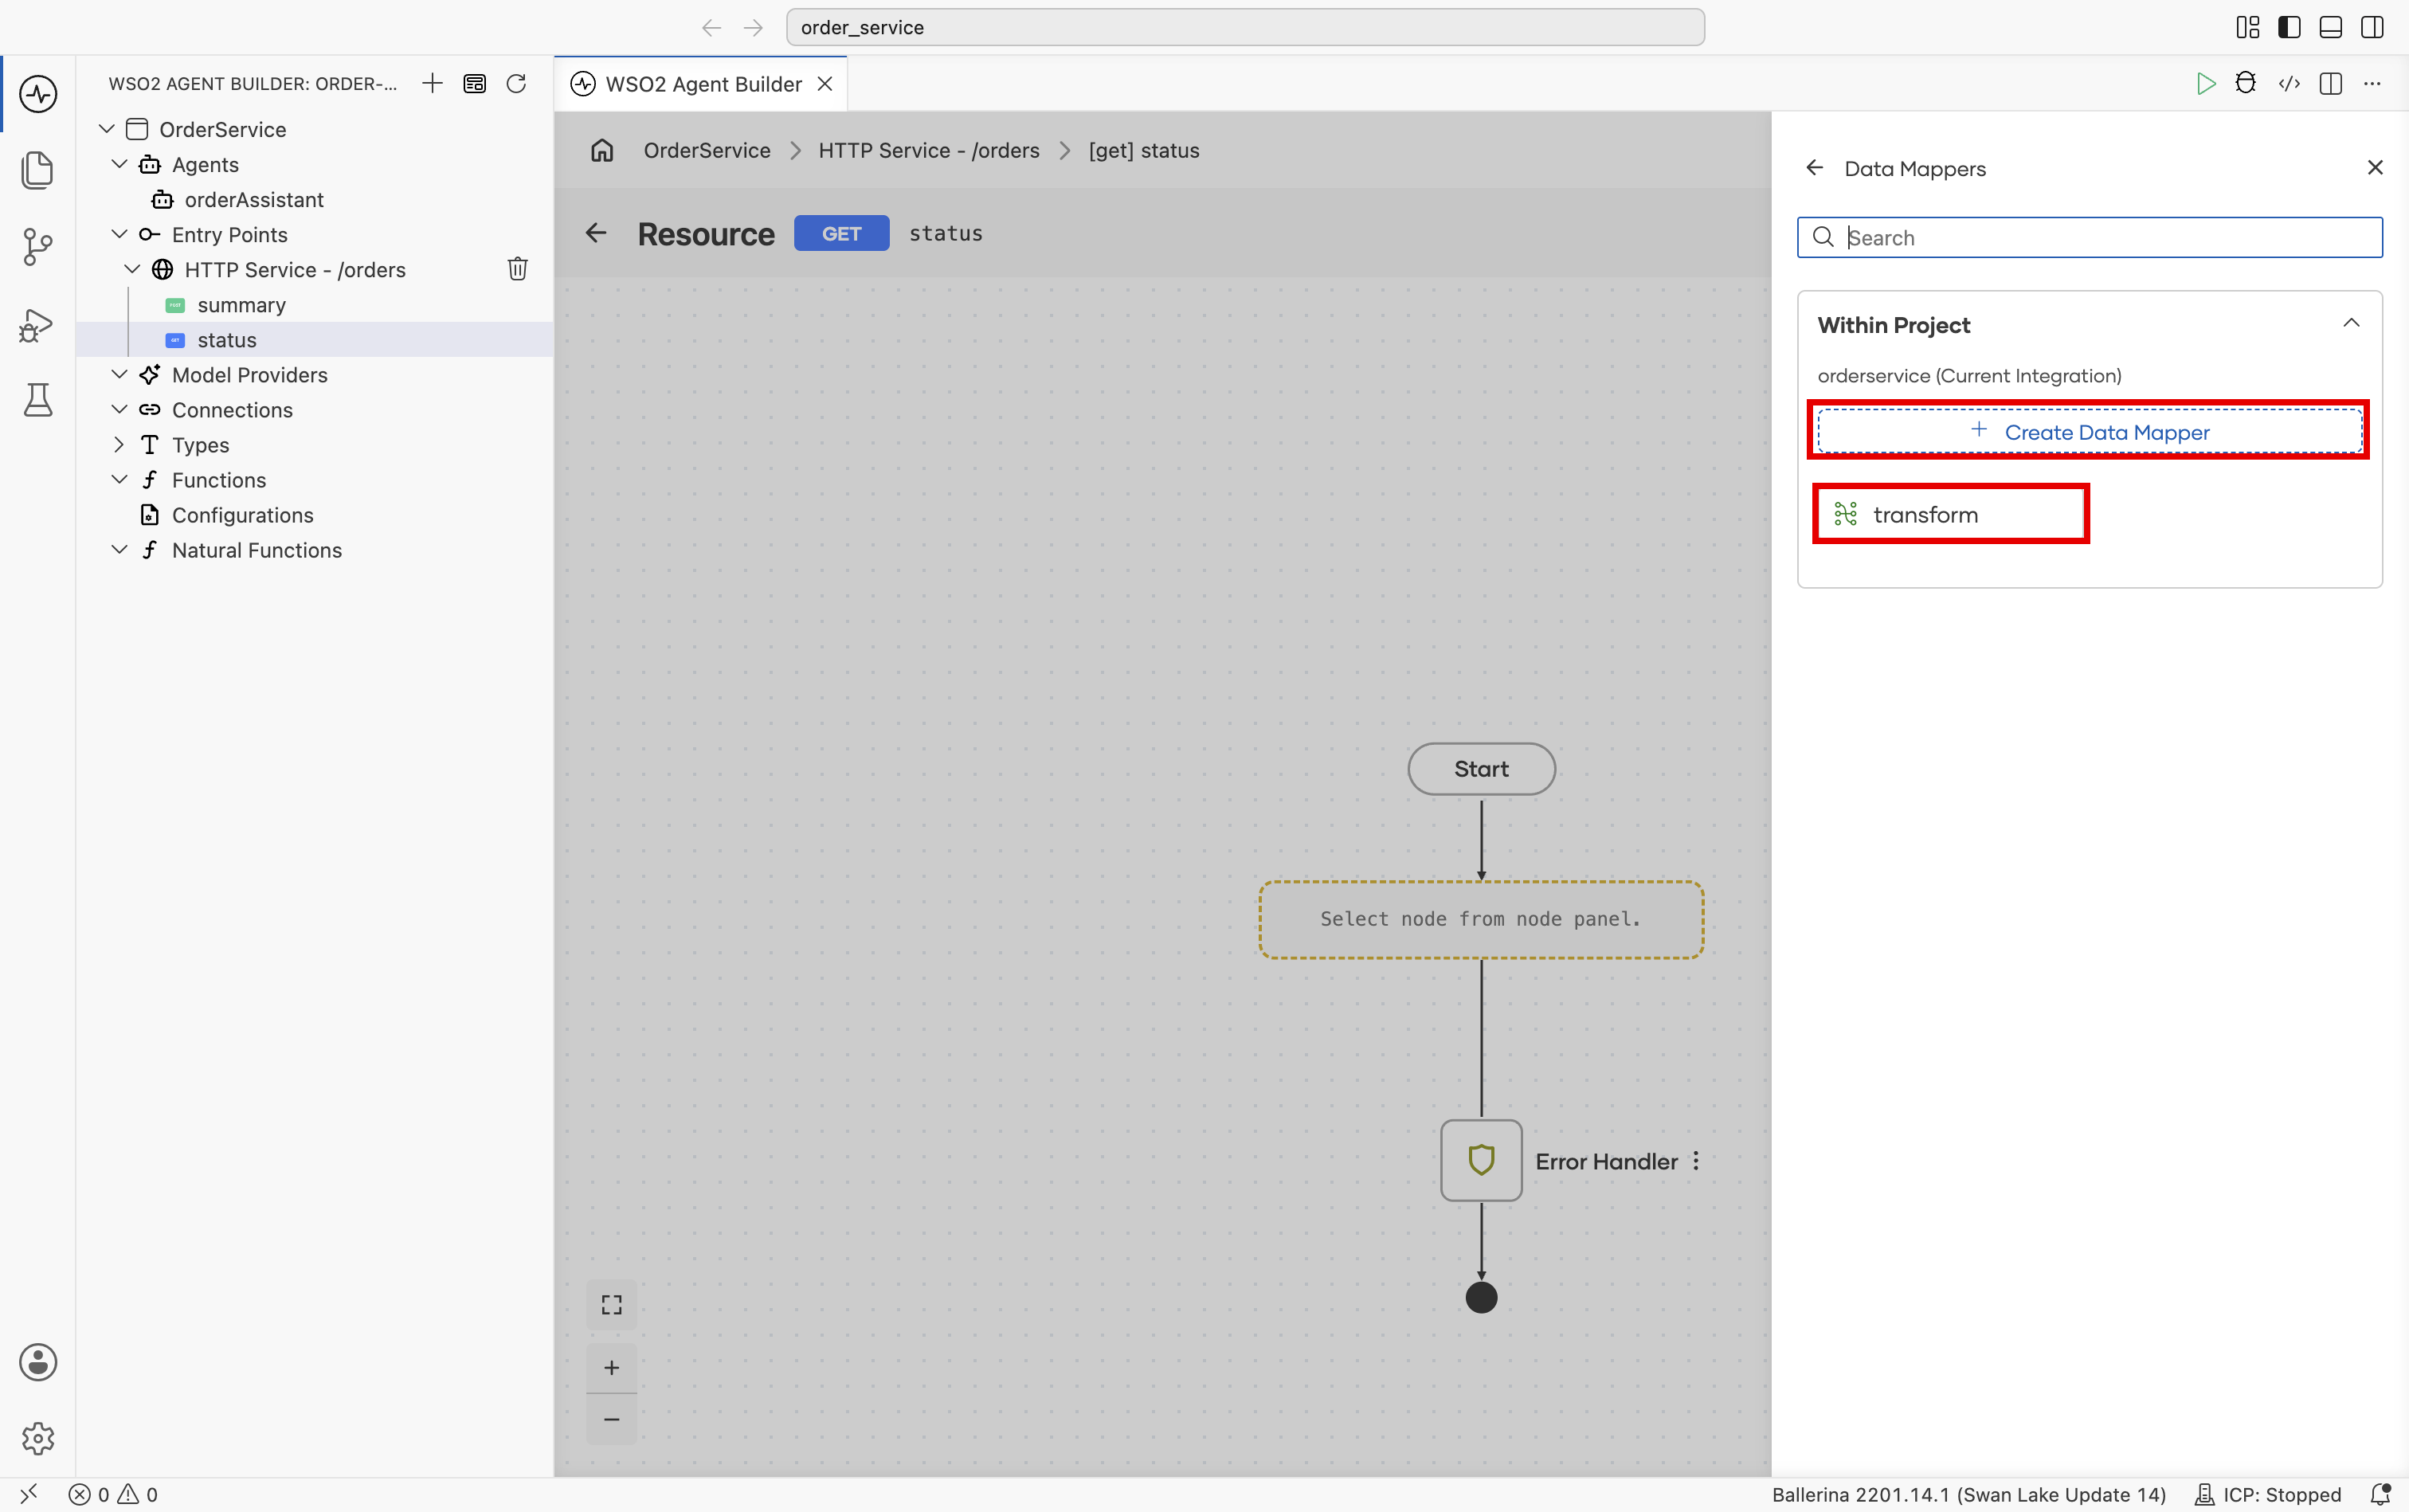
- The Data Mappers panel lists the data mappers already in the integration. Select one to reuse it, or select + Create Data Mapper to create a new one.
- In the Data Mapper Creation panel, set:
- Data Mapper Name, for example
toOrderSummary. - Inputs: select + Add Argument and pass the value to map, for example
'order. Its type is detected from the value. - Output: the type the data mapper returns, for example
OrderSummary. - Result: the variable that holds the mapped value, for example
summary.
- Data Mapper Name, for example
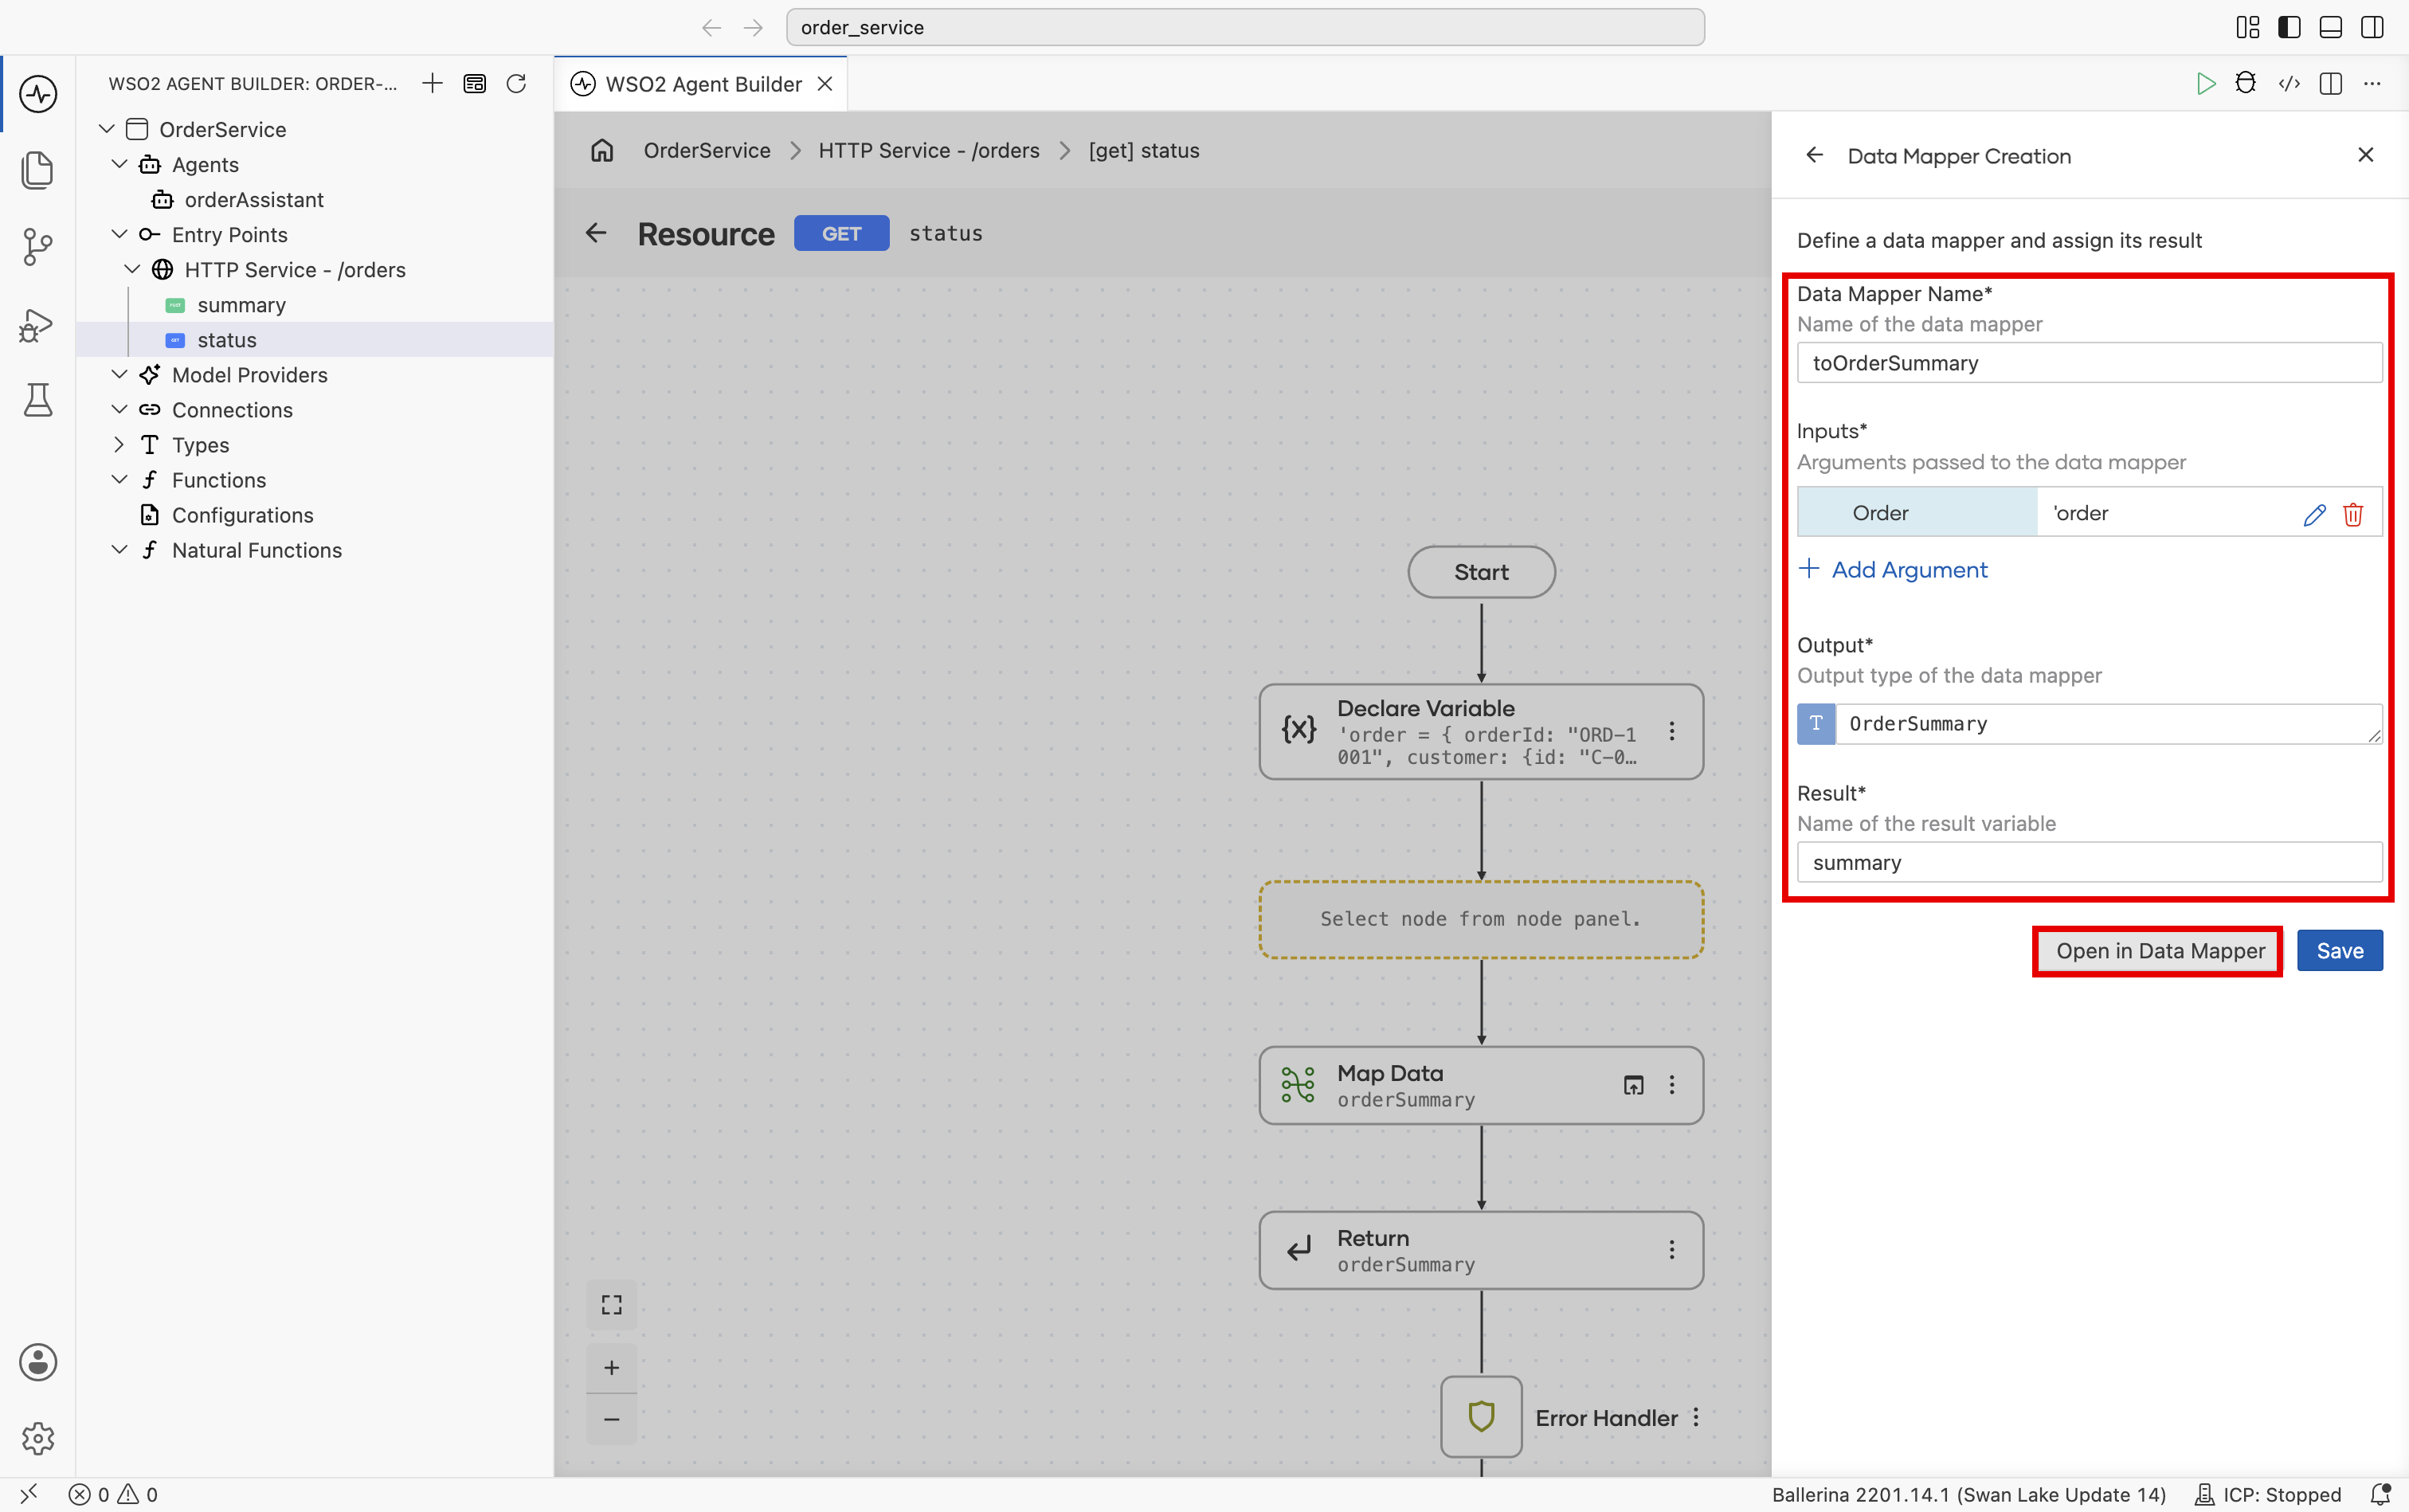
- Select Open in Data Mapper to create the data mapper and start mapping right away, or Save to add the node to the flow and map later.
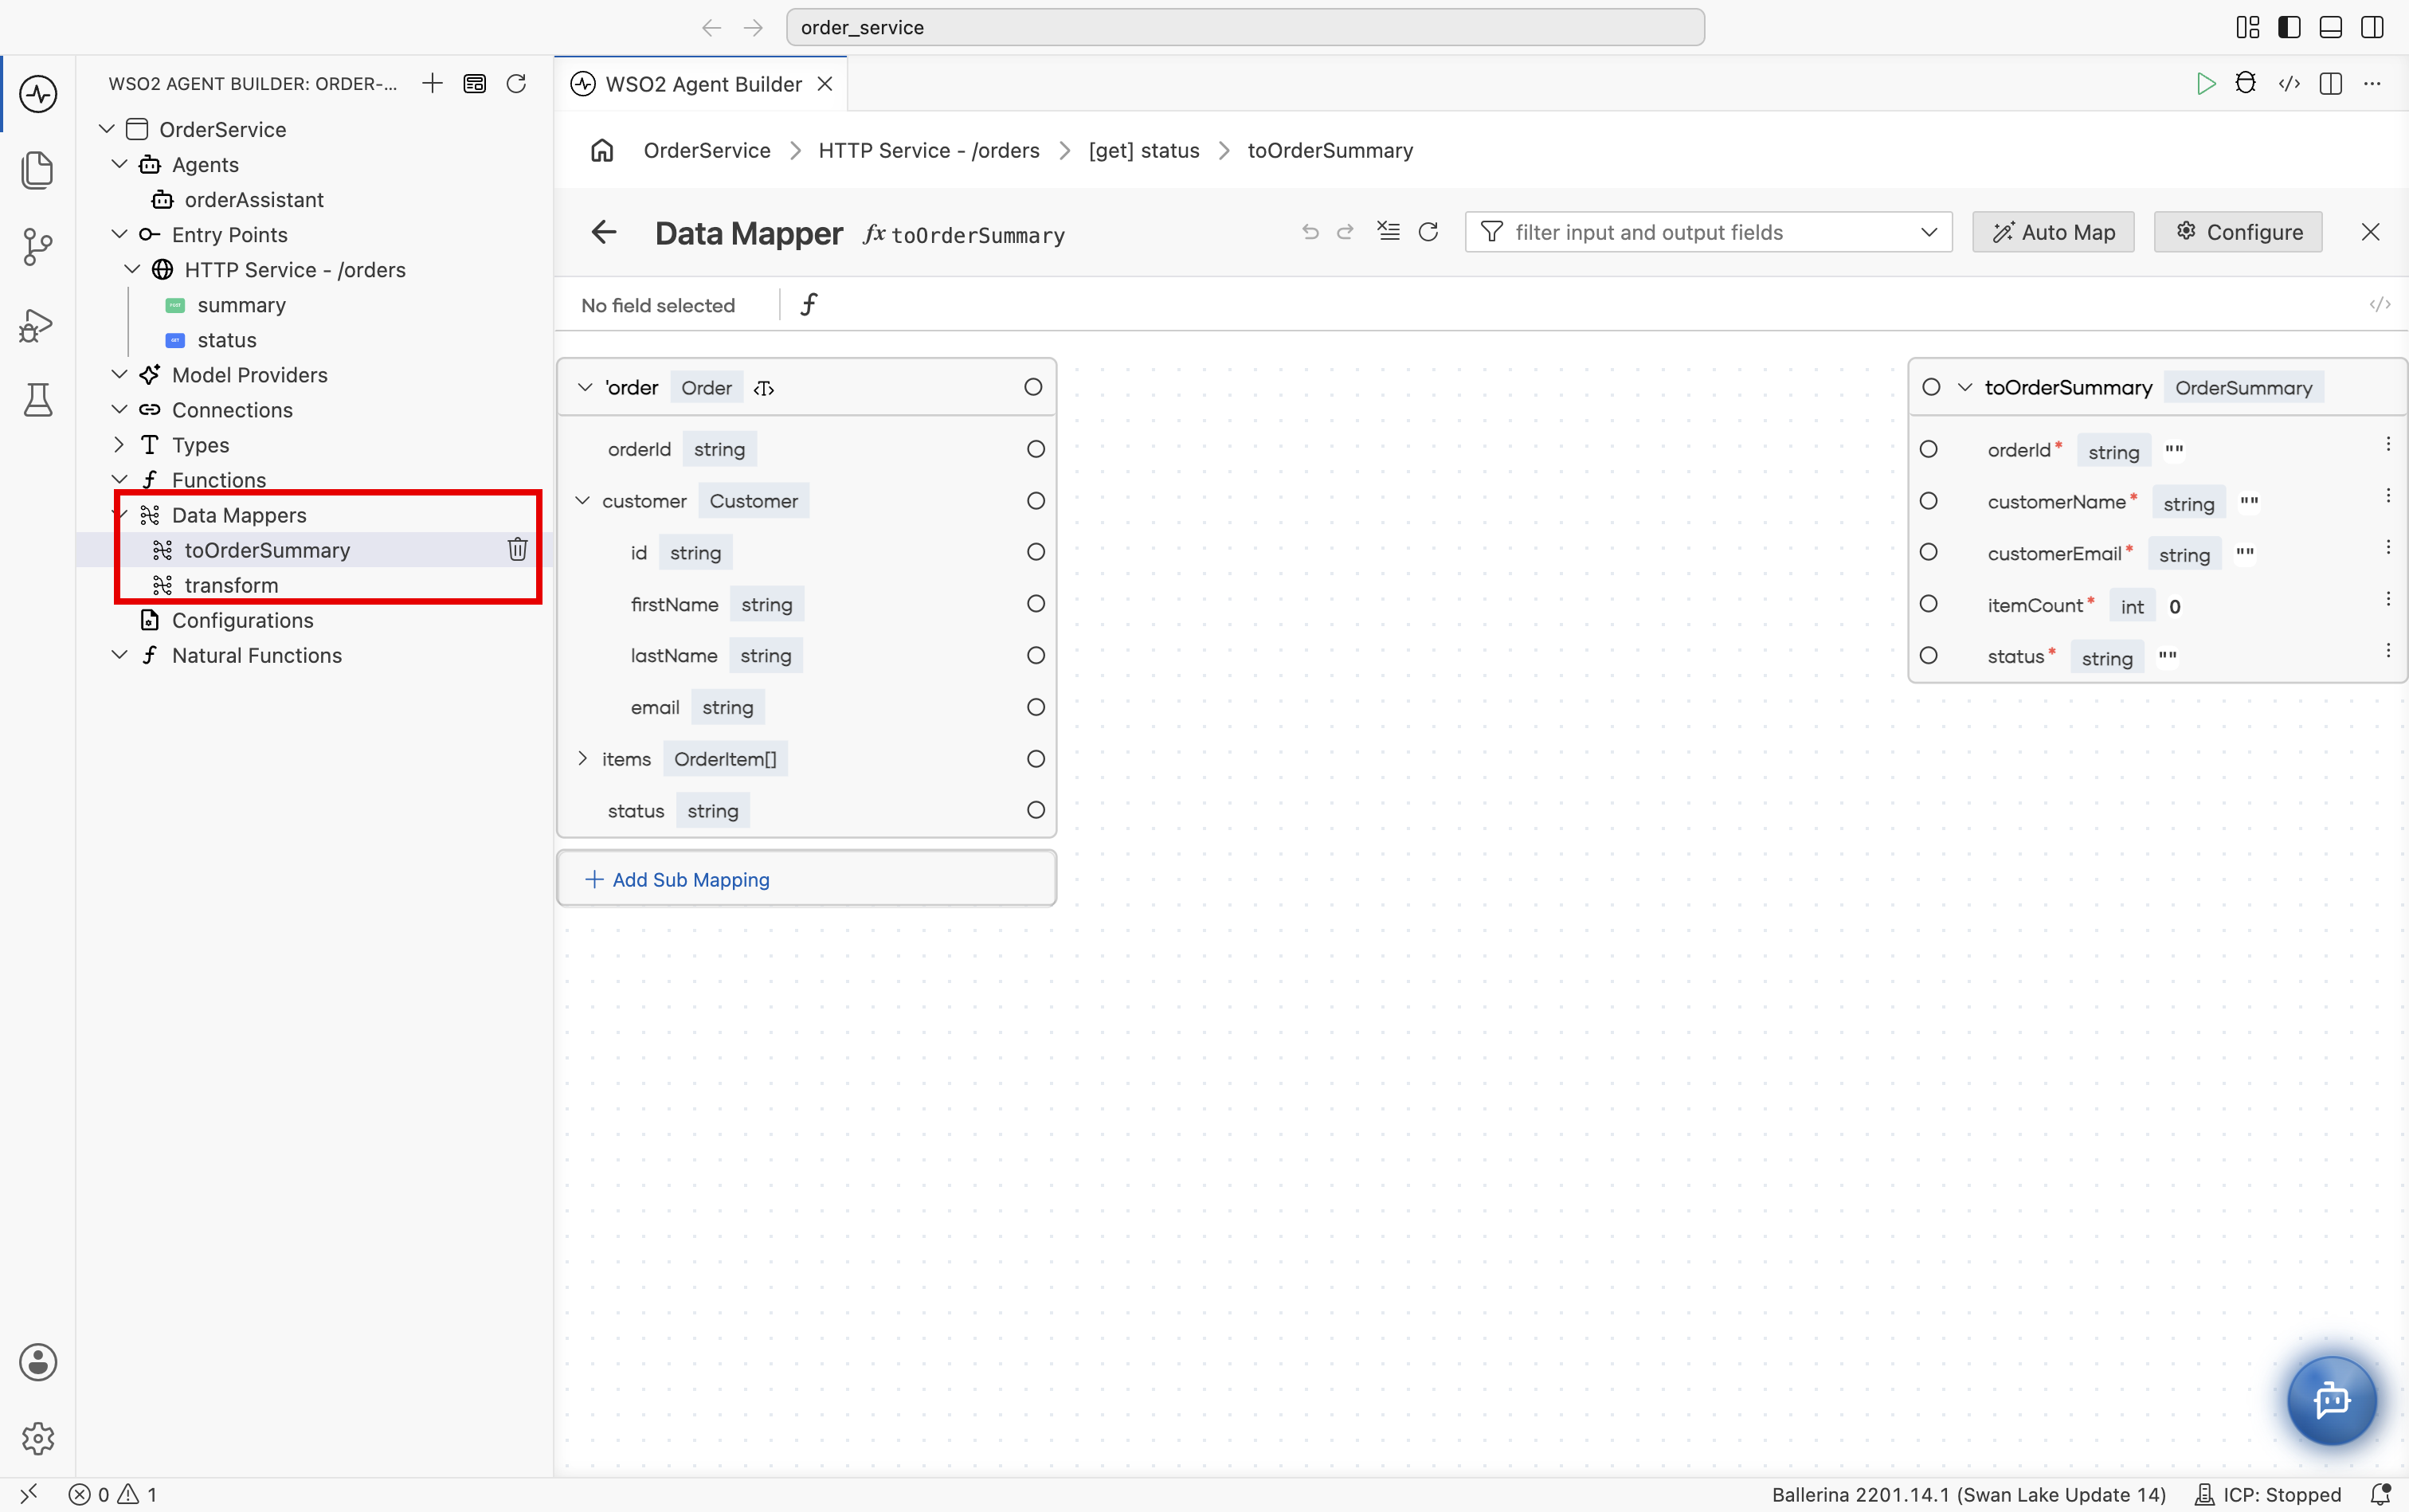
The new data mapper opens with the inputs on the left and the output fields on the right, ready to map. Once a data mapper exists, the project explorer shows a Data Mappers section that lists every data mapper in the integration.
Open the data mapper
- Select a data mapper under Data Mappers in the project explorer.
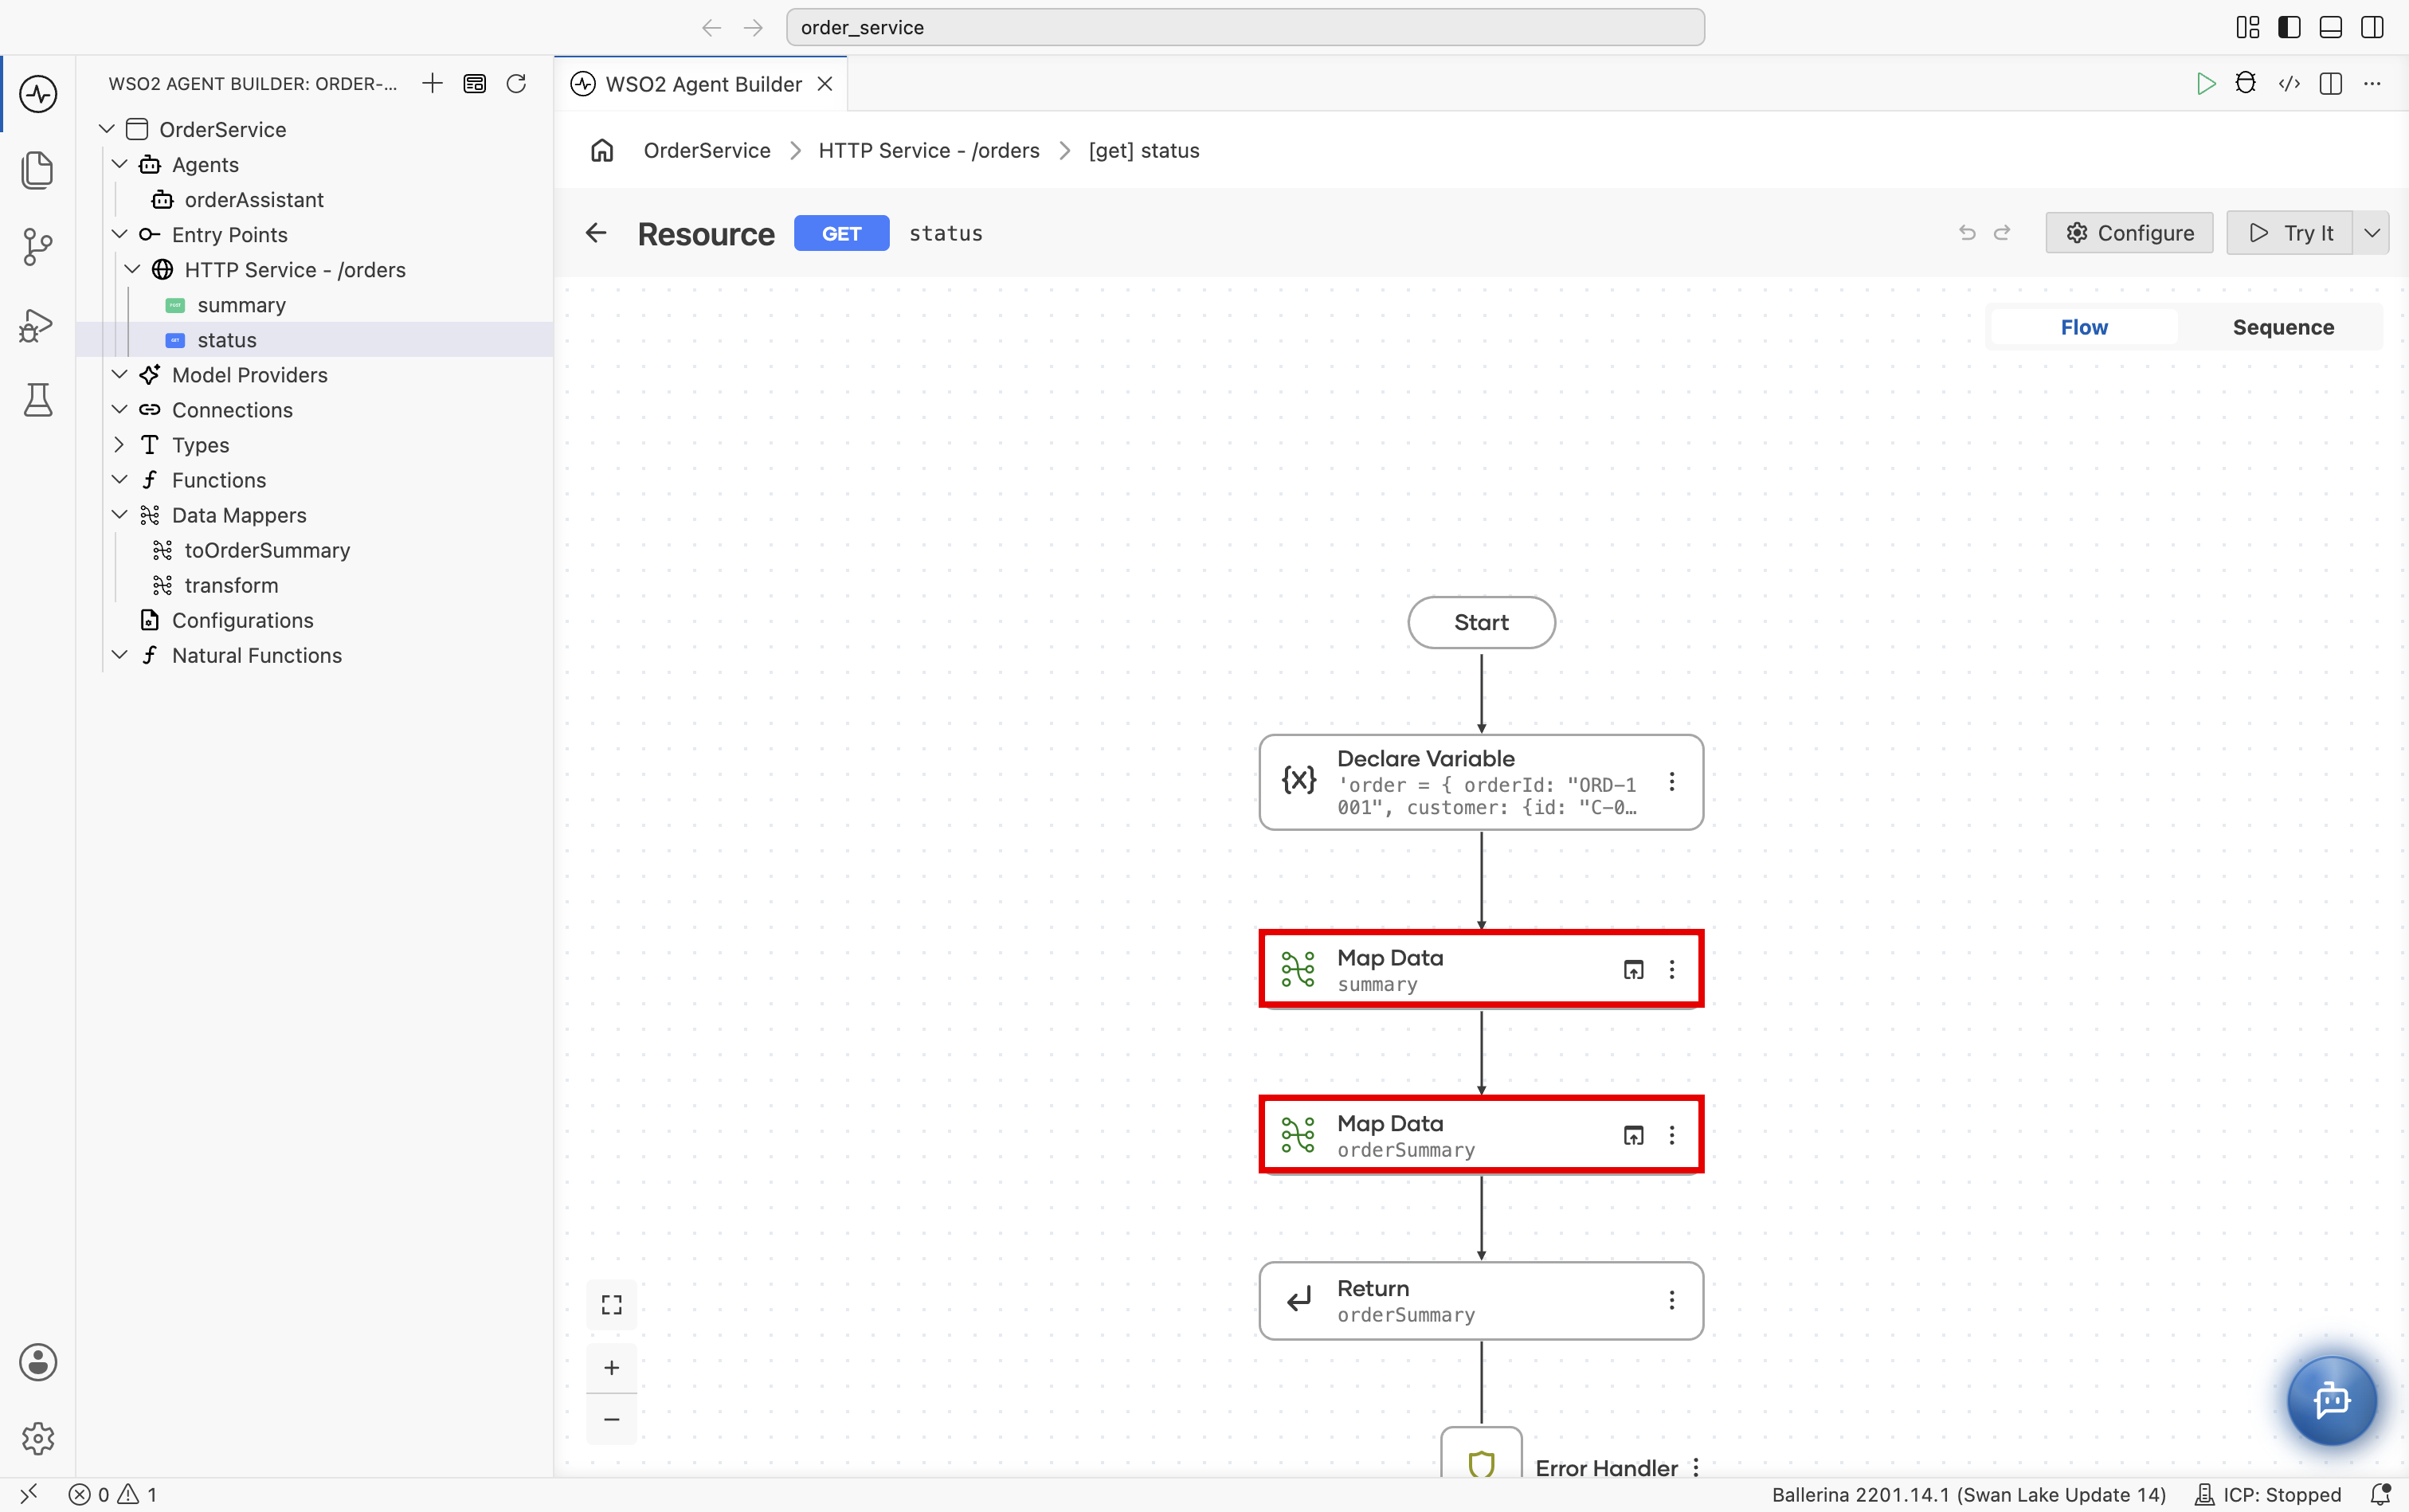
- In a flow, select the view icon on a Map Data node, or select ⋮ → View on the node.
Header
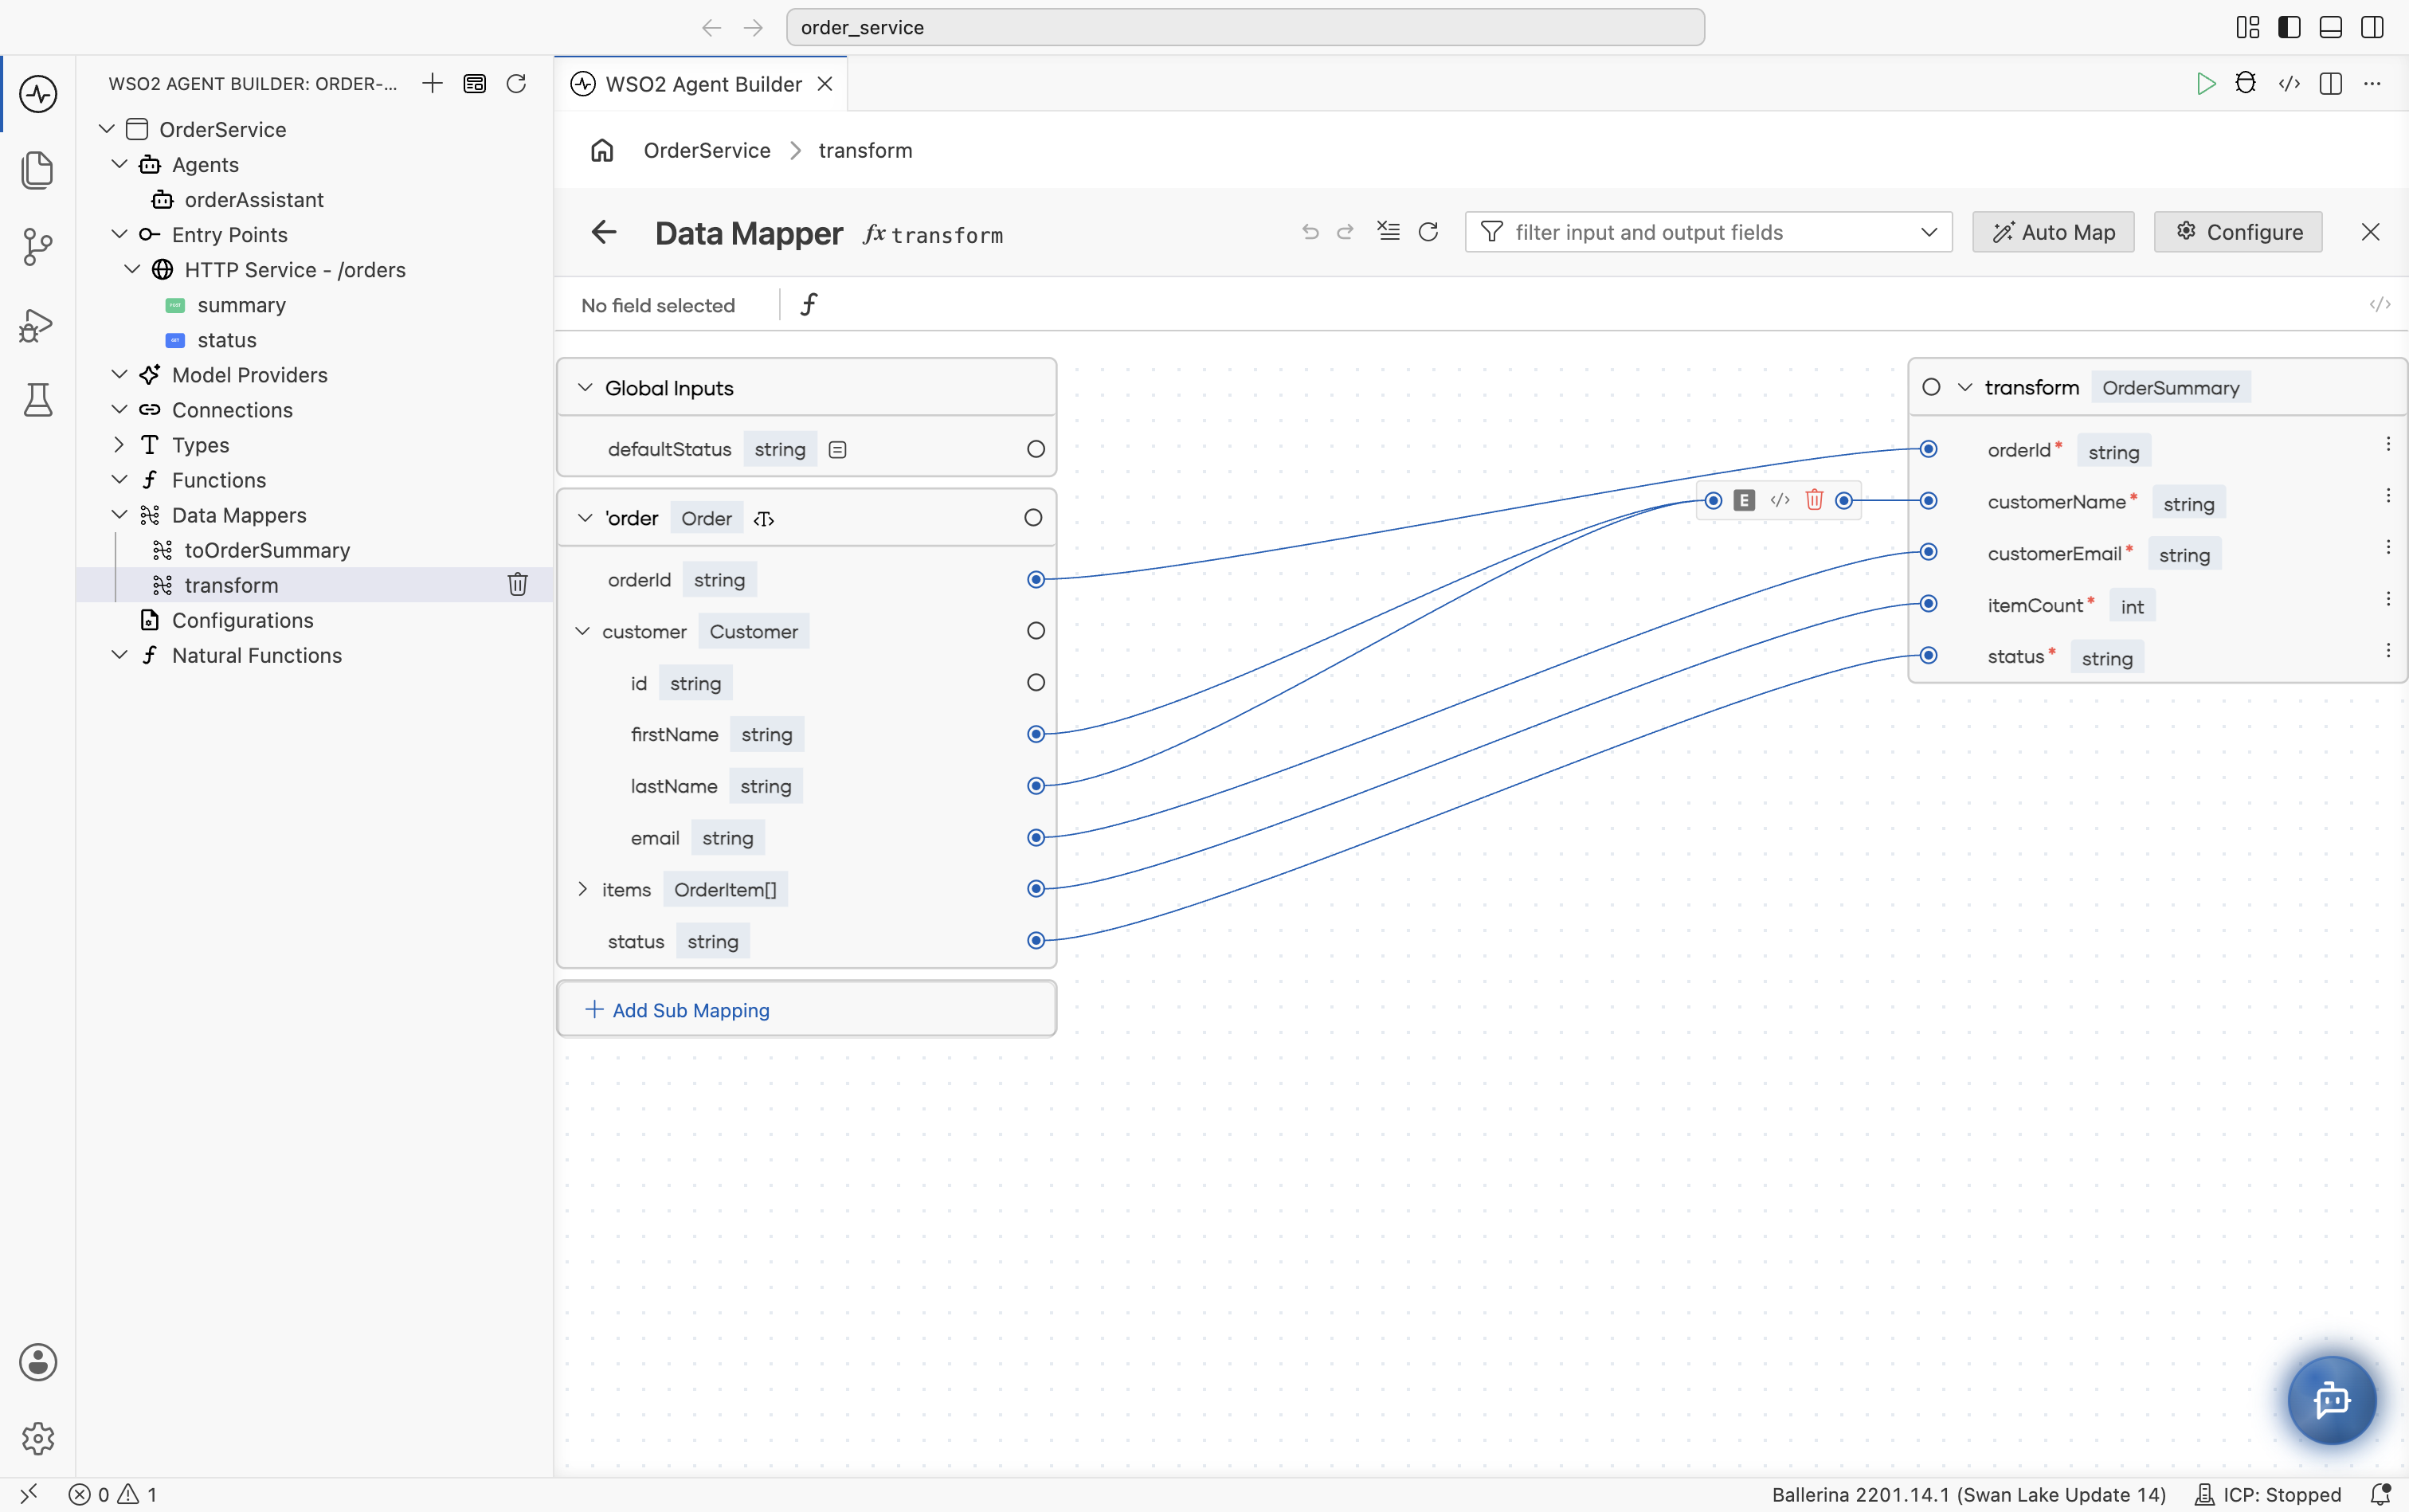
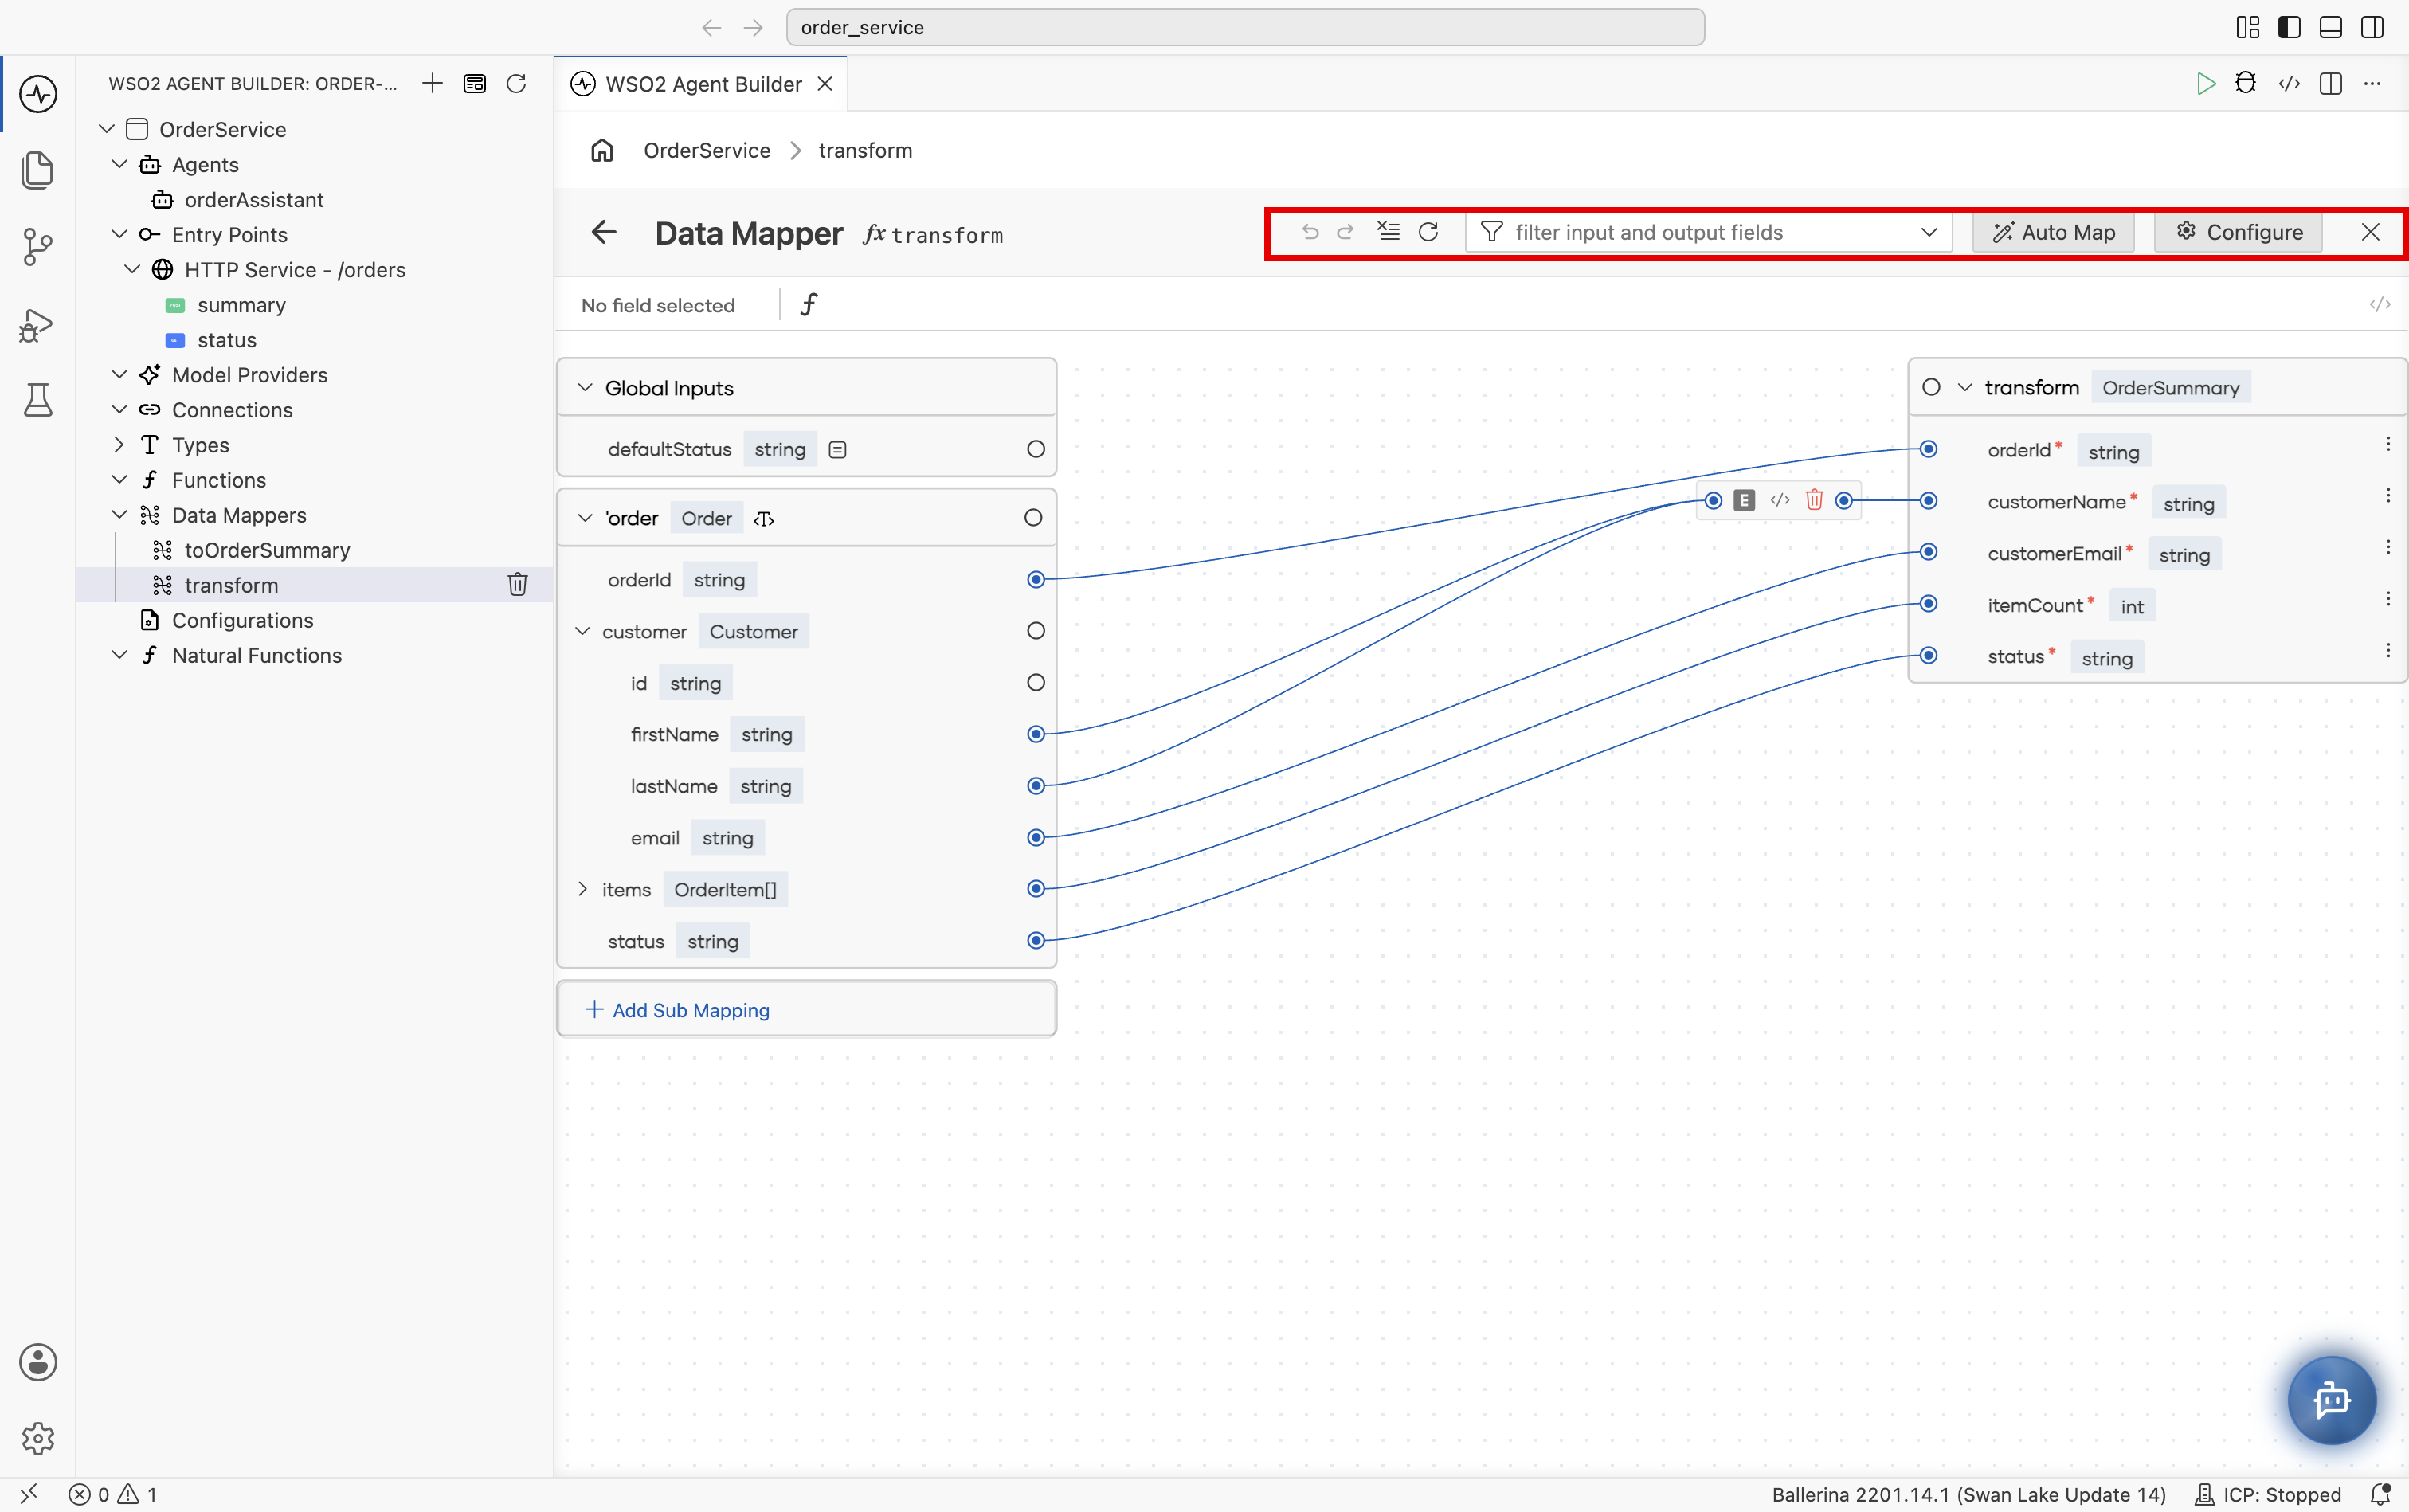
The header runs along the top of the data mapper and combines the breadcrumb, the data mapper title, and the high-level actions.
| Control | Description |
|---|---|
| Breadcrumb | Shows the path from the parent artifact (for example, OrderService > HTTP Service - /orders > [get] status > transform). Select a segment to return to it. |
| Back | Returns to the previous view. |
| Title | Displays the fx icon followed by the data mapper name (for example, transform). |
| Undo / Redo | Reverses or reapplies recent mapping changes. |
| Clear all | Deletes all mappings. |
| Refresh | Reloads the data mapper to pick up changes made to the underlying types. |
| Filter input and output fields | Filters fields whose names match the search term, useful for large records. |
| Auto Map | Runs the AI-based automatic mapping action described below. |
| Configure | Opens the data mapper's configuration. Use it to rename the data mapper, toggle Public, or change its inputs and output. |
| Close | Closes the data mapper and returns to the previous view. |
The header controls are highlighted below.
Expression bar
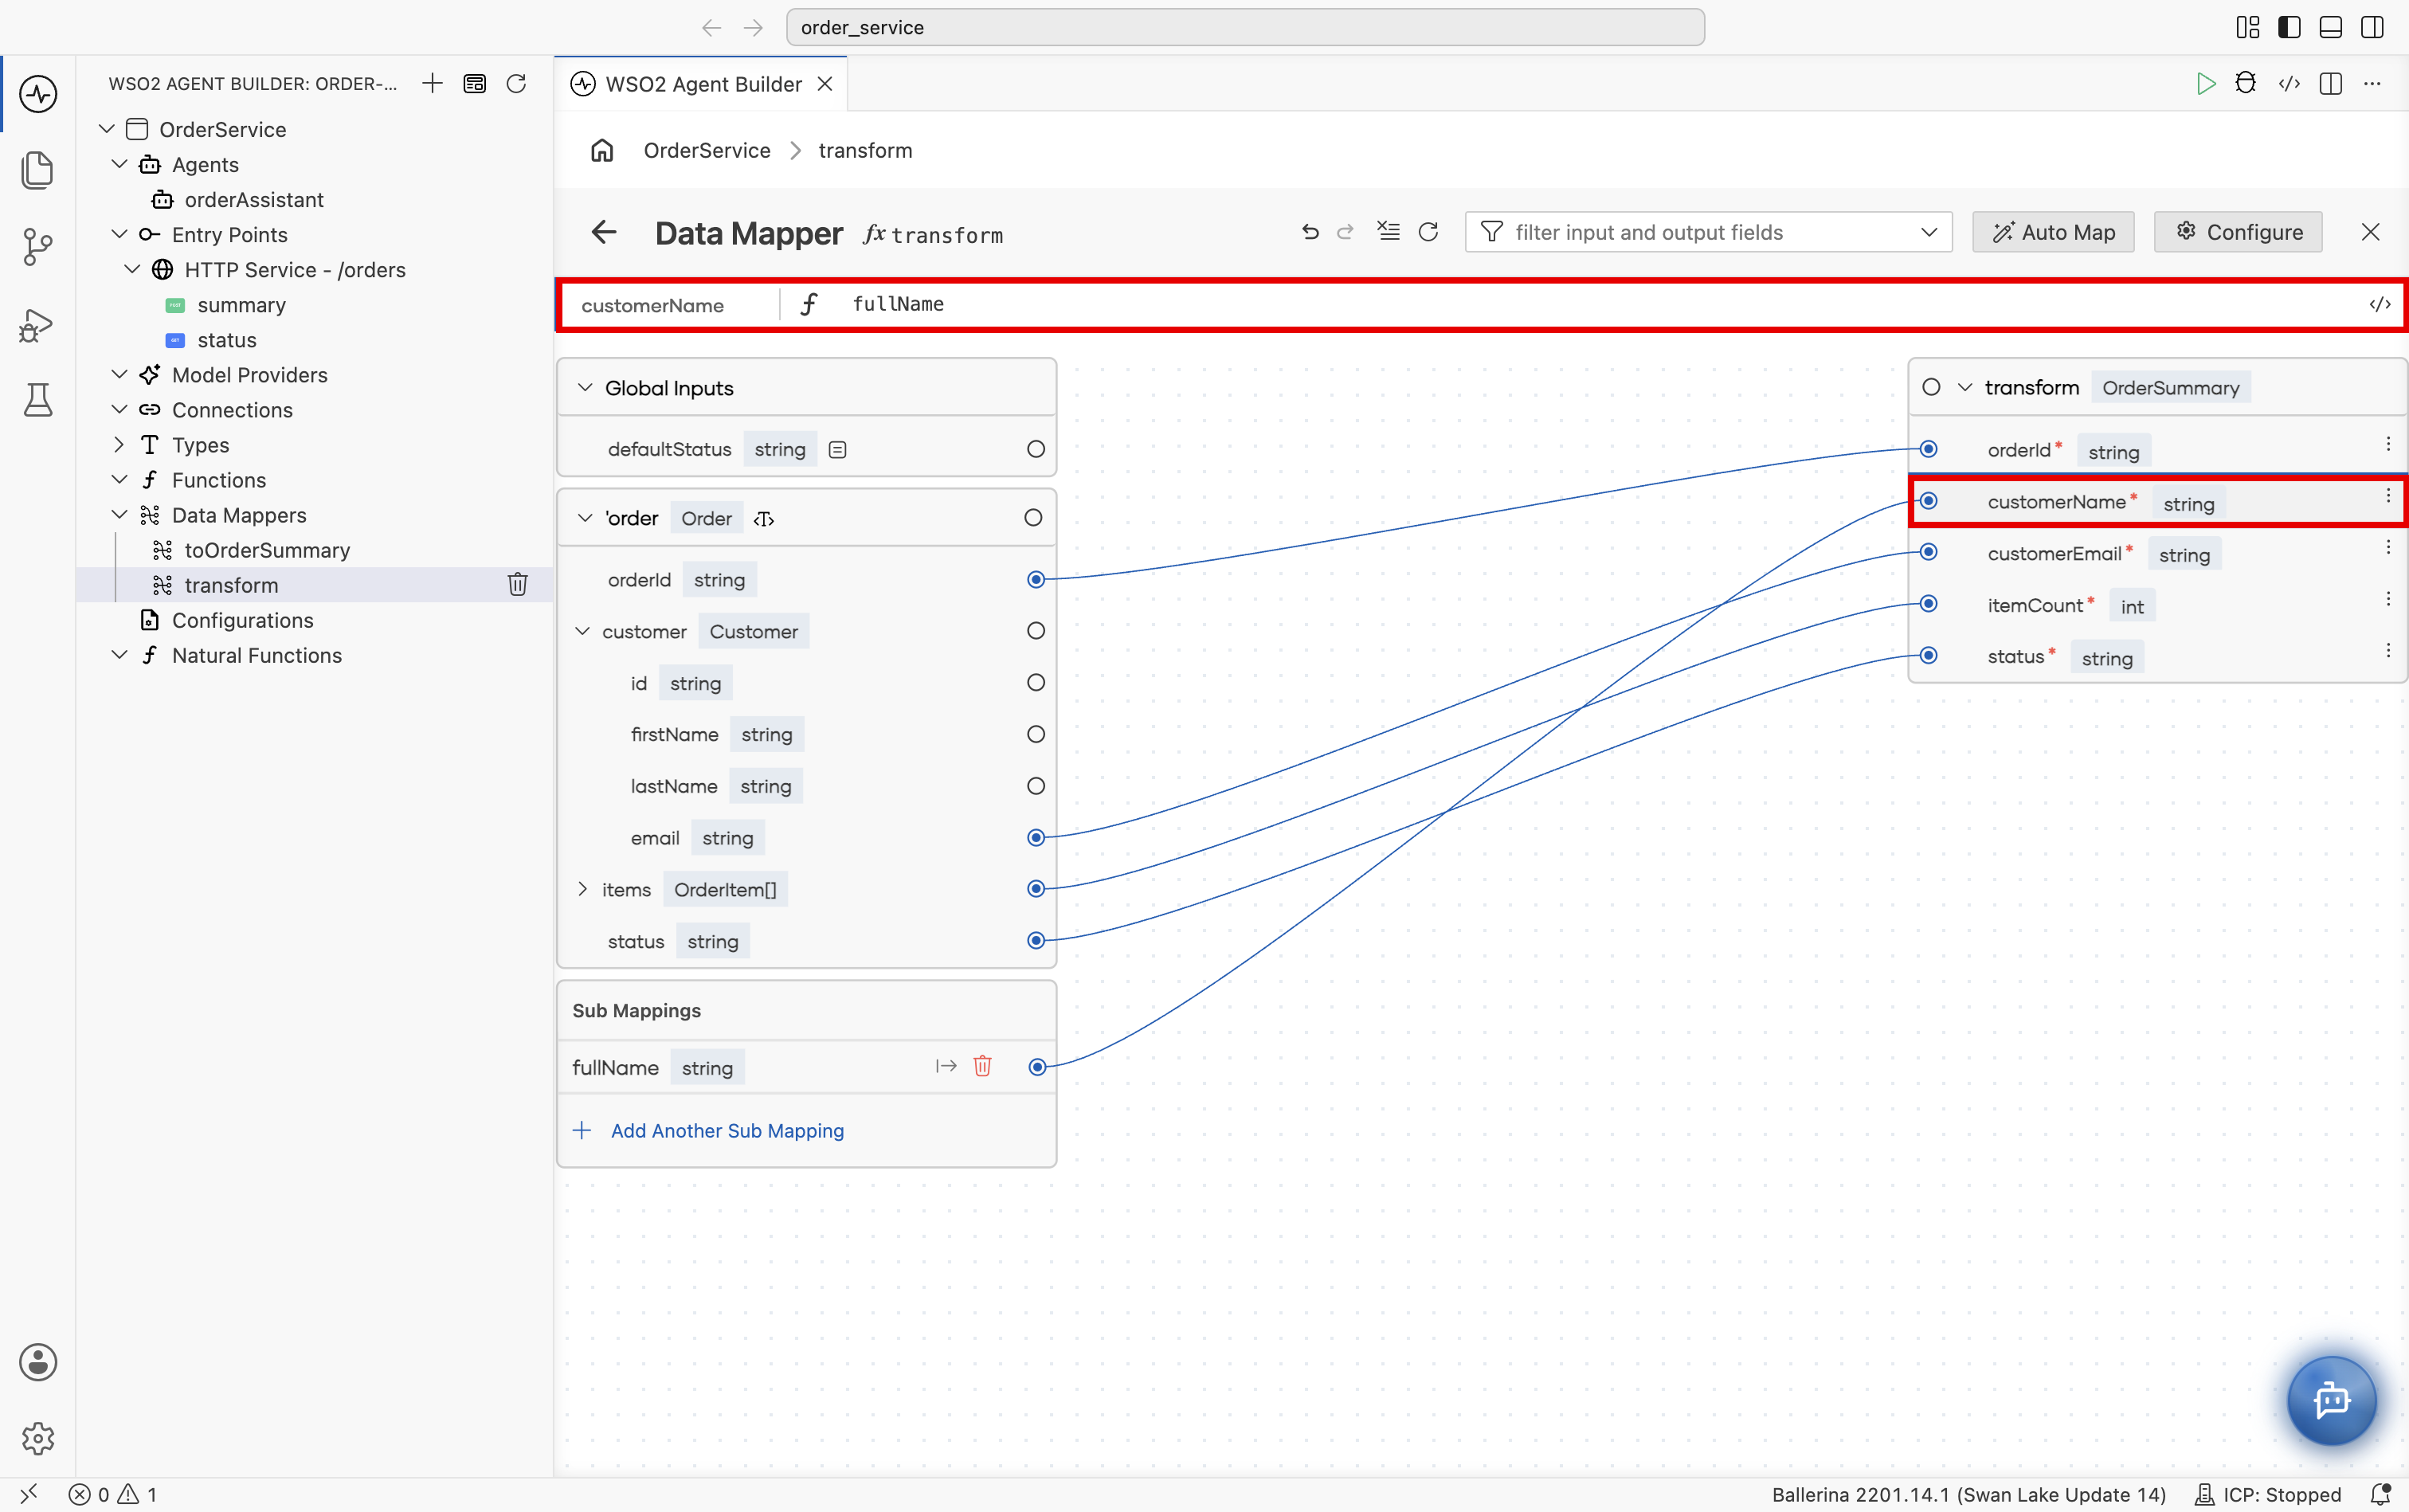
Below the header, the Expression bar shows the field you are currently working with and provides an editor with completion support to write inline expressions when an output field is selected.
Inputs side
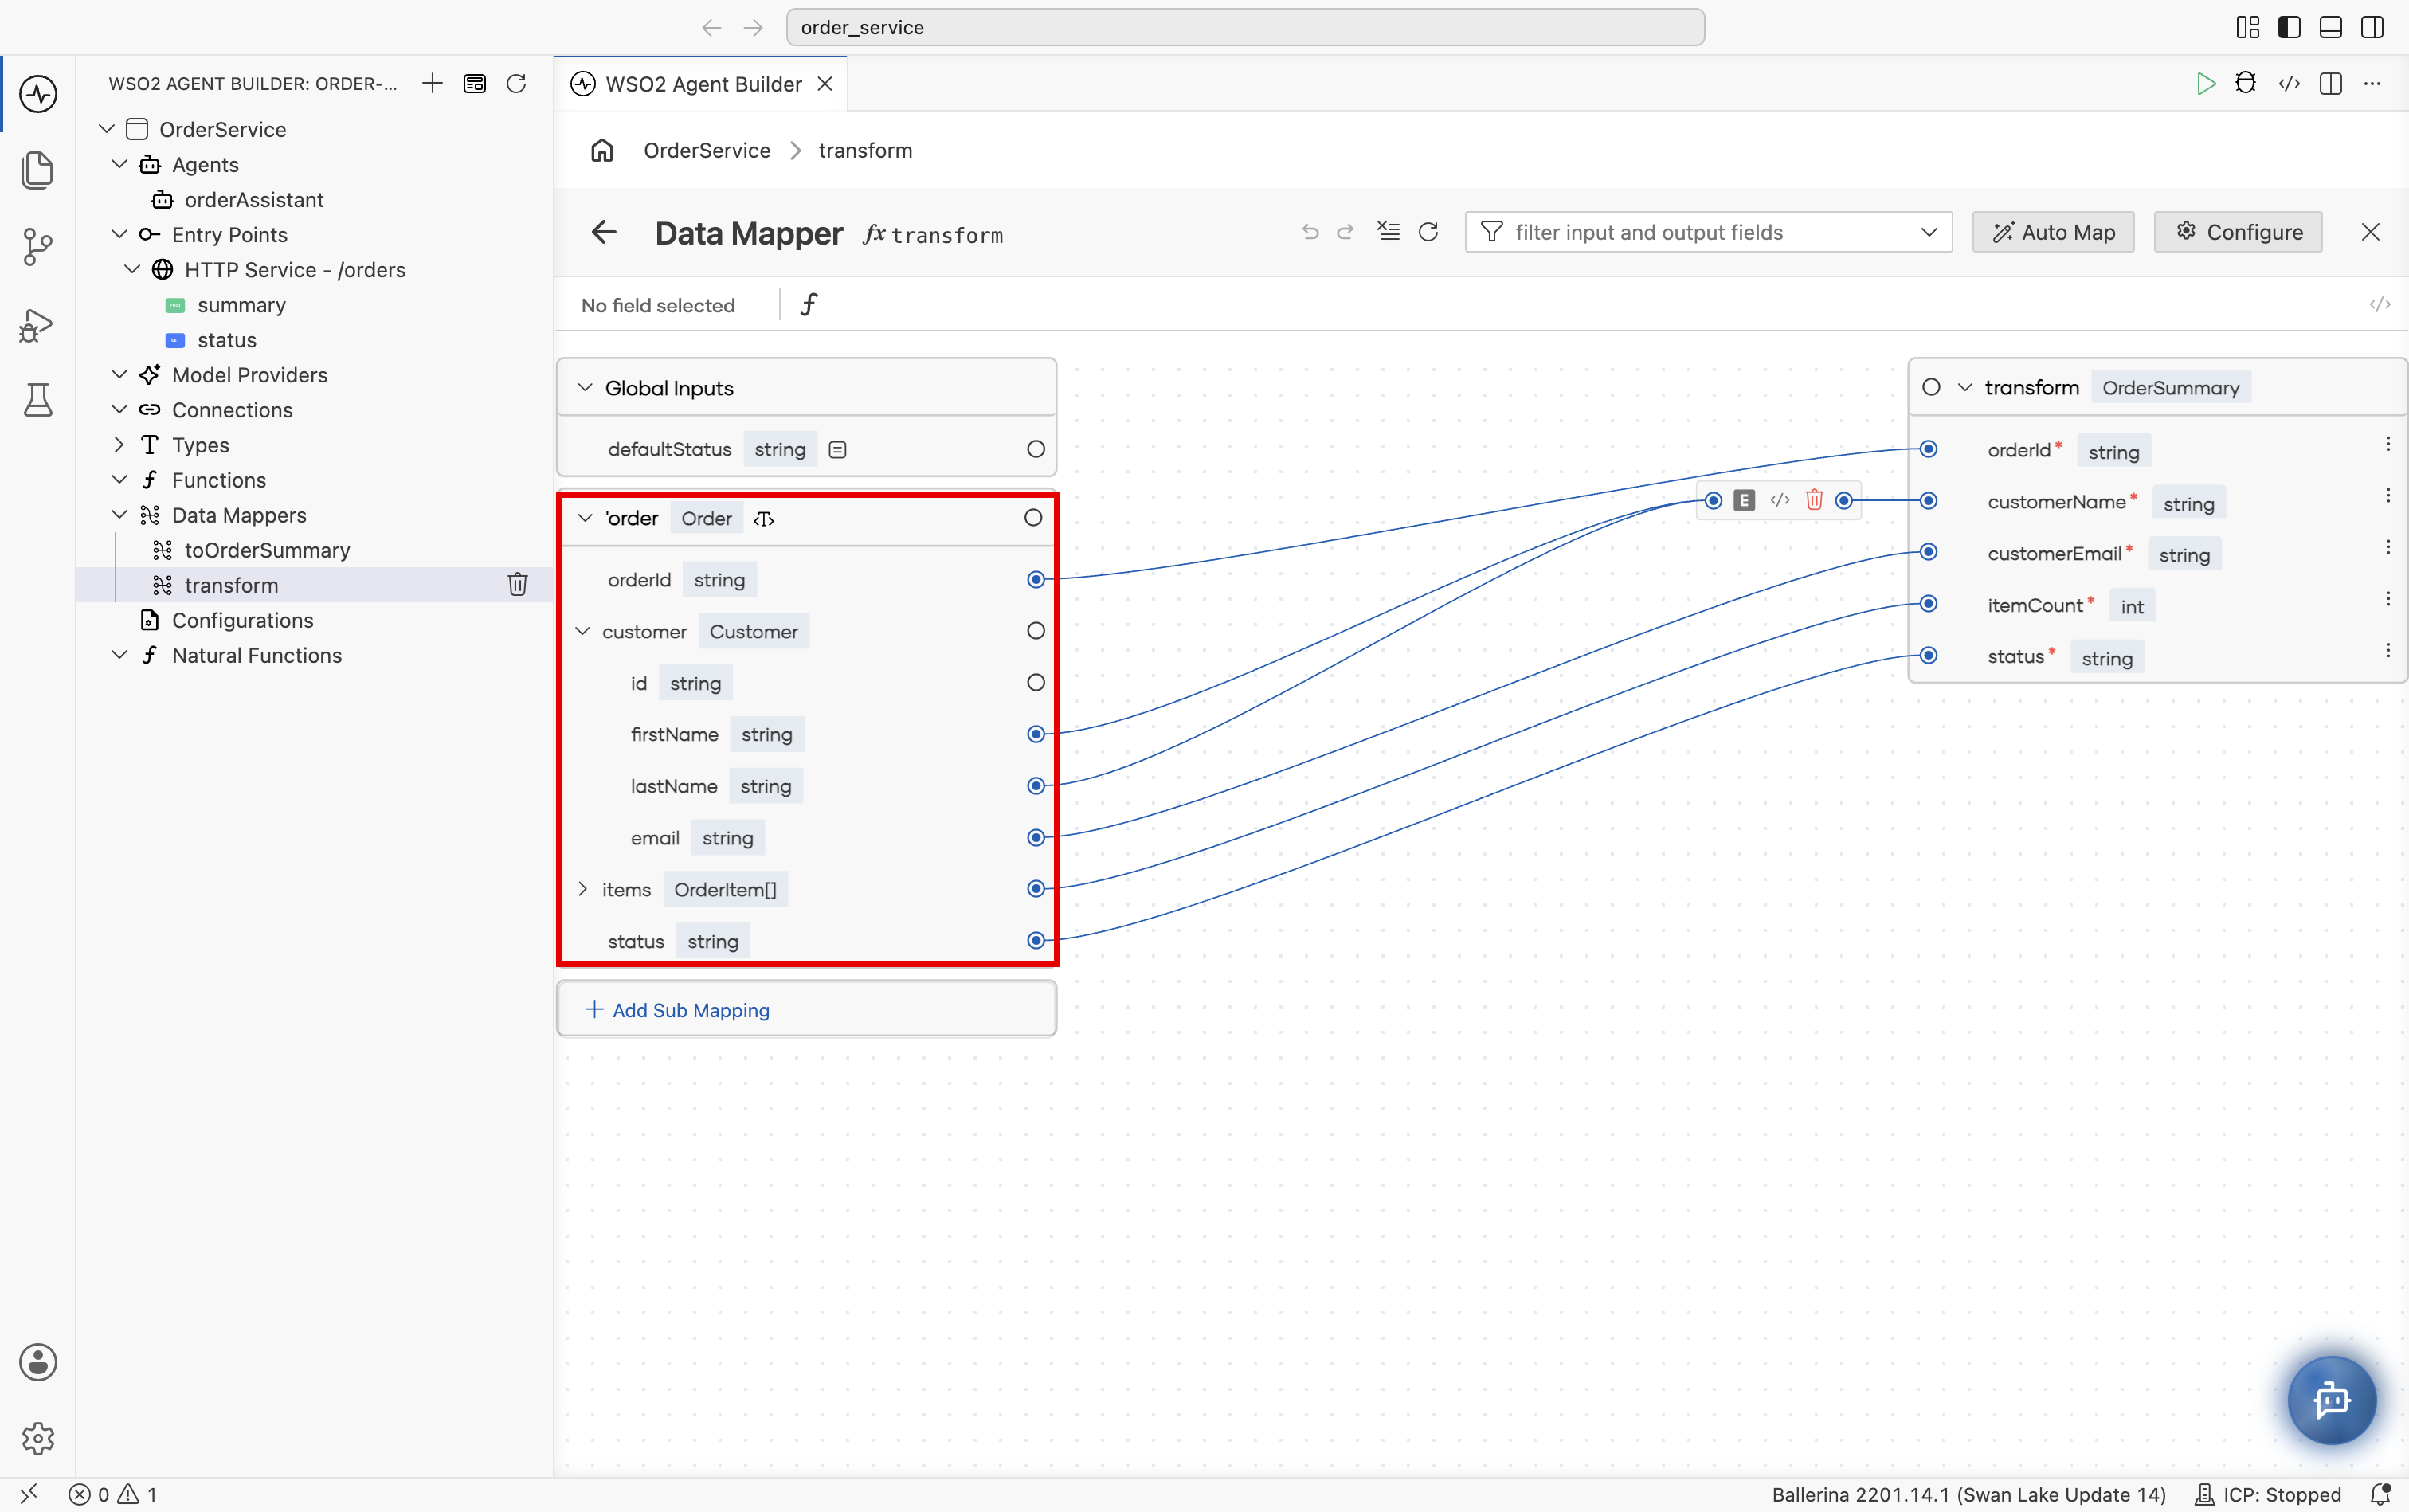
The left side of the data mapper lists every input it receives. Each input appears as a collapsible node showing the parameter name and its type, with each field of the type rendered as a row inside the node. Nested records (for example, customer) and arrays (for example, items) can be expanded.
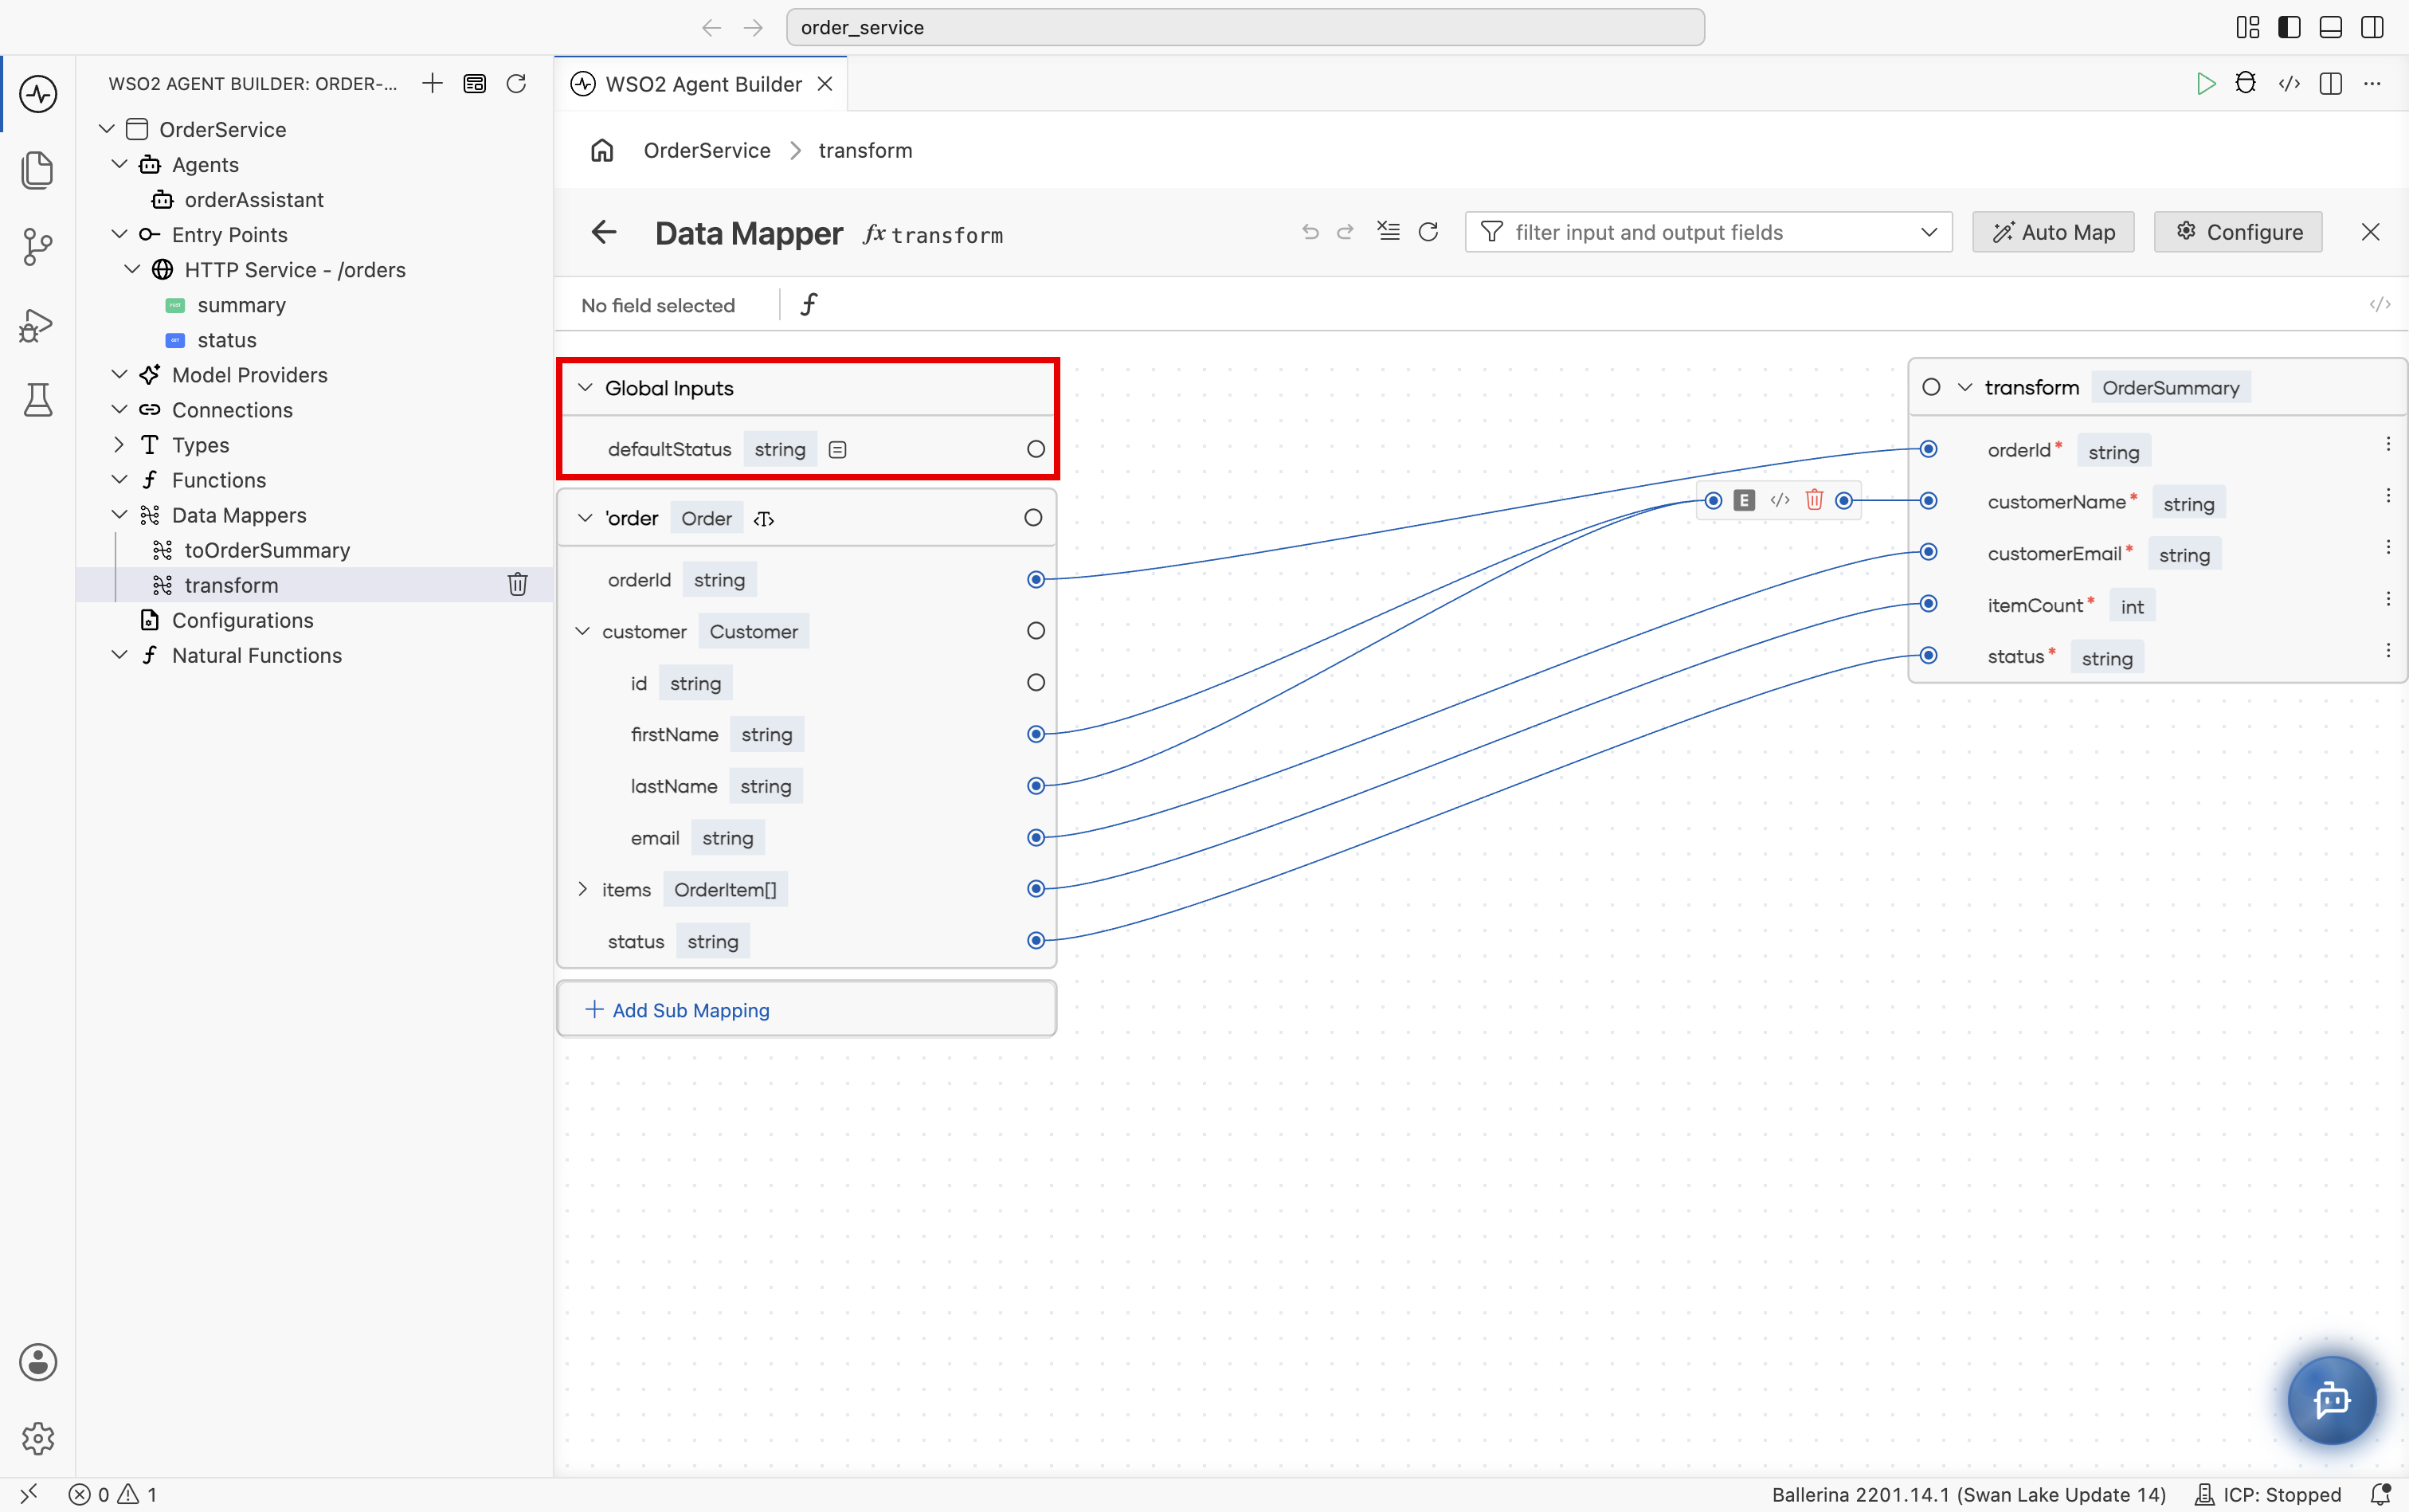
Global Inputs
When the integration has values that are reachable from anywhere, such as configurable variables, a Global Inputs section appears at the top of the inputs side. Use it when a target field should be mapped from a global value. In this example, the defaultStatus configurable is listed under Global Inputs.
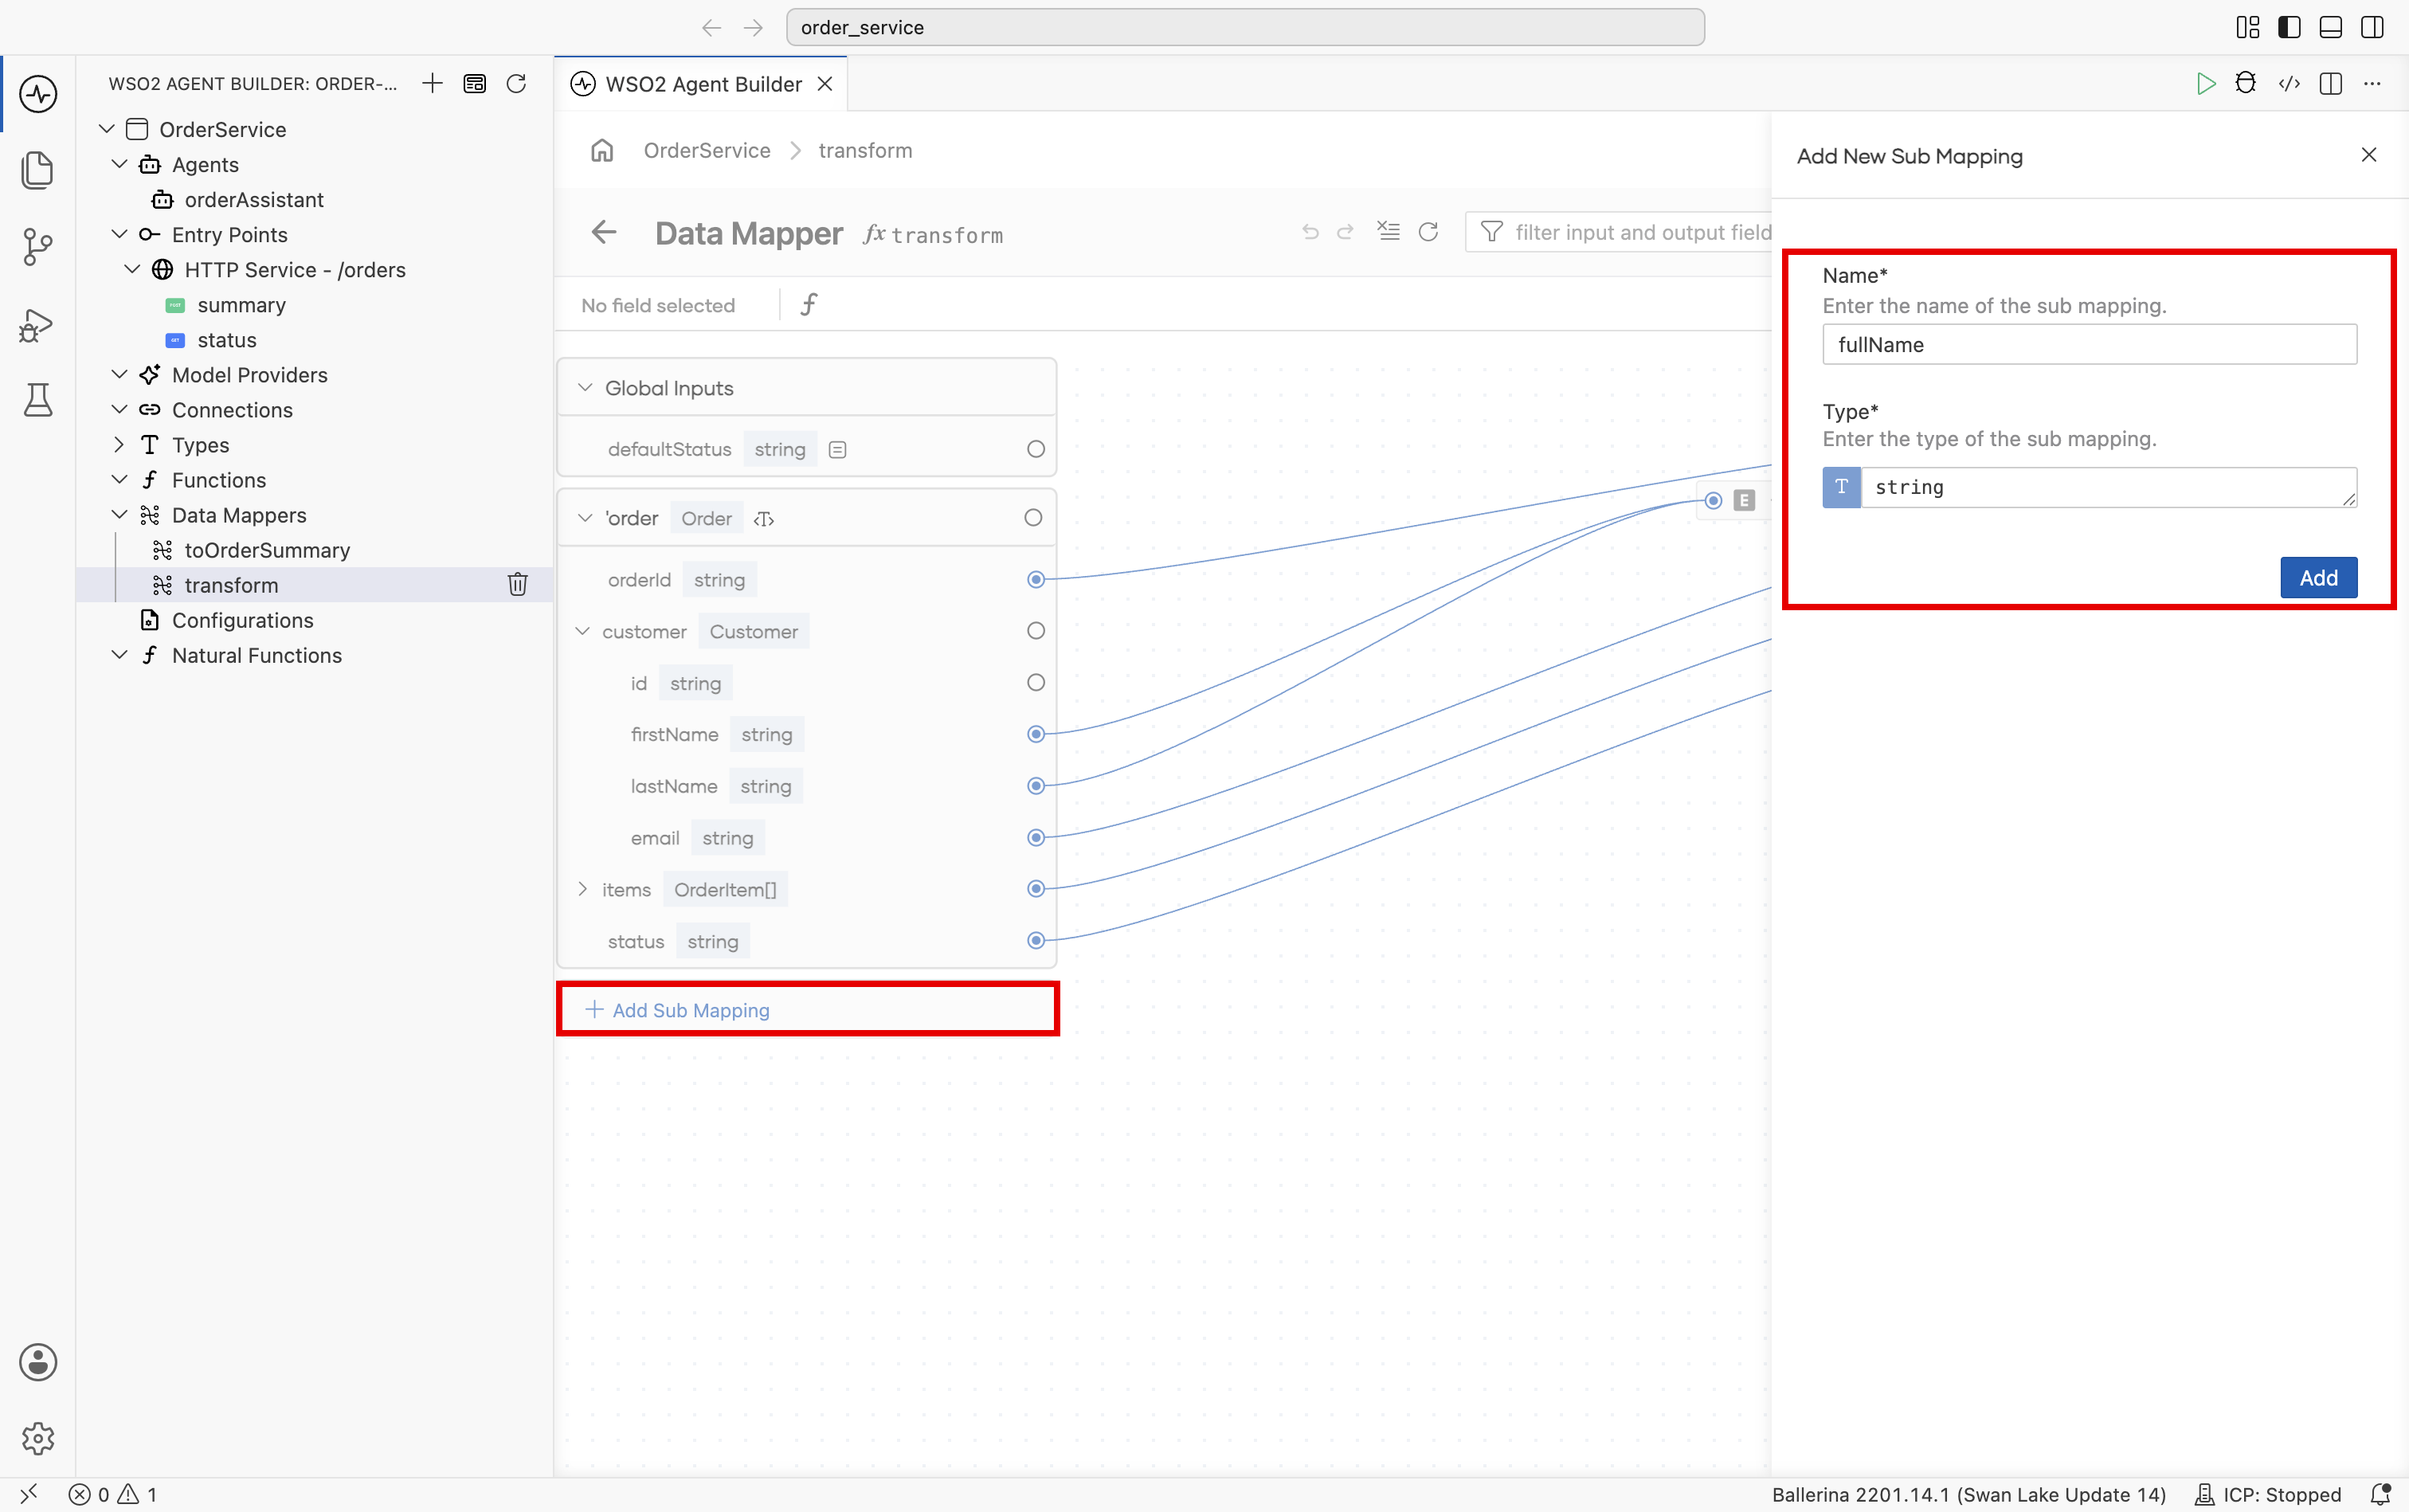
Sub Mappings
A sub mapping is a named intermediate mapping computed once inside the data mapper and reused across multiple output fields. Select + Add Sub Mapping at the bottom of the inputs side, then enter a Name (for example, fullName) and Type (for example, string) in the Add New Sub Mapping panel, and select Add. A sub mapping behaves like an additional input field. Use sub mappings to avoid repeating the same computation across many output fields, or to break a complex transformation into named steps.
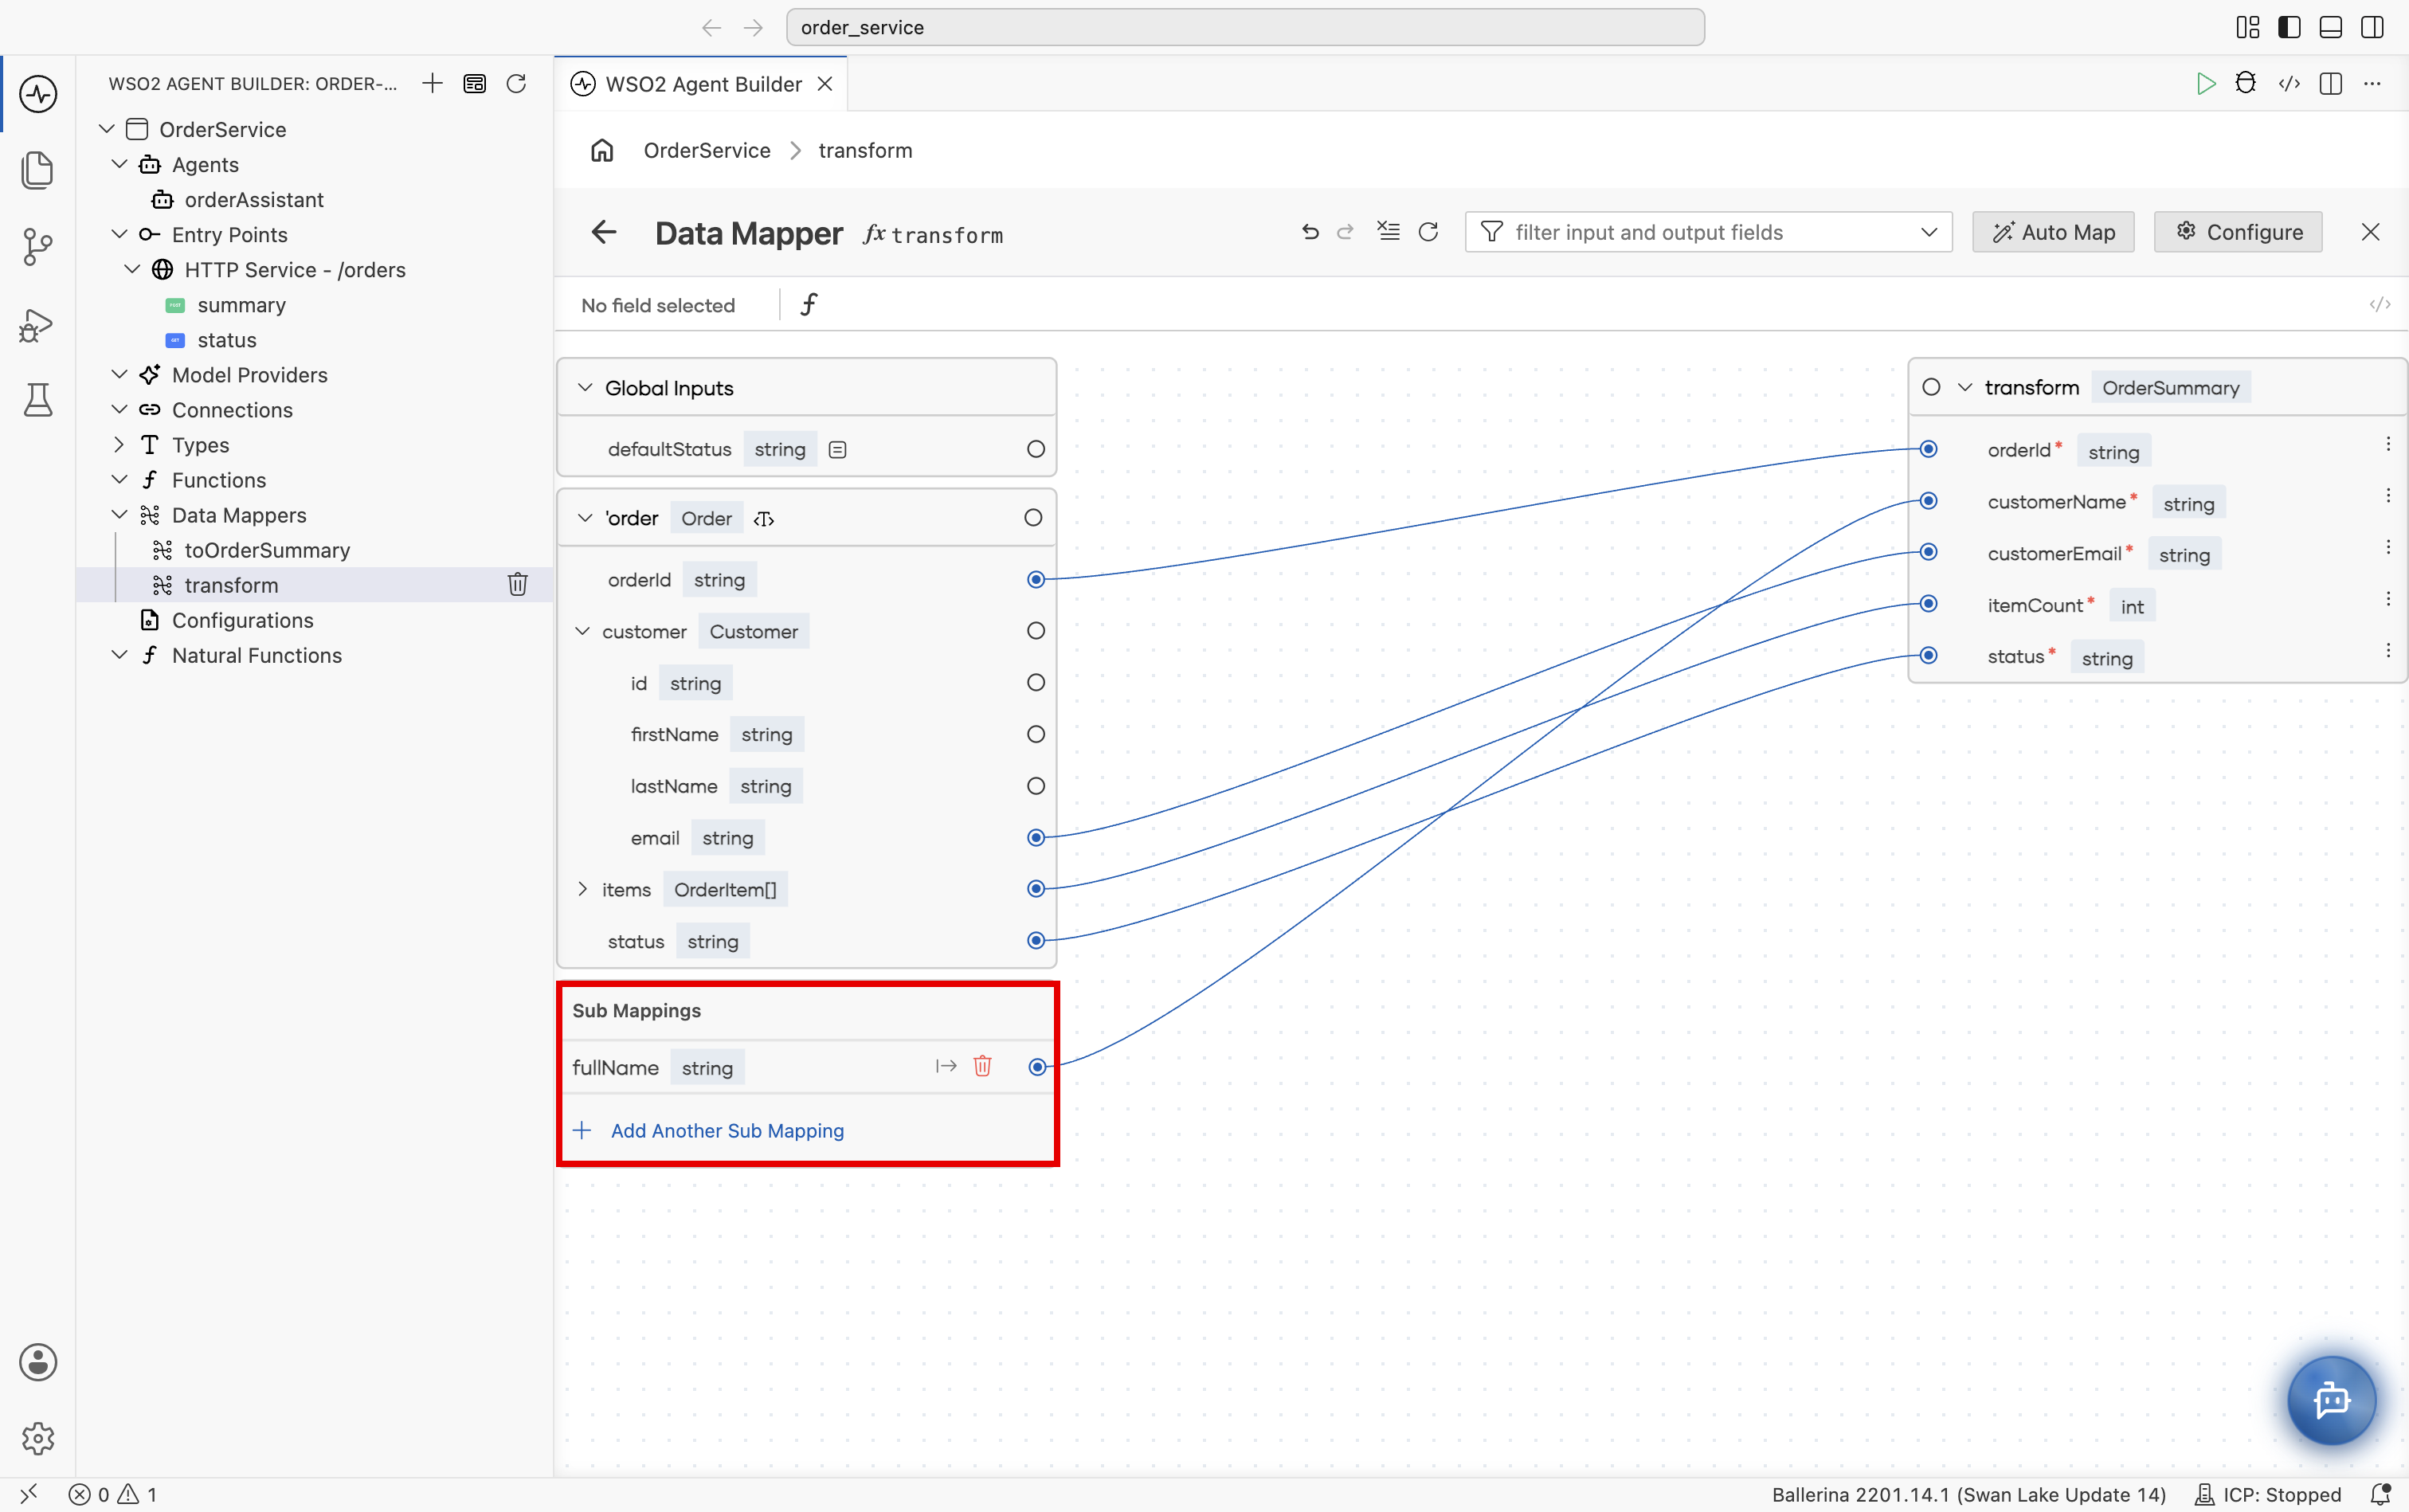
The sub mapping appears in a Sub Mappings section on the inputs side, and you can map it like any other input. Here, fullName joins the customer's first and last names and is mapped to customerName. Select + Add Another Sub Mapping to add more.
Output side
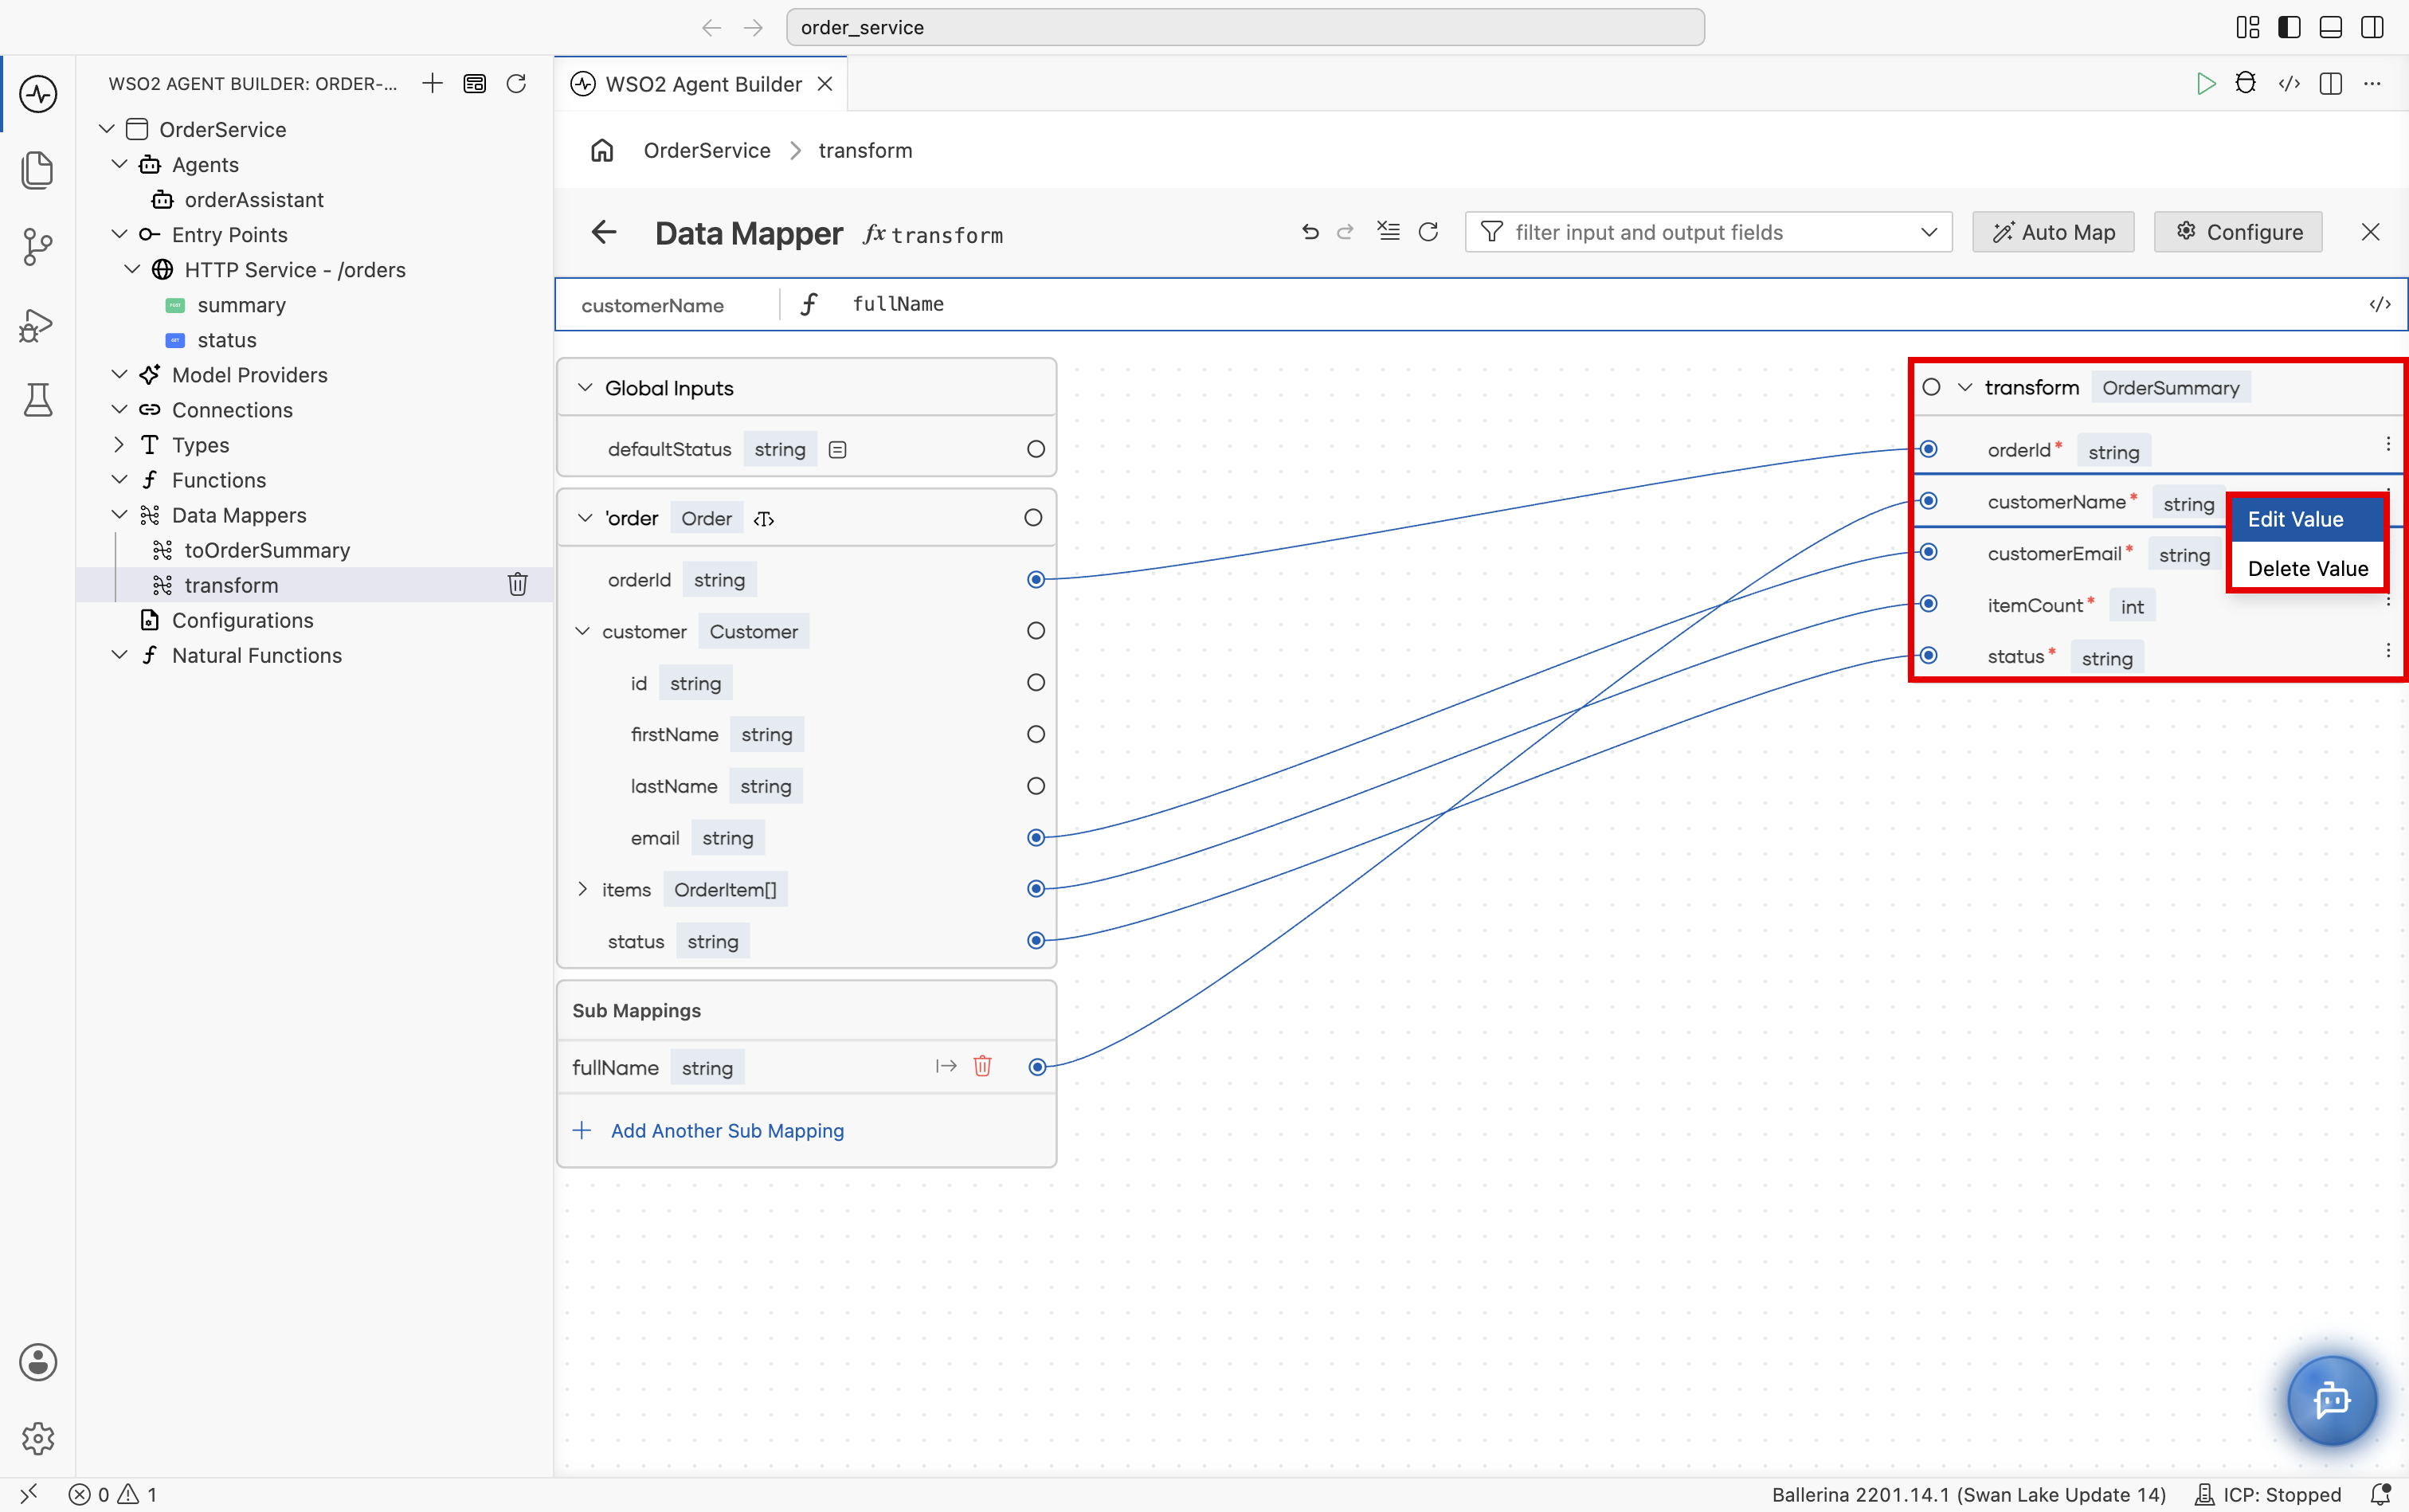
The right side of the data mapper shows the output type with each field rendered as a row. Every required field is marked with a red asterisk. Use the ⋮ menu on a field to access its options, such as Edit Value and Delete Value.
Mapping area
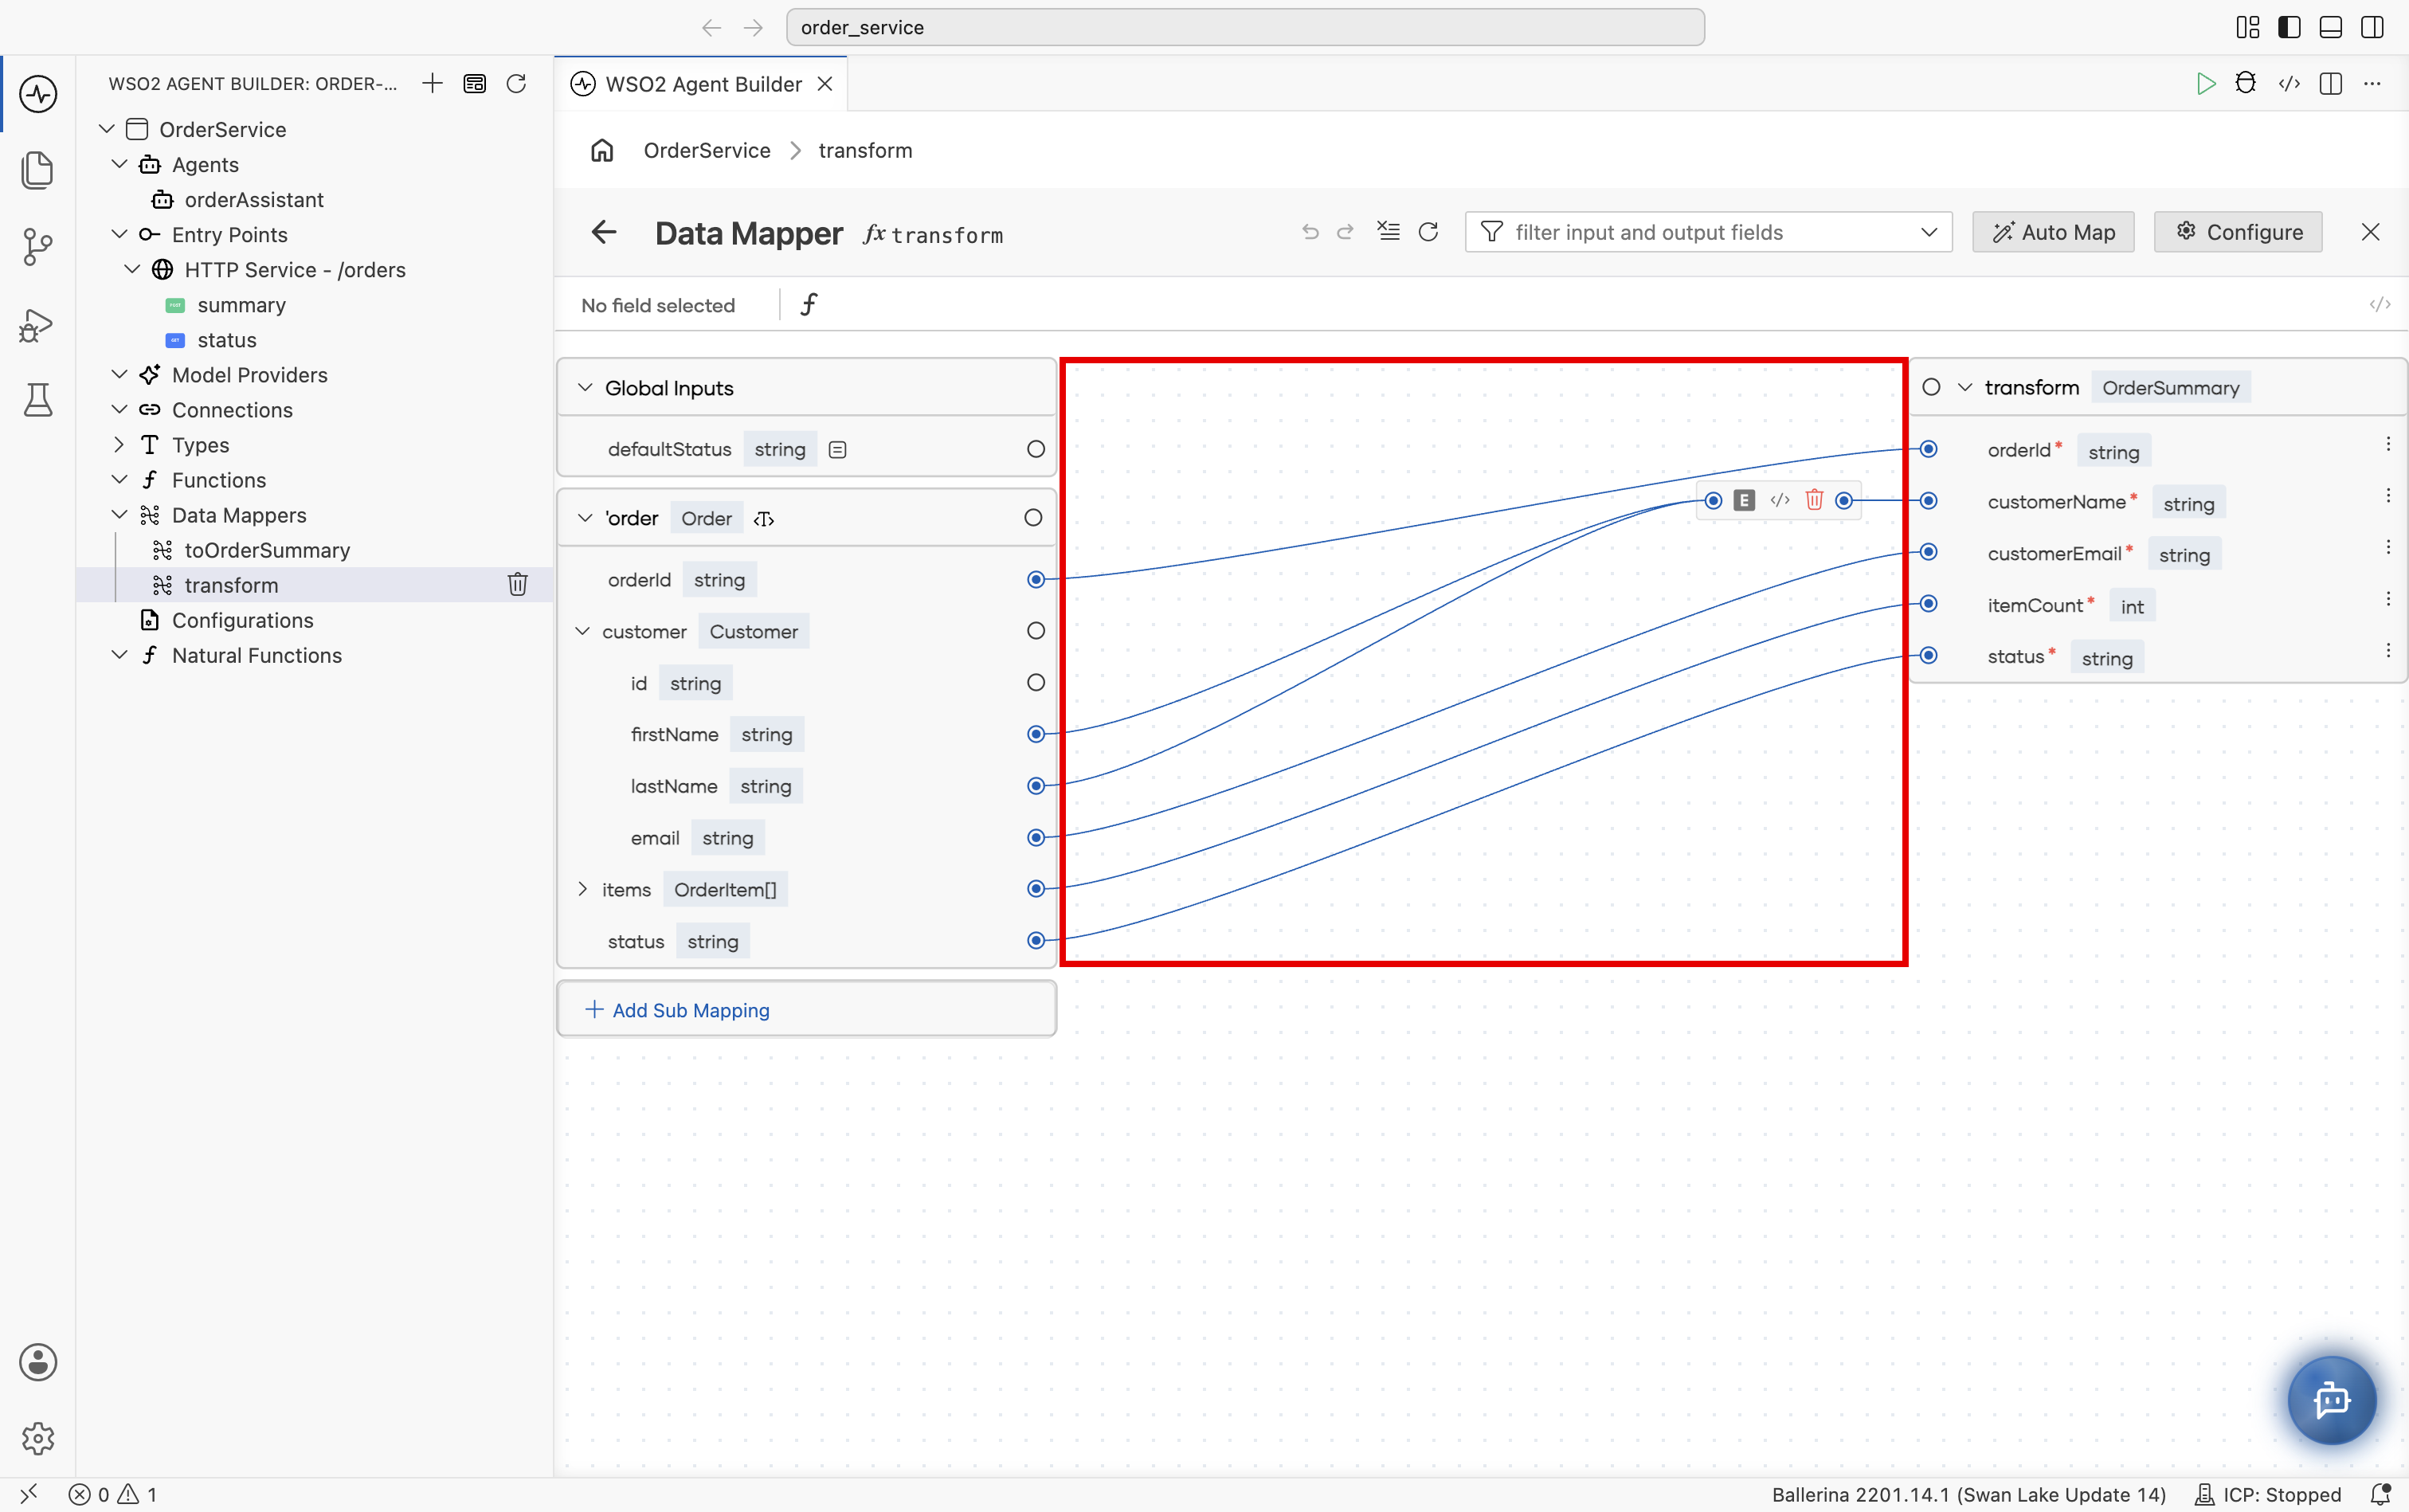
The mapping area is the central region between the input and output sides. Links on this area represent mapping connections.
- Select an input field, then select the desired output field to create a mapping.
- Select an existing link to see available options for that mapping.
- When a mapping combines several inputs, the links meet at an expression node, with options to view and edit the expression or delete the mapping.
- When there is an issue with a created mapping, the corresponding link shows a diagnostic so you can fix it using the available code actions or the expression bar.
Auto Map
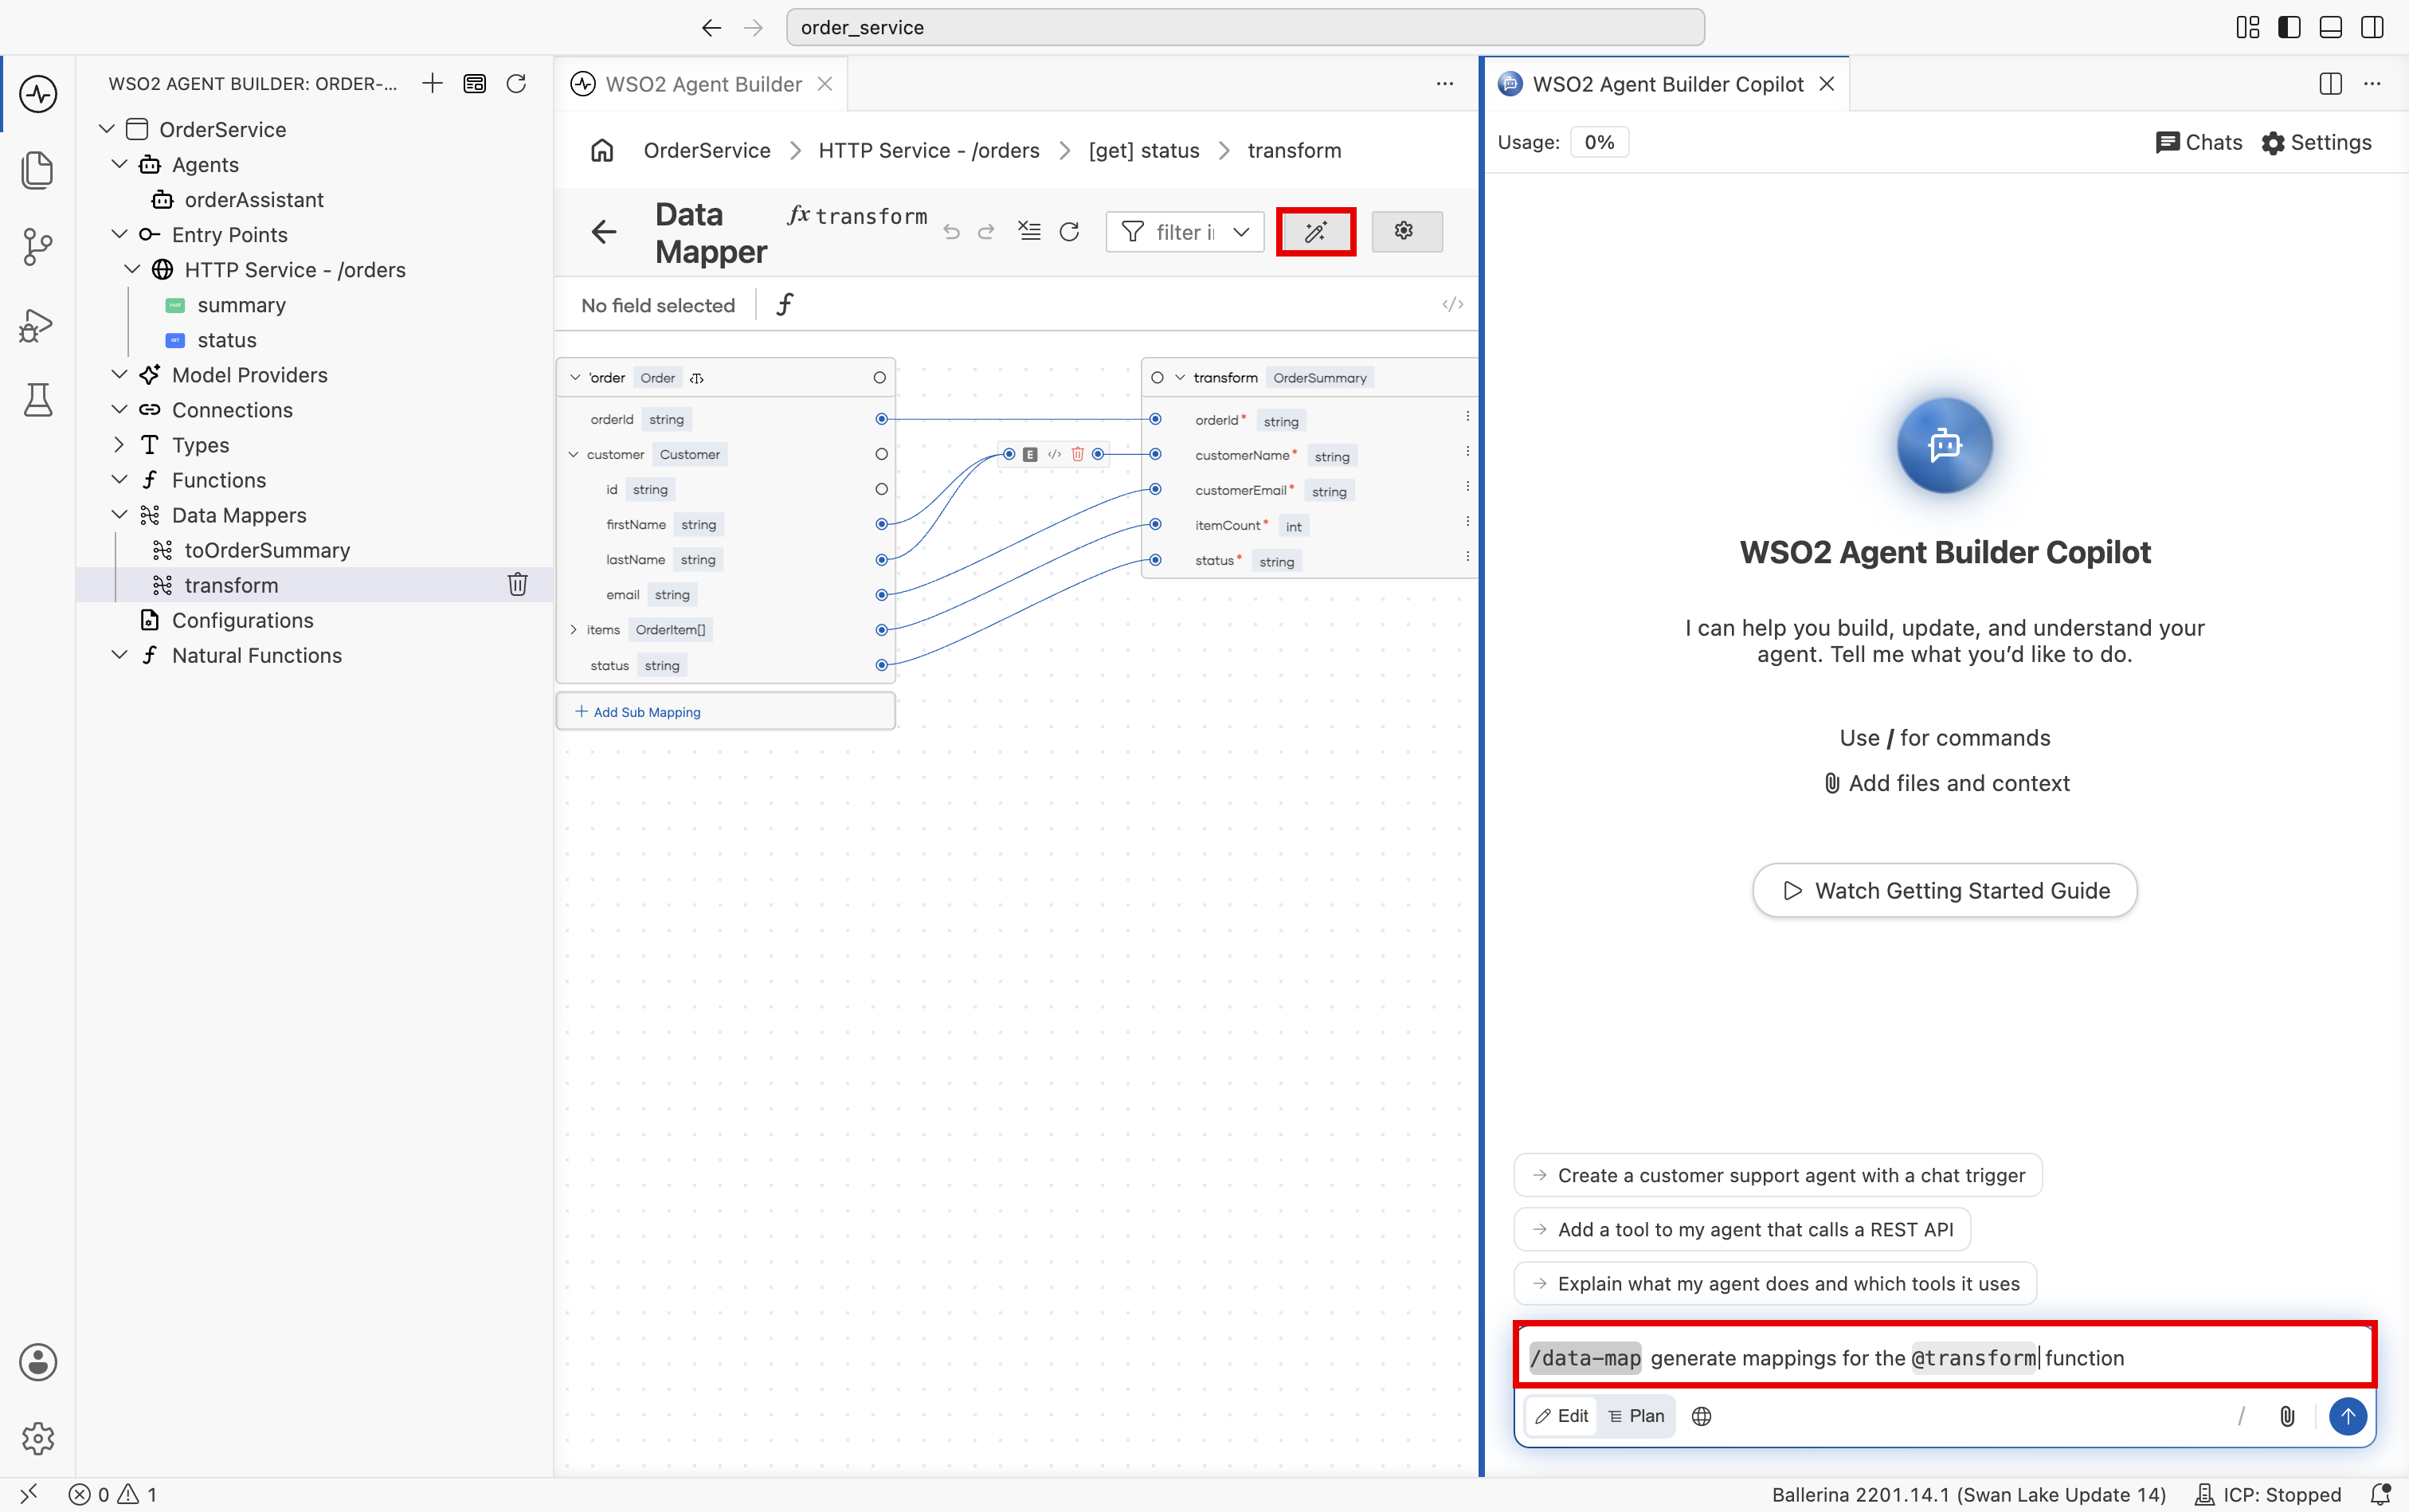
Auto Map in the header opens the WSO2 Agent Builder Copilot panel alongside the data mapper, with a /data-map request for the current data mapper prefilled (for example, /data-map generate mappings for the @transform function). Submit it to let the Copilot read the project files and generate field mappings based on the input and output types. When complete, mapping lines appear in the data mapper.
Configure
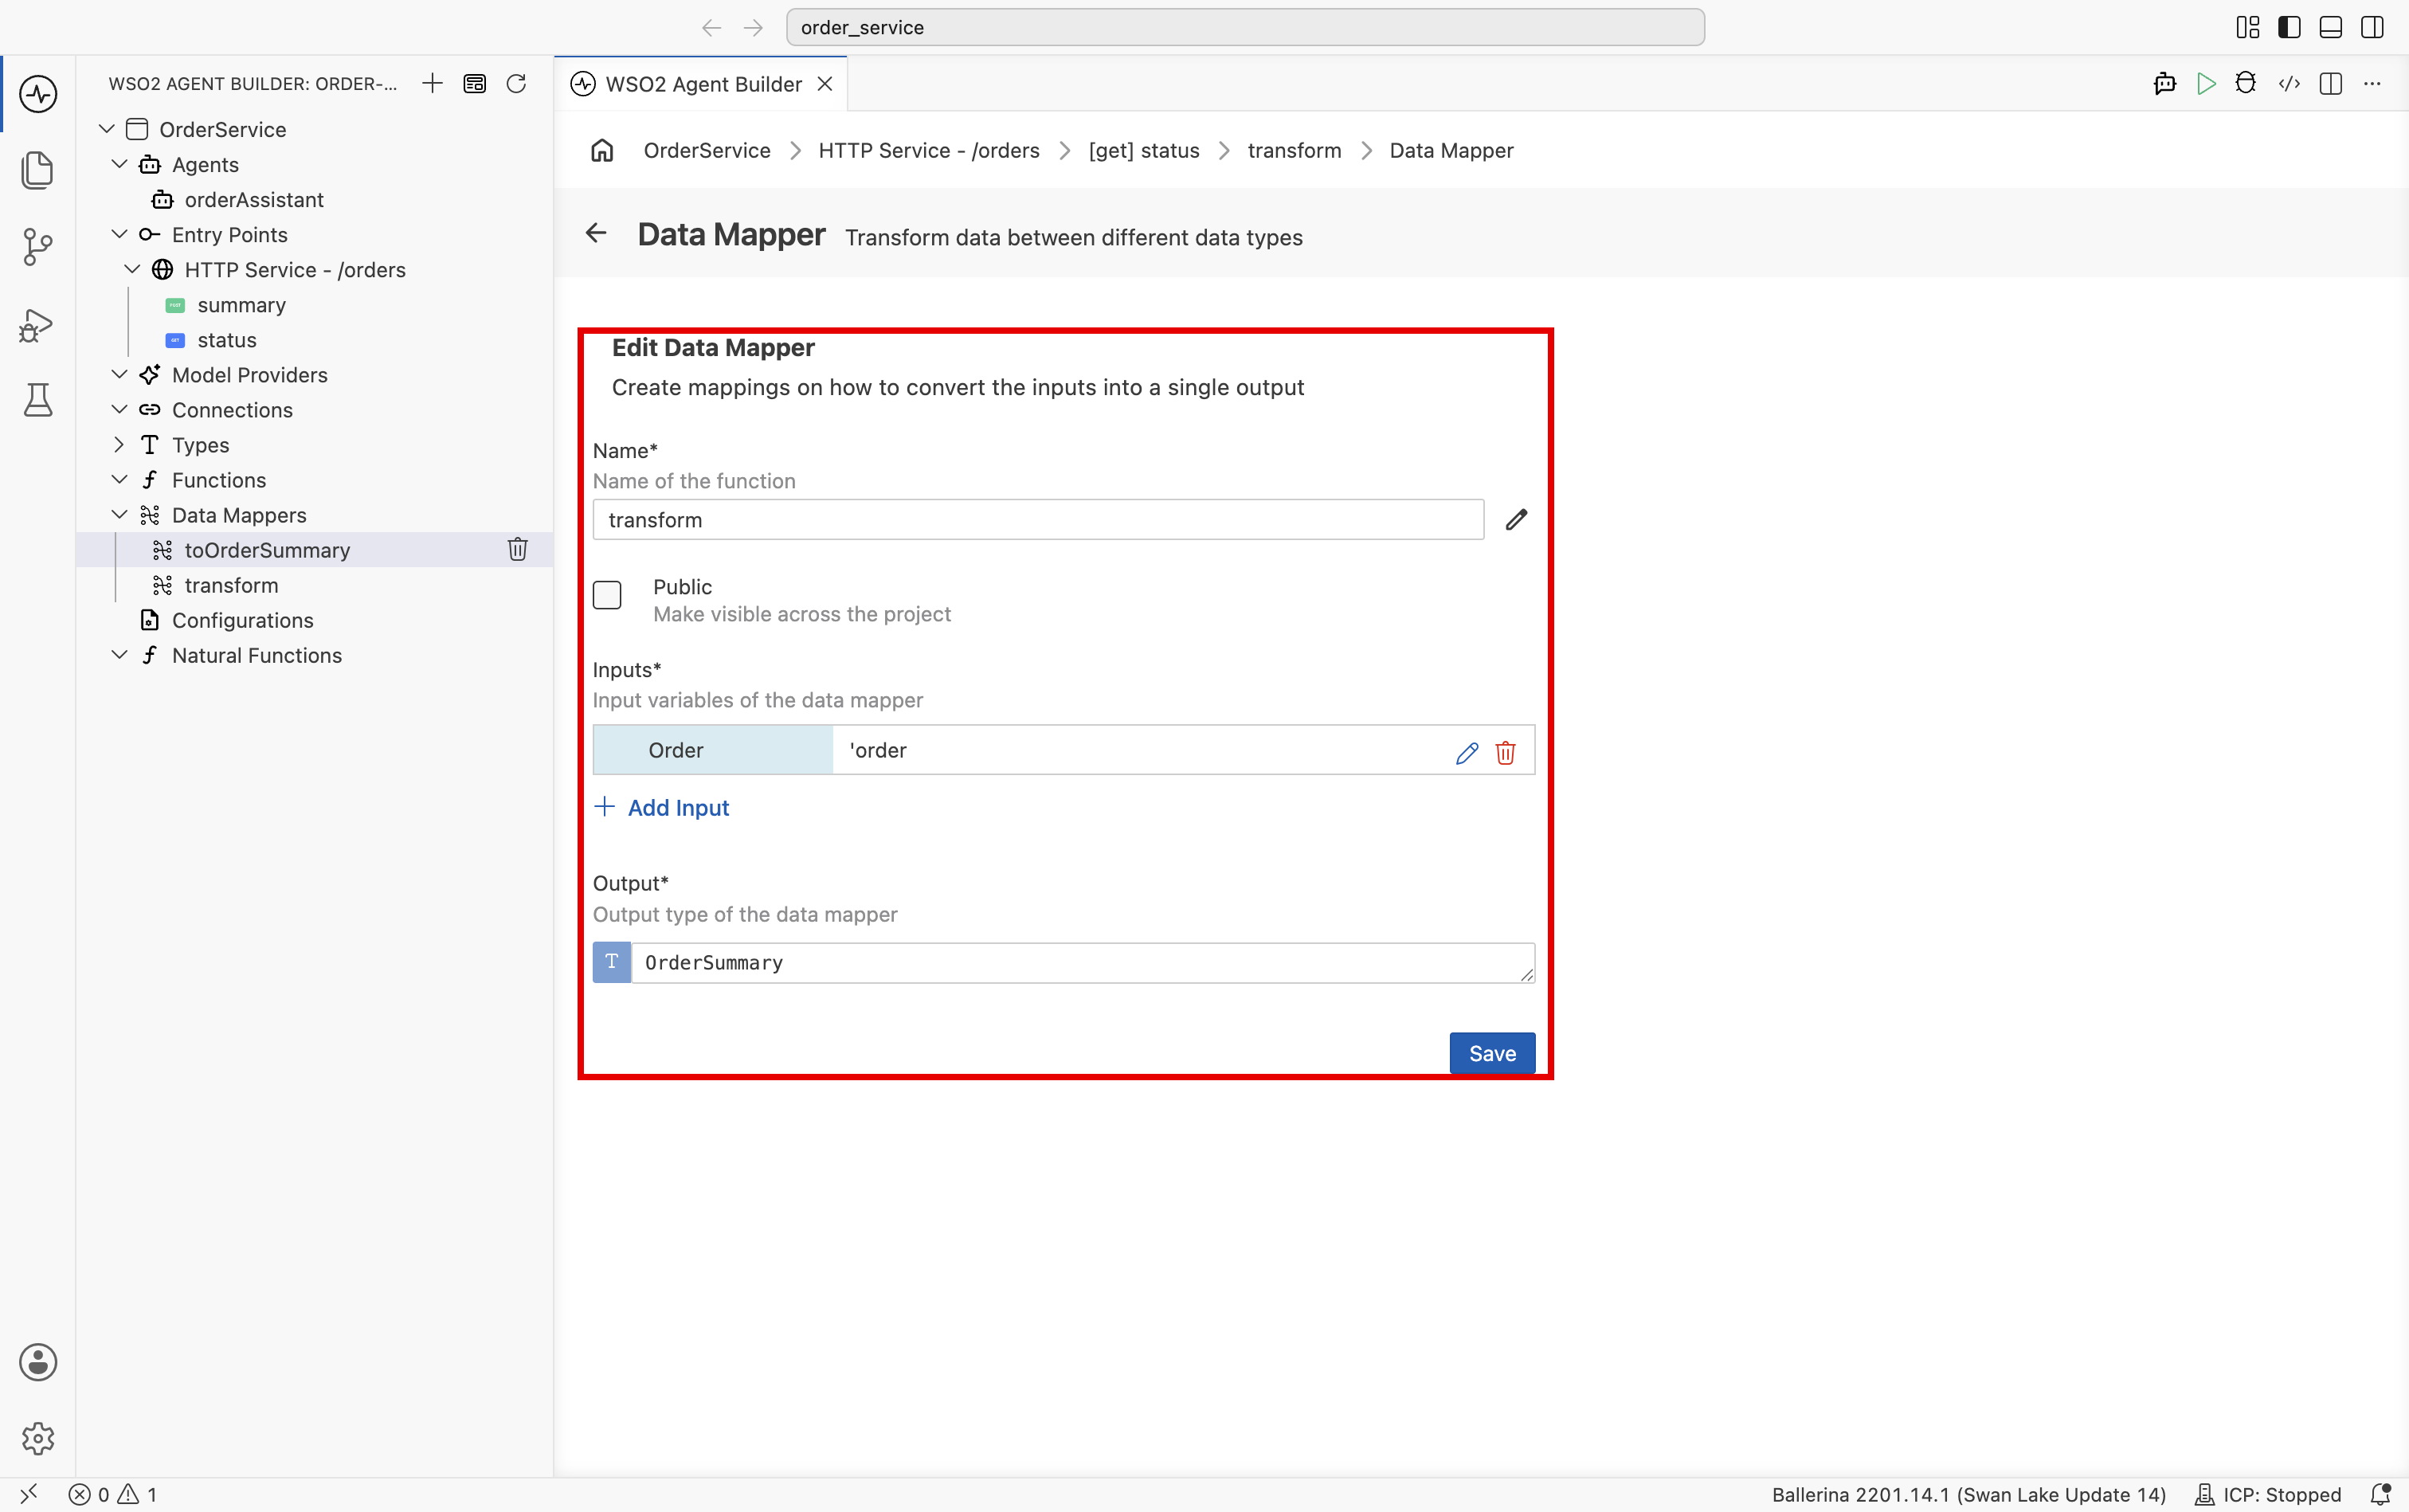
Configure in the header opens the Edit Data Mapper page. Use it to rename the data mapper, toggle Public to make it visible across the project, or change the Inputs and Output. Select Save to apply your changes.
What's next
- Node palette: Map Data: add a data mapper to a flow.
- Type Panel: define the record types the data mapper maps between.
- Flow Canvas: invoke the data mapper from a flow node.