Example
Table of Contents
TCP Example
What you'll build
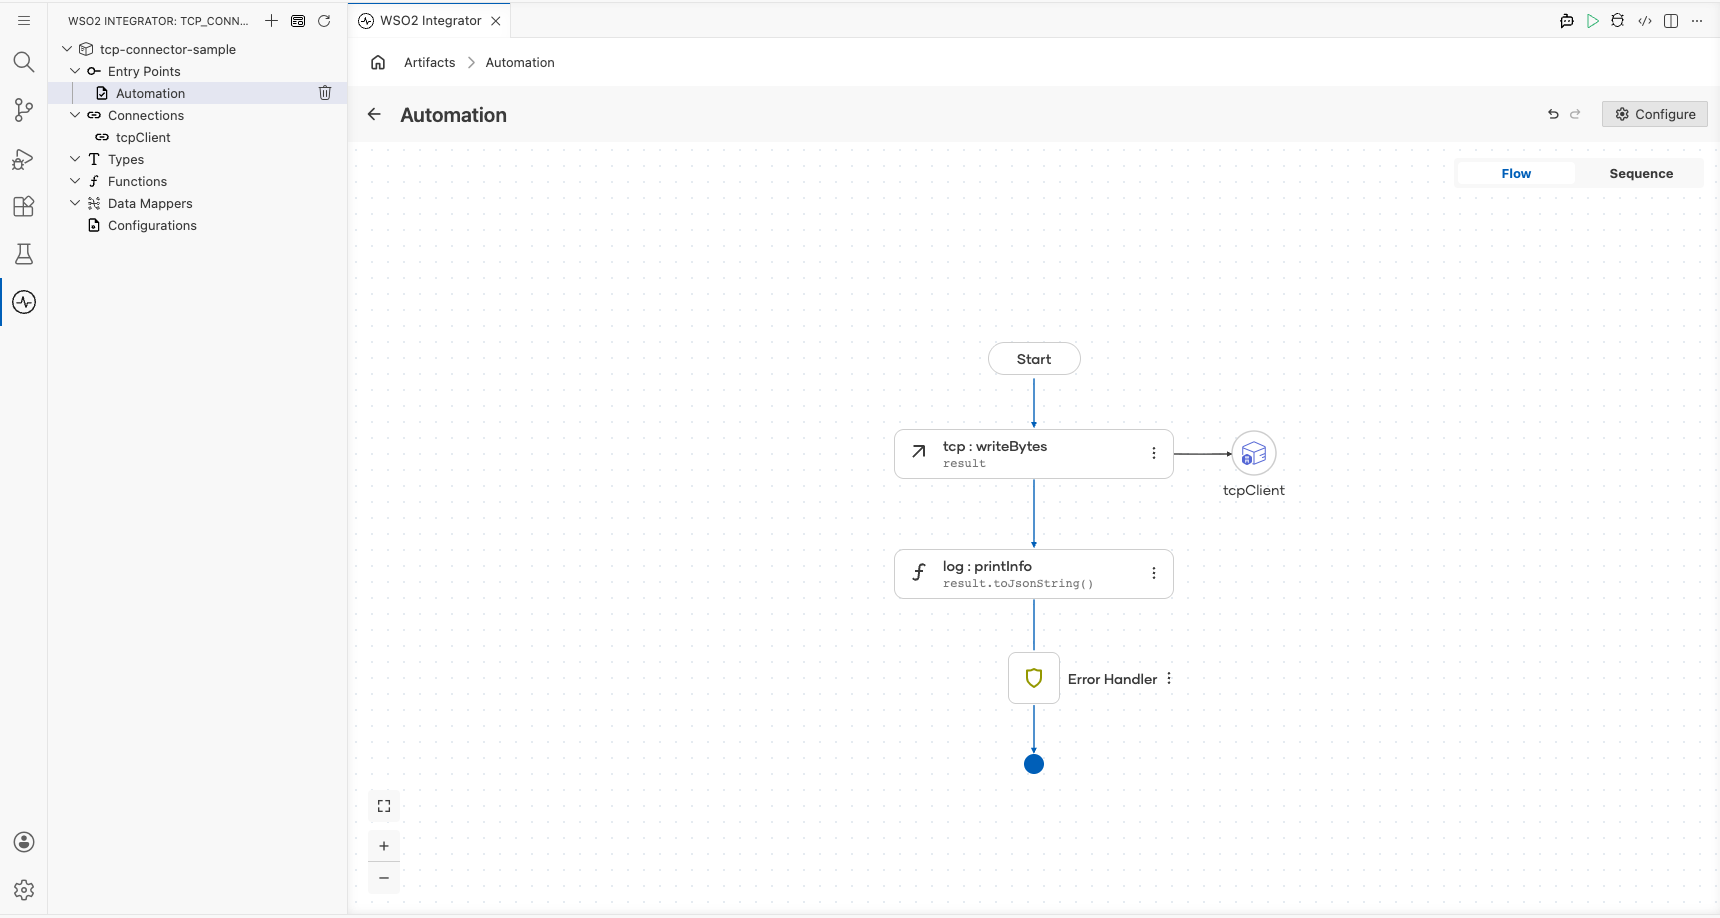
Build a TCP connector integration that connects to a remote TCP server and sends a byte message. The integration uses an Automation entry point to invoke the writeBytes operation and transmit data to the configured TCP host.
Operations used:
- writeBytes : Sends a
byte[]payload to the connected remote TCP host
Architecture
Prerequisites
- A running TCP server with a reachable host and port
Setting up the TCP integration
New to WSO2 Integrator? Follow the Create a New Integration guide to set up your integration first, then return here to add the connector.
Adding the TCP connector
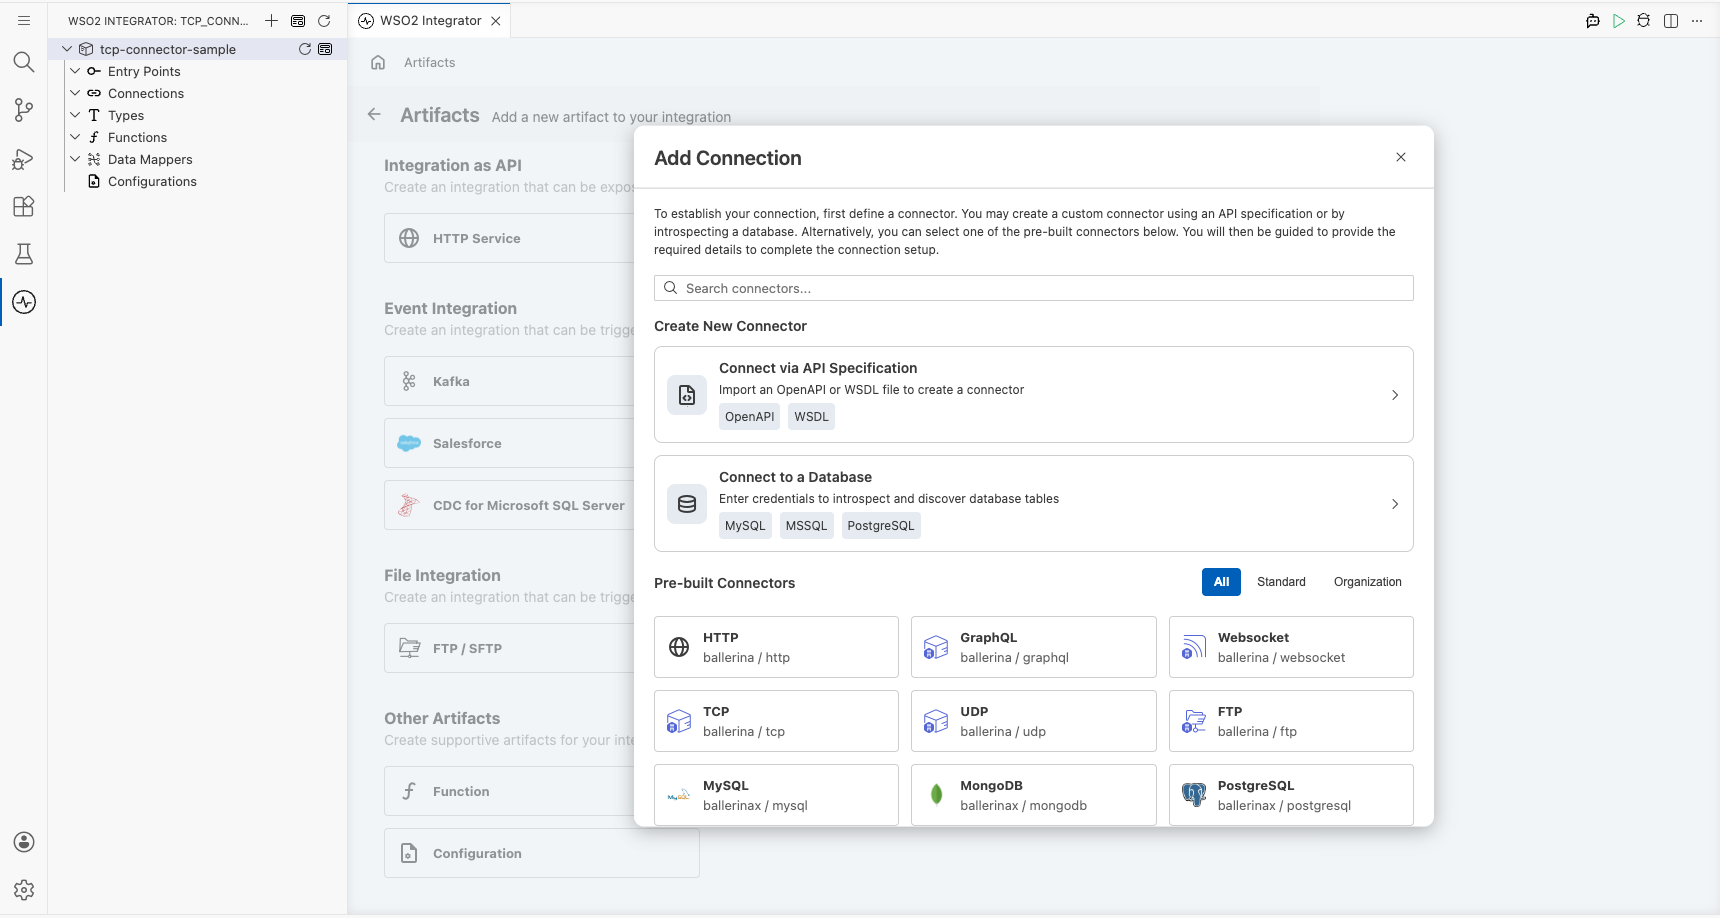
Select + Add Connection from the Artifacts panel and search for TCP in the connector palette. Select the TCP connector: not "TCP Caller".
Configuring the TCP connection
Step 1: Fill in the TCP connection parameters
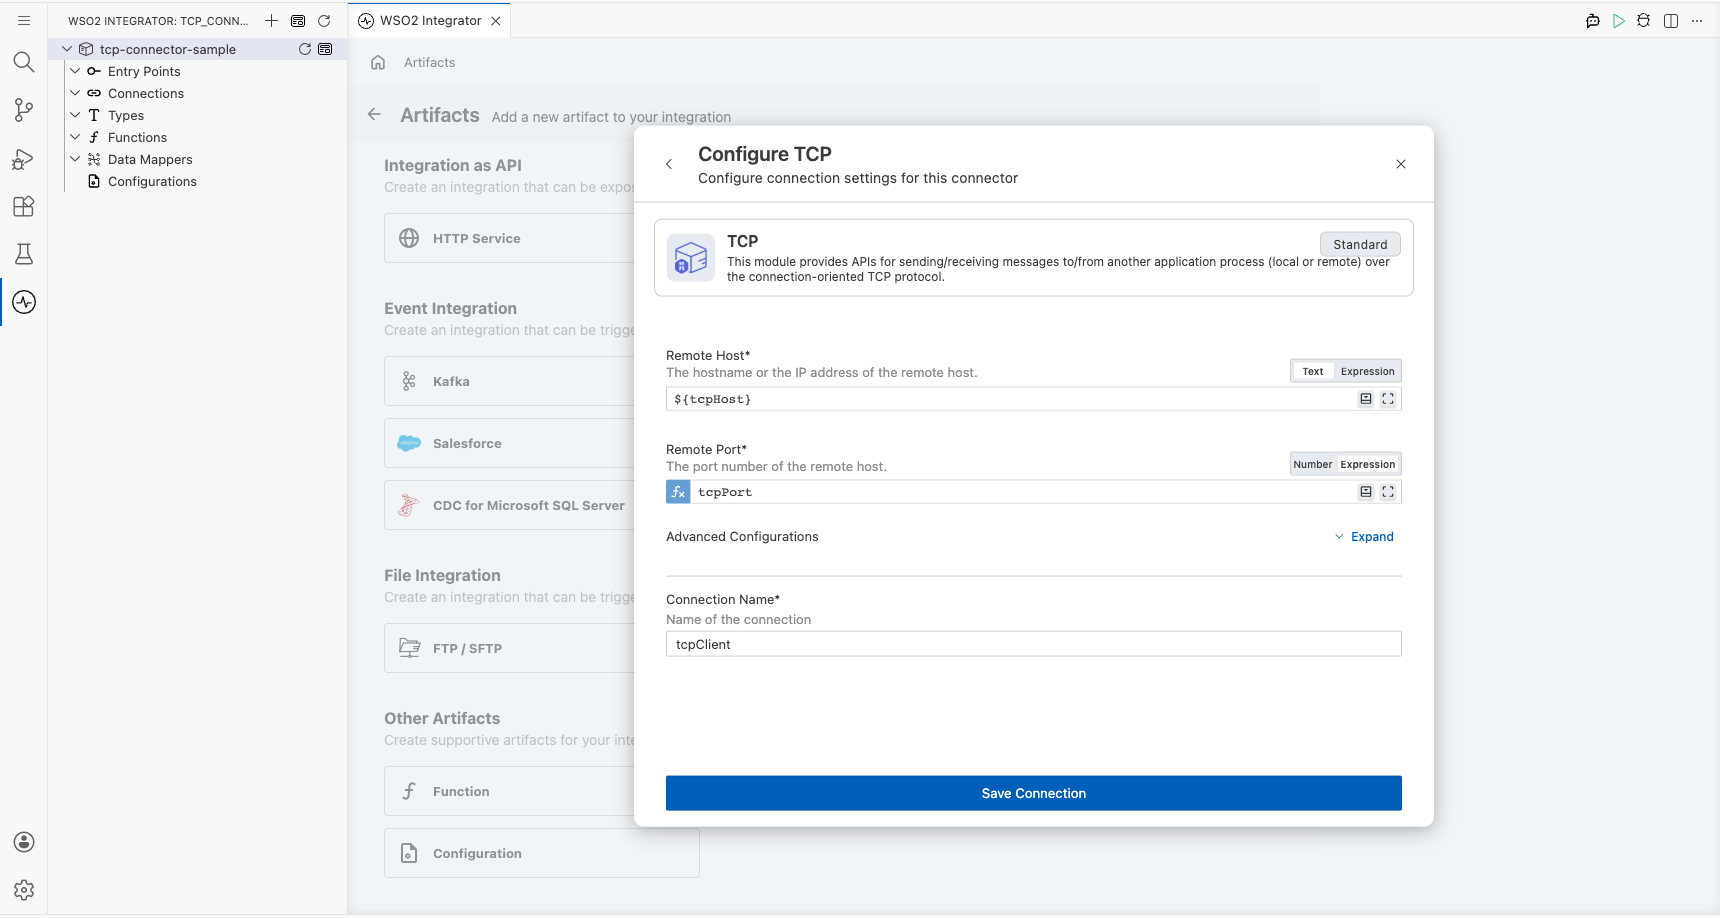
Bind each connection parameter to a configurable variable in the Configure TCP form:
- Remote Host : Binds to the
tcpHostconfigurable variable (string) representing the remote server hostname - Remote Port : Binds to the
tcpPortconfigurable variable (int) representing the remote server port - Connection Name : Keep the default value
tcpClient
Step 2: Save the TCP connection
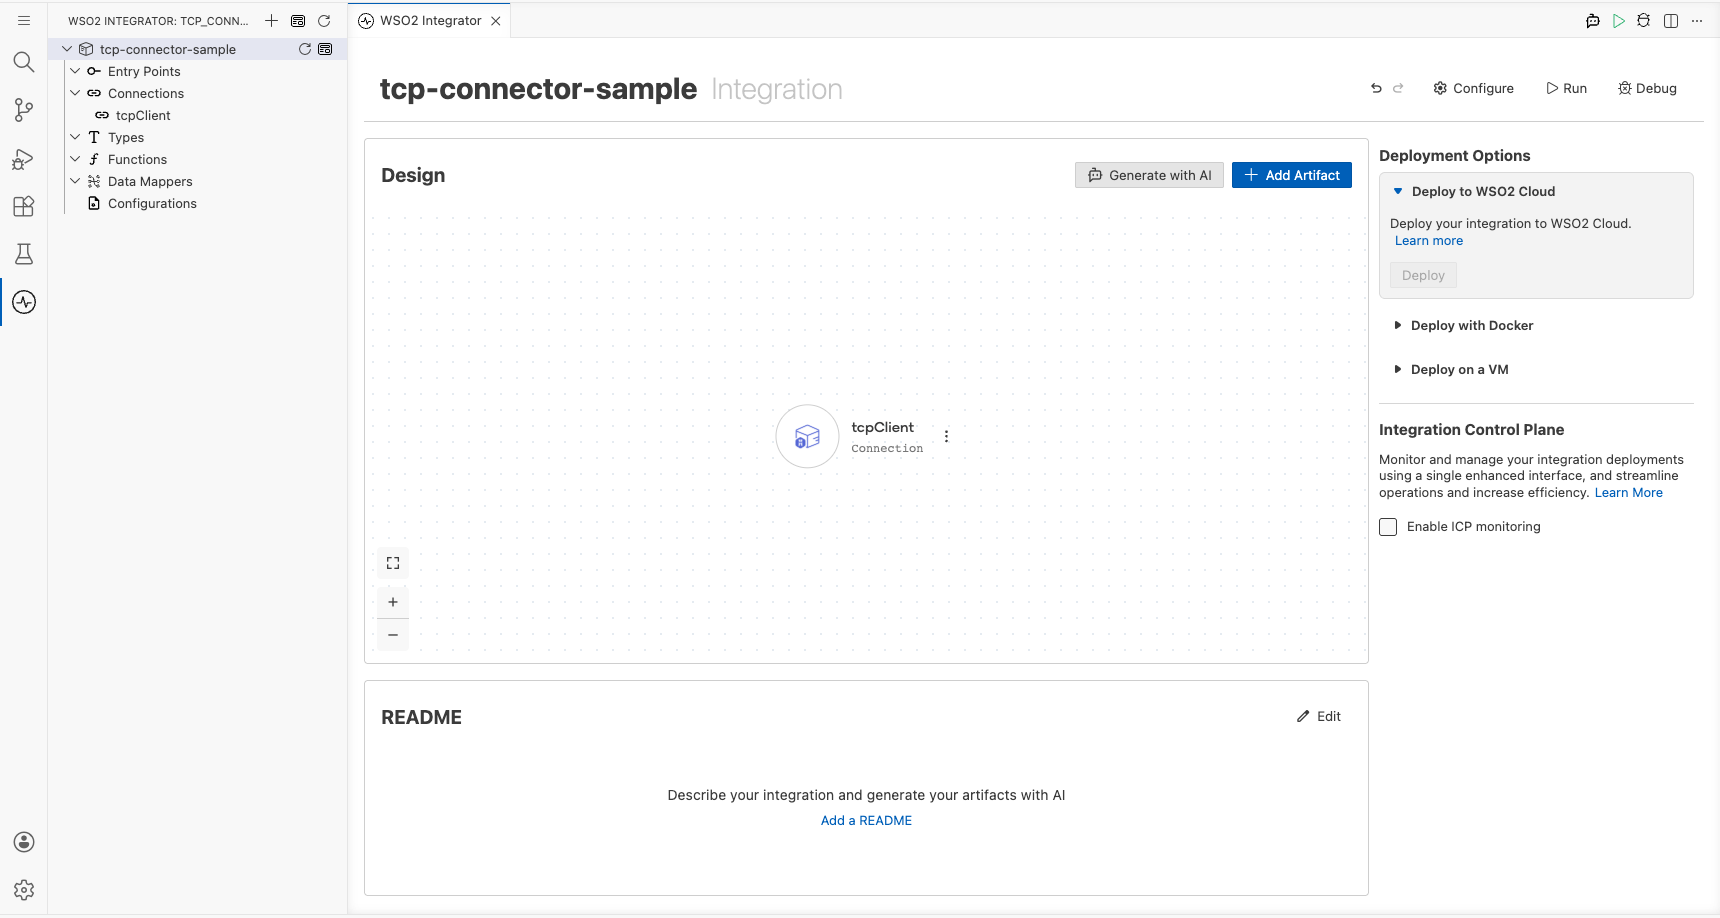
Select Save Connection. The tcpClient connection appears on the integration canvas and in the sidebar under Connections.
Step 3: Set actual values for your configurables
- In the left panel, select Configurations.
- Set a value for each configurable listed below.
- tcpHost (string) : The hostname or IP address of the remote TCP server
- tcpPort (int) : The port number of the remote TCP server
Configuring the TCP writeBytes operation
Step 4: Add an Automation entry point
Select + Add Artifact on the canvas, then select Automation from the Artifacts panel and select Create. This creates a main automation entry point and opens the flow canvas.
Step 5: Select the writeBytes operation and configure its parameters
- Inside the automation flow, select the + button between Start and Error Handler to open the node panel.
- Under Connections → tcpClient, expand to reveal the available operations.
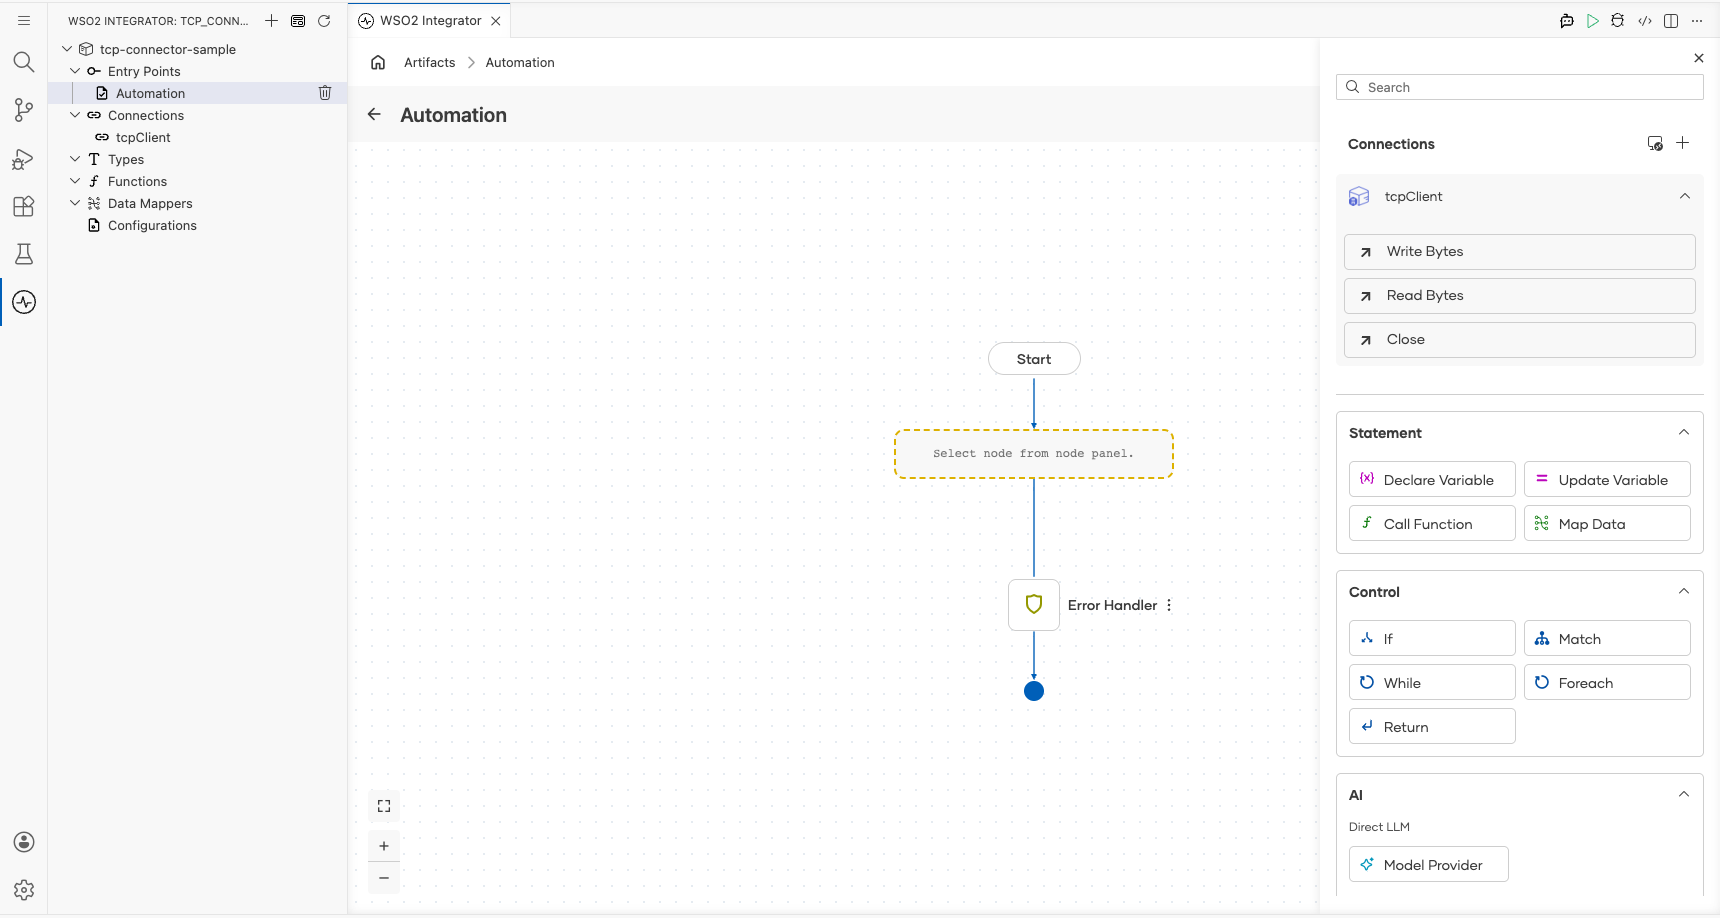
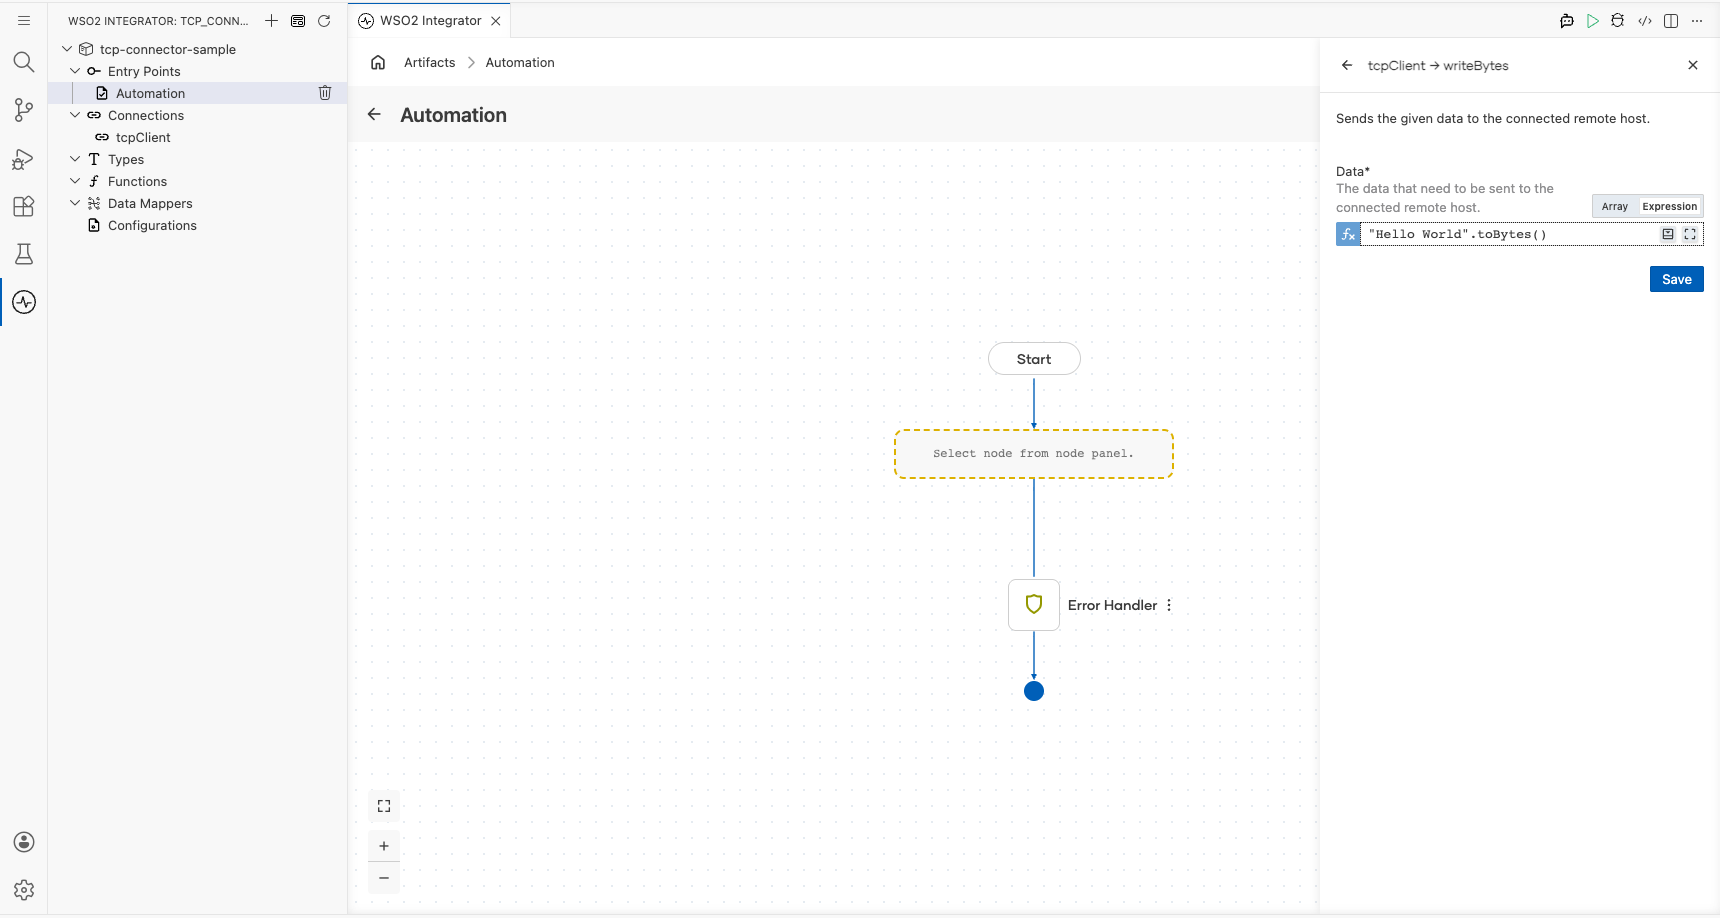
- Select Write Bytes and fill in the operation fields.
- Data : Enter
"Hello World".toBytes()as the byte payload to send to the remote TCP host
Try it yourself
Try this sample in WSO2 Integration Platform.

TCP Trigger Example
What you'll build
This integration listens on a configurable TCP port and handles raw TCP client connections using the ballerina/tcp library. When a TCP client connects, the onConnect handler fires and logs the caller information using log:printInfo. The overall flow follows a listener → handler → log pattern, where the TCP listener accepts connections and routes them to the auto-registered onConnect handler.
Architecture
Prerequisites
- A TCP client tool (for example,
ncortelnet) for testing
Setting up the TCP integration
New to WSO2 Integrator? Follow the Create a New Integration guide to set up your integration first, then return here to add the trigger.
Adding the TCP trigger
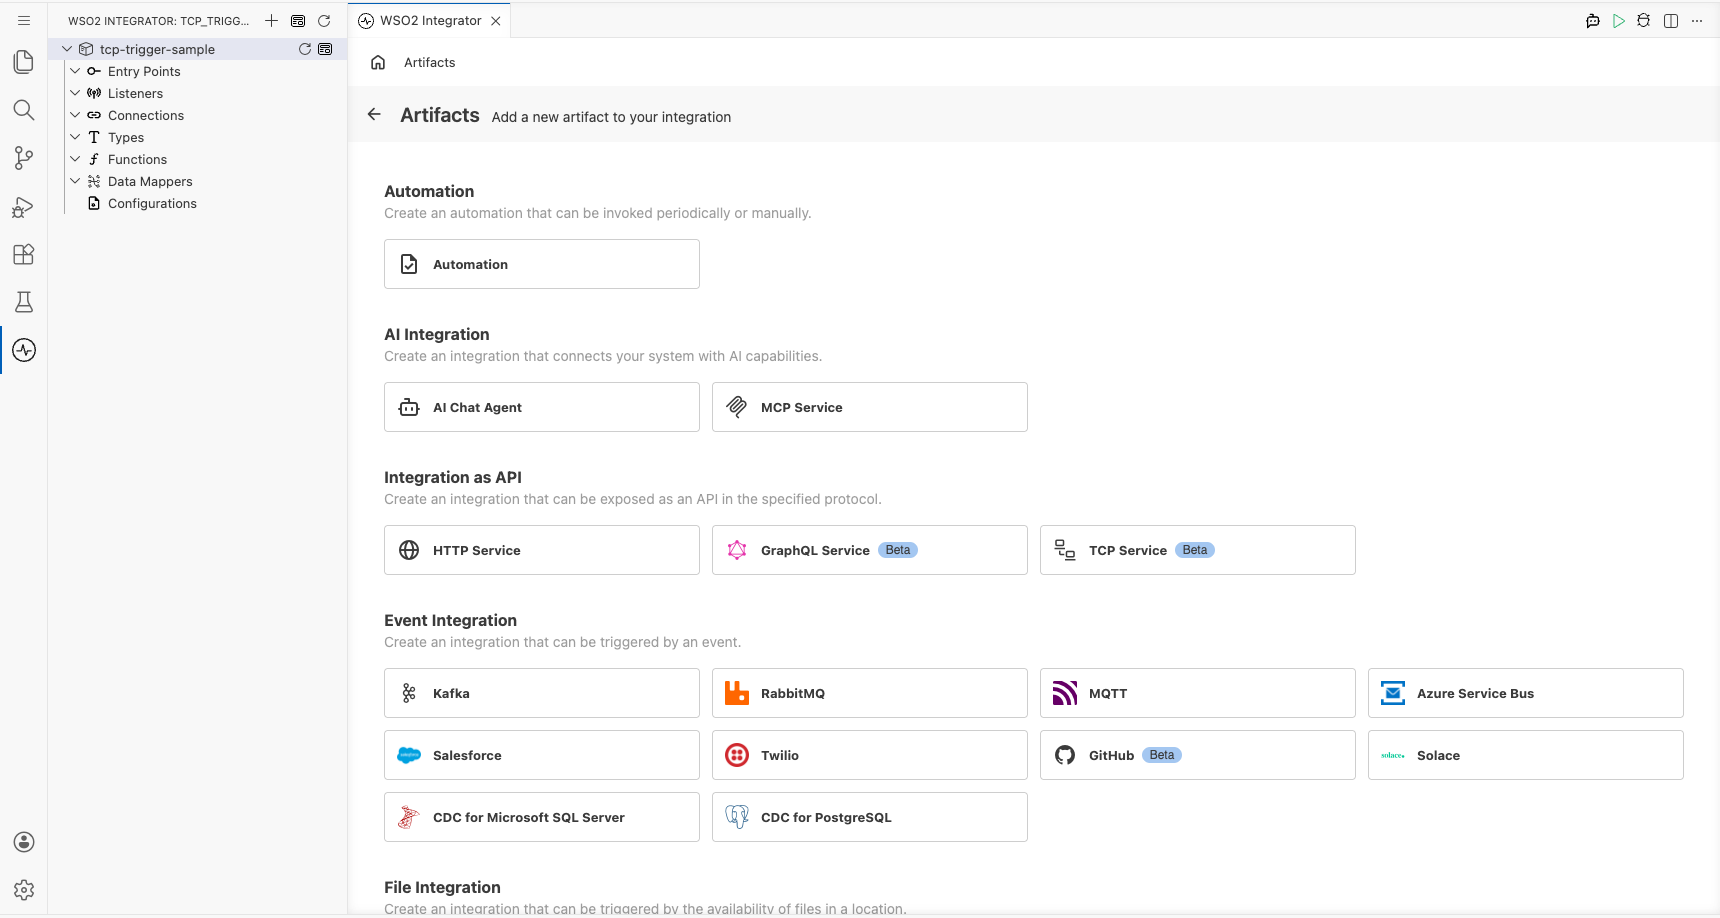
Step 1: Open the artifacts palette and select the TCP service
Select Add Artifact (the + icon) in the WSO2 Integrator panel toolbar to open the Artifacts palette. Locate the Integration as API category and select TCP Service.
Configuring the TCP listener
Step 2: Bind the listener port to a configuration variable
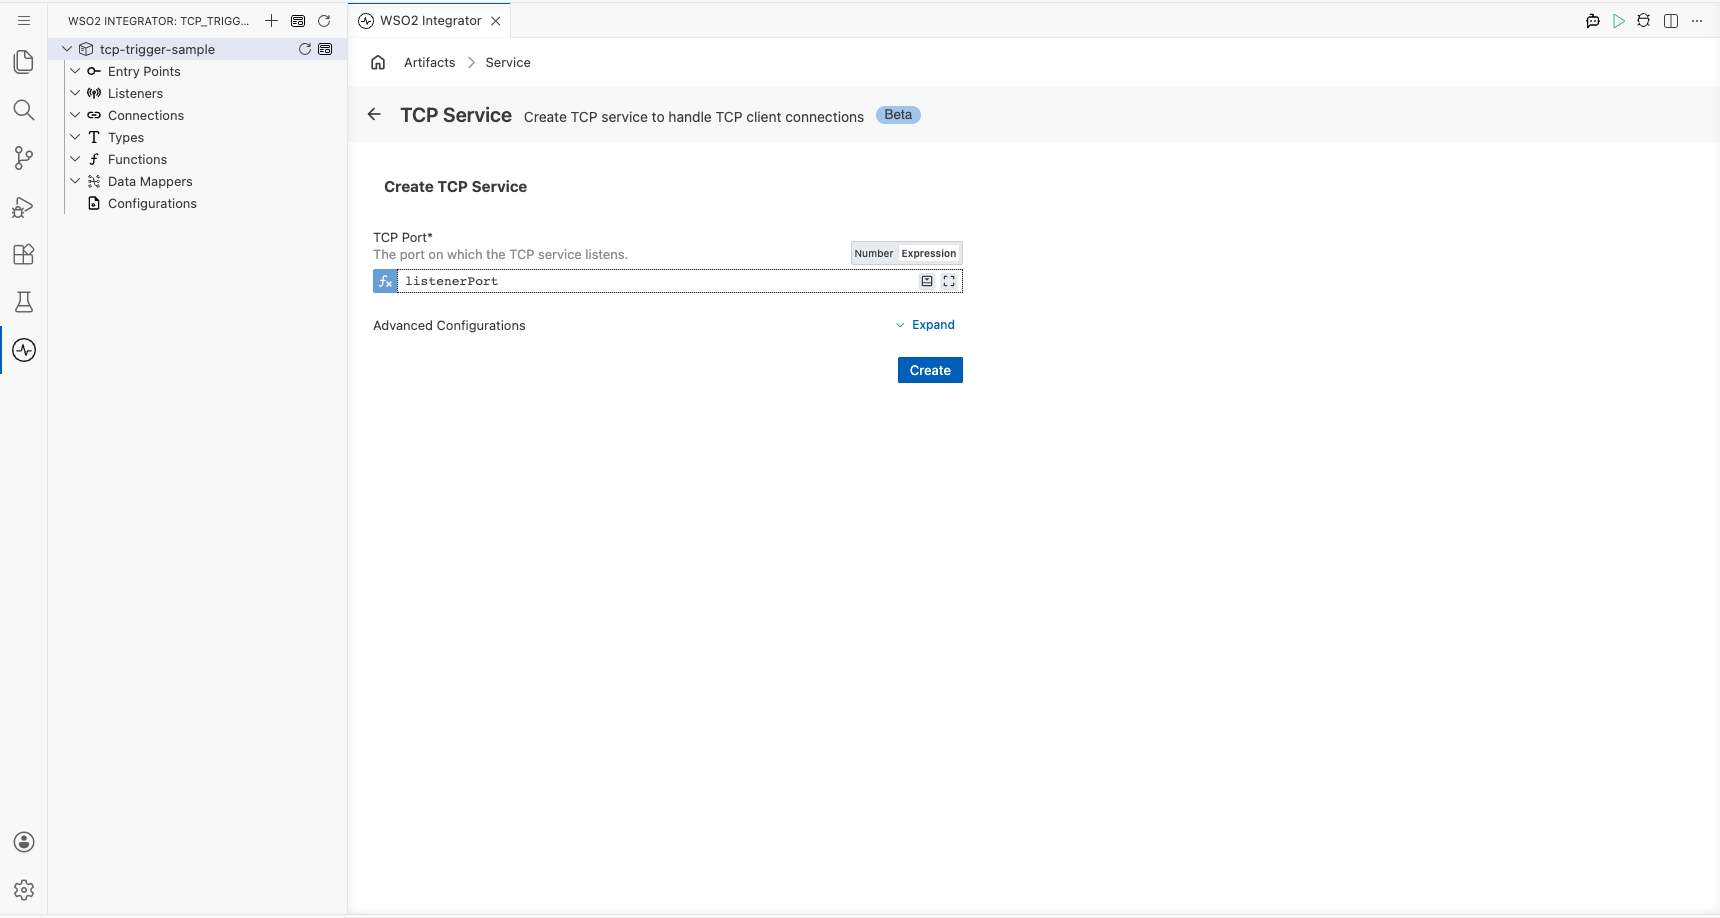
In the Create TCP Service form, bind the TCP Port field to a configurable int variable so the port can be set at runtime without redeploying.
- Select the Expression toggle next to the TCP Port field to switch to Expression mode.
- Select the Open Helper Panel icon to open the Helper Panel on the right.
- In the Helper Panel, select the Configurables tab, then select New Configurable.
- In the New Configurable dialog, enter
listenerPortas the name and selectintas the type, then select Save. - In the TCP Port expression field, enter
listenerPortand select listenerPort int from the autocomplete dropdown.
- listenerPort : The port on which the TCP listener accepts client connections
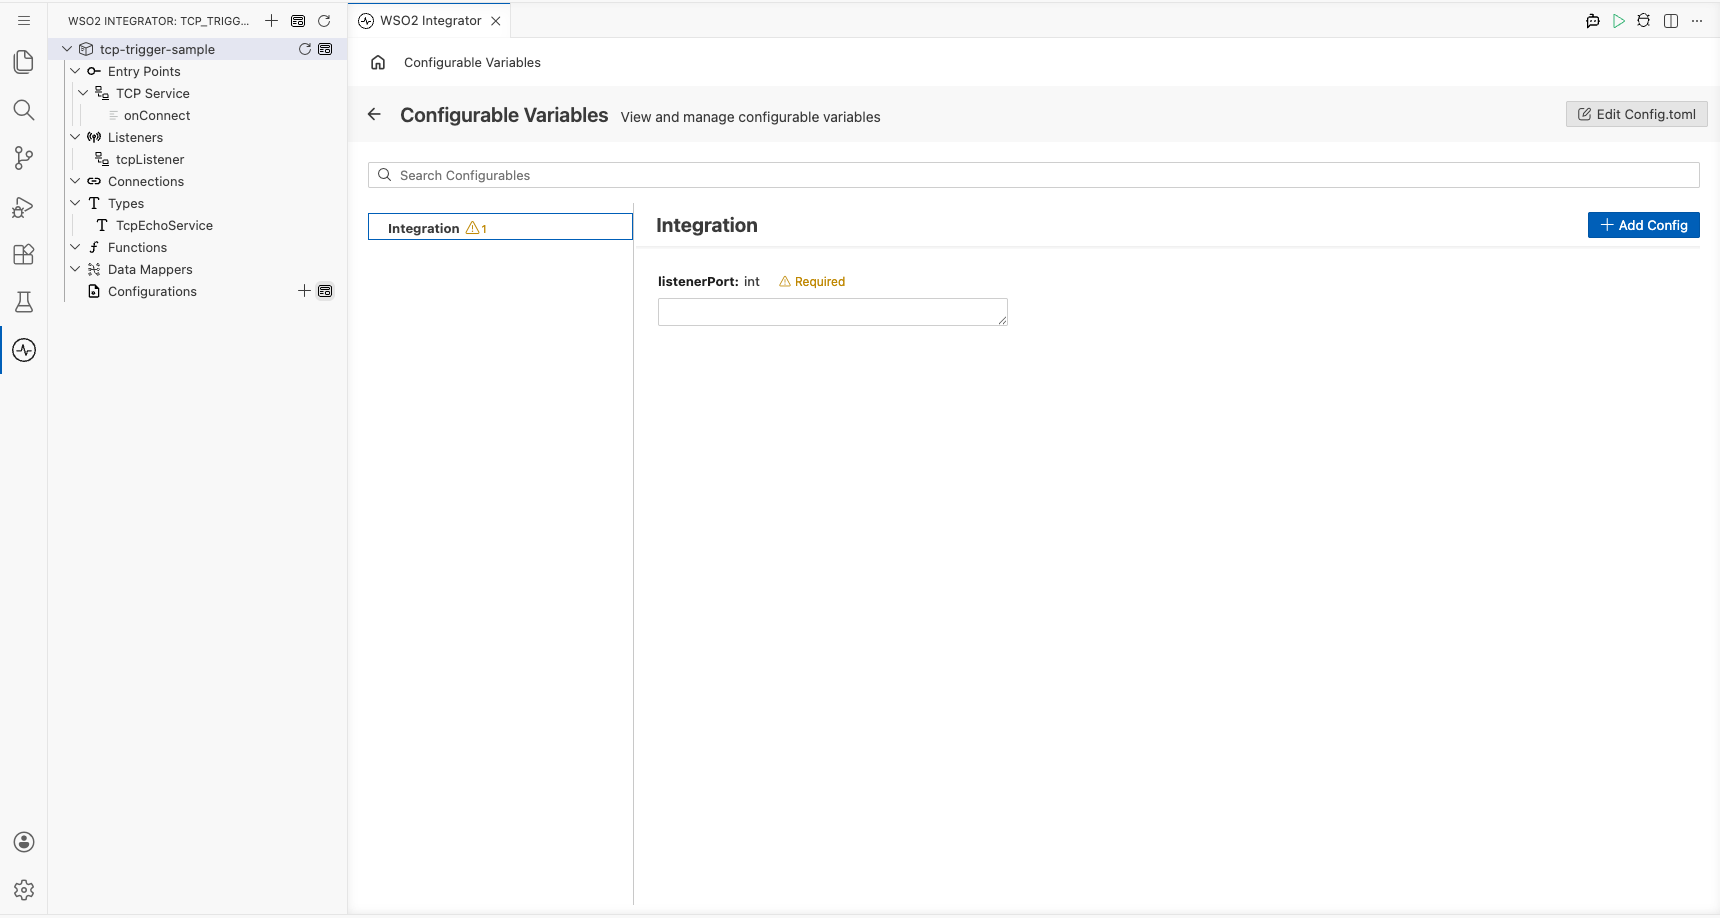
Step 3: Set actual values for your configurations
Select Configurations in the left panel of WSO2 Integrator to open the Configurations panel and provide values for each configuration.
- listenerPort (int) : The port number on which the TCP listener accepts incoming client connections
Step 4: Create the TCP service
Select Create to register the TCP service. WSO2 Integrator creates a tcp:Listener named tcpListener under Listeners and a tcp:Service entry point under Entry Points with the onConnect handler auto-registered.
Handling TCP events
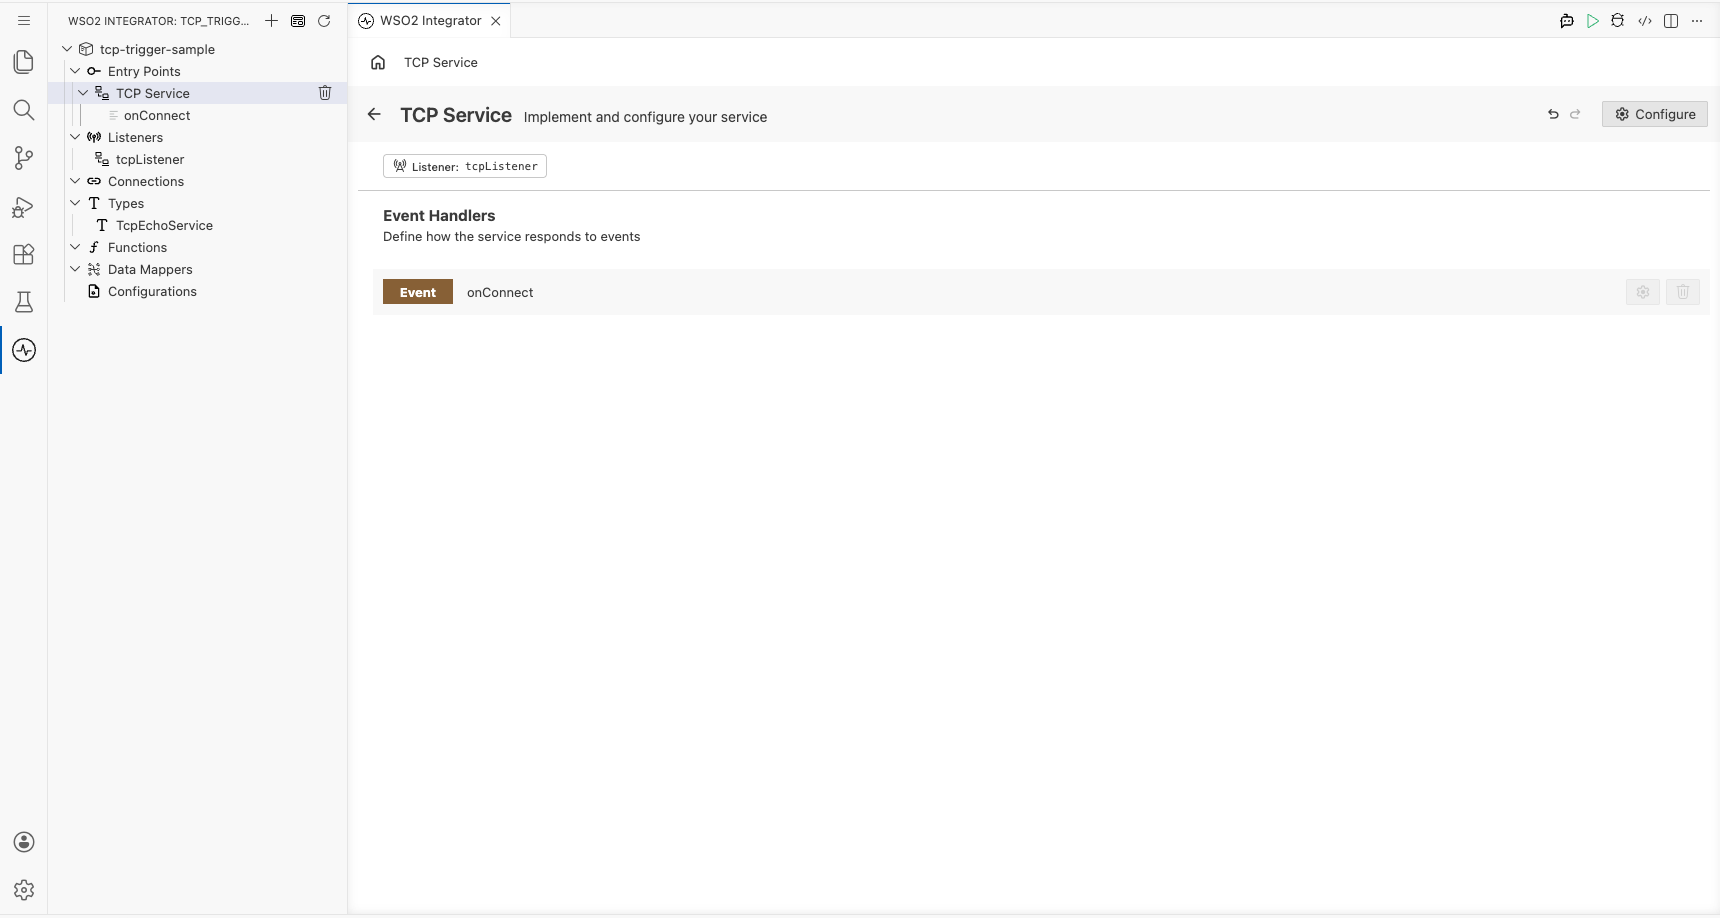
Step 5: View the auto-registered handlers in the service view
Select TCP Service under Entry Points in the left panel to open the TCP Service view. The onConnect handler is auto-registered by the framework-there's no Add Handler side panel for the TCP trigger.
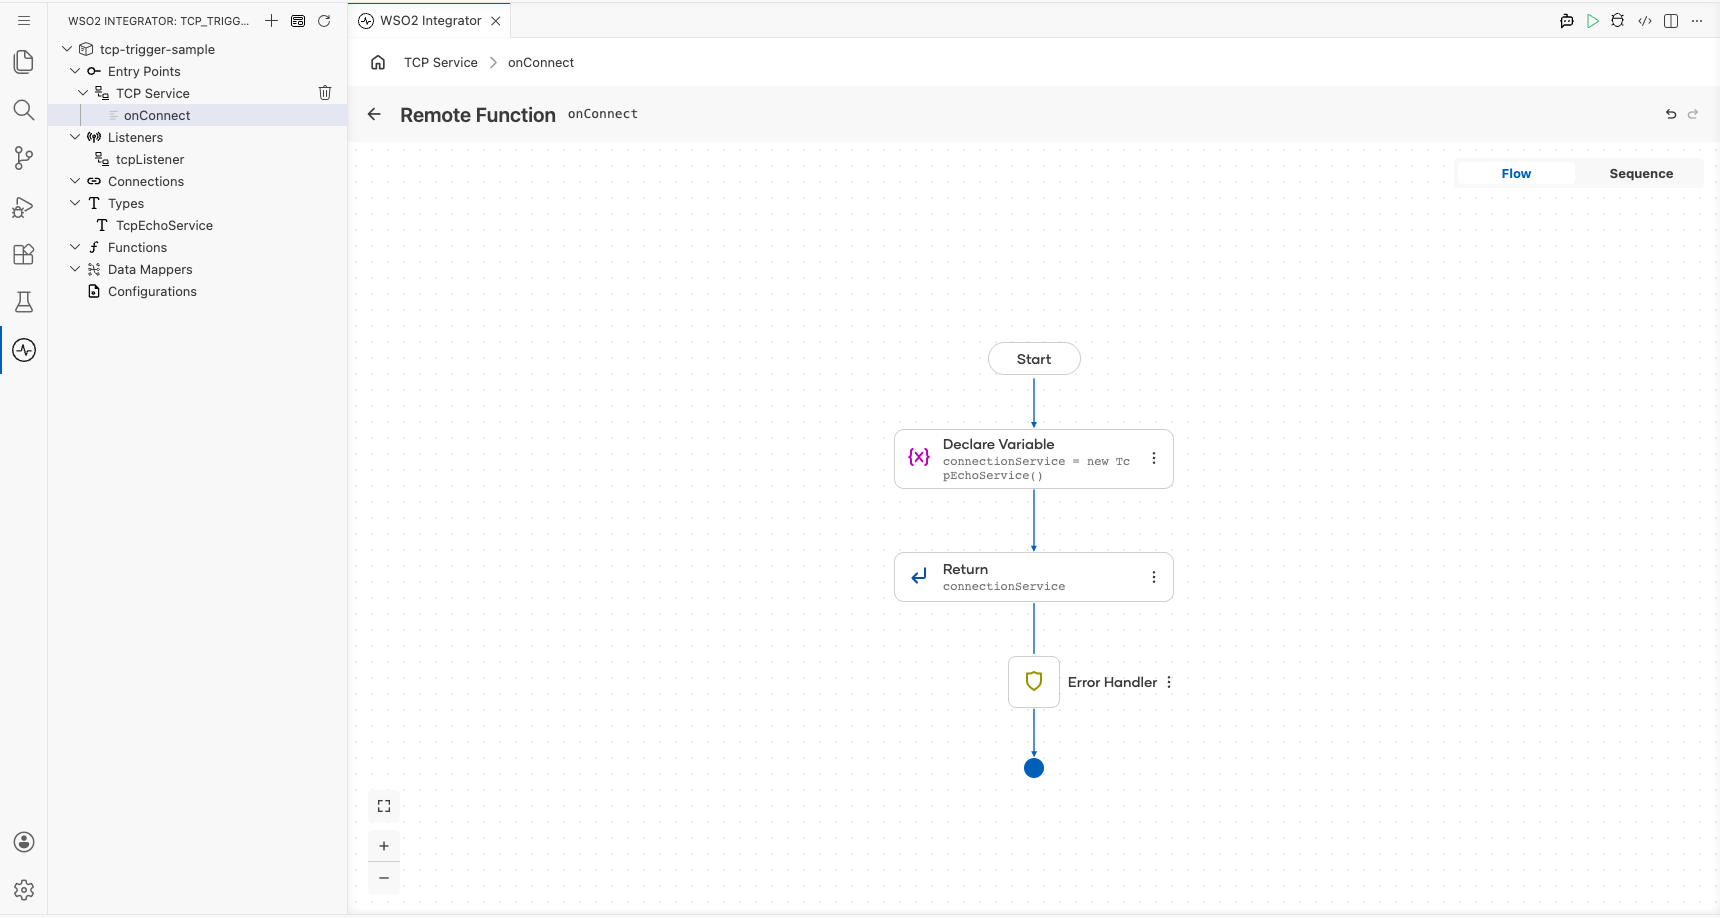
Step 6: Examine the onConnect handler flow
Select the onConnect row to open the handler's flow canvas. The initial flow shows the TcpEchoService instantiation and return steps generated by the framework. The TcpEchoService type implements tcp:ConnectionService and is returned to the TCP listener to route subsequent onBytes, onError, and onClose calls.
Step 7: Log the caller information in the onConnect flow
In the onConnect flow canvas, open the auto-generated TcpEchoService and add a Log step before the existing Declare Variable and Return steps. Use log:printInfo to output the caller details (for example, the caller remote address or connection metadata) so each incoming connection is logged before the handler returns the TcpEchoService to the listener.
Running the integration
Run the integration from the WSO2 Integrator panel by selecting Run Integration (▶) in the editor toolbar.
Once the service starts and listens on the configured port, use one of the following methods to fire a test event:
- Use
nc(netcat): Connect a TCP client to the listener port-for example,nc <host> <port>-to trigger theonConnecthandler immediately on connection. telnet: Open a telnet session to the listener address and port to establish a TCP connection and trigger theonConnecthandler.- WSO2 Integrator built-in Try It tool: If available, select the WSO2 Integrator built-in Try It TCP client template to send a test connection without an external tool.
When the connection is established, the onConnect handler fires and logs the caller information to the console output in WSO2 Integrator.
Try it yourself
Try this sample in WSO2 Integration Platform.
More code examples
The TCP connector provides practical examples illustrating usage in various scenarios. Explore these examples, covering TCP clients, services, and socket-based messaging use cases.
-
HTTP client server: Build a simple HTTP-style client and server over TCP connections.
-
TCP chat server: Implement a chat server using TCP socket communication.