Setup Guide
This guide walks you through getting the necessary details from SAP SuccessFactors so that the connector can authenticate and communicate with your Employee Central instance.
This connector supports two authentication methods: Basic Authentication and OAuth 2.0 SAML Bearer.
Method 1: Basic Authentication
If you already have a username and password for this integration to work, you can use those directly. If you'd rather create a new account with narrowed scope for this integration, follow these steps:
- Sign in to your SAP SuccessFactors instance as an administrator.
- Navigate to Admin Center > Add New Employee and create a new user account for this integration.
- Navigate to Admin Center > Manage Permission Roles, create a role scoped to only the permissions this integration needs, and grant it to the new user.
- Navigate to Admin Center > Reset User Password and set a password for the new user account.
In either case, you will also need the API server hostname for your SuccessFactors region, for example, api12.successfactors.eu. The complete list of API server hostnames by region is available in the SAP SuccessFactors API documentation.
Method 2: OAuth 2.0 SAML Bearer
Step 1: Generate a key pair and certificate
-
Generate an RSA key pair and a matching X.509 certificate. If you don't already have one, generate a self-signed pair with OpenSSL:
openssl req -x509 -newkey rsa:2048 -keyout private_key.pem -out certificate.pem -days 365 -nodes -subj "/CN=YourAppName"private_key.pemis secret - it never leaves your machine or gets uploaded anywhere. Onlycertificate.pemis registered with SAP.
Step 2: Register an OAuth2 client application
-
Sign in to your SAP SuccessFactors instance as an administrator.
-
Search for Manage OAuth2 Client Applications in Admin Center's action search, or navigate to it directly under Admin Center > Company Settings.

-
Choose Register Client Application and provide the following information:
Field Description Application Name A name to identify this integration Description An optional description X.509 Certificate The contents of certificate.pemas a single continuous base64 string, with the-----BEGIN CERTIFICATE-----/-----END CERTIFICATE-----lines and line breaks removed. Produce this withawk '/BEGIN CERTIFICATE/{flag=1;next}/END CERTIFICATE/{flag=0}flag' certificate.pem | tr -d '\n'and paste the single line of output it prints. -
Choose Register to save the application.
Step 3: Note your credentials
After registering, open the application (choose View from the application list) to find the Company ID and the API Key SAP assigned to it.
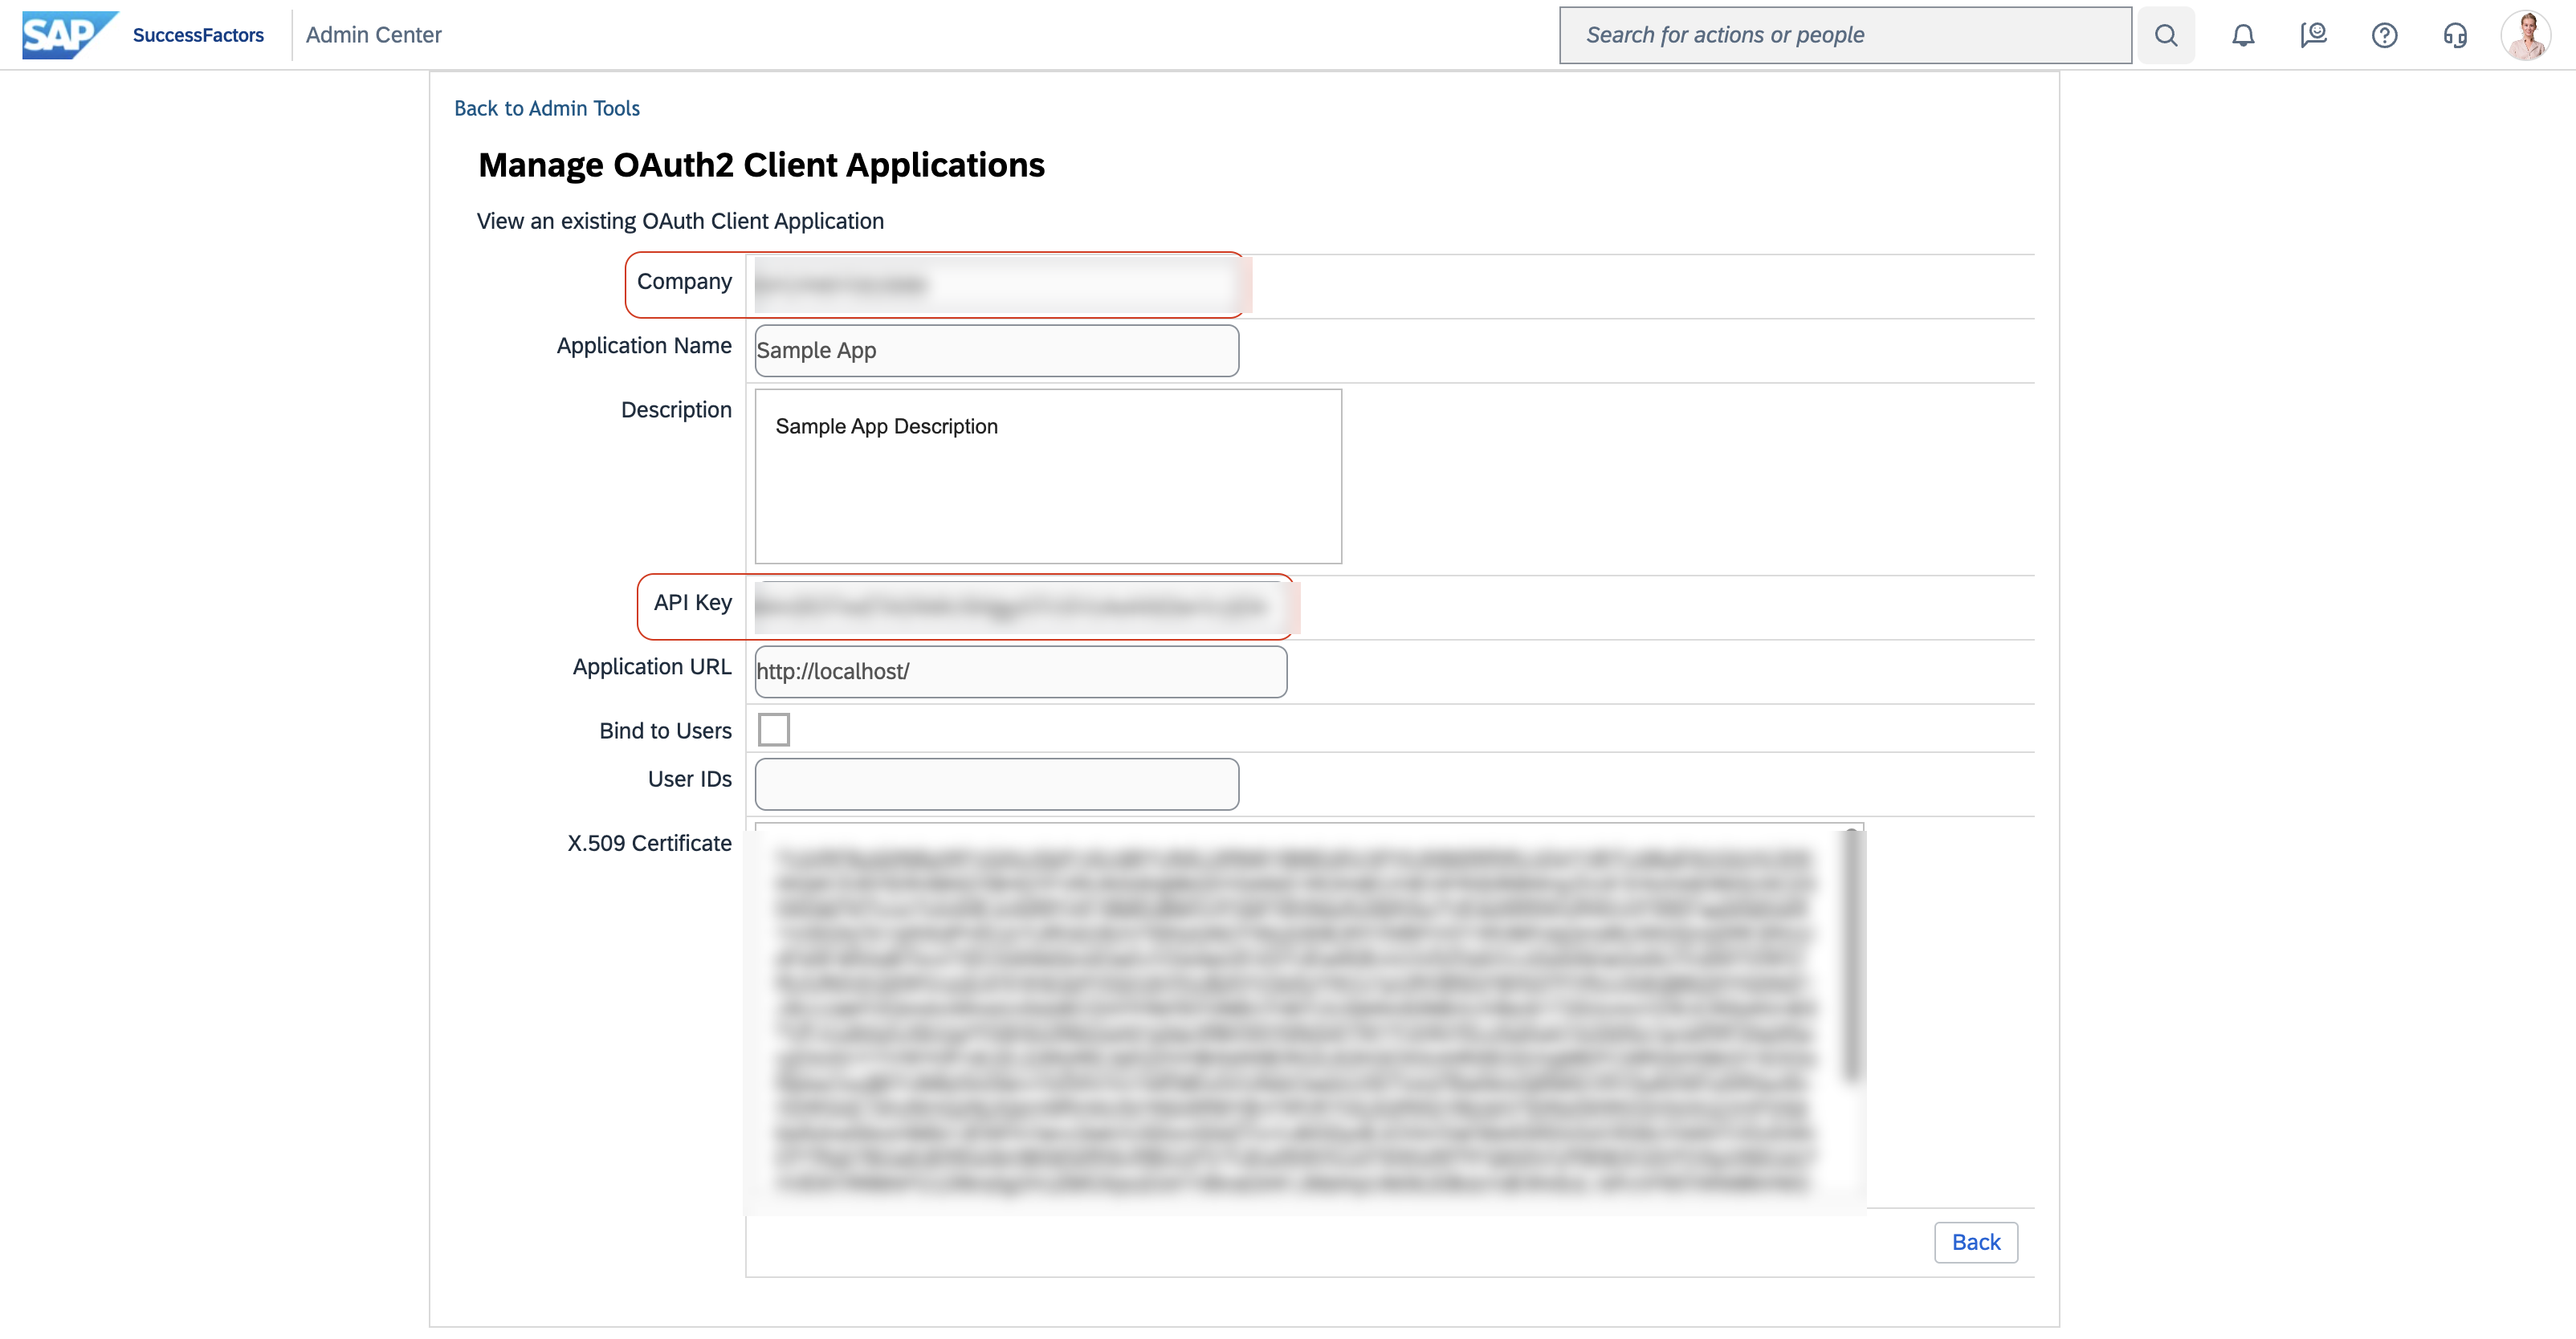
You now have everything the connector's SAML Bearer configuration needs: the API Key, the Company ID, the username to authenticate as, your private_key.pem and certificate.pem files, and the OAuth2 token endpoint (typically https://<admin-center-host>/oauth/token).
Next steps
- Action Reference - Available operations