Lifecycle Management
API lifecycle management is an important aspect of API management. The API lifecycle consists of various states that an API passes through, from creation to retirement. In WSO2 Cloud - Integration Platform, there are five distinct lifecycle states: CREATED, PRE-RELEASED, PUBLISHED, DEPRECATED, and RETIRED.
By leveraging the various lifecycle states, API managers can optimize the development process and ensure that subscribers have access to the latest and most reliable APIs.
API lifecycle states
The following lifecycle states are applicable to APIs in WSO2 Cloud - Integration Platform:
| API lifecycle state | Use case | Corresponding action |
|---|---|---|
CREATED | The API is created but is not ready for consumption. | The API is not visible to subscribers in the Developer Portal. |
PRE-RELEASED | A prototype is created for early promotion and consumer testing. You can deploy a new API or a new version of an existing API as a prototype to provide subscribers with an early implementation of the API. | The API is published to the Developer Portal as a pre-release. |
PUBLISHED | The API is ready for subscribers to view and subscribe to via the Developer Portal. | The API is visible in the Developer Portal and is available for subscription. |
DEPRECATED | The old version of an API is moved to this state when a newer version of the API is PUBLISHED. | The API is deployed and is available to existing subscribers. New subscriptions are disabled. Existing subscribers can continue to use it as usual until the API is retired. |
RETIRED | The API is no longer in use when it is in this state. | The API is unpublished and deleted from the Developer Portal. |
Manage the lifecycle of an API
To change the lifecycle state of an API via the WSO2 Cloud Console, follow the instructions given below:
You must have publishing privileges to manage the lifecycle states of an integration.
-
Sign in to the WSO2 Cloud.
-
Select the project.
-
In the Integrations pane, click on the integration for which you want to manage the lifecycle.
-
Navigate to the lifecycle management page using one of the following options:
- In the integration overview page, click Lifecycle Status.
- In the left navigation menu, under Develop, click Lifecycle.

-
You will see a lifecycle state transition diagram showing the integration's current state. The possible next states you can apply are displayed above the diagram. If the integration has multiple endpoints, use the endpoint selector on the page to switch between them. The lifecycle state change applies only to the currently selected endpoint. Click on a required lifecycle state to apply it to the integration. For example, if an integration is in the
CREATEDstate, you can click eitherPRE-RELEASEDorPUBLISHED.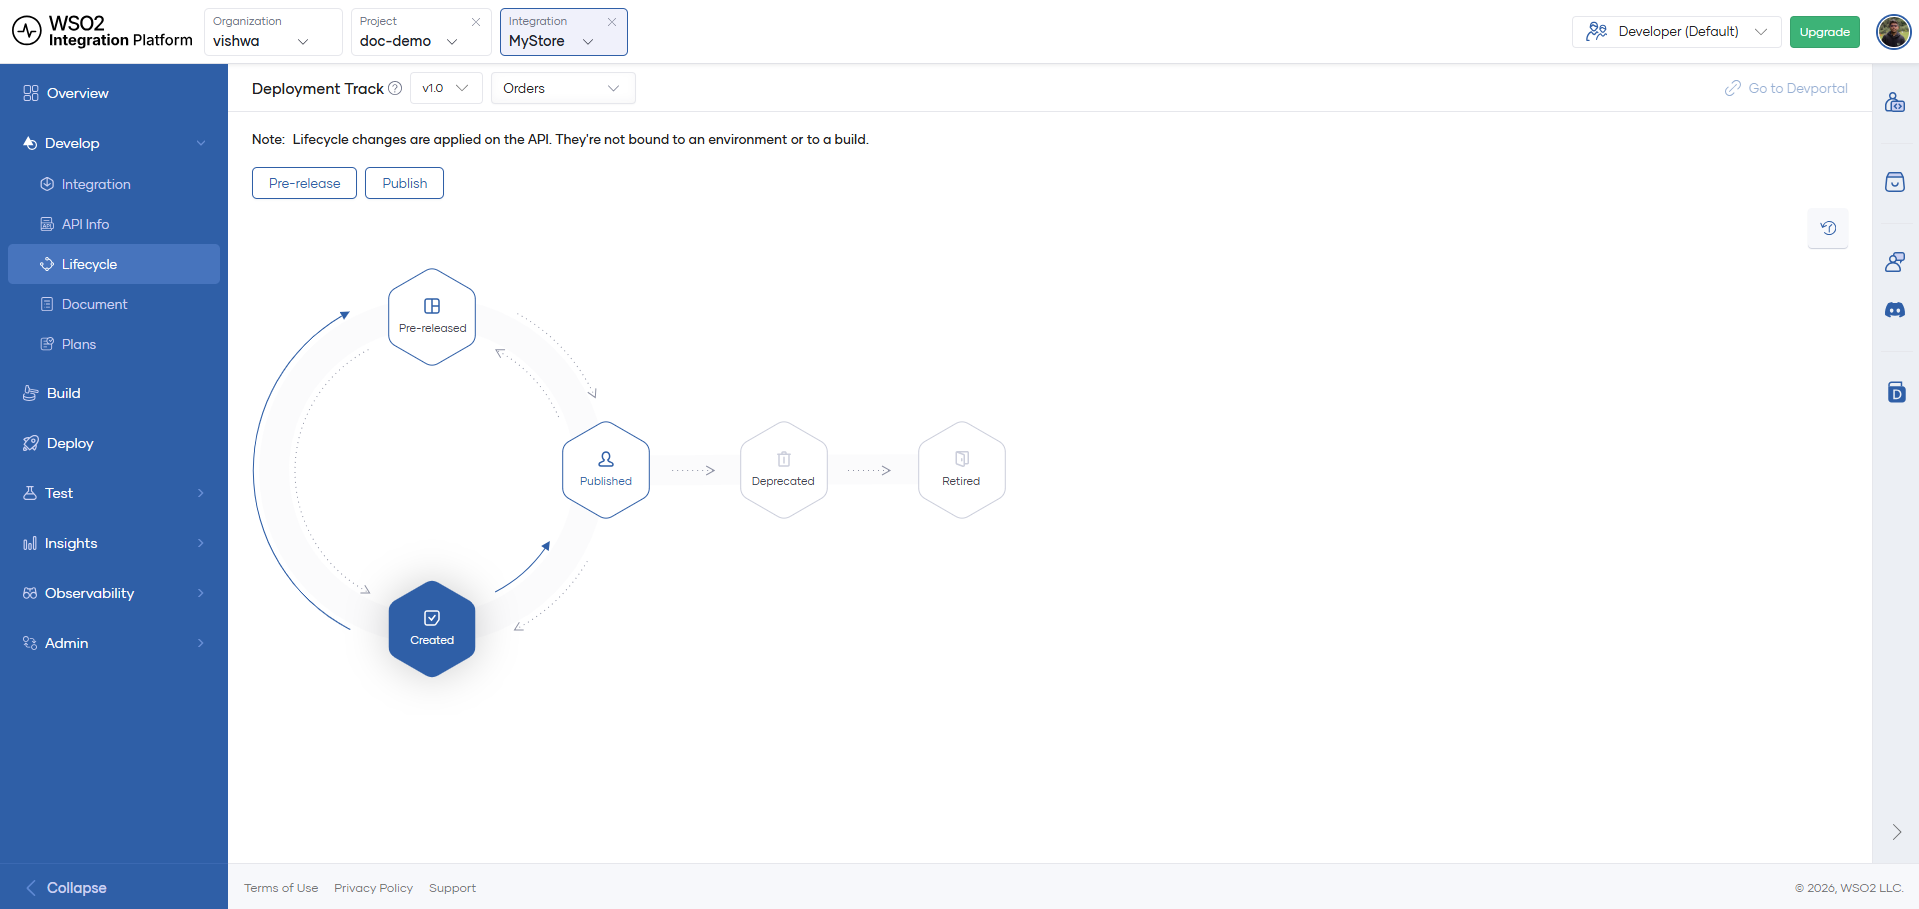
In the integration overview page, next to the Lifecycle Status button, a status indicator shows how many endpoints are currently in the PUBLISHED state. For example, 0 / 2 Published indicates that the integration has two endpoints and none of them are published yet.

When you promote an integration to the Production environment, any endpoints that were in the CREATED state will get automatically PUBLISHED.