Deploy to WSO2 Agent Manager
You can deploy your agents to WSO2 Agent Manager directly from WSO2 Agent Builder. Agent Manager builds the agentic integration from your GitHub repository, deploys it, and lets you run and manage your organization's agents in one place.
- Access to a WSO2 Agent Manager instance: its console URL and an account that can sign in to it.
- A project with an agentic integration that has something to run, such as an agent with a trigger.
- The project published to a GitHub repository. Agent Manager builds from GitHub, so it needs your code there. To publish a project, see steps 5a–5e in Deploy to WSO2 Cloud.
Connect to Agent Manager
-
In WSO2 Agent Builder, open the agentic integration's overview. To get there, select the agentic integration's name in the sidebar.
-
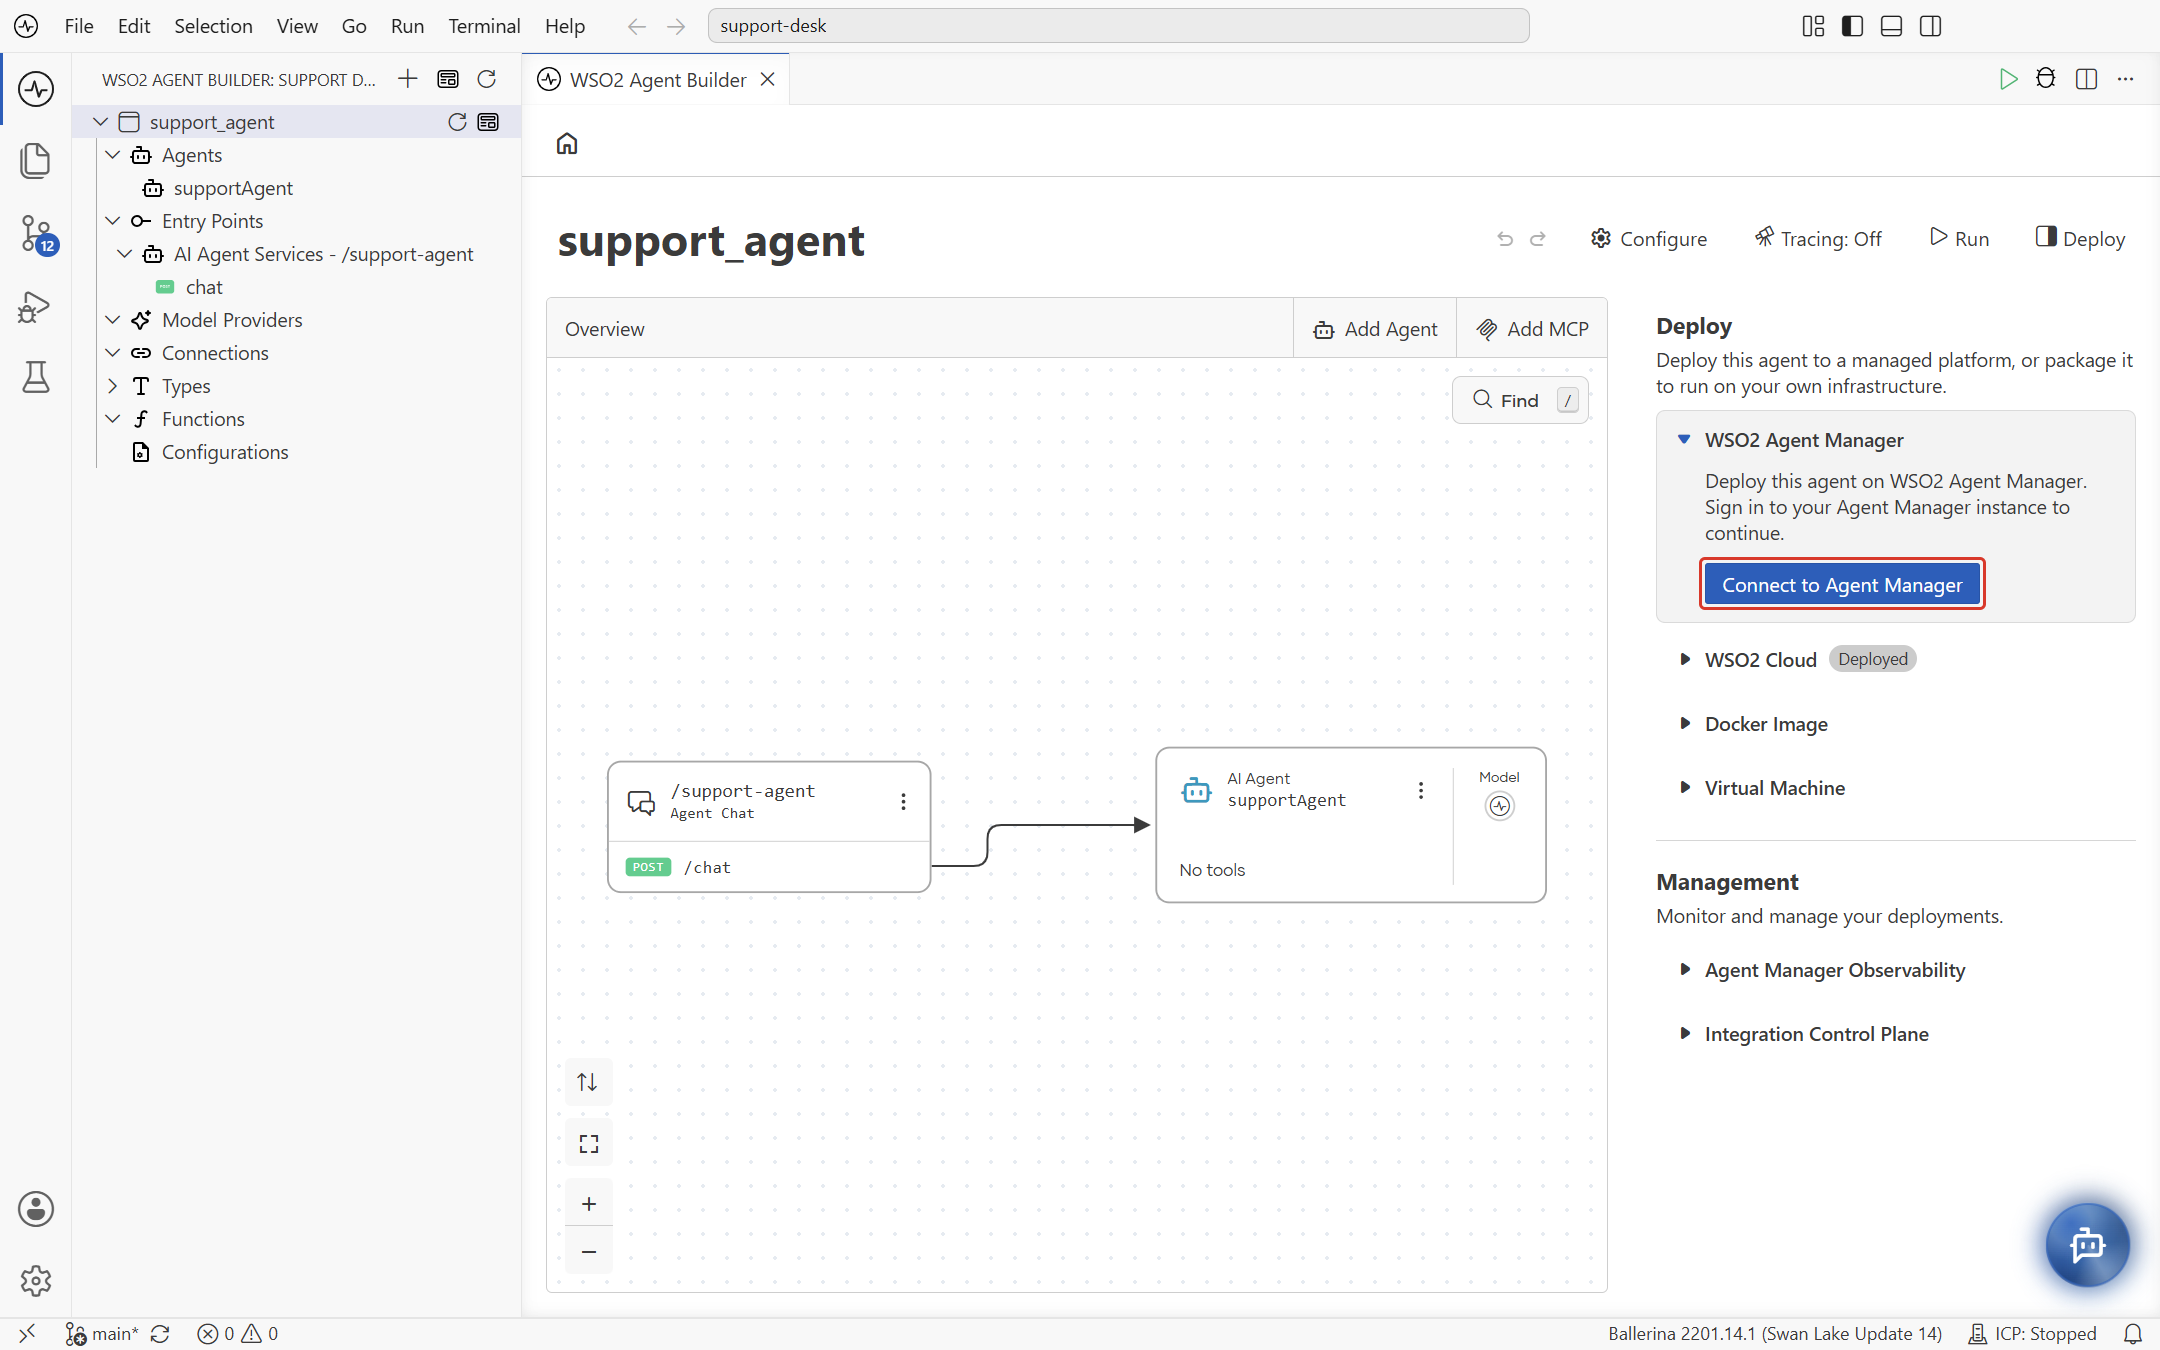
Select Deploy at the top right. In the Deploy panel, expand WSO2 Agent Manager and select Connect to Agent Manager.
-
Enter your Agent Manager Console URL, for example
https://console.agent-manager.example.com, and press Enter.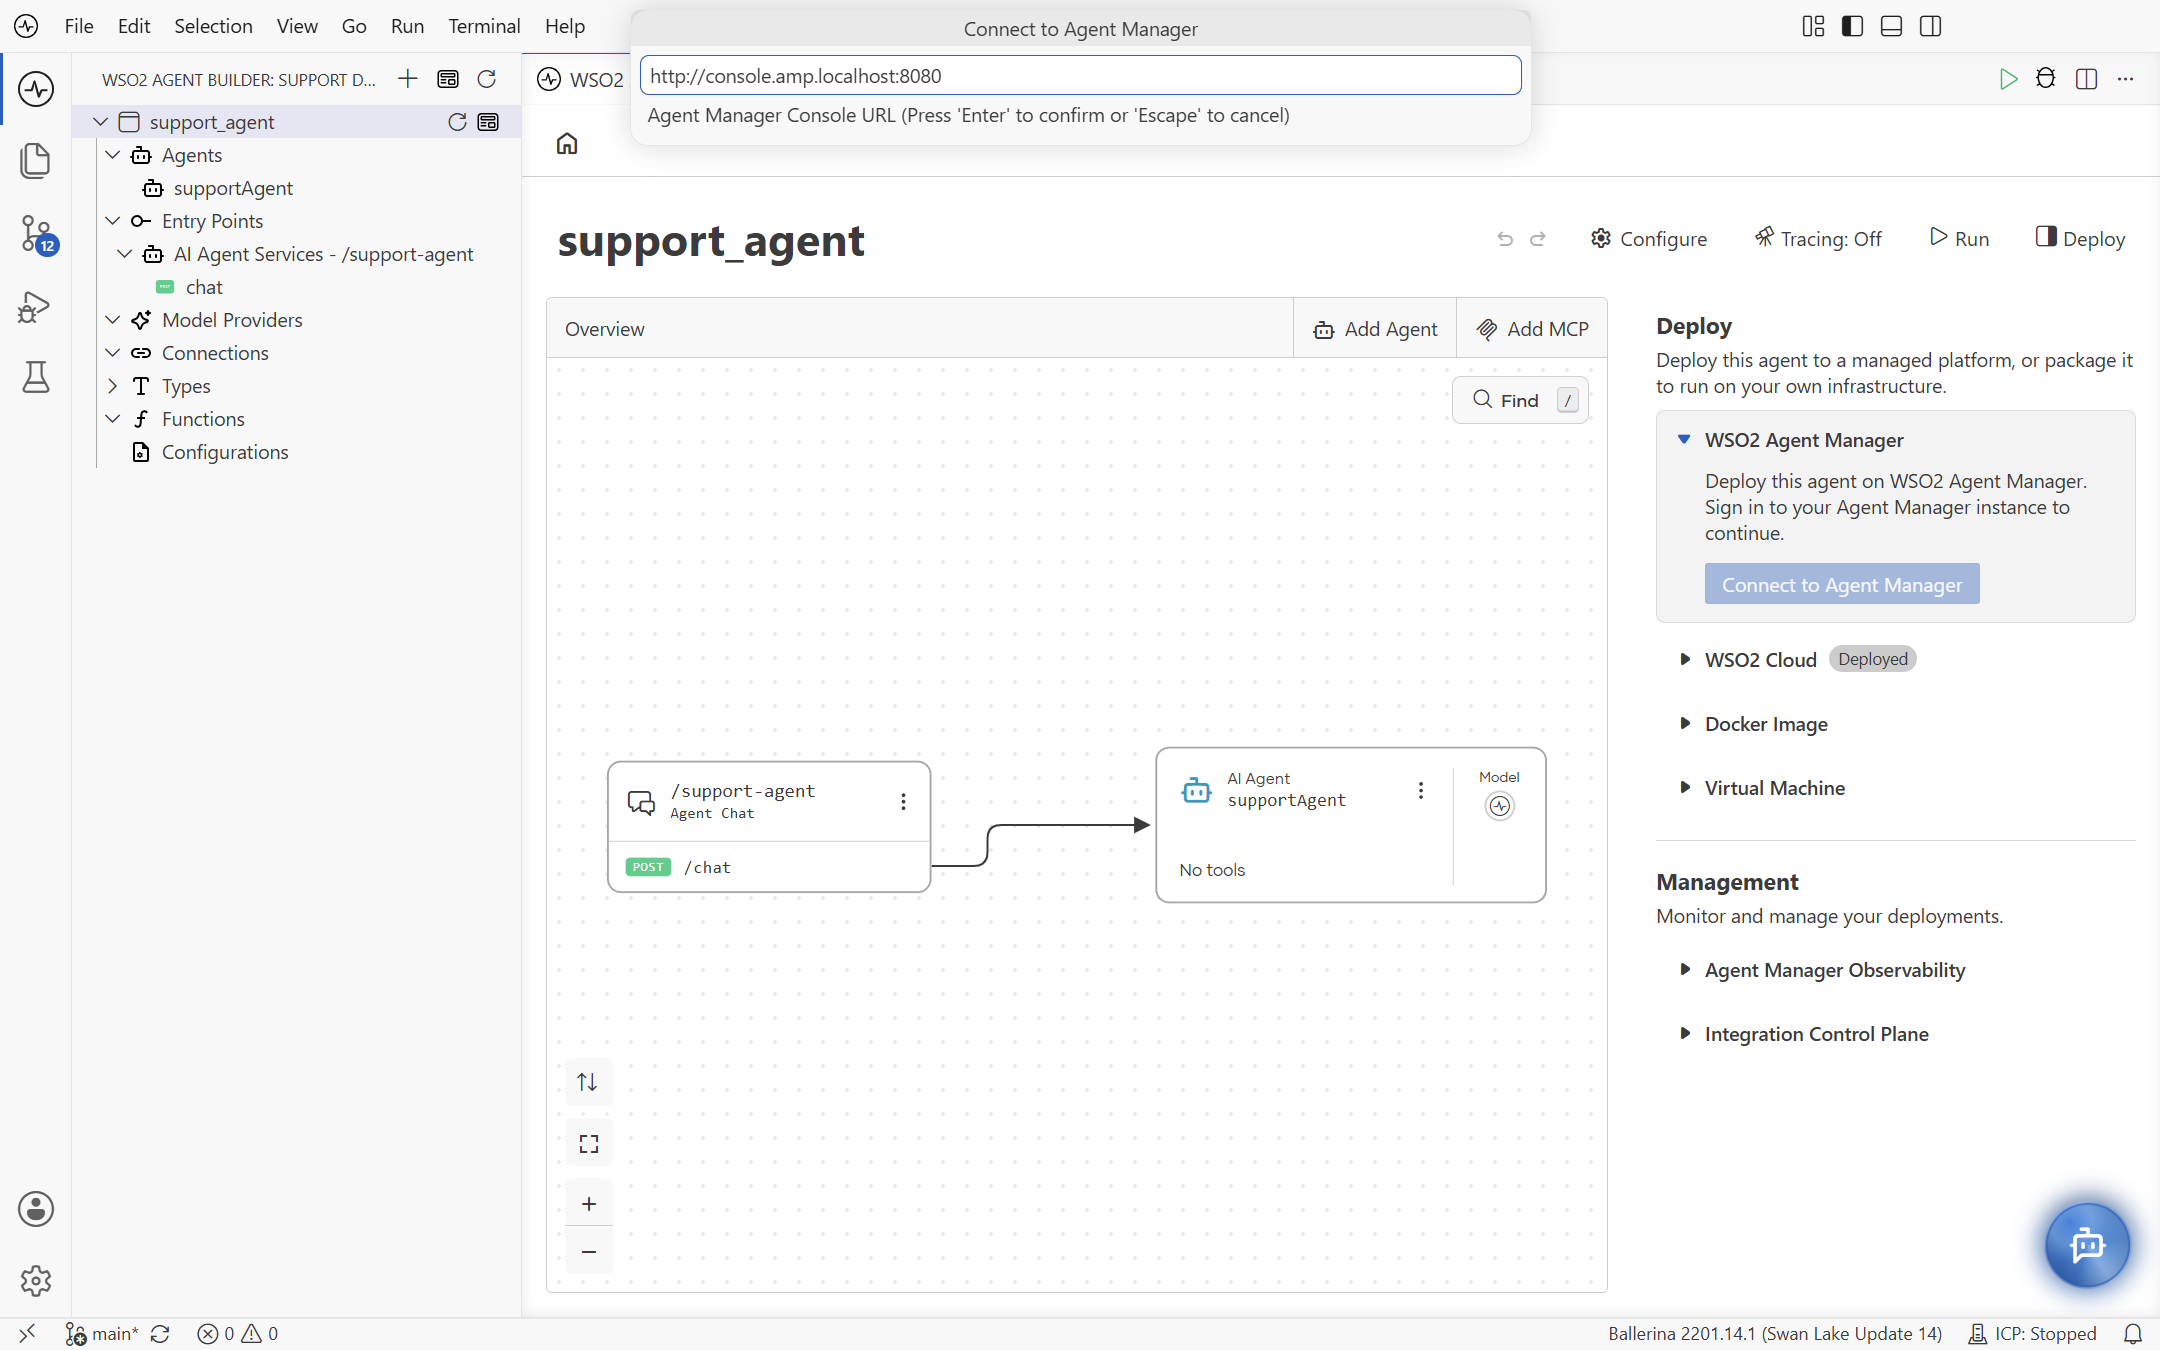
-
A browser opens on the Agent Manager sign-in page. Sign in, then return to WSO2 Agent Builder when the browser asks you to.
If your account belongs to more than one Agent Manager organization, WSO2 Agent Builder asks you to select one.
Once you're signed in, WSO2 Agent Builder shows Signed in to Agent Manager, and the WSO2 Agent Manager section shows your GitHub repository, its branch, and whether it is public or private.
Prepare the project
Agent Manager needs an openapi.yaml that describes your agent's API, and the Agent Manager module that sends your agent's traces to it.
-
In the WSO2 Agent Manager section, keep Enable Auto-Instrumentation selected to send traces to Agent Manager.
-
Select Prepare Project.
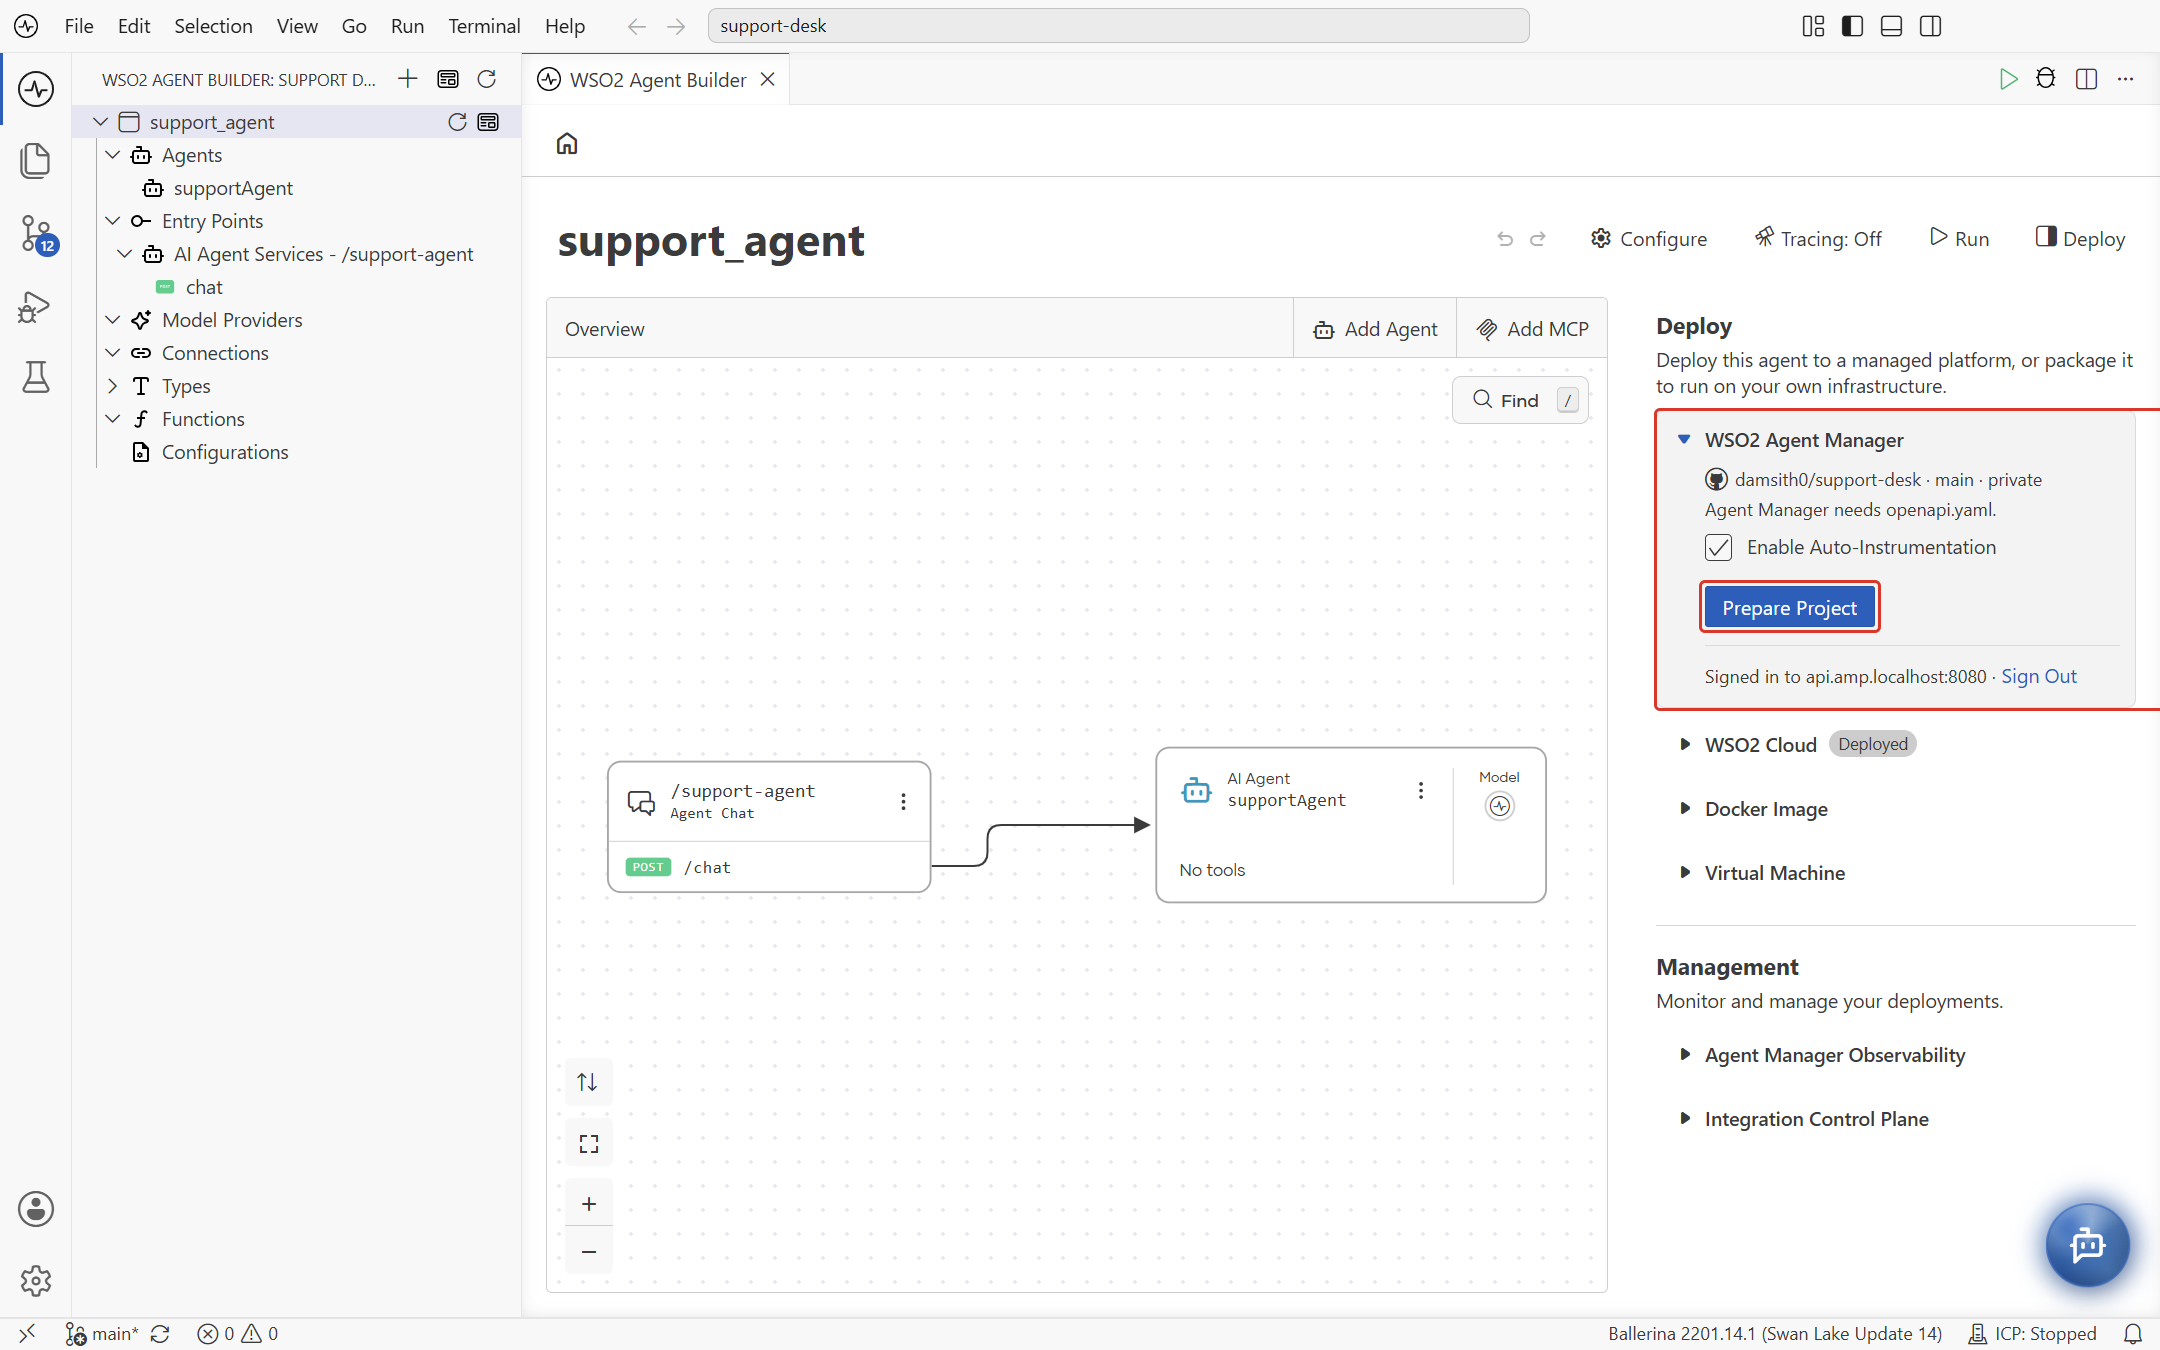
WSO2 Agent Builder adds
openapi.yamlandagent_manager.balto the agentic integration, and turns on observability in itsBallerina.toml. -
The section now shows "GitHub doesn't have agent_manager.bal or openapi.yaml yet. Commit and push your changes before deploying." Select Review and Commit.
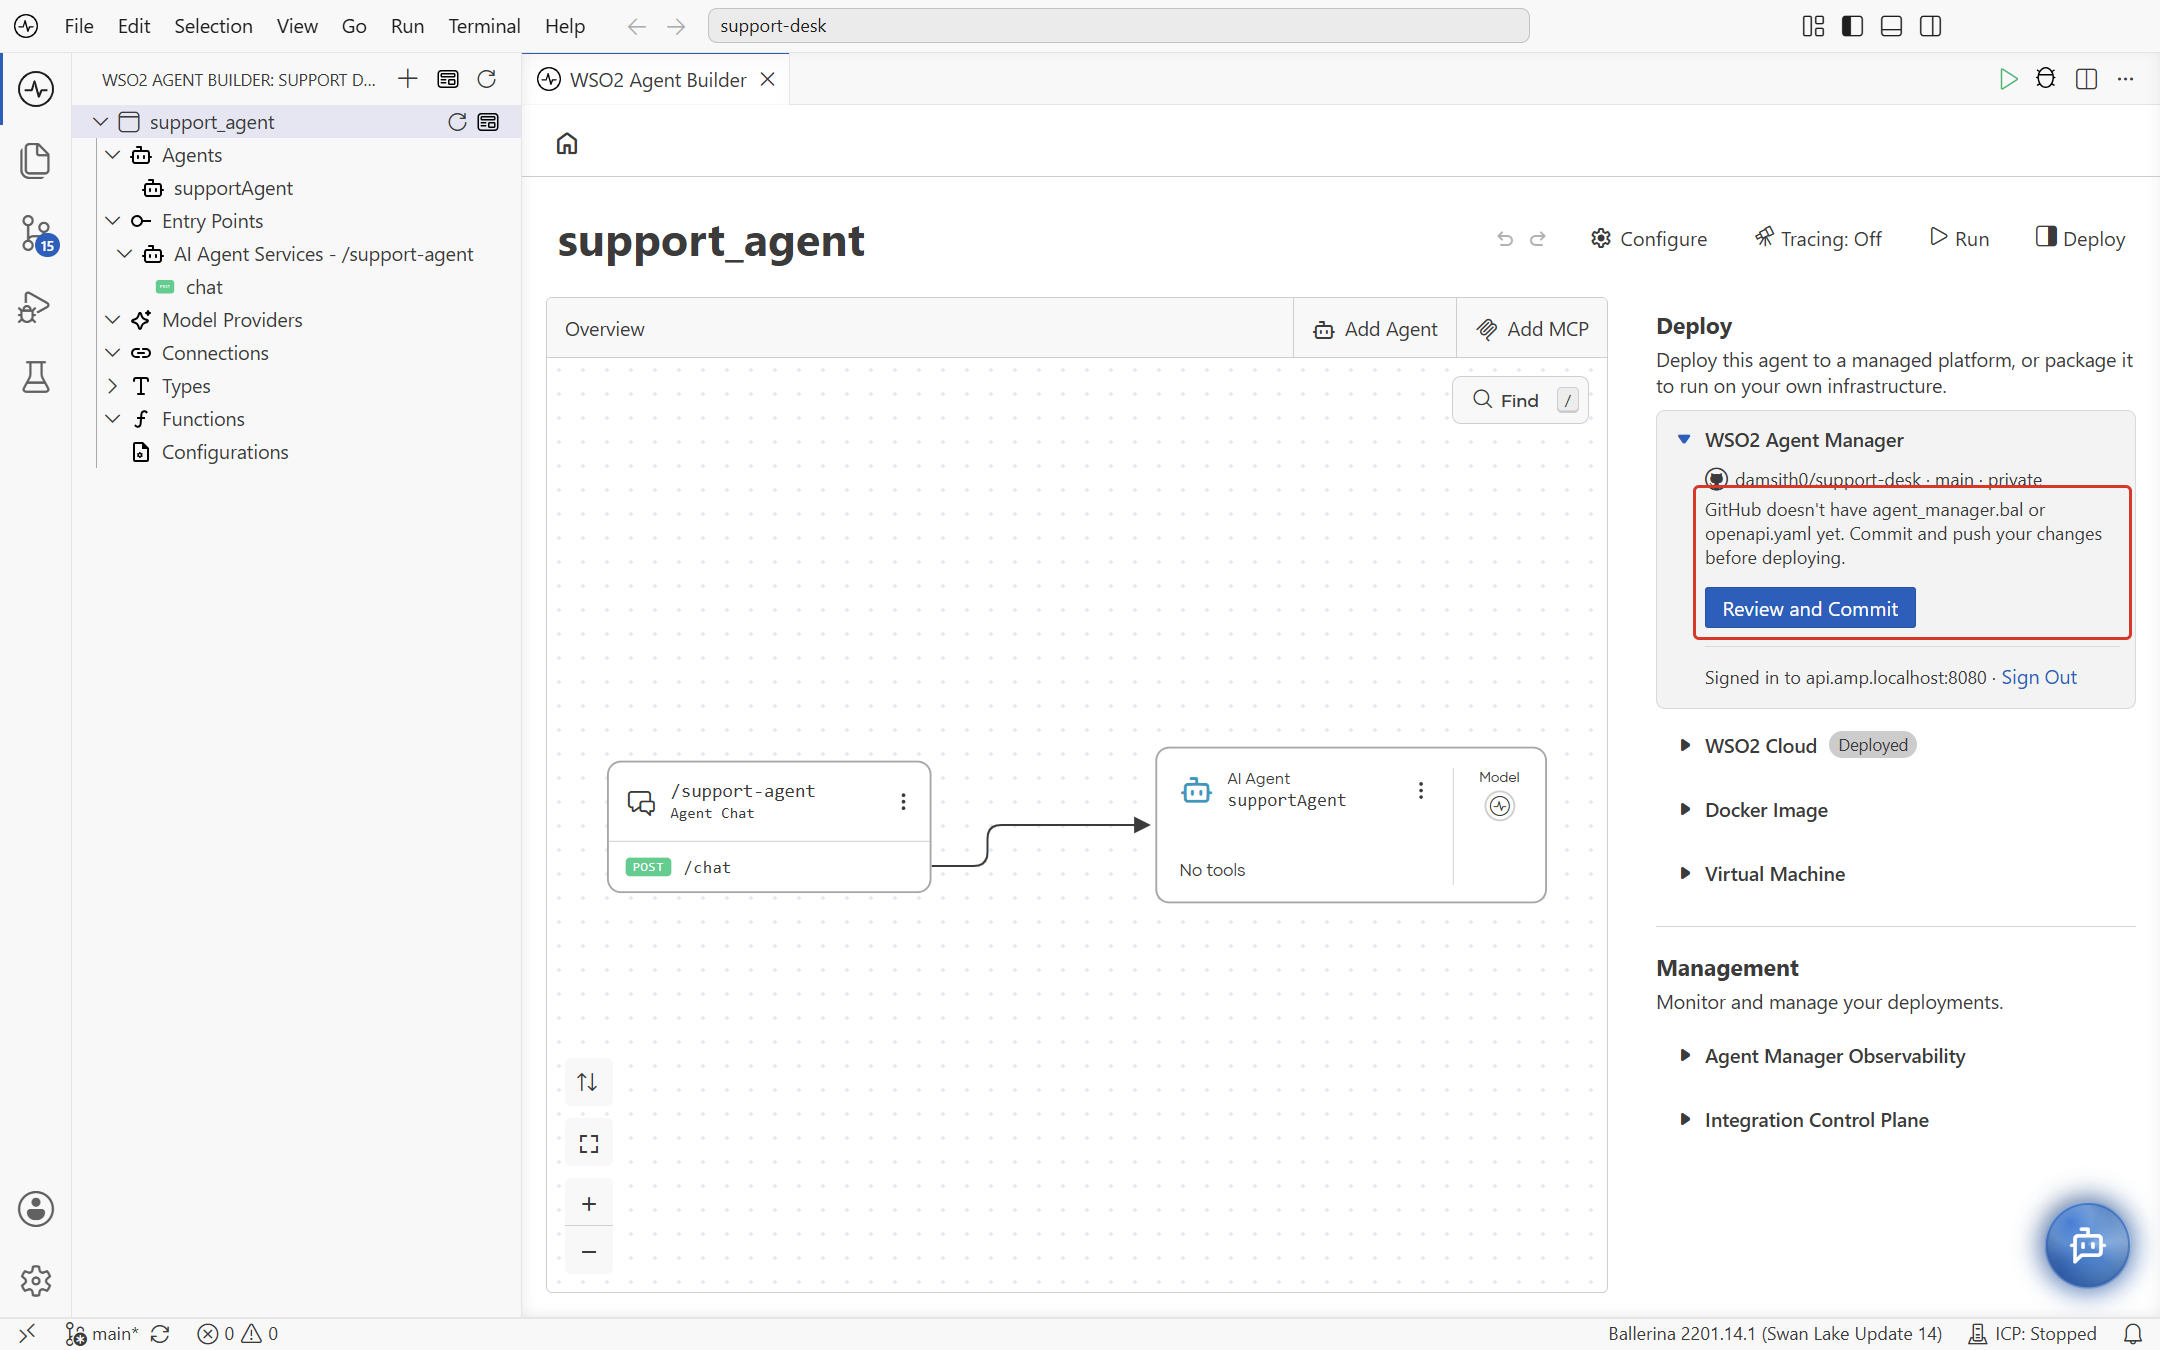
-
In the Source Control view, commit the new and changed files, then push them to GitHub.
Keep secrets out of your repositoryYour agentic integration's
Config.tomlcan hold secrets, such as the access token for the Default WSO2 Model Provider. Make sureConfig.tomlis in your.gitignorebefore you commit.
Create and deploy the agent
-
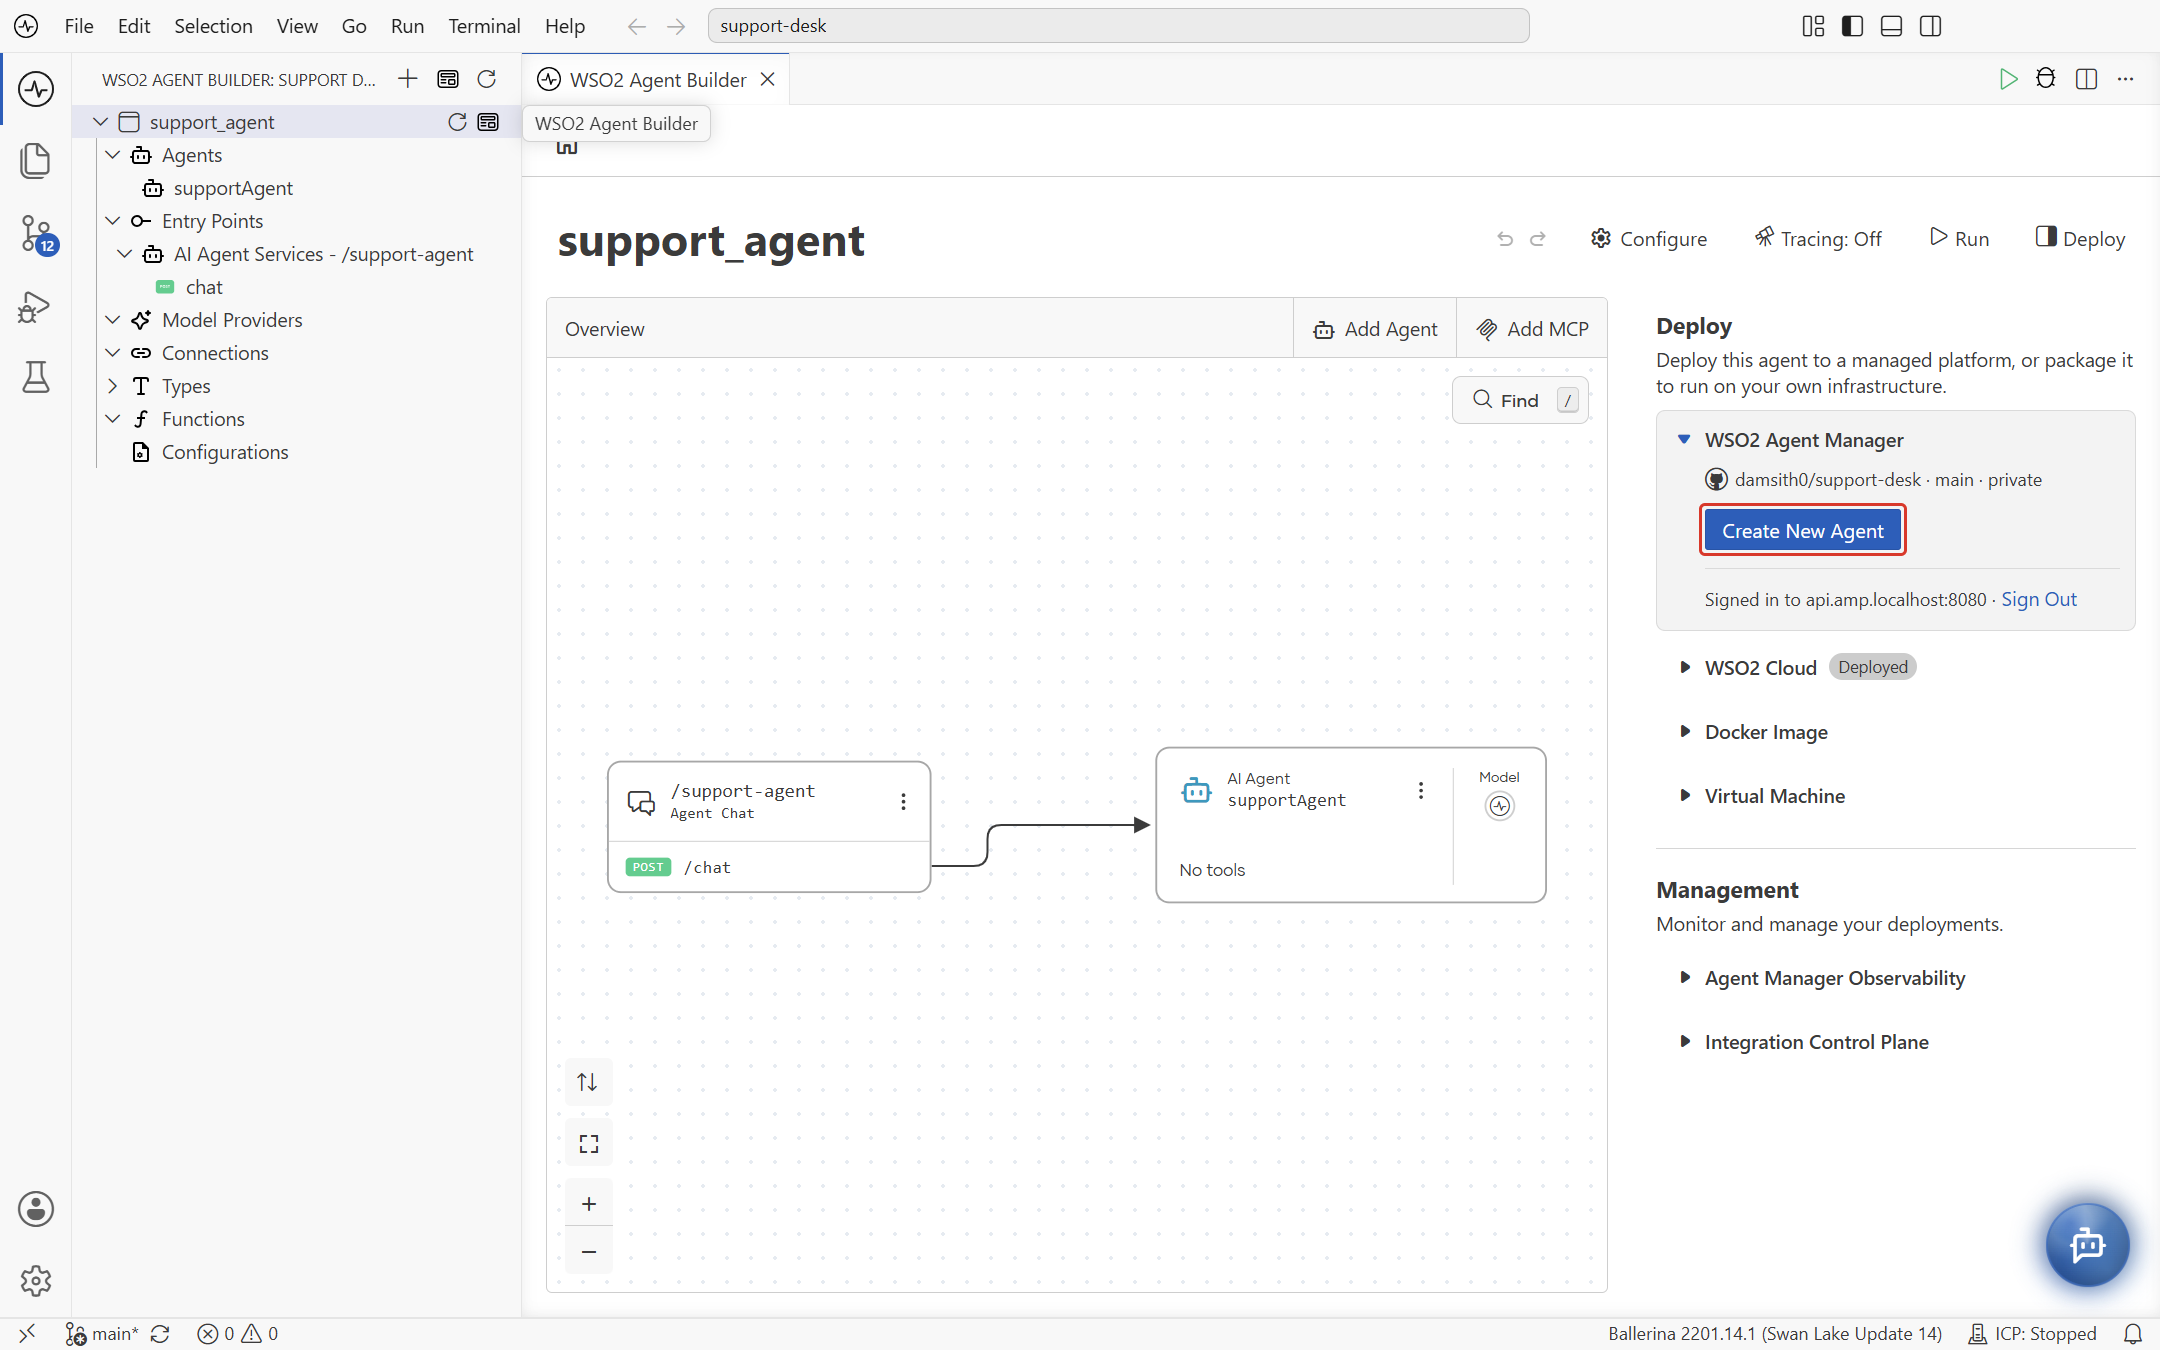
Back on the overview, in the WSO2 Agent Manager section, select Create New Agent.
-
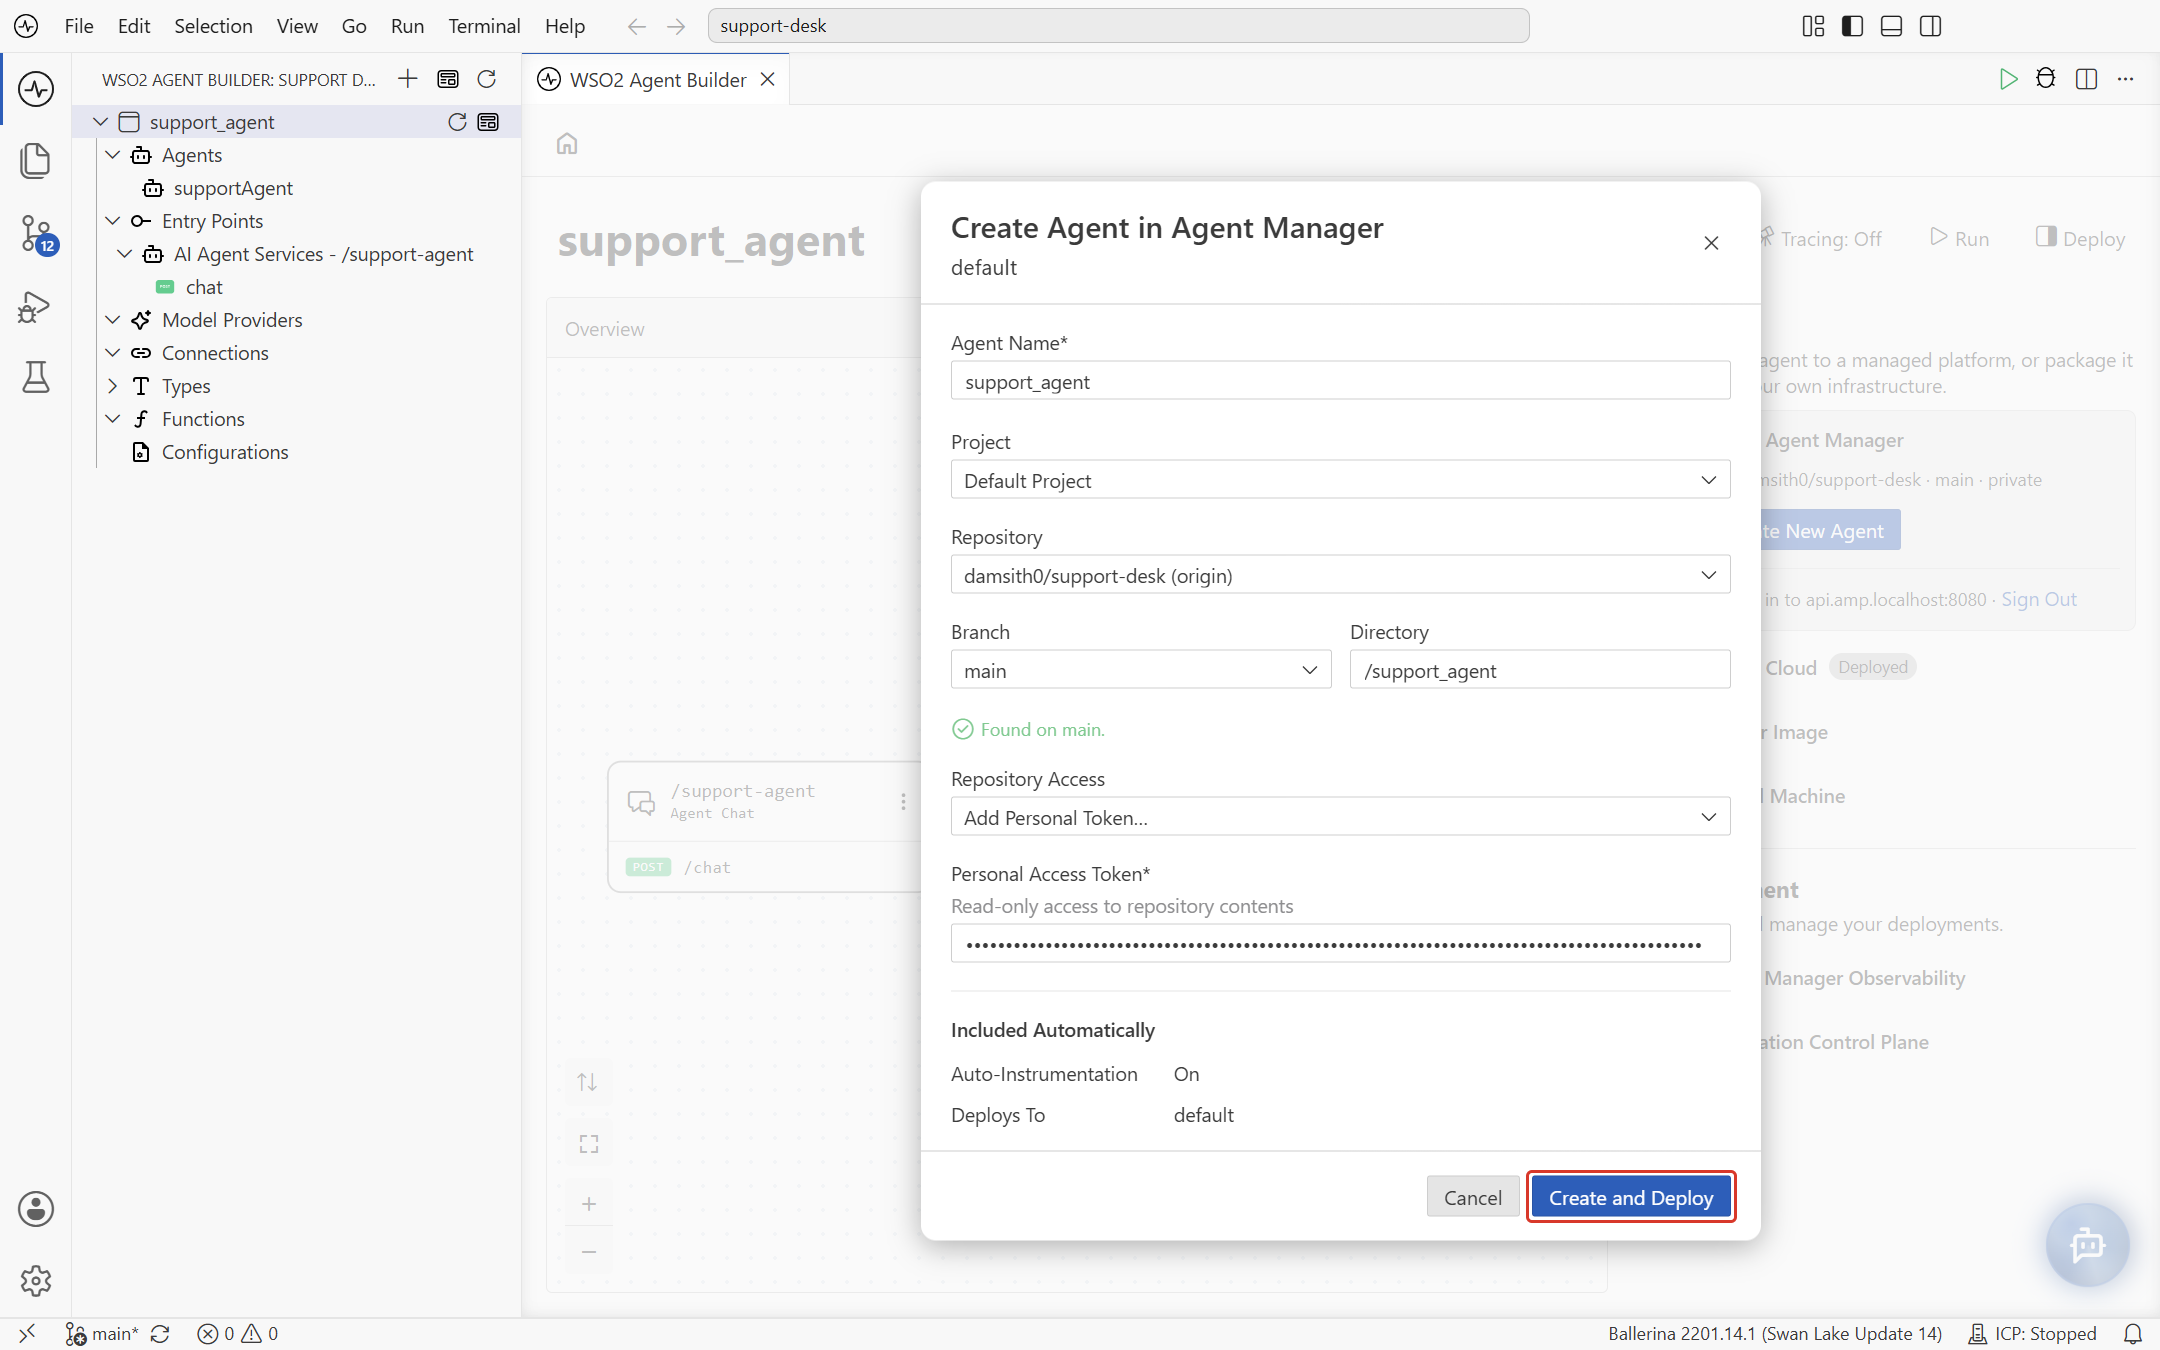
In Create Agent in Agent Manager, check the details. WSO2 Agent Builder fills them in from your project:
Field Description Agent Name The agent's name in Agent Manager. Defaults to the agentic integration's name. Project The Agent Manager project to create the agent in. Repository The GitHub repository Agent Manager builds from. Branch The branch to build. Directory The agentic integration's folder in the repository. "Found on branch." confirms that the folder is on GitHub. The dialog also lists what's Included Automatically: Auto-Instrumentation, and the environment the agent Deploys To.
-
If the repository is private, set Repository Access to Add Personal Token... and enter a GitHub Personal Access Token with read-only access to the repository contents.
-
Select Create and Deploy.
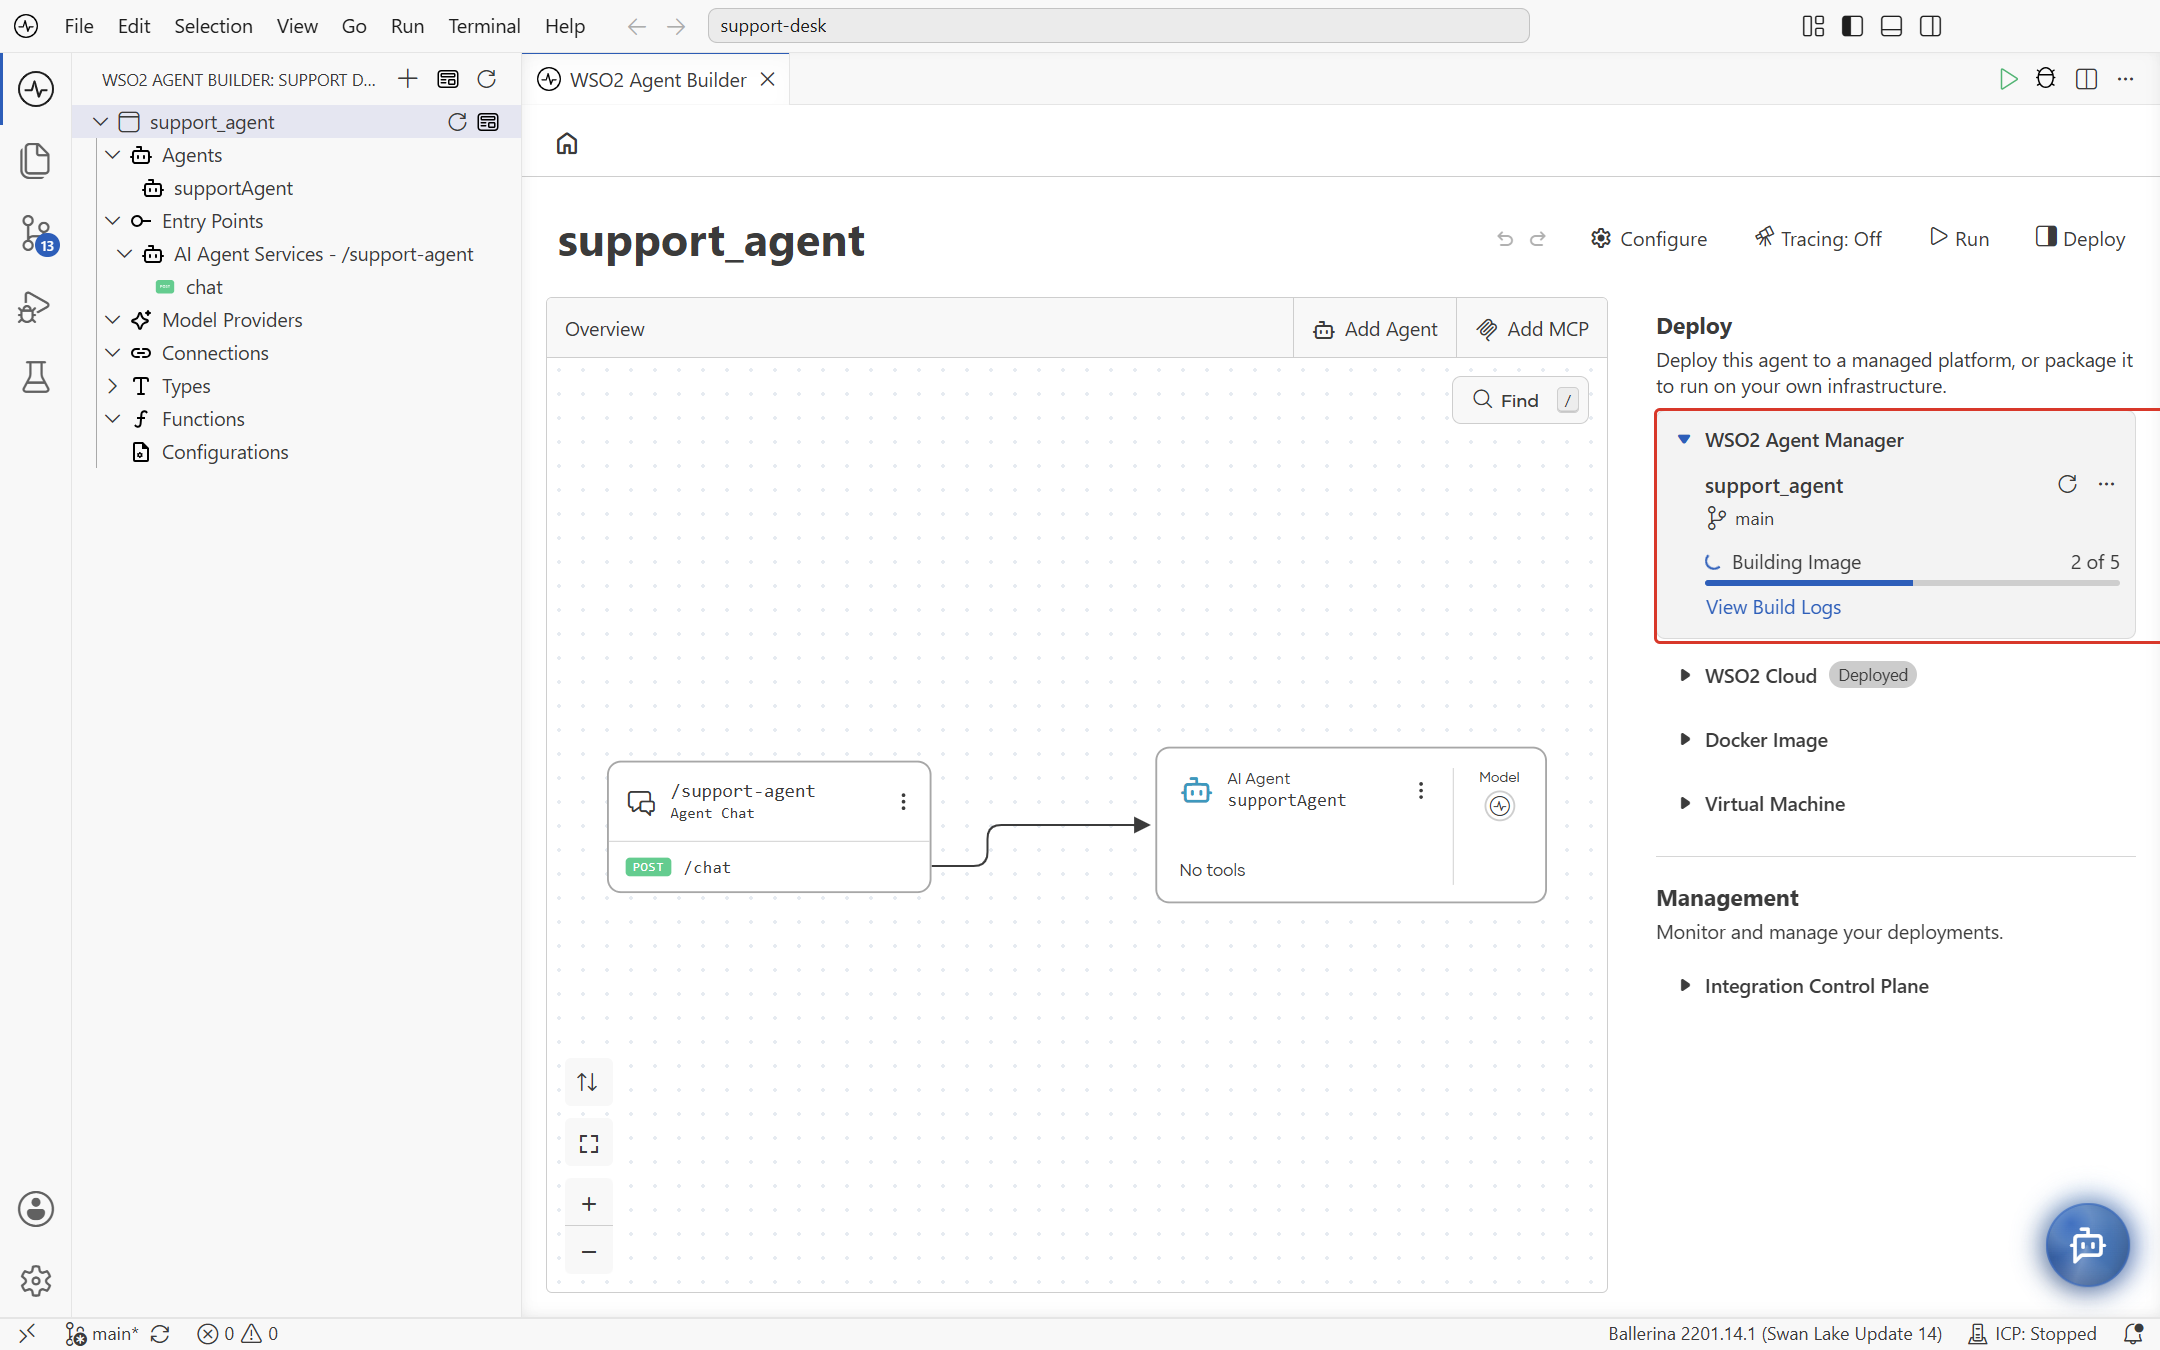
Agent Manager creates the agent and starts a build. The WSO2 Agent Manager section shows the agent, its branch, and the progress through five steps: Queued, Cloning Source, Building Image, Publishing Image, and Deploying. Select View Build Logs to follow the build.
Manage the deployed agent
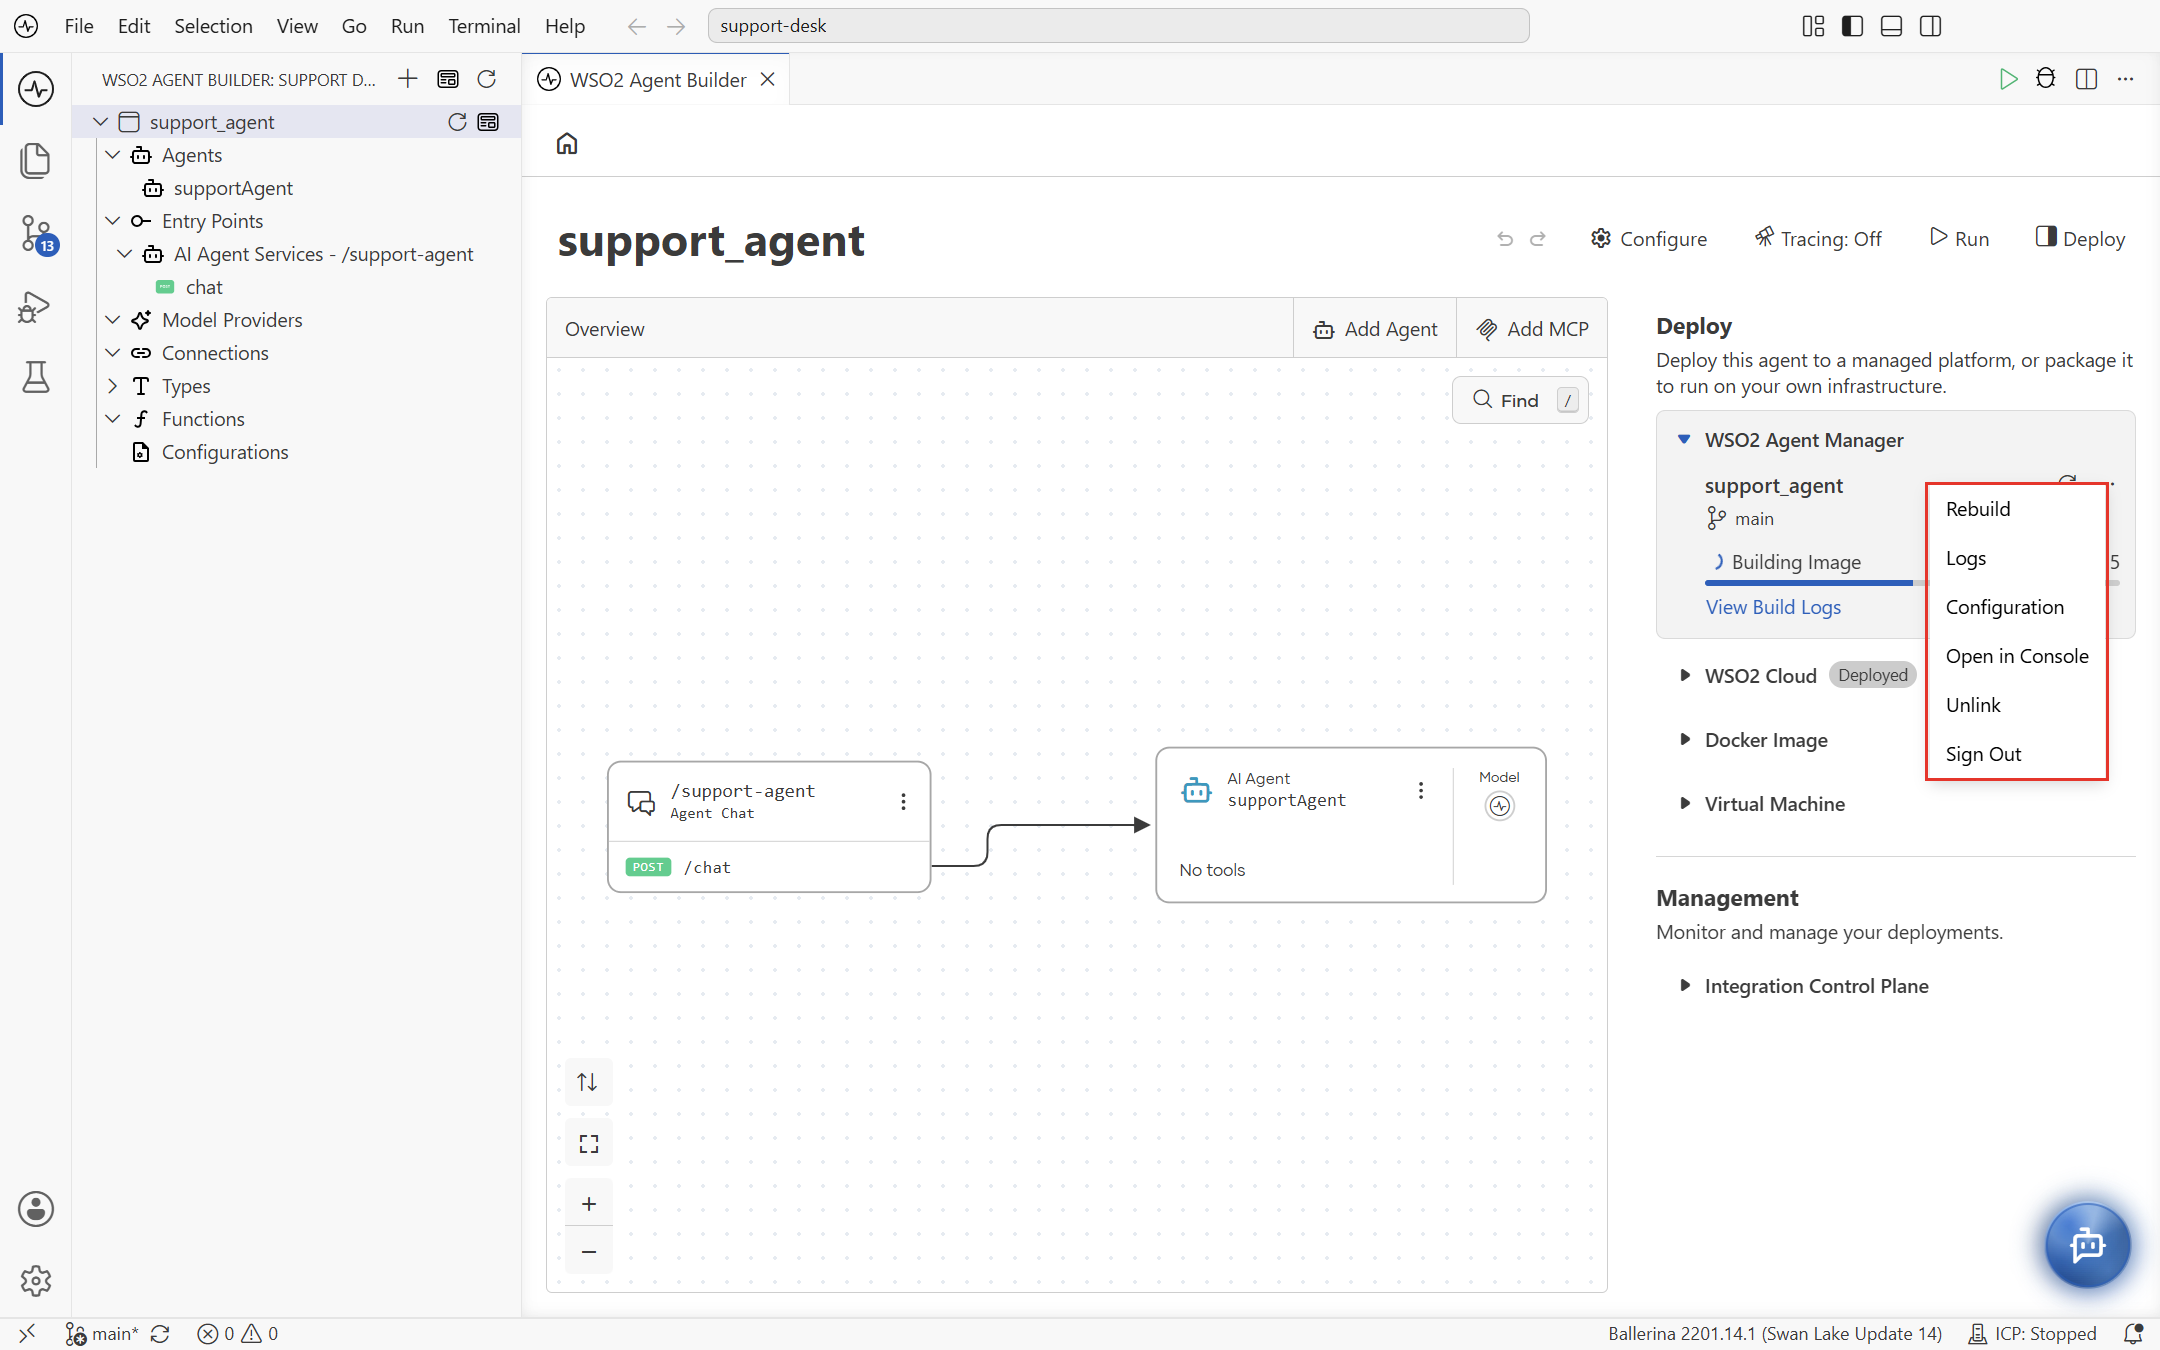
Select the ⋯ next to the agent's name in the WSO2 Agent Manager section:
- Rebuild: build and deploy the agent again, for example after you push new changes.
- Logs: view the agent's logs.
- Configuration: set the agent's configuration values in Agent Manager.
- Open in Console: open the agent in the Agent Manager console.
- Unlink: disconnect the agentic integration from the agent in Agent Manager.
- Sign Out: sign out of Agent Manager.
What's next
- Deploy to WSO2 Cloud — Deploy your agent to the fully managed WSO2 Cloud.
- Containerized Deployment — Run your agent on Docker, Kubernetes, or Red Hat OpenShift.
- Managing Configurations — Per-environment configuration strategies.