Setup Guide
To use the Microsoft Teams connector, you need access to a Microsoft 365 account and an application registered in Microsoft Entra ID.
The screenshots in this guide are for illustration only. The Microsoft Entra admin center changes over time, so treat them as a visual reference rather than an exact match — follow the described actions and choose the values (application name, redirect URI, permissions, and so on) that fit your own scenario.
Prerequisites
- A Microsoft 365 account with access to Microsoft Teams
- Permission to register applications in your organization's Microsoft Entra ID (formerly Azure Active Directory)
Register an application in Microsoft Entra ID
-
Sign in to the Microsoft Entra admin center.
-
Navigate to Entra ID > App registrations and click New registration.
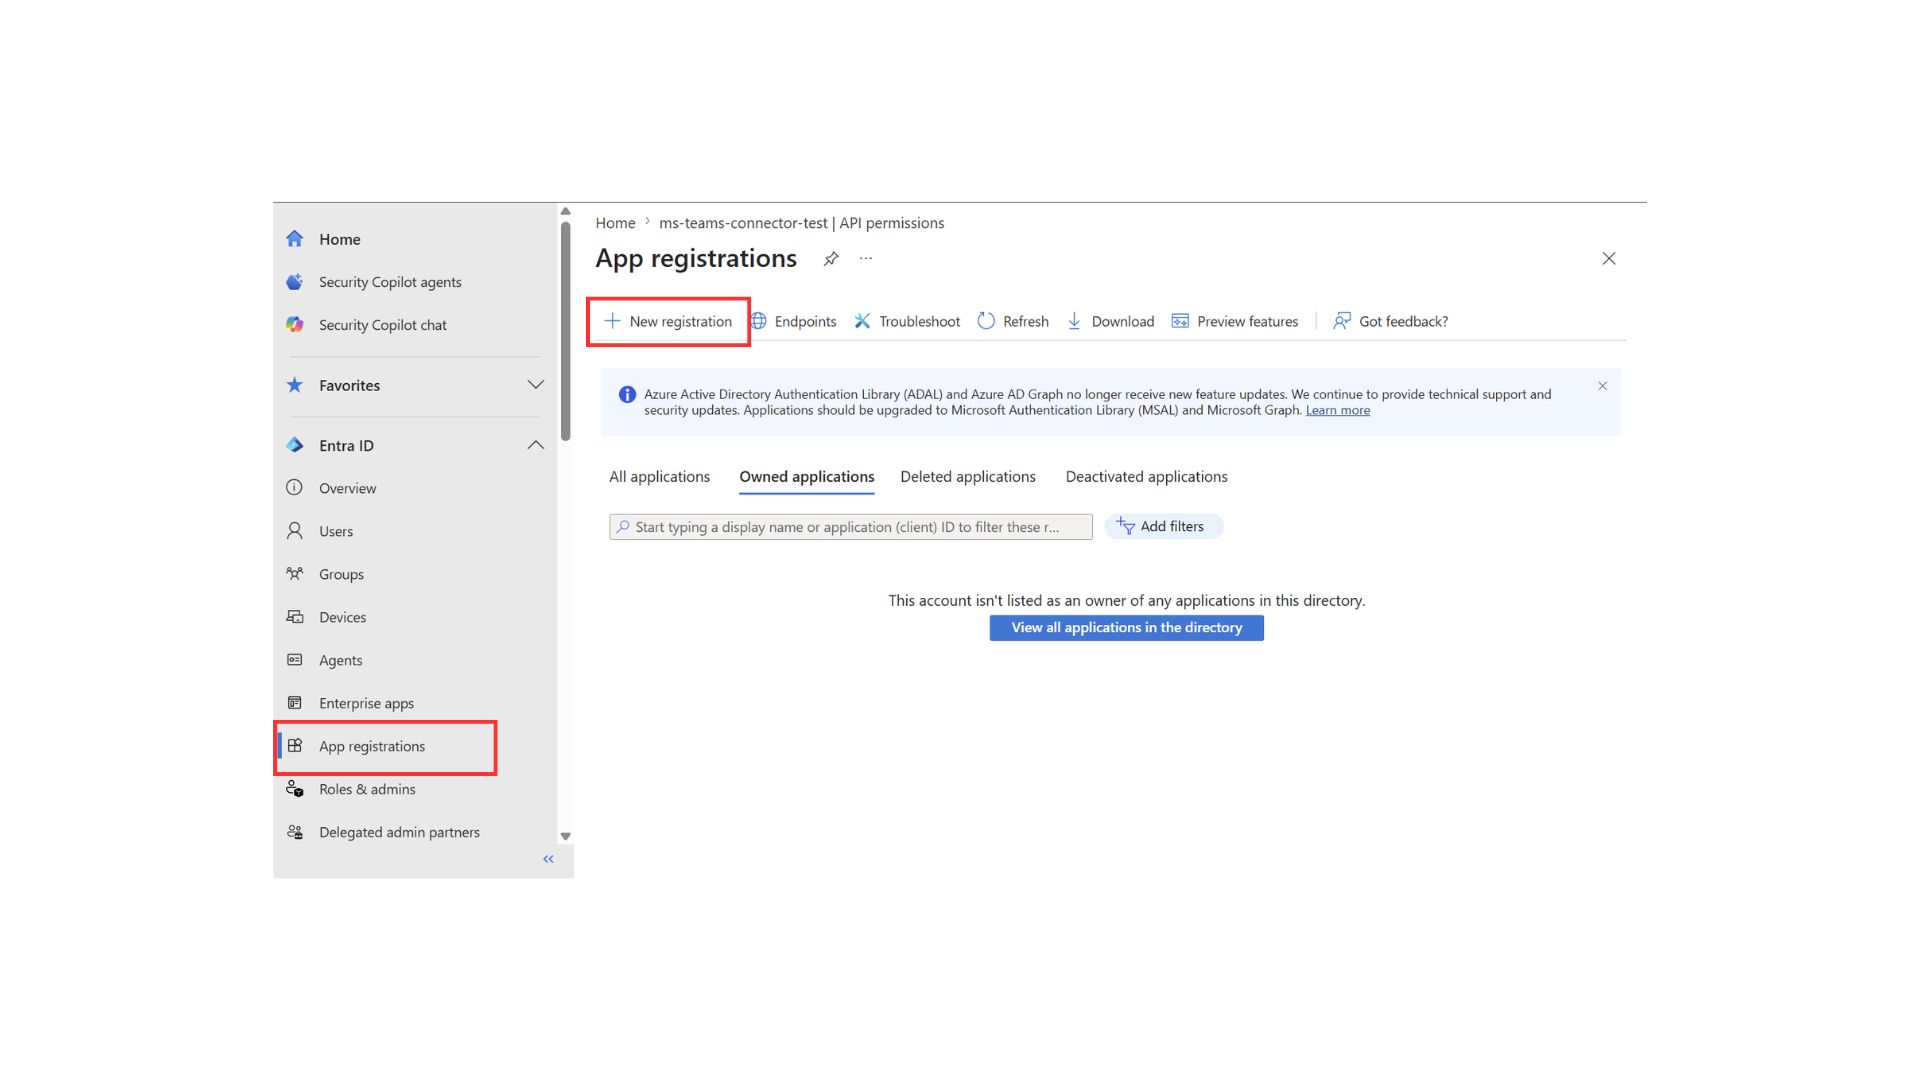
-
Enter a name of your choice and select the account types appropriate for your organization. For delegated (
refresh_token) access, add a Redirect URI under the Web platform — this is where the sign-in flow returns the authorization code (a Microsoft-hosted page such ashttps://jwt.msis a convenient choice). The Web platform is required for the delegated flow because the connector redeems the code using a client secret (a confidential-client flow). Click Register.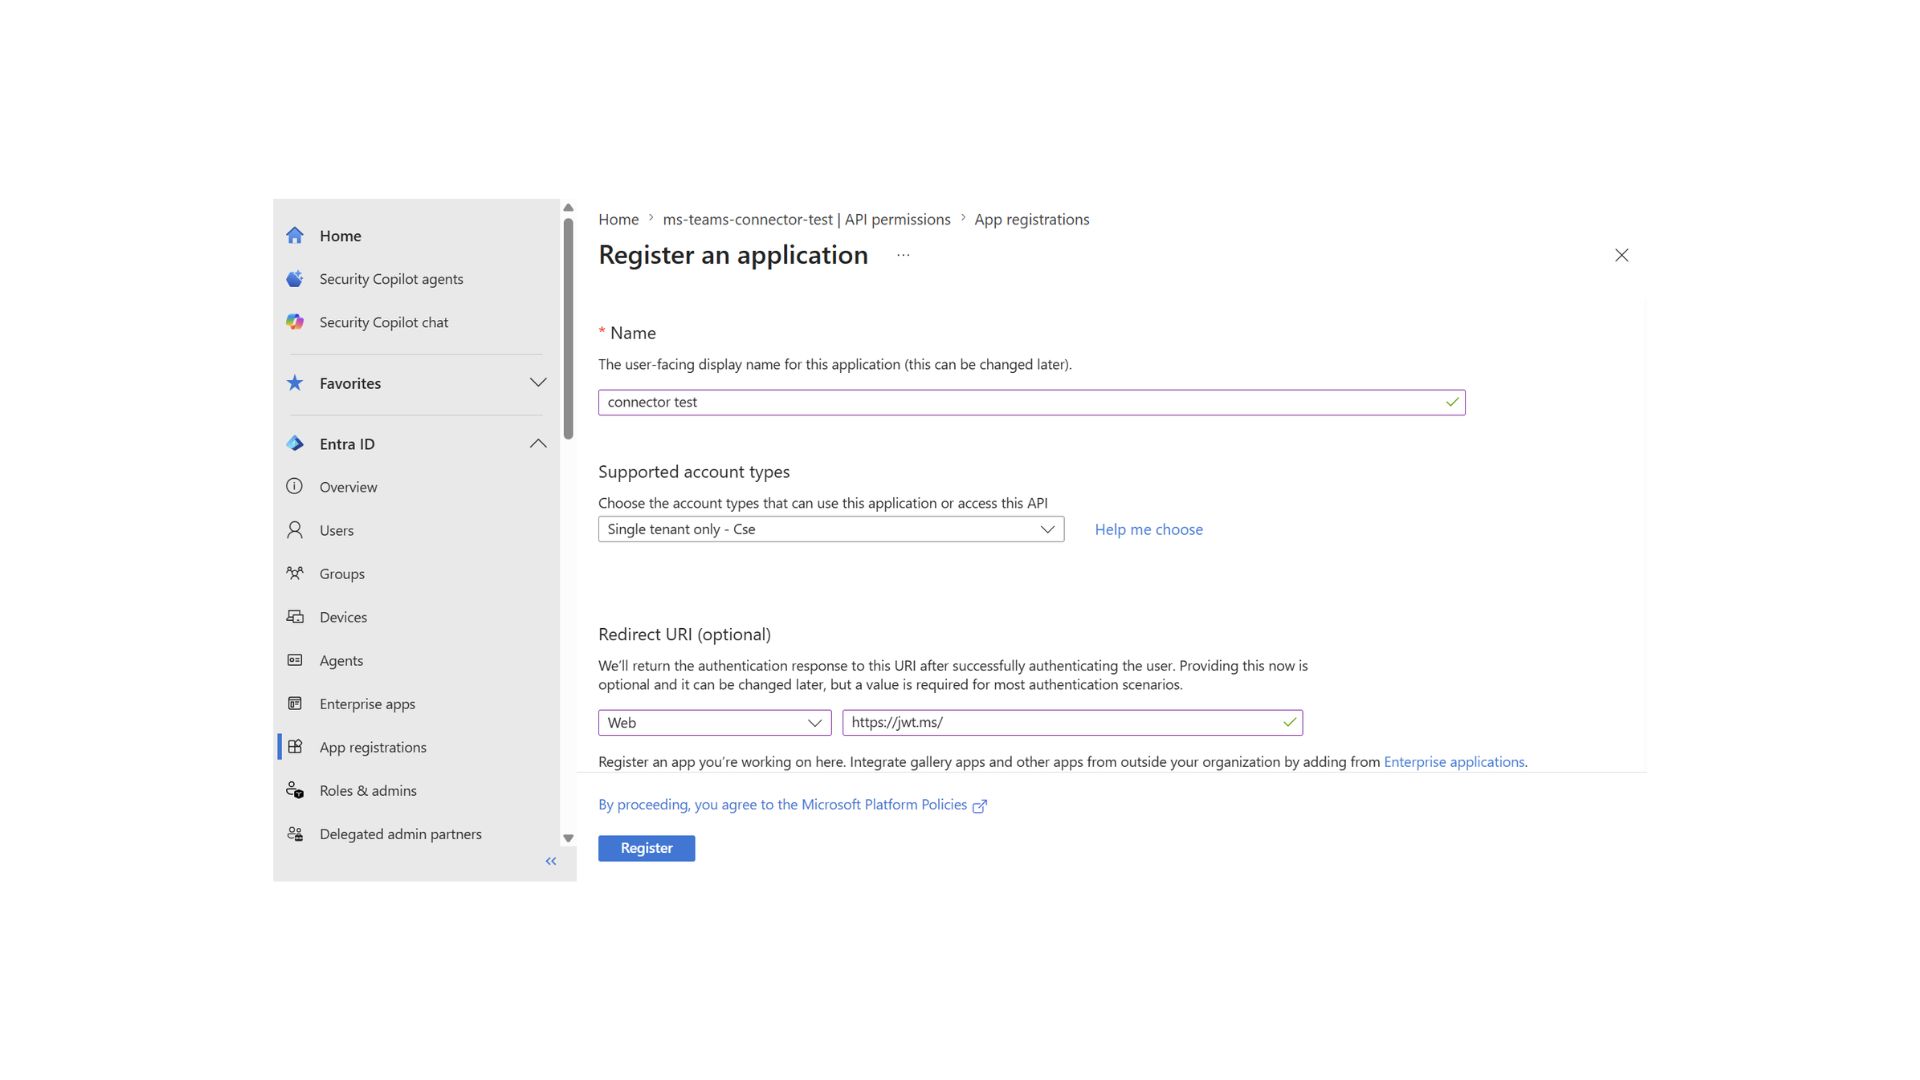
-
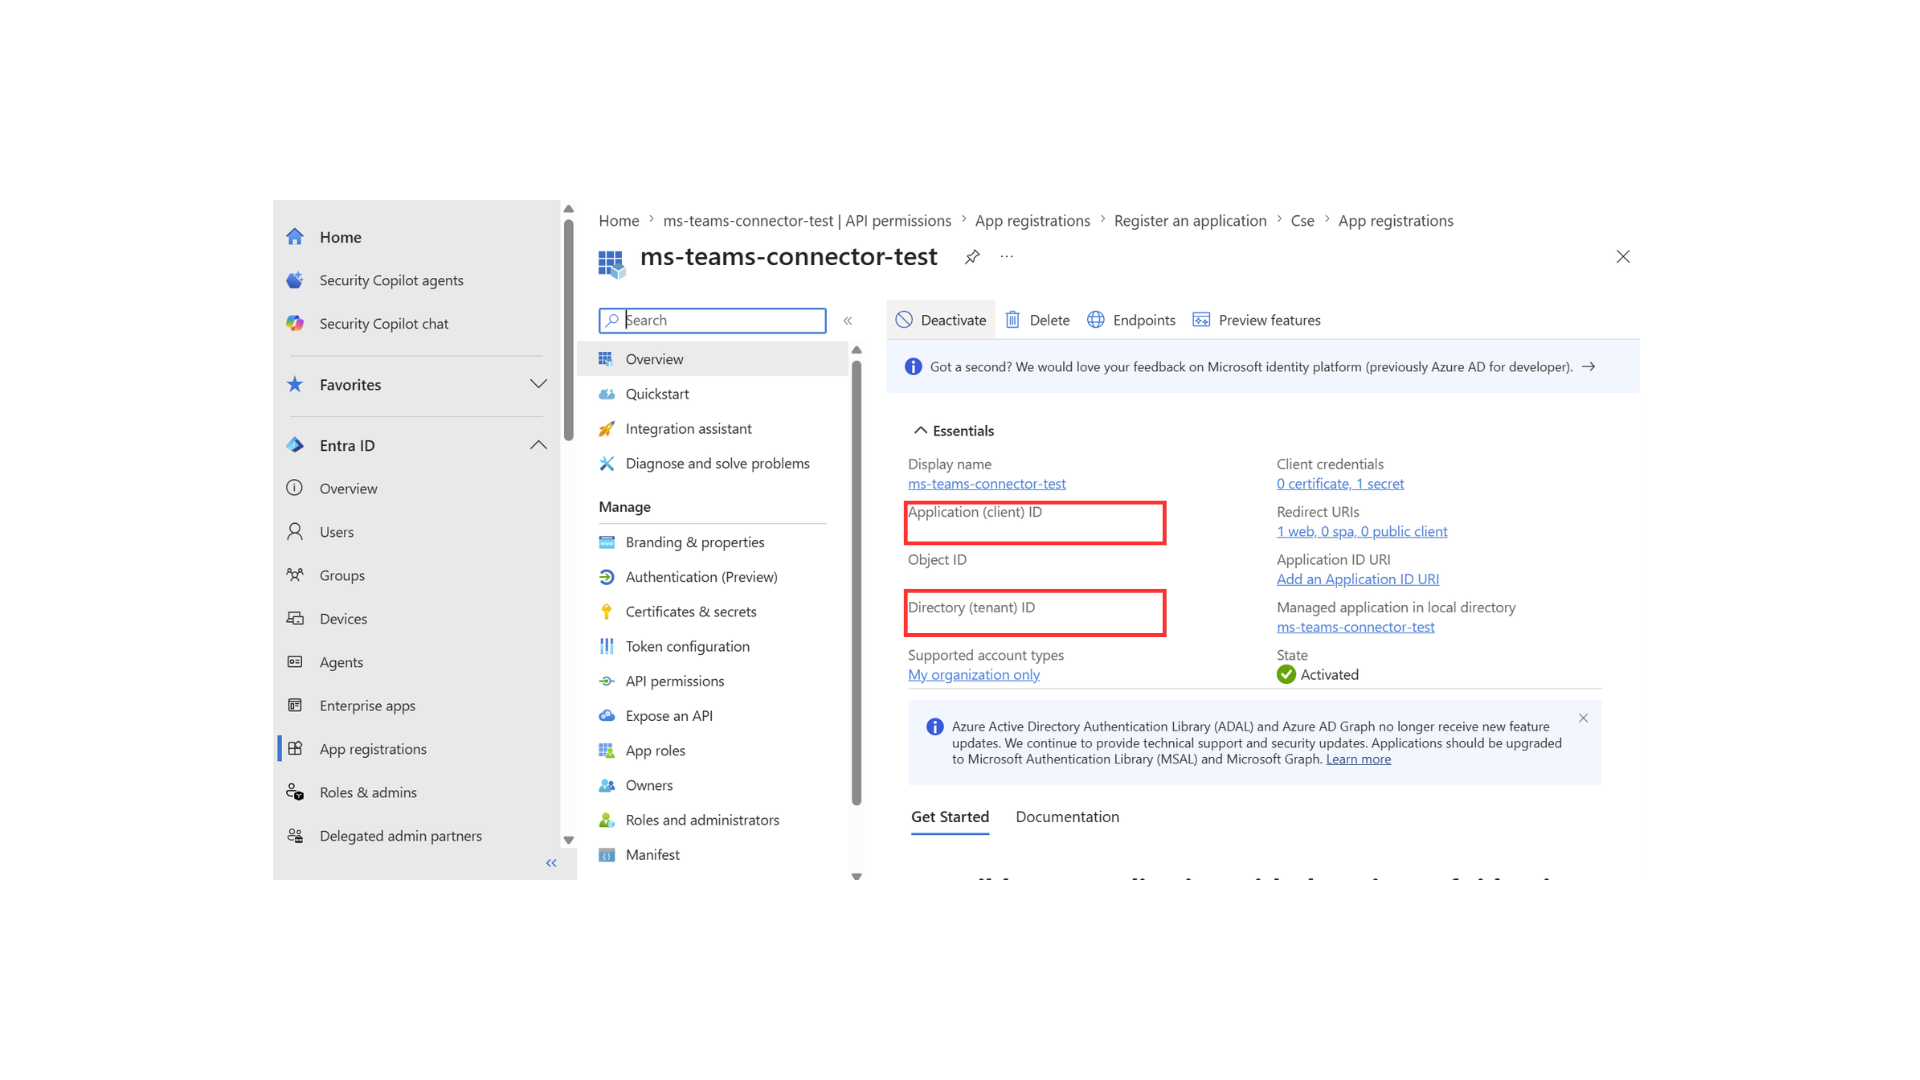
On the app's Overview page, note the Application (client) ID and Directory (tenant) ID — both are needed when configuring the connector.
Add Microsoft Graph permissions
-
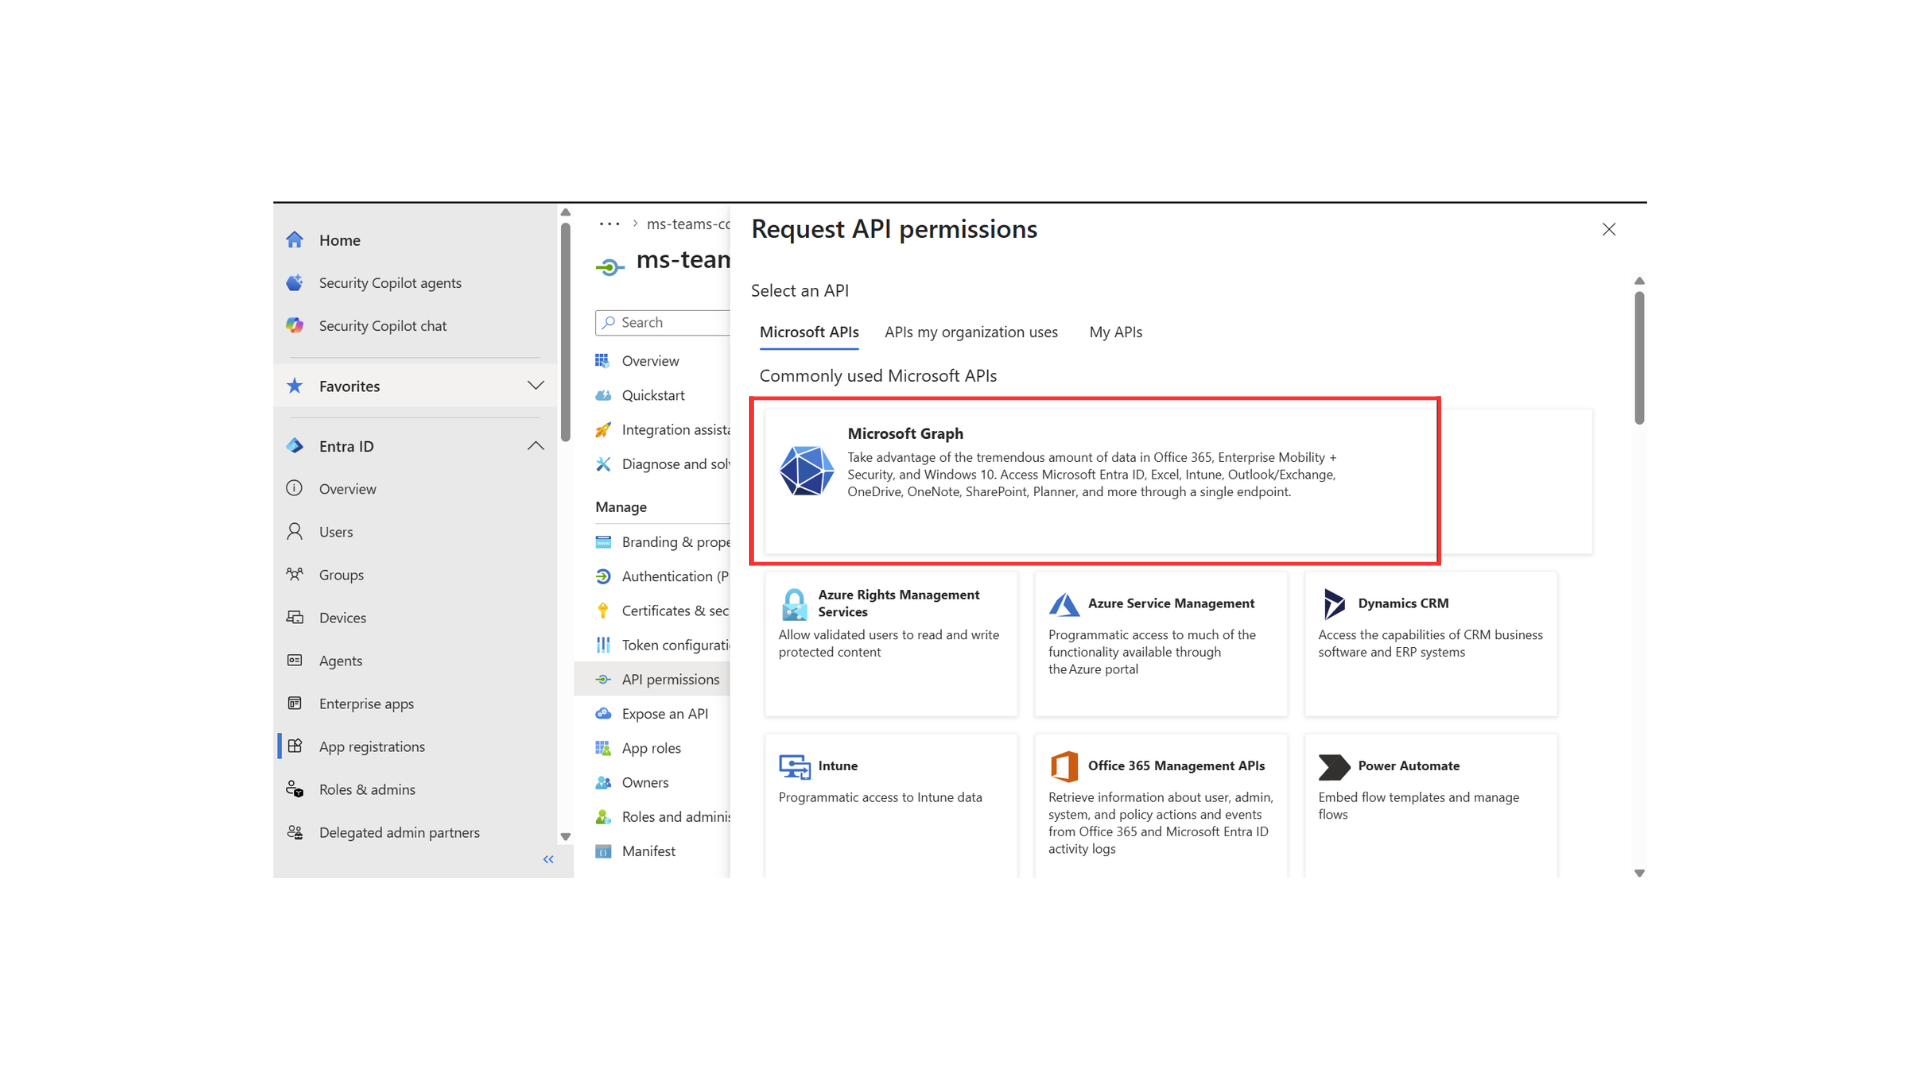
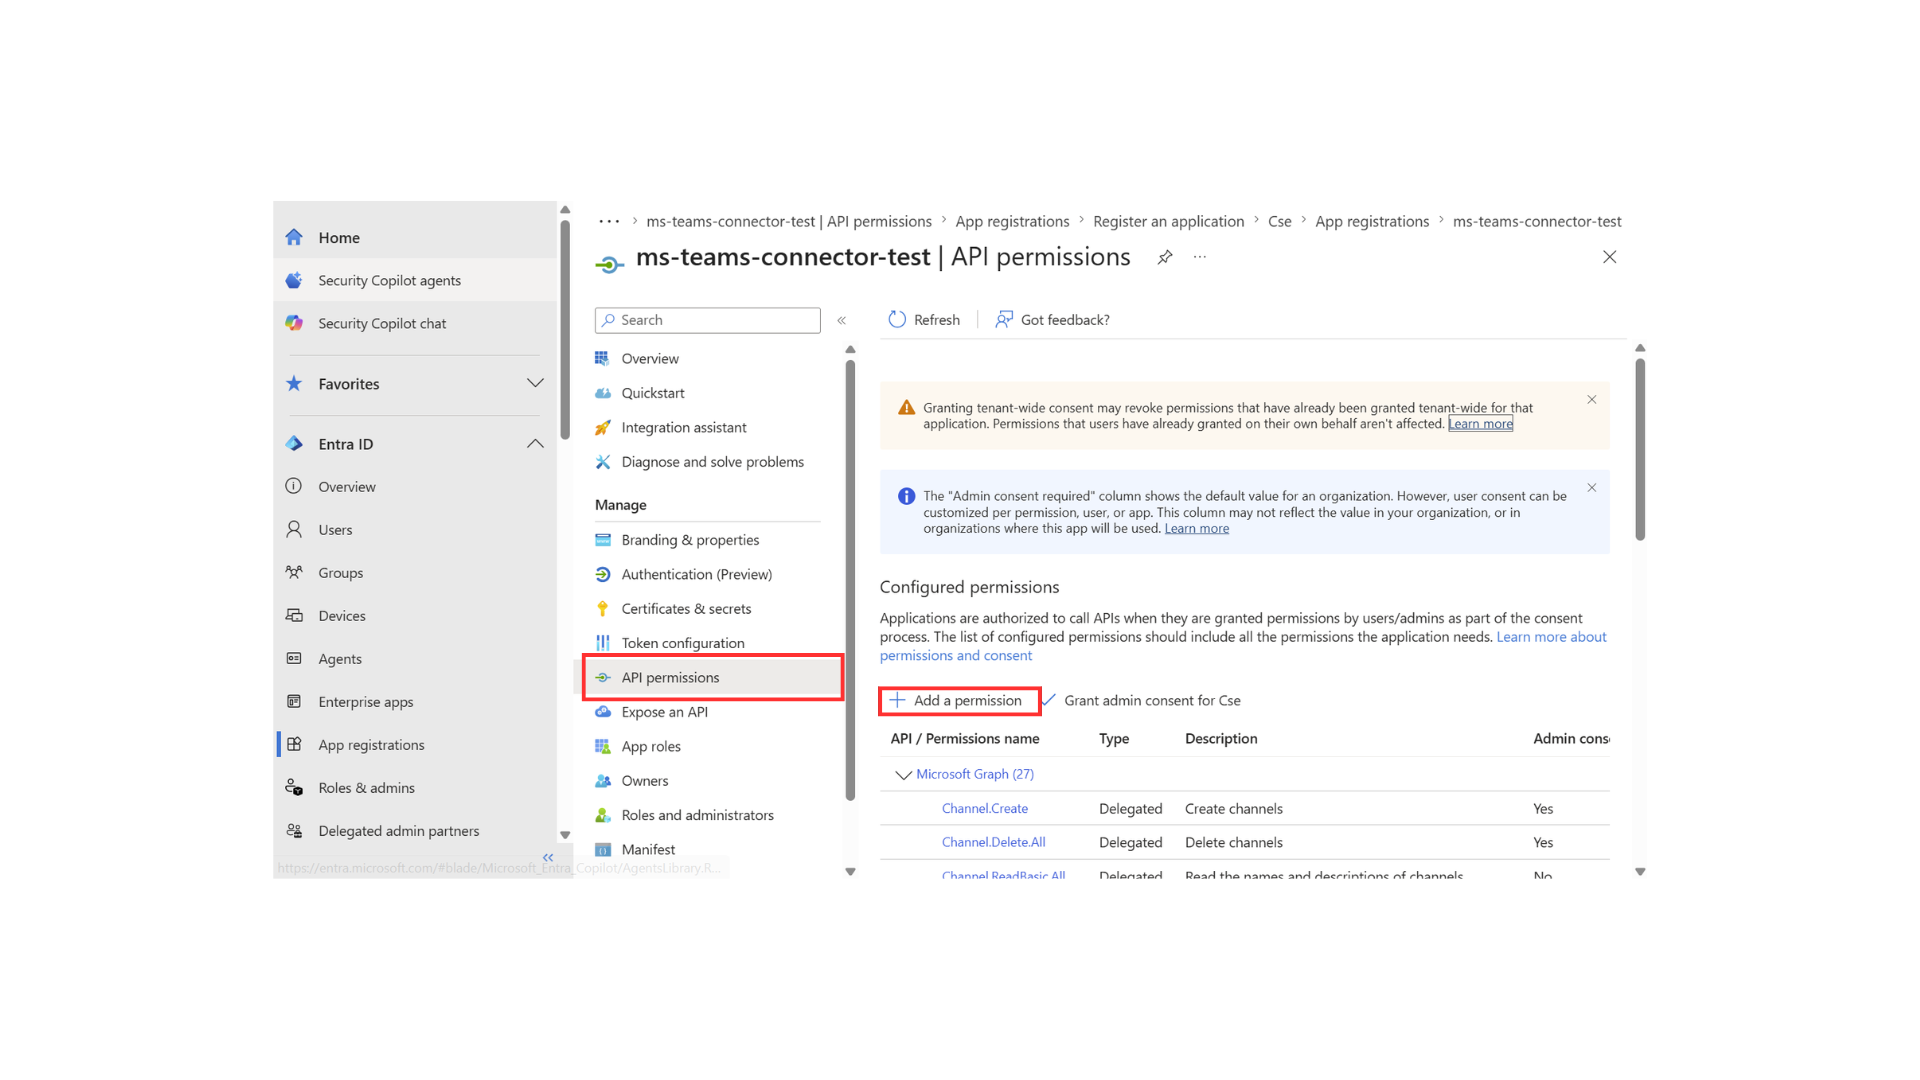
In the registered application, go to API permissions > Add a permission > Microsoft Graph.
-
Choose Delegated permissions (for
refresh_tokenauth) or Application permissions (forclient_credentialsauth), then add the permissions your use case requires — each operation's required scope is listed in its Microsoft Graph API reference. For the delegated flow, also includeoffline_accessso the token response includes a refresh token. Click Add permissions.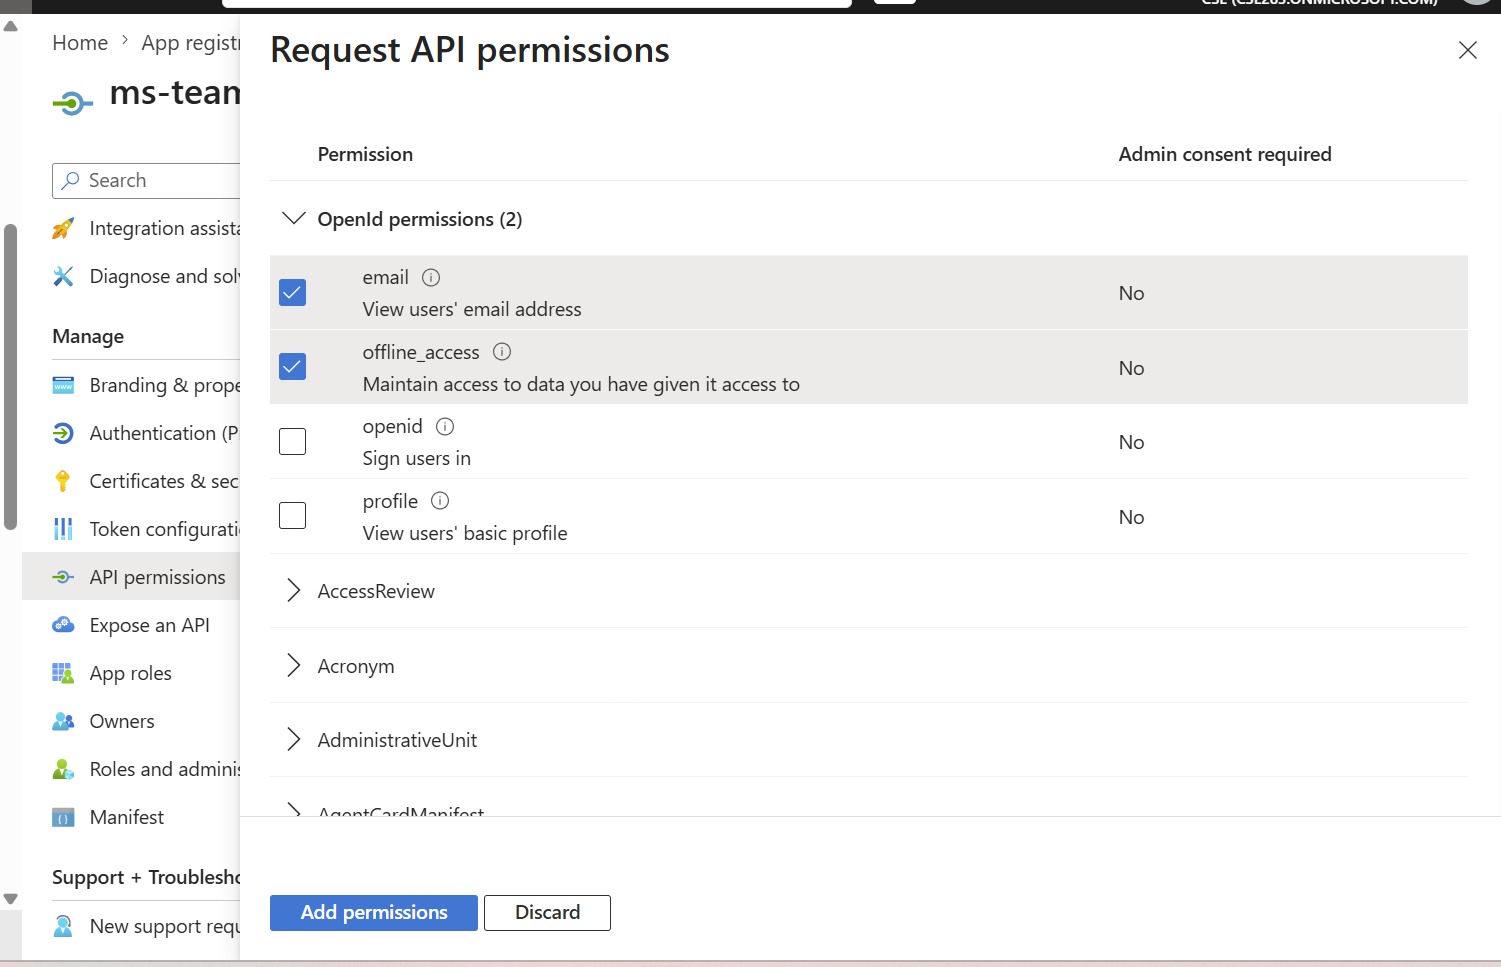
-
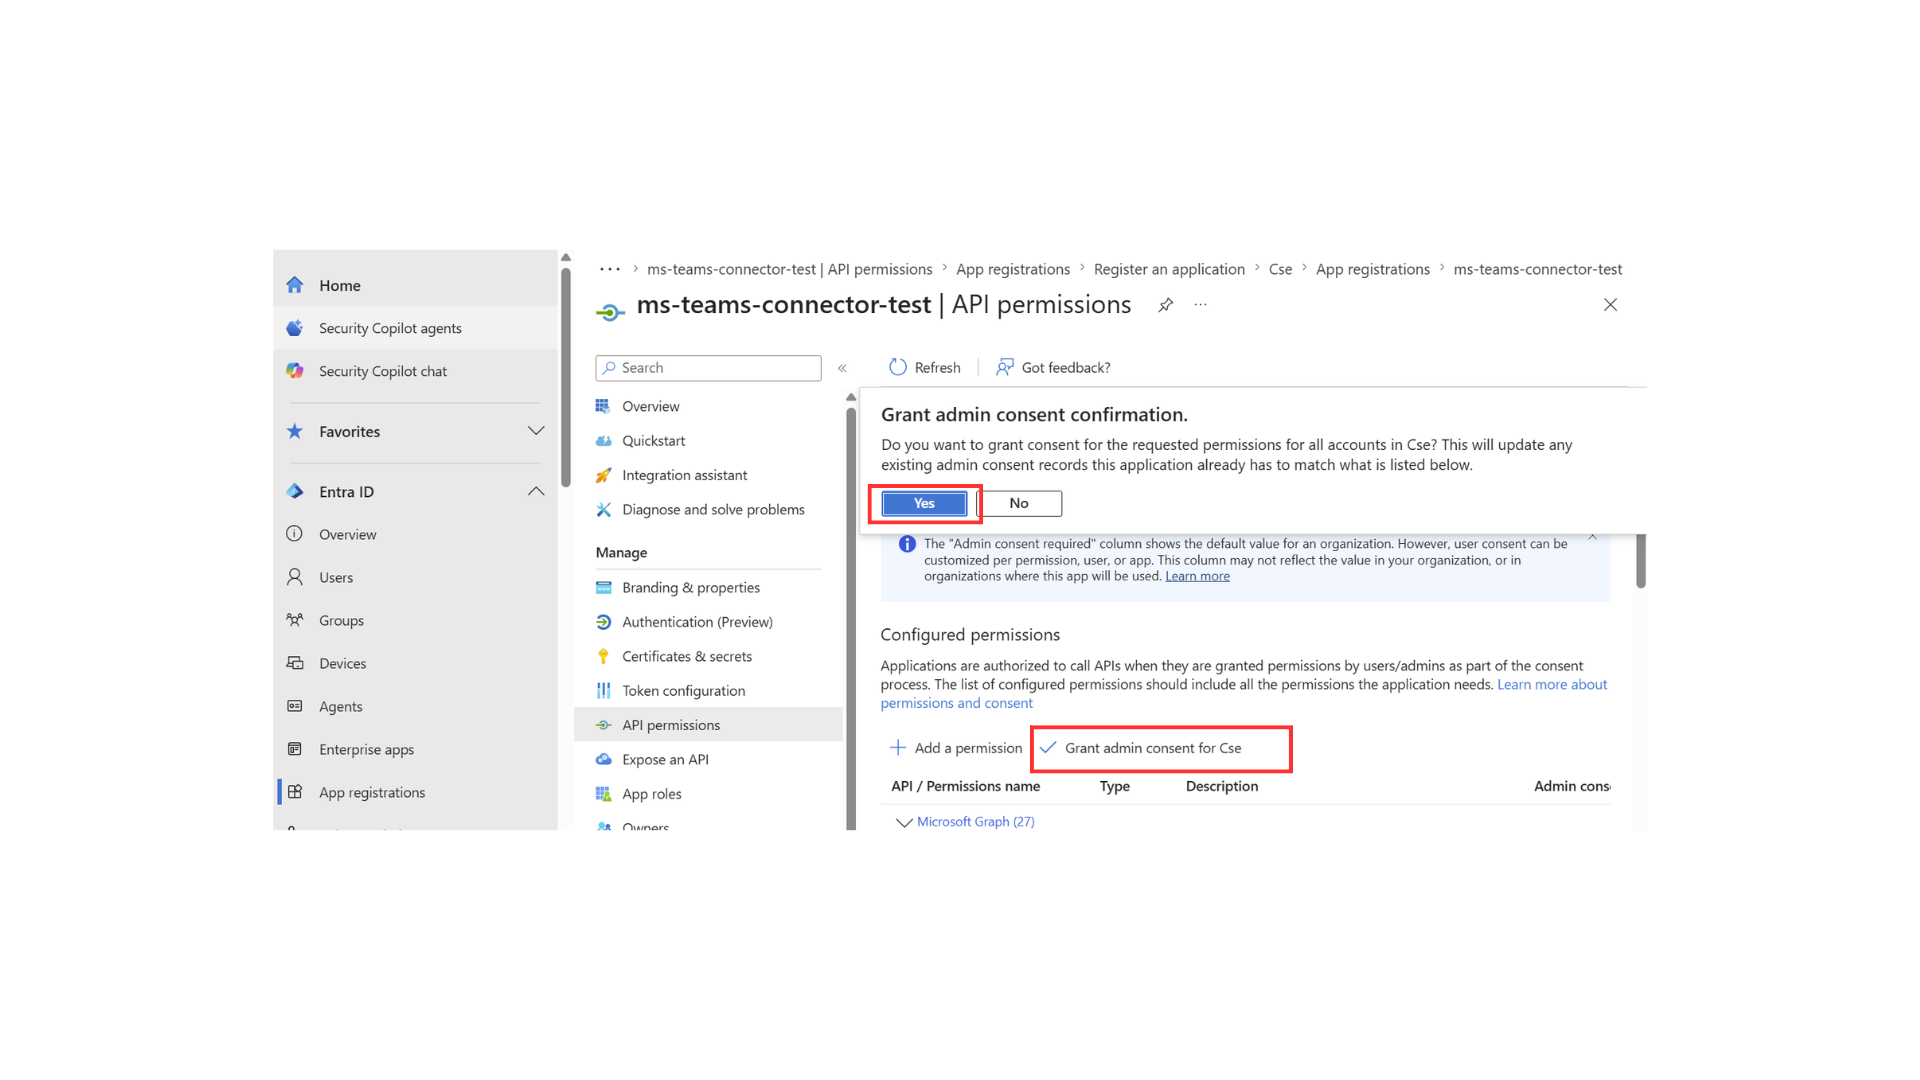
Back on the API permissions page, click Grant admin consent for <your tenant> and confirm Yes.
-
Confirm every permission now shows Granted for <your tenant> in the Status column.
Create a client secret
-
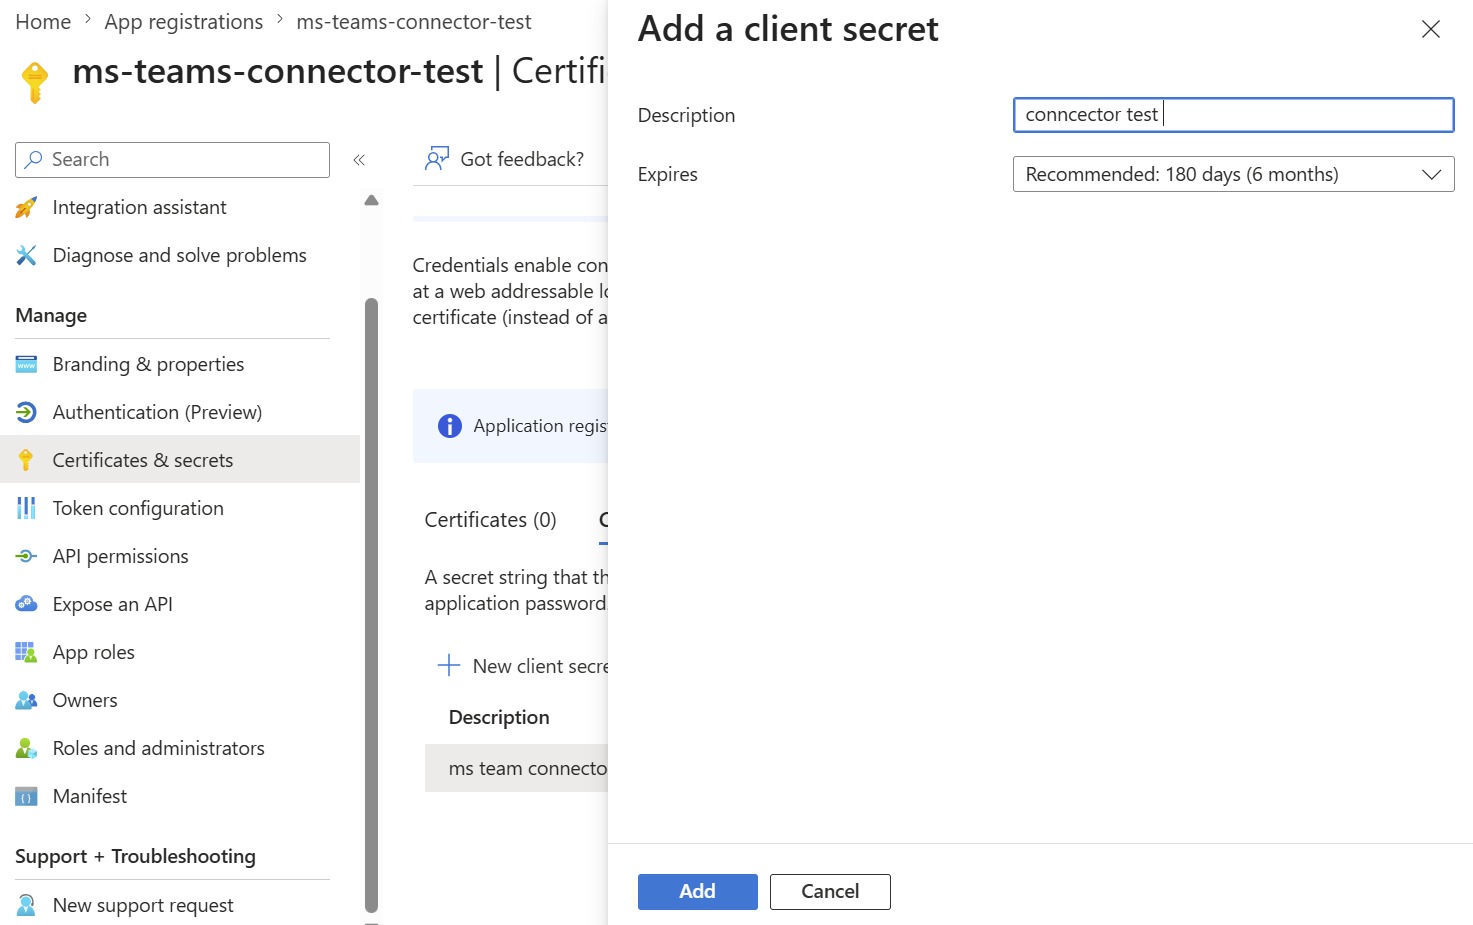
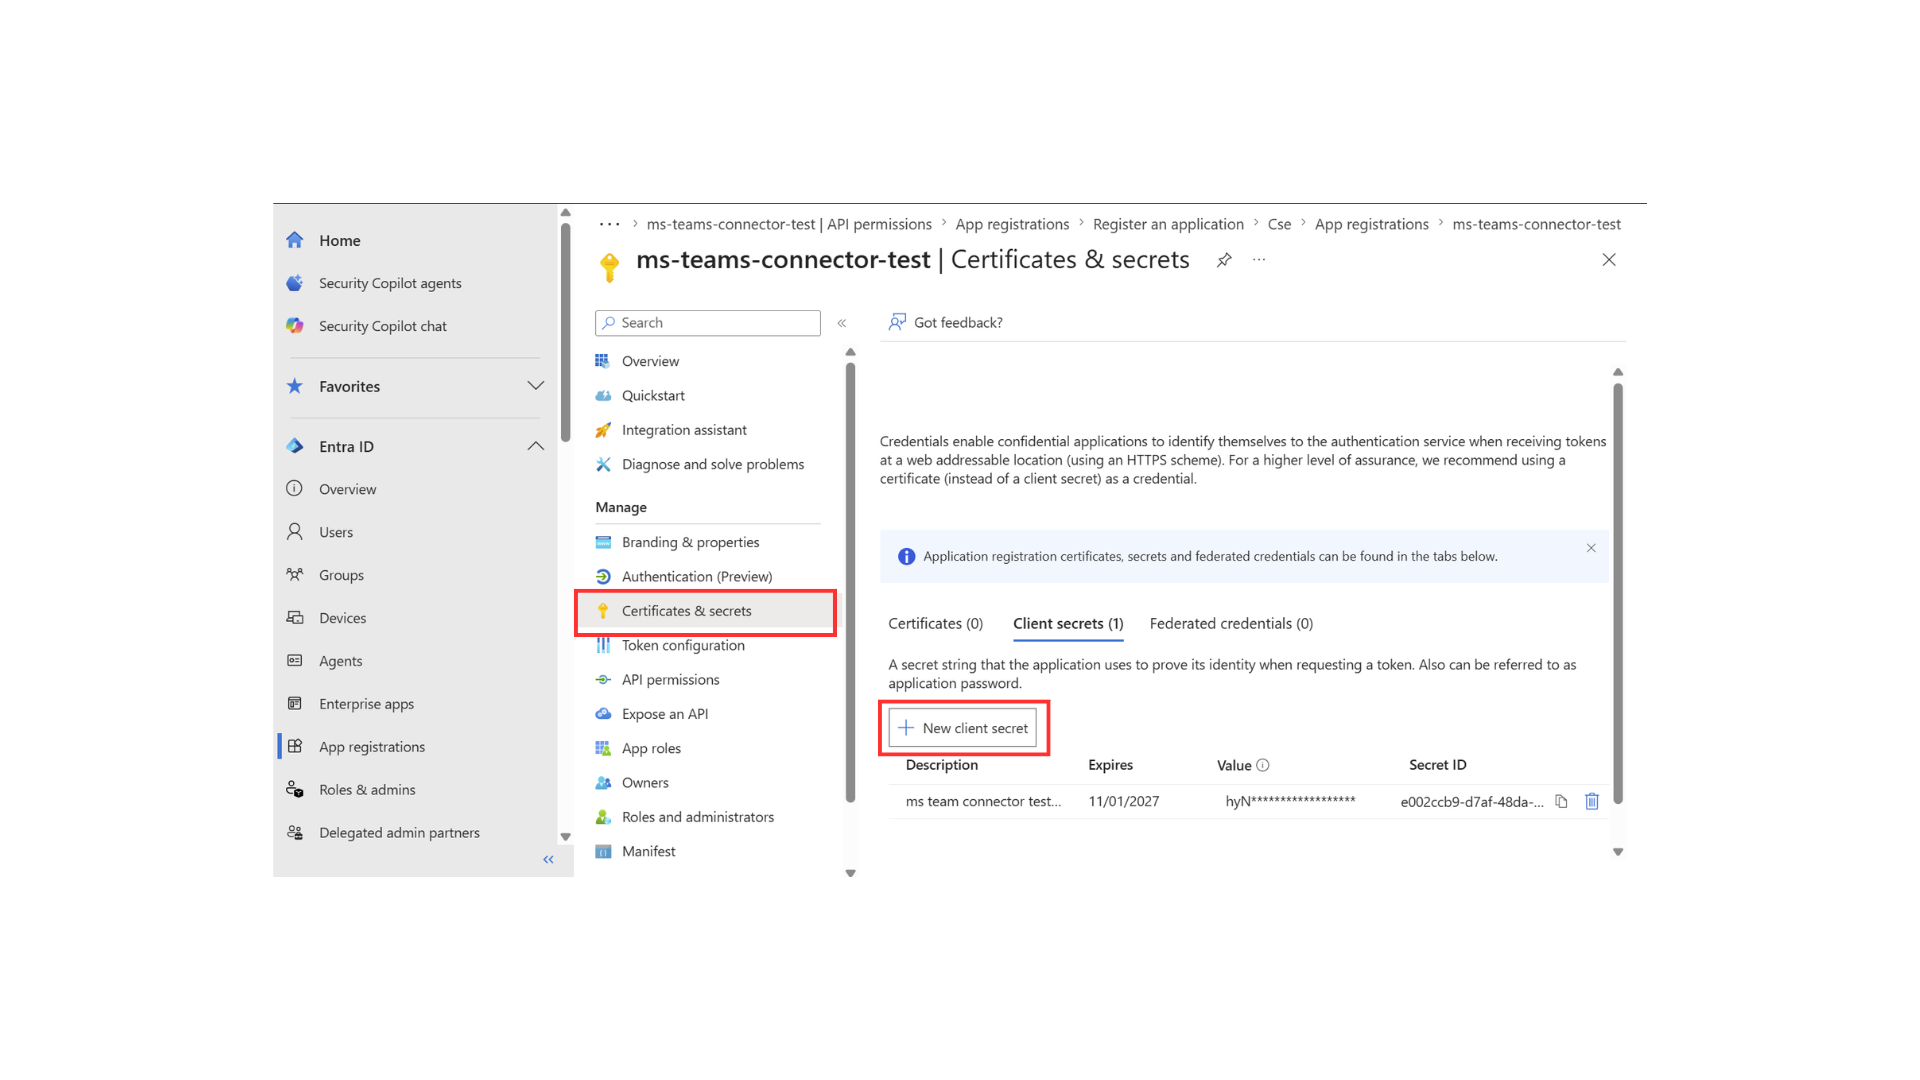
Go to Certificates & secrets > New client secret, add a description and an expiry, and click Add.
-
Copy the secret Value immediately — it is shown only once. The Secret ID shown next to it is just a label for the secret, not a credential.
Obtain OAuth 2.0 credentials
Microsoft Entra's v2.0 token endpoint for the registered application is https://login.microsoftonline.com/<TENANT_ID>/oauth2/v2.0/token.
The connector supports two authentication modes:
Option A — Delegated access (authMode = "refresh_token")
This mode acts on behalf of a signed-in user and requires an initial interactive browser sign-in to obtain an authorization code. Exchange that code for a refresh token at the /token endpoint using your client_id, client_secret, and redirect_uri. Store the resulting refresh_token along with clientId, clientSecret, and tenantId — the connector uses these to mint new access tokens automatically on each call.
Option B — App-only access (authMode = "client_credentials")
This mode authenticates the application itself (no user, no redirect URI required) and requires Application permissions (admin-consented) from the previous step. Supply clientId, clientSecret, and tenantId directly — the connector calls the /token endpoint with the client credentials grant whenever a token is needed. No refresh token is used in this mode.
Next steps
- Action Reference - Available operations