Example
SAP JCo Client Example
What you'll build
Build an integration that connects to an SAP system with a SAP JCo (SAP Java Connector) client and performs two operations in a single automation: sending an IDoc and executing an RFC-enabled function module. Every SAP connection parameter is bound to a configurable variable.
Operations used:
- Send IDoc (Intermediate Document) : Sends an IDoc to the SAP system over tRFC.
- Execute : Calls an RFC-enabled function module on the SAP system and returns the response.
Architecture
Prerequisites
- An SAP system with a valid application server host, system number, client number, and logon credentials. See the Setup Guide.
- The
sapjco3.jarandsapidoc3.jarlibraries, added manually to the project'sBallerina.tomlas described in Configure Ballerina.toml with JAR paths. These proprietary libraries can't be bundled with the connector and must be obtained separately from the SAP Support Portal.
Setting up the SAP JCo integration
New to WSO2 Integrator? Follow the Create a New Integration guide to set up your integration first, then return here to add the connector.
Adding the Jco connector
Step 1: Open the connector palette
- In the WSO2 Integrator sidebar, select + next to Connections to open the Add Connection palette.
- Enter
sap.jcoin the search field.
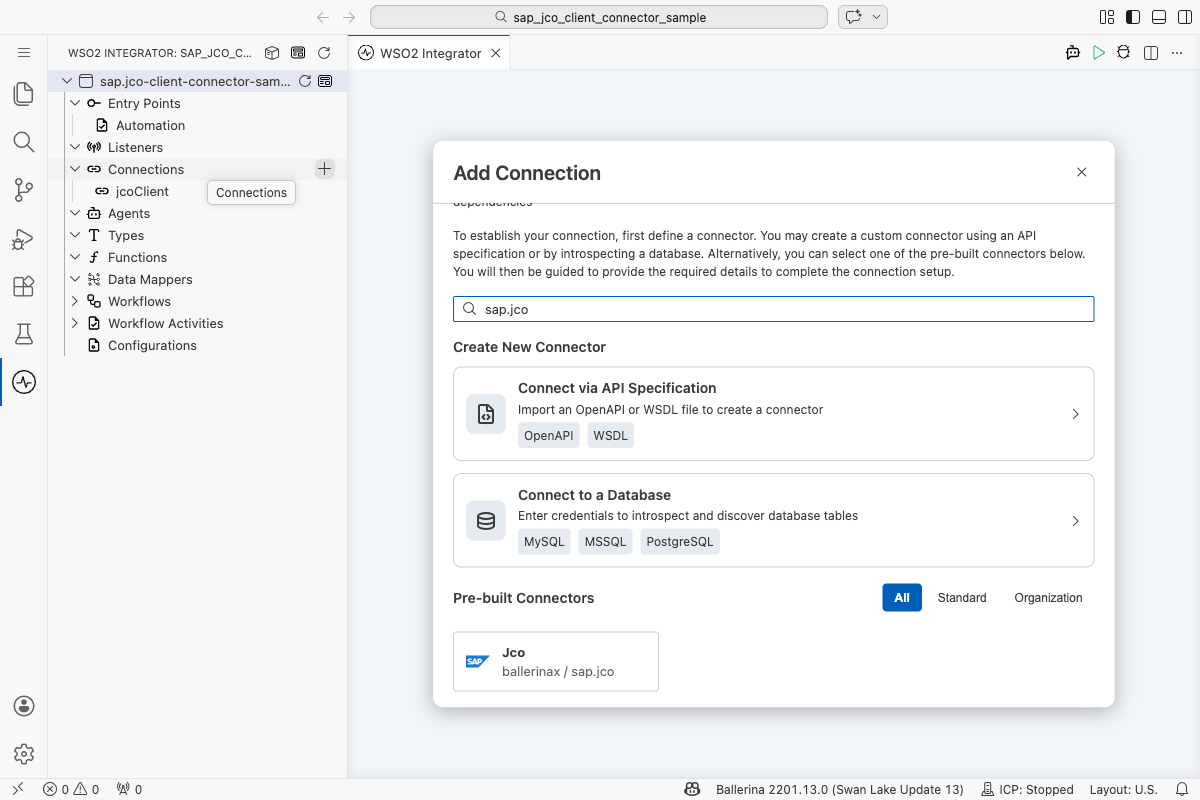
- Select the Jco connector card.
Configuring the Jco connection
Step 2: Bind the connection parameters to configurable variables
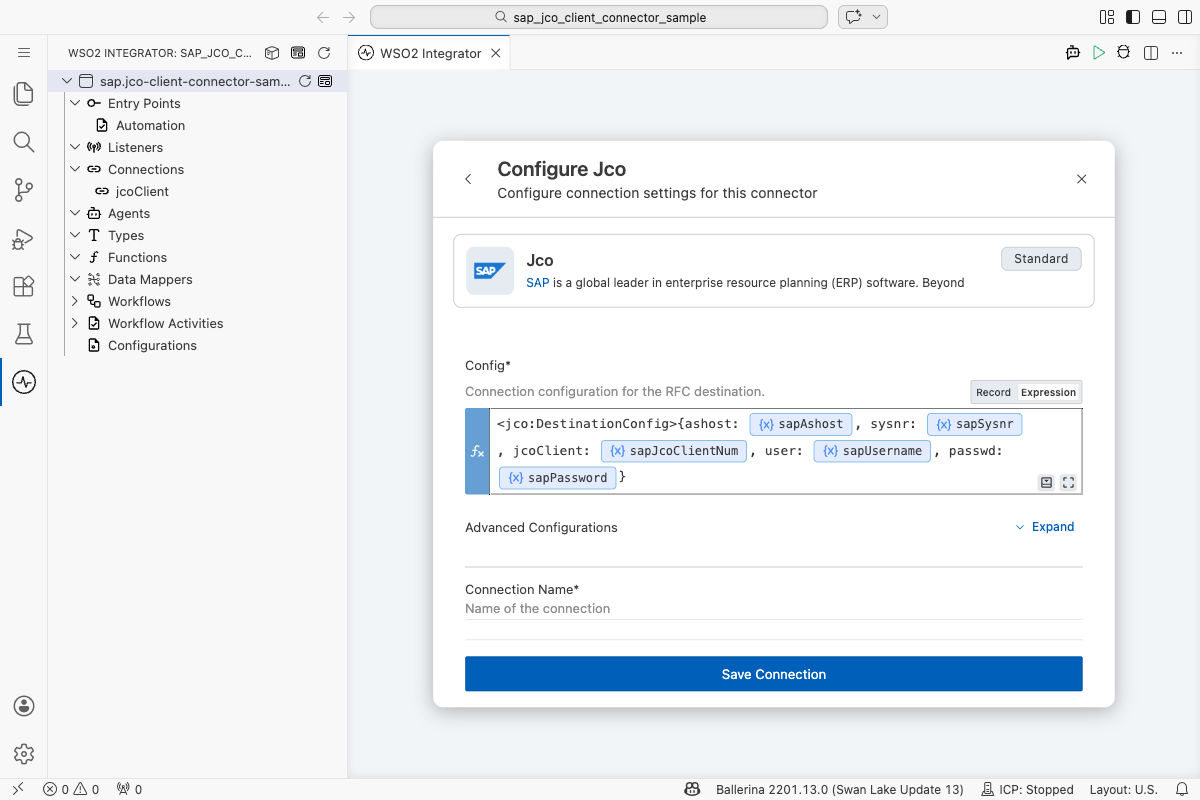
For each SAP credential, open the helper panel of the Config field, select the Configurables tab, select + New Configurable, and save a configurable string variable for it. Then switch Config to expression mode and enter a jco:DestinationConfig cast referencing each configurable:
- Config :
<jco:DestinationConfig>{ashost: sapAshost, sysnr: sapSysnr, jcoClient: sapJcoClientNum, user: sapUsername, passwd: sapPassword}, withsapAshost,sapSysnr,sapJcoClientNum,sapUsername, andsapPasswordeach bound to a configurable variable. The explicit cast resolves the type ambiguity betweenDestinationConfigand the raw property-map alternative.
Step 3: Save the connection
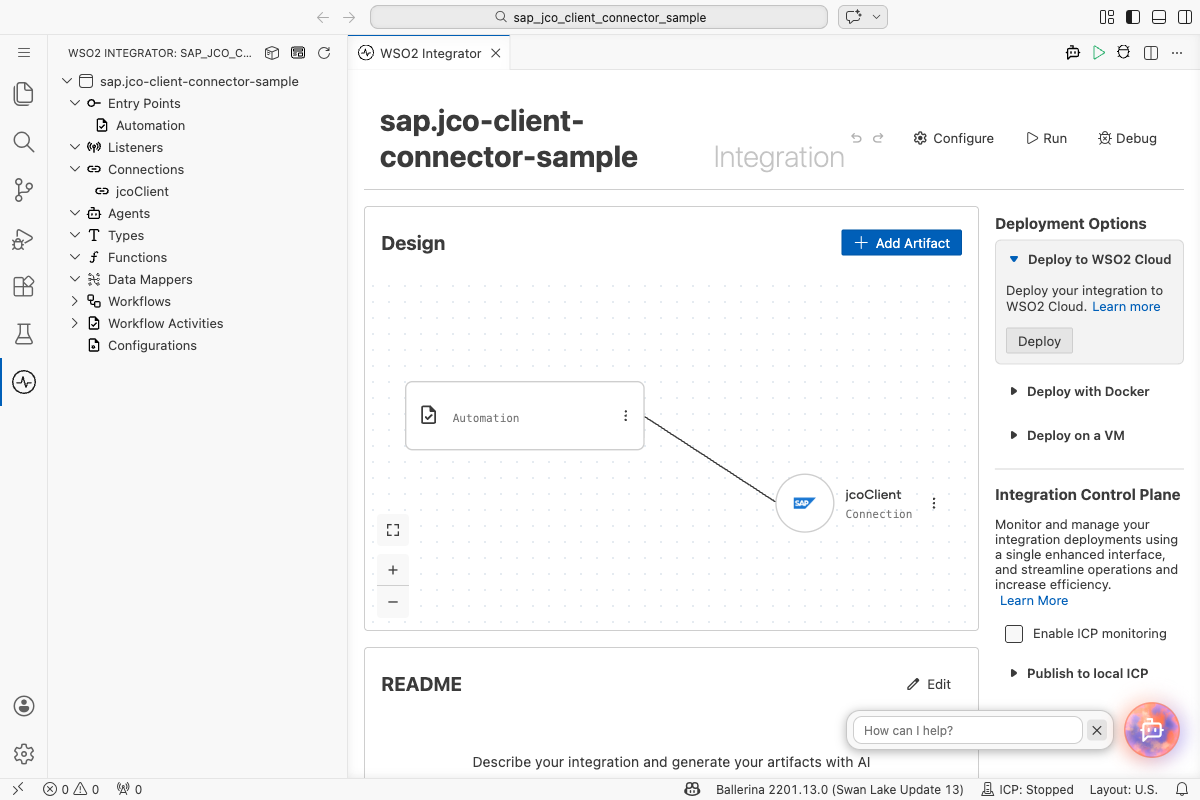
Select Save Connection. The Connections section now lists jcoClient as an available connection in the project.
Step 4: Set actual values for your configurables
- In the left panel, select Configurations.
- Enter a value for each configurable listed below.
- sapAshost (
string) : The SAP application server host name. - sapSysnr (
string) : The two-digit SAP system number. - sapJcoClientNum (
string) : The three-digit SAP client number. - sapUsername (
string) : The SAP logon user name. - sapPassword (
string) : The SAP logon password.
Configuring the Jco Send IDoc and Execute operations
Step 5: Add an automation entry point
Select + next to Entry Points, select Automation, and select Create to accept the default name (main). The flow canvas opens with Start and Error Handler nodes.
Step 6: Expand the connection and select Send IDoc
Select + on the flow canvas, then expand jcoClient under Connections to display its operations: Execute, Send IDoc, and Close.
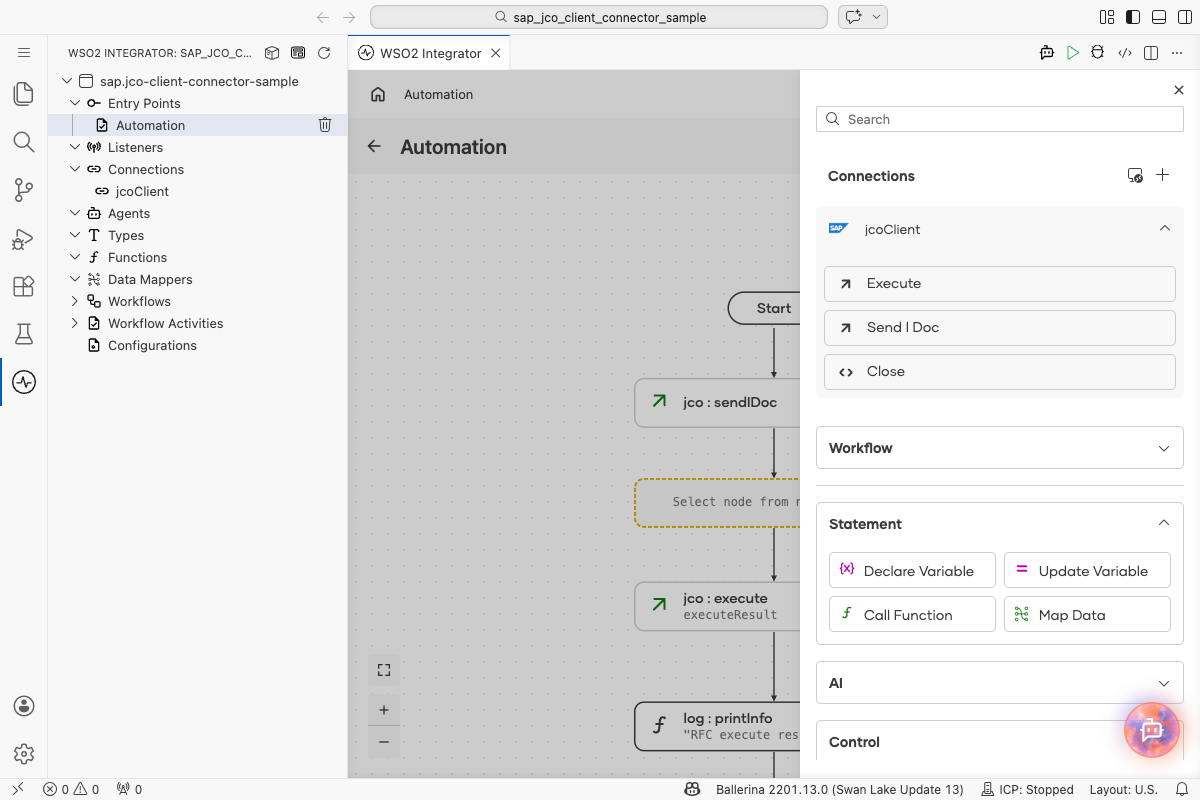
Select Send IDoc to open the jcoClient → sendIDoc form, then enter:
- IDoc : An IDoc XML payload, for example an
ORDERS05document with anEDI_DC40control record segment.
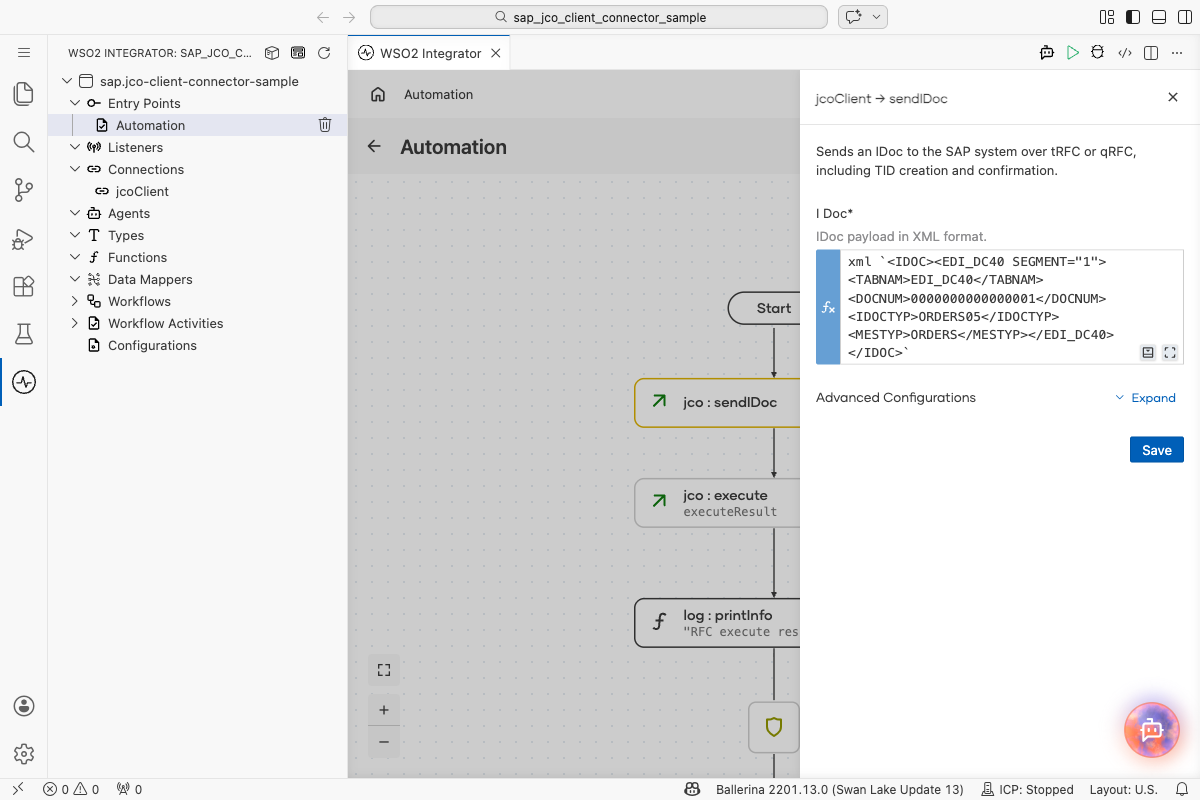
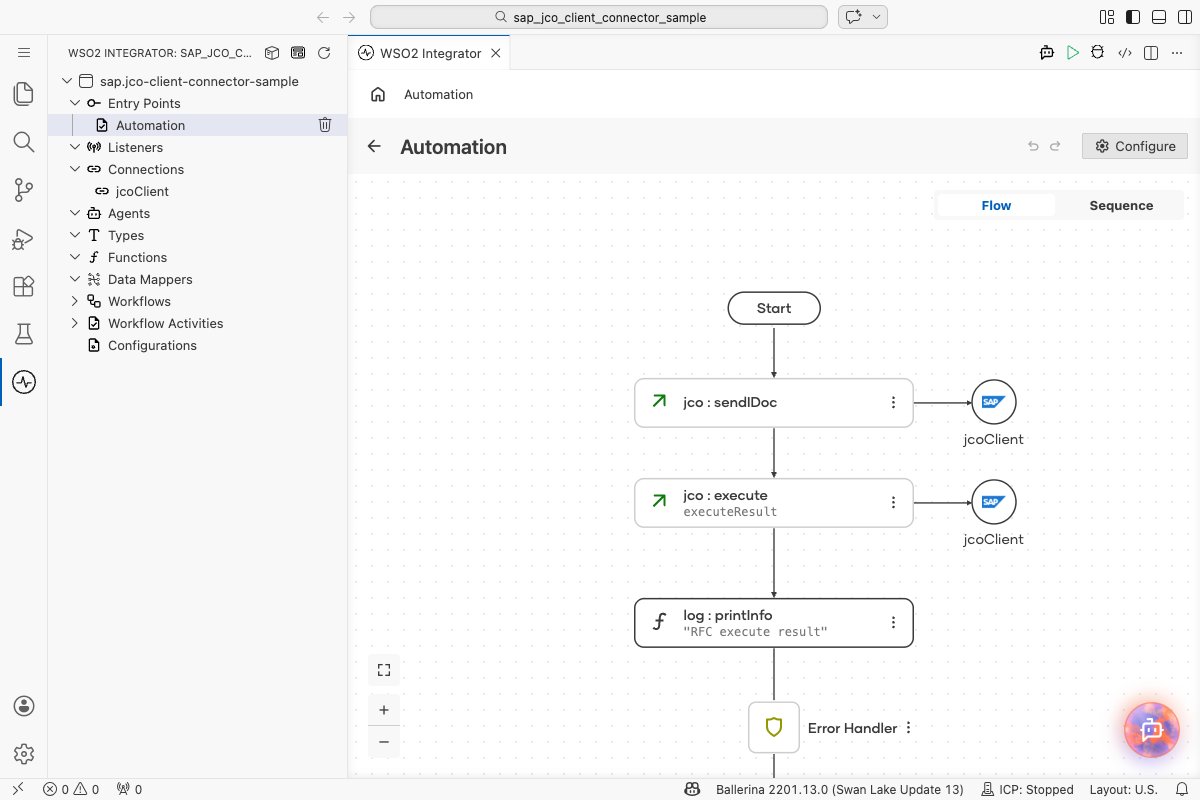
Select Save. The jco : sendIDoc node connects between Start and Error Handler.
Step 7: Add and configure the Execute operation
Select the + node between jco : sendIDoc and Error Handler, expand jcoClient again, and select Execute to open the jcoClient → execute form. Enter:
- Function Name : The RFC function module to call, for example
STFC_CONNECTION. - Result : The variable name to store the response in, for example
executeResult. - Return Type :
xml, to receive the raw response instead of a typed record. - Parameters (under Advanced Configurations) : Select
importParameters, then addREQUTEXTas the key andHello SAPas the value.
Select Save. The jco : execute node connects between jco : sendIDoc and Error Handler.
Step 8: Log the Execute result
Add a Log Info step after jco : execute, setting its Msg field to "RFC execute result" with result set to executeResult.
Try it yourself
Try this sample in WSO2 Integration Platform.

SAP JCo Trigger Example
What you'll build
Build an integration that reacts to IDocs pushed from an SAP system. A jco:Listener registers as a JCo server with the SAP gateway, and an IDocService handles every inbound IDoc through an onReceive callback, logging its content, with a separate onError callback for framework-level errors.
Operations used:
- onReceive : Invoked when an IDoc is received from the SAP system.
- onError : Invoked when a framework-level error occurs.
Architecture
Prerequisites
- An SAP system with a program ID registered for inbound connections via transaction SM59, and an SAP gateway host and service reachable from the integration. Complete the program ID registration and IDoc partner profile setup.
- The
sapjco3.jarandsapidoc3.jarlibraries, added manually to the project'sBallerina.tomlas described in Configure Ballerina.toml with JAR paths. These proprietary libraries can't be bundled with the connector and must be obtained separately from the SAP Support Portal.
Setting up the SAP JCo integration
New to WSO2 Integrator? Follow the Create a New Integration guide to set up your integration first, then return here to add the trigger.
Adding the SAP JCo trigger
Step 1: Open the Artifacts palette and configure the listener
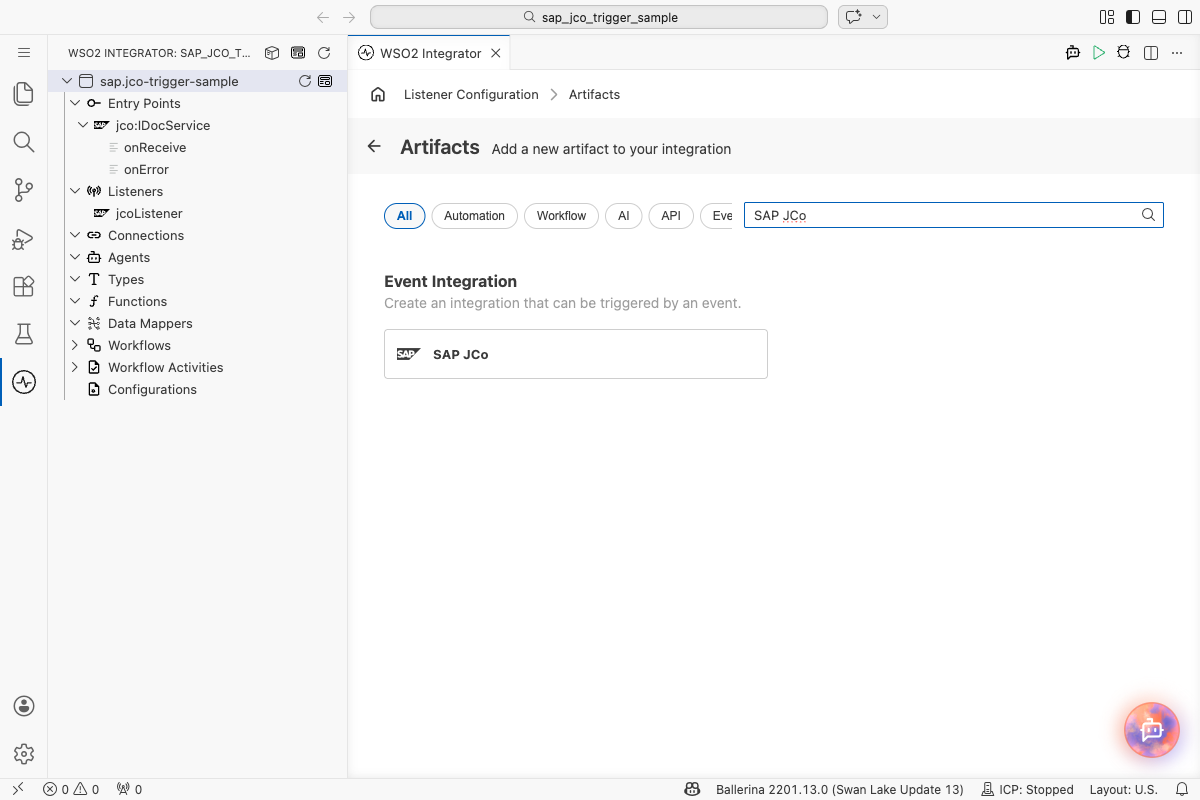
Select + Add Artifact, then select the SAP JCo card in the Event Integration category. The Create SAP JCo Event Integration form opens.
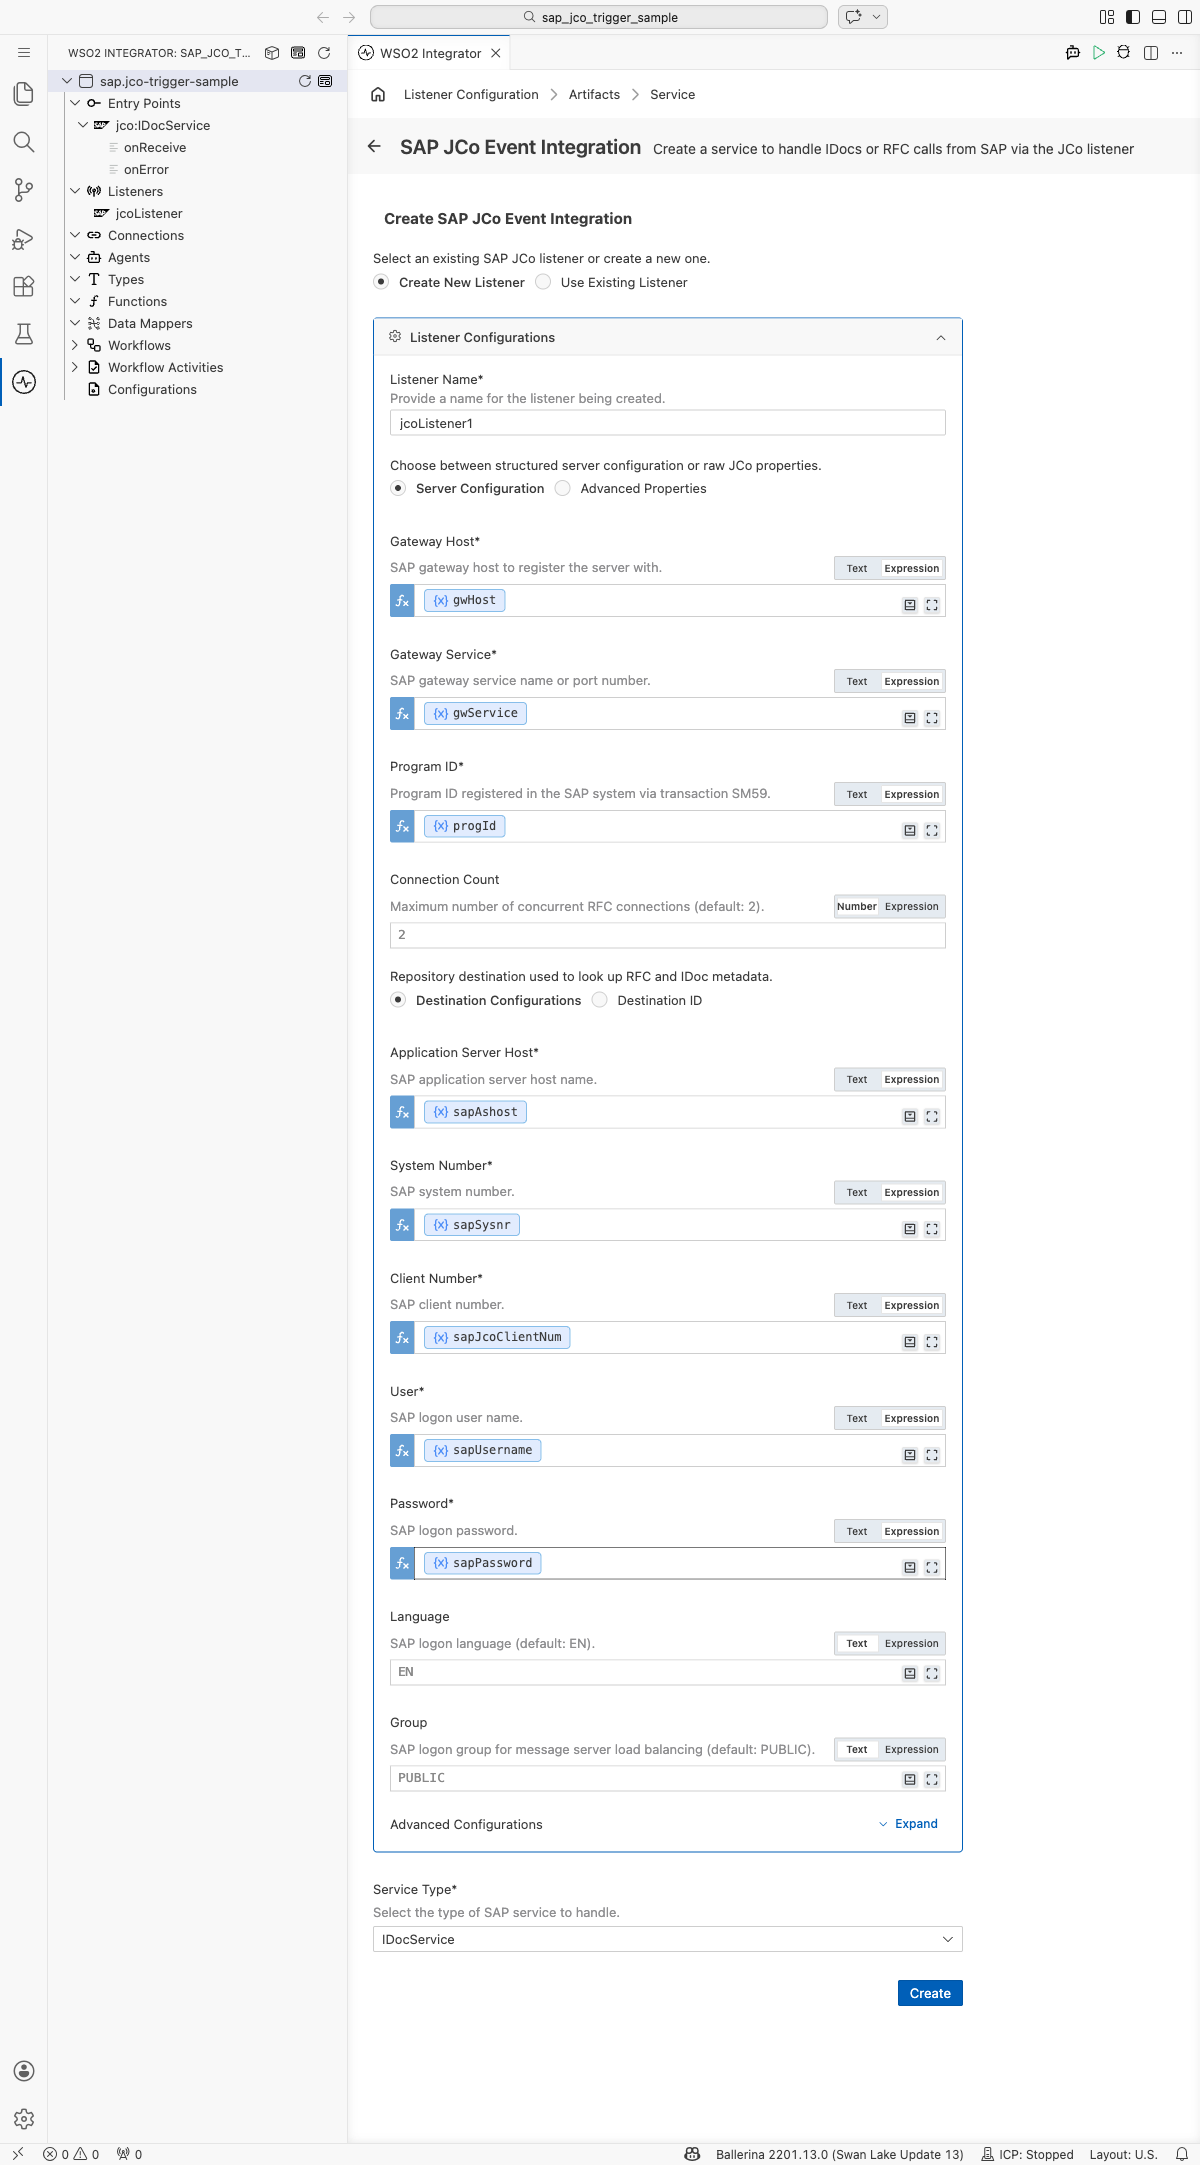
For each field, open its helper panel, select the Configurables tab, select + New Configurable, and save a configurable string variable for it.
- Listener Name : A name for the listener, for example,
jcoListener. - Gateway Host : The SAP gateway host to register the server with, bound to a configurable variable.
- Gateway Service : The SAP gateway service name or port, bound to a configurable variable.
- Program ID : The program ID registered in the SAP system via transaction SM59, bound to a configurable variable.
Step 2: Configure the repository destination and select the service type
With Destination Configurations selected, bind the remaining fields to configurable variables:
- Application Server Host : The SAP application server host name.
- System Number : The SAP system number.
- Client Number : The SAP client number.
- User : The SAP logon user name.
- Password : The SAP logon password.
- Service Type : Select IDocService. This walkthrough receives IDocs; for inbound RFC calls, select RfcService and use the Trigger Reference.
Step 3: Set actual values for your configurations
- In the left panel, select Configurations.
- Enter a value for each configurable listed below.
- gwHost (
string) : The SAP gateway host. - gwService (
string) : The SAP gateway service name or port. - progId (
string) : The program ID registered via transaction SM59. - sapAshost (
string) : The SAP application server host name. - sapSysnr (
string) : The SAP system number. - sapJcoClientNum (
string) : The SAP client number. - sapUsername (
string) : The SAP logon user name. - sapPassword (
string) : The SAP logon password.
Step 4: Create the listener and service
Select Create. The listener and IDocService are registered, and the Service view opens with onReceive and onError event handlers listed.
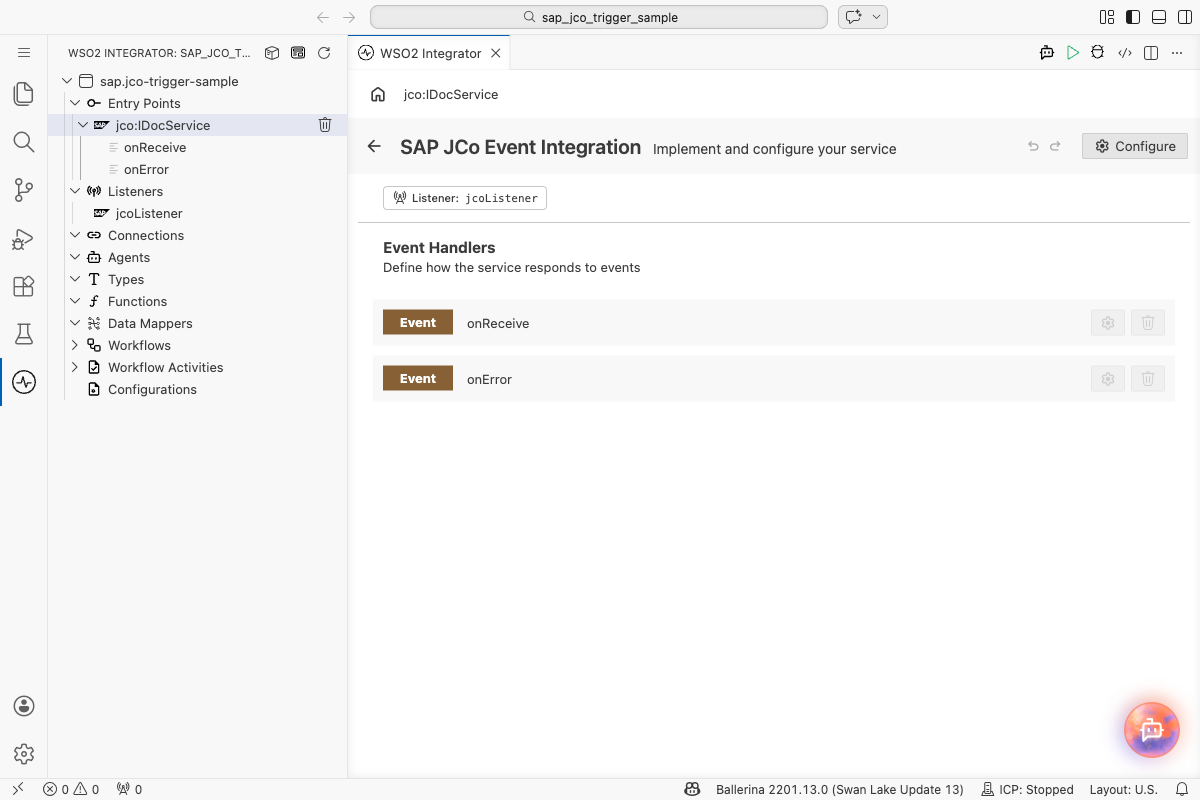
Handling SAP JCo events
Step 5: Log the received IDoc in onReceive
Select onReceive to open its flow canvas, select the + node, and select Log Info. Set its Msg field, in expression mode, to "Received IDoc: " + iDoc.toString().
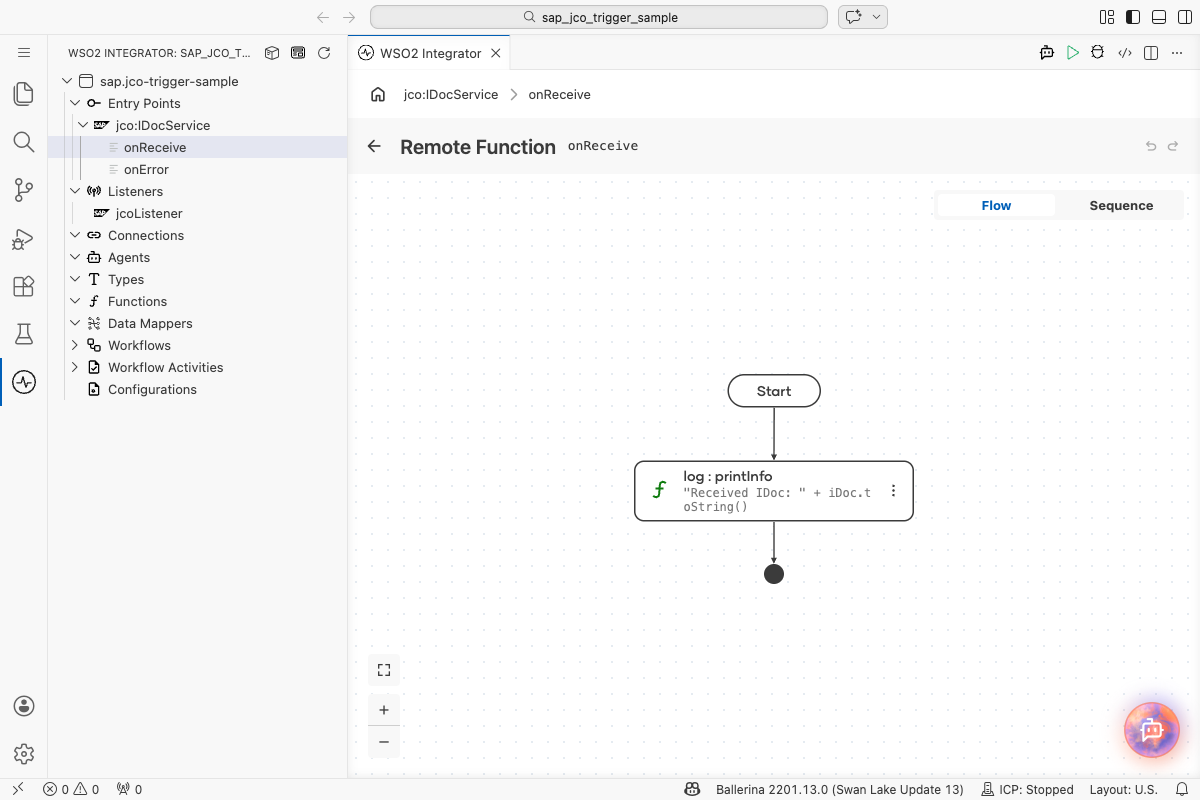
Select Save, then select the back arrow to return to the Service view.
Step 6: Log the error in onError
Select onError to open its flow canvas, select the + node, and select Log Error. Set its Msg field to "Error processing IDoc", then expand Advanced Configurations and set Error to err.
Select Save.
Running the integration
Step 7: Run the integration and dispatch a test IDoc
- Select Run to start the integration, and wait for the listener to register with the SAP gateway.
- From the SAP system, dispatch an IDoc to the registered program ID, for example, using the Client Example's Send IDoc operation or an equivalent SAP outbound process.
- Confirm the IDoc content appears in the integration's log output.
Try it yourself
Try this sample in WSO2 Integration Platform.
More code examples
The Ballerina SAP JCo Connector provides practical examples illustrating usage in various scenarios. Explore these
scenarios to understand how to automate processes involving SAP systems and external data sources using Ballerina.
-
SAP Inventory Update via RFC - Integrate external inventory data into an SAP system and update inventory records through an RFC.
-
Automate IDoc Dispatch - Demonstrate the automation of generating and dispatching IDocs for shipment details.
-
Automated Supplier Order Processing via IDoc Listener - Set up an IDoc listener to automate supplier order processing.
-
SAP Product Catalog Sync - Query SAP material master data using RFC table parameters (filter criteria and field selection) and sync the results to an external product catalog API.
-
SAP Real-Time Credit Check Service - Expose a Ballerina service as an inbound RFC server that SAP calls synchronously during sales order creation to validate customer creditworthiness.