Setup Guide
This guide walks you through getting the credentials and URLs the RudderStack connector needs from the RudderStack dashboard.
The connector calls three RudderStack APIs that use different credentials:
| API | Operations | Credential | Host |
|---|---|---|---|
| Event Stream | identify, track, page, screen, group, alias, batch | Source write key | Your data plane URL |
| Activation | getProfile, getProfiles, deleteProfile, deleteProfiles | Service Access Token | profiles.rudderstack.com (US) or profiles-eu.rudderstack.com (EU) |
| Profiles | startProfilesRun, getProfilesRunStatus | Service Access Token | api.rudderstack.com (US) or api.eu.rudderstack.com (EU) |
You only need the credentials of the APIs you call. For example, an integration that only sends events needs only the write key and the data plane URL.
Prerequisites
- A RudderStack account
Step 1: Create an HTTP source
The write key identifies the source that the Event Stream operations send events to.
- Sign in to the RudderStack dashboard.
- In the left sidebar, select Directory. On the Sources tab, select HTTP.
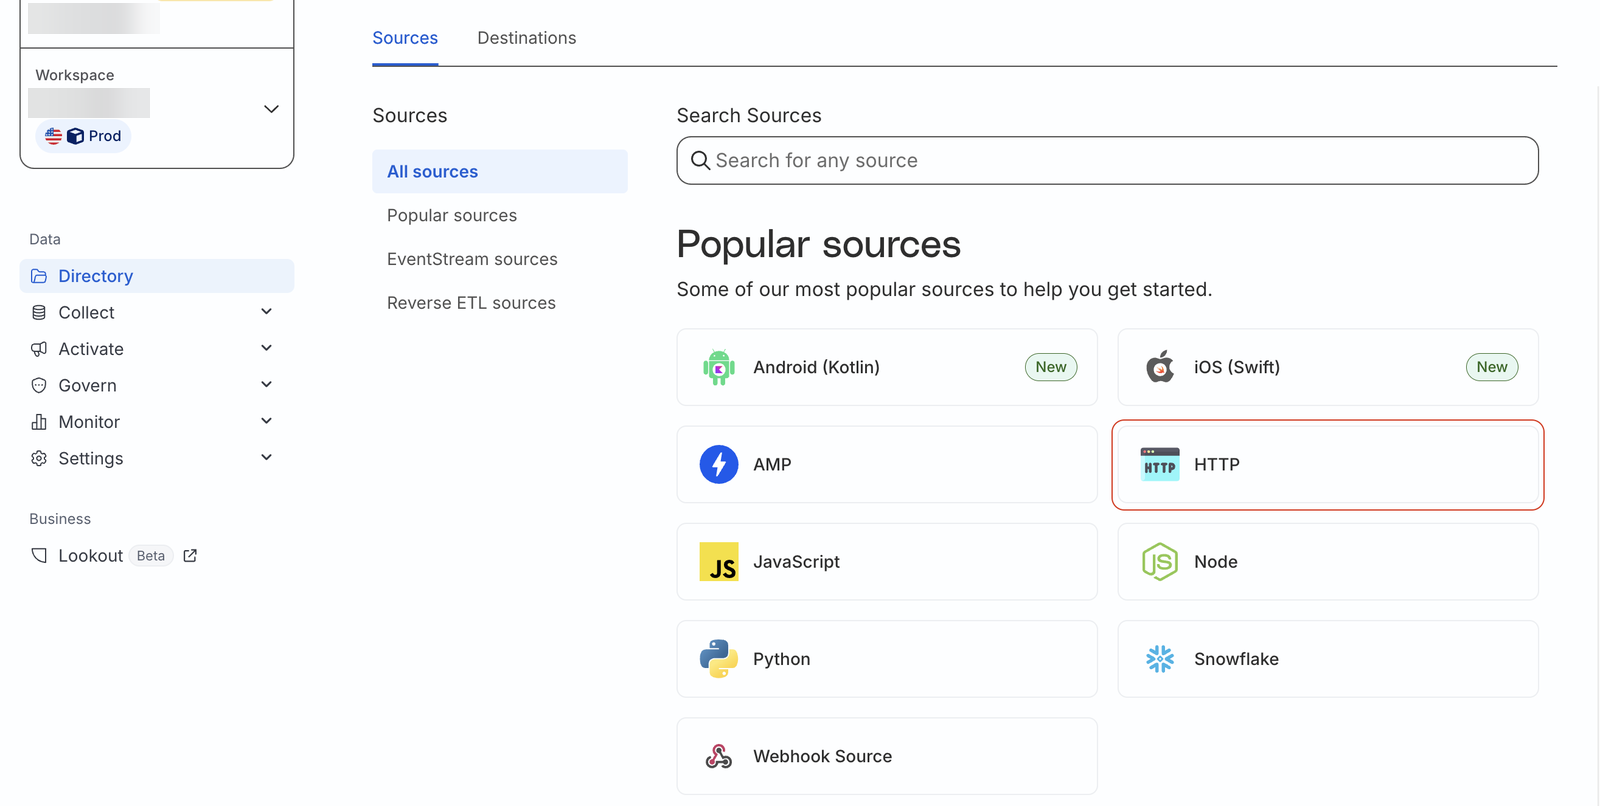
- Enter a name for the source and complete the setup.
Step 2: Copy the write key and the data plane URL
- Open the source. Select Write key in the source header to copy the write key.

- Copy the Data plane URL shown at the top of the Connections page, for example,
https://<your-workspace>.dataplane.rudderstack.com.
Step 3: Generate an access token
The Activation and Profiles APIs authenticate with a Bearer token. For development and testing, use a Personal Access Token. For production, use a workspace-level Service Access Token.
For development and testing: Personal Access Token
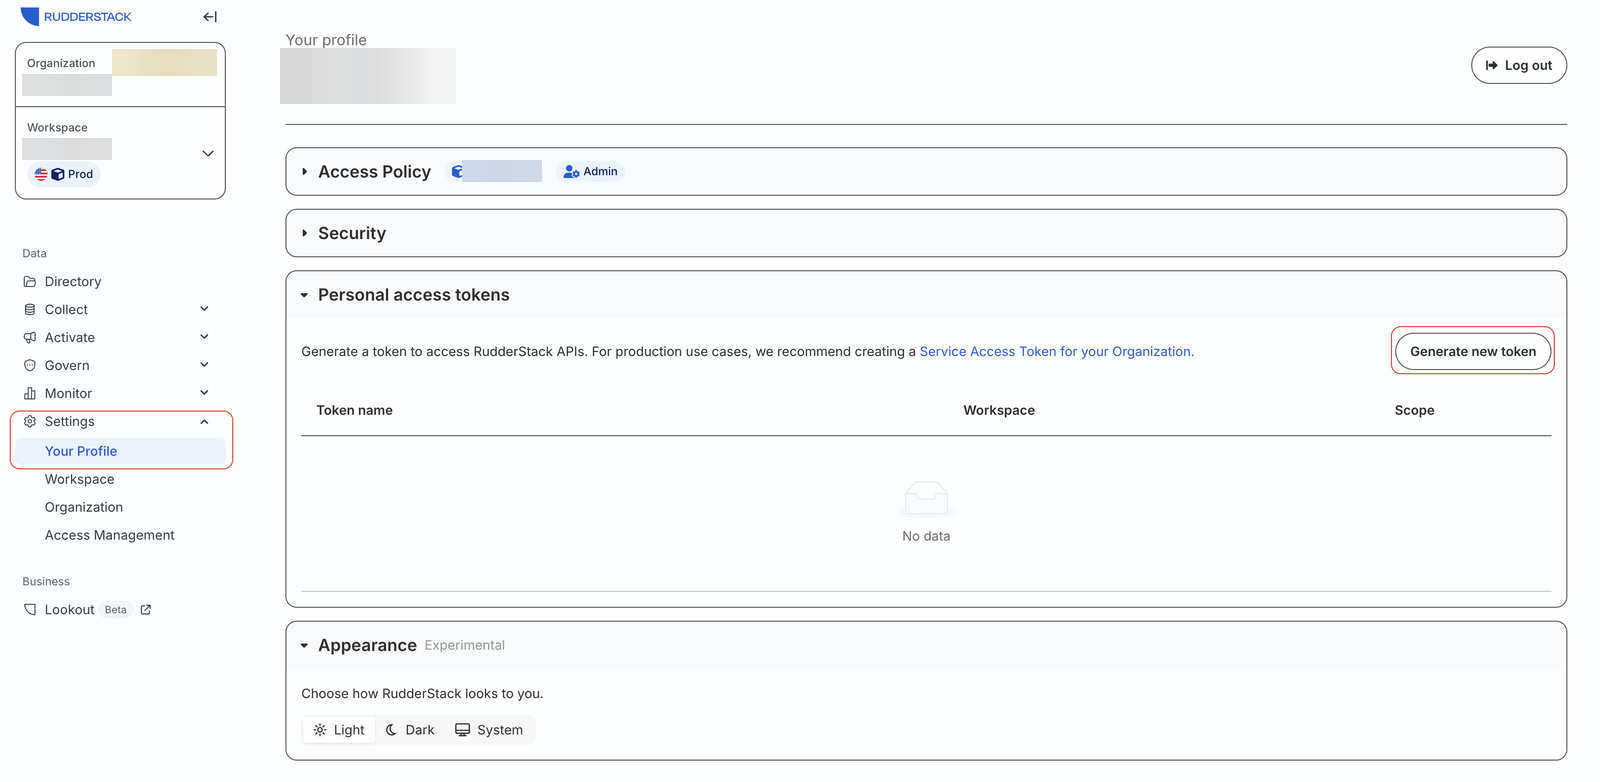
- In the left sidebar, select Settings > Your Profile. Under Personal access tokens, select Generate new token.
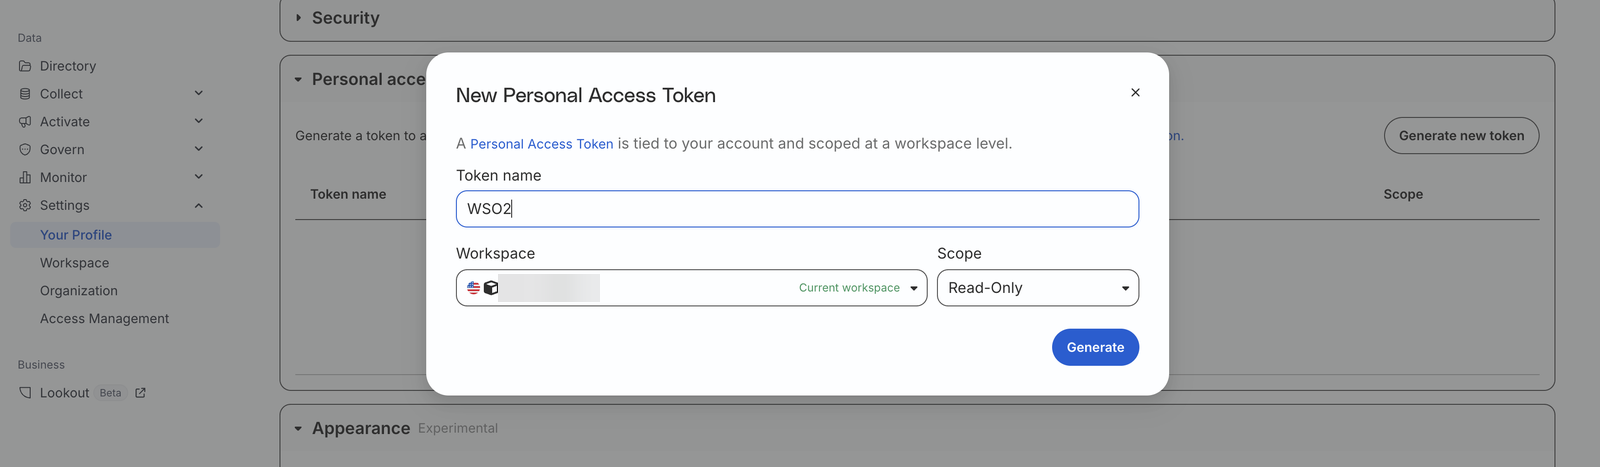
- Enter a Token name, select the Workspace and the Scope, and select Generate.
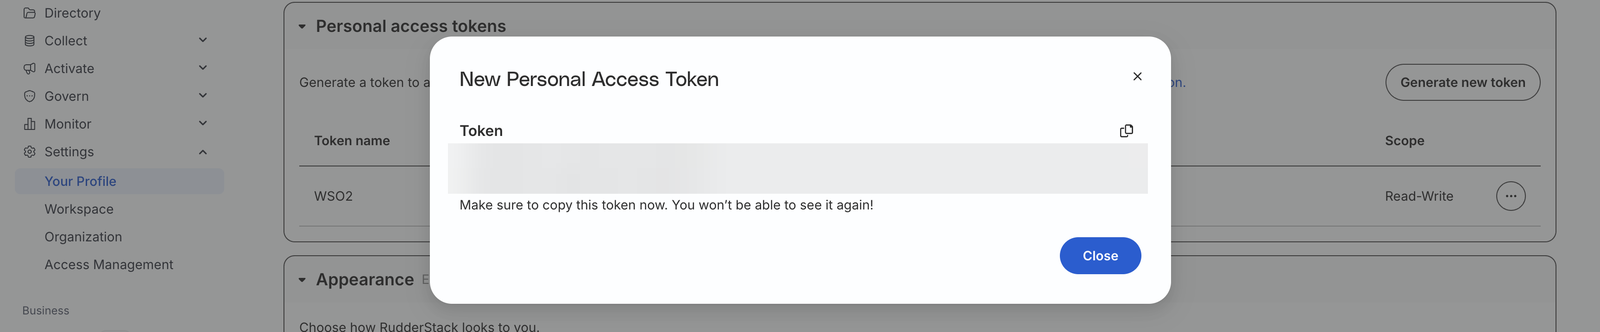
- Copy the token. It is shown only once.
For production: Service Access Token
Only workspace admins can generate Service Access Tokens. See RudderStack's guide on Service Access Tokens for details.
- In the left sidebar, select Settings > Access Management > Service Access Tokens, and select the Workspace tab.
- Select Generate new token, enter a name, select the workspace, and select Next.
- Under Workspace SAT access policy, grant the permissions for the APIs you use:
- Activation API: Destination Data Access on the Redis destination that the Profiles project syncs to.
- Profiles API: Edit on the Profiles resource.
- Select Generate and copy the token. It is shown only once, and its access policy can't be changed later.
Step 4: Note your workspace region
The Activation and Profiles APIs have separate US and EU hosts. If your workspace is in the EU region, set region to rudderstack:EU in the connection config. The default is rudderstack:US.
You now have everything the connector needs:
- writeKey: the source write key, for the Event Stream operations
- serviceUrl: the data plane URL, for the Event Stream operations
- serviceAccessToken: the Service Access Token (or Personal Access Token), for the Activation and Profiles operations
- region:
rudderstack:USorrudderstack:EU
Store the write key and the access token securely. Bind them to configurable variables and supply the values in Config.toml at runtime instead of hardcoding them.
What's next
- Action Reference: available operations
- Example: build an integration with this connector