Example
What you'll build
This example builds an automation that delivers a message to an Amazon SQS queue. The automation runs on demand, sends one message through the SQS connector, and logs the response that Amazon SQS returns. Credentials and the target queue URL stay in configurable variables, so the integration holds no sensitive values.
Operations used:
- Send Message : Delivers a message to the specified SQS queue.
Architecture
Prerequisites
- An AWS account with an IAM user that's allowed to send messages to Amazon SQS.
- An access key ID and a secret access key for that IAM user.
- An Amazon SQS queue, along with its queue URL and region.
Setting up the SQS integration
New to WSO2 Integrator? Follow the Create a New Integration guide to set up your integration first, then return here to add the connector.
Adding the SQS connector
Step 1: Open the connector palette
Select Add Connection in the Connections section.
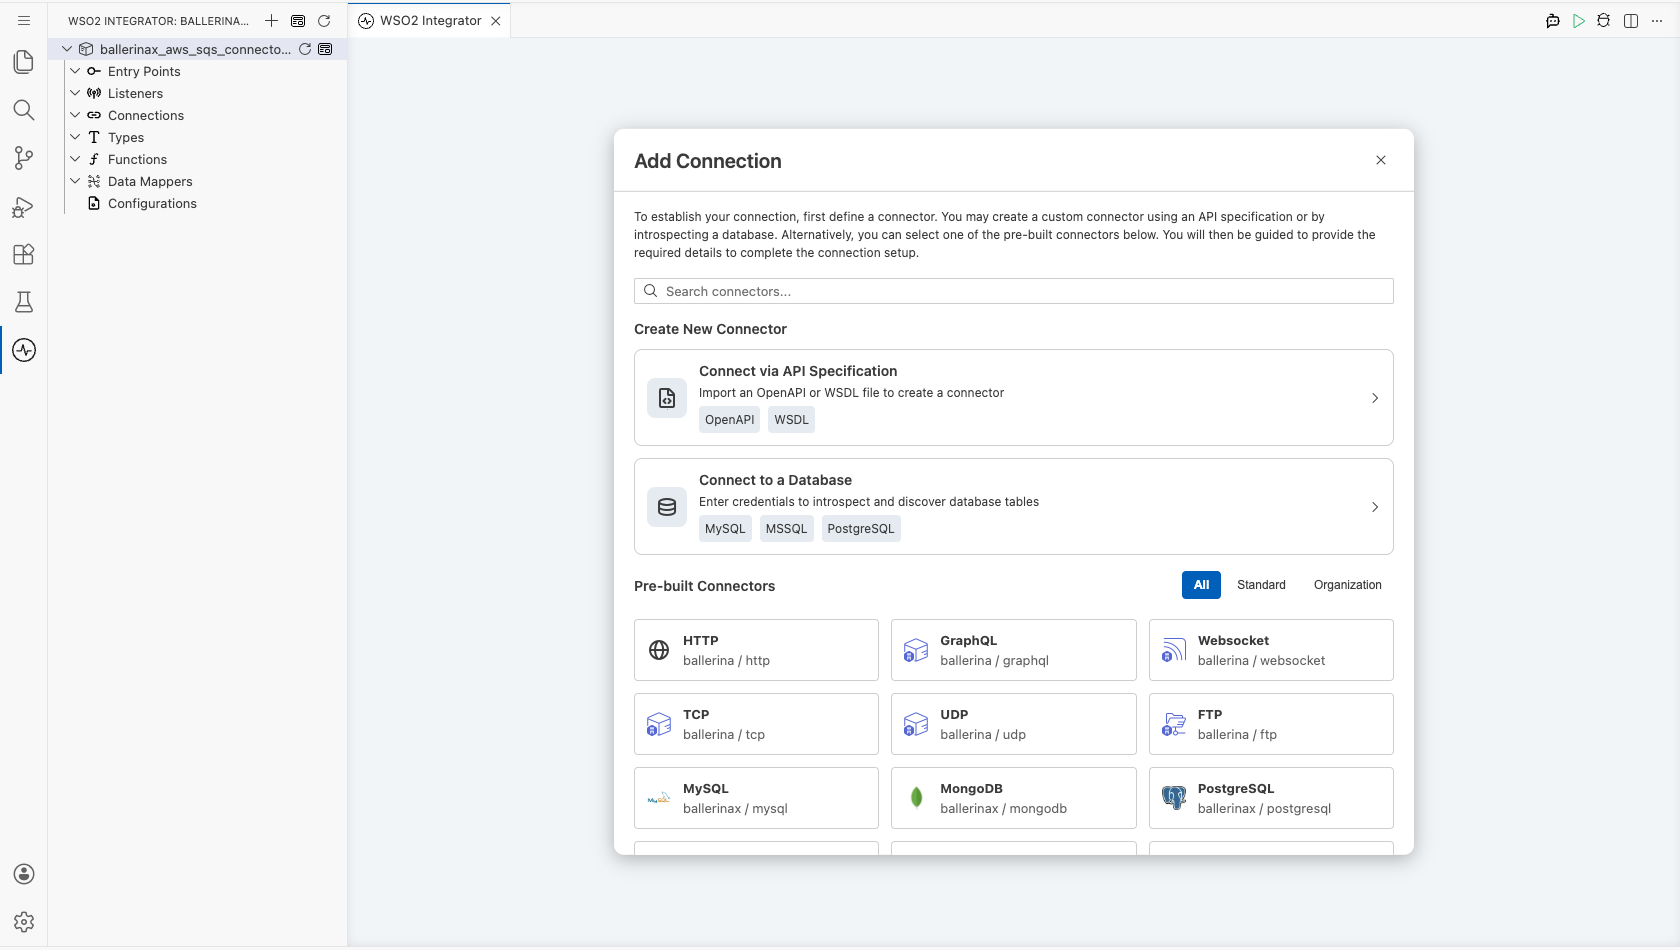
Step 2: Select the SQS connector
- Enter
aws.sqsin the search field. - Select the SQS connector card.
Note: Two cards match the search. Select SQS rather than SQS Caller, which belongs to the queue listener.
Configuring the SQS connection
Step 3: Bind the connection parameters to configurable variables
Bind each required connection field to a configurable variable so that the integration stores no credential. Keep the default authentication style, which uses a static access key pair, and keep the default connection name sqsClient.
- Auth : Authentication details that identify the caller to AWS
- Region : AWS region that hosts the queue
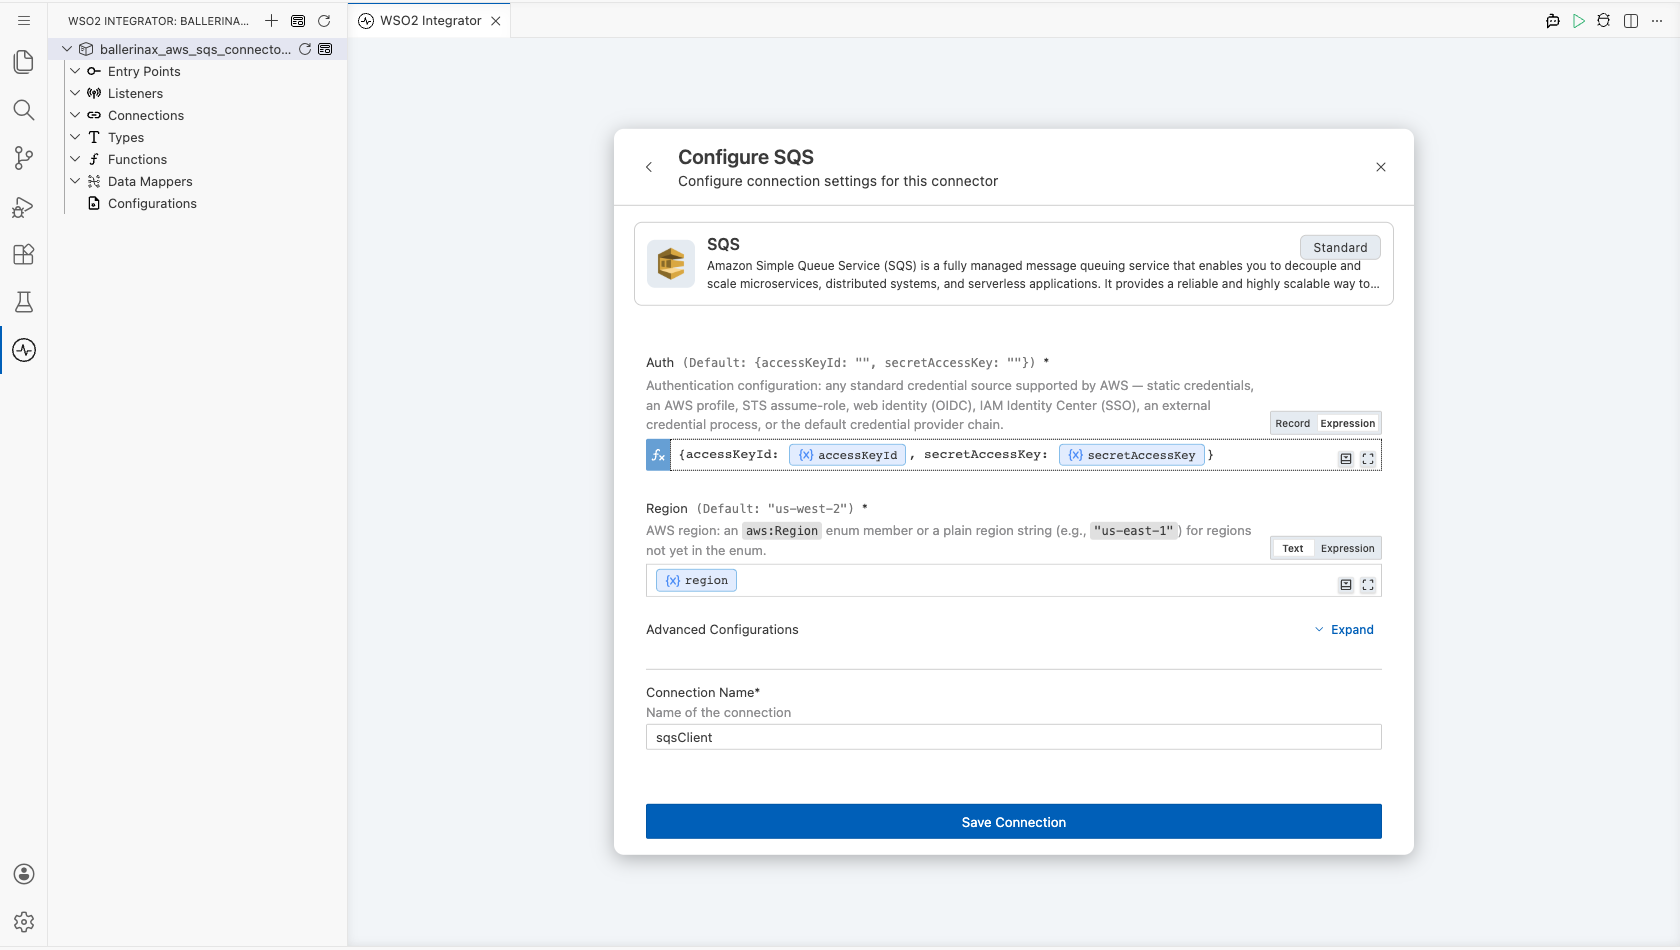
Step 4: Save the connection
Select Save Connection and verify that the connection appears in the Connections section.
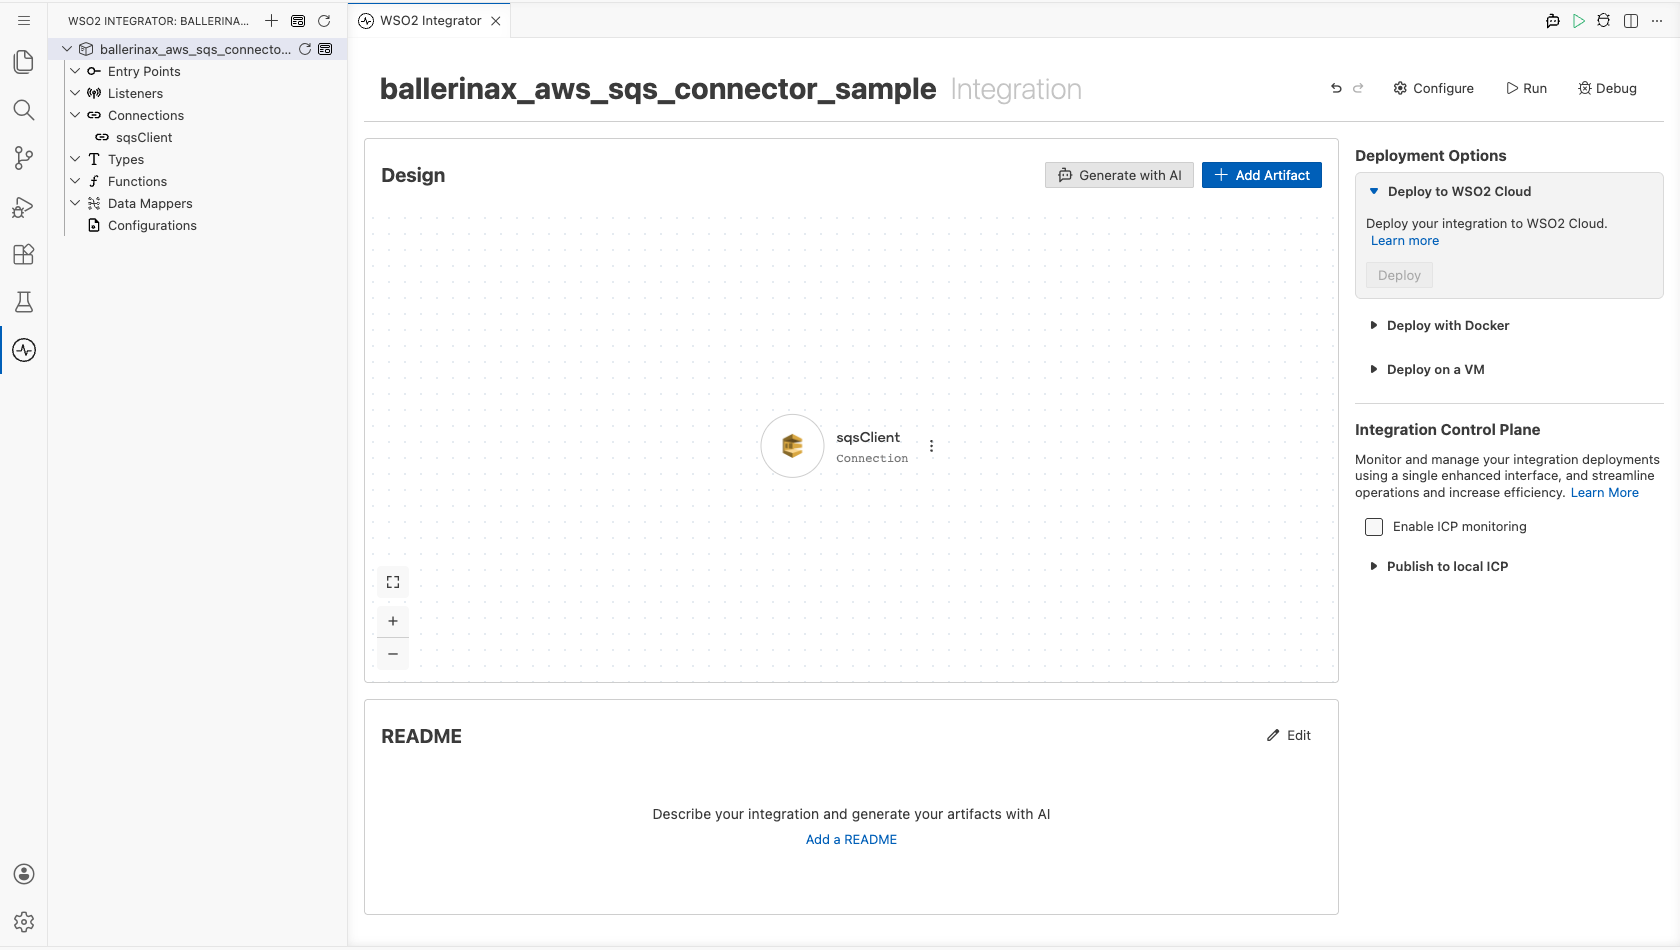
Step 5: Set actual values for your configurables
- Select Configurations at the bottom of the project tree under Data Mappers.
- Enter a value for each configurable variable listed below before you run the integration.
- region (
string) : AWS region that hosts the queue, such asus-east-1 - accessKeyId (
string) : Access key ID of the IAM user - secretAccessKey (
string) : Secret access key of the IAM user
Configuring the SQS Send Message operation
Step 6: Add an automation entry point
- Select Add Entry Point next to Entry Points.
- Select Automation.
- Select Create to accept the settings.
Step 7: Expand the connection and configure the Send Message operation
- Select + between Start and Error Handler in the automation flow.
- Expand sqsClient to display its operations.
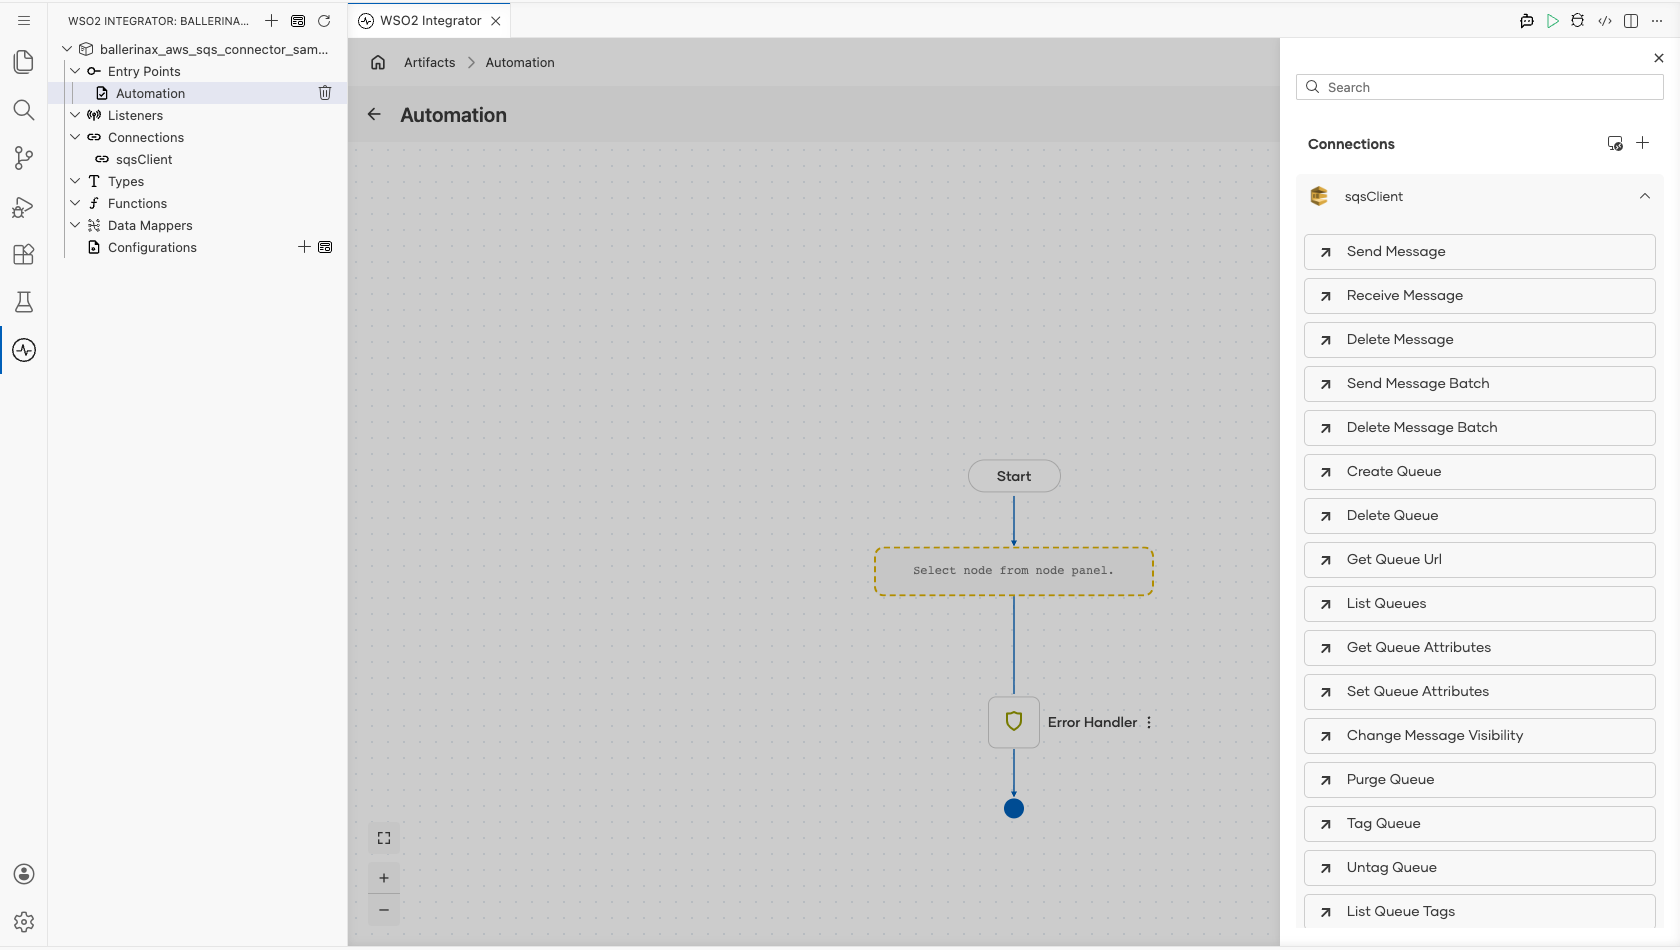
- Select Send Message and enter its required values.
- Queue Url : Queue that receives the message, bound to a configurable variable
- Message Body : Message text to deliver, up to
256KiB - Result : Name of the variable that holds the response from Amazon SQS
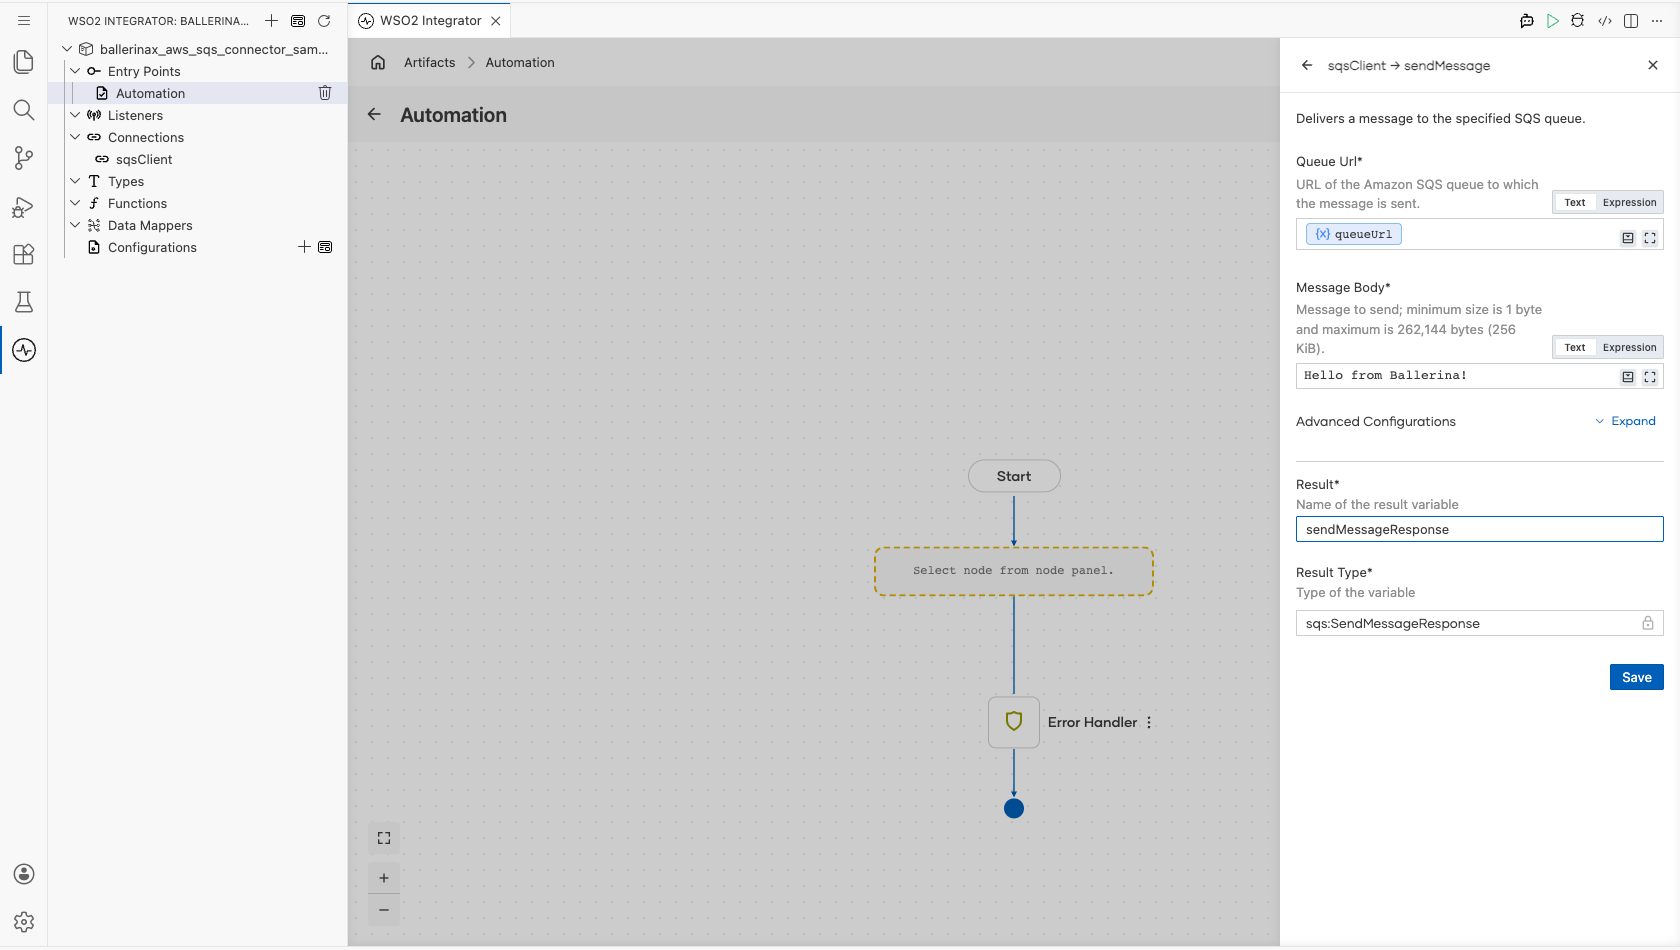
- Select Save.
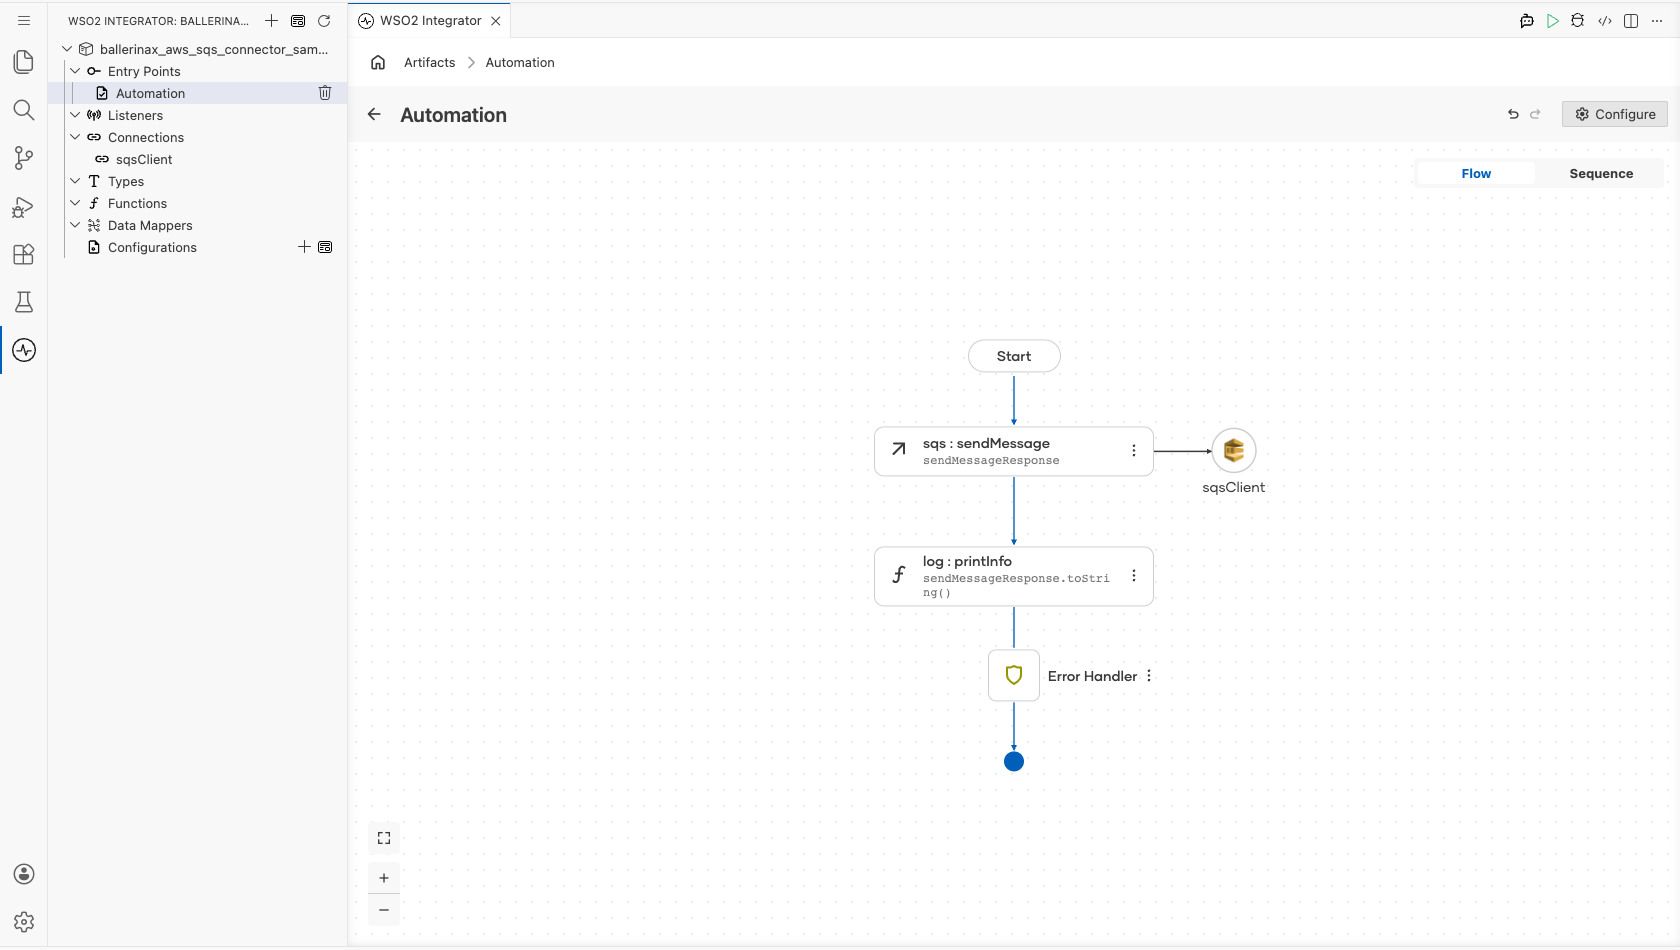
Step 8: Log the Send Message result
- Select + below the Send Message node.
- Expand Logging and select Log Info.
- Set Msg to the operation result, then select Save.
Try it yourself
Try this sample in WSO2 Integration Platform.

More code examples
The ballerinax/aws.sqs connector provides practical examples illustrating usage in various scenarios. Explore these examples:
- Basic Queue Consumer – Demonstrates creating a standard SQS queue, sending messages, and consuming them using a Ballerina listener.
- Basic Queue Operations – Shows how to create a queue, send, receive, and delete messages, and delete the queue.
- Advanced Messaging Features – Demonstrates advanced messaging features such as message attributes, batch sending, and custom queue attributes.
- FIFO Queue – Shows how to work with FIFO queues, including sending messages with different
messageGroupIds and grouping received messages.