Setup Guide
This guide walks you through setting up an IBM MQ queue manager and creating the queues and topics required to use the IBM MQ connector.
Prerequisites
- An IBM MQ server instance. You can download IBM MQ or run it via Docker using the
icr.io/ibm-messaging/mq:latestimage. Alternatively, sign up for an IBM MQ cloud account.
Step 1: Start an IBM MQ queue manager
If using Docker, start a queue manager with the following command:
docker run --env LICENSE=accept --env MQ_QMGR_NAME=QM1 \
  --publish 1414:1414 --publish 9443:9443 \
  icr.io/ibm-messaging/mq:latest
This starts a queue manager named QM1 with the default developer configuration, which pre-creates a server connection channel (DEV.APP.SVRCONN), queues (DEV.QUEUE.1, DEV.QUEUE.2, DEV.QUEUE.3), and a topic (DEV.BASE.TOPIC).
The default developer configuration creates a user app with password password for application connections. These credentials are publicly known — rotate them before using this instance in any shared or non-local environment.
Step 2: Create a queue
-
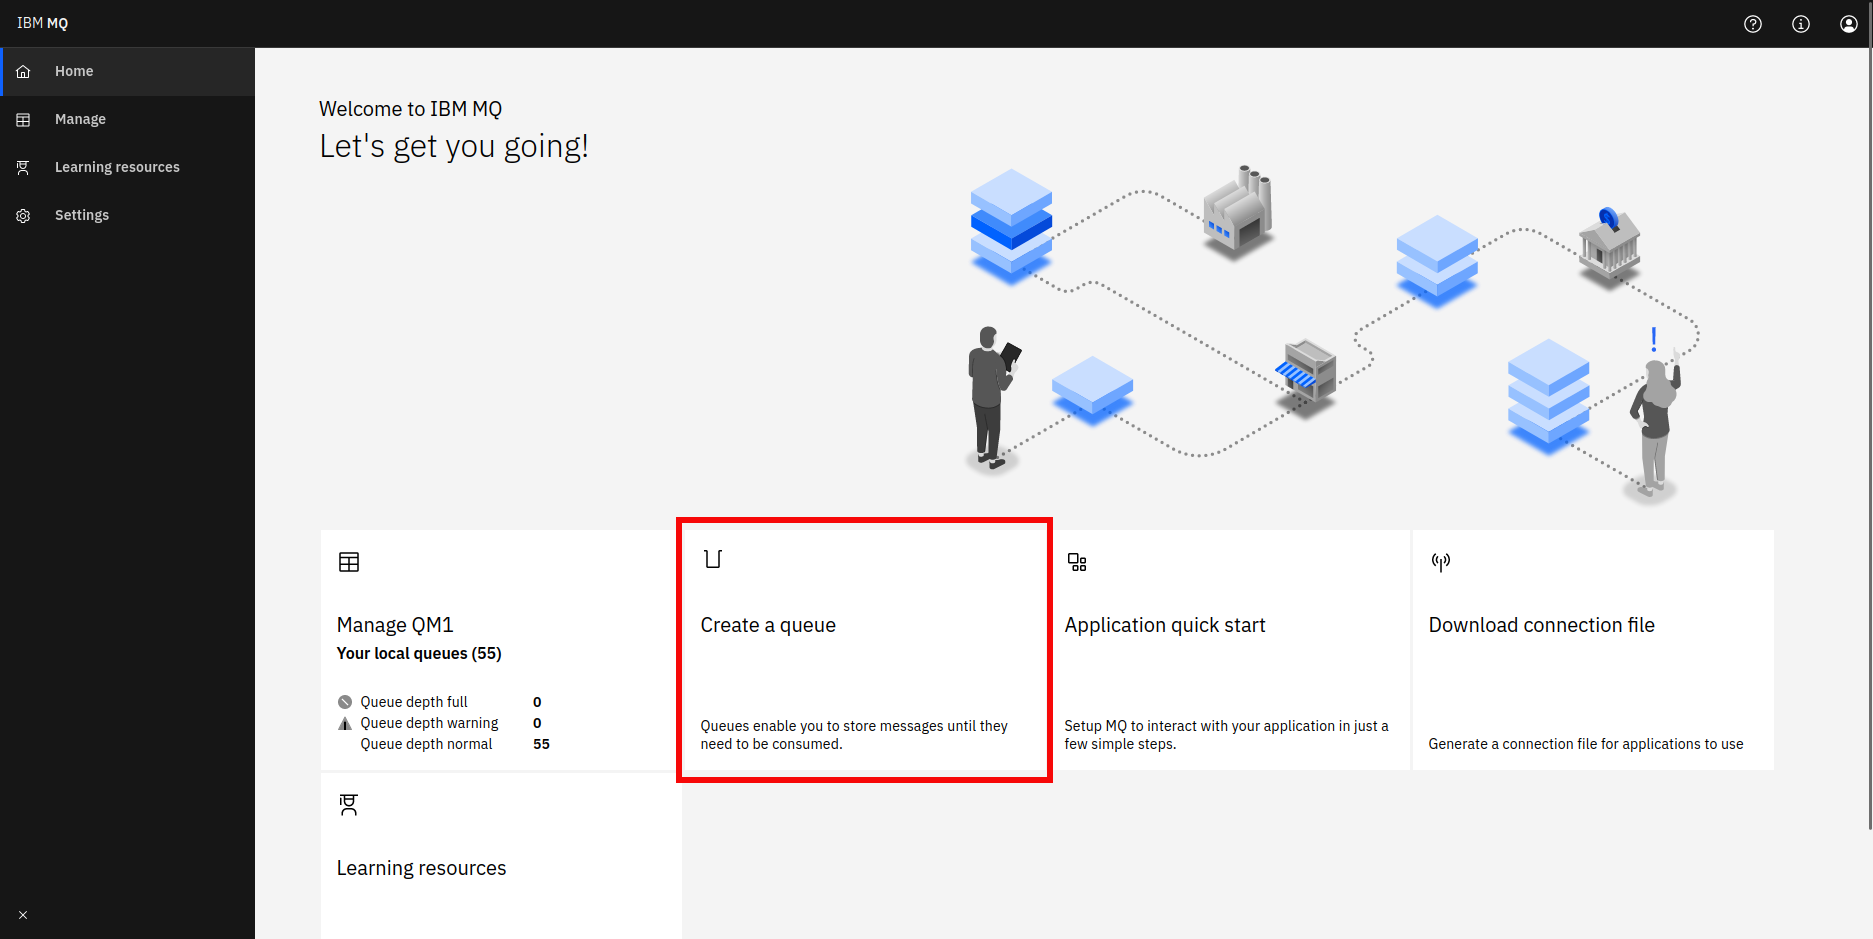
Access the IBM MQ console at
https://localhost:9443/ibmmq/consolein your browser. -
Select the Create a queue link.
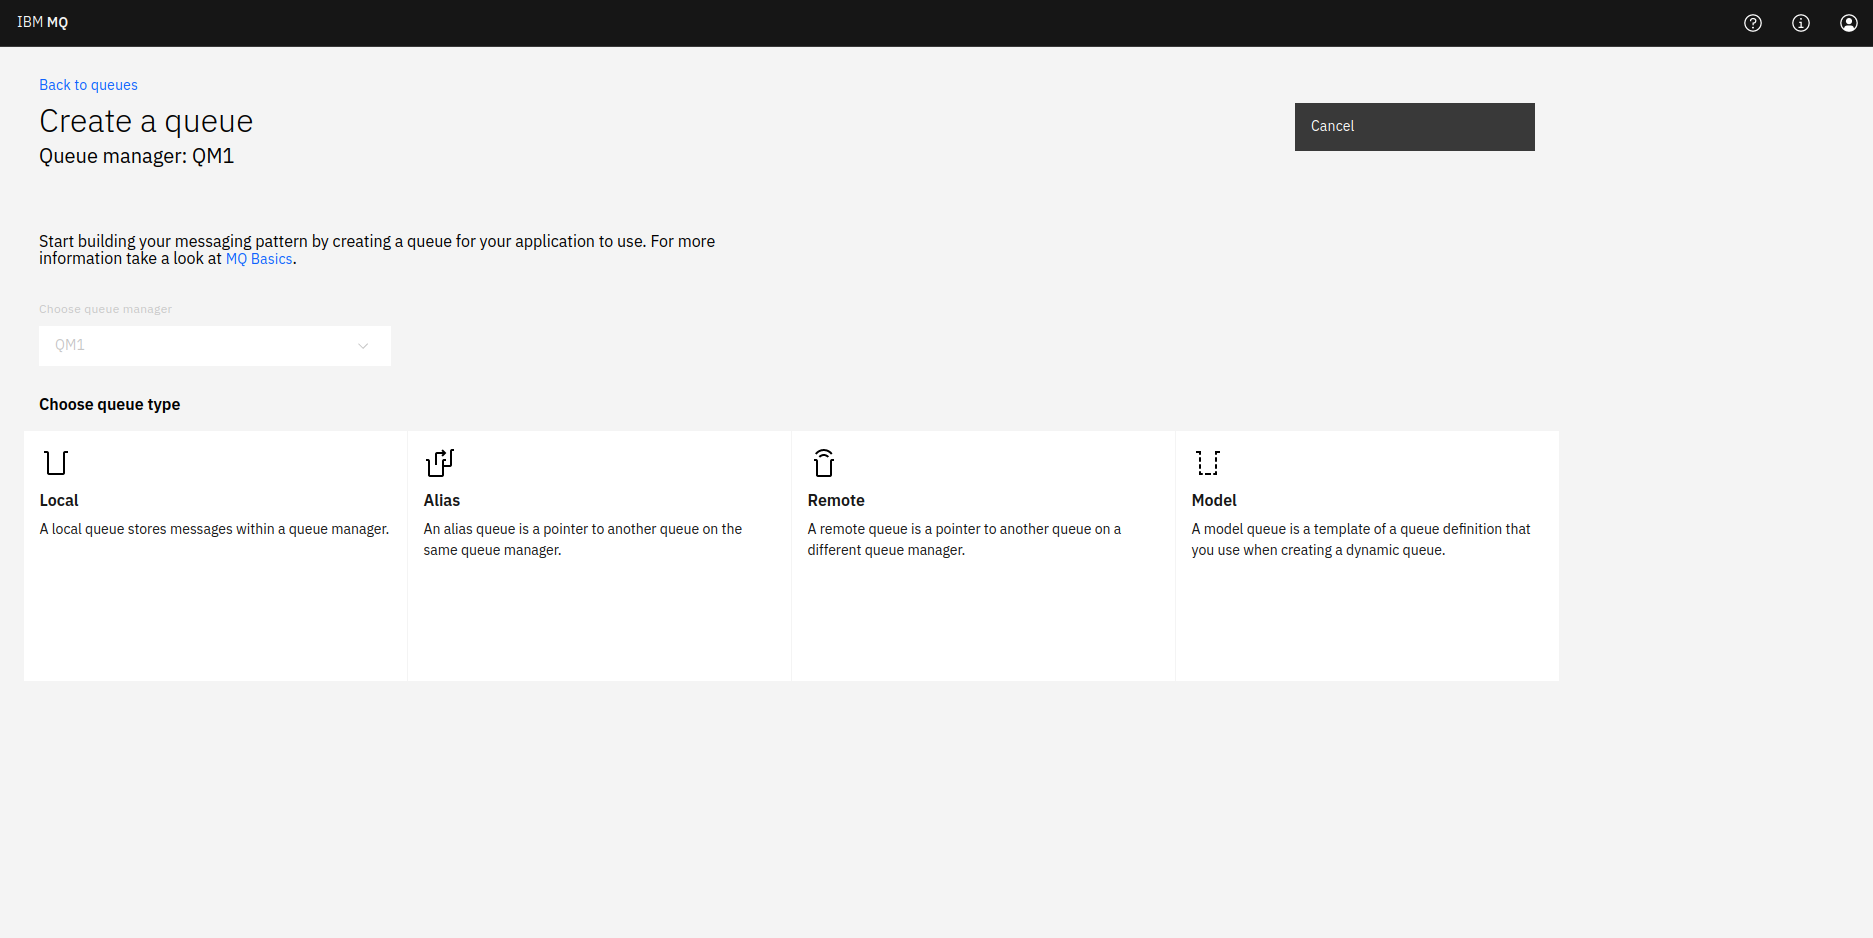
-
Choose your desired queue type.
Step 3: Create a topic
-
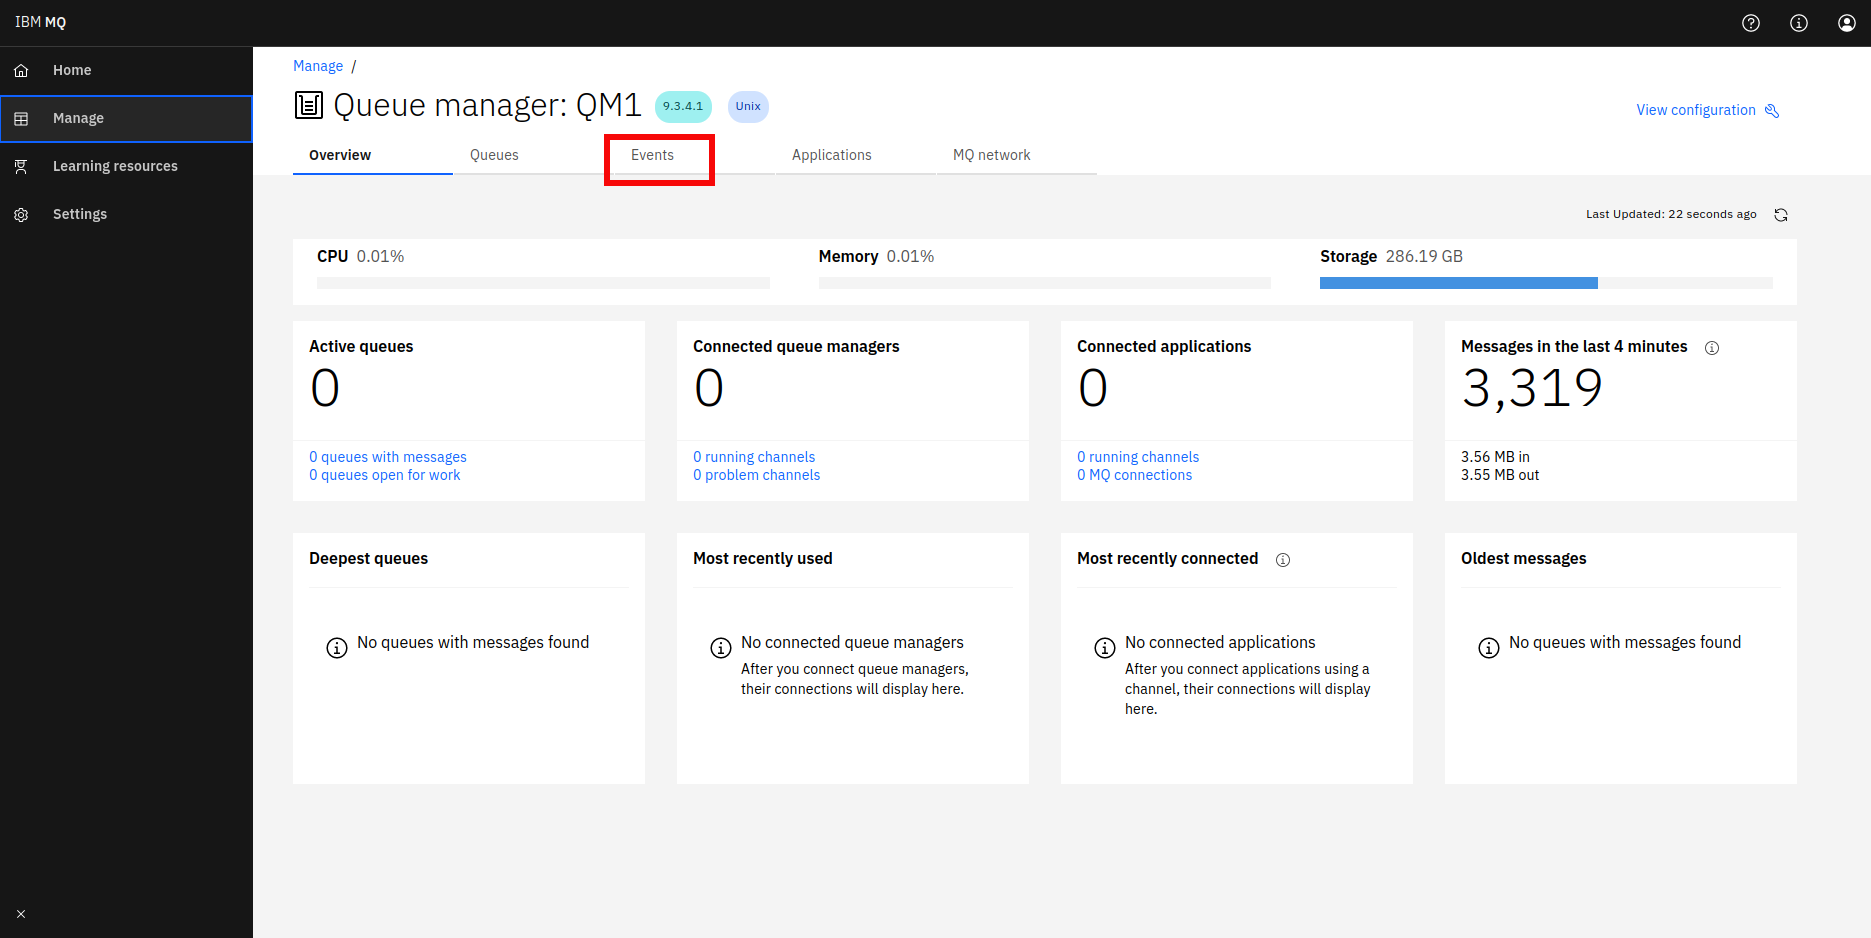
Select the Manage link in the sidebar.

-
Navigate to the Events tab.
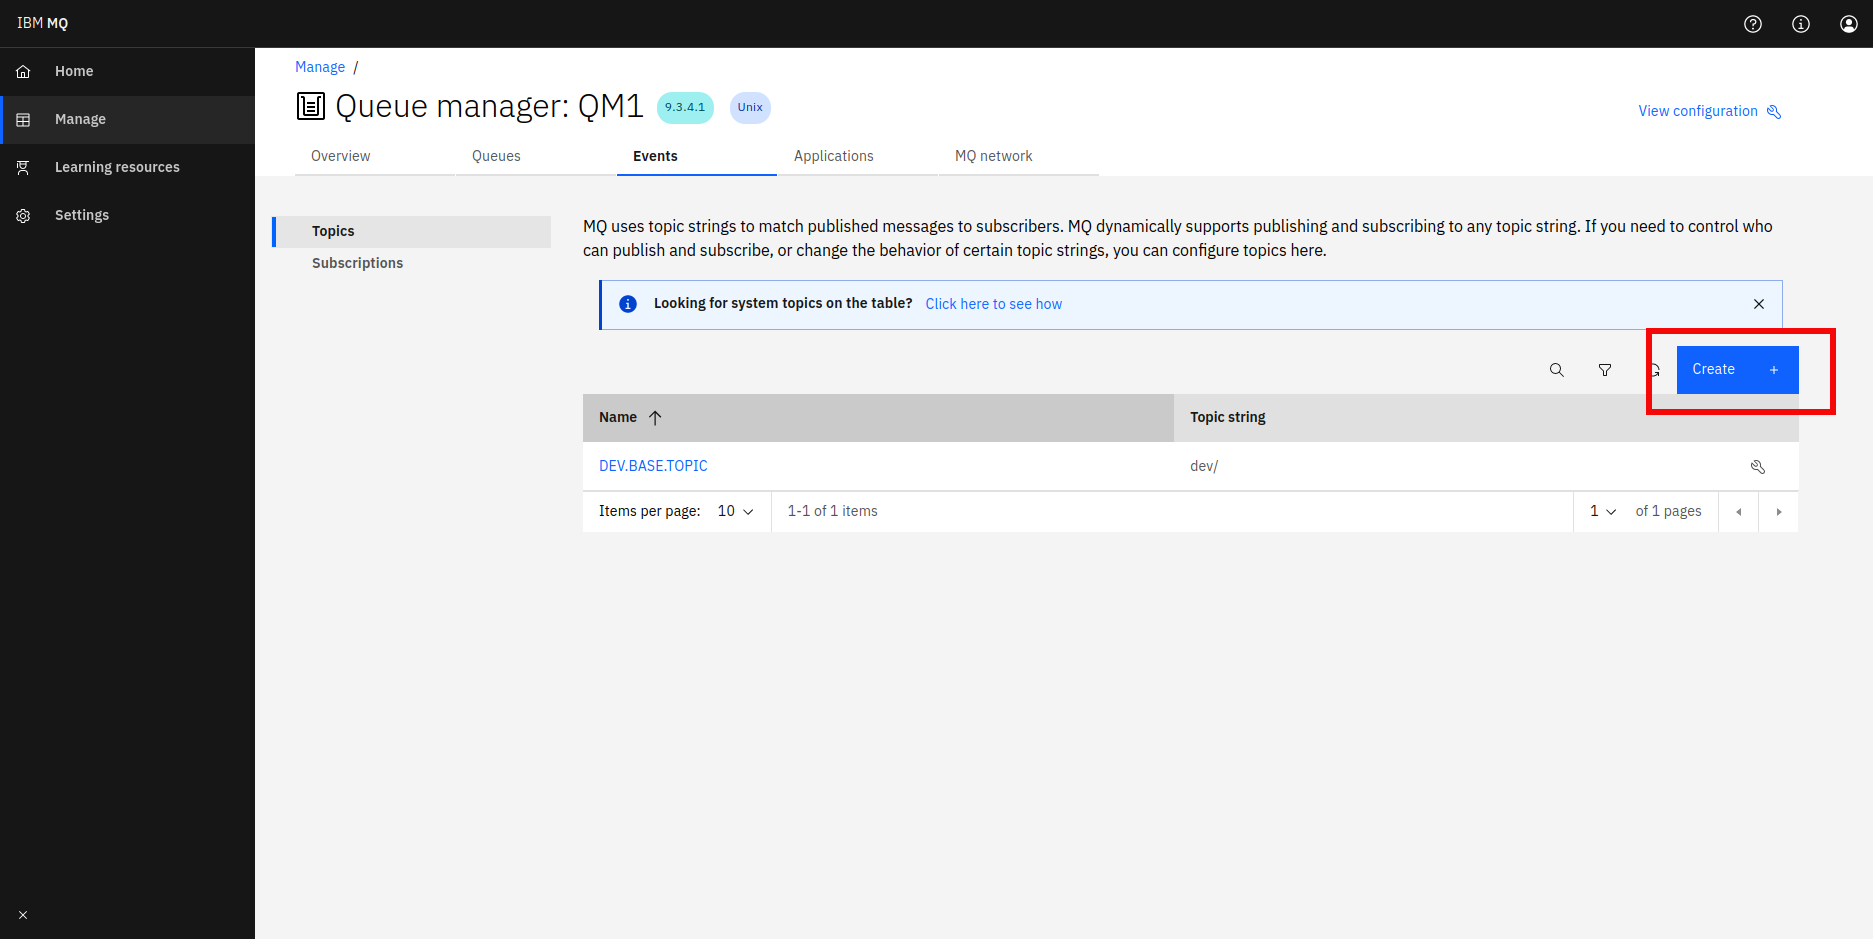
-
Select Create and fill in the topic details.
Step 4: Note your connection details
Collect the following details for configuring the connector:
| Field | Default value |
|---|---|
| Queue manager name | QM1 |
| Host | localhost |
| Port | 1414 |
| Channel | DEV.APP.SVRCONN |
| User ID | app |
| Password | password |