Example
Table of Contents
RabbitMQ Example
What you'll build
Build a WSO2 Integrator automation that publishes a message to a RabbitMQ queue using the ballerinax/rabbitmq connector. The integration sends "Hello, RabbitMQ!" to a queue named myQueue, with all connection credentials bound to configurable variables so no secrets are hard-coded.
Operations used:
- publishMessage : Publishes a message to a specified RabbitMQ queue using a routing key
Architecture
Prerequisites
- A running RabbitMQ server accessible from your integration environment
- RabbitMQ credentials (username, password, virtual host, host, and port)
Setting up the RabbitMQ integration
New to WSO2 Integrator? Follow the Create a New Integration guide to set up your integration first, then return here to add the connector.
Adding the RabbitMQ connector
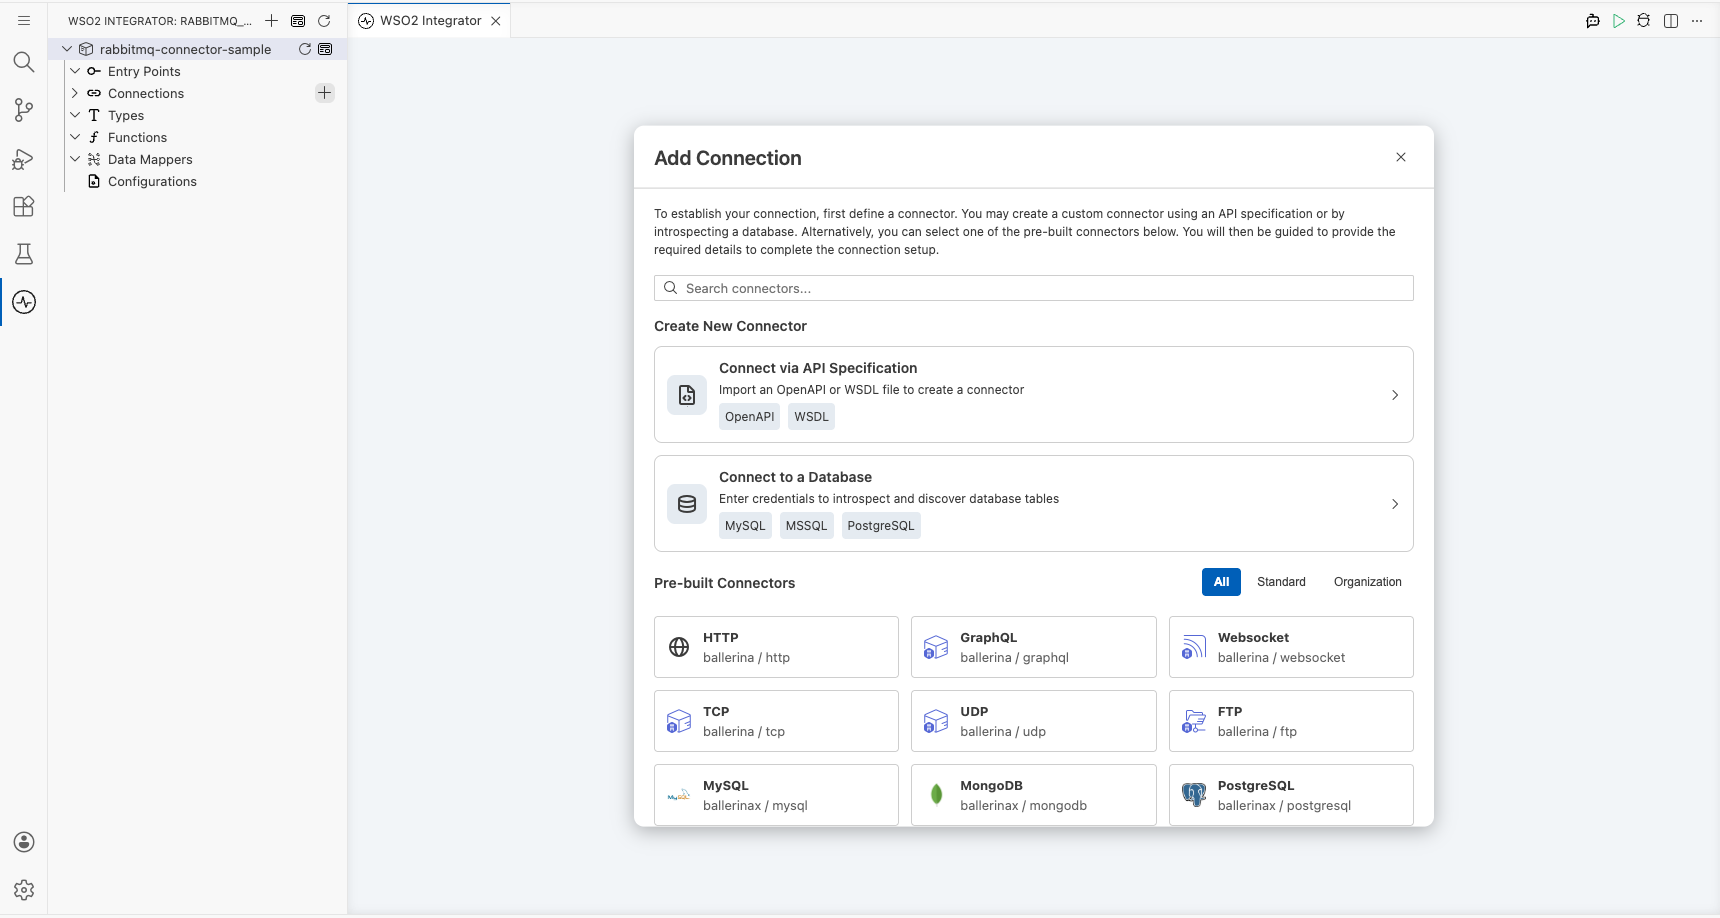
Step 1: Open the Add Connection panel
In the left sidebar, under Connections, select + Add Connection to open the connector palette.
Step 2: Add an Automation entry point
In the left sidebar, hover over Entry Points and select + Add Entry Point. On the artifact selection panel, choose Automation, then select Create.
A new automation named main appears in the sidebar under Entry Points, and the low-code flow canvas opens showing a Start → Error Handler skeleton.
Configuring the RabbitMQ connection
Step 3: Fill in the connection parameters
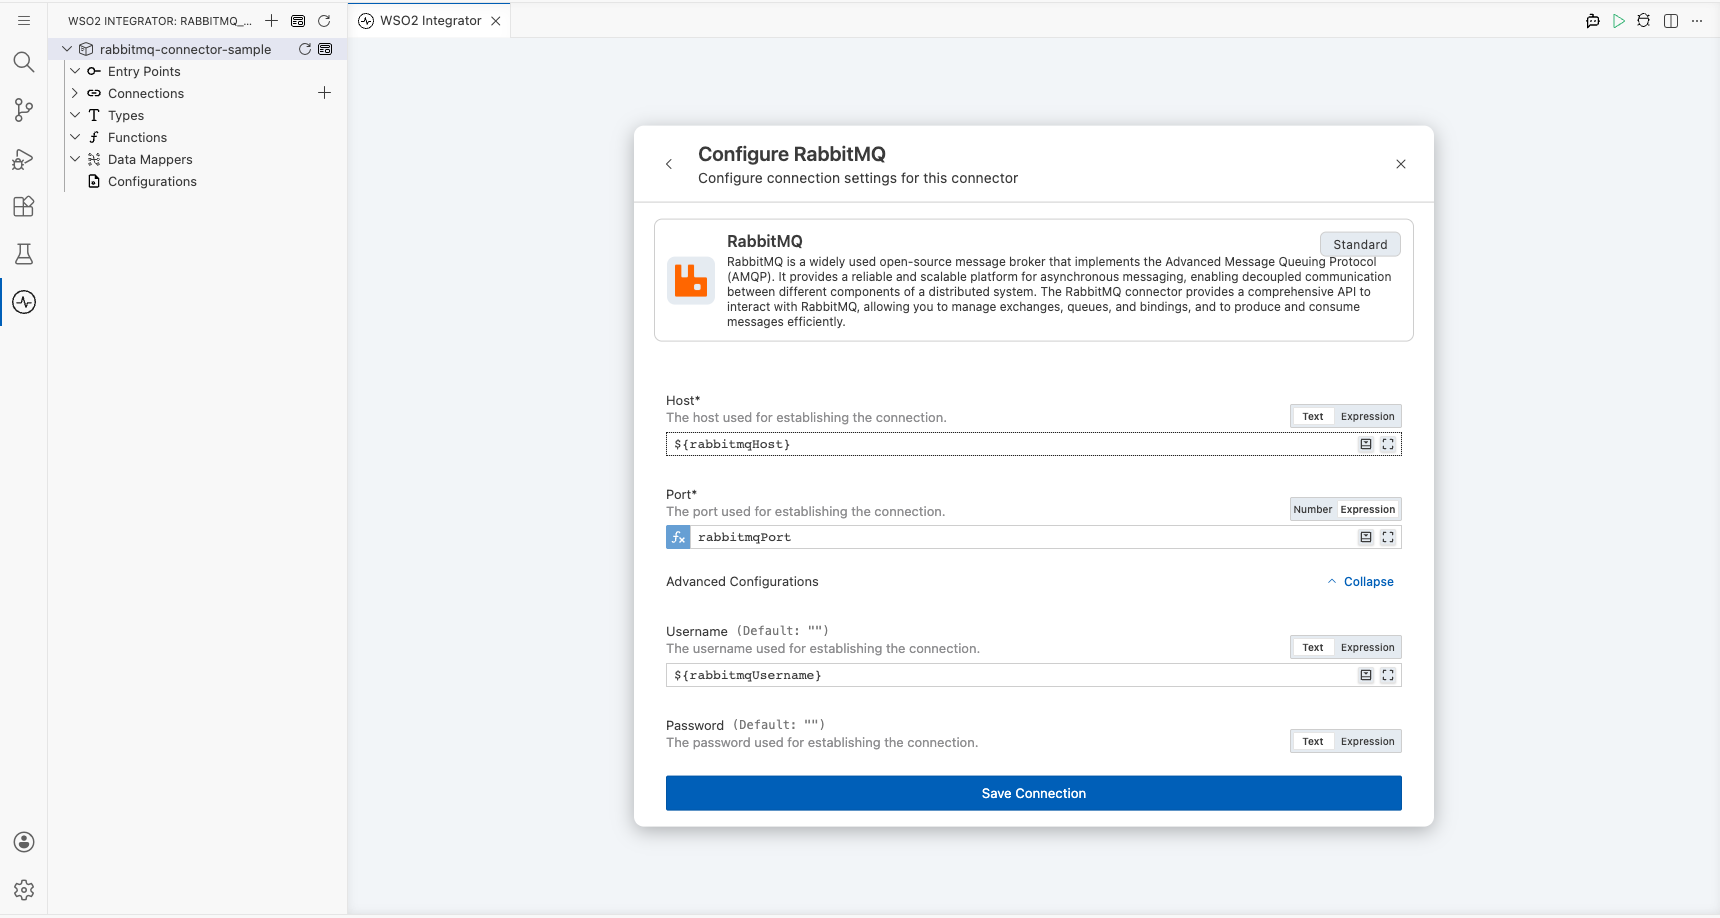
Search for RabbitMQ, select the ballerinax/rabbitmq connector card, and bind each field to a configurable variable using the Helper Panel.
- host : The RabbitMQ server hostname, bound to a configurable variable
- port : The RabbitMQ server port (switch to Expression mode to access the Helper Panel for
intfields), bound to a configurable variable - username : The RabbitMQ username (expand Advanced Configurations), bound to a configurable variable
- password : The RabbitMQ password, bound to a configurable variable
- virtualHost : The RabbitMQ virtual host, bound to a configurable variable
Set the Connection Name to rabbitmqClient.
Step 4: Save the connection
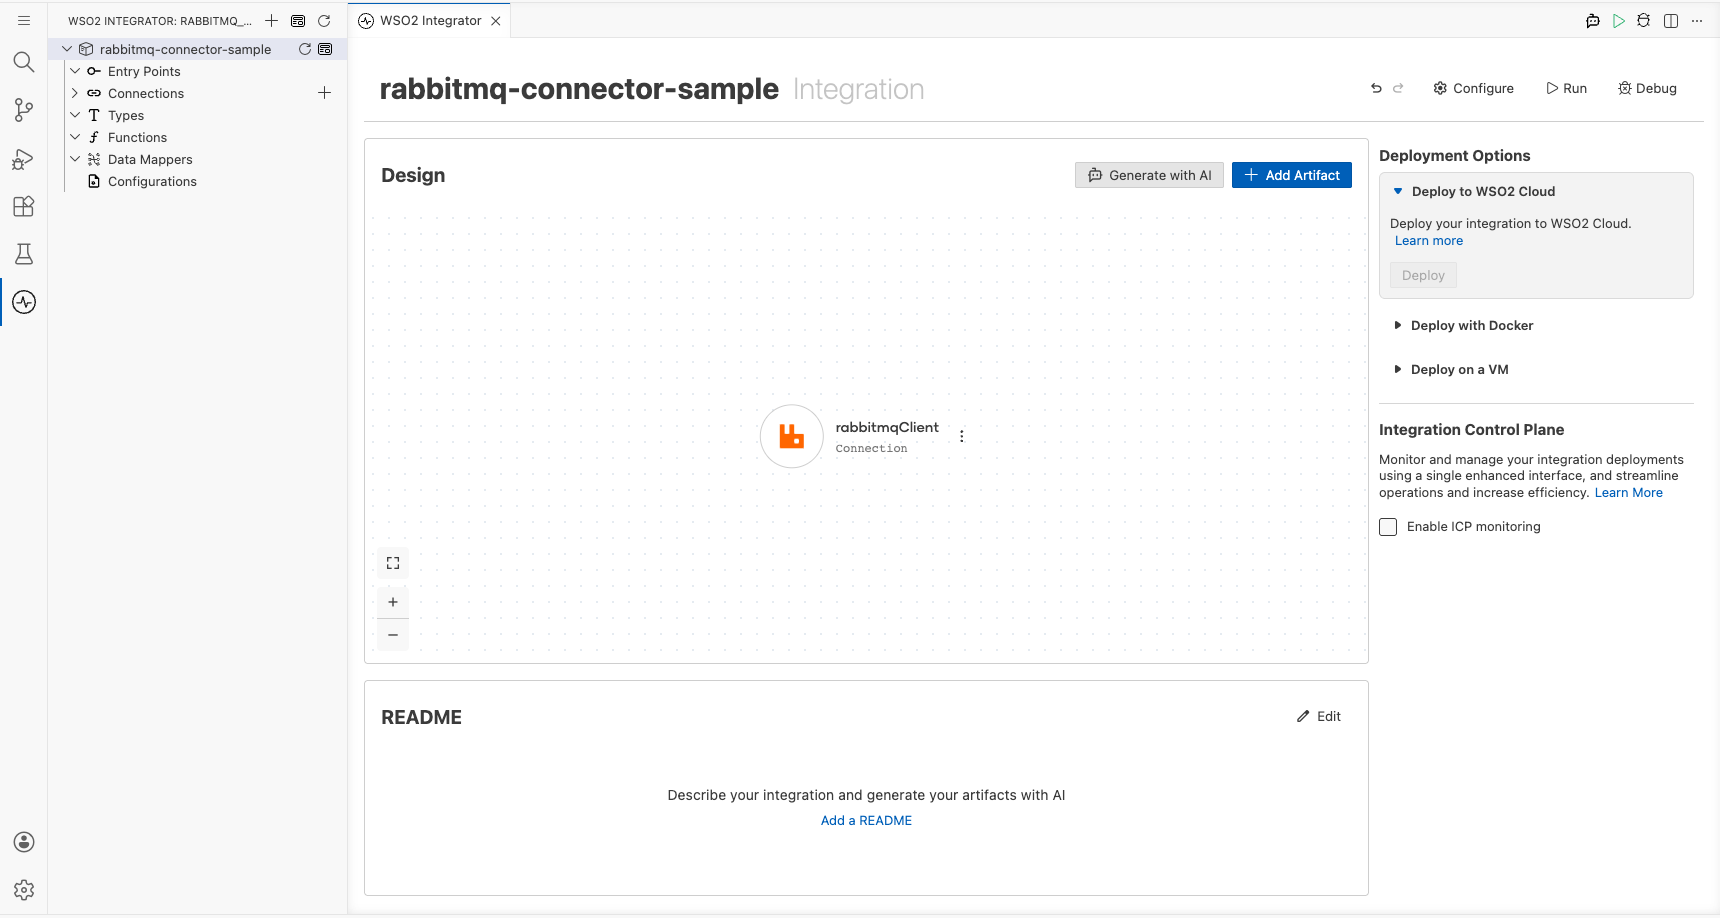
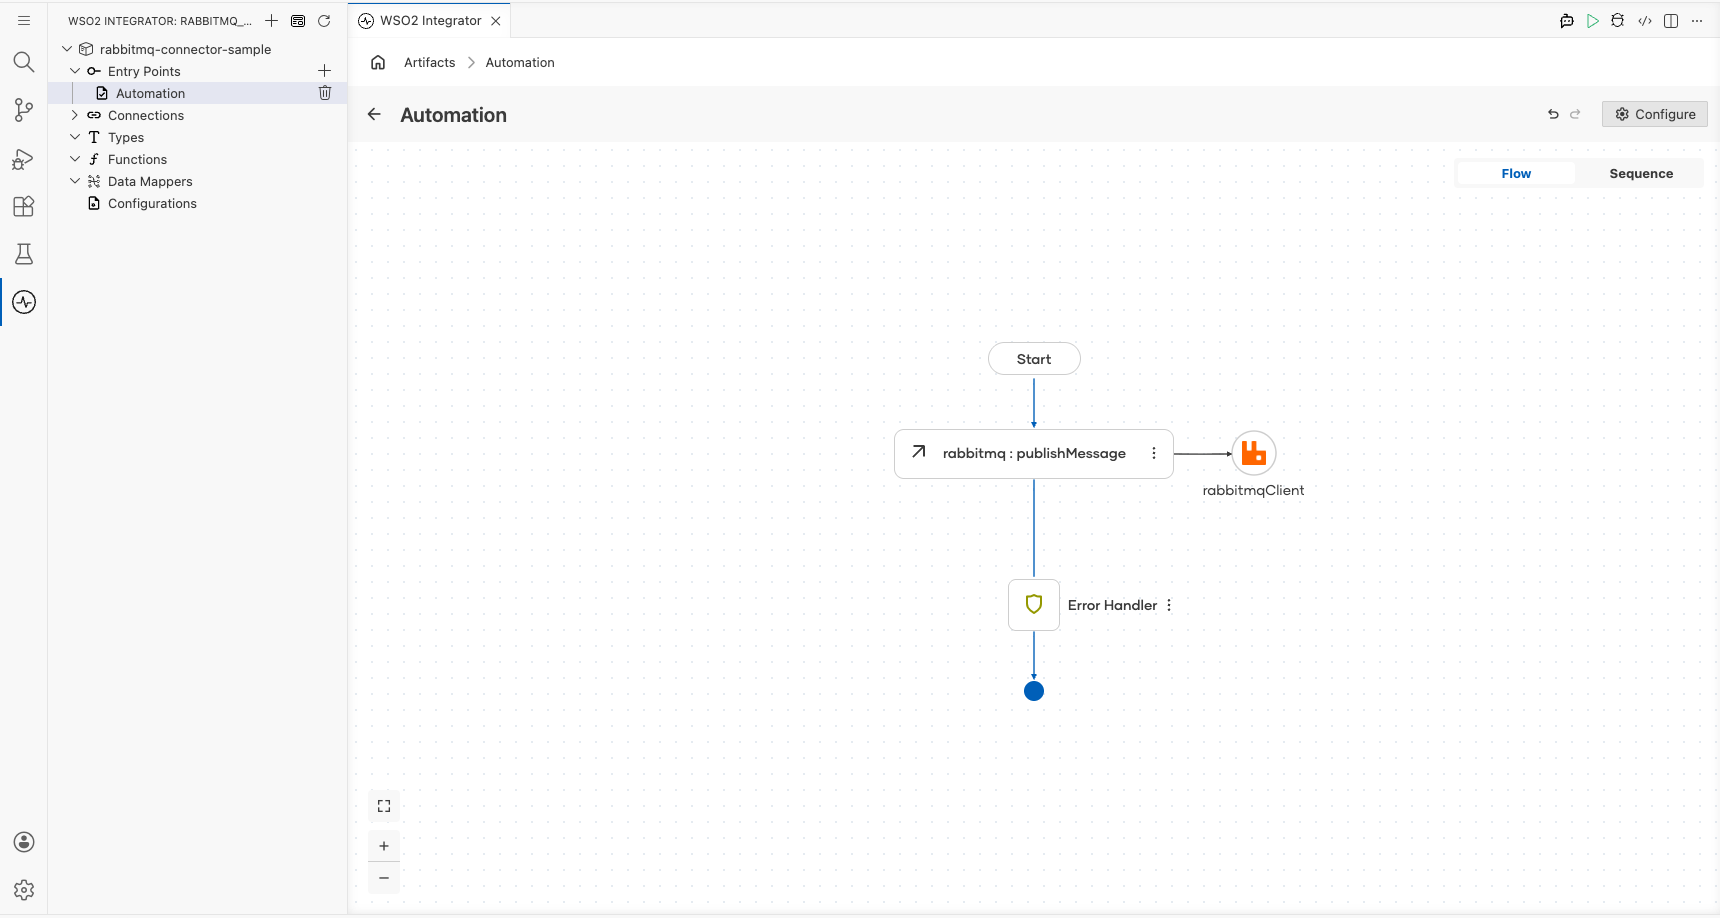
Select Save Connection. The canvas returns to the overview, showing the rabbitmqClient connection node.
Step 5: Set actual values for your configurables
- In the left panel, select Configurations.
- Set a value for each configurable listed below.
- rabbitmqHost (string) : The hostname or IP address of your RabbitMQ server
- rabbitmqPort (int) : The port your RabbitMQ server listens on
- rabbitmqUsername (string) : The username for authenticating with RabbitMQ
- rabbitmqPassword (string) : The password for authenticating with RabbitMQ
- rabbitmqVirtualHost (string) : The virtual host to connect to on the RabbitMQ server
Configuring the RabbitMQ publishMessage operation
Step 6: Select the publishMessage operation and configure it
On the flow canvas, select the + button between Start and Error Handler. Under Connections → rabbitmqClient, expand the connection to see all available operations.
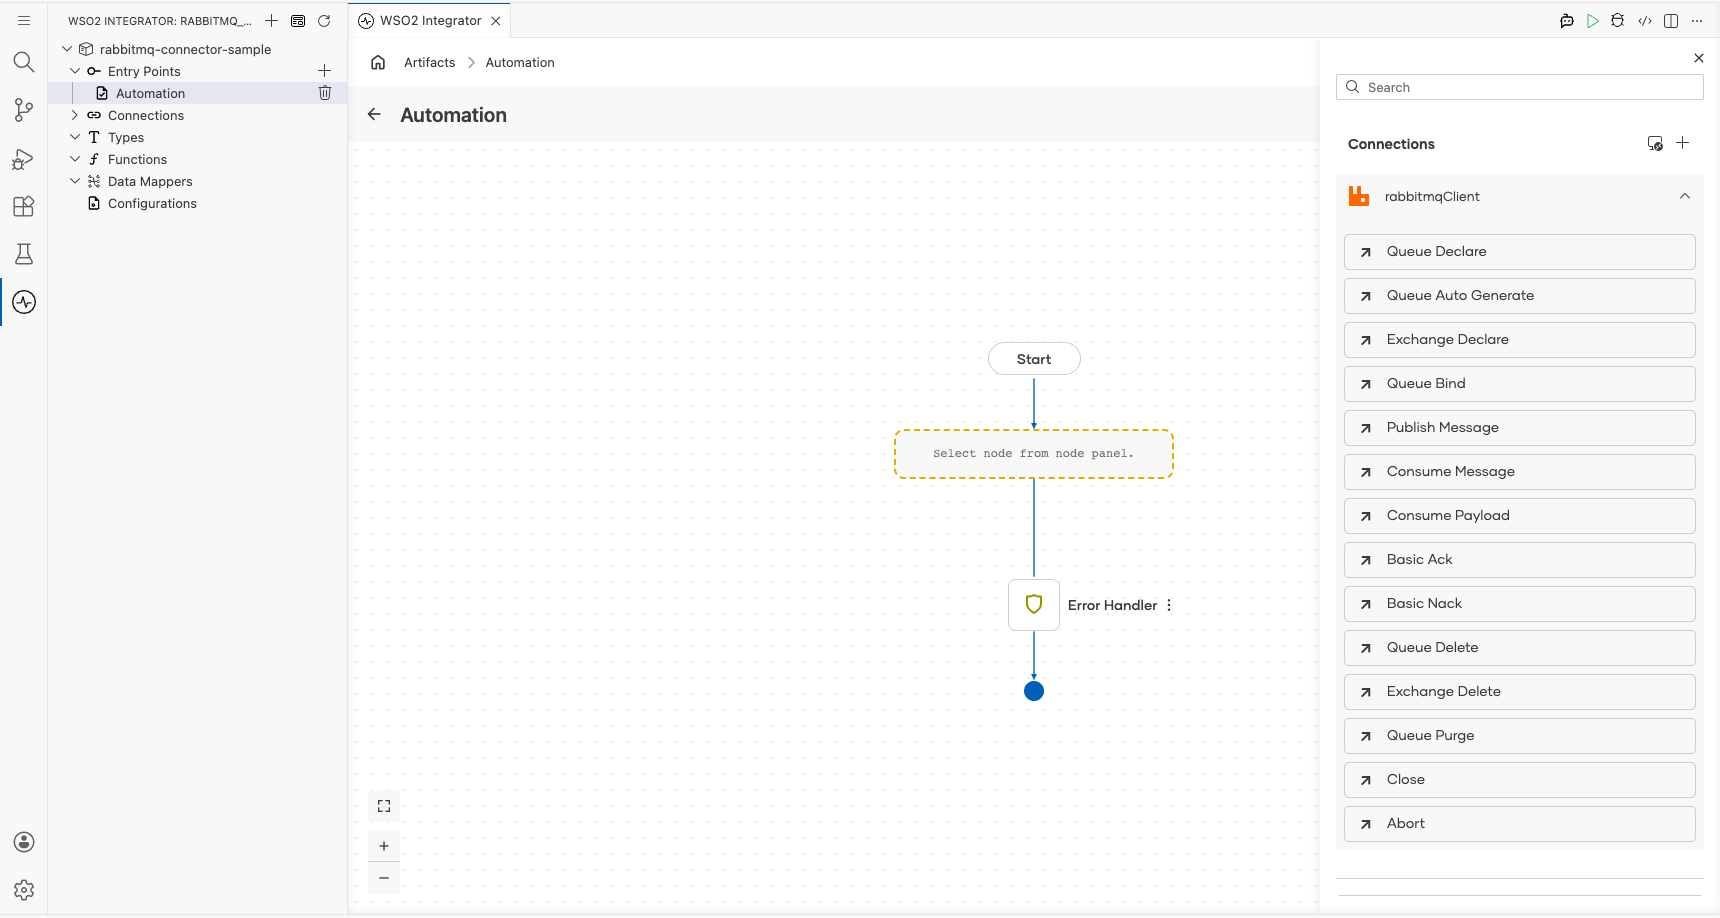
Select Publish Message and configure the Message field by switching to Expression mode and entering the record literal with the fields below.
- content : The message payload to publish; set to
"Hello, RabbitMQ!" - routingKey : The target queue name; set to
"myQueue"
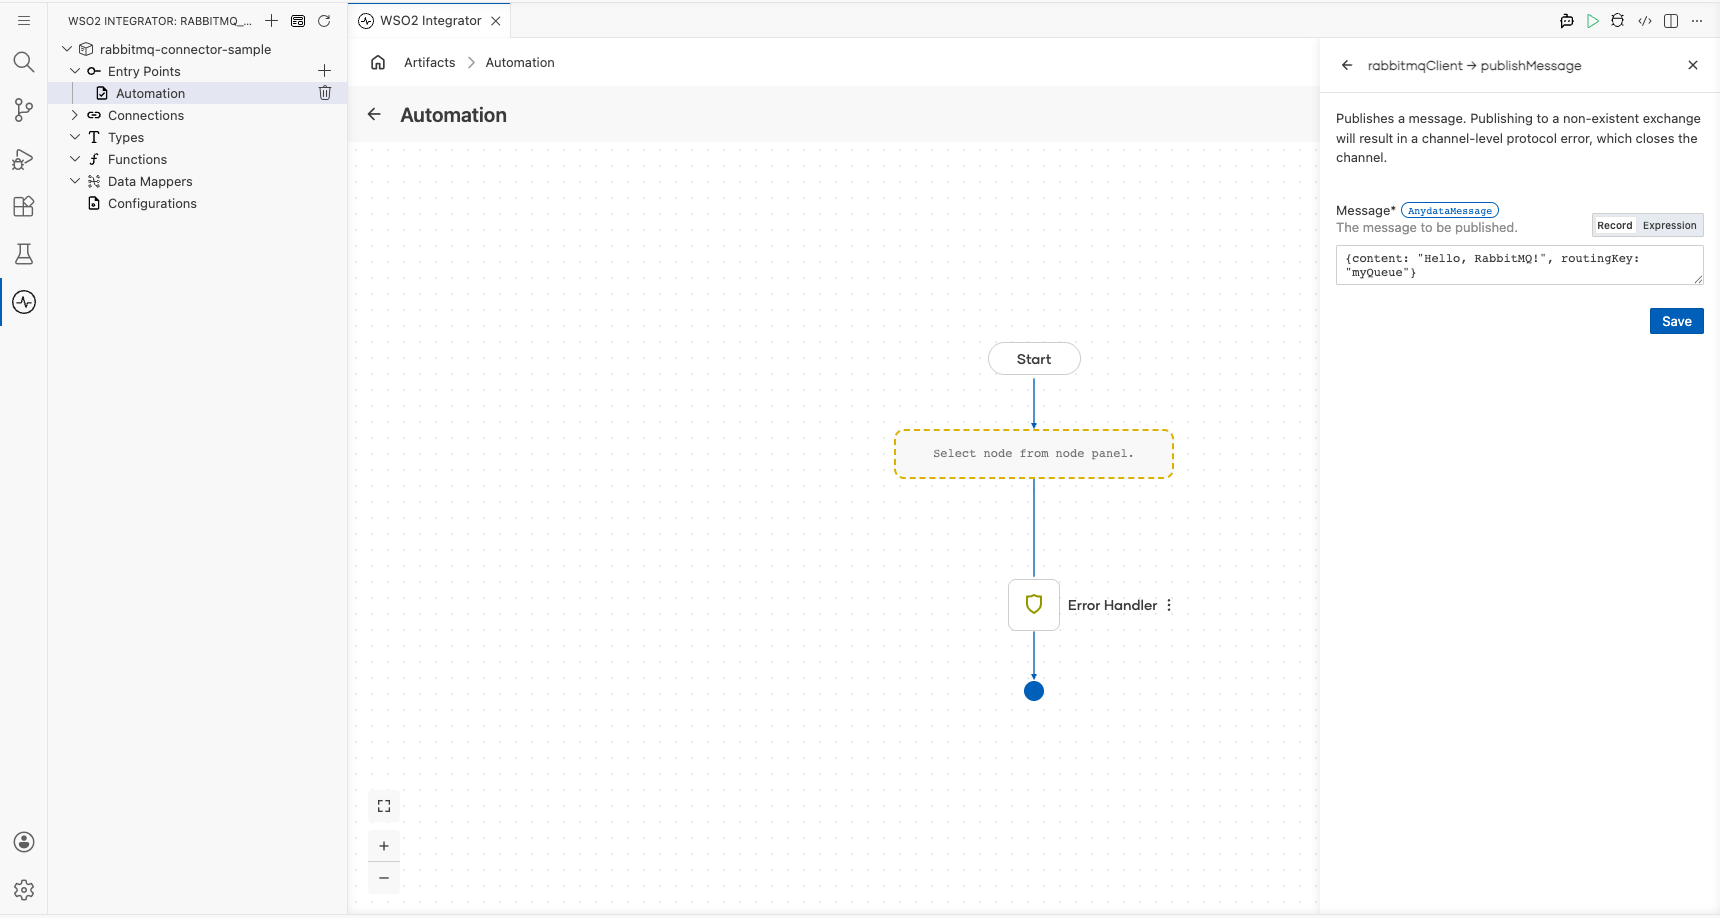
Select Save. The publishMessage node appears on the canvas connected to rabbitmqClient.
Try it yourself
Try this sample in WSO2 Integration Platform.

RabbitMQ Trigger Example
What you'll build
This integration uses a RabbitMQ broker as the event source. When a message arrives on a configured RabbitMQ queue, the RabbitMQ listener dispatches it to an onMessage handler, which logs the message payload as a JSON string. The overall flow is: RabbitMQ Producer → RabbitMQ Queue → RabbitMQ Listener → onMessage handler → log:printInfo.
Architecture
Prerequisites
- A running RabbitMQ broker with the host, port, and queue name available.
Setting up the RabbitMQ integration
New to WSO2 Integrator? Follow the Create a New Integration guide to set up your integration first, then return here to add the trigger.
Adding the RabbitMQ trigger
Step 1: Open the artifacts palette and select the RabbitMQ trigger
Select Add Artifact in the WSO2 Integrator panel. In the artifacts palette, expand the Event Integration category and locate the RabbitMQ trigger card.
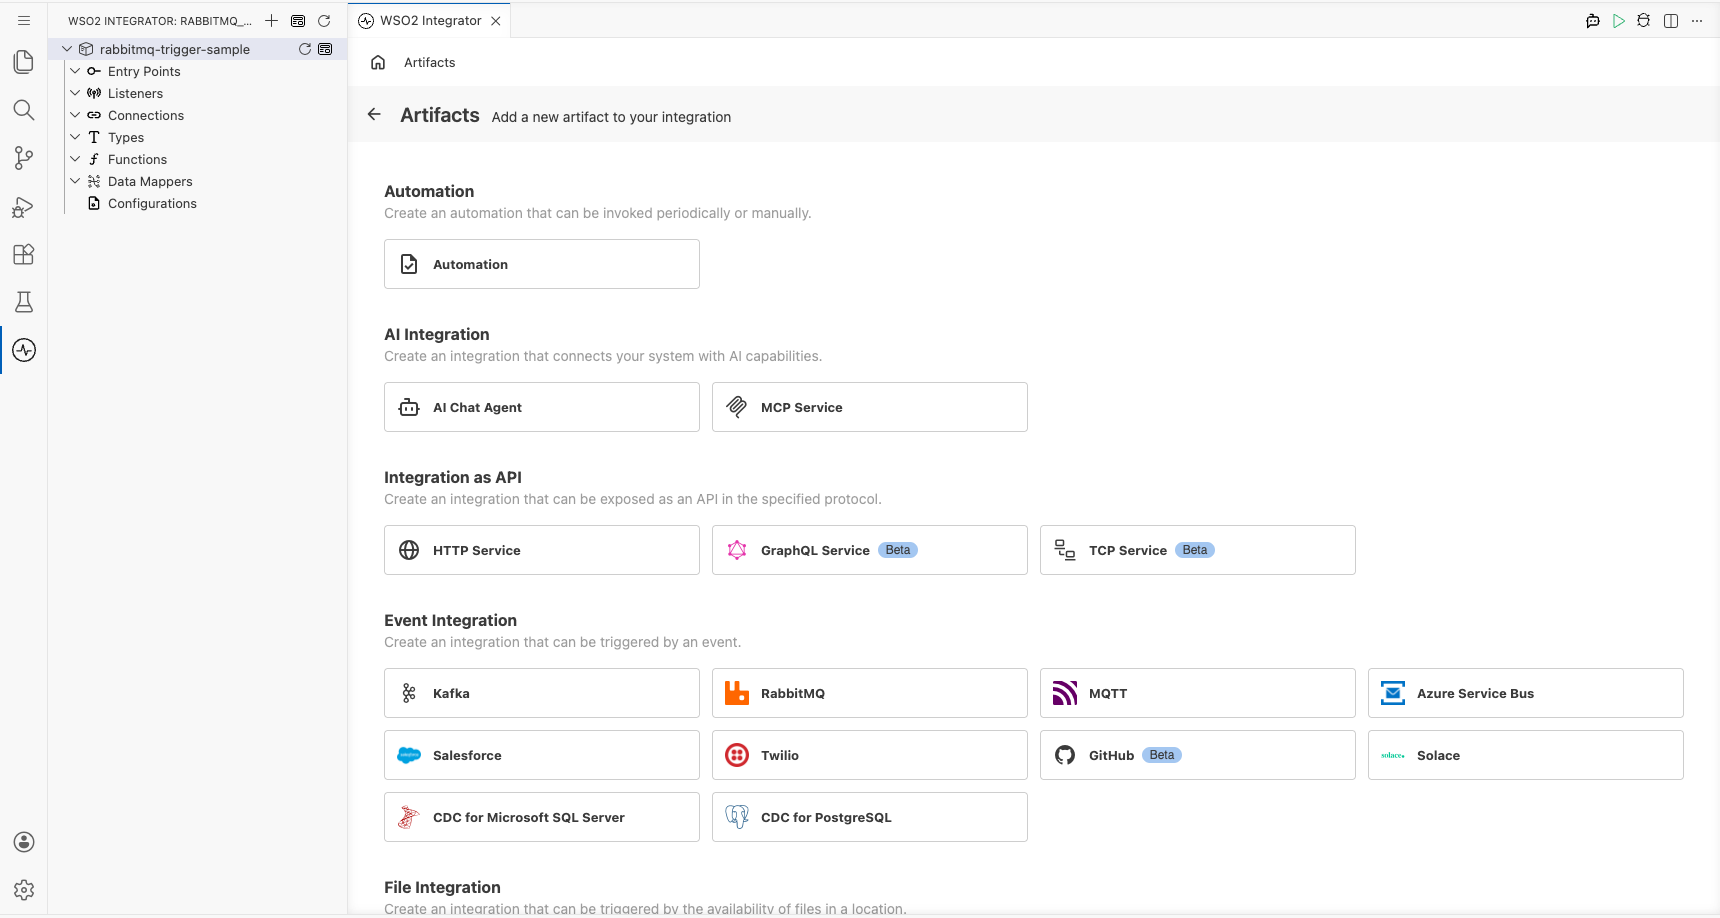
Configuring the RabbitMQ listener
Step 2: Bind listener parameters to configuration variables
Select the RabbitMQ trigger card to open the trigger configuration form. Bind each listener parameter to a configuration variable:
- Host : the RabbitMQ broker hostname
- Port : the RabbitMQ broker port number
- Queue Name : the name of the queue to subscribe to
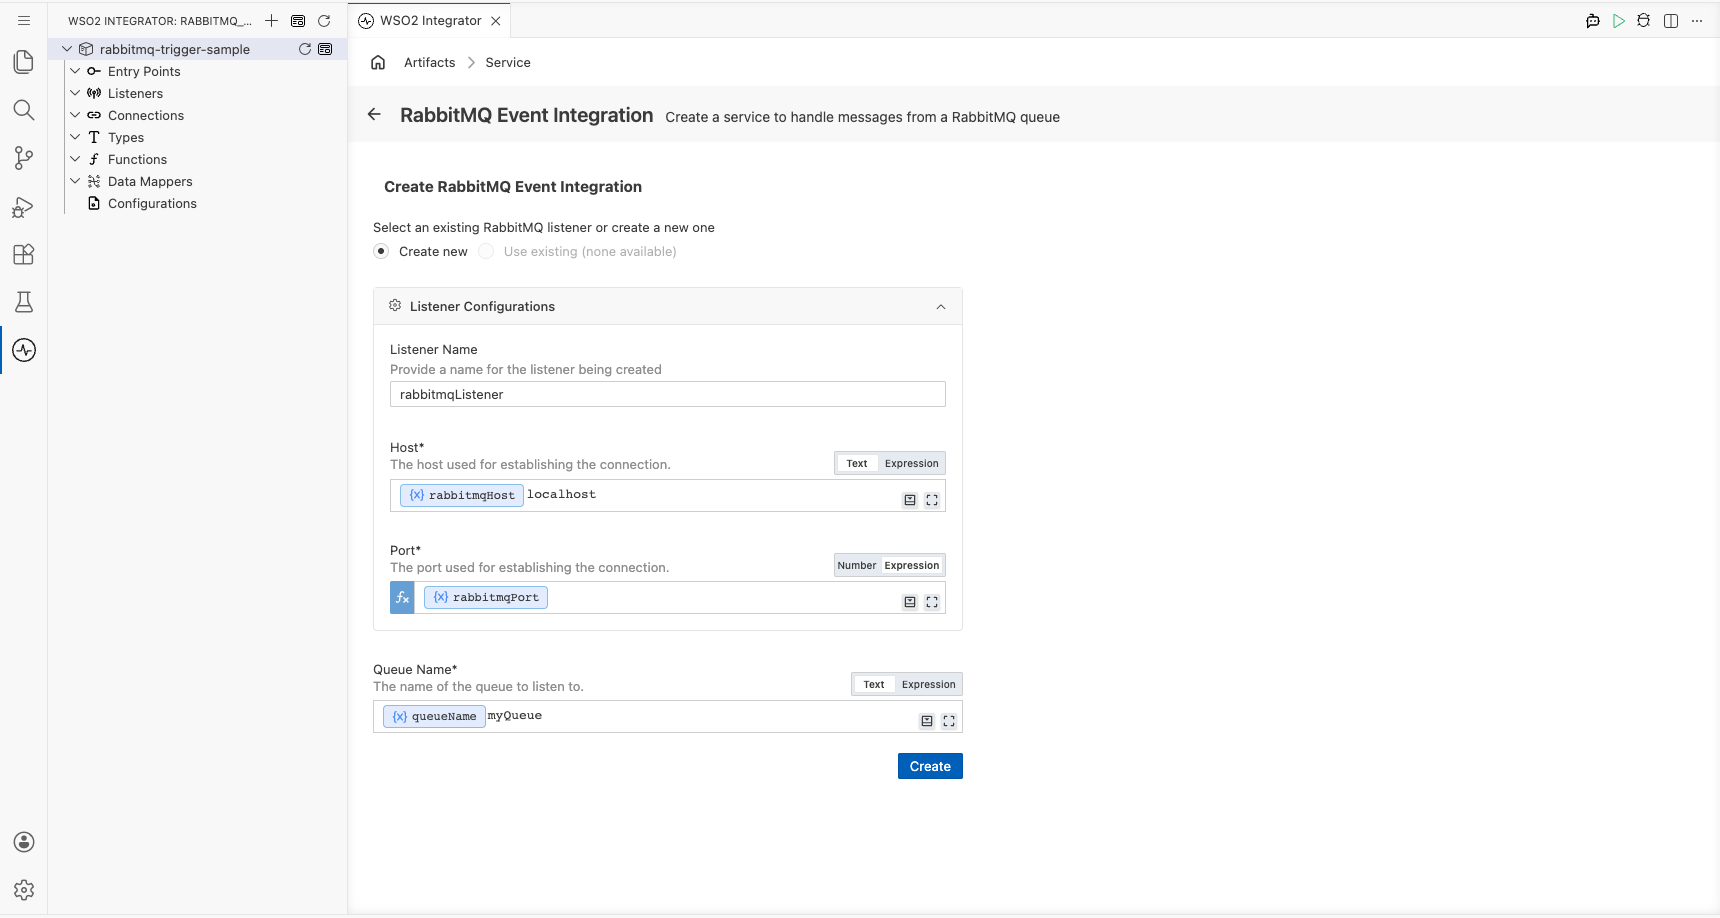
Step 3: Set actual values for your configurations
In the left panel, select Configurations to open the Configurations panel. Set a value for each configuration listed below:
- rabbitmqHost (string) : the hostname or IP address of your RabbitMQ broker
- rabbitmqPort (int) : the port your RabbitMQ broker listens on
- queueName (string) : the name of the queue the listener subscribes to
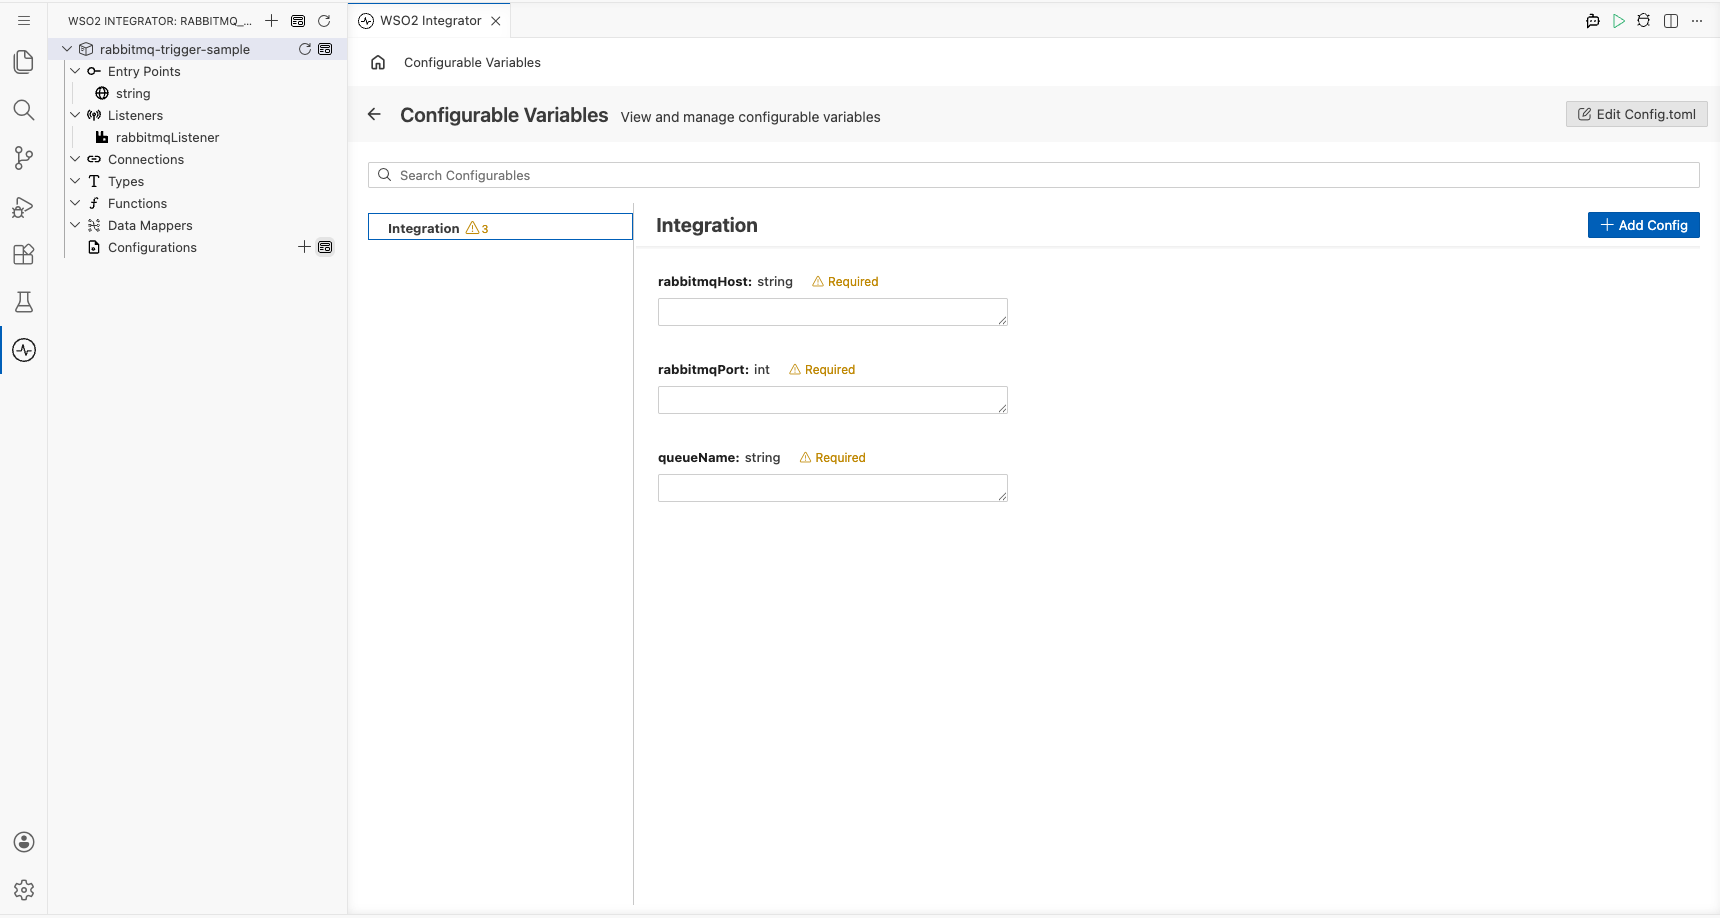
Step 4: Create the trigger service
Select Create to generate the trigger service.
Handling RabbitMQ events
Step 5: Add the onMessage handler
In the RabbitMQ Event Integration service view, select + Add Handler. The Select Handler to Add side panel opens and lists the available handlers.
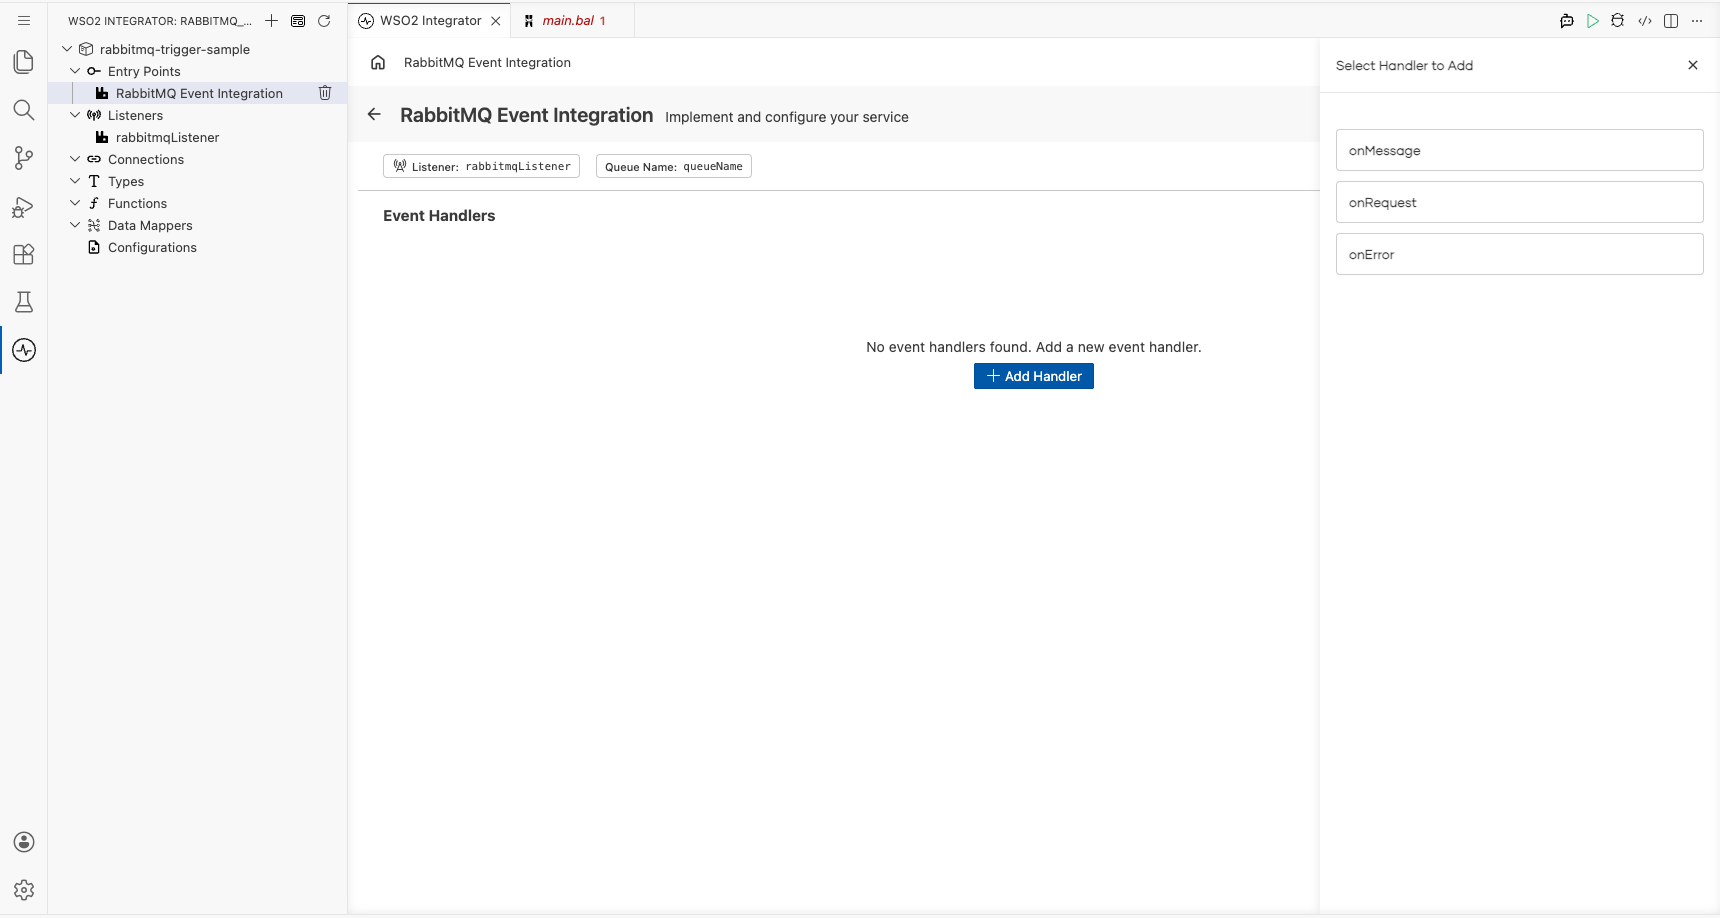
Step 6: Define the message type schema
Select onMessage from the side panel. The Message Handler Configuration panel opens. Under Message Configuration, select Define Value. In the modal, select the Create Type Schema tab. Enter RabbitMQMessage as the Name, then select the + icon next to Fields to add each field:
- routingKey :
string - content :
string
Select Save to create the RabbitMQMessage type, then select Save on the handler configuration panel to register the handler.
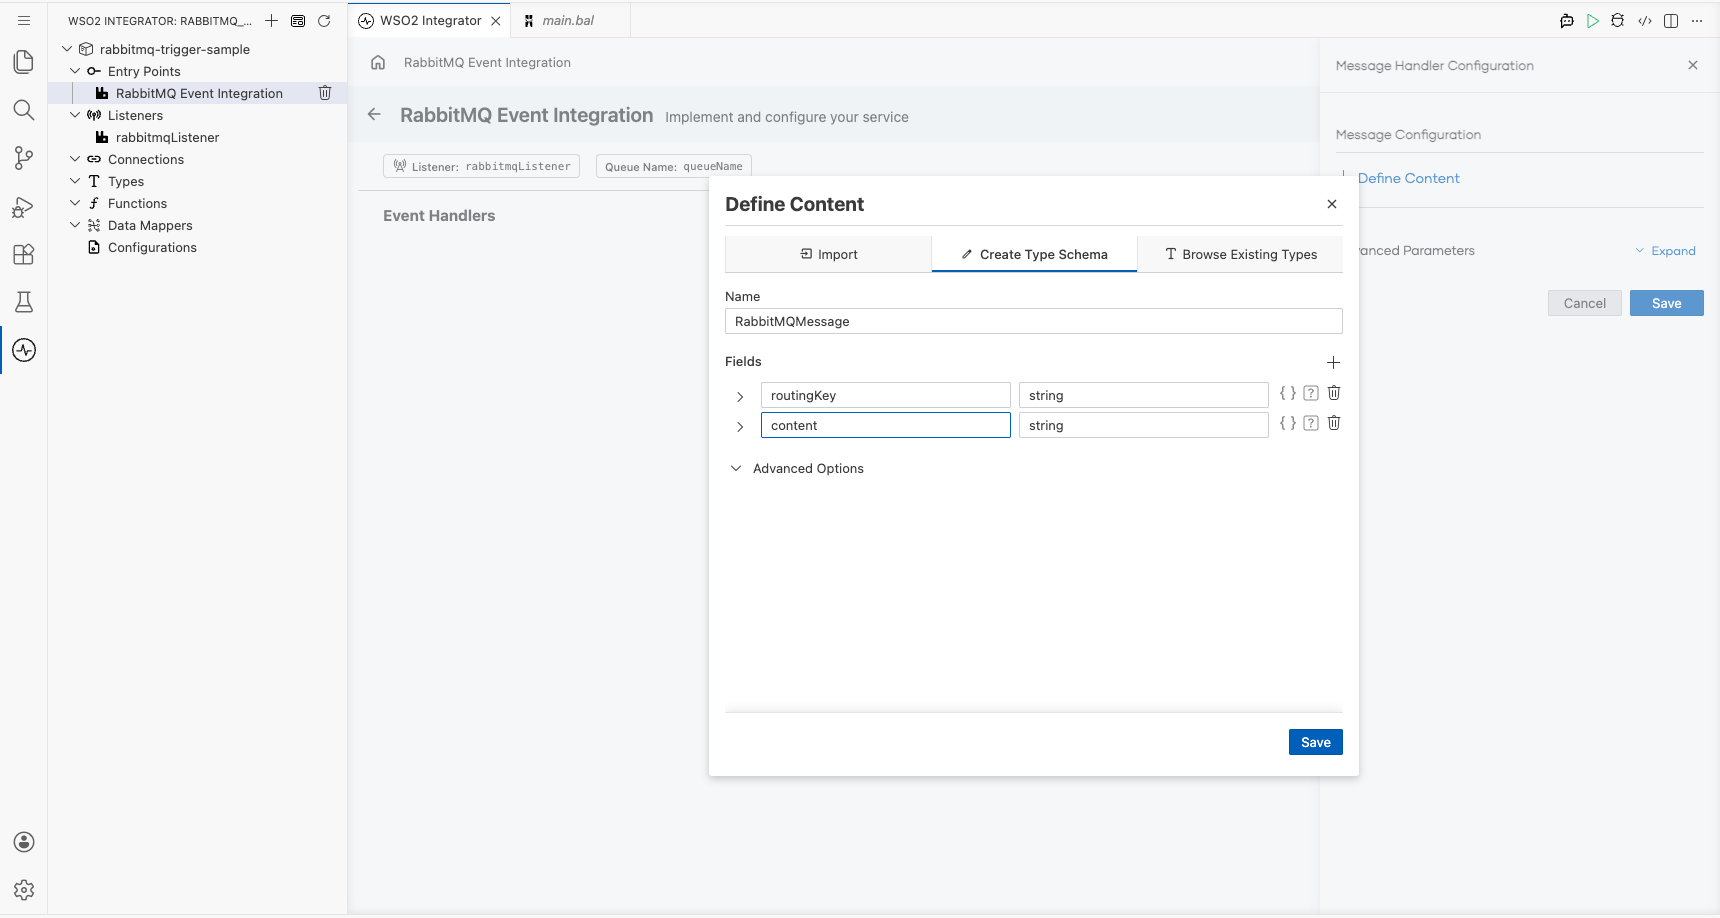
Step 7: Add a log statement to the handler
Select the + icon in the flow chart, and in the side panel that opens, choose Log Info from the Logging section, then enter message.toJsonString() as the message.
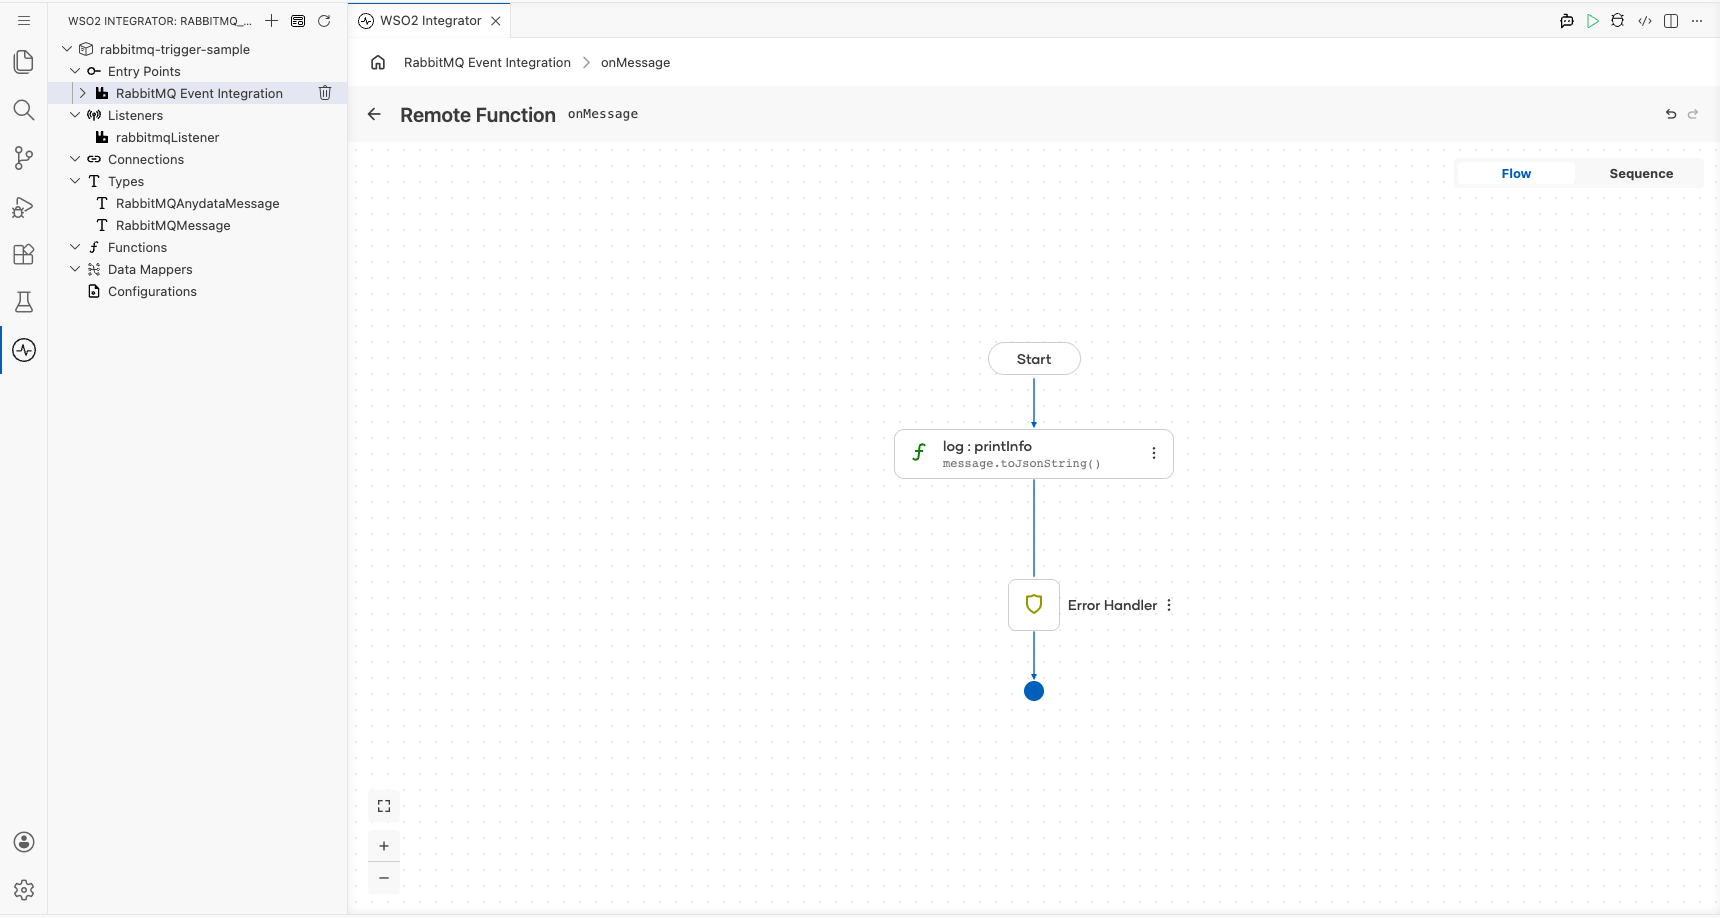
Step 8: Confirm the registered handler in the service view
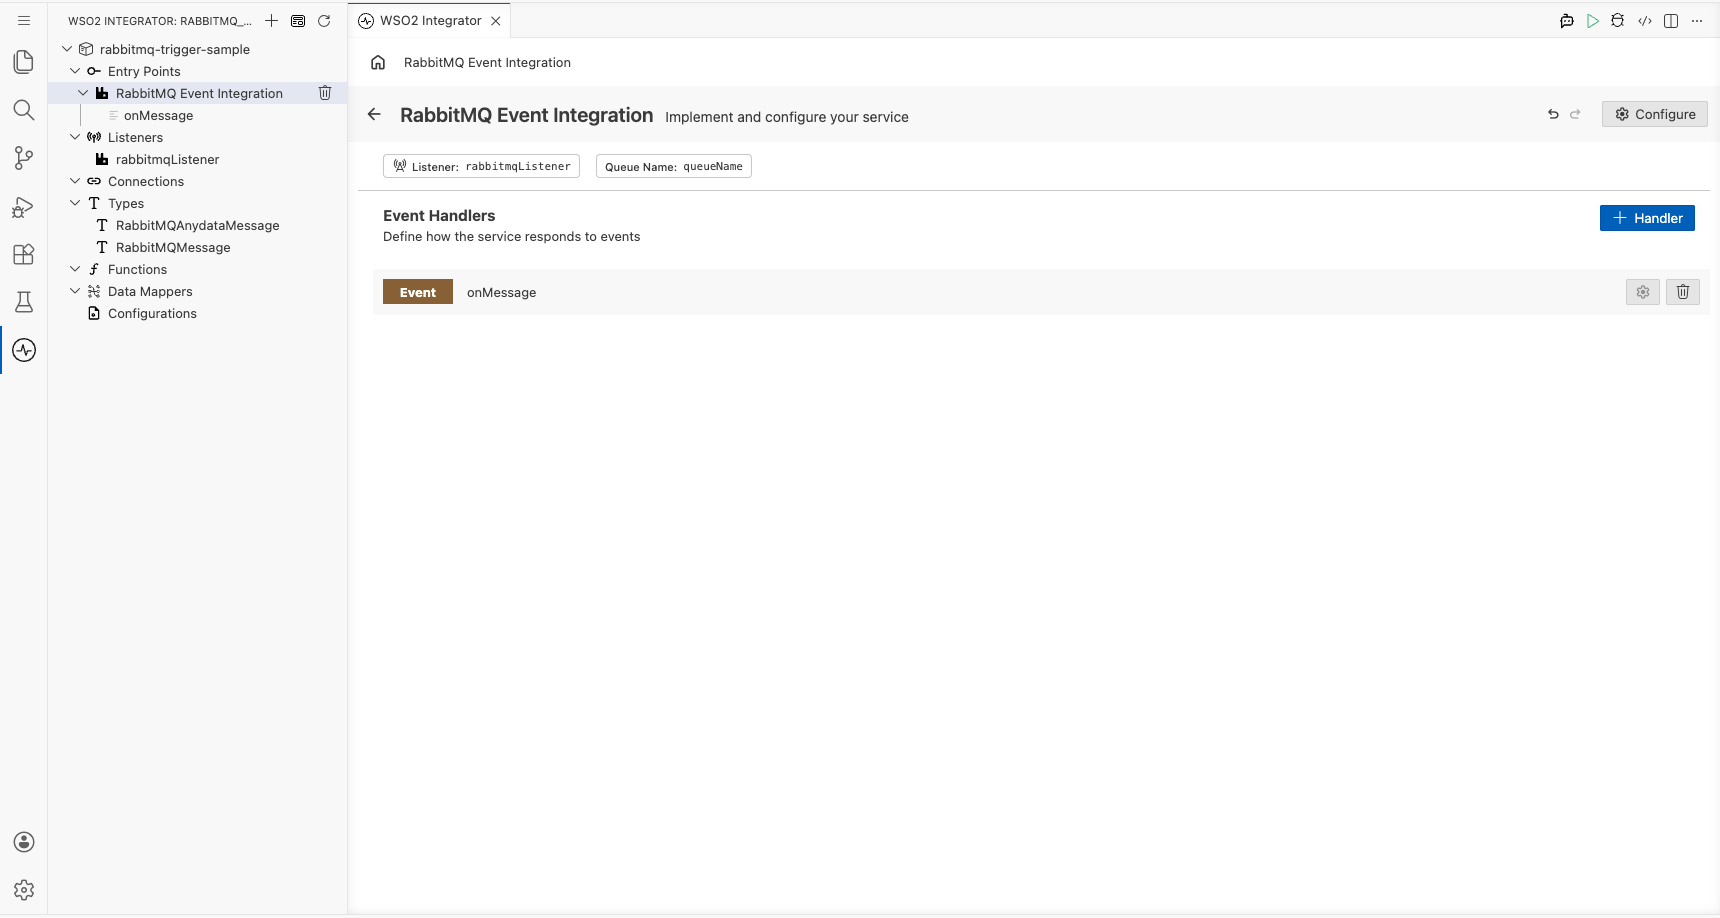
Navigate back to the RabbitMQ Event Integration service view. Confirm that the Event: onMessage handler row appears under Event Handlers, with the listener and queue name badges visible.
Running the integration
Run the integration from WSO2 Integrator by selecting Run in the project panel. The service connects to the RabbitMQ broker, subscribes to the configured queue, and logs every incoming message as a JSON string.
To fire a test event, use one of the following approaches:
- WSO2 Integrator RabbitMQ publisher template; create a new integration using the RabbitMQ publisher template, configure it to point to the same broker and queue, and publish a sample message.
- RabbitMQ CLI (
rabbitmqadmin); use therabbitmqadmincommand-line tool to publish a message directly to the queue. - RabbitMQ Management Console: open the RabbitMQ Management UI in your browser, navigate to the Queues tab, select your queue, and use the Publish message form to send a test payload.
Watch the WSO2 Integrator log output to see the incoming message printed as a JSON string by log:printInfo.
Try it yourself
Try this sample in WSO2 Integration Platform.