Example
What you'll build
Build an integration workflow that asks an AuthZEN Policy Decision Point (PDP) whether a user may perform an action on a resource, and logs the decision. The workflow uses the public Cerbos PDP of the AuthZEN interoperability tests, so it needs no credentials.
Operations used:
- evaluate : Asks the PDP whether a user may create a todo in a shared todo app, and returns the decision
Architecture
Prerequisites
- The URL of an AuthZEN PDP and the credentials it expects, if any (see the Setup Guide). This example uses the public PDP
https://authzen-proxy-demo.cerbos.dev, which needs no credentials.
Setting up the AuthZEN integration
New to WSO2 Integrator? Follow the Create a New Integration guide to set up your integration first, then return here to add the connector.
Adding the AuthZEN connector
Step 1: Open the connector palette and search for the connector
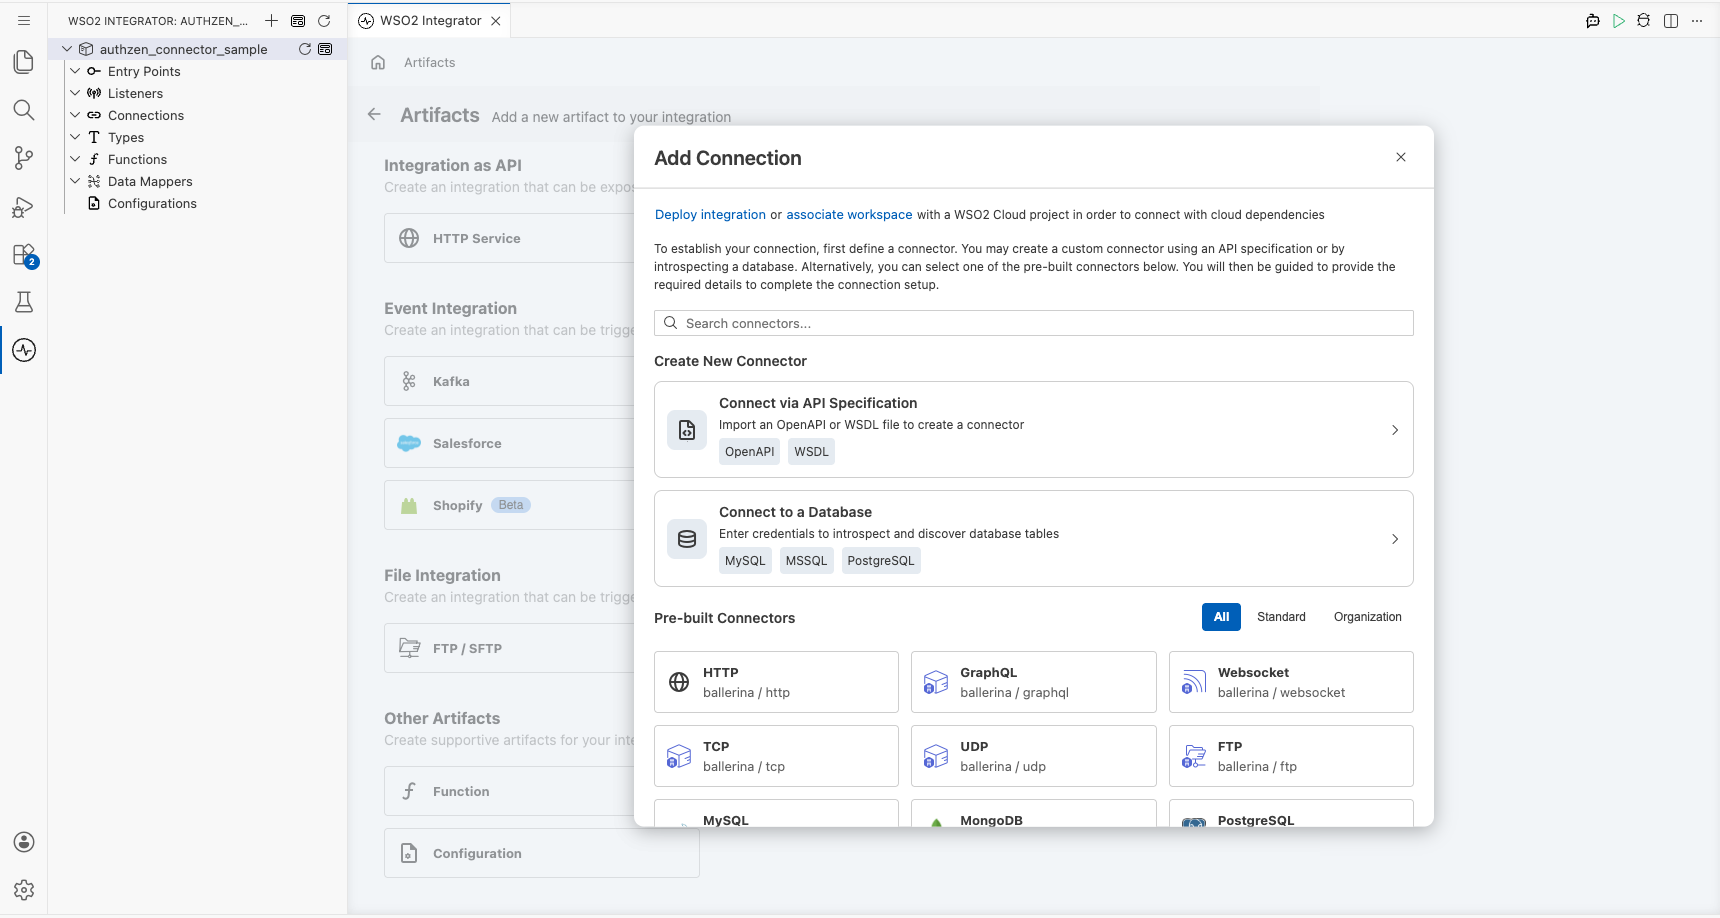
Select Add Artifact, then select Connection to open the connector palette. Search for authzen and select the Authzen connector card.
Configuring the AuthZEN connection
Step 2: Fill in the connection parameters
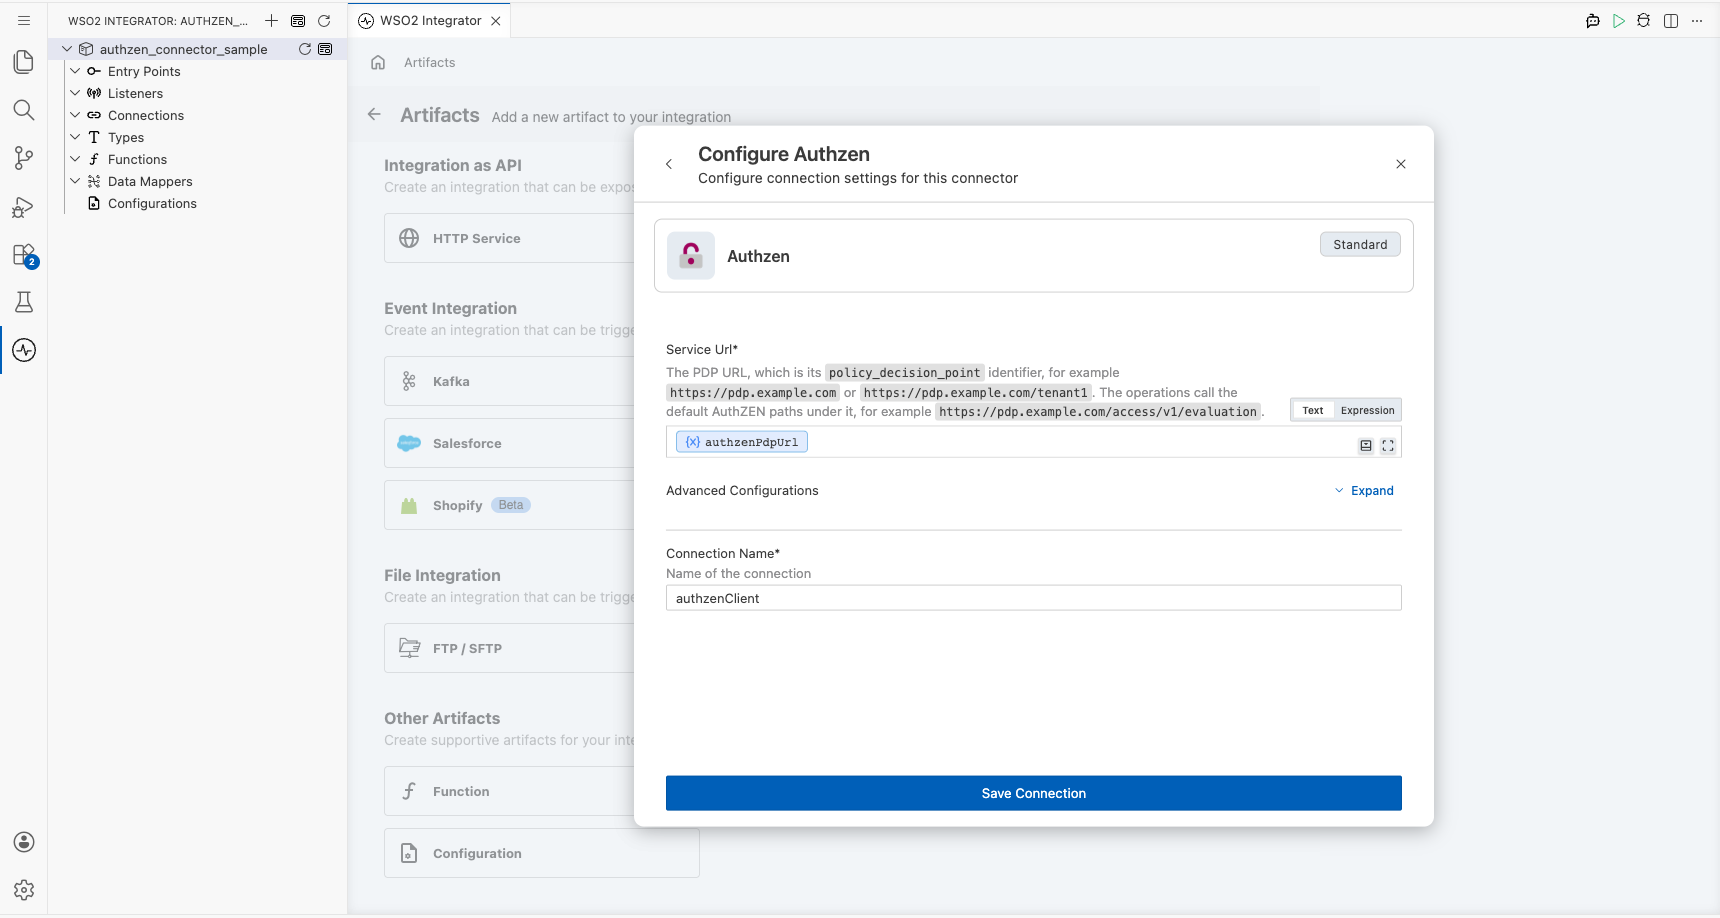
Enter the connection parameters, binding each field to a configurable variable:
- Service Url : The PDP URL; bind to the
authzenPdpUrlconfigurable variable - Connection Name : Keep the default
authzenClient
The public PDP of this example needs no credentials. For a PDP that authenticates its callers, set Auth under Advanced Configurations, for example {token: authzenAccessToken} for a Bearer token.
Step 3: Save the connection
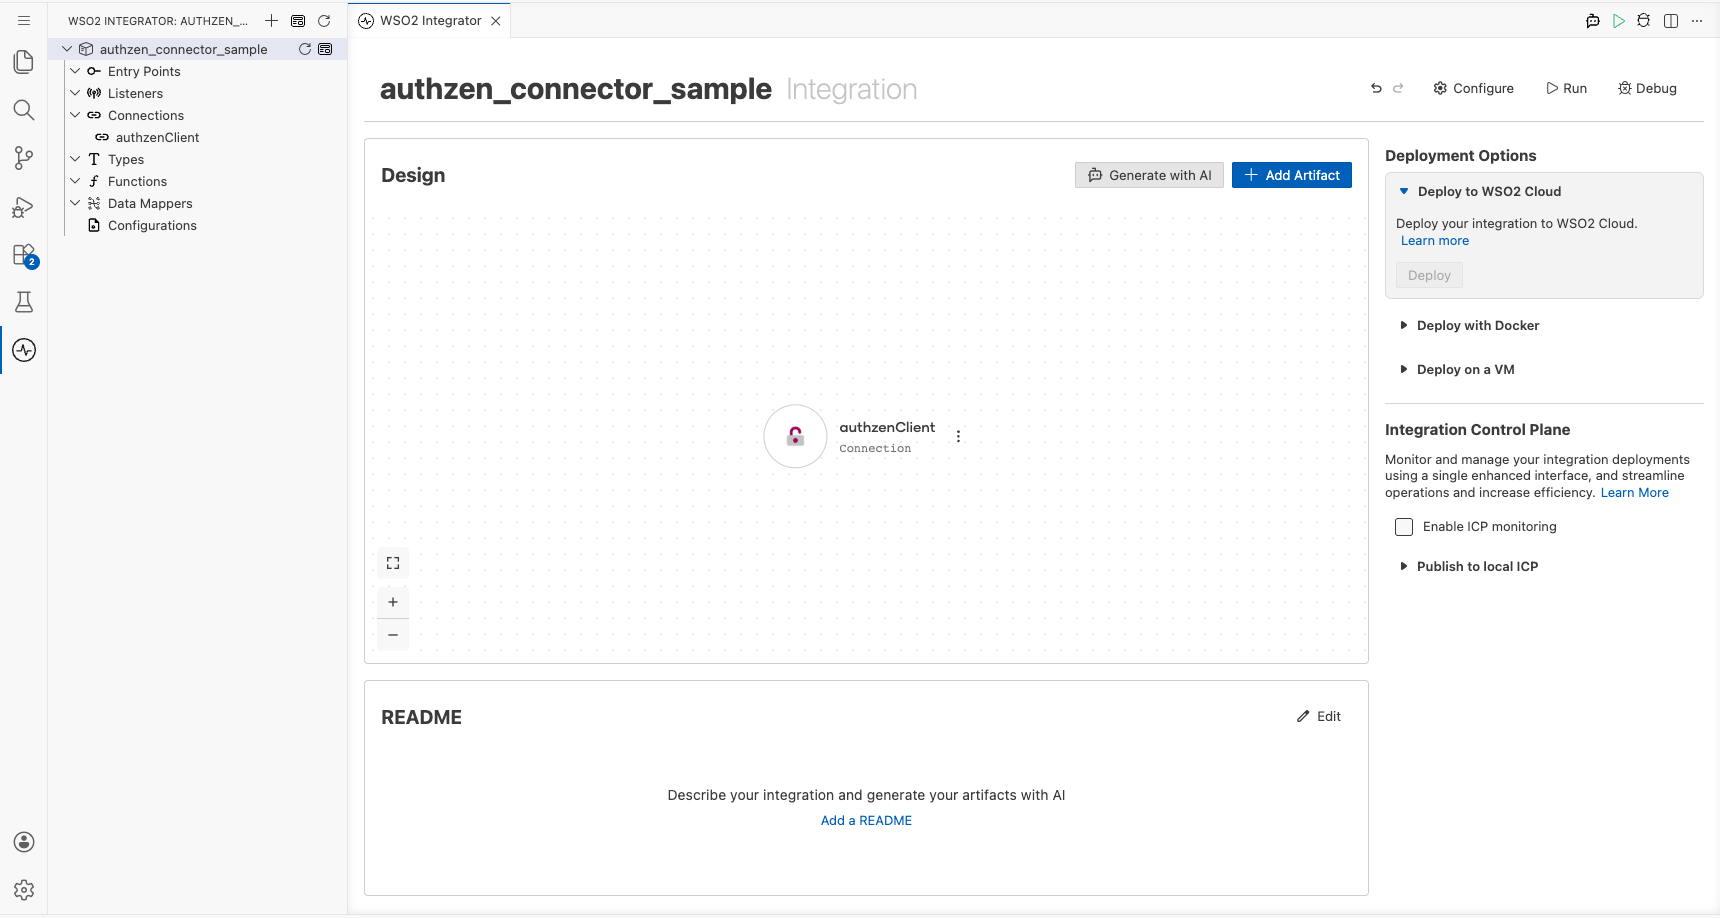
Select Save Connection. The connection appears under Connections in the project tree and on the design canvas.
Step 4: Set actual values for your configurables
- In the left panel, select Configurations.
- Set a value for each configurable listed below:
- authzenPdpUrl (string) : The PDP URL, for example,
https://authzen-proxy-demo.cerbos.dev
Configuring the AuthZEN evaluate operation
Step 5: Add an automation entry point
Select Add Artifact, then select Automation and select Create to add the automation entry point to the canvas.
Step 6: Select and configure the evaluate operation
- On the automation canvas, select the + button to add a step.
- Expand the authzenClient connection under Connections.
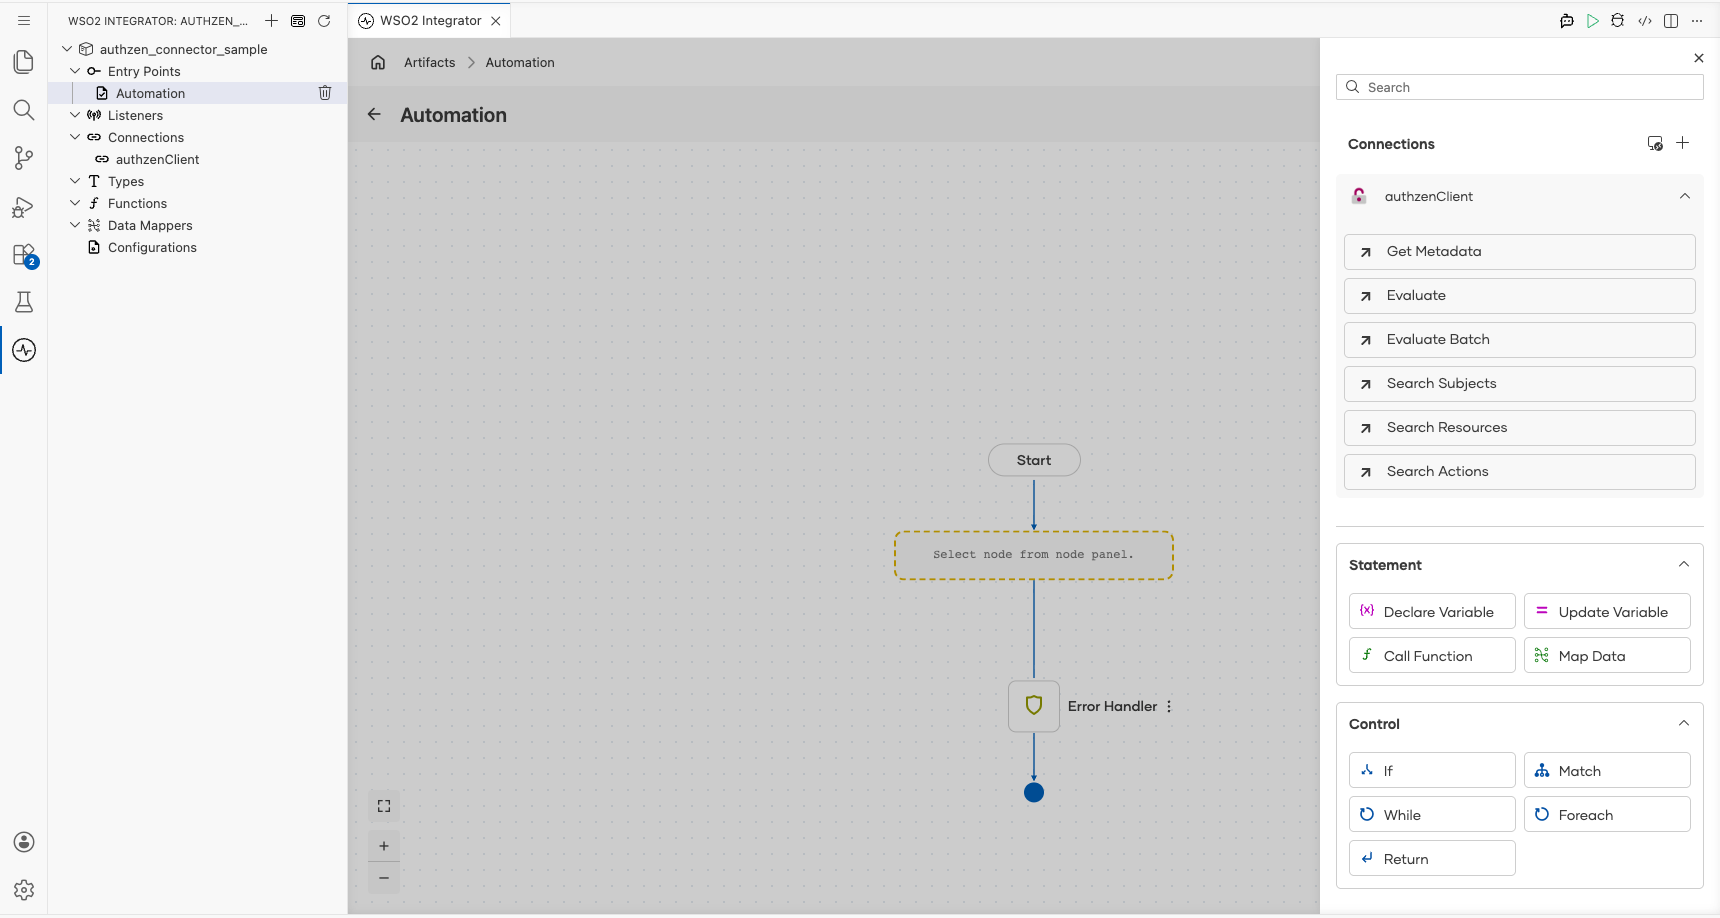
- Select Evaluate (
evaluate) and configure it:
- Request : Switch to Expression and enter
{subject: {'type: "user", id: "CiRmZDA2MTRkMy1jMzlhLTQ3ODEtYjdiZC04Yjk2ZjVhNTEwMGQSBWxvY2Fs"}, action: {name: "can_create_todo"}, 'resource: {'type: "todo", id: "todo-1"}}. The subject ID is the user Rick of the AuthZEN interop "todo" scenario, who is an admin. - Result : Keep the default result variable name
authzenDecision
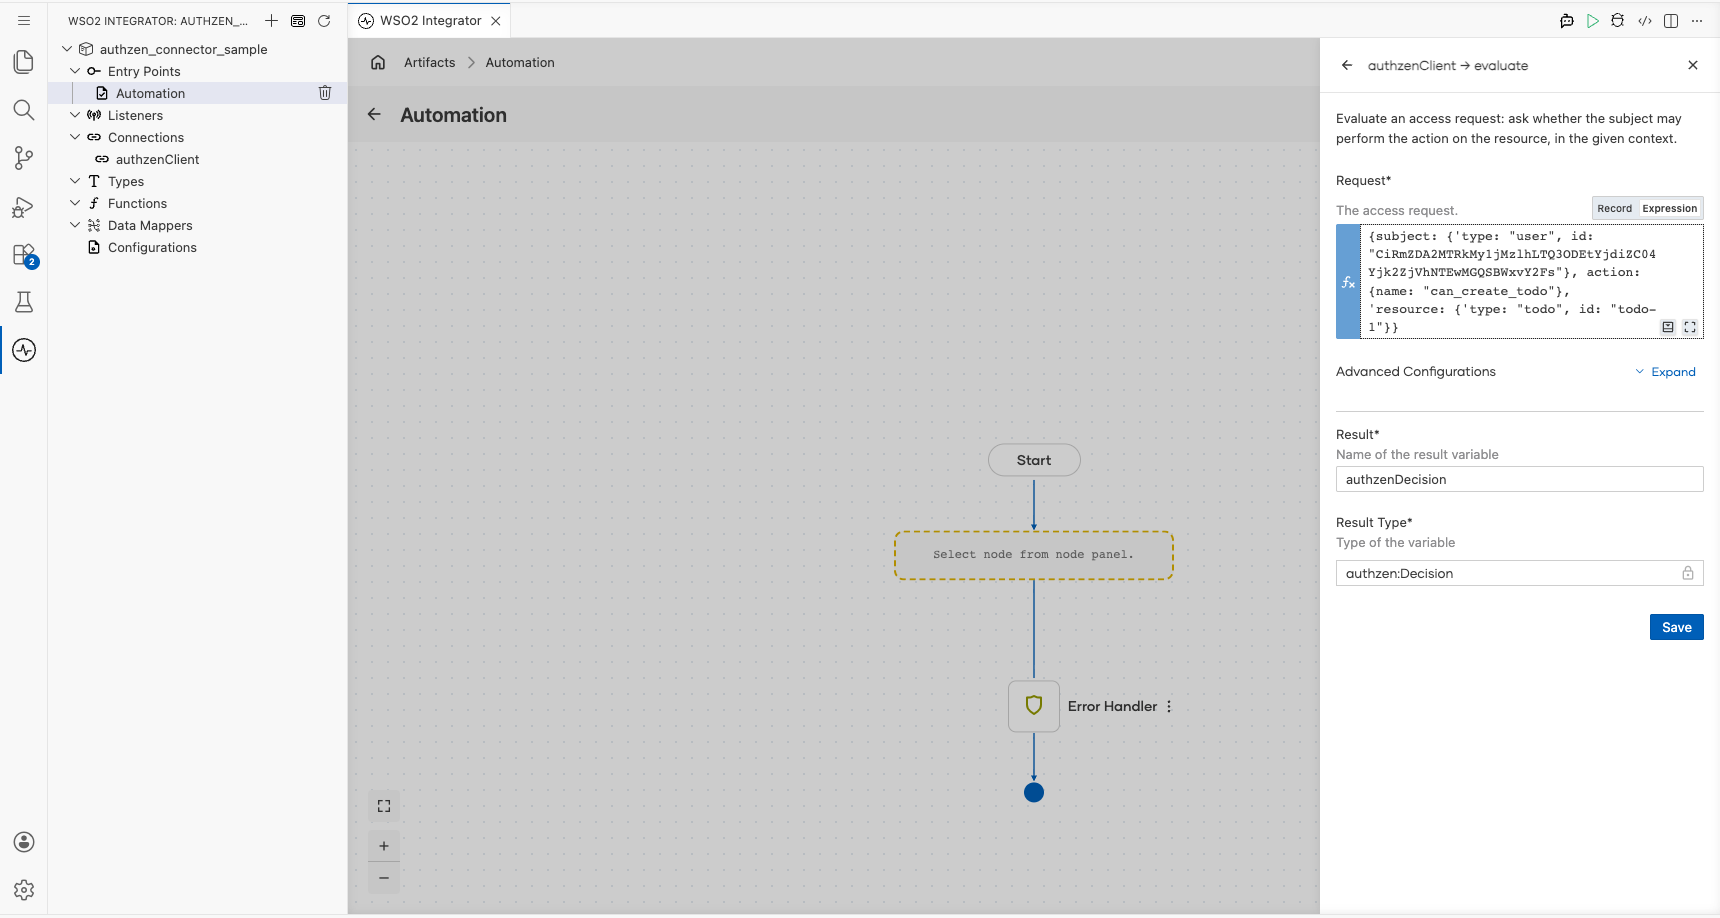
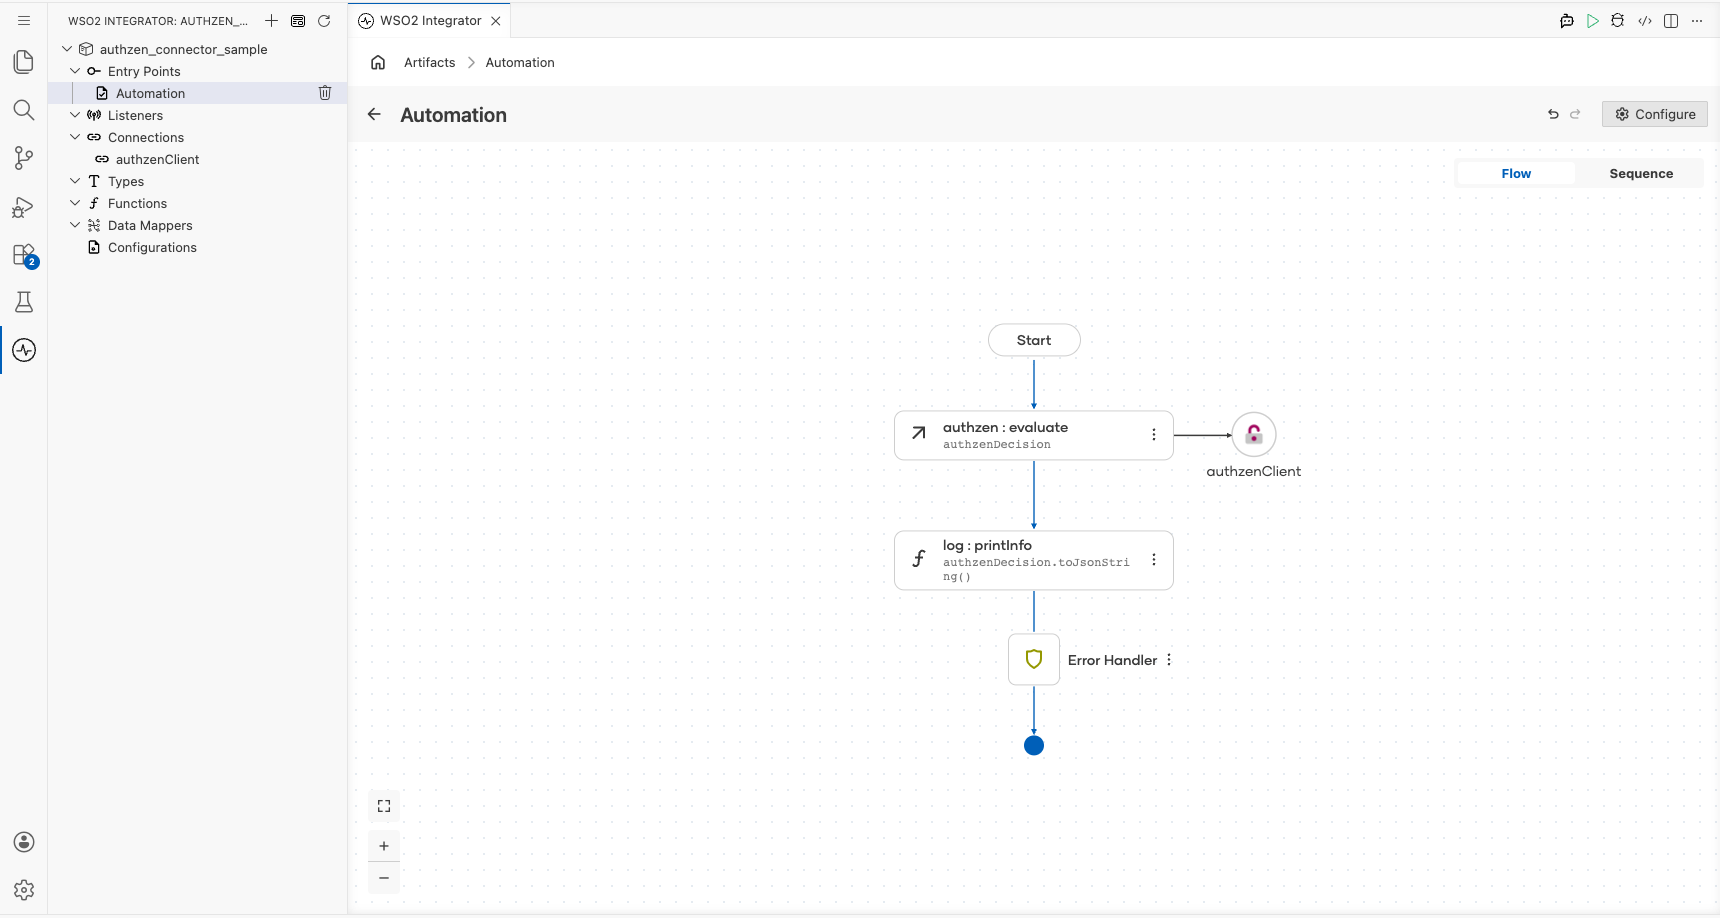
- Select Save to add the operation to the flow, then add a Log Info step after it, switch Msg to Expression and enter
authzenDecision.toJsonString(). The PDP returns{"decision":true}with the reasons for the decision incontext.
Try it yourself
Try this sample in WSO2 Integration Platform.

More code examples
The AuthZEN Ballerina connector provides practical examples illustrating usage in various scenarios. Explore these examples, covering use cases like checking access in an application and reviewing who can access records.
-
Check access in a todo app - Check one access request, then every user and action of a todo app in one batch call.
-
Review who can access records - Find who may delete a record, which records a user may delete (page by page), and what a user may do on a record.