Add Identifier First login
# Add Identifier First login
Identifier first login separates the authentication flow into two steps. The first step prompts the user to enter a unique identifier, such as an email address, and the second step involves authentication.
This allows you to personalize the experience for users based on their unique identifier. For example, based on the domain name of a user's email address, you can redirect the user to an external identity provider.
# Prerequisites
To get started, you need to register an application with Asgardeo. You can register your own application or use one of the sample applications provided.
# Enable Identifier First for an app
Follow the steps below to enable Identifier First as an authenticator in the login flow of your application.
On the Asgardeo Console, go to Applications.
Select your application, go to its Login Flow tab and create an Identifier First based authentication flow as described below.
Using the Classic Editor
To add Identifier First using the classic editor:
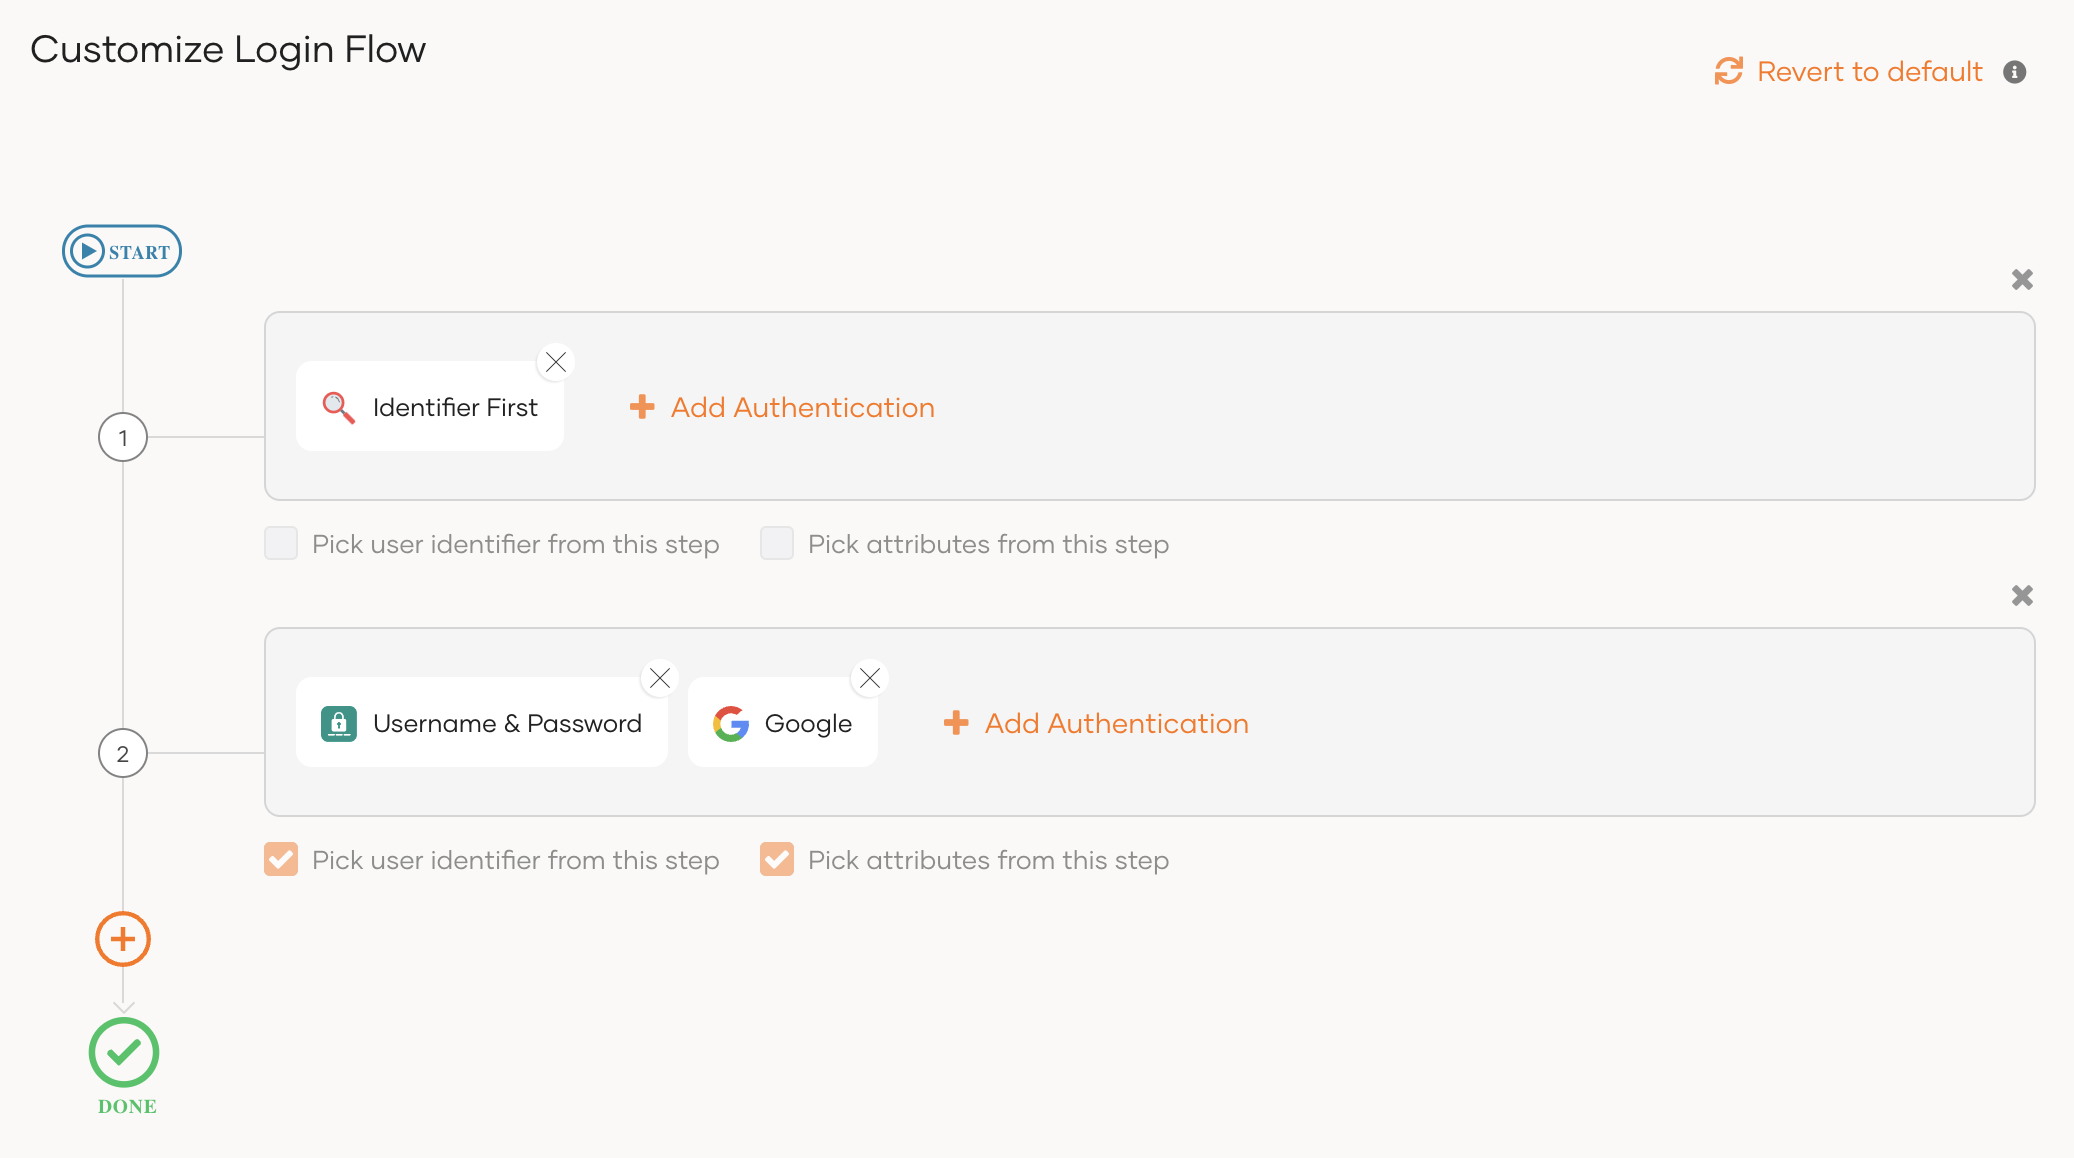
In the first step, click Add Authentication and select Identifier First.
- If you haven't already configured an authentication flow, click Start with default configuration to begin.
- Remove the Username & Password authenticator from the first step as it cannot co-exist with Identifier First in the same step.
Add a second authentication step by clicking the + icon and add your preferred authenticators to this step.

Use conditional authentication to customize the authentication flow.
Be sure to pick the user identifier and attributes from the first step only if you have enabled the
ValidateUsernameparameter in your conditional authentication script.
Using the Visual Editor
To add Identifier First using the visual editor:
Switch to the Visual Editor tab.
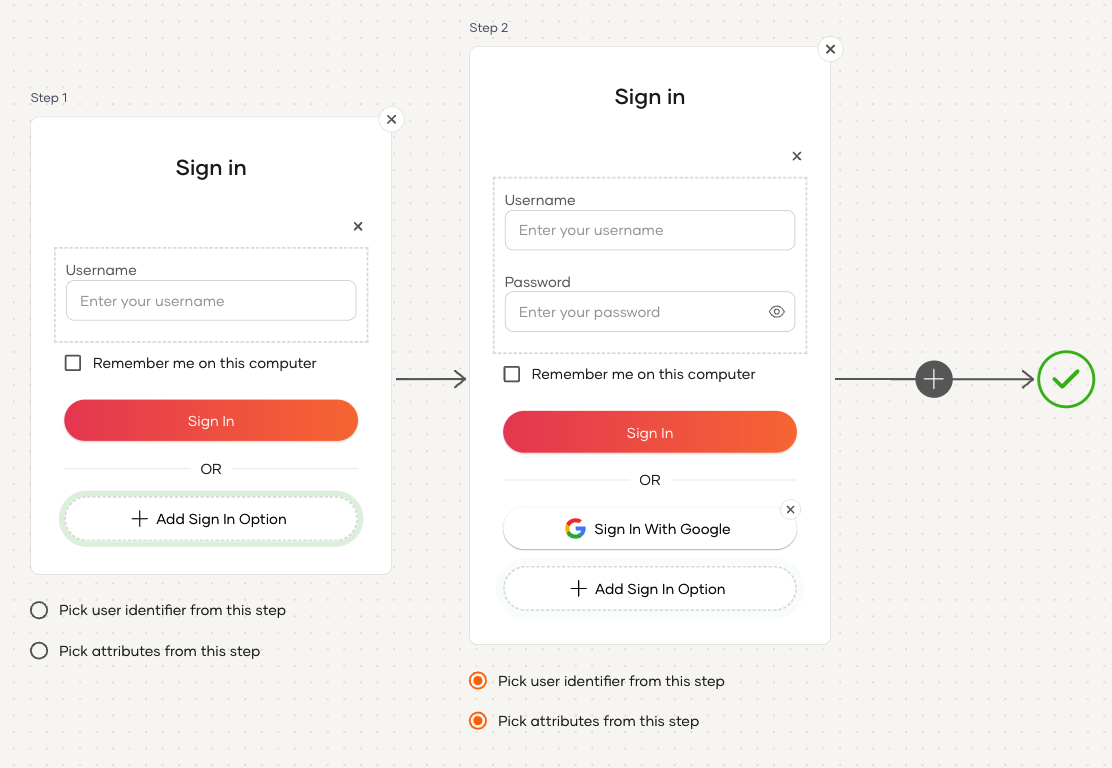
In the first step, click
+ Add Sign In Optionand select Identifier First.Remove the Username & Password authenticator from the first step as it cannot co-exist with Identifier First in the same step.
Add a second authentication step by clicking the + icon and add your preferred authenticators to this step.

Use conditional authentication to customize the authentication flow.
Be sure to pick the user identifier and attributes from the first step only if you have enabled the
ValidateUsernameparameter in your conditional authentication script.
Click Update to save your changes.
# Customize the authentication flow
Identifier First login allows you to customize the authentication flow based on the user identifier.
For example, let's say that you want users whose user identifiers end in gmail.com to log in with Google and for the other users to use basic authentication.
Follow the steps below to implement this logic.
Add the following conditional authentication script.
Learn how to enable conditional authentication
var domain = '@gmail.com';

var onLoginRequest = function (context) {
    executeStep(1, {
        onSuccess: function (context) {
            var userIdf = context.steps[1].subject.username;
            if (userIdf.endsWith(domain)) {
                Log.info("executing externally");
                executeStep(2, {
                    authenticatorParams: {
                        common: {
                            'login_hint_value': userIdf  // This is where we resolve the dynamic query param.
                        }
                    },
                    authenticationOptions: [{
                        idp: 'Google' // Name of the OIDC idp.
                    }]
                }, {});
            } else {
                Log.info("executing internally");
                executeStep(2, {
                    authenticationOptions: [{ authenticator: 'BasicAuthenticator' }]
                }, {});
            }
        }
    });
};
1
2
3
4
5
6
7
8
9
10
11
12
13
14
15
16
17
18
19
20
21
22
23
24
25
26
27Let's look at how this script works.
The
onSuccessparameter checks whether the username entered in the first step ends with the specified domain, in this example,@gmail.com, and redirects the user to the relevant identity provider.The user is redirected to the identity provider specified in the
authenticationOptionsparameter. If the username does not end with@gmail.com, the user is taken to theusername & passwordauthenticator.The
login_hint_valueparameter passes the username to the external authenticator. In this example, it is set as the Google ID.
Additional Parameters
Listed below are other parameters that are associated with Identifier First login.
skipIdentifierPreProcess
When set to true, the authentication flow skips basic username validations and pre-processings that are performed on the user identifier.... executeStep(1, { authenticatorParams: { common: { 'skipIdentifierPreProcess': "true", } } } ...1
2
3
4
5
6
7
8
9
ValidateUsername
When set to true, the authentication flow checks if a user has an existing account associated with the user identifier. This functionality is disabled by default..... executeStep(1, { authenticatorParams: { common: { 'ValidateUsername': "true", } } } ....1
2
3
4
5
6
7
8
9You cannot enable this parameter if you have an IdP discovery flow in your logic similar to what we have implemented in this guide.
Click Update to confirm.
# Try it out
Follow the steps given below.
Access the application URL.
Click Login to open the Asgardeo login page.
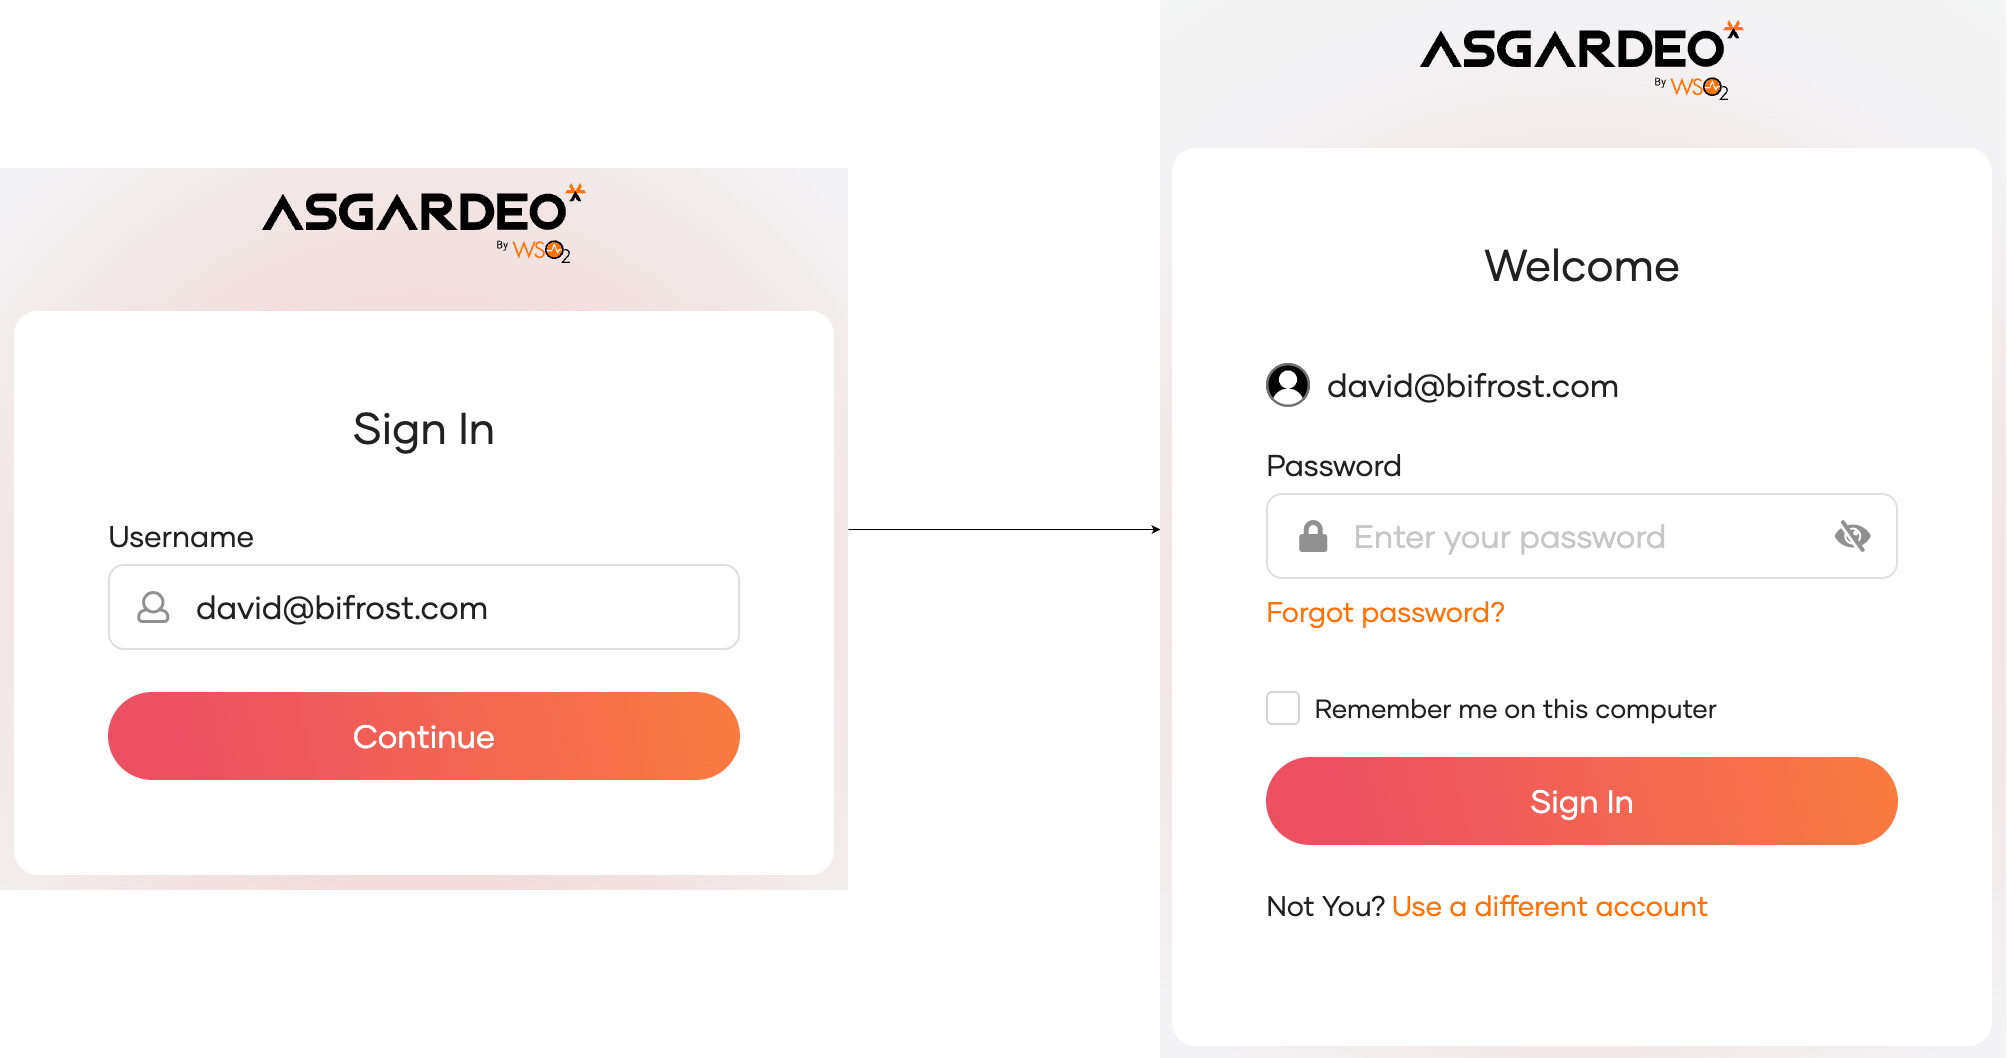
Enter a user identifier that does not end with
@gmail.com. You will be redirected to the basic authenticator.
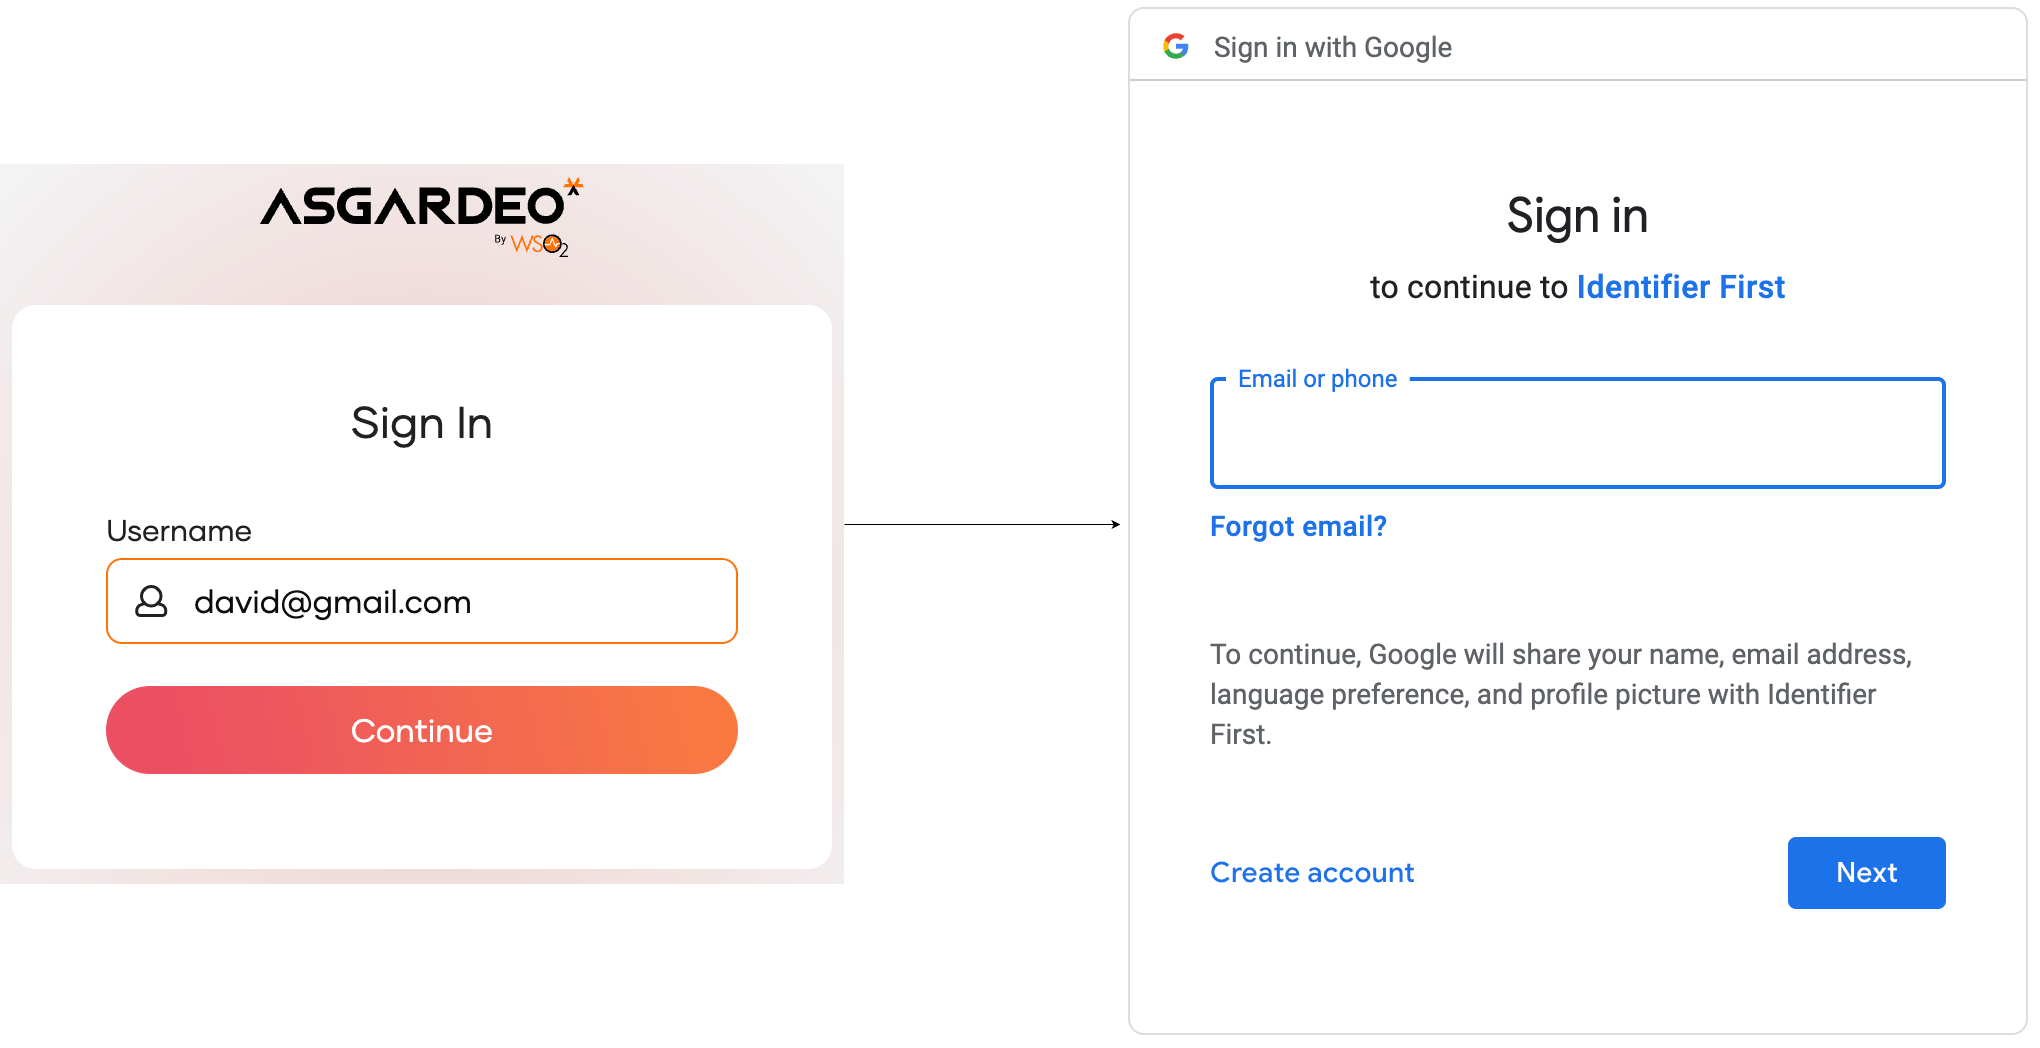
Enter a user identifier that ends with
@gmail.com. You will be redirected to the Google authenticator.
