Secure Your Spring Boot API with WSO2 Identity Platform
Spring Boot is a Java framework that simplifies the development of robust applications by offering a production-ready environment with minimal configurations. Spring security provides comprehensive tools to facilitate authentication and authorization for REST APIs. Spring Security seamlessly integrates with Spring Boot and allows developers to focus on business logic rather than boilerplate code.
The goal of this tutorial is to explore how we can enhance API security by integrating WSO2 Identity Platform, a comprehensive identity and access management solution, with Spring Security. This combination will handle authentication and authorization processes effectively.
Let's look at the following example scenario.
Scenario
Issue Management Application is a REST API service built using Spring Boot and Spring Security. The application allows the following CRUD operations to be performed.
- list issues
- create issues
- update issues
- delete issues
The application users are divided into the following two roles with different levels of permissions.
Reporterscan create and list issues.Fix-Verifiershave full access to the application and can perform all operations.
You are tasked with delegating access to the application so that users are given appropriate levels of access based on their roles. Let's use WSO2 Identity Platform to achieve this.
Step 1: Create a simple CRUD API
Create a simple issue management REST API which provides create, view, update and delete operations to issues.
You can find a sample implementation in the following repository.
Step 2: Integrate your service with WSO2 Identity Platform
Follow the instructions below to connect your Issue Management service with WSO2 Identity Platform.
Step 2.1: Register your API resources in WSO2 Identity Platform
First, let's register your issue management REST API with WSO2 Identity Platform. To do so,
-
Go to your organization from the WSO2 Identity Platform Console.
-
Define permissions for the API resource with the following permissions.
issues:viewissues:createissues:updateissues:delete
Step 2.2 Register your application in WSO2 Identity Platform
You need to register your application in WSO2 Identity Platform and connect your API resources to it. To do so,
-
Create a standard-based application in WSO2 Identity Platform by selecting the grant type as
Codeand the access token type asJWT. -
Connect the API resources with the application that you created in Step 1 above.
Step 2.3 Create roles in your application
Let's define the various roles of your application and give each role appropriate permissions.
To do so, create roles and associate to the application with the following details:
- Reporter - Assign
create:issesandview:issuespermissions. - Fix-Verifier - Assign all permissions.
Step 2.4 Assign roles to user groups in WSO2 Identity Platform
For the application roles defined in Step 2.3 above to take effect, we need to assign those roles to users in WSO2 Identity Platform. The best way to do this is to create user groups and assign the relevant roles to each group.
To do so,
-
Create user groups in WSO2 Identity Platform. For this scenario, let's create two groups and name them
ReporterandFix-Verifier. -
Assign application roles created in step 2.3 above to the relevant groups.
Step 2.5 Assign users to groups in WSO2 Identity Platform
Now that you have assigned the application roles to the relevant user groups in WSO2 Identity Platform, let's add users to these groups so that they can access the API resources.
To do so,
Step 3: Configure Spring Security
In your Spring project, do the following configurations so that it is correctly integrated with WSO2 Identity Platform.:
-
Create a security configuration file and include the following JWT decoder to validate WSO2 Identity Platform issued tokens.
Note
WSO2 Identity Platform issues access tokens of
at+jwttype. -
Add the following annotation to each endpoint that needs to be restricted with a scope.
For example, if the endpoint requires the
issues:viewscope, add the following annotation.
Step 4: Try it out
Let's try to access the API resources of the sample application as a Reporter user and a Fix-Verifer user. Follow the steps below to try out the scenario.
-
Use a web browser to obtain an authorization code using the URL shown below.
Note
Refer the documentation to learn about the authorization code flow.
-
Log in as a
Reporteruser to WSO2 Identity Platform and provide consent to the application to access the shown scopes.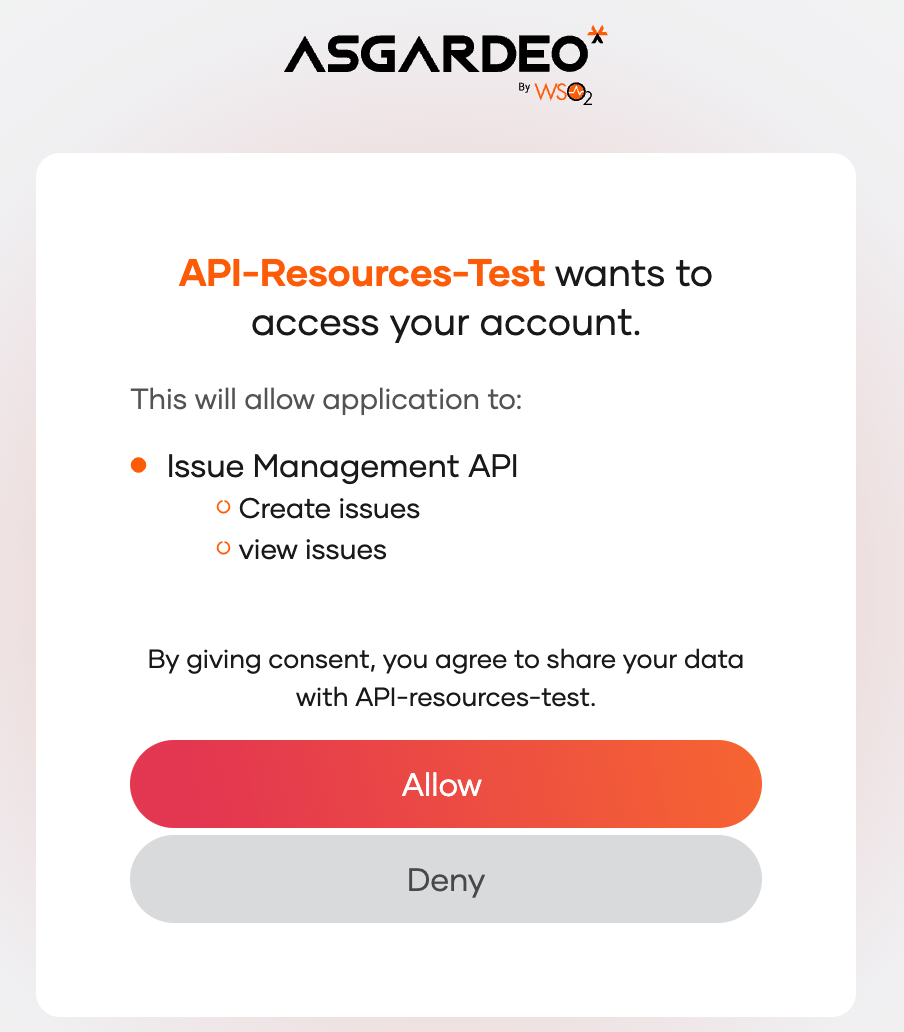
-
Once you retrieve the authorization code from the browser response, use the following cURL command to request for an access token.
curl --location --request POST 'https://api.asgardeo.io/t/{organization_name}/oauth2/token' --header 'Content-Type: application/x-www-form-urlencoded' --data-urlencode 'code={authorization_code}' --data-urlencode 'grant_type=authorization_code' --data-urlencode 'client_id={client_id}' --data-urlencode 'client_secret={client_secret}' --data-urlencode 'redirect_uri={redirect_uri}' -
Observe the scopes calim in the access token and verify that the
Reporteruser has access to onlyissues:viewandissues:createscopes. -
Repeat steps 1-4 for a
Fix-Verifieruser and observe that this user has access to all scopes. -
Start the sample application and invoke a restricted API using each of the tokens you obtained above.
- The
Reportertoken will only allow viewing and creating issues in the system. - The
Fix-Verifiertoken will enable viewing, creating, updating, and deleting issues in the system.
- The