Authenticate users into Android applications using WSO2 Identity Platform
An Android app is a software application that runs on Android devices or emulators. It is distributed in the form of an APK file, which is a ZIP archive that contains the app code, resources, and metadata. Android apps can be written in Kotlin or Java and are executed within a virtual machine.
There are two ways to implement user authentication in your application:
- Add the logic to handle user authentication into the application.
- Use an identity provider to handle user authentication in your application.
If you choose the first option of handling user registration and login within the application, there are certain difficulties that you need to consider.
- First, the application itself will be responsible for maintaining user identities and implementing secure password policies. It also needs to include bot detection mechanisms and ensure proper security protocols are in place for authentication.
- If you want to include a dedicated login option for admins, it needs to be handled within the application. However, if an admin makes a mistake, it will be difficult to identify the error and the respective admin, as the application will not know which admin logged in.
To avoid these challenges, it is recommended to use an identity provider to handle user registration and authentication. This means that all user identities are managed by the identity provider and that the login data is recorded. In cases of harmful activity, it will be easier to identify who was online and what they did, which makes problem-solving and threat elimination easier.
WSO2 Identity Platform, a SaaS-based customer identity and access management (CIAM) solution, is a suitable identity provider for Android applications.
Overview
This tutorial guides you through the process of integrating user authentication capabilities into an Android application using WSO2 Identity Platform as the CIAM provider.
Authentication flow
The high-level flow for the integration is as follows:
- The user clicks the login button of an Android application.
- The user is directed to the WSO2 Identity Platform login page.
- The user enters their WSO2 Identity Platform account credentials.
- The user is authenticated via WSO2 Identity Platform, and upon successful login, they are redirected to the application's home page.
- If the user clicks the logout button of the application, they are logged out from WSO2 Identity Platform and redirected to the relevant page.
OIDC authentication method
Before you dive into integrating WSO2 Identity Platform with your mobile application, let's take a closer look at the authentication mechanism you will use for login capabilities. Authentication involves various protocols, but for this example, we'll be using the OIDC protocol, which is widely recognized as the industry standard for mobile applications.
To ensure a secure authentication process for your Android application, let's use the OIDC protocol with PKCE. Learn more about the authorization code flow with PKCE.
SDKs
In the world of software development, an SDK (Software Development Kit) is an essential set of software tools and programs that enable developers to create applications for specific platforms, operating systems, computer systems, or devices. It's like a kit of different items that come with the tools and instructions required for assembling them, similar to putting together a standard car model.
When integrating WSO2 Identity Platform with your mobile application, you can use any third-party OIDC SDK that supports the protocol. For this tutorial, let's use the app-auth Android SDK. With the app-auth Android SDK, you can easily add OIDC-based login and logout capabilities to your Android applications.
Sample scenario
In this tutorial, we'll use the example of creating Meal Magic, a food delivery app that requires user authentication for ordering food. You'll begin by building a basic application without integrating WSO2 Identity Platform authentication.
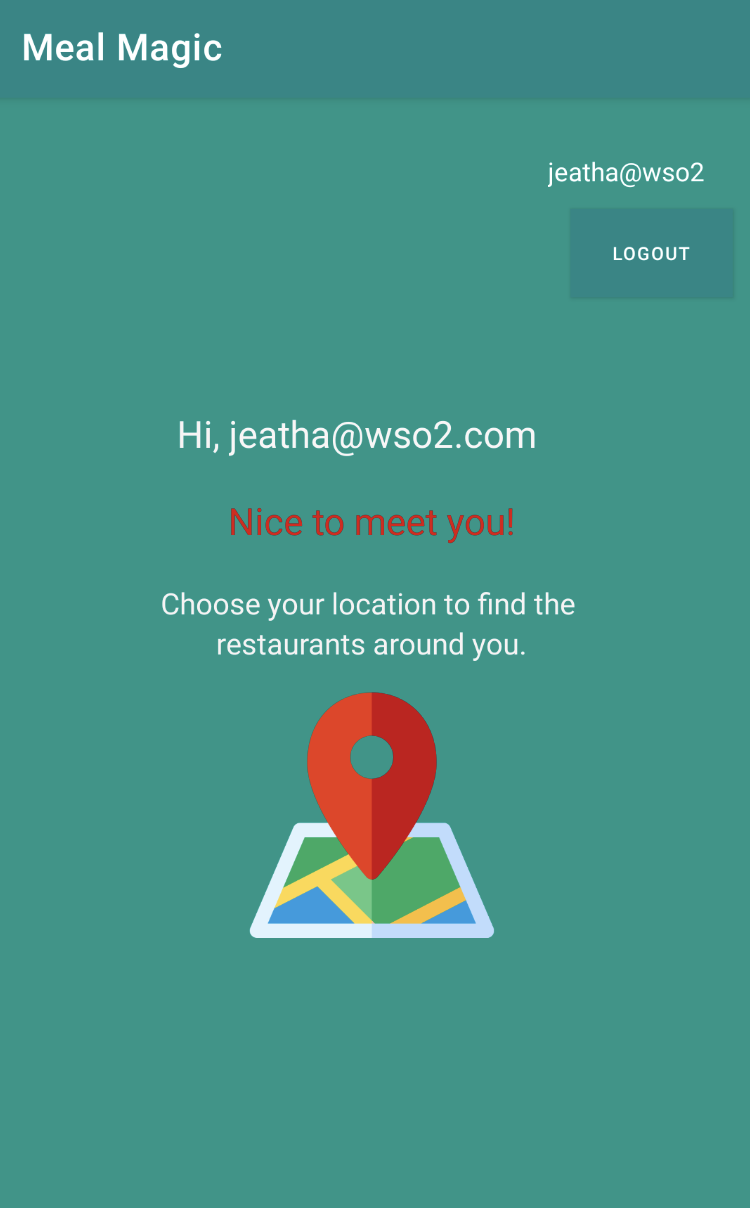
Then, you'll integrate WSO2 Identity Platform authentication into the application. After successful authentication, the user will see their username on the next screen and will be able to select a location to find nearby restaurants. The application will also provide a logout option for users to log out.
Prerequisites
Set up any one of the following environments to edit and refactor your Android application code.
- Android Studio
- IntelliJ IDEA
- Visual Studio Code
Step 1: Set up the application
First, you need to create the application.
After installing Android Studio, create a new project with a basic activity, and design the application login page and the home page.
Step 2: Register the application in WSO2 Identity Platform
To integrate WSO2 Identity Platform as your CIAM provider, you need to register your application in WSO2 Identity Platform. Since you are building an Android application, it should be registered as a mobile application. See the instructions on registering a mobile application.
Note
When registering the application, it's important to specify com.sample.mealmagic://home as the authorized redirect URI, which must also match the redirect URL specified in the application configuration.
After registering your application with WSO2 Identity Platform, you can enable user attributes for the app. These attributes correspond to the user's profile information that can be retrieved by the application with the user's consent.
Note
If you need additional attributes that are not listed in the user's profile section by default, you can configure new attributes and retrieve them through the profile scope.
Note that admin users are not allowed to log in to the Android application. Therefore, it is necessary to create a business user in WSO2 Identity Platform. See the instructions on managing users in WSO2 Identity Platform.
Step 3: Install dependencies
Add dependencies in the build.gradle file.
dependencies {
……………
implementation 'net.openid:appauth:0.7.0'
implementation 'com.squareup.okio:okio:1.14.1'
}
Appauth is an SDK for application authentication, while Okio is a library that simplifies and enhances the usage of InputStream and OutputStream classes from the standard java.io package by providing a buffered source.
Step 4: Configure the Callback URL
Once the authorization flow is completed on the browser, WSO2 Identity Platform will redirect to the callback URL sent in the authorization request. In order for the app to capture this response, it must register with the Android OS as a handler for this redirect URI as below.
Add RedirectSchema to the build.gradle file.
android.defaultConfig.manifestPlaceholders = [
    'appAuthRedirectScheme': 'com.example.myapplication'
]
Step 5: Implement sign-in
We have two activities - MainActivity and UserInfoActivity. The main activity has a sign-in button. Once the user clicks the sign-in button, at the code level, we need to send a call to WSO2 Identity Platform to get the authorization code.
As mentioned earlier, it's a best practice for mobile applications to use OpenID Connect (OIDC) with the PKCE option. Since PKCE is being used, the authorization request must include a code challenge and code challenge method. When using the app-auth SDK, these parameters are automatically included in the authorization request via the builder method, so there's no need to manually add them.
-
First, fetch the identity provider metadata information using the
fetchFromIssuermethod and add the information toAuthorizationServiceConfiguration.!!! note You can find the issuer details in the Info tab of the application you created in WSO2 Identity Platform.
-
After providing the issuer details, call the
buildermethod with the required parameters.The following parameters must be sent:
Client id This is the client ID of the application registered in WSO2 Identity Platform. Note that client secrets are not issued for mobile apps since they are public clients. However, the PKCE extension is enabled by default as a security measure. Redirect URI This is the URI to which the authorization code is sent upon authentication and where the user is redirected upon logout. This is the callback URL configured in WSO2 Identity Platform for the Android mobile app. Response type Use Codeas we are using the authorization code grant.Scopes Use scopes to define the required access. If you include profile, the user's profile details will be sent in the ID token. To obtain the ID token, you must also send theopenidscope. For our use case, to get the user's name and other profile details, we will request theopenidandprofilescopes. These scopes should be configured in the WSO2 Identity Platform application as well.@Override public void onClick(View view) { String tokenEndpoint = ConfigManager. readConfigValues(view.getContext(), "token_endpoint"); String clientId = ConfigManager.readConfigValues(view.getContext(), "client_id"); String redirectUrl = ConfigManager. readConfigValues(view.getContext(), "redirect_url"); String scopes = ConfigManager.readConfigValues(view.getContext(), "scopes"); AuthorizationServiceConfiguration.fetchFromIssuer(Uri.parse(tokenEndpoint), (serviceConfiguration, ex) -> { Uri redirectUri = Uri.parse(redirectUrl); if (serviceConfiguration != null && clientId != null) { AuthorizationRequest.Builder builder = new AuthorizationRequest.Builder( serviceConfiguration, clientId, ResponseTypeValues.CODE, redirectUri ); if (scopes != null) { builder.setScopes(scopes.split(",")); } AuthorizationRequest request = builder.build(); AuthorizationService authorizationService = new AuthorizationService( view.getContext()); CustomTabsIntent.Builder intentBuilder = authorizationService. createCustomTabsIntentBuilder(request.toUri()); customTabIntent.set(intentBuilder.build()); Intent completionIntent = new Intent(view.getContext(), UserInfoActivity.class); Intent cancelIntent = new Intent(view.getContext(), MainActivity.class); authorizationService.performAuthorizationRequest(request, PendingIntent. getActivity(view.getContext(), 0, completionIntent, 0), PendingIntent. getActivity(view.getContext(), 0, cancelIntent, 0), customTabIntent.get()); } }); } -
After implementing the logic described above, set the
AuthorizeListeneras theOnClickListenerfor your sign-in button.!!! note This triggers an authorization request to WSO2 Identity Platform when the sign-in button is clicked, and the WSO2 Identity Platform login page opens on your browser.
-
To log in, use your WSO2 Identity Platform credentials.
!!! note - As mentioned in the code snippets above, if the authorization is successful, you are redirected to the
UserInfoActivity. If it fails, you are redirected toMainActivity. - Once the authorization flow is successful, an authorization code is sent to the application via browser redirection. The application must then send the authorization code and additional information to WSO2 Identity Platform to get the access token and ID token. -
To retrieve the access token in the
UserInfoActivityclass of your application, add the following code.!!! note This code retrieves the authorization response and performs the token request to get the access token and ID token.
@Override
protected void onStart() {

   super.onStart();
   handleAuthorizationResponse(getIntent());
}

private void handleAuthorizationResponse(Intent intent) {

   final AuthorizationResponse response = AuthorizationResponse.fromIntent(intent);
   AuthorizationService service = new AuthorizationService(this);
   if (response != null) {
      performTokenRequest(service, response.createTokenExchangeRequest(),
               this::handleCodeExchangeResponse);
   }
}

private void performTokenRequest(AuthorizationService authService, TokenRequest request,
                                 AuthorizationService.TokenResponseCallback callback) {

   authService.performTokenRequest(request, callback);
}


private void handleCodeExchangeResponse(TokenResponse tokenResponse,
                                       AuthorizationException authException) {


   idToken = tokenResponse.idToken;
   accessToken = tokenResponse.accessToken;
   callUserInfo();
}
Step 6: Get user information
After receiving the access token, you can use it to authenticate and call the user info endpoint. This retrieves the requested user details. In this scenario, since we only requested the profile scope with the username, the user info endpoint contains the username.
Note
You can find the UserInfo endpoint in the Info tab of the application you created in WSO2 Identity Platform.
String userinfoEndpoint = ConfigManager.
readConfigValues(getApplicationContext(), "userinfo_endpoint");
URL userInfoEndpoint = new URL(userinfoEndpoint);
HttpURLConnection conn = (HttpURLConnection) userInfoEndpoint.openConnection();
conn.setRequestProperty("Authorization", "Bearer " + accessToken);
conn.setInstanceFollowRedirects(false);
String response = Okio.buffer(Okio.source(conn.getInputStream())).
      readString((StandardCharsets.UTF_8));
JSONObject json = new JSONObject(response);

TextView username1 = findViewById(R.id.username1);
TextView username2 = findViewById(R.id.username2);

username1.setText(json.getString("username"));
username2.setText(json.getString("username"));

Button btnClick = findViewById(R.id.logout);
btnClick.setOnClickListener(new LogoutListener());
Step 7: Implement logout
To enable users to log out of the application, add an on-click listener to the logout button as shown below.
public class LogoutListener implements Button.OnClickListener {
   @Override
   public void onClick(View view) {

      String logoutEndpoint = ConfigManager.
               readConfigValues(view.getContext(), "logout_endpoint");
      String url = logoutEndpoint + "?id_token_hint=" + idToken;

      CustomTabsIntent.Builder builder = new CustomTabsIntent.Builder();
      CustomTabsIntent customTabsIntent = builder.build();
      customTabsIntent.intent.setFlags(Intent.FLAG_ACTIVITY_NO_HISTORY |
               Intent.FLAG_ACTIVITY_NEW_TASK
               | Intent.FLAG_ACTIVITY_SINGLE_TOP);
      customTabsIntent.launchUrl(view.getContext(), Uri.parse(url));
   }
}
When the user clicks the logout button, the application sends a logout request to the WSO2 Identity Platform logout endpoint.
Note
You can find the logout endpoint in the Info tab of the application you created in WSO2 Identity Platform.
As a result, the user will be logged out from WSO2 Identity Platform and redirected to the default logout page. If you want to redirect the user to a different page, you can include the post_logout_redirect_uri parameter in the logout request.
Once the logout is successful, the user is redirected to the URL specified in the post_logout_redirect_uri parameter.
Step 8: Try it out
Let's walk through the end-to-end flow of the application we built in this tutorial.
-
Run the Android application.
After the application starts, you will see the login page with the Sign In option.
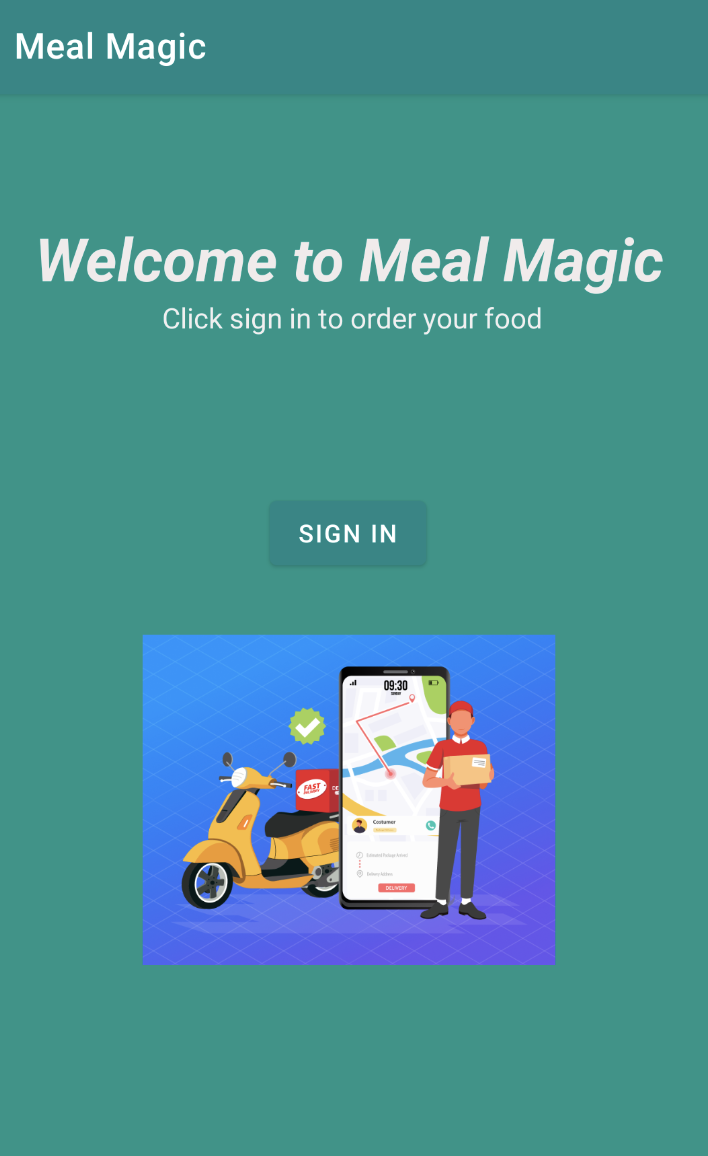
-
Click Sign In to start the authentication process.
You are redirected to WSO2 Identity Platform's login page, where you enter valid user credentials.
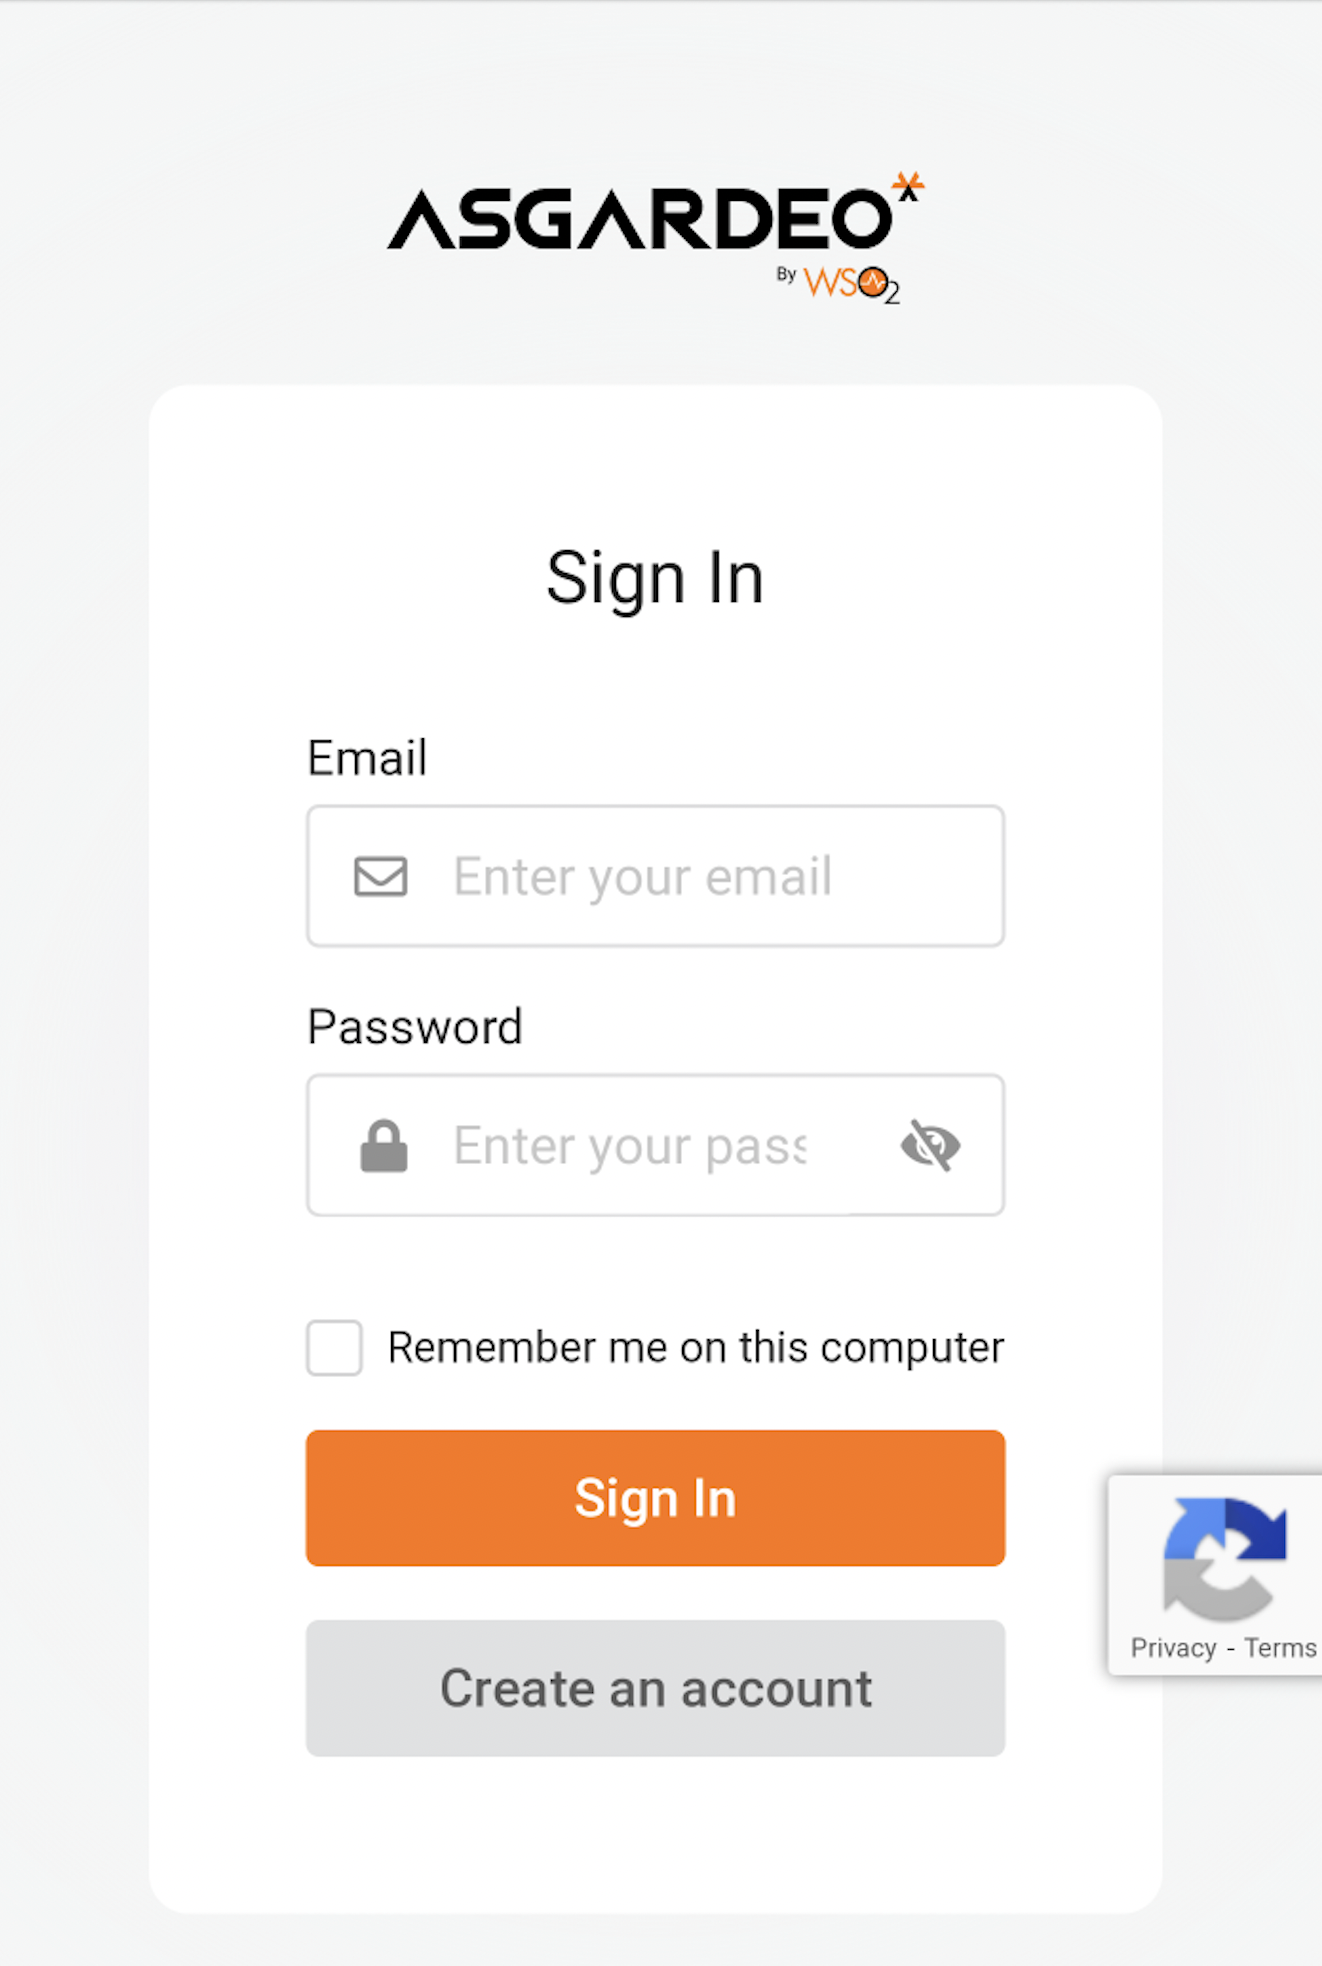
-
Use the credentials of the user you created on WSO2 Identity Platform.
Upon the first login attempt, WSO2 Identity Platform prompts for consent to share the configured attributes with the Android application.
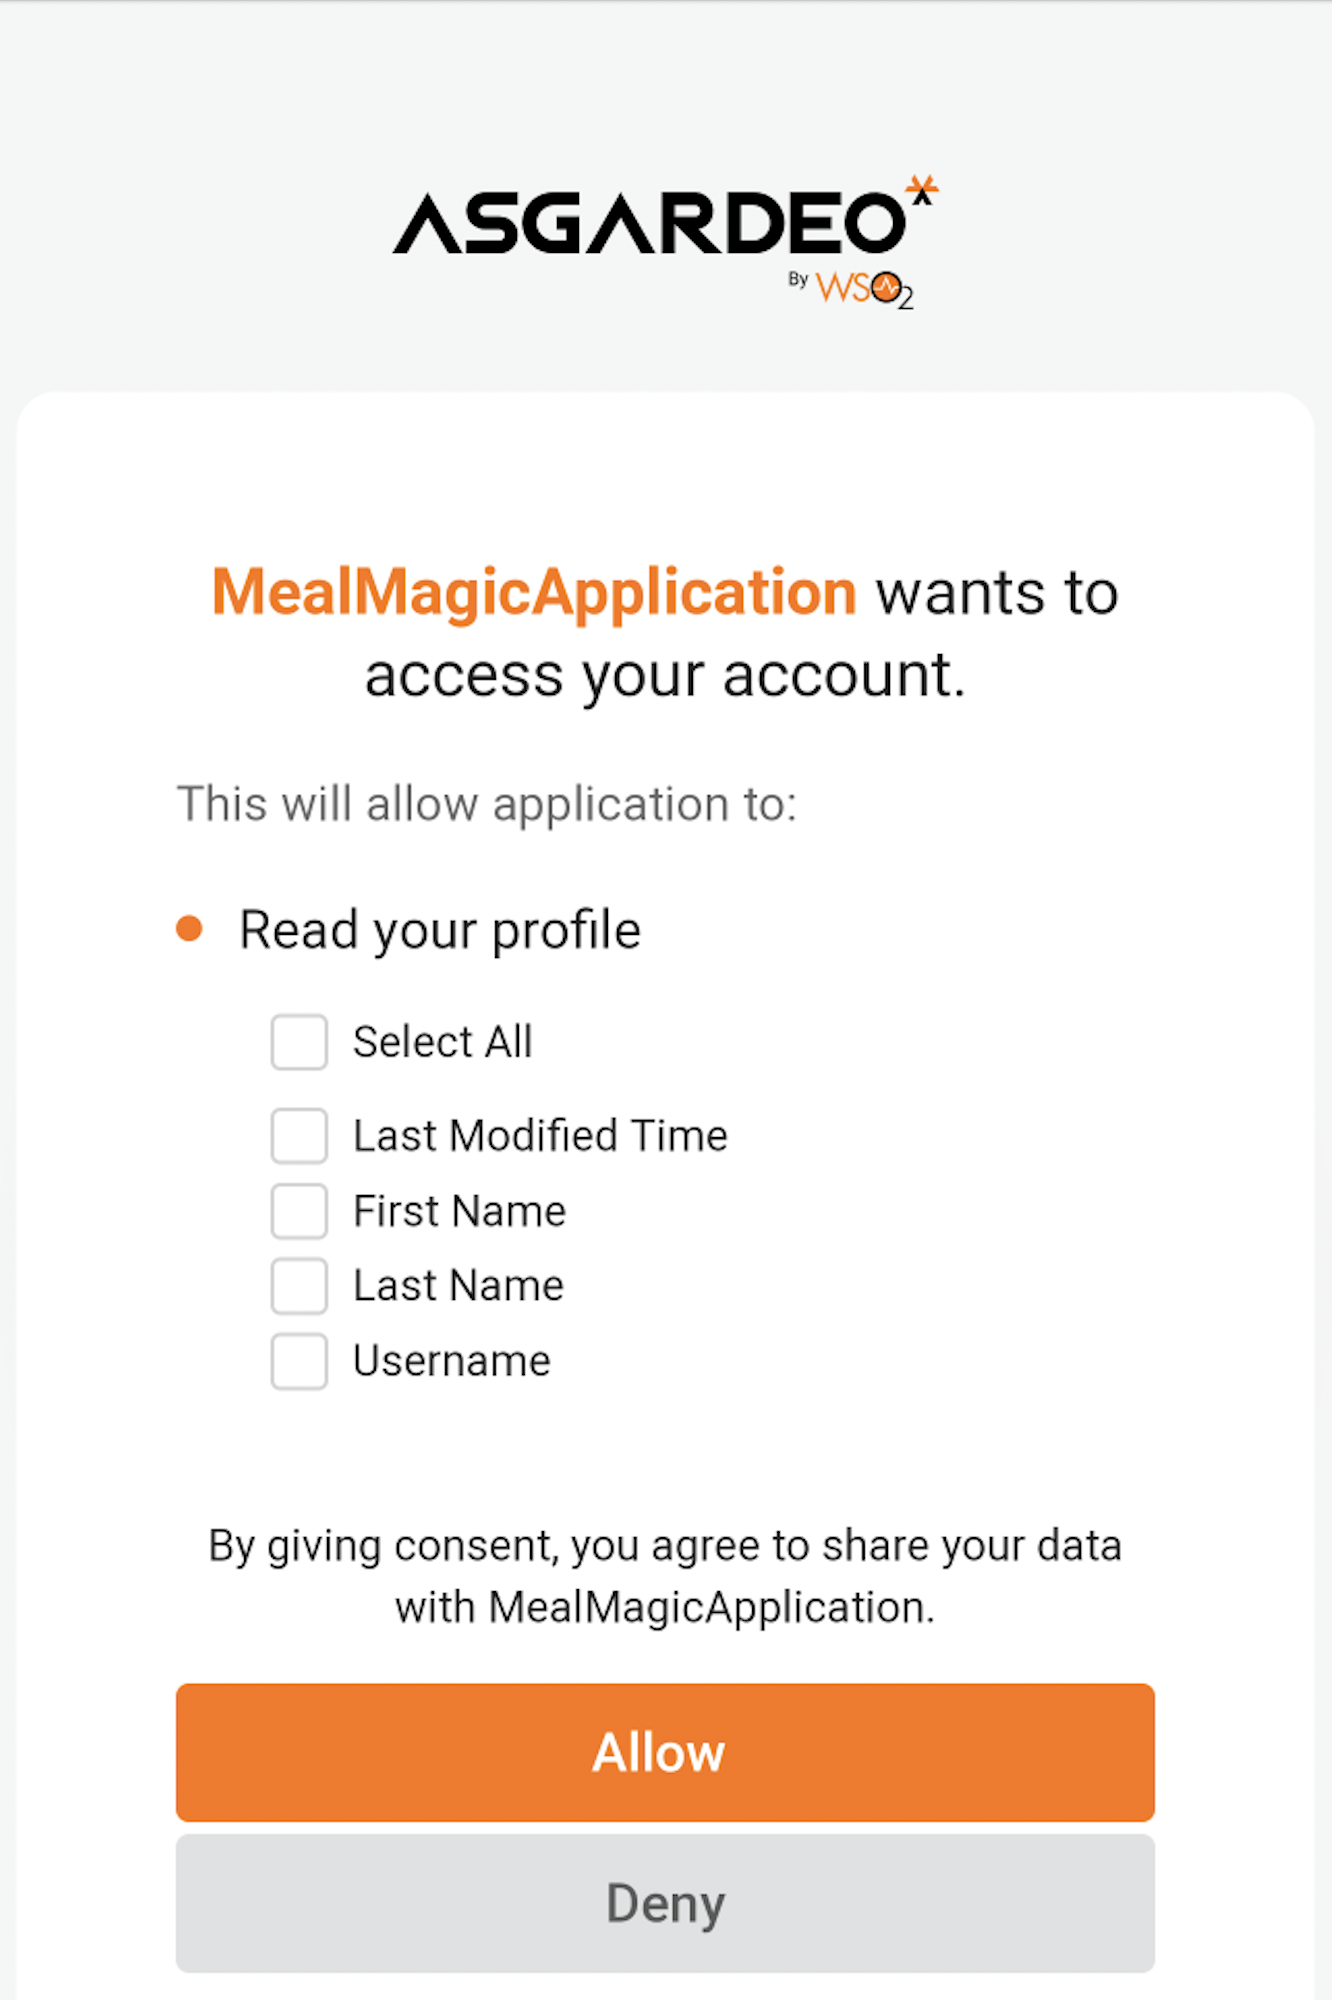
-
Give your consent accordingly, allowing the application to access your profile information.
-
Once logged in, you will see a home page.
-
Log out from the application by clicking Log out.
You get redirected to the login page upon a successful logout.
Summary
In this tutorial, we covered the steps to add authentication to an Android application using WSO2 Identity Platform as the CIAM provider. The AppAuth SDK was used for integrating the authentication and authorization capabilities. We also looked at the configurations required on the WSO2 Identity Platform side for the application.
Starting with a basic Android application without user authentication, we modified the code to successfully integrate the login, logout, and user info retrieval methods with WSO2 Identity Platform. You can access the completed source code of the application.