Build a Sentiment Analyzer
Time: Under 10 minutes | What you'll build: An HTTP endpoint that listens on POST /sentiment-analyzer/analyze, sends a customer review to an AI agent, and returns the sentiment (POSITIVE, NEGATIVE, or NEUTRAL) along with a confidence score.
This quick start shows the full cycle in WSO2 Agent Builder: define the result types, create an agent with classification instructions, expose it through a typed HTTP trigger, and test it. Because the trigger's response is typed, Ballerina enforces the result: the agent can only return one of the three sentiment values.
- Model Providers for LLMs
- A project to work in. If you do not have one, see Create a new integration.
- Visual Designer
- Ballerina Code
Step 1: Create the agentic integration
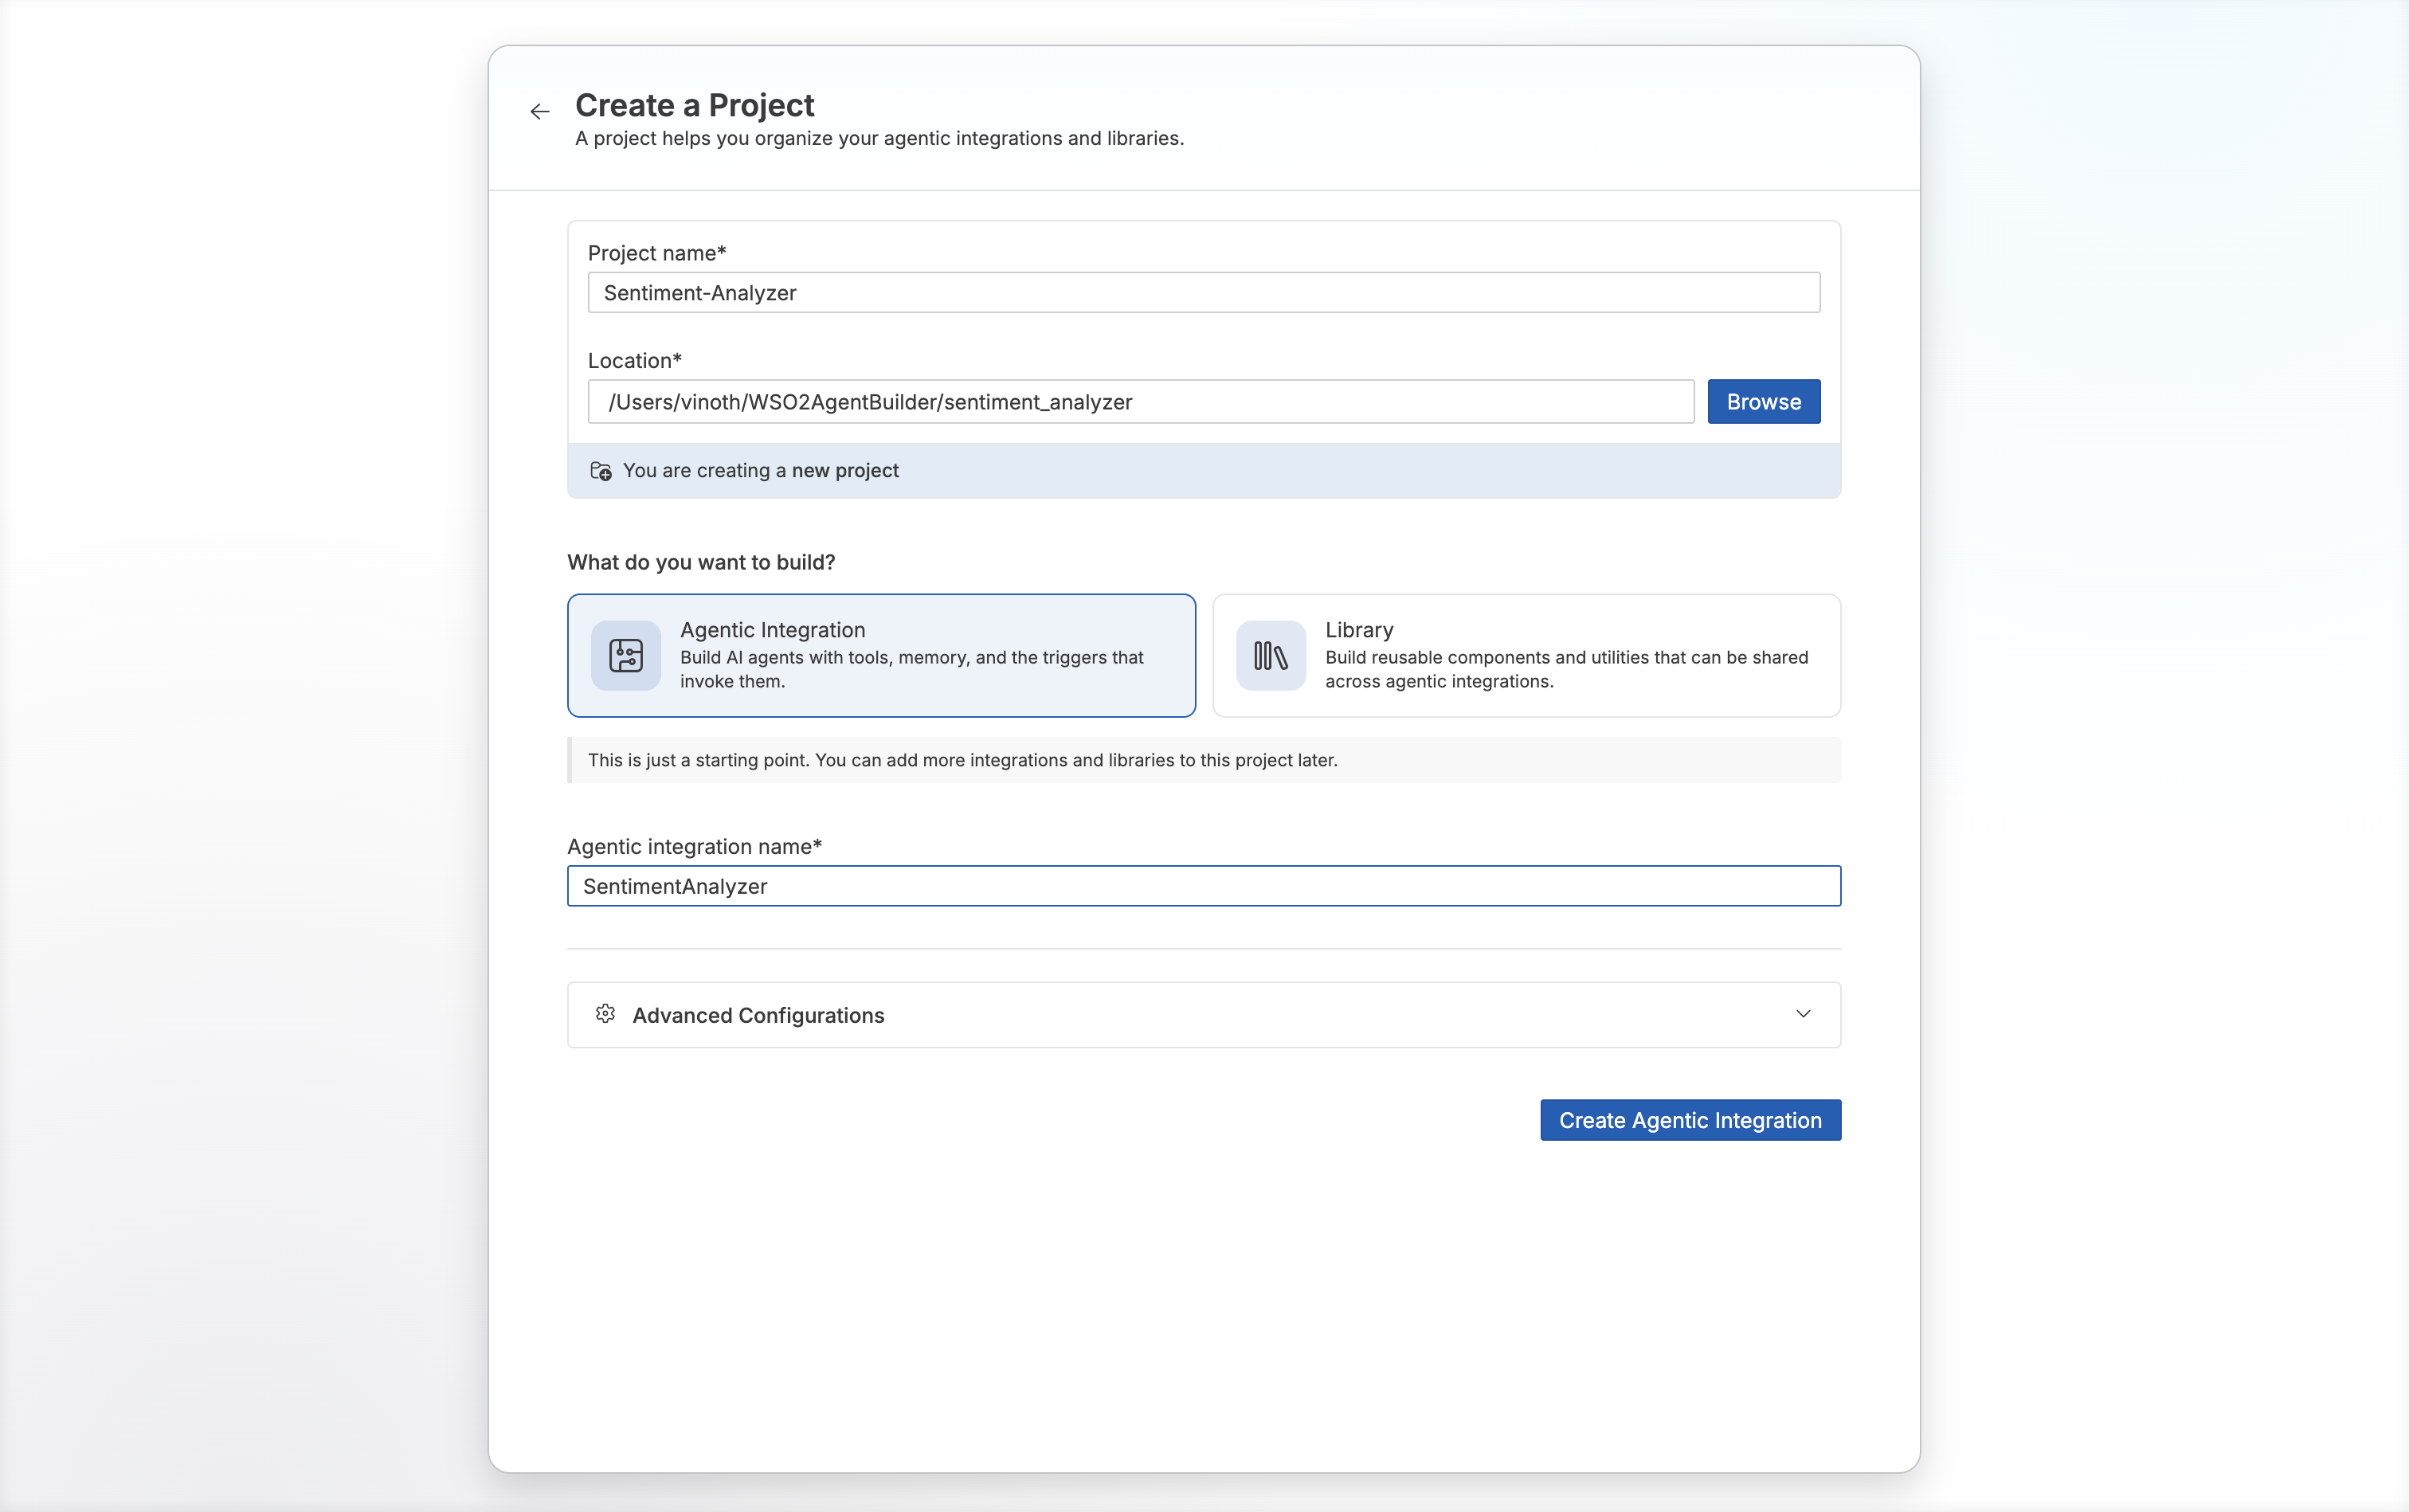
- Open WSO2 Agent Builder and select Create under Start Building your Agent.
- Set Project name to
Sentiment-Analyzerand choose a Location. - Under What do you want to build?, keep Agentic Integration selected.
- Set Agentic integration name to
SentimentAnalyzer. - Select Create Agentic Integration.
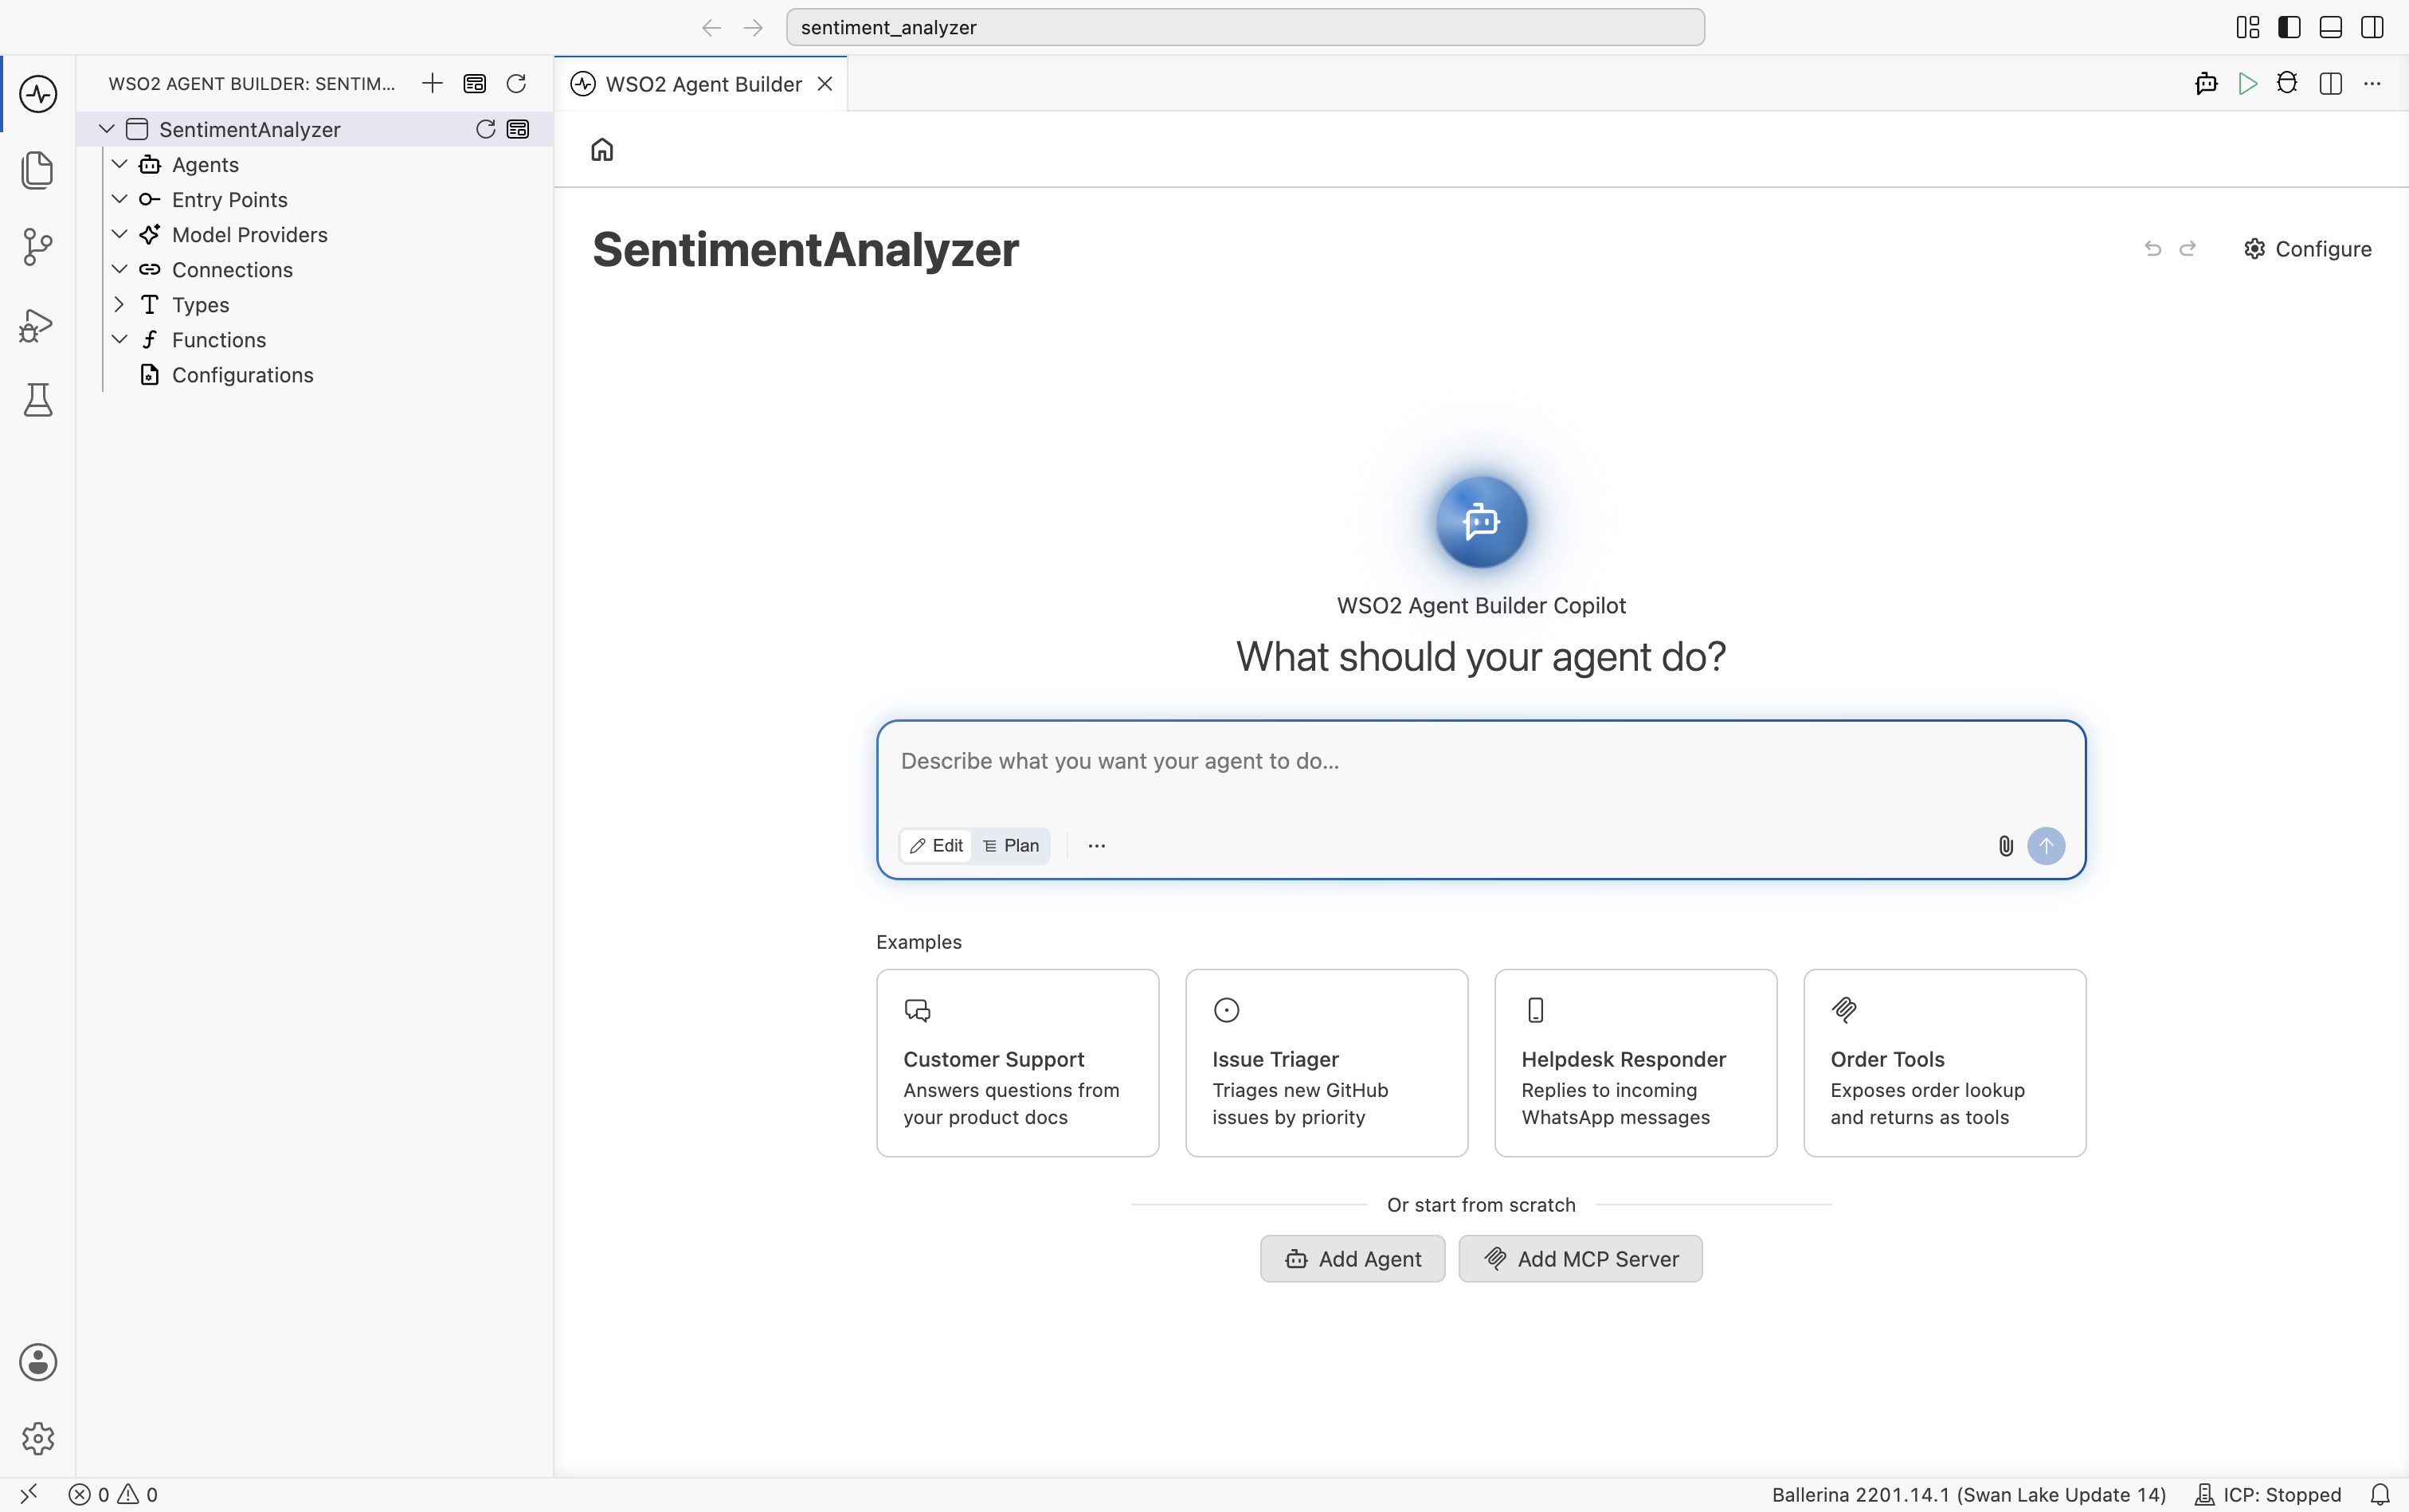
The integration opens with the WSO2 Agent Builder Copilot, which asks What should your agent do? Skip it for this quick start and build the integration manually.
Step 2: Define the result types
The agent's reply is bound to a typed result. Define an enum for the sentiment and a record for the full result so Ballerina can enforce them.
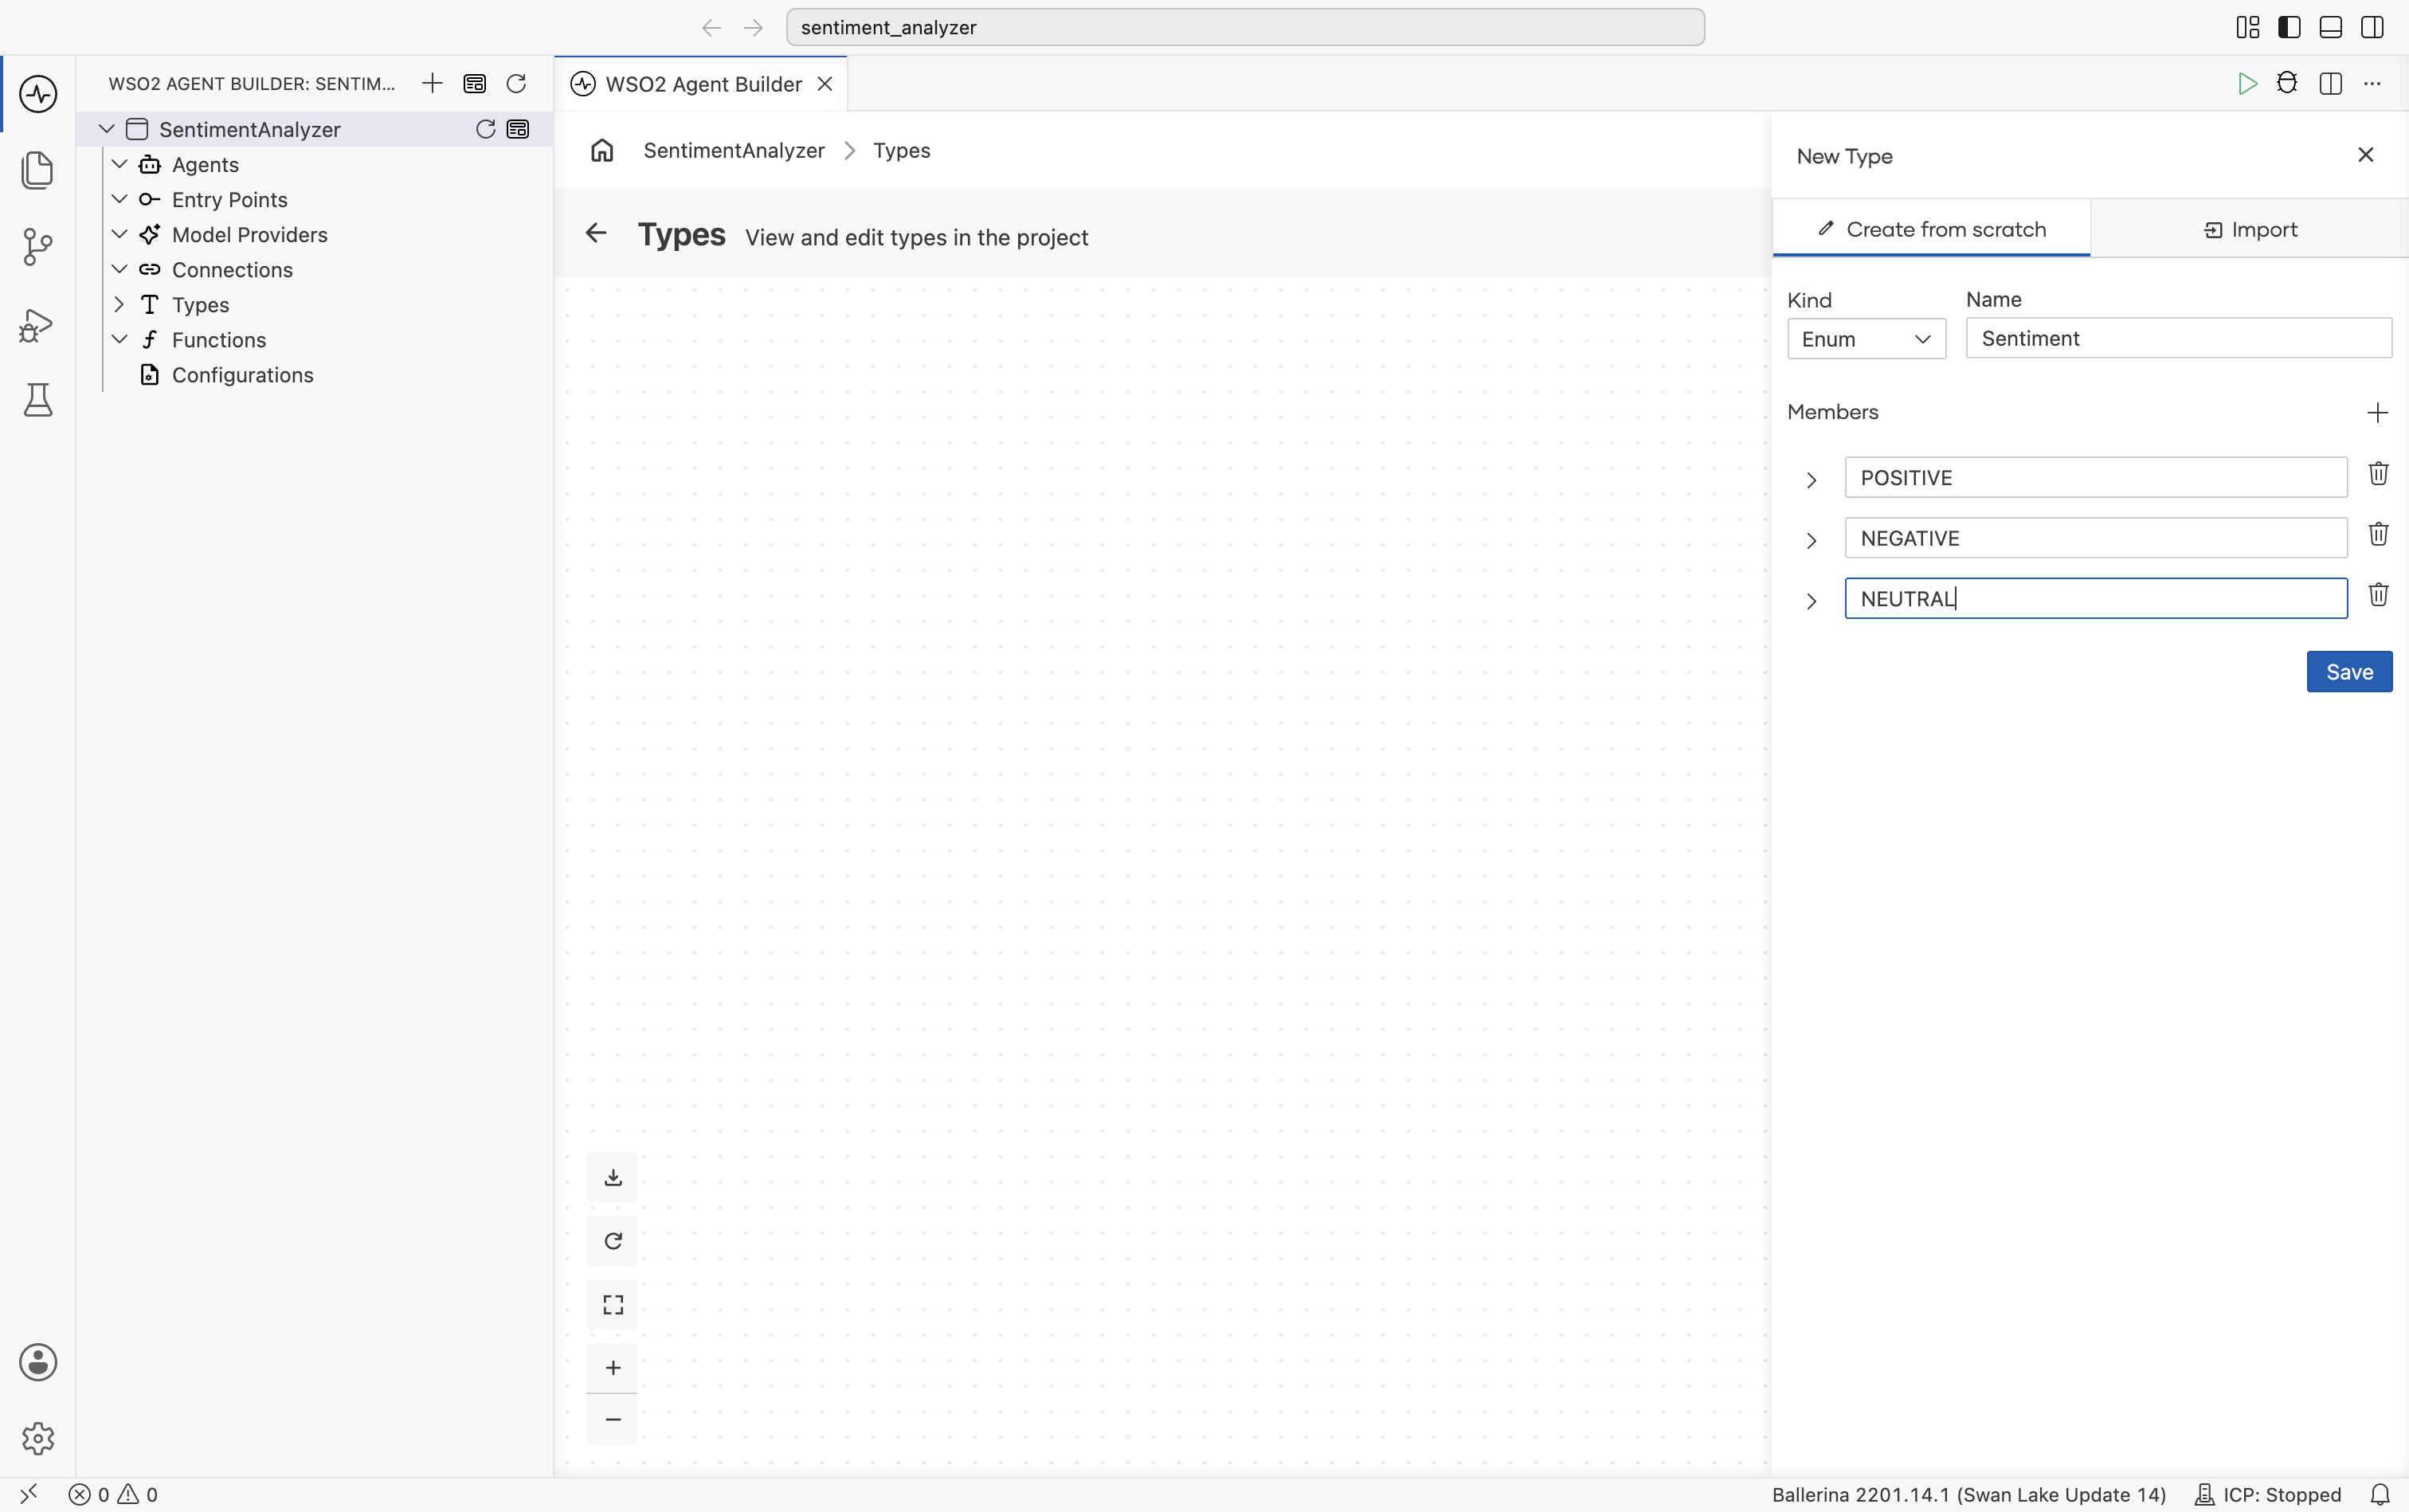
Create the Sentiment enum
- In the project explorer, hover over Types and select +.
- Set Kind to Enum and Name to
Sentiment. - Select + next to Members to add three members:
POSITIVE,NEGATIVE, andNEUTRAL. - Select Save.
Create the SentimentResult record
-
Select + Add Type.
-
Keep Kind as Record and set Name to
SentimentResult. -
Select + next to Fields to add two fields:
Name Type sentimentSentimentconfidencefloat -
Select Save.
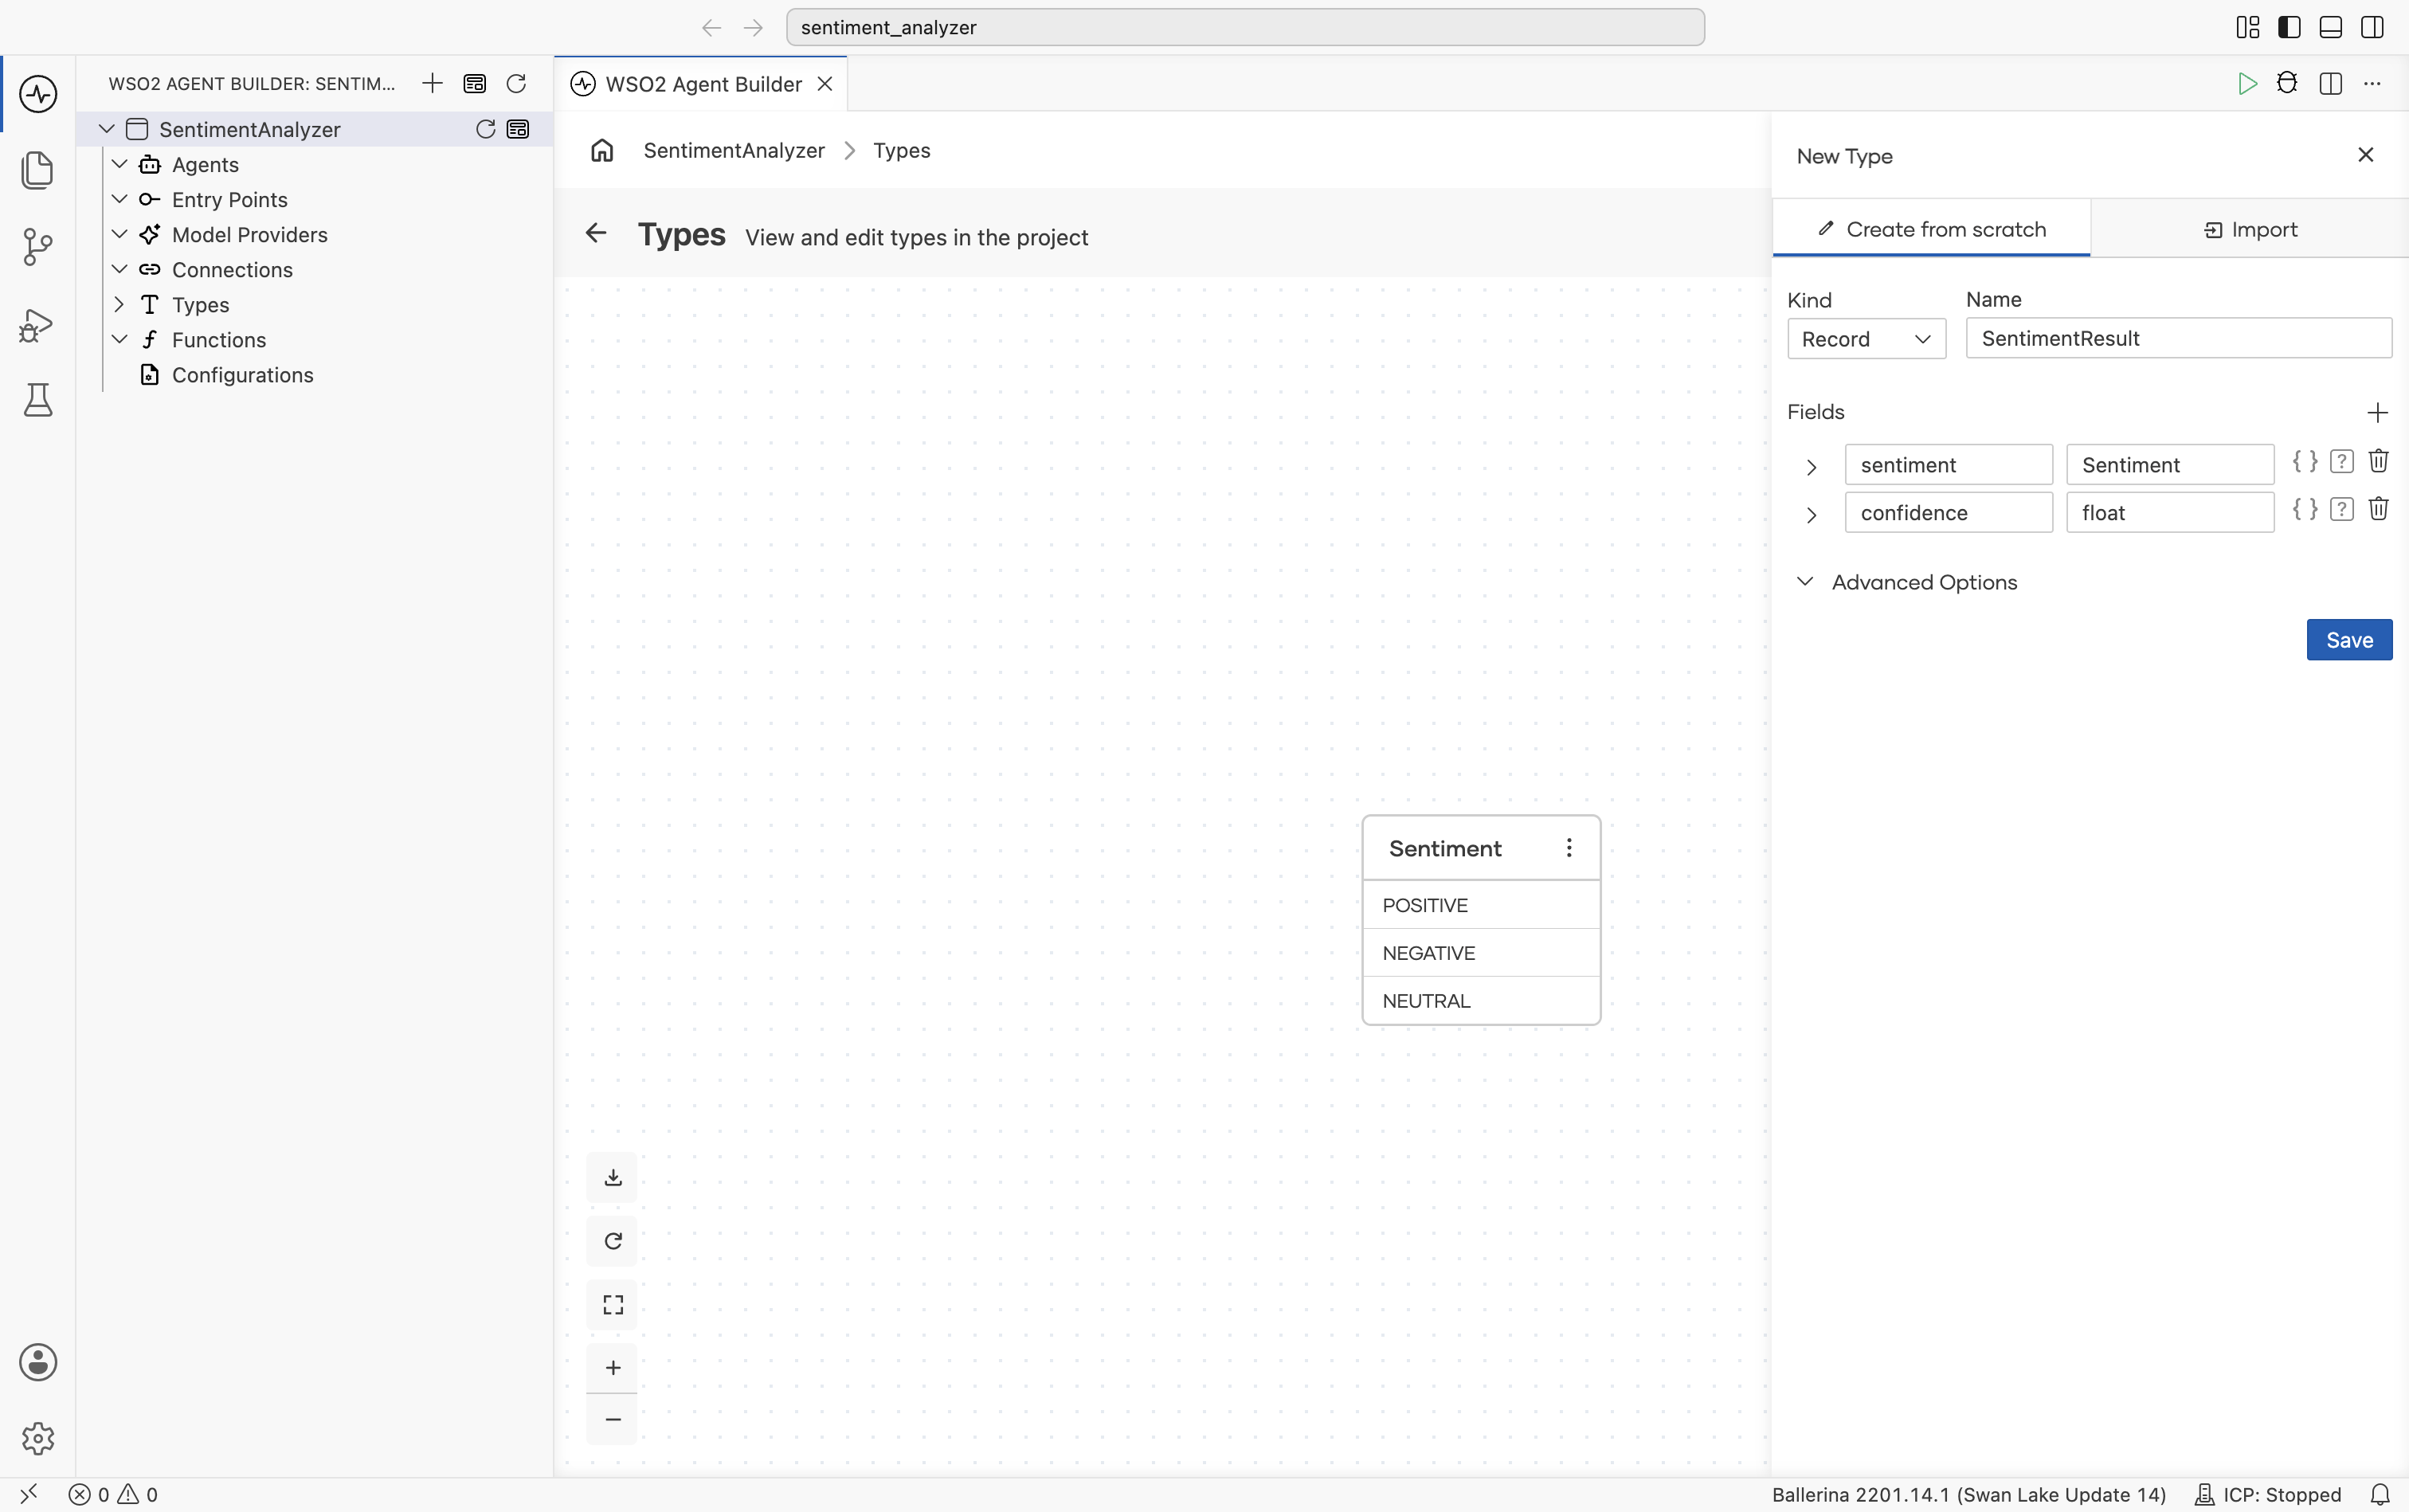
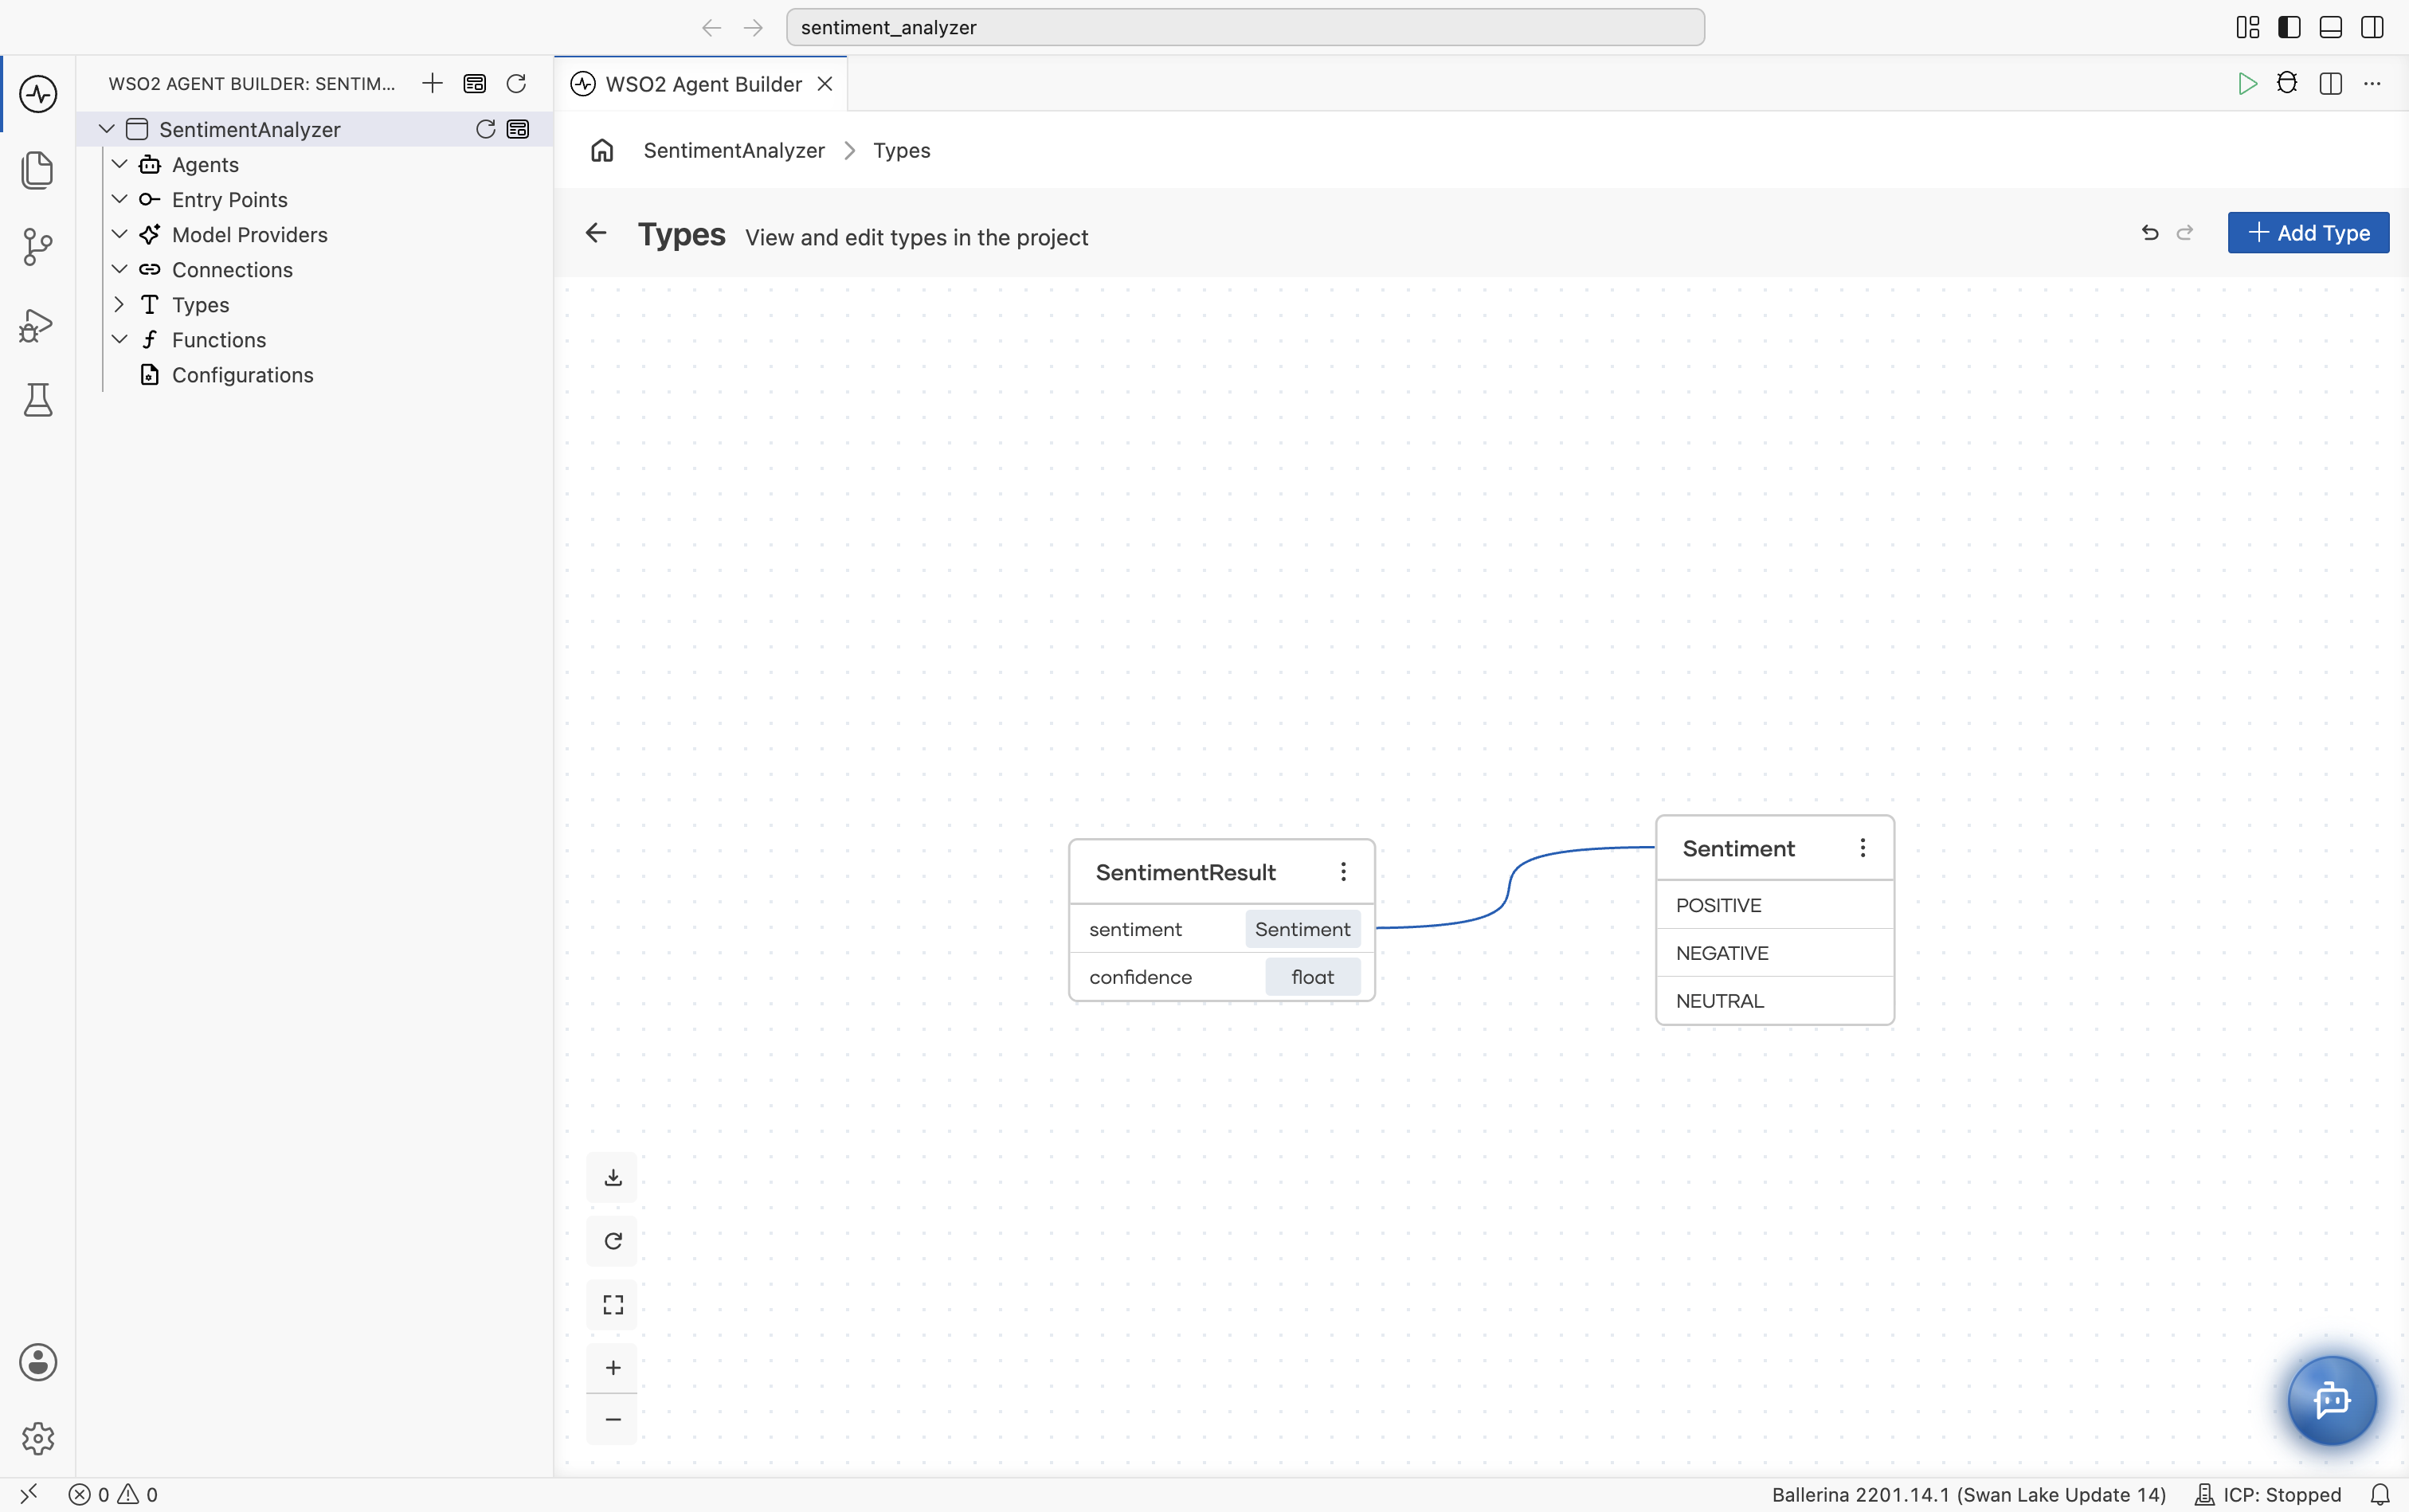
The Types view shows SentimentResult linked to the Sentiment enum.
Step 3: Create the agent
- Return to the integration home page and, under Or start from scratch, select Add Agent.
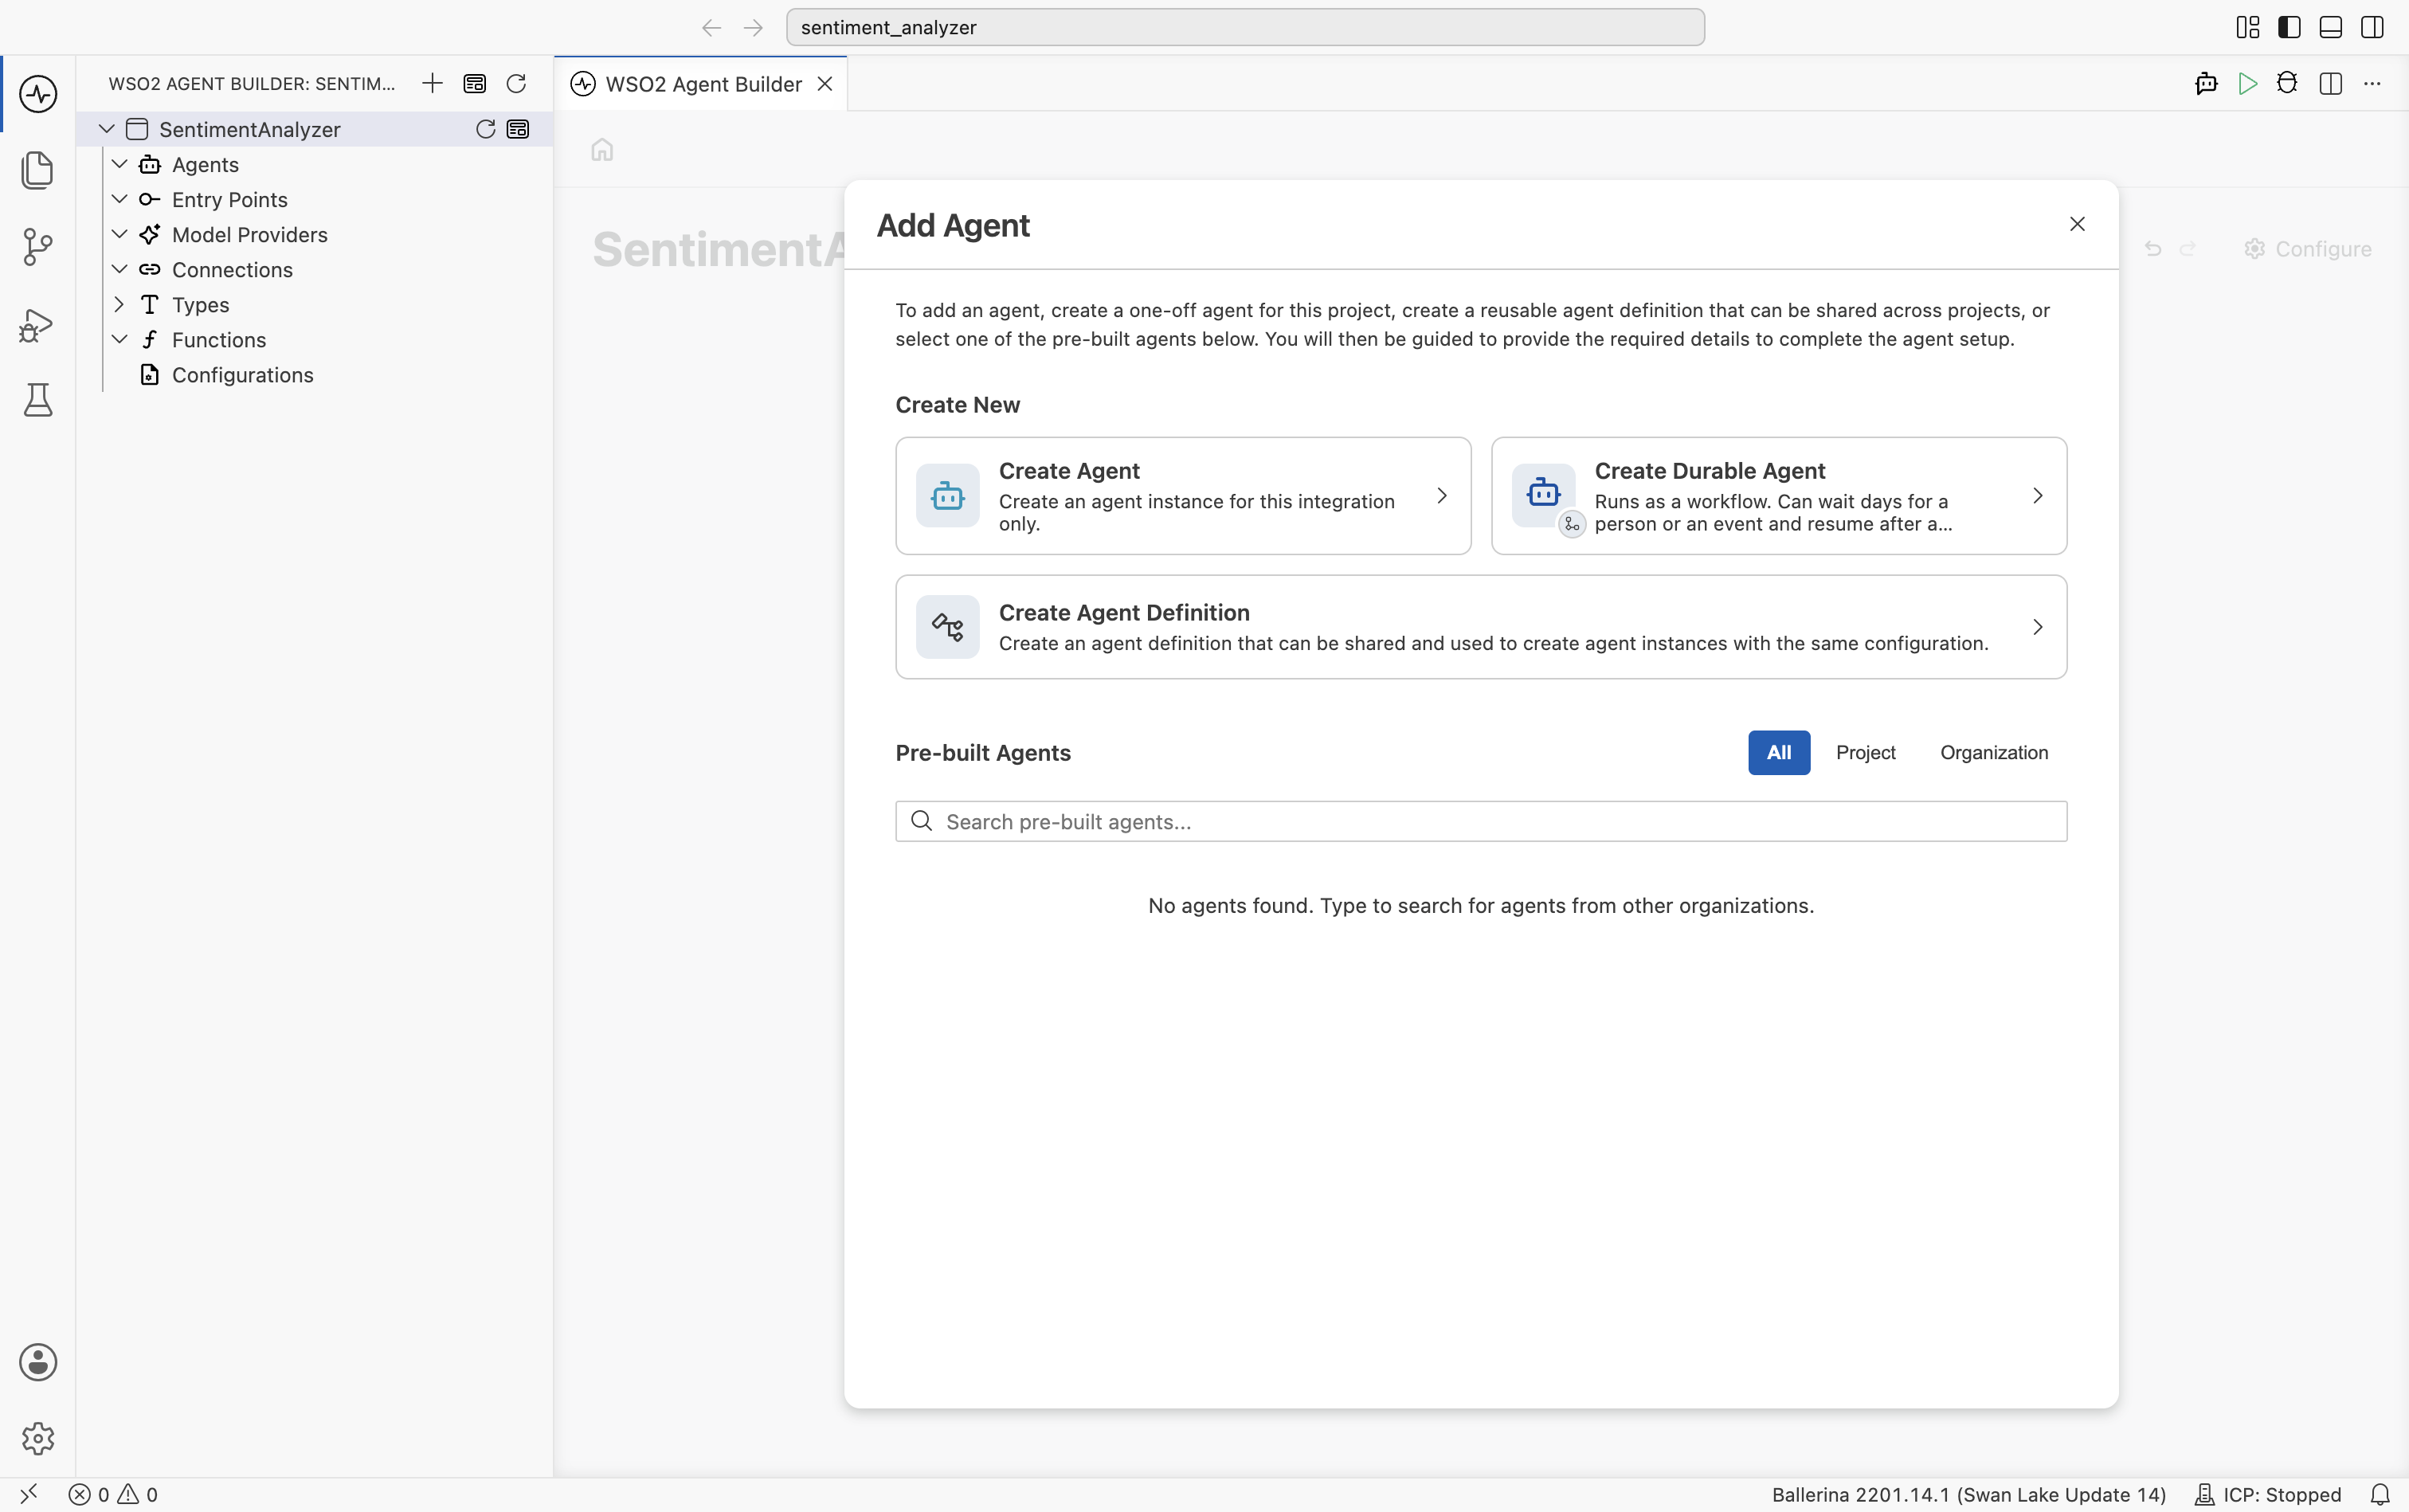
- In the Add Agent dialog, select Create Agent under Create New.
-
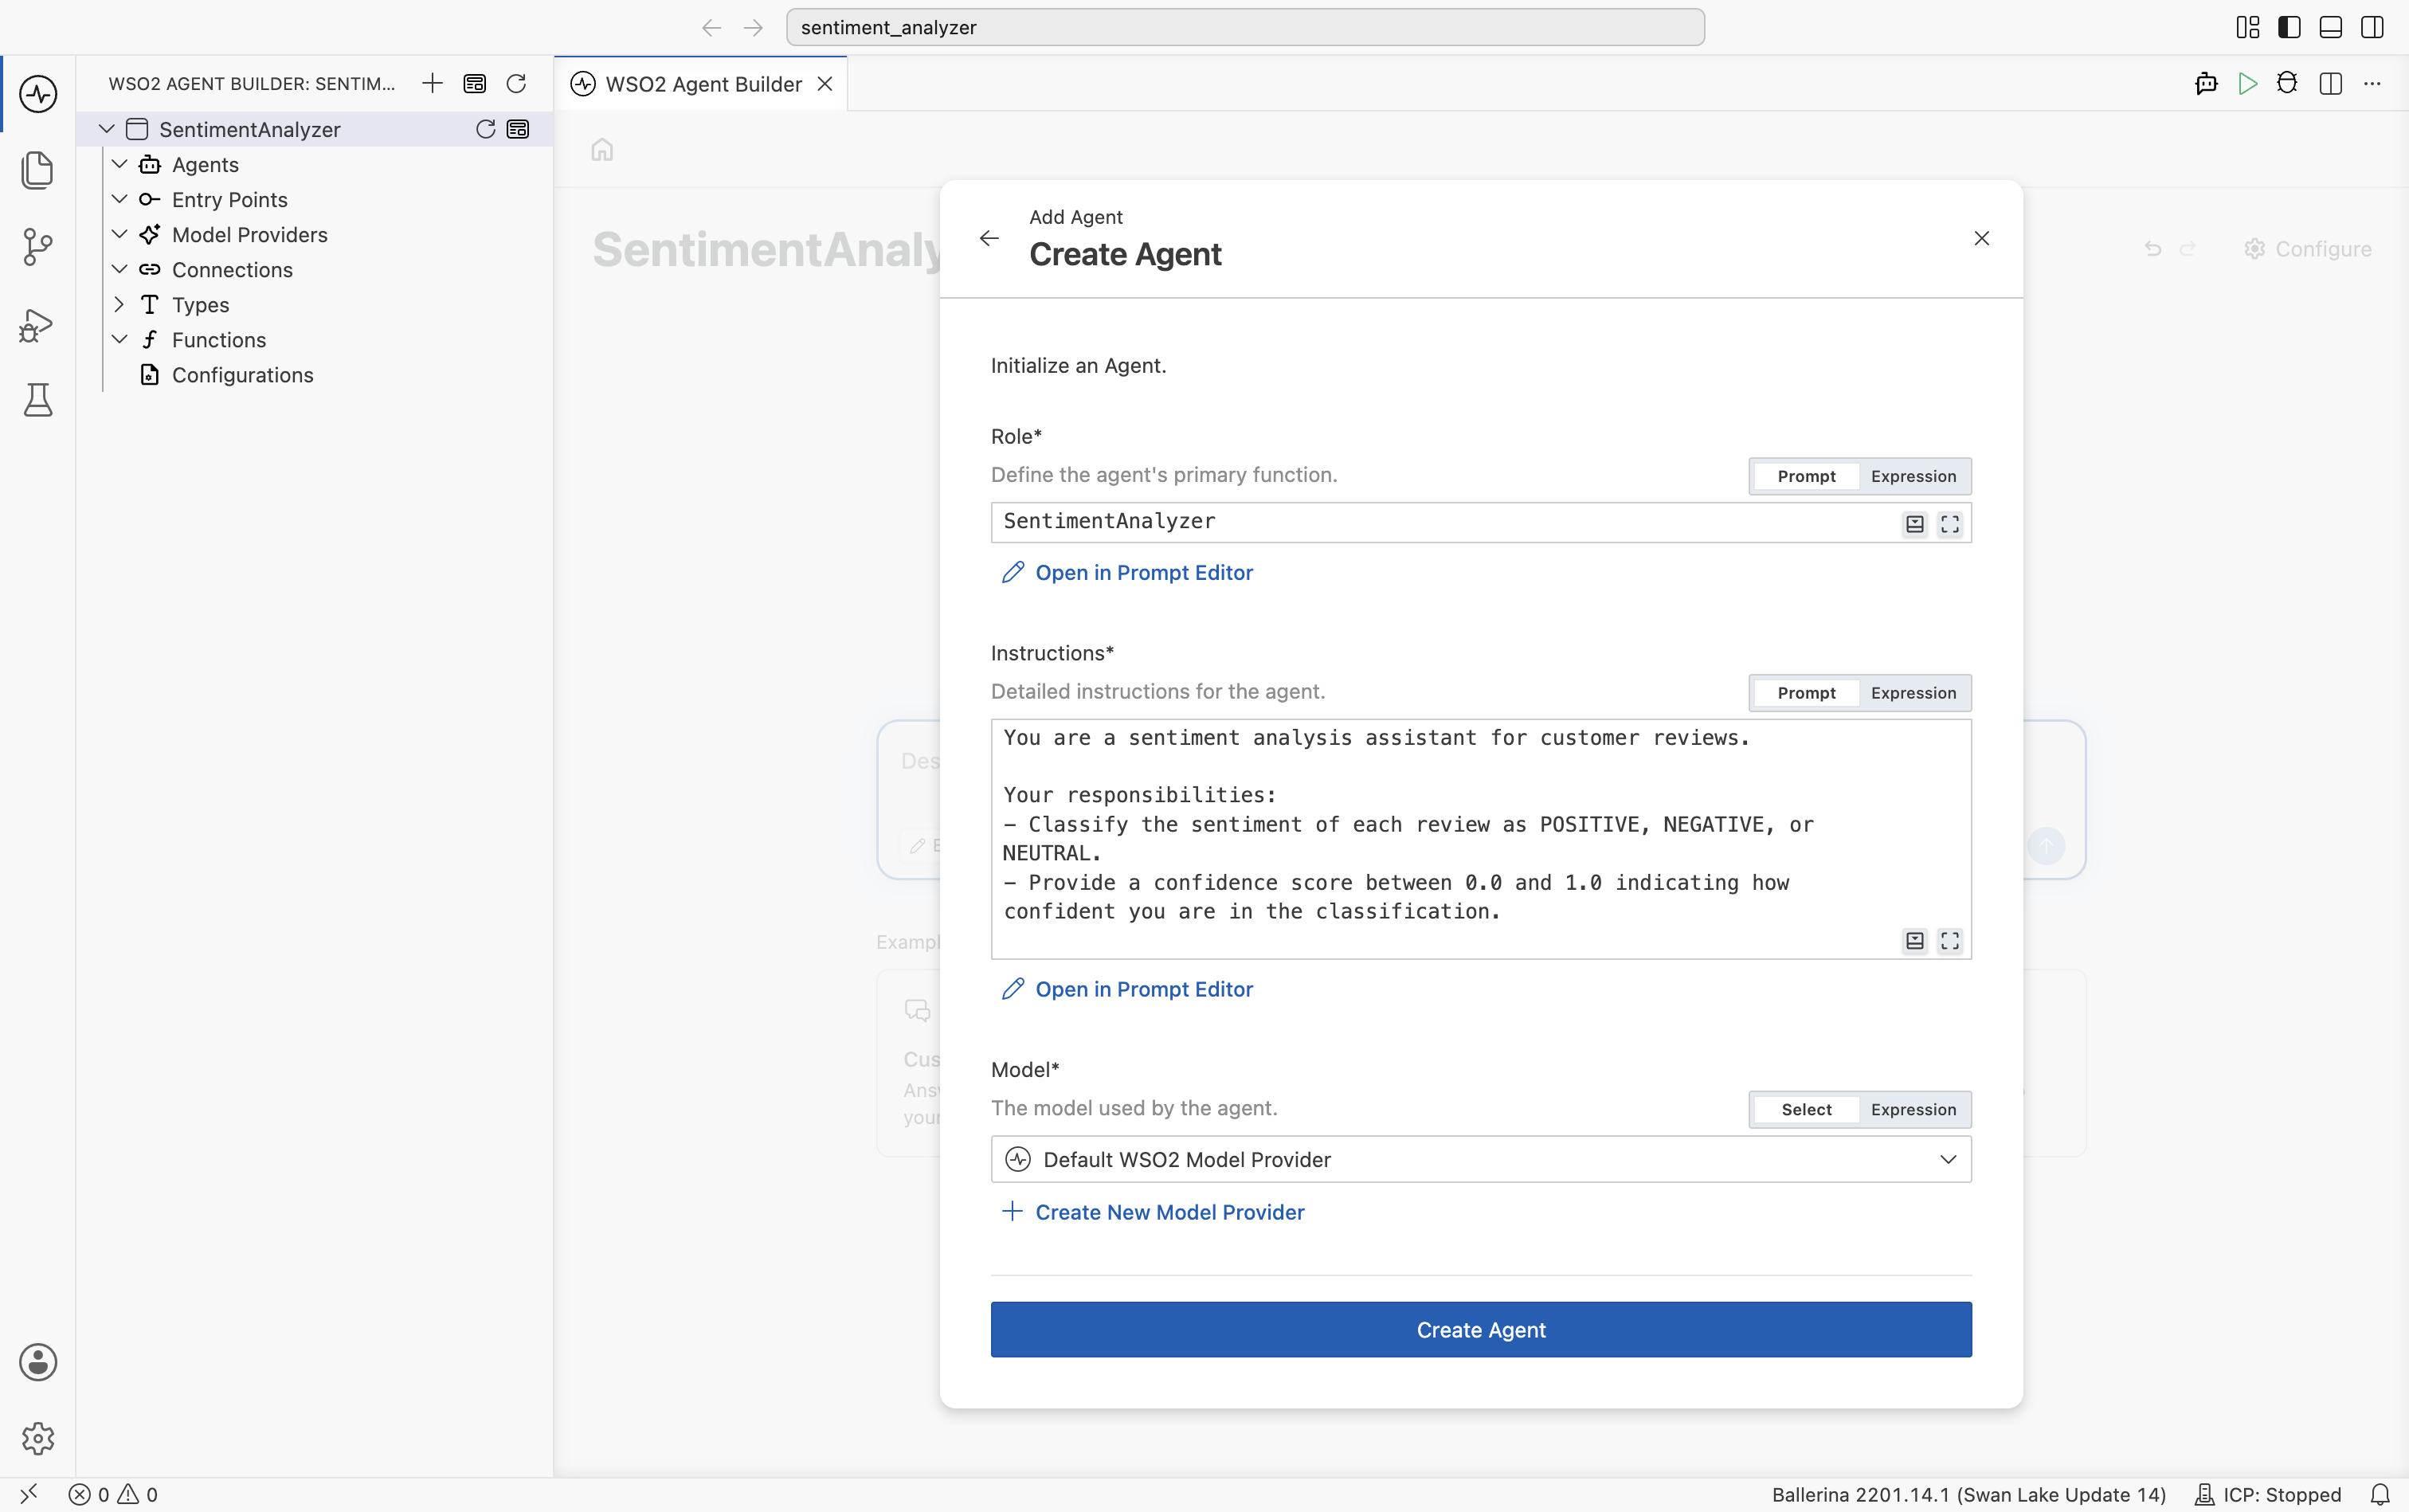
Set Role to
SentimentAnalyzer. -
Set Instructions to:
You are a sentiment analysis assistant for customer reviews.

Your responsibilities:
- Classify the sentiment of each review as POSITIVE, NEGATIVE, or NEUTRAL.
- Provide a confidence score between 0.0 and 1.0 indicating how confident you are in the classification.
You don't need to describe the output format. The typed response you set on the HTTP trigger in Step 4 tells the model what shape to return.
-
Keep Model as Default WSO2 Model Provider. No third-party API key is required. To use a different LLM, see Model providers.
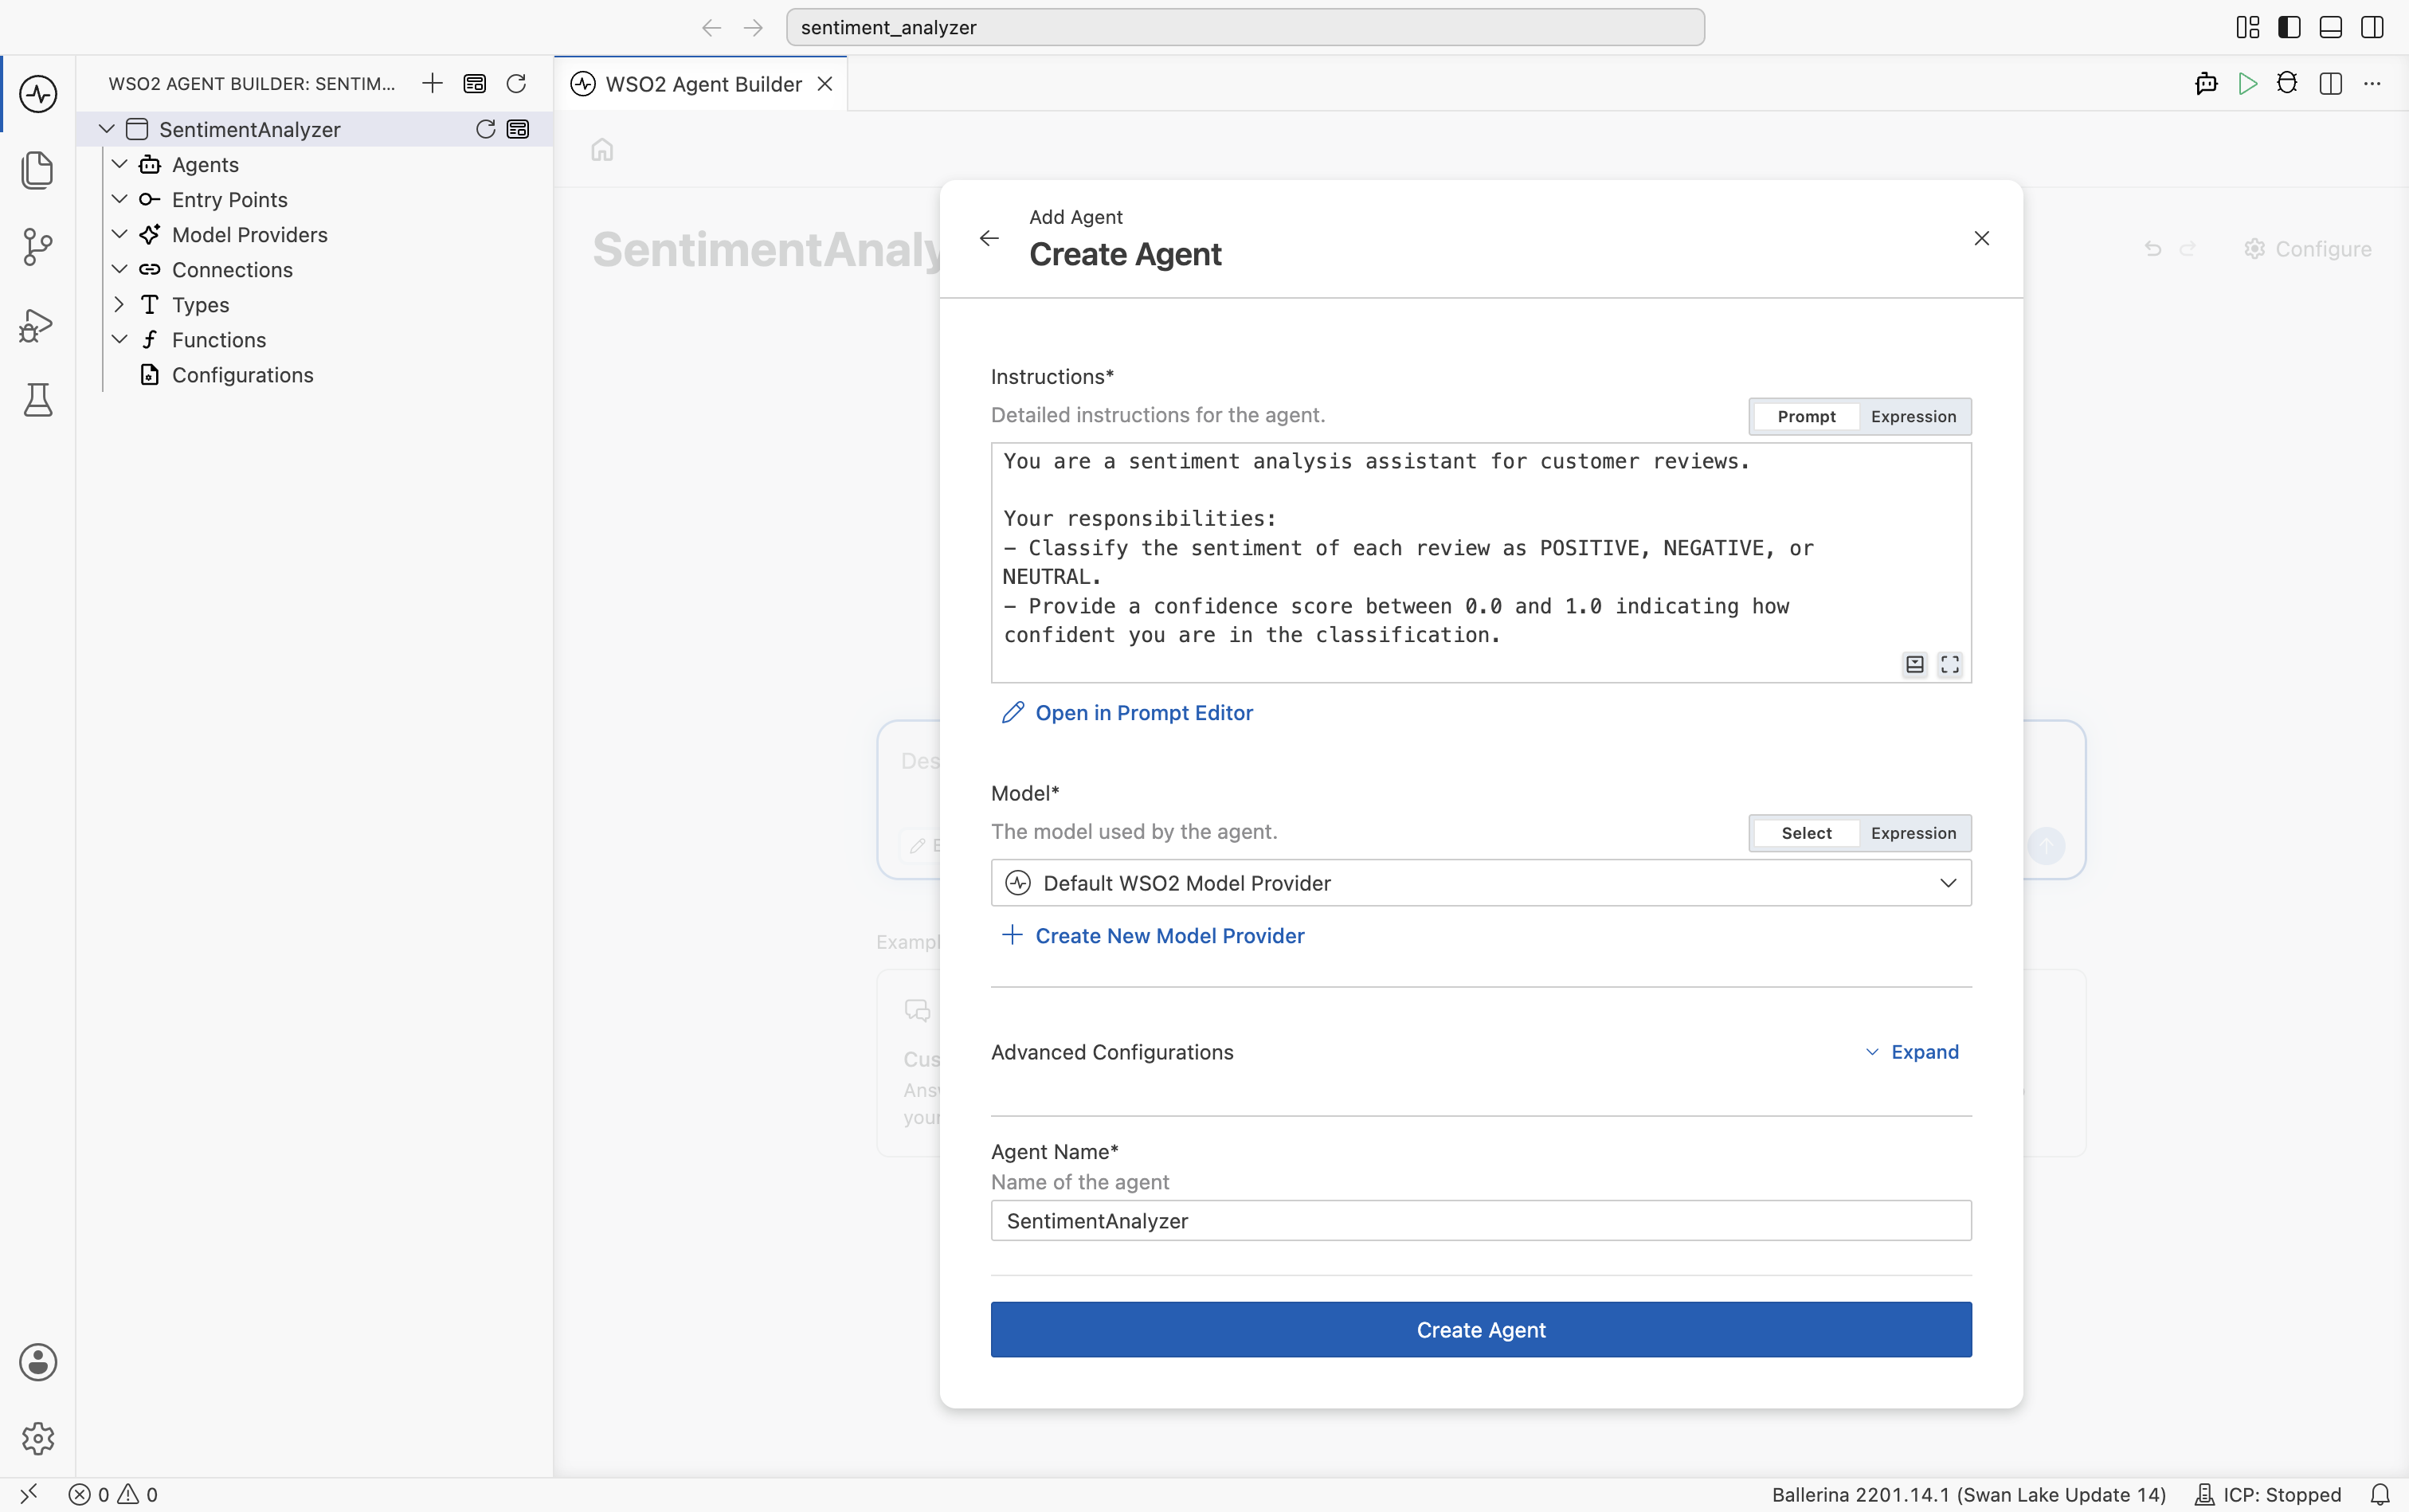
- Scroll down and set Agent Name to
SentimentAnalyzer. - Select Create Agent.
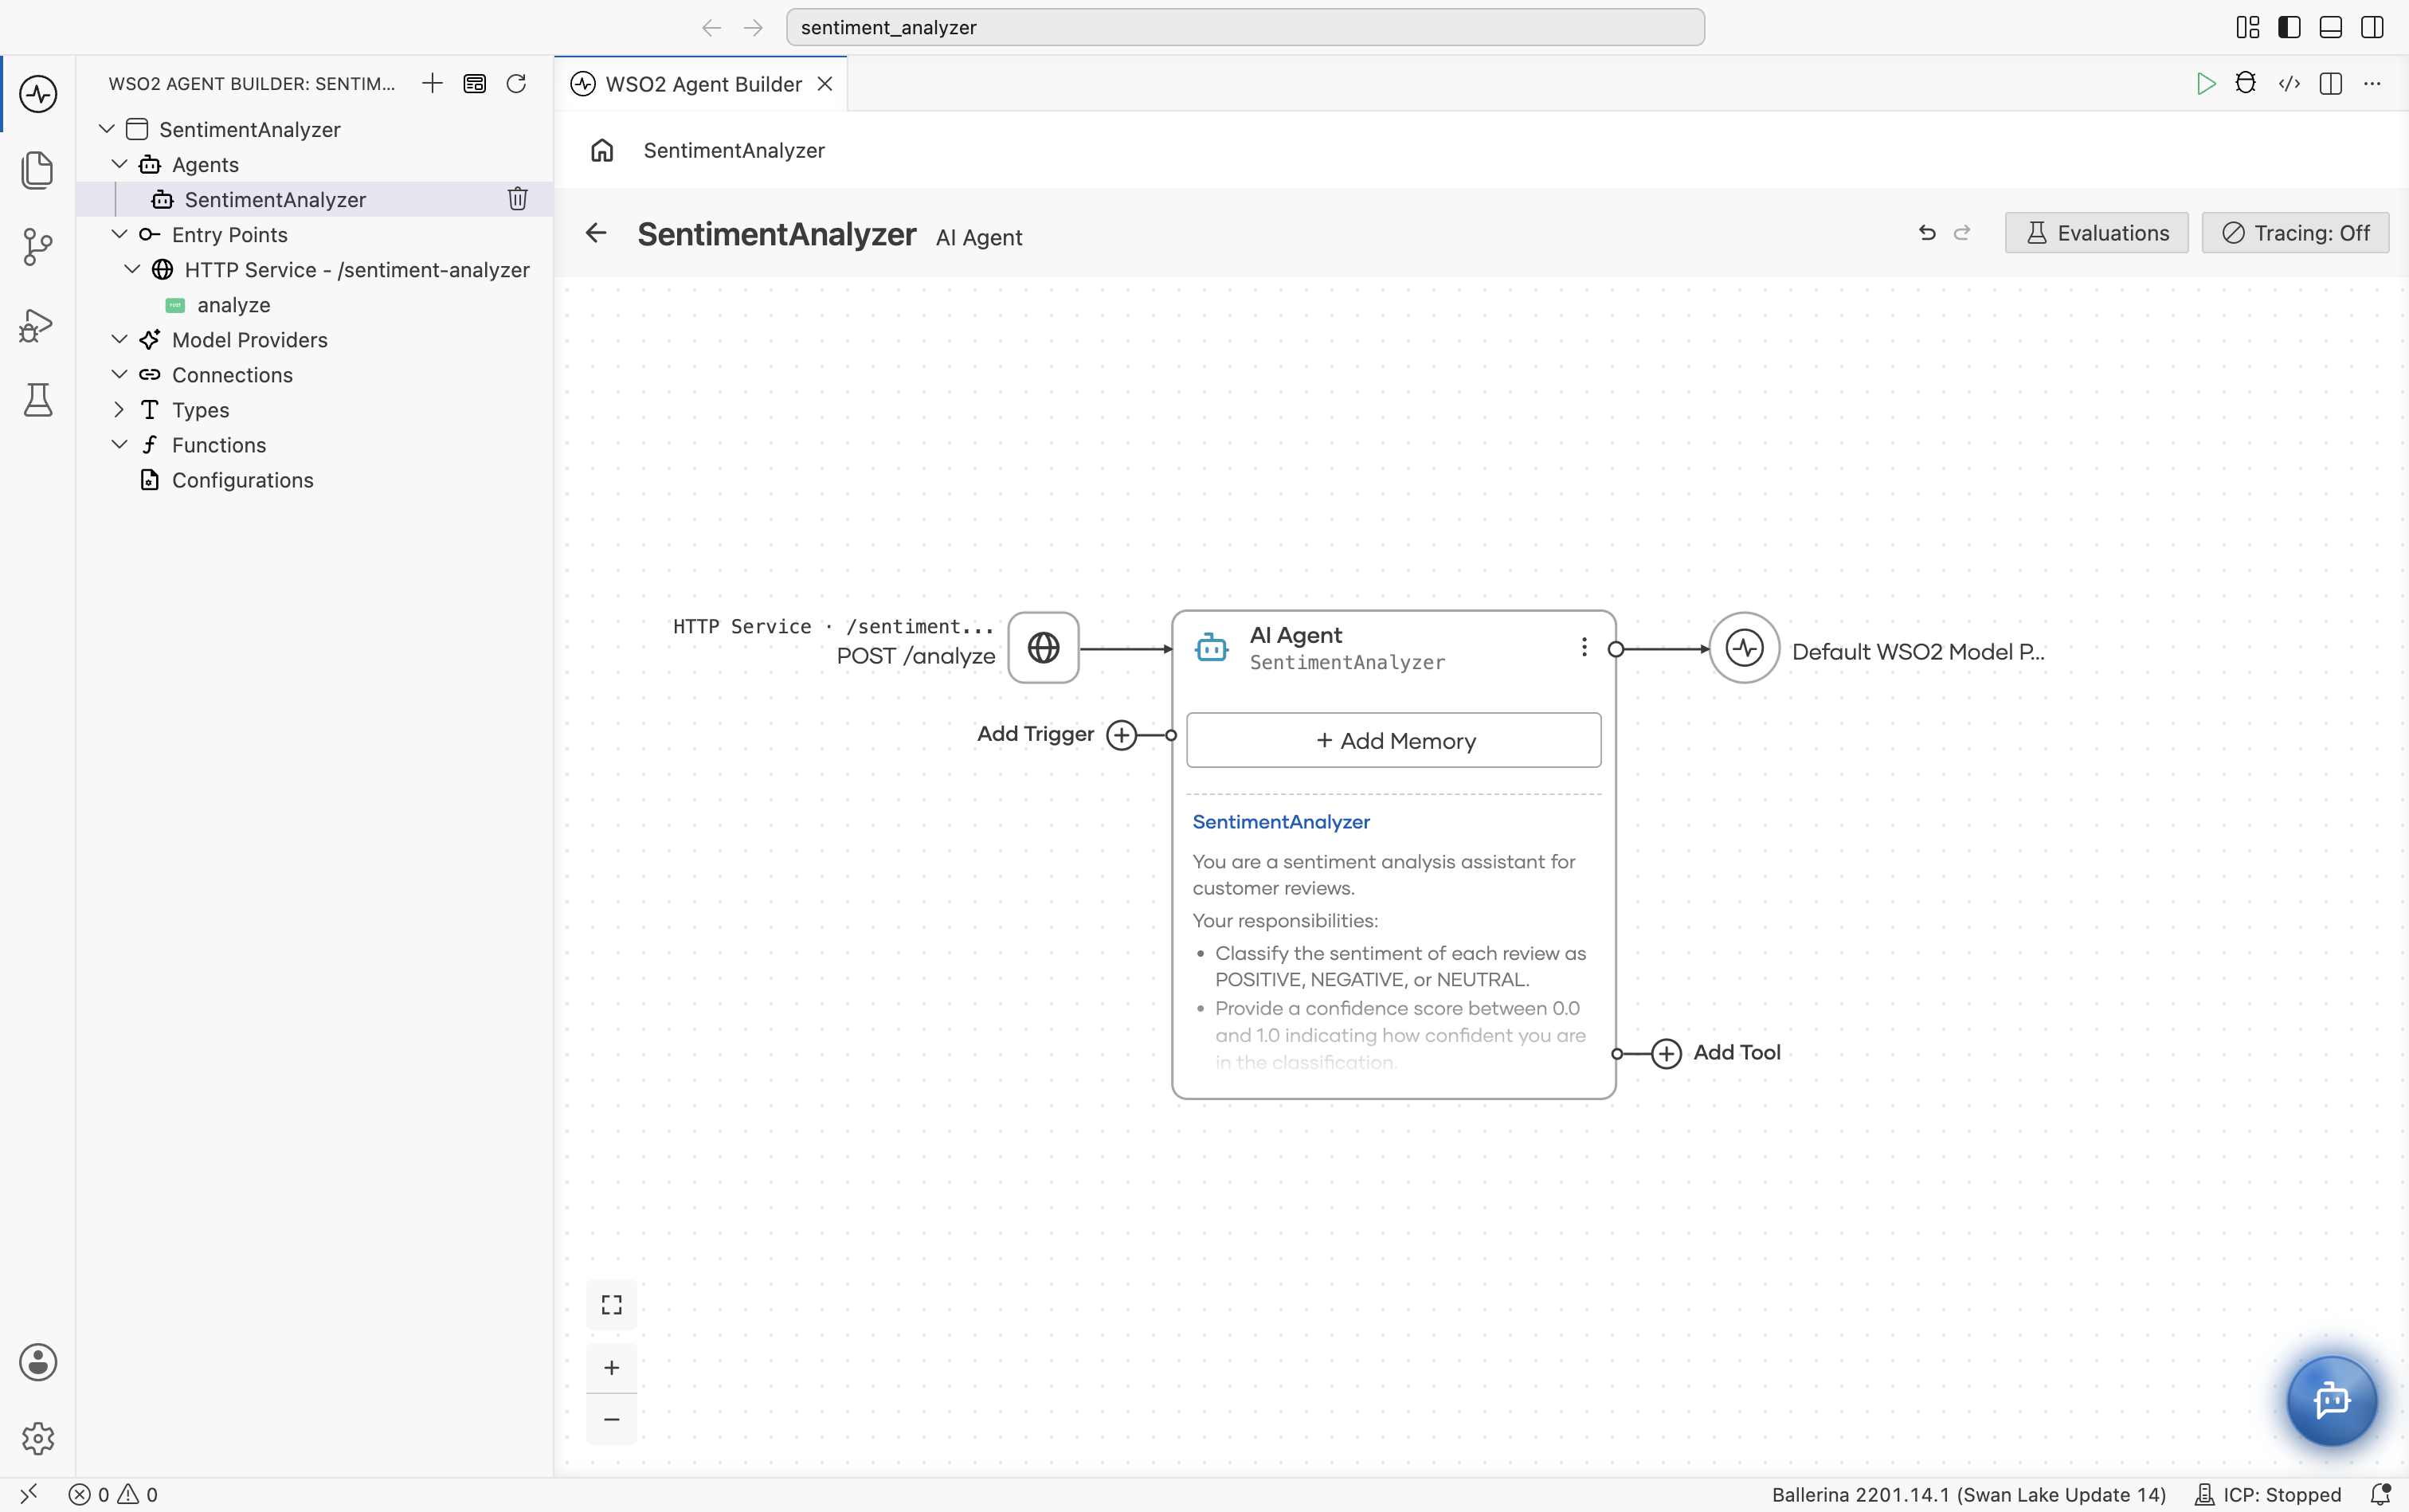
The agent canvas for SentimentAnalyzer shows the AI Agent node connected to Default WSO2 Model Provider, with Add Trigger on its left.
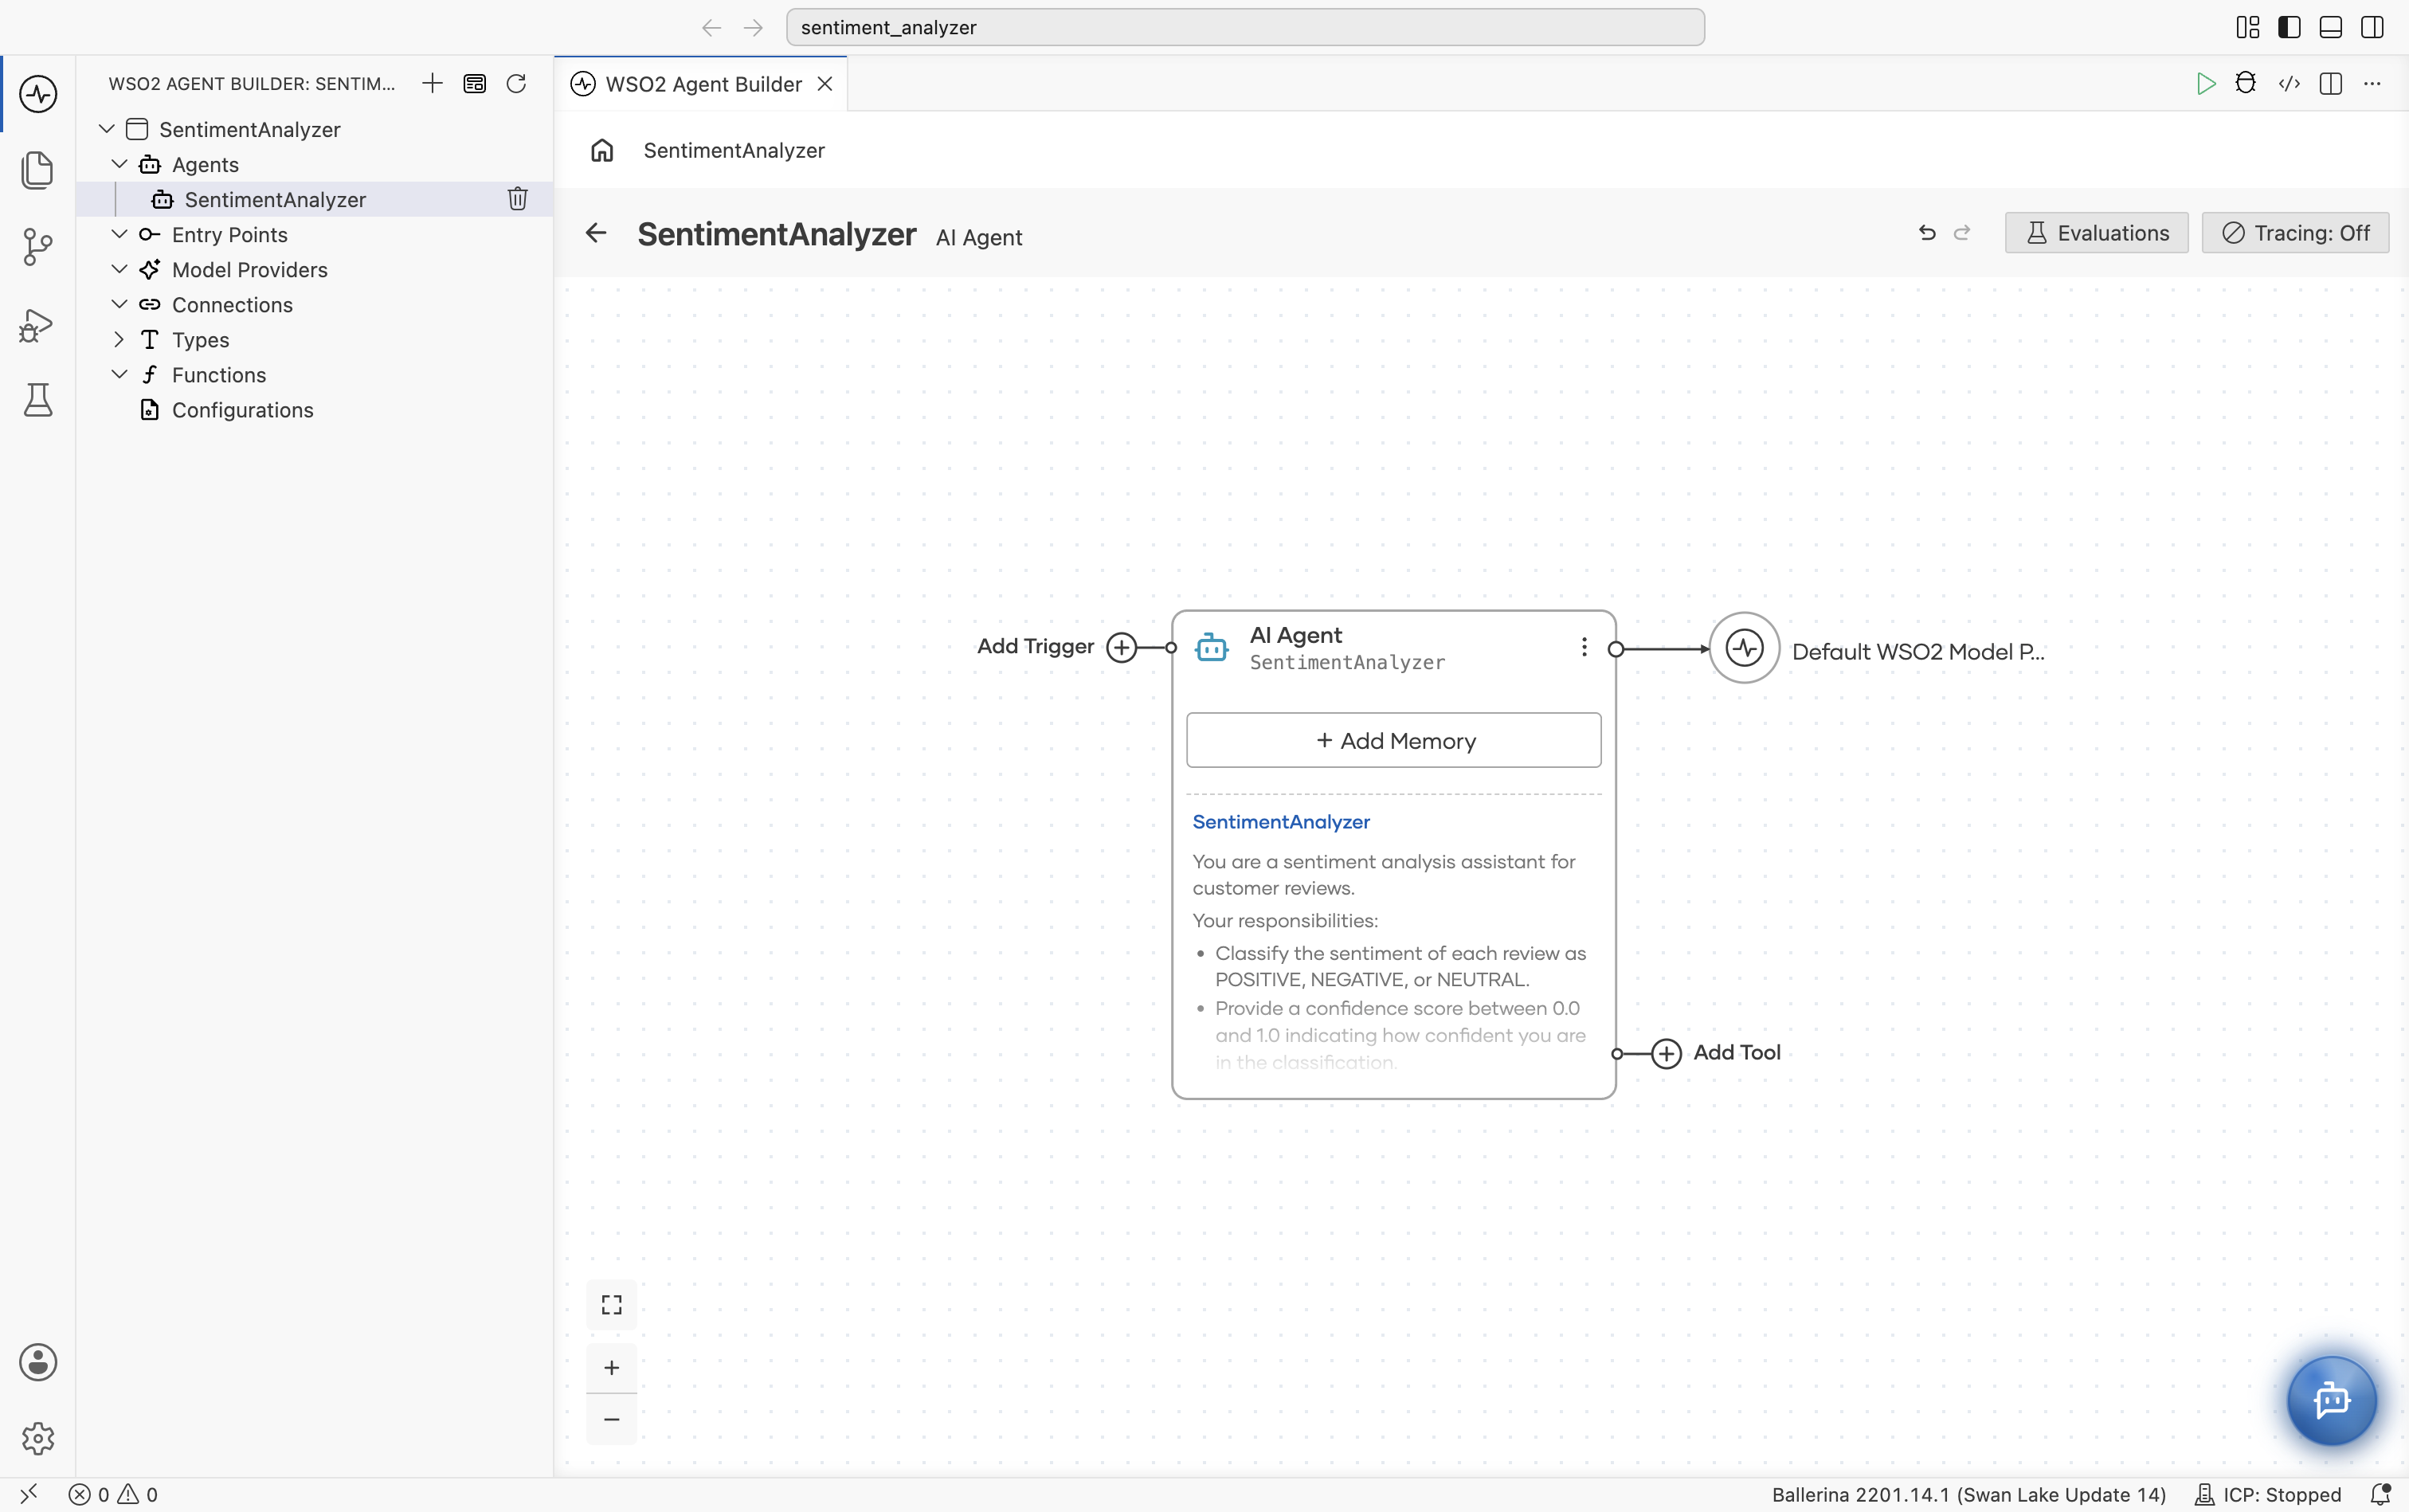
Step 4: Expose the agent through an HTTP trigger
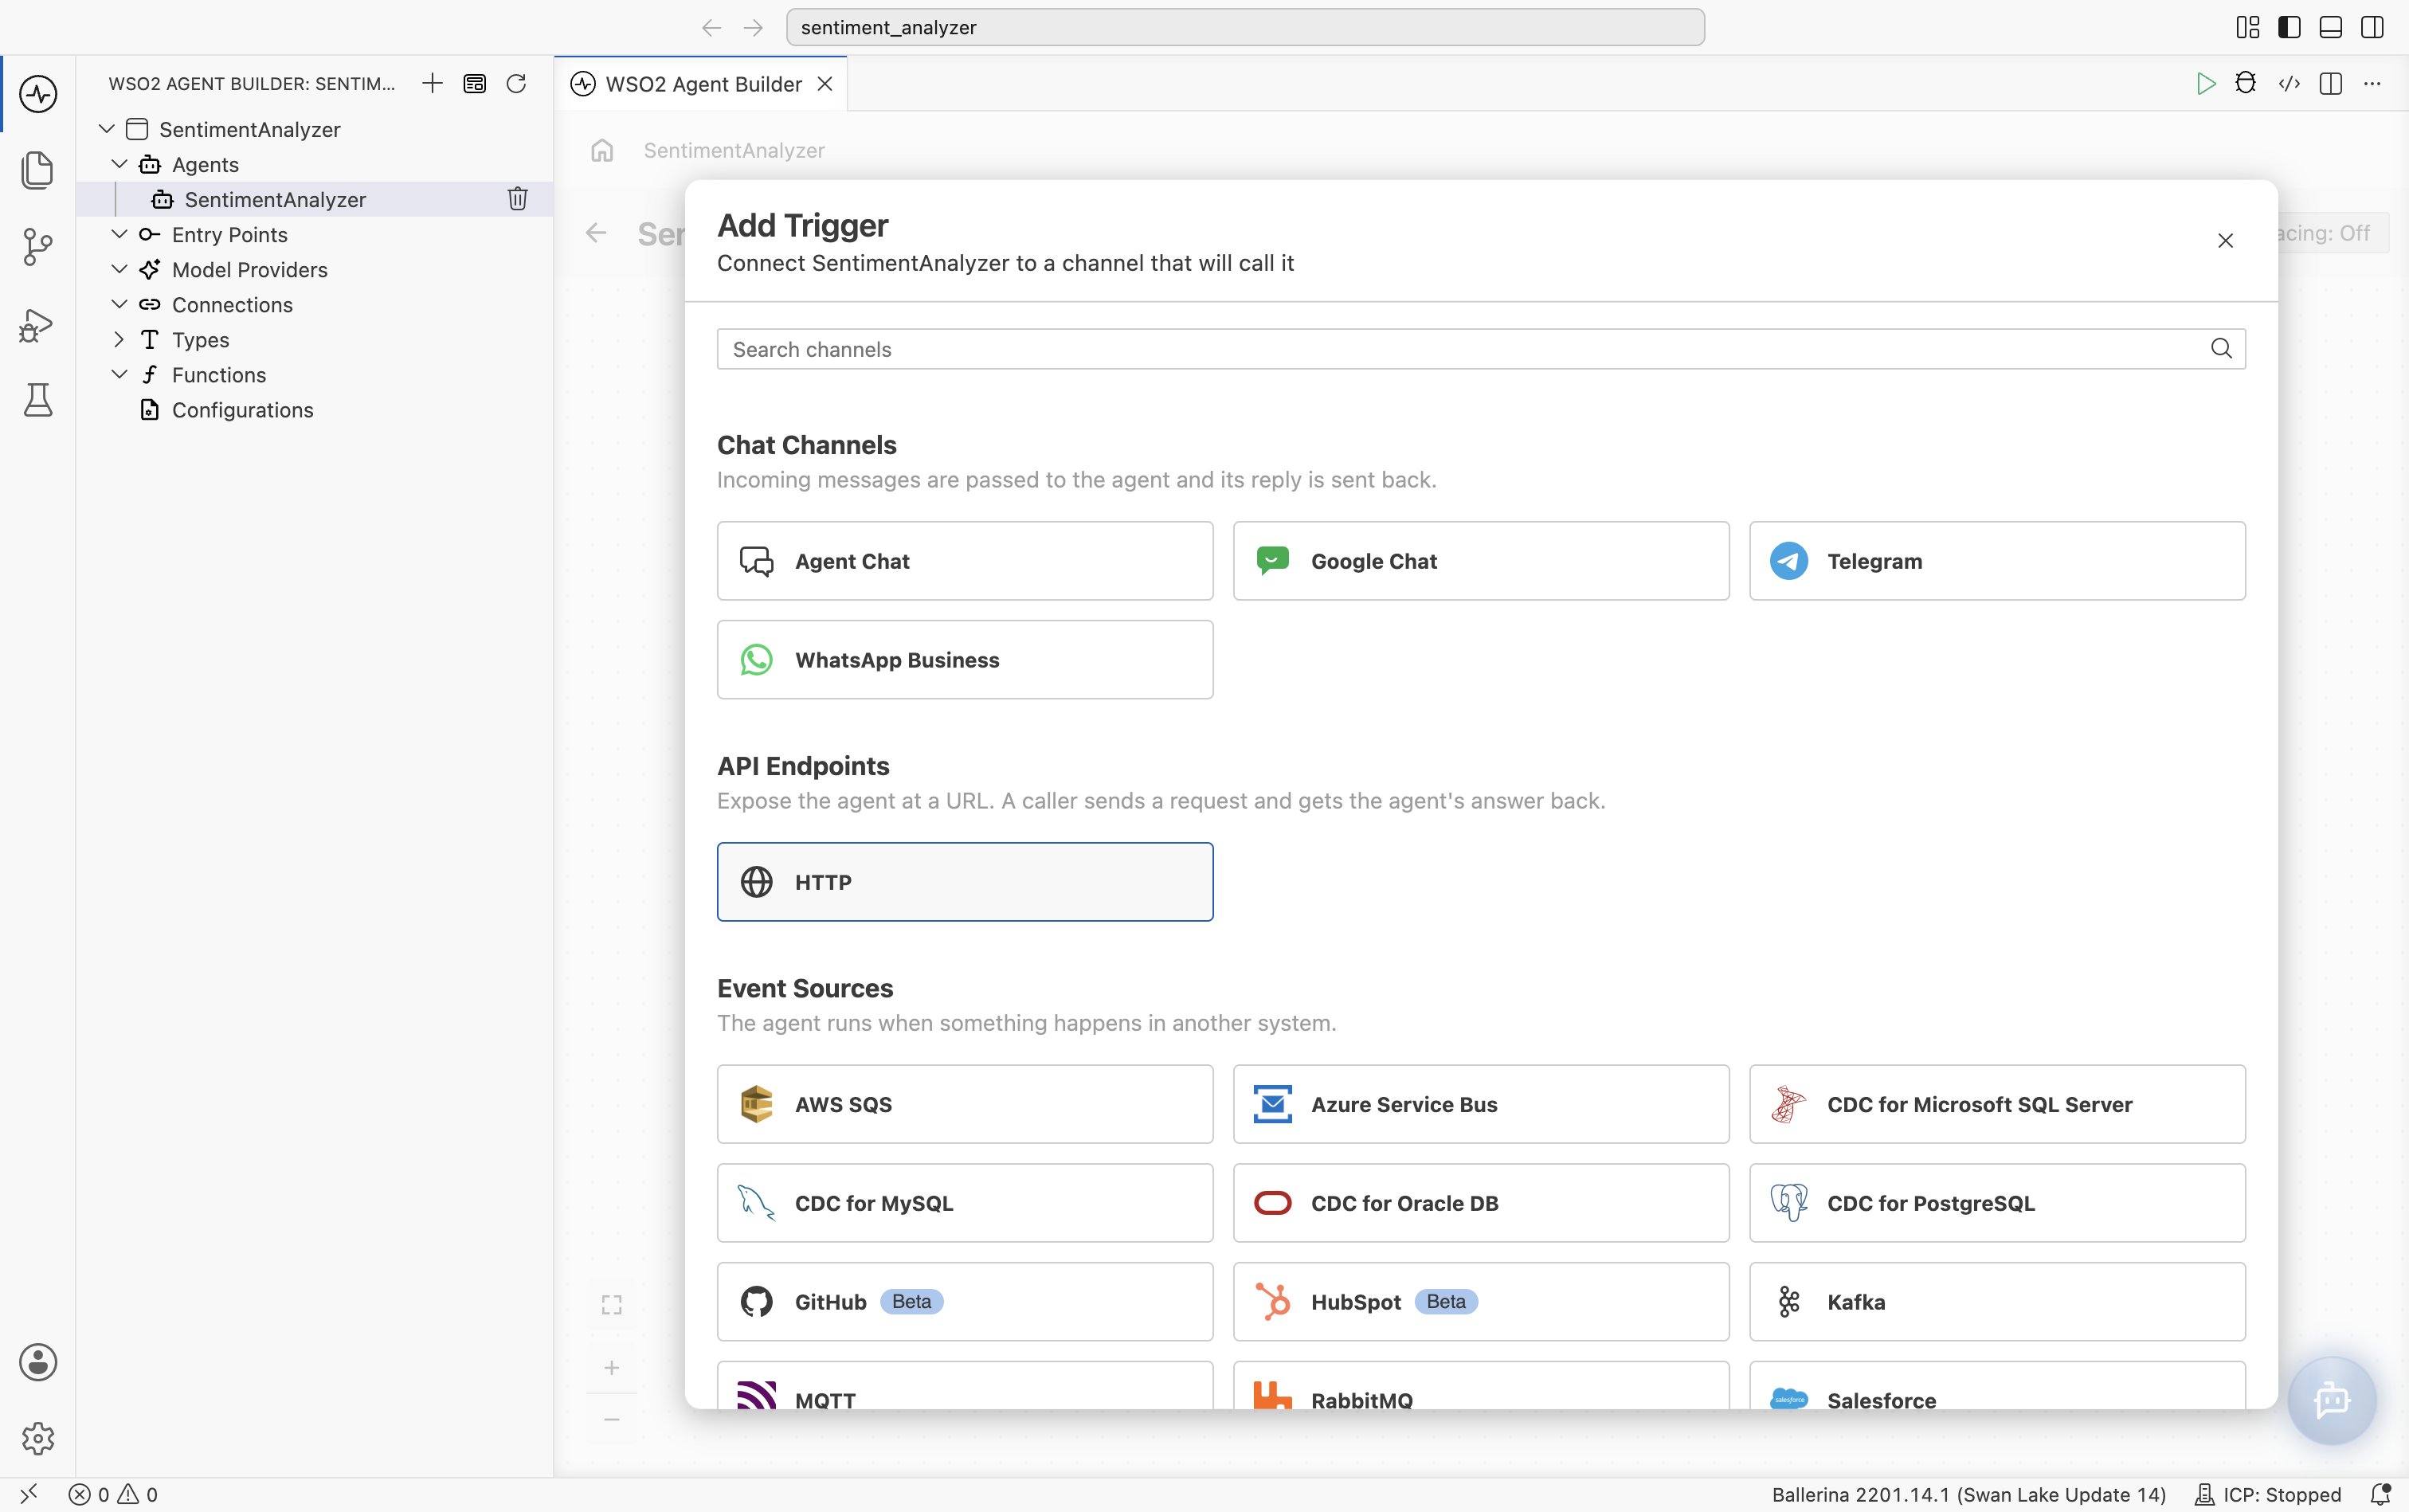
- Select Add Trigger on the left of the AI Agent node, then select HTTP under API Endpoints.
- Keep Endpoint Path as
/sentiment-analyzer. - Keep HTTP Method as POST and set Resource Path to
analyze.
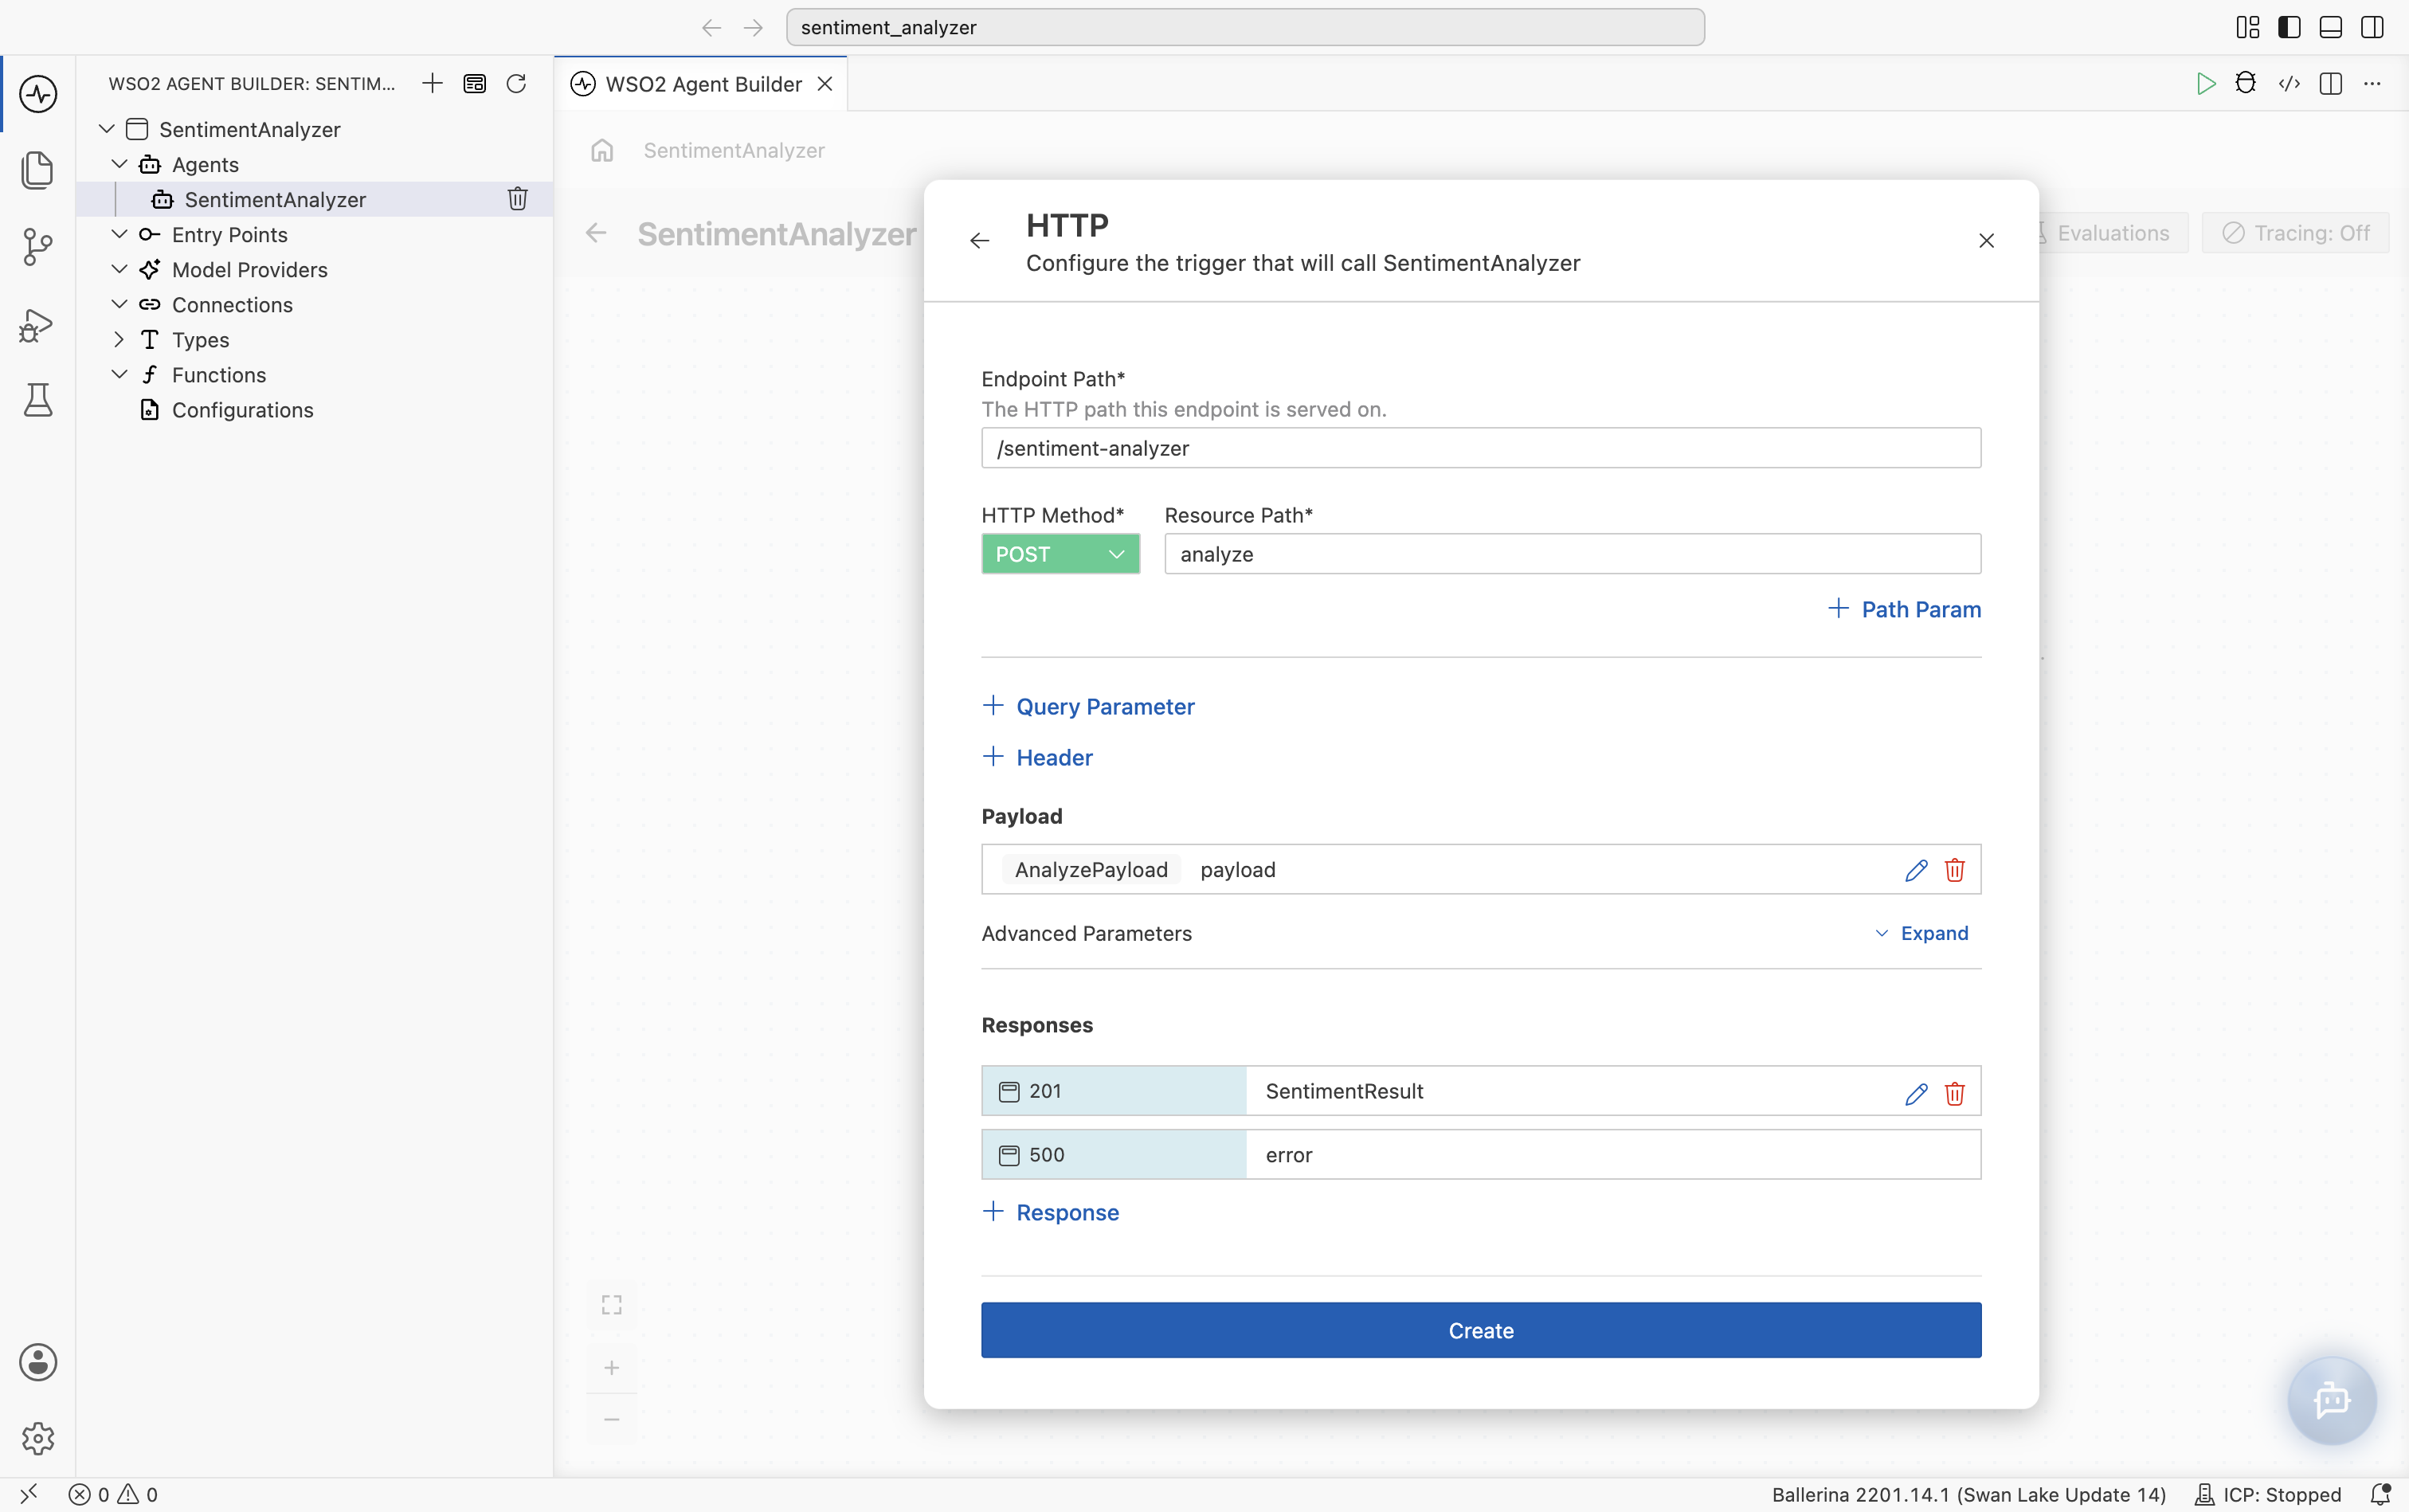
Define the request payload
- Under Payload, select the edit icon on the default
string payload. - Clear the Type field, type
AnalyzePayload, and select Add Type: AnalyzePayload. - In the Create New Type dialog, keep Kind as Record, select + next to Fields, and add a field
textof typestring. - Select Save in the dialog, then select Save on the payload panel.
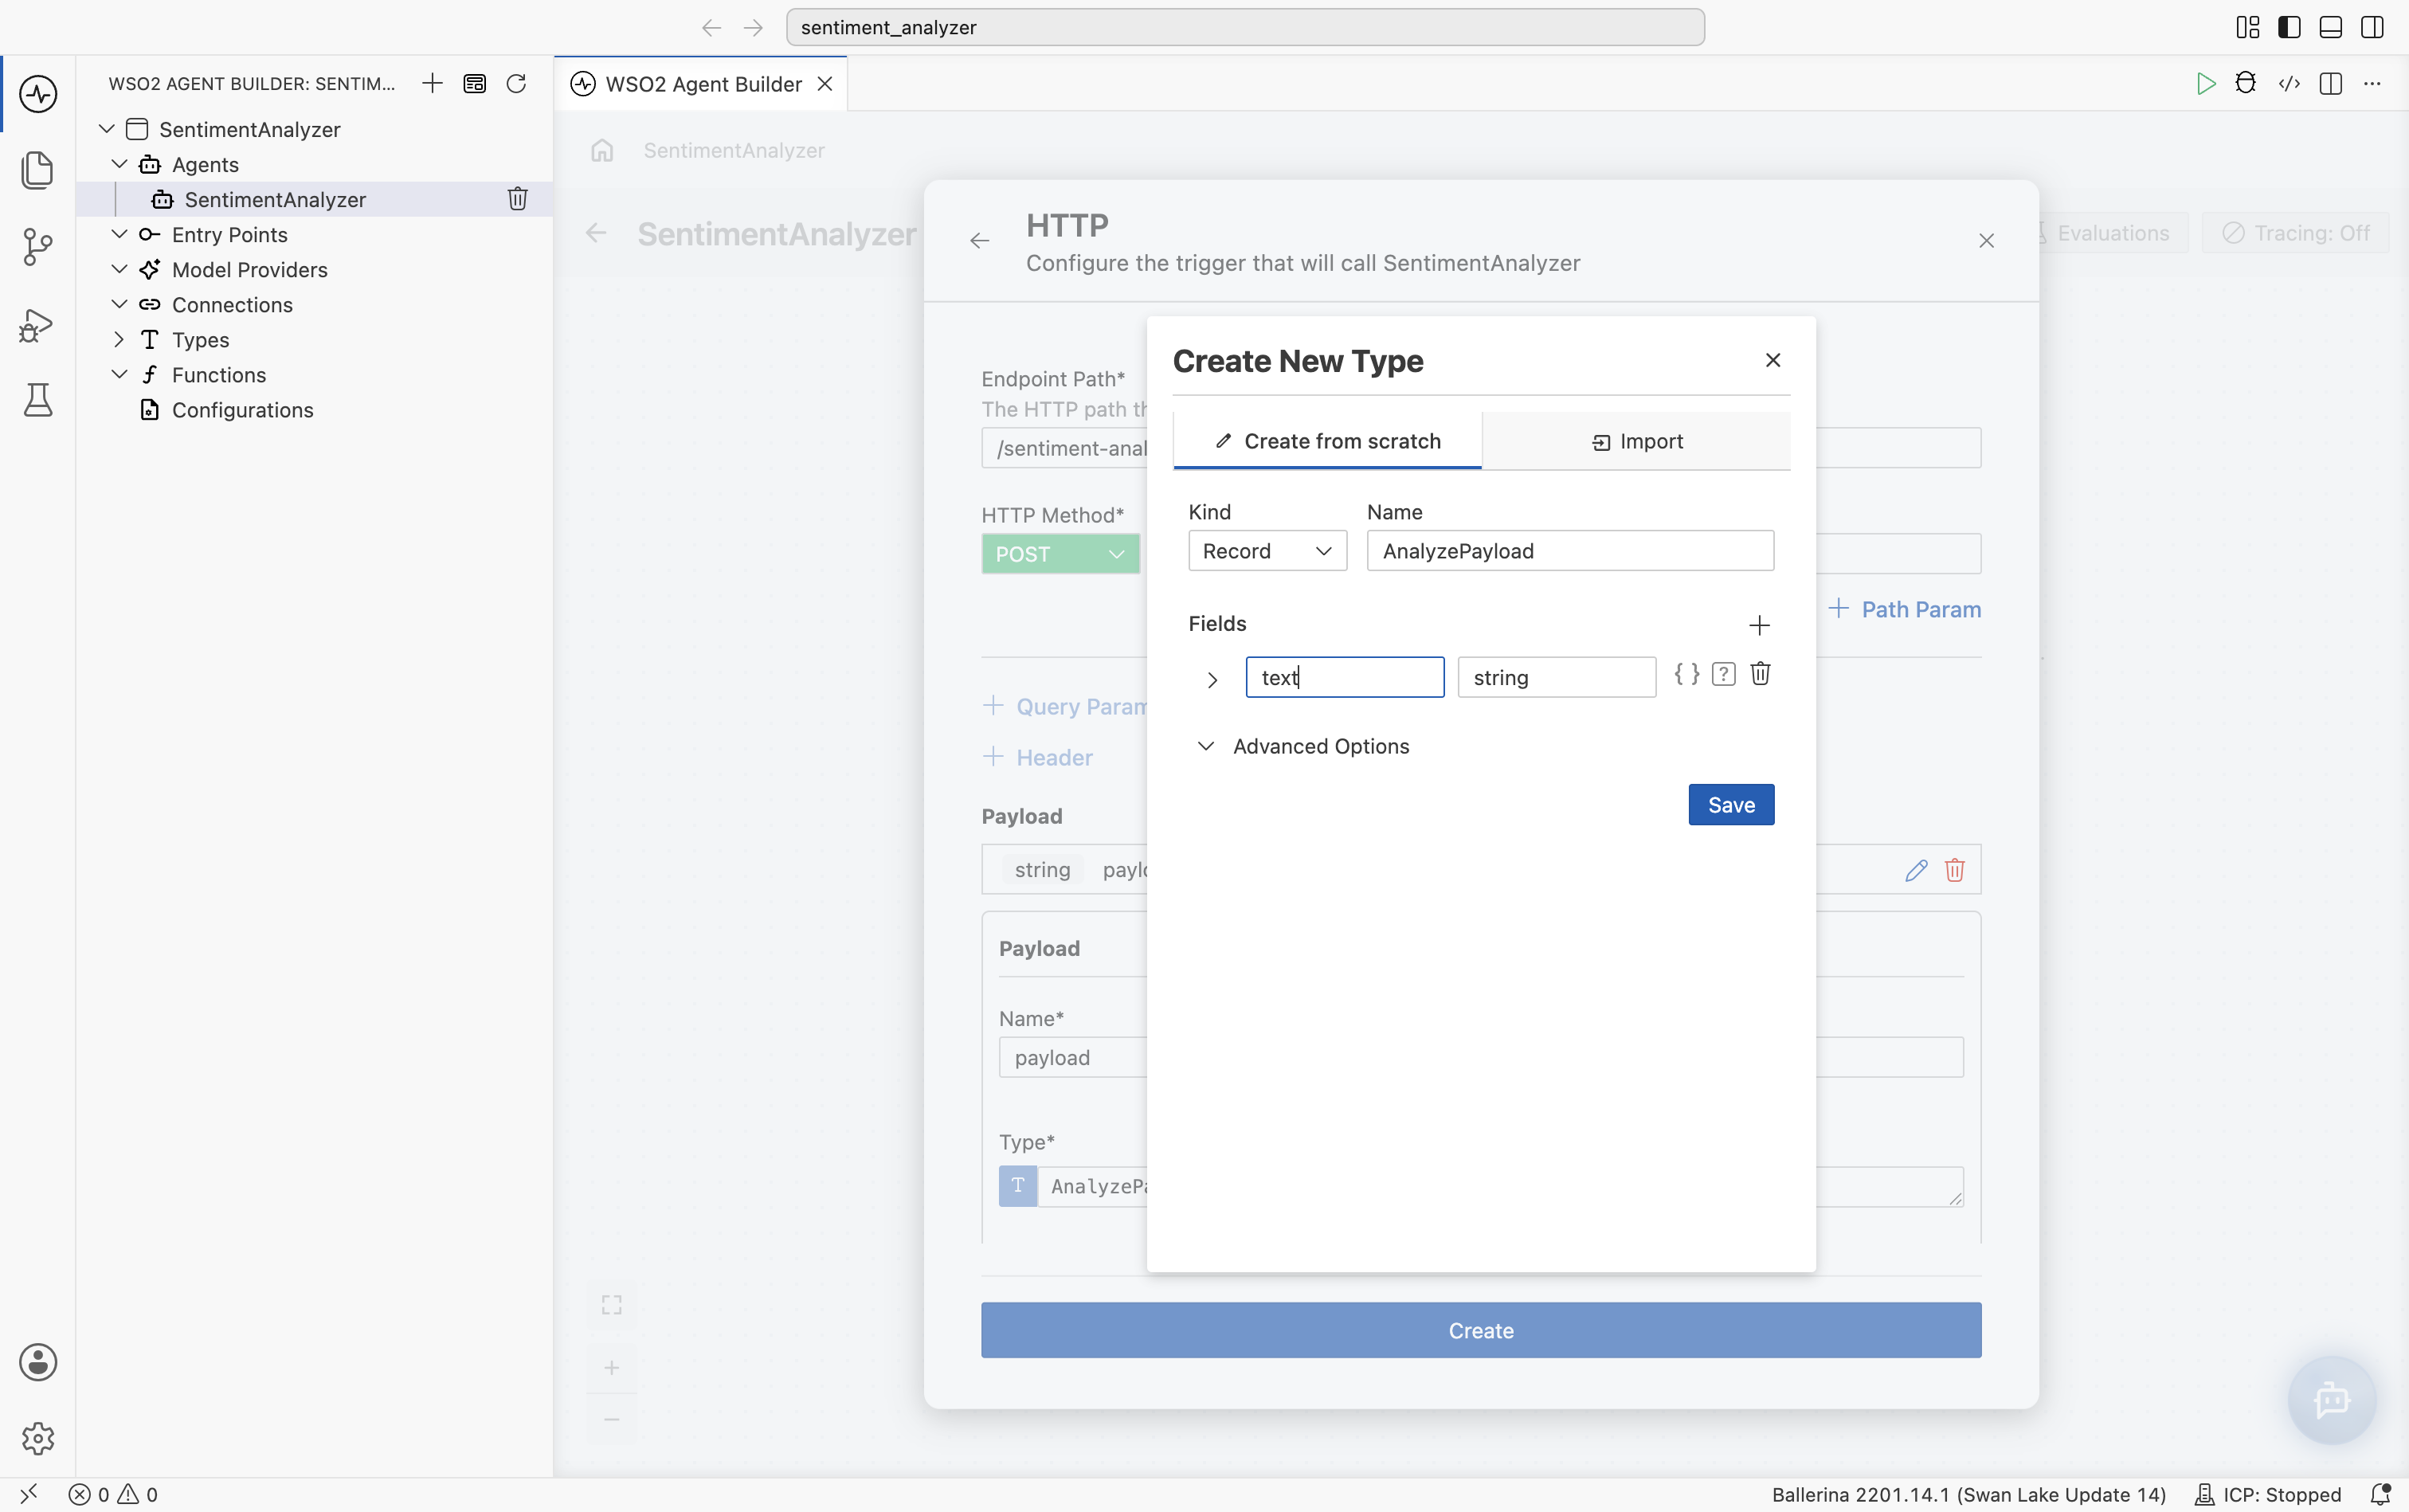
Define the response type
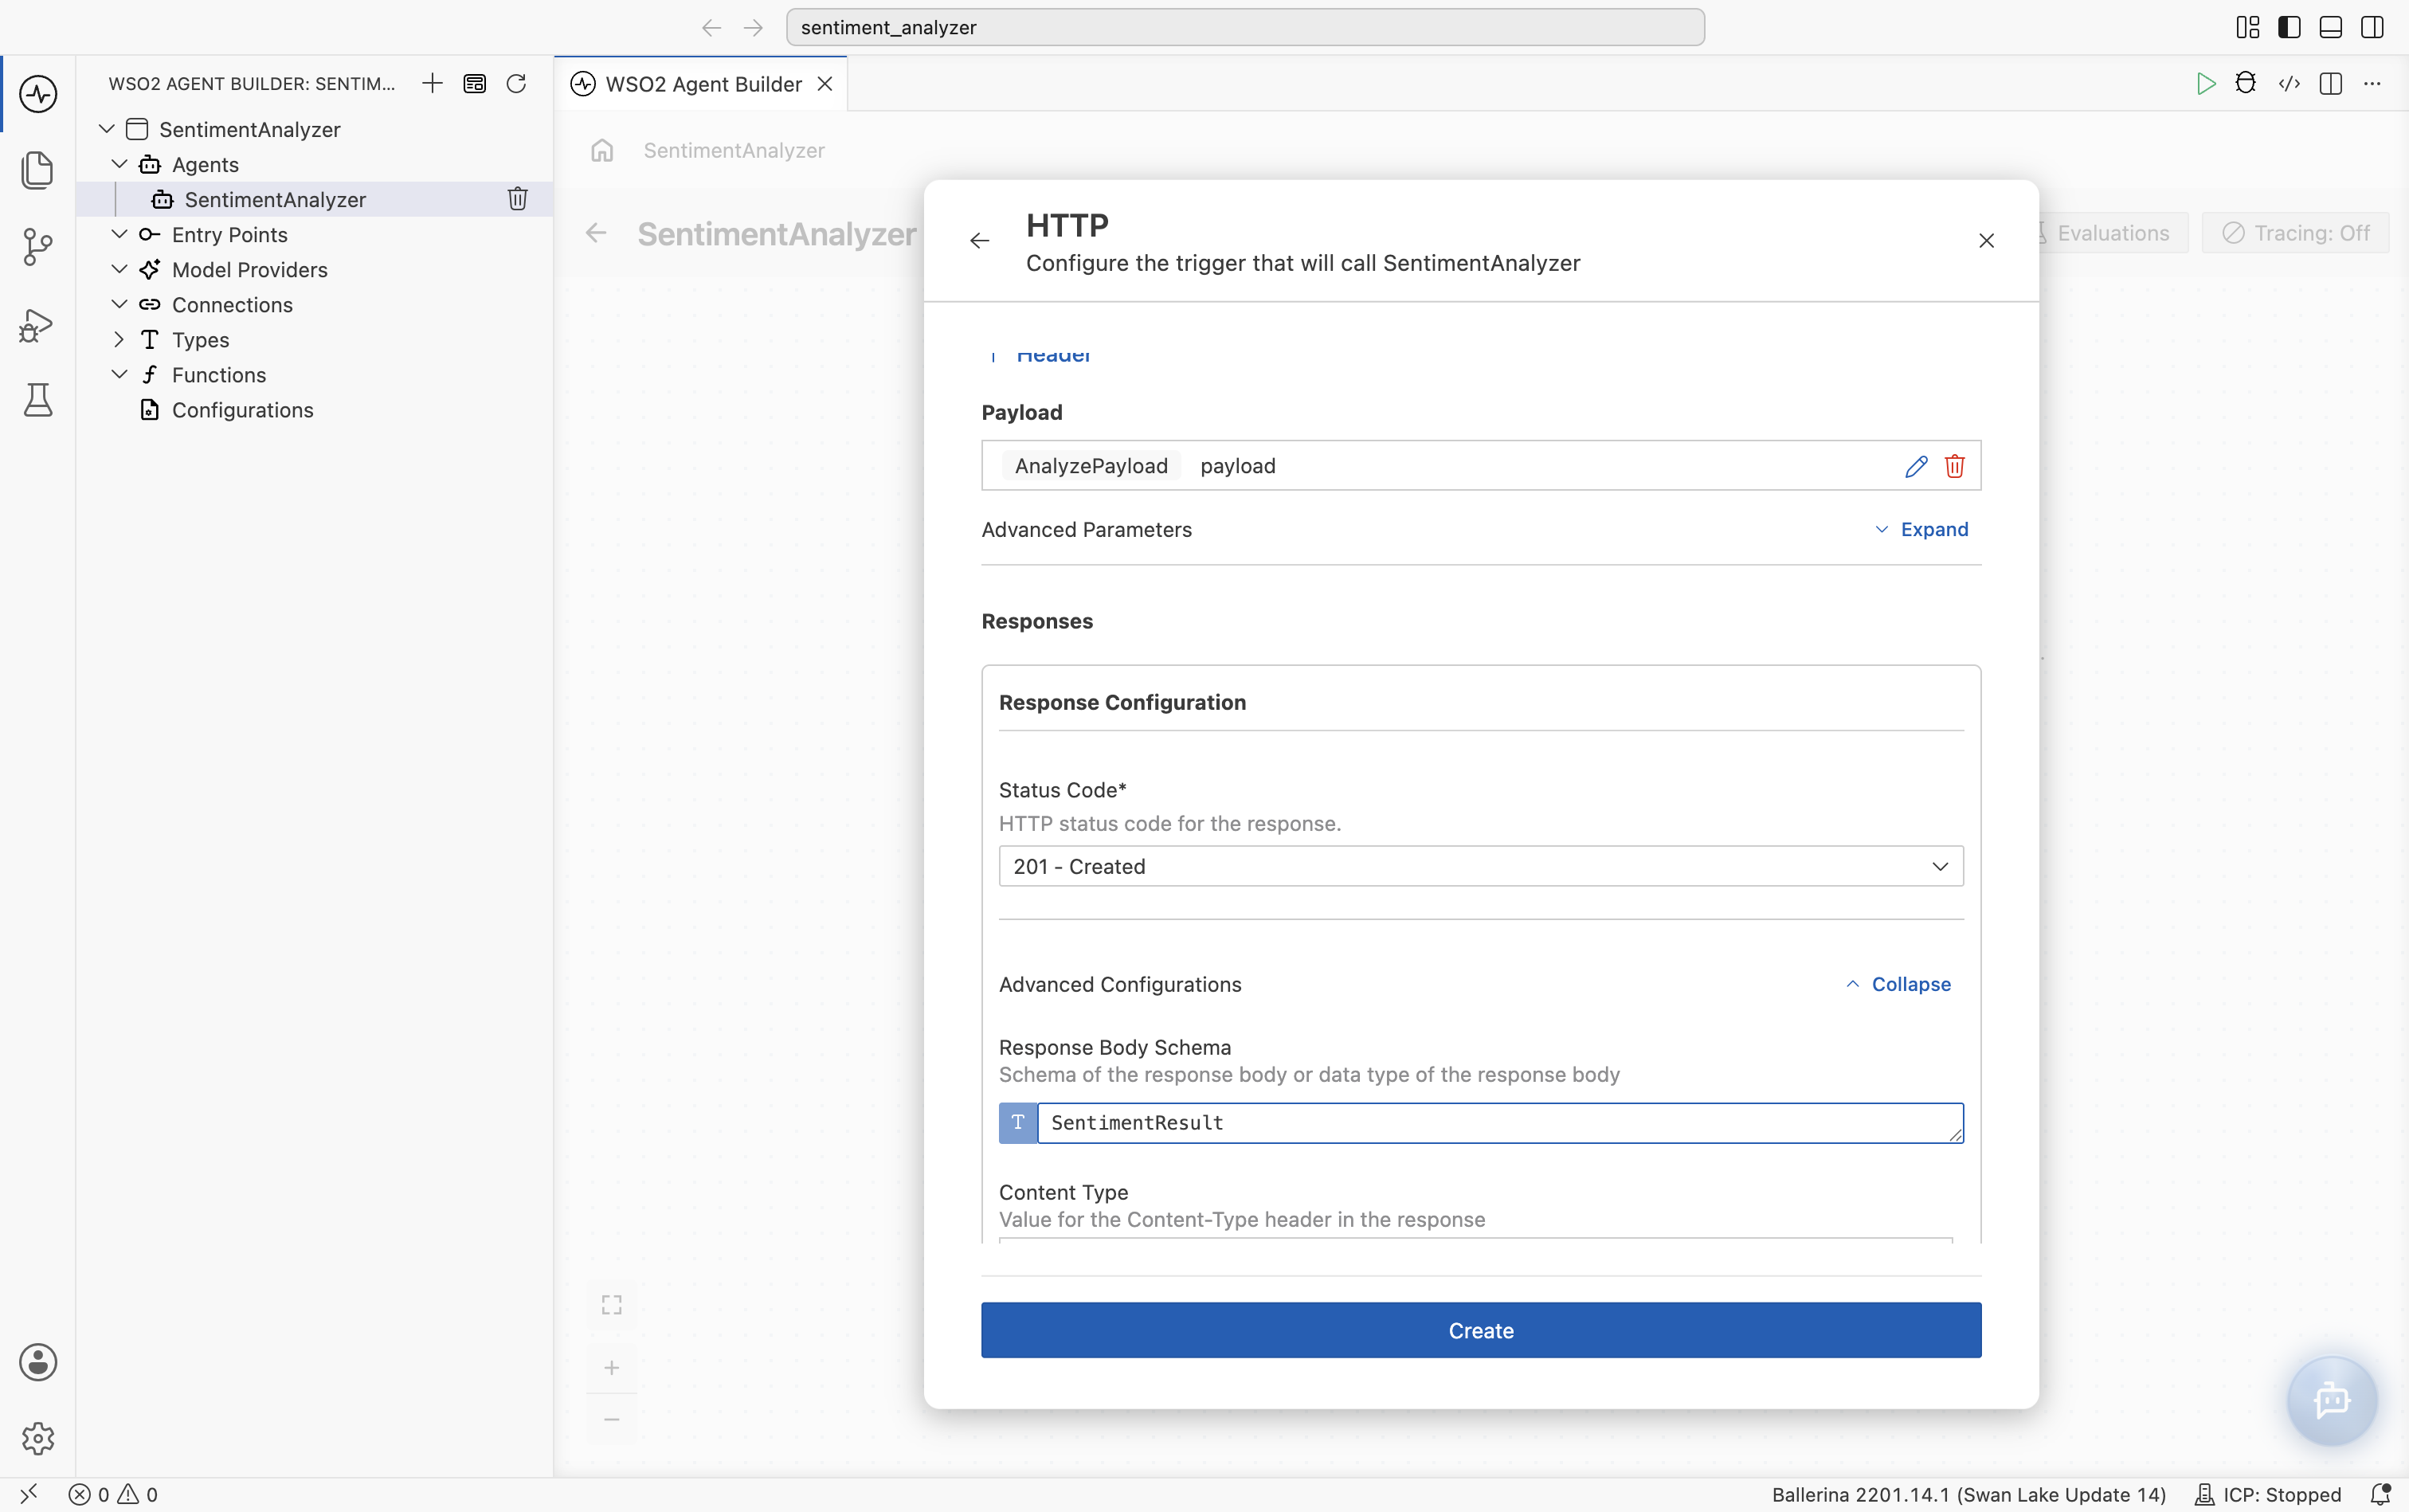
- Under Responses, select the edit icon on the
201response (Ballerina returns201 CreatedforPOSTresources by default). - Expand Advanced Configurations and set Response Body Schema to
SentimentResult. - Select Save on the response configuration.
Set the request instructions
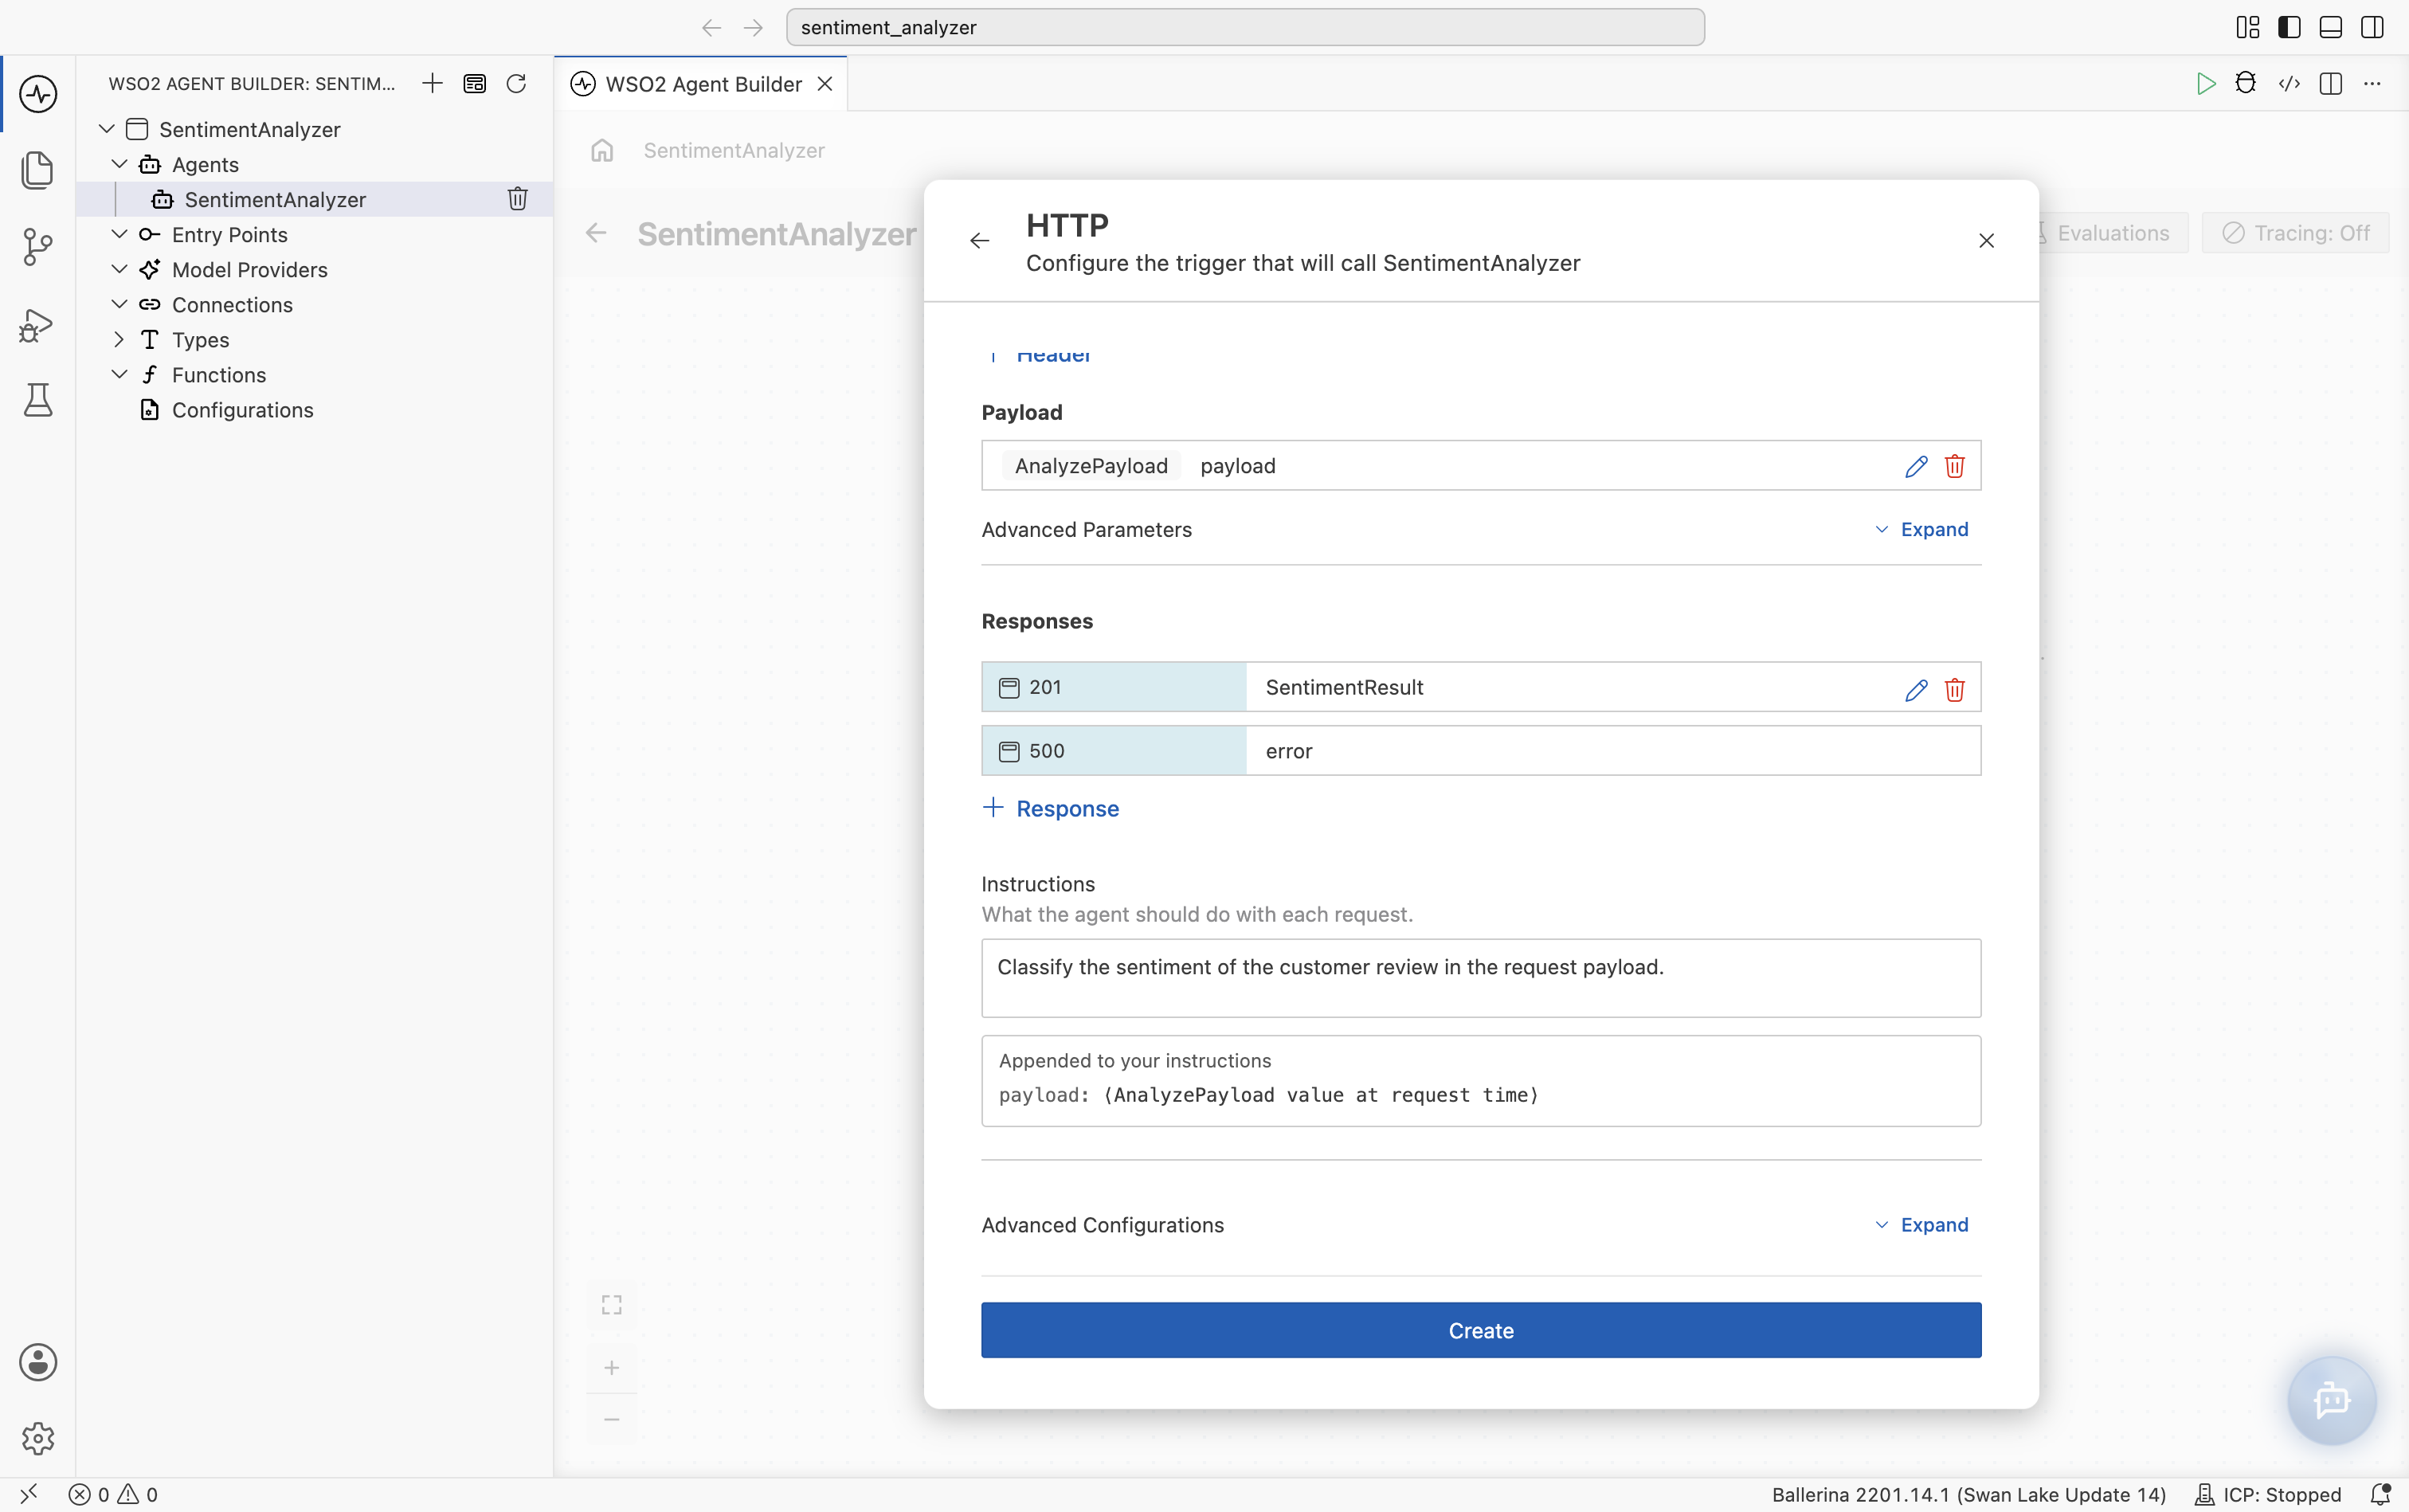
The Instructions field tells the agent what to do with each request. The trigger appends the payload to these instructions at request time, as shown under Appended to your instructions.
- Set Instructions to
Classify the sentiment of the customer review in the request payload. - Confirm that the form shows
AnalyzePayloadfor the request andSentimentResultfor the201response, witherrorprefilled for500. - Select Create.
The agent canvas now shows the HTTP Service · /sentiment-analyzer trigger with POST /analyze connected to the agent.
Step 5: Review the resource flow
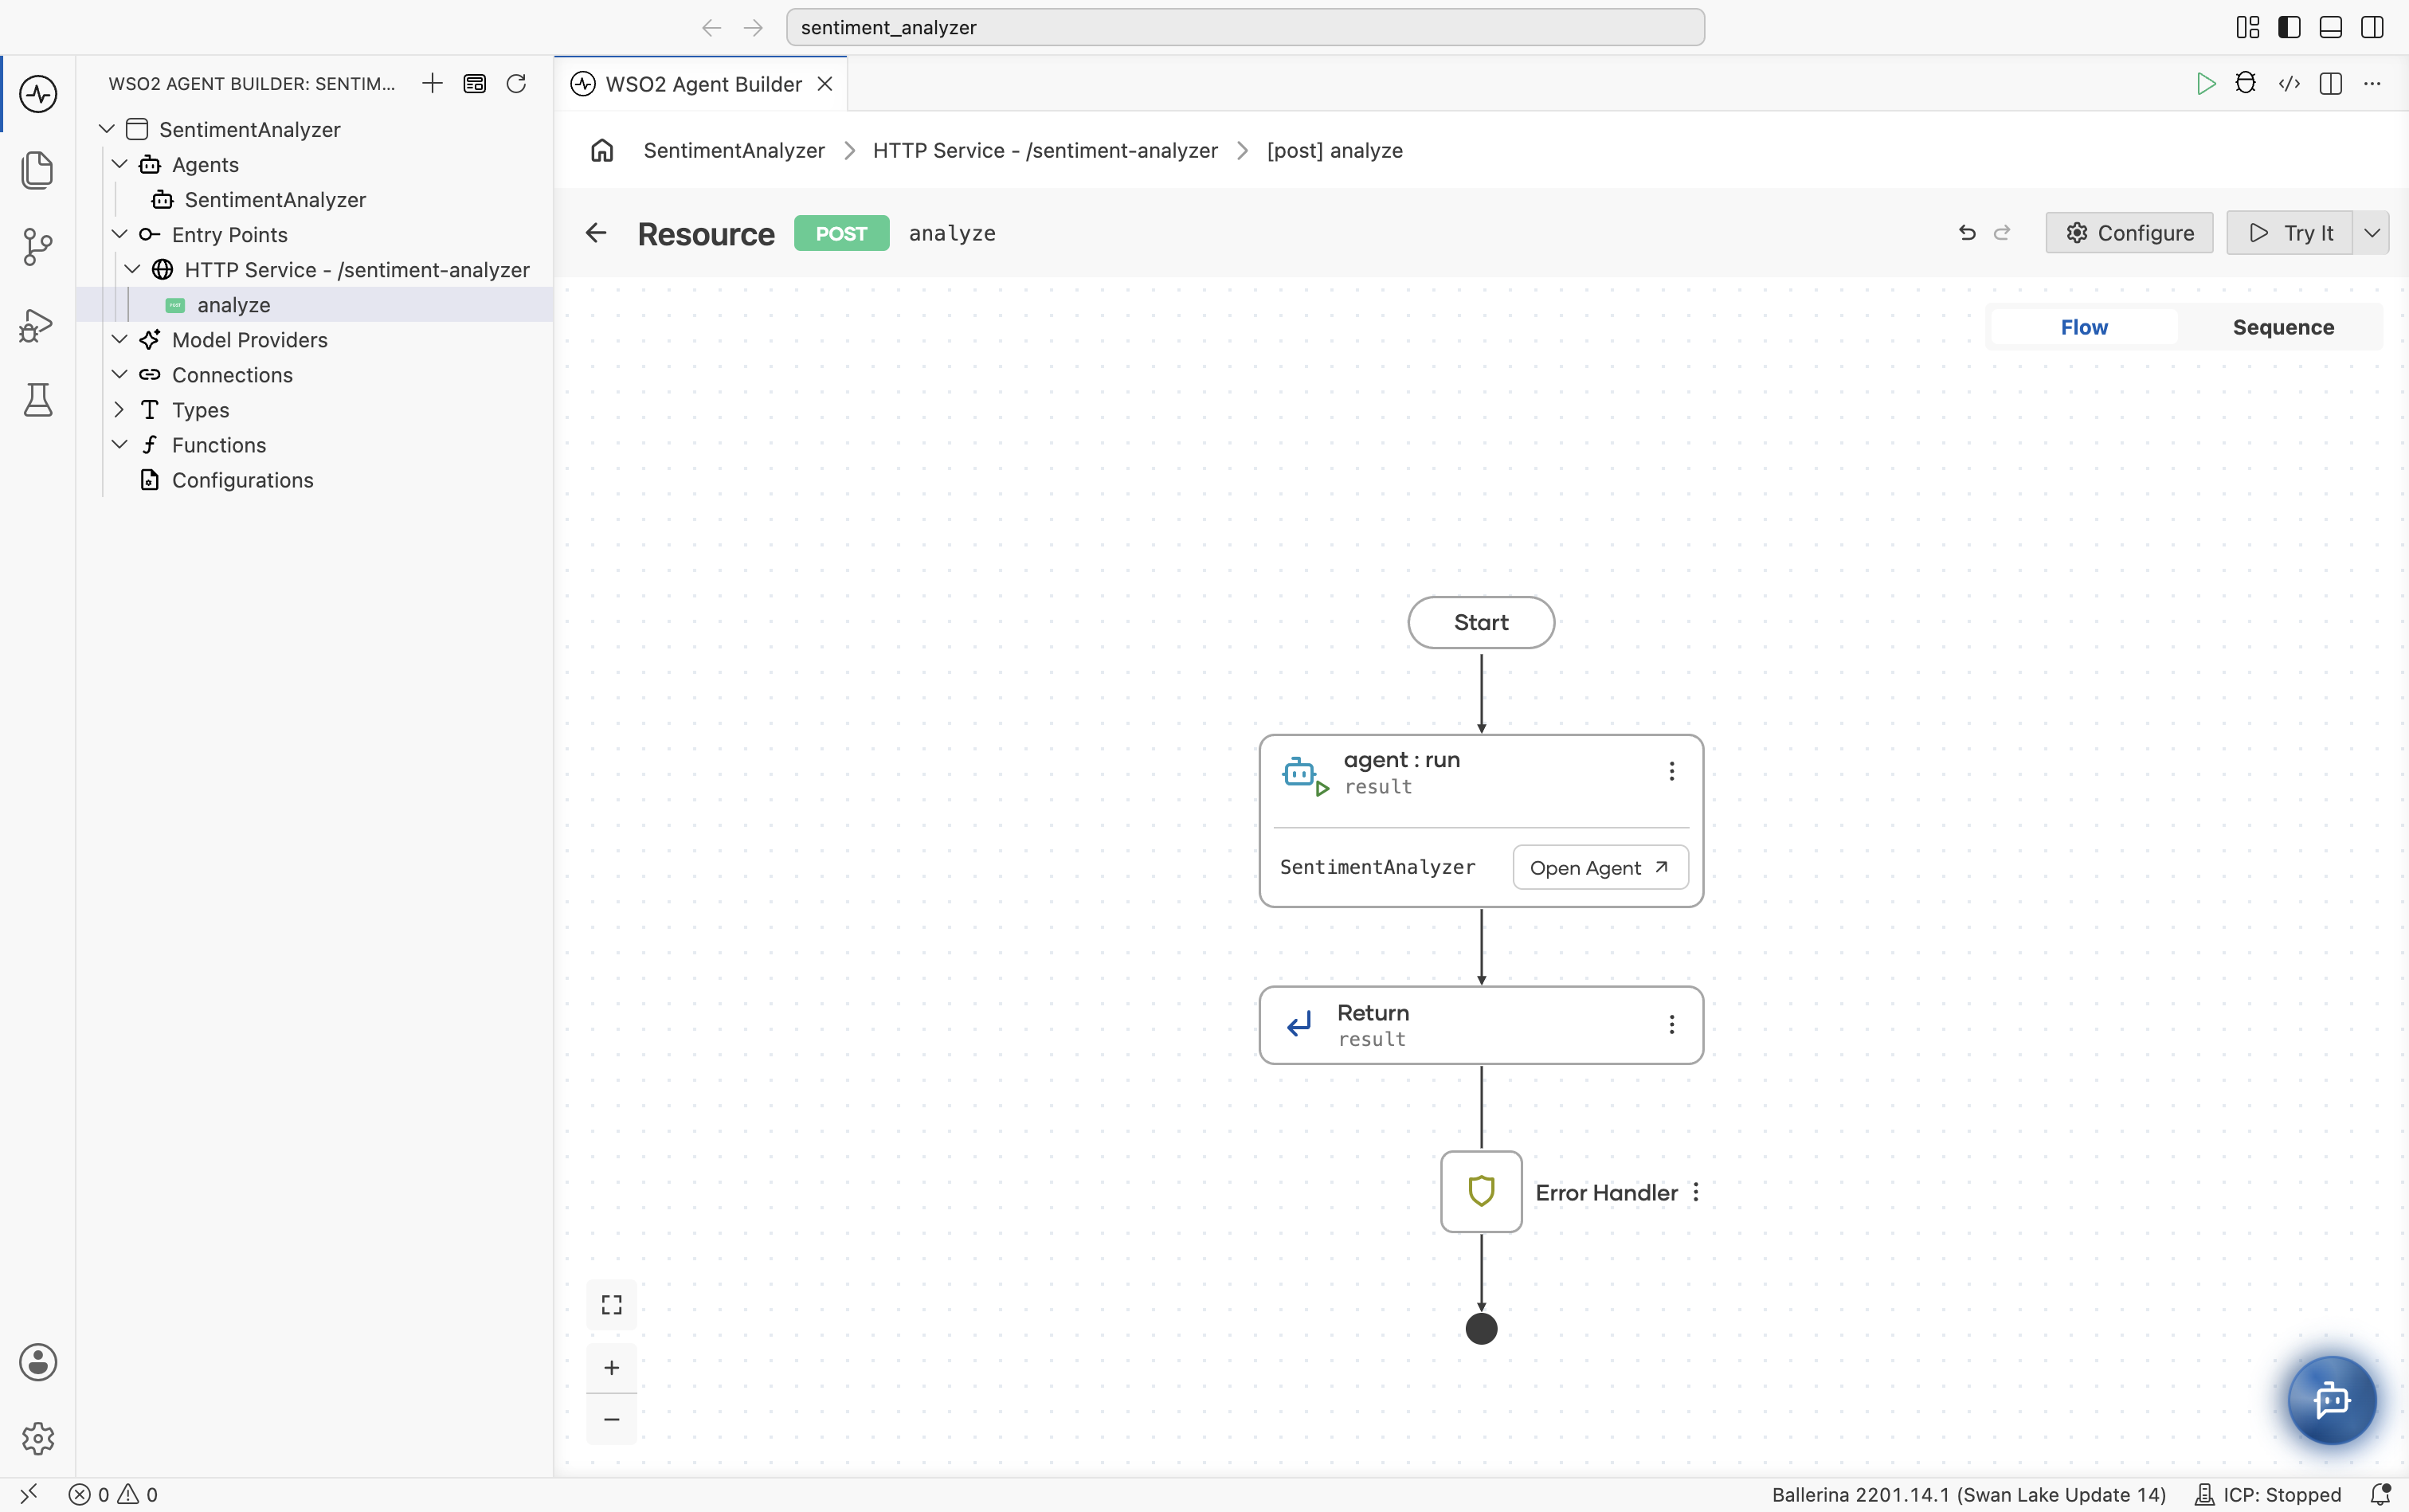
Under Entry Points, expand HTTP Service - /sentiment-analyzer and select the analyze resource. Agent Builder generates the flow for you:
- agent : run sends the request instructions and payload to
SentimentAnalyzerand binds the reply toresult, typed asSentimentResult. - Return returns
resultas the response. - Error Handler catches failures from the agent call.
Use the Flow/Sequence toggle at the top right to switch between the diagram and a linear step list.
Step 6: Run and test
- Select Run Integration at the top-right corner of the editor. Wait until the terminal shows
Running executable. - On the
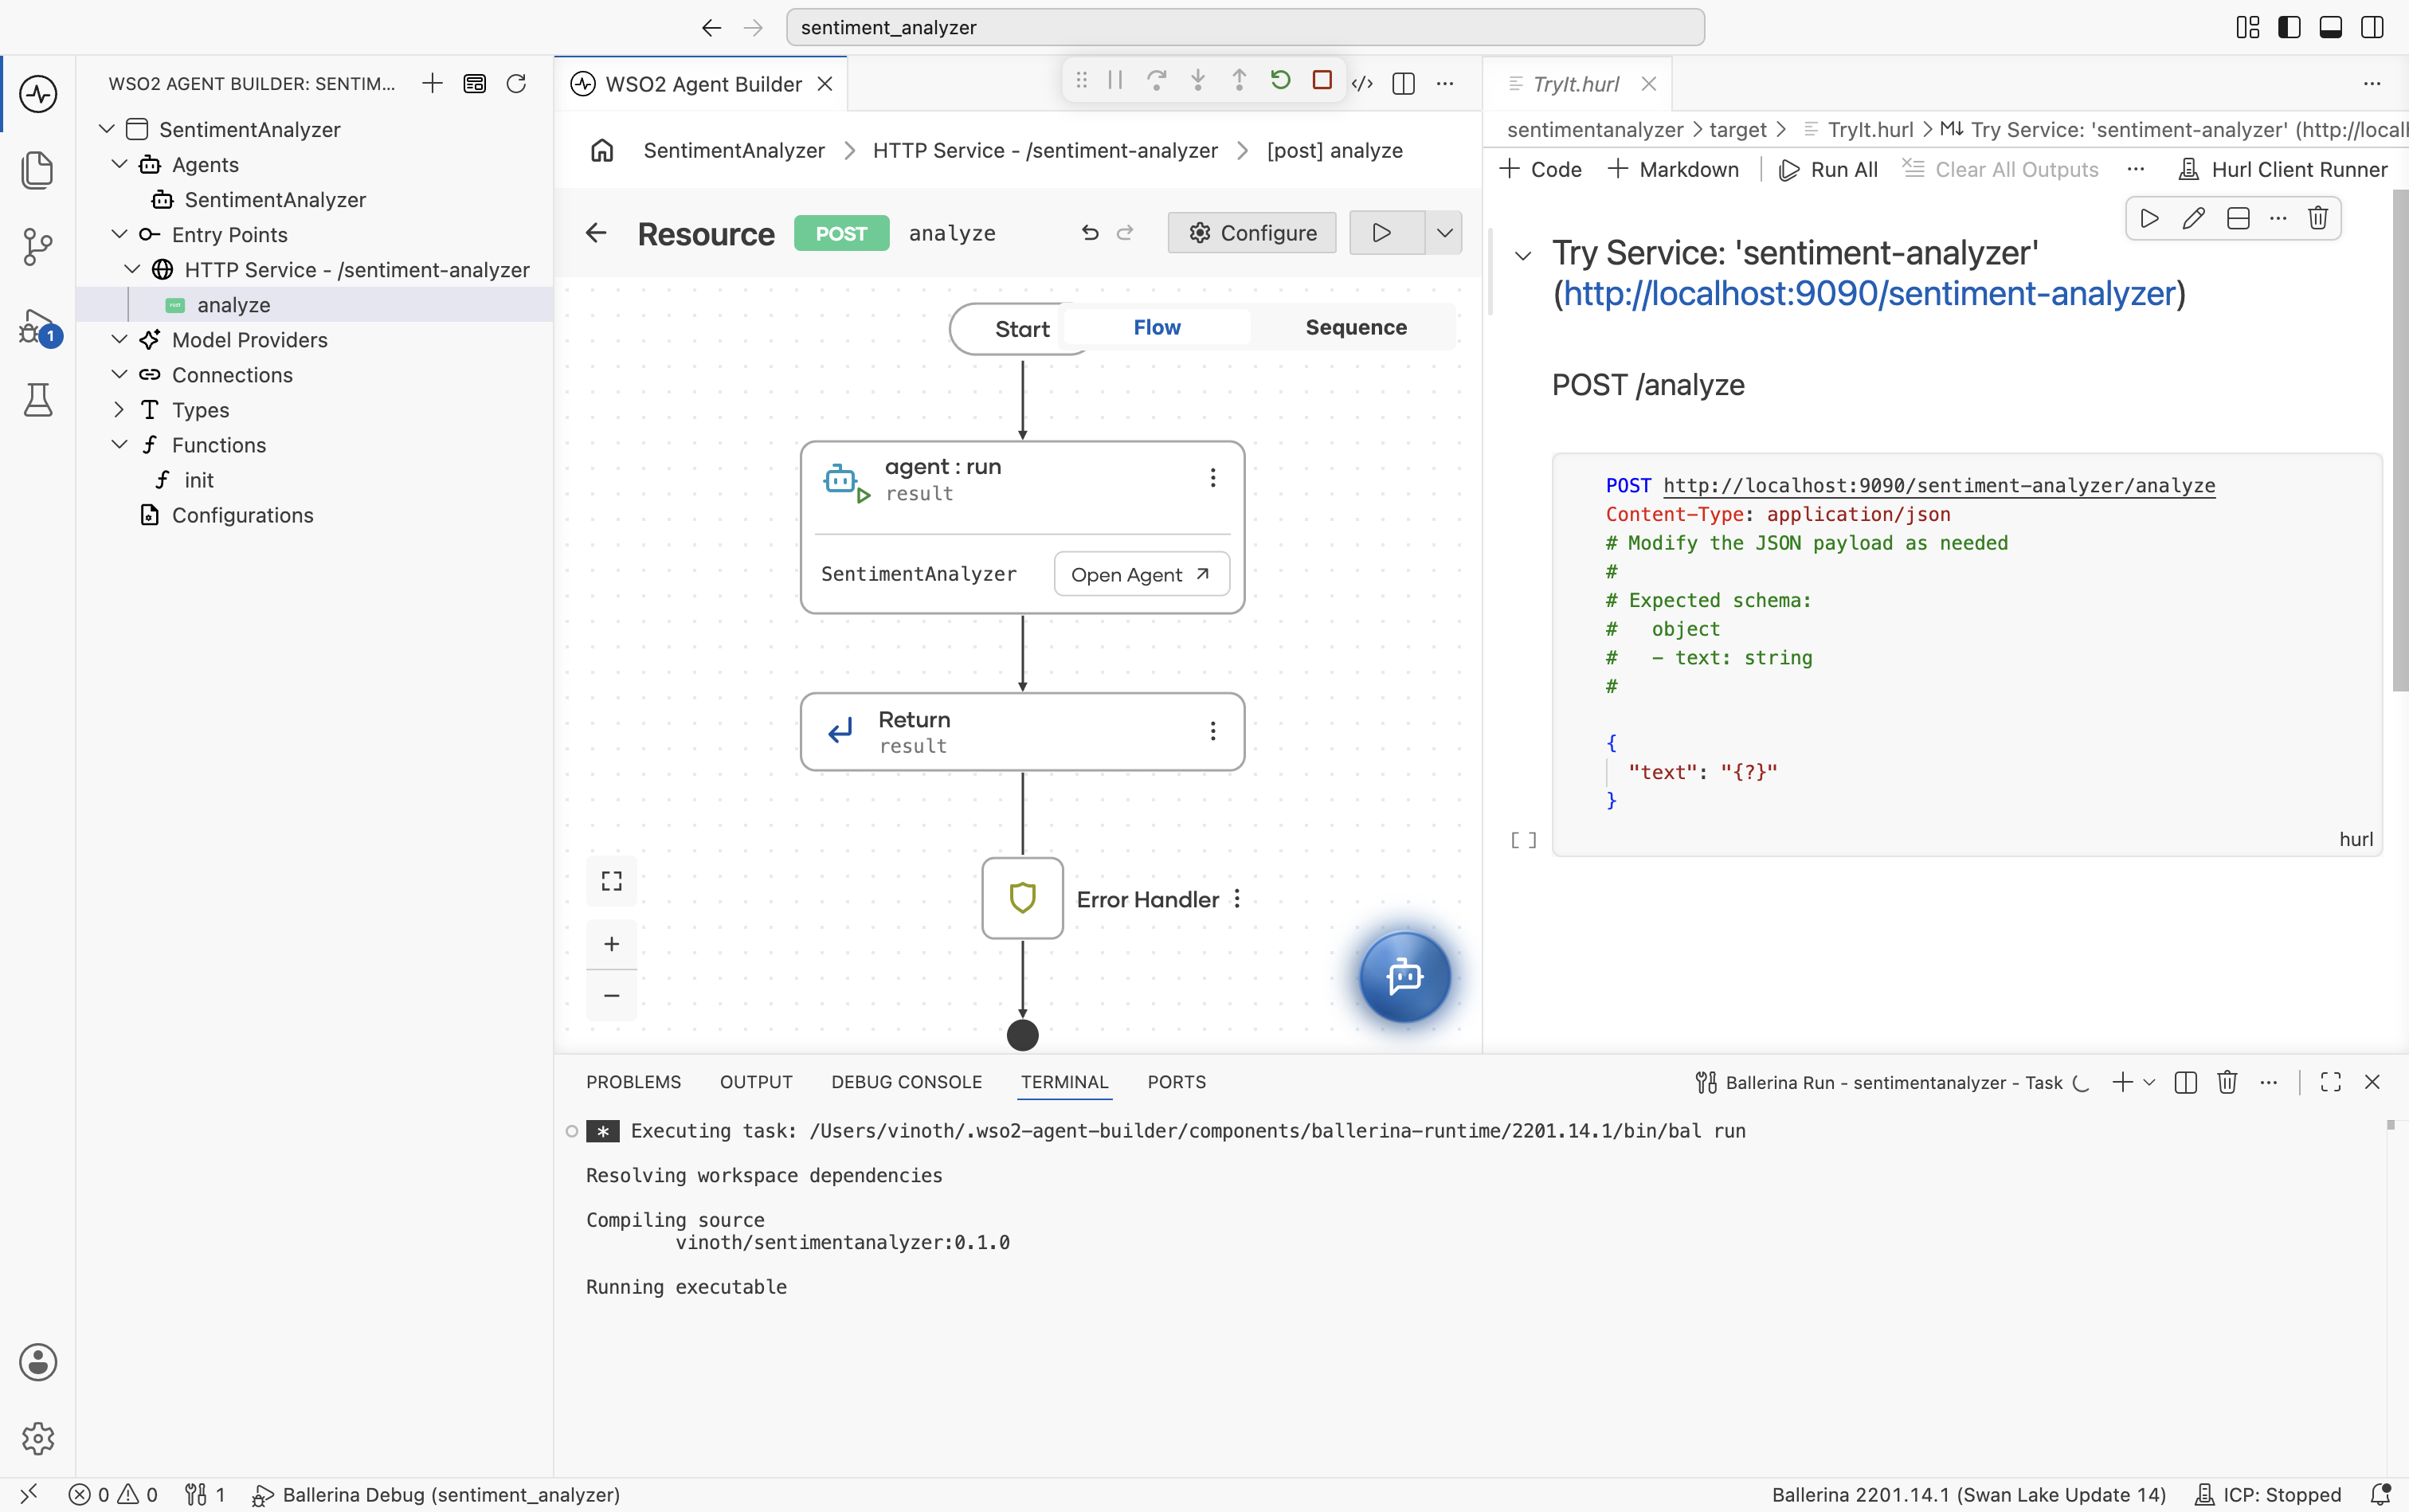
analyzeresource, select Try It, then select Try It (Try resource with Hurl Client). ATryIt.hurlfile opens with aPOSTrequest to/sentiment-analyzer/analyze, a comment describing the expected schema (text: string), and a JSON body with a{?}placeholder.
-
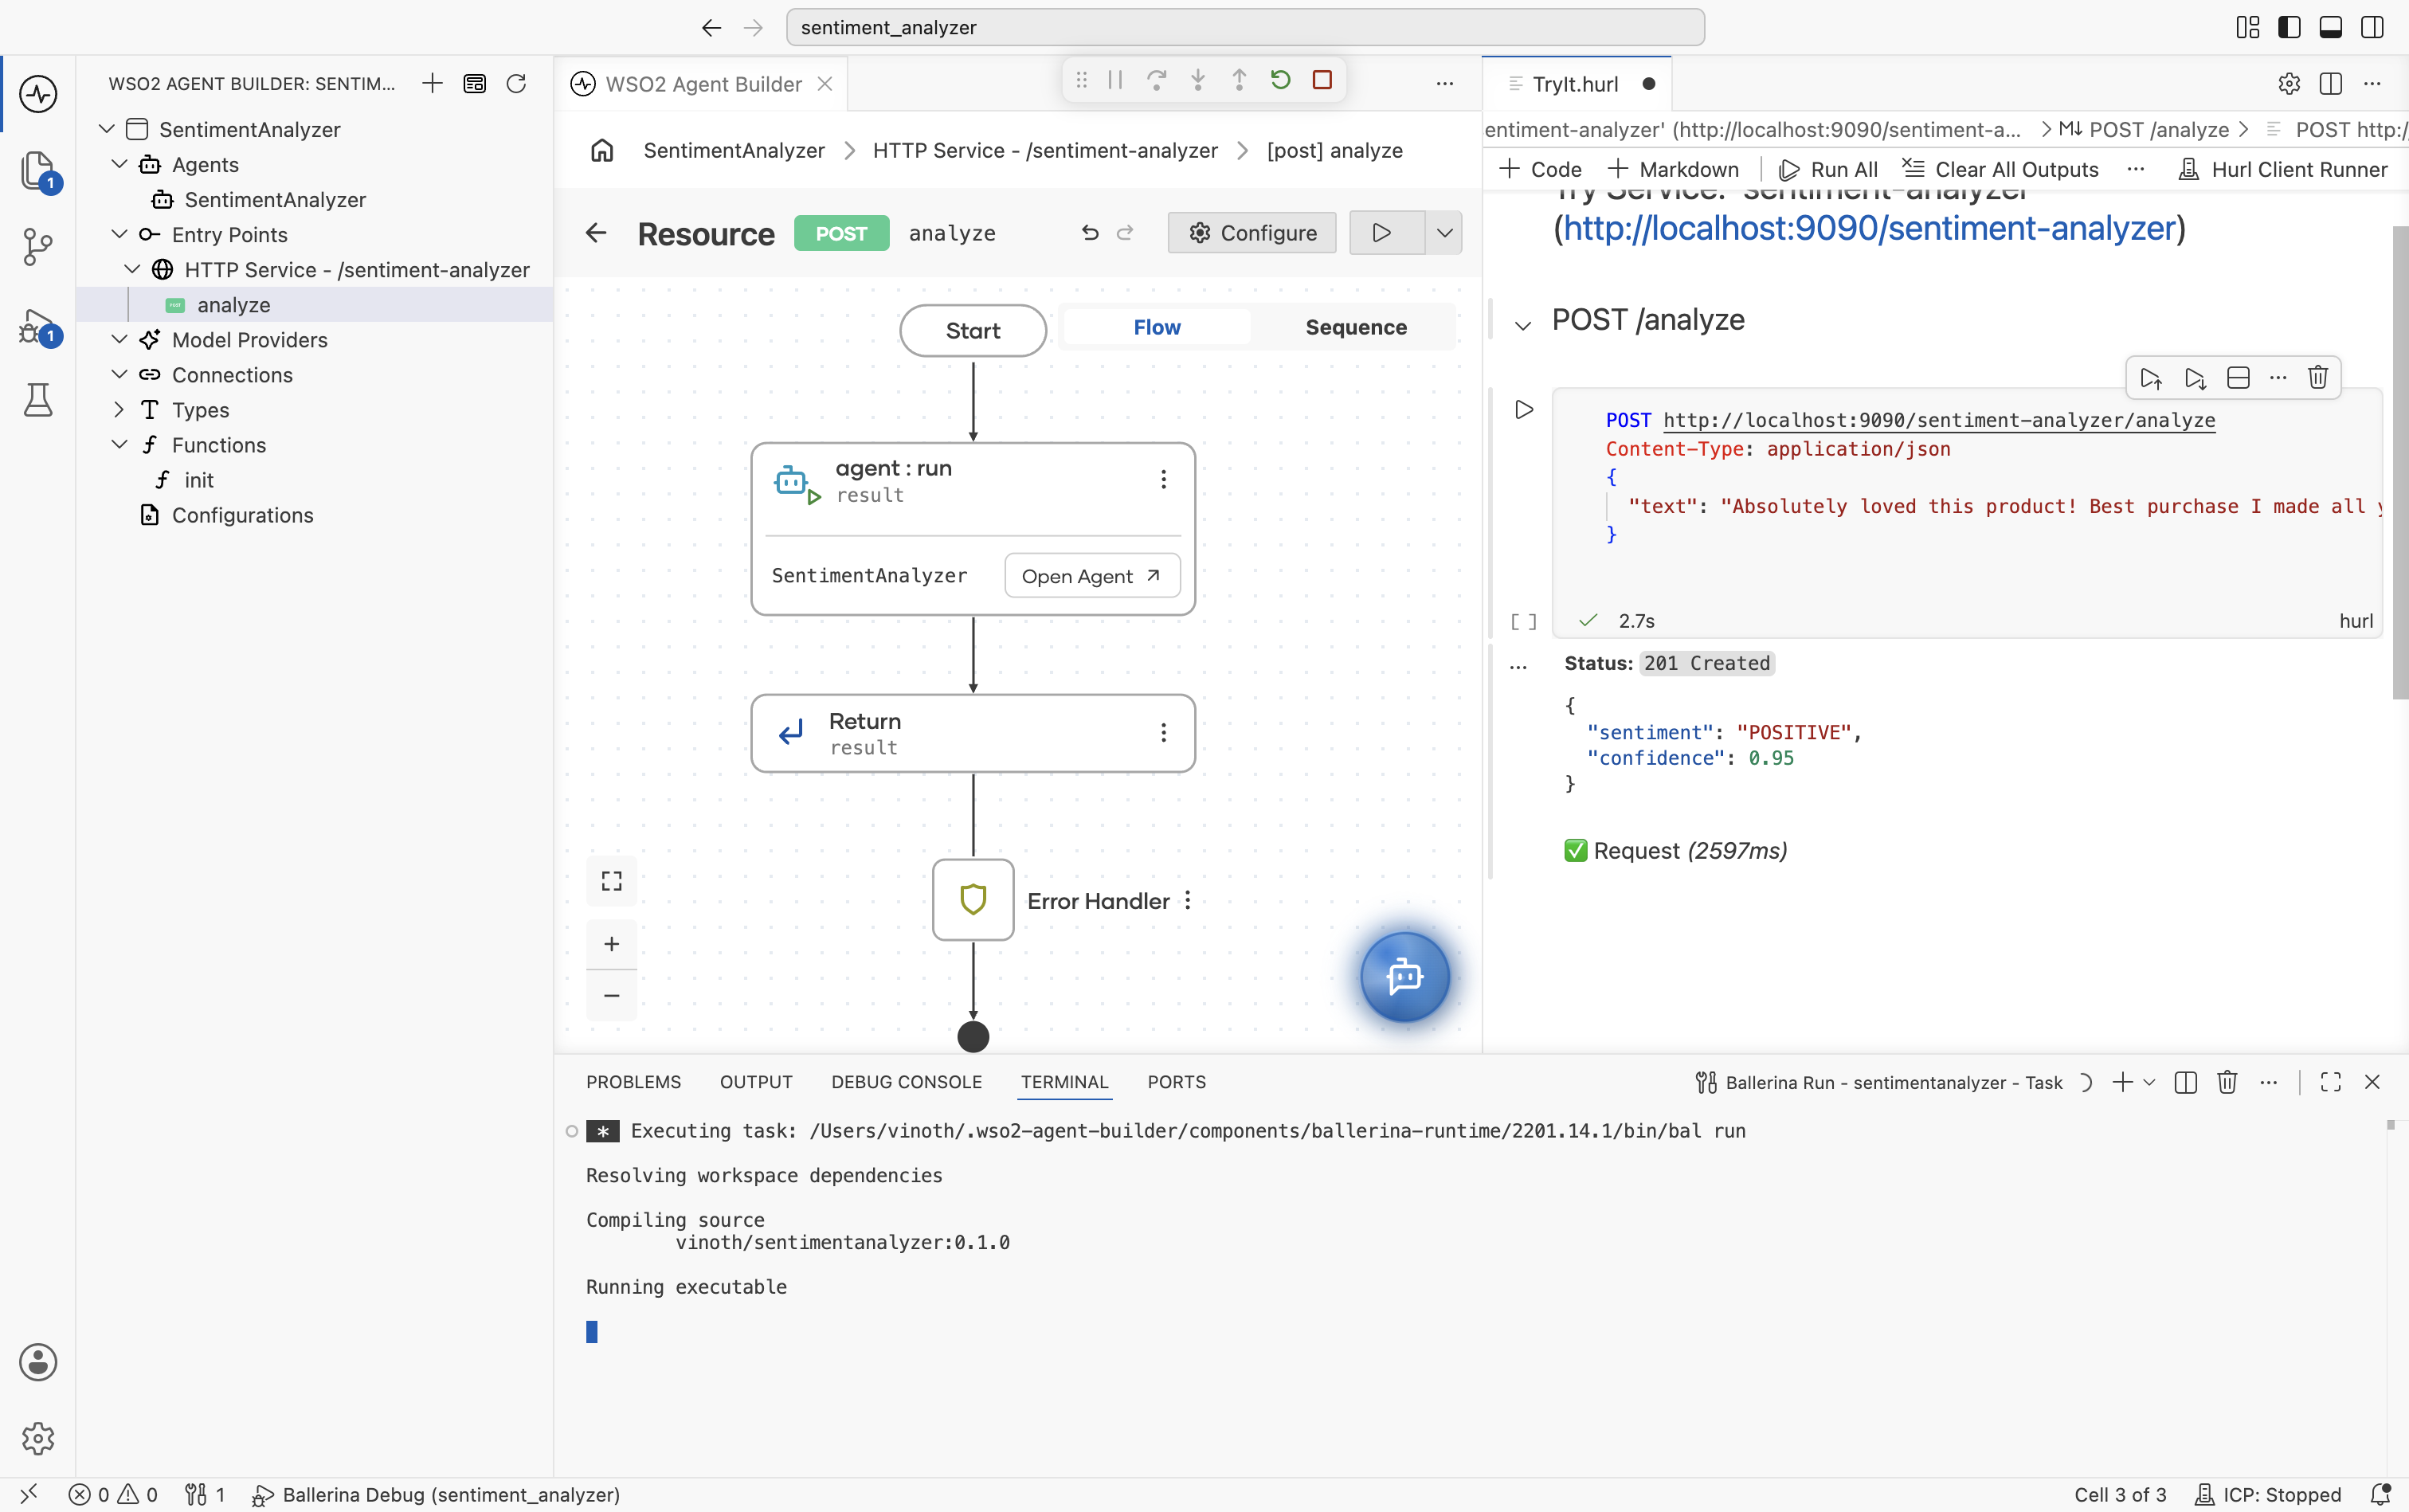
Replace the placeholder with a review, for example:
{
  "text": "Absolutely loved this product! Best purchase I made all year."
} -
Select the run icon next to the request to send it.
-
Confirm the response shows
Status: 201 Createdwith a body that includes"sentiment": "POSITIVE"along with aconfidencescore.
The following Ballerina program is what WSO2 Agent Builder generates from the Visual Designer steps. The resource binds the agent's reply to SentimentResult, so the response includes both the sentiment and a confidence score (for example, {"sentiment":"POSITIVE","confidence":0.95}). The HTTP resource wraps the agent call in a do/on fail block, matching the Error Handler node shown in the flow.
types.bal:
enum Sentiment {
    POSITIVE,
    NEGATIVE,
    NEUTRAL
}

type SentimentResult record {|
    Sentiment sentiment;
    float confidence;
|};

type AnalyzePayload record {|
    string text;
|};
agents.bal:
import ballerina/ai;

final ai:Agent SentimentAnalyzer = check new (
    systemPrompt = {
        role: string `SentimentAnalyzer`,
        instructions: string `You are a sentiment analysis assistant for customer reviews.

Your responsibilities:
- Classify the sentiment of each review as POSITIVE, NEGATIVE, or NEUTRAL.
- Provide a confidence score between 0.0 and 1.0 indicating how confident you are in the classification.
`
    }, model = check ai:getDefaultModelProvider()
);
main.bal:
import ballerina/http;

listener http:Listener httpDefaultListener = http:getDefaultListener();

service /sentiment\-analyzer on httpDefaultListener {
    resource function post analyze(@http:Payload AnalyzePayload payload) returns SentimentResult|error {
        do {
            SentimentResult result = check SentimentAnalyzer.run(string `Classify the sentiment of the customer review in the request payload.

Request payload:
${payload.toJsonString()}`);
            return result;
        } on fail error err {
            // handle error
            return error("unhandled error", err);
        }
    }
}
Note that run is not explicitly given an expected type here. Ballerina infers it from the type of the variable the result is assigned to (SentimentResult), so the agent is asked for a reply of that shape and the reply is validated against it before it is returned.
Run and test the integration from WSO2 Agent Builder using the Try It panel as shown in Step 6, or with curl:
curl -X POST http://localhost:9090/sentiment-analyzer/analyze \
  -H "Content-Type: application/json" \
  -d '{"text": "Absolutely loved this product! Best purchase I made all year."}'
The response returns Status: 201 Created with a body similar to {"sentiment":"POSITIVE","confidence":0.95}, with the actual sentiment and confidence score determined by the model.
How it works
The HTTP trigger is the agent's entry point. Each request to POST /sentiment-analyzer/analyze runs the SentimentAnalyzer agent with the trigger's instructions and the review, and the agent's reply becomes the response body.
The resource assigns the reply to a SentimentResult variable. Behind the scenes the agent is asked to produce output that conforms to that type, and the reply is parsed and validated before it reaches your code.
Because the sentiment field is an enum, the agent cannot return free-form text for it. It must pick one of POSITIVE, NEGATIVE, or NEUTRAL. If the model returns anything else, the call fails with a typed error that the Error Handler catches, rather than silently passing bad data downstream.
What's next
- Build a Hotel Finder Agent — Add custom tools and session-scoped memory
- What is an AI Agent? — Understand the agent architecture
- What are Tools? — Learn tool design patterns