Example
FTP Example
What you'll build
Build a WSO2 Integrator automation that connects to a remote FTP server, retrieves a JSON file using the getJson operation, and logs its contents. The workflow uses configurable variables to manage FTP credentials securely.
Operations used:
- getJson : Retrieves a JSON file from a specified path on the FTP server and returns its contents as a
jsonvalue.
Architecture
Prerequisites
- Access to an FTP server with a JSON file at a known path
- FTP server credentials (host, port, username, and password)
Setting up the FTP integration
New to WSO2 Integrator? Follow the Create a New Integration guide to set up your integration first, then return here to add the connector.
Adding the FTP connector
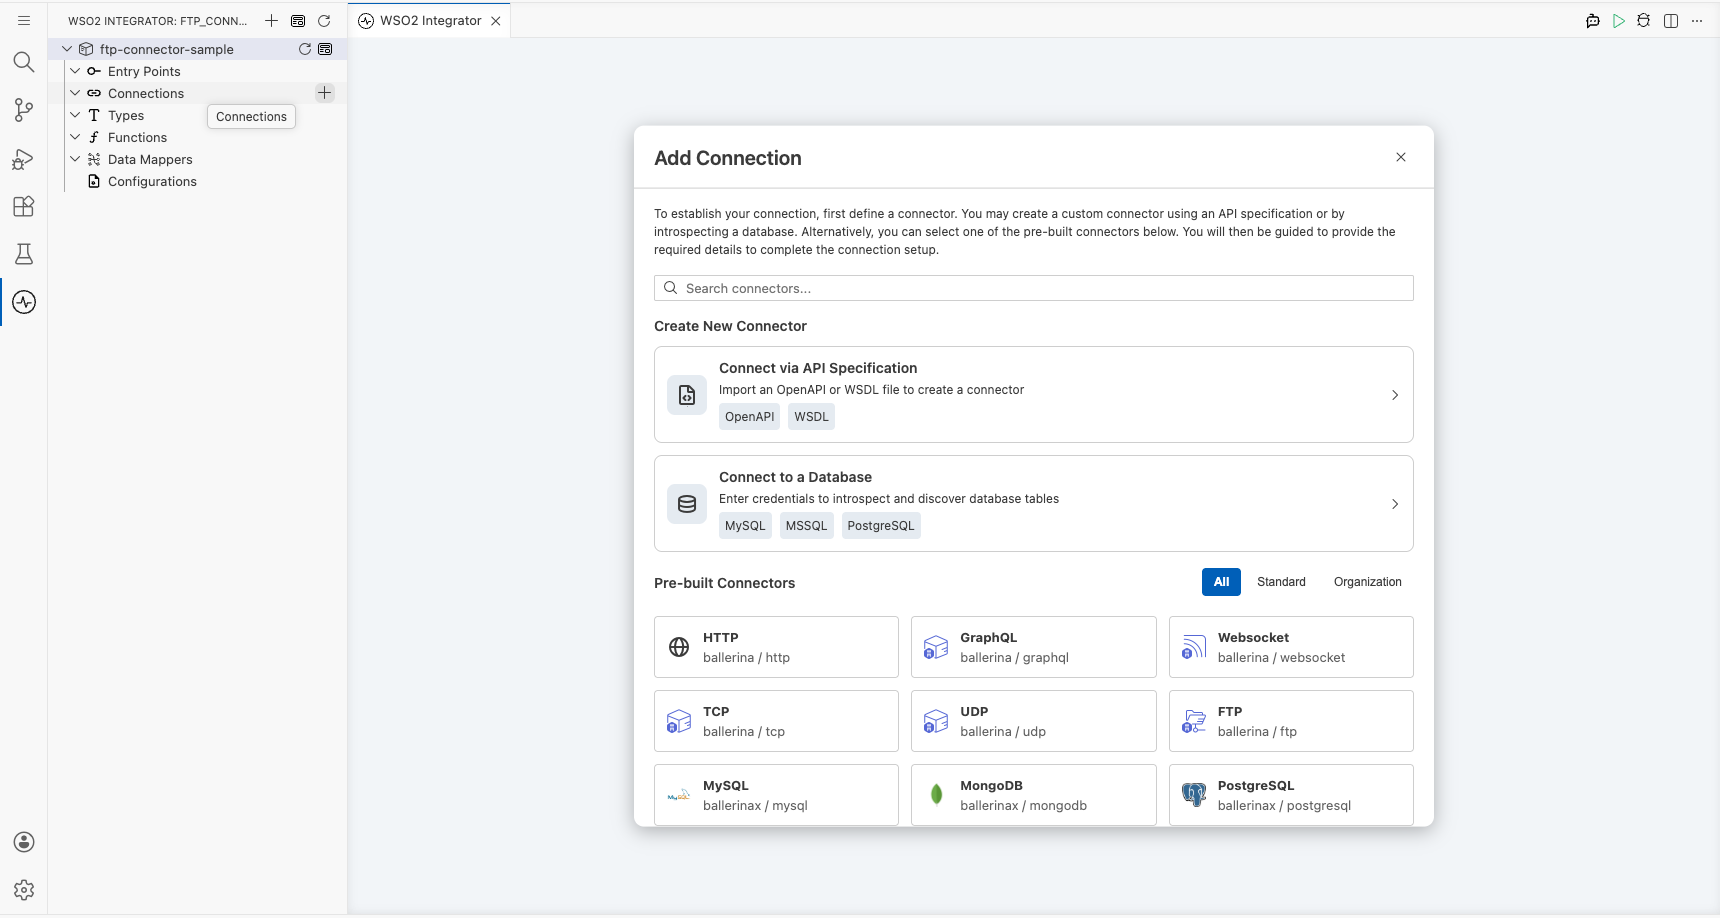
Select Add Connection in the WSO2 Integrator sidebar to open the connector palette.
Step 1: Open the connector palette and select the FTP connector
- In the WSO2 Integrator sidebar, expand Connections and select the + button next to it.
- In the connector palette search box, enter
ftp. - Select the FTP card (under
ballerina/ftp, labeled "Standard").
Configuring the FTP connection
Step 2: Bind connection parameters to configurable variables
Set the Client Config field using four configurable variables. Use the Configurables tab in the helper panel to create each variable:
- host (string) : Hostname or IP address of the FTP server
- port (int) : Port number used by the FTP server (default
21) - auth.credentials.username (string) : Username for FTP authentication
- auth.credentials.password (string) : Password for FTP authentication
After creating all four configurables, enter the following record literal in the Client Config expression field and set Connection Name to ftpClient.
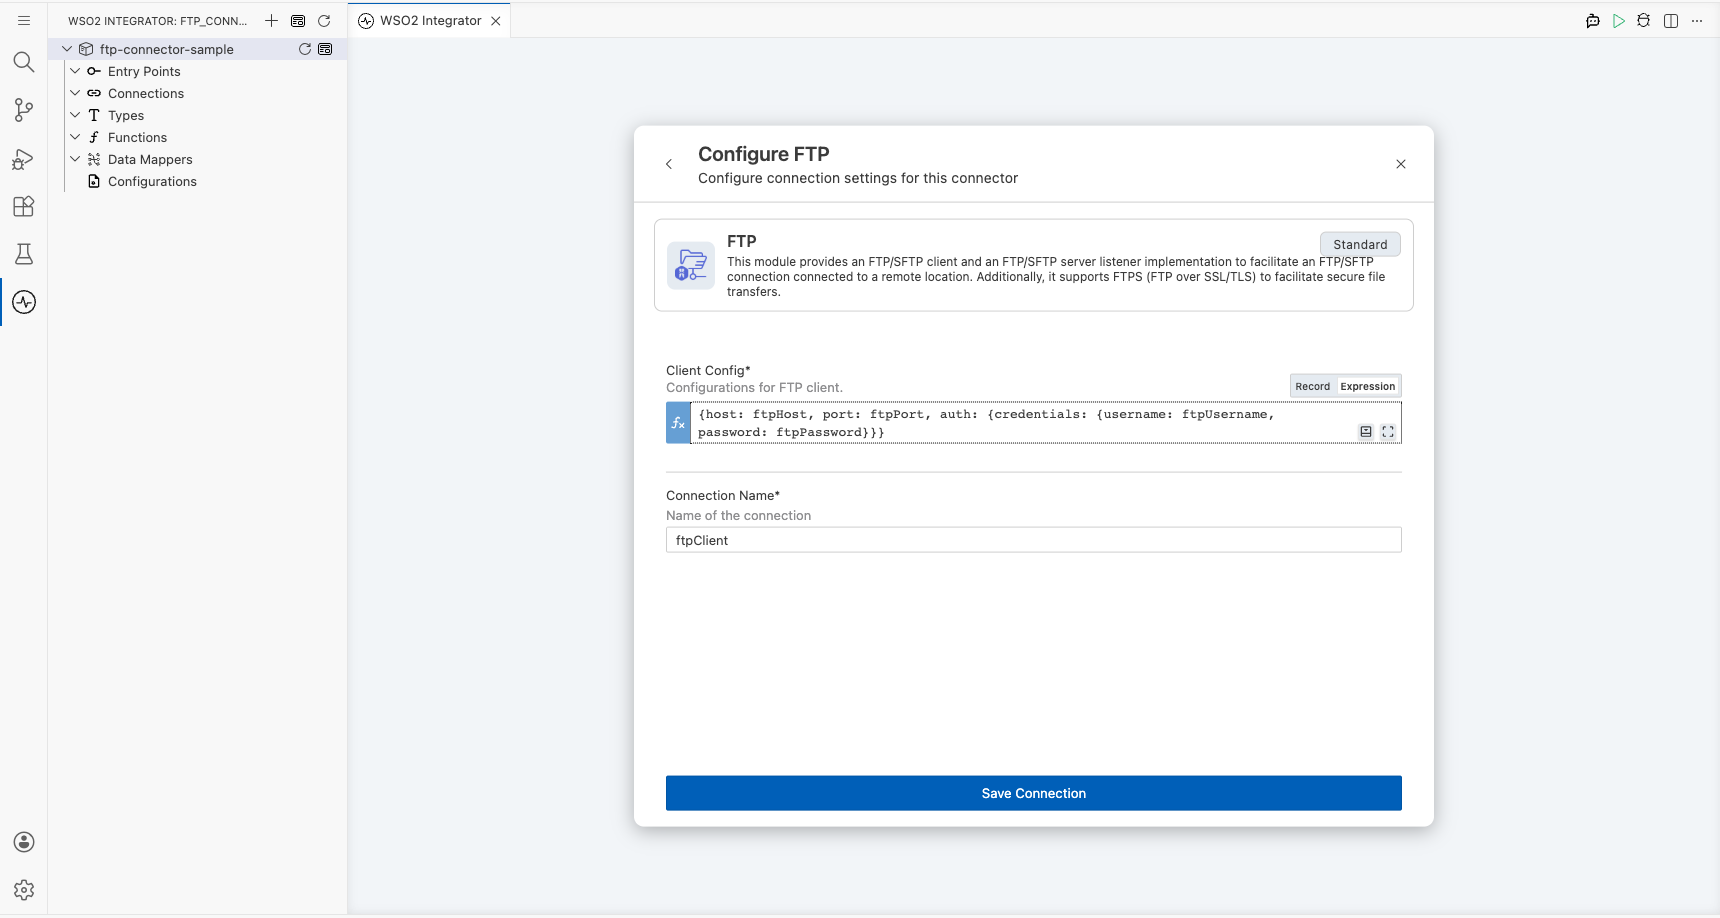
Step 3: Save the connection
Select Save Connection to persist the connection. The form closes and the canvas displays the ftpClient connection node.

Step 4: Set actual values for your configurables
- In the left panel, select Configurations.
- Set a value for each configurable listed below.
- ftpHost (string) : The hostname or IP address of your FTP server (for example,
"ftp.example.com") - ftpPort (int) : The port your FTP server listens on
- ftpUsername (string) : Your FTP account username
- ftpPassword (string) : Your FTP account password
Configuring the FTP getJson operation
Step 5: Add an Automation entry point
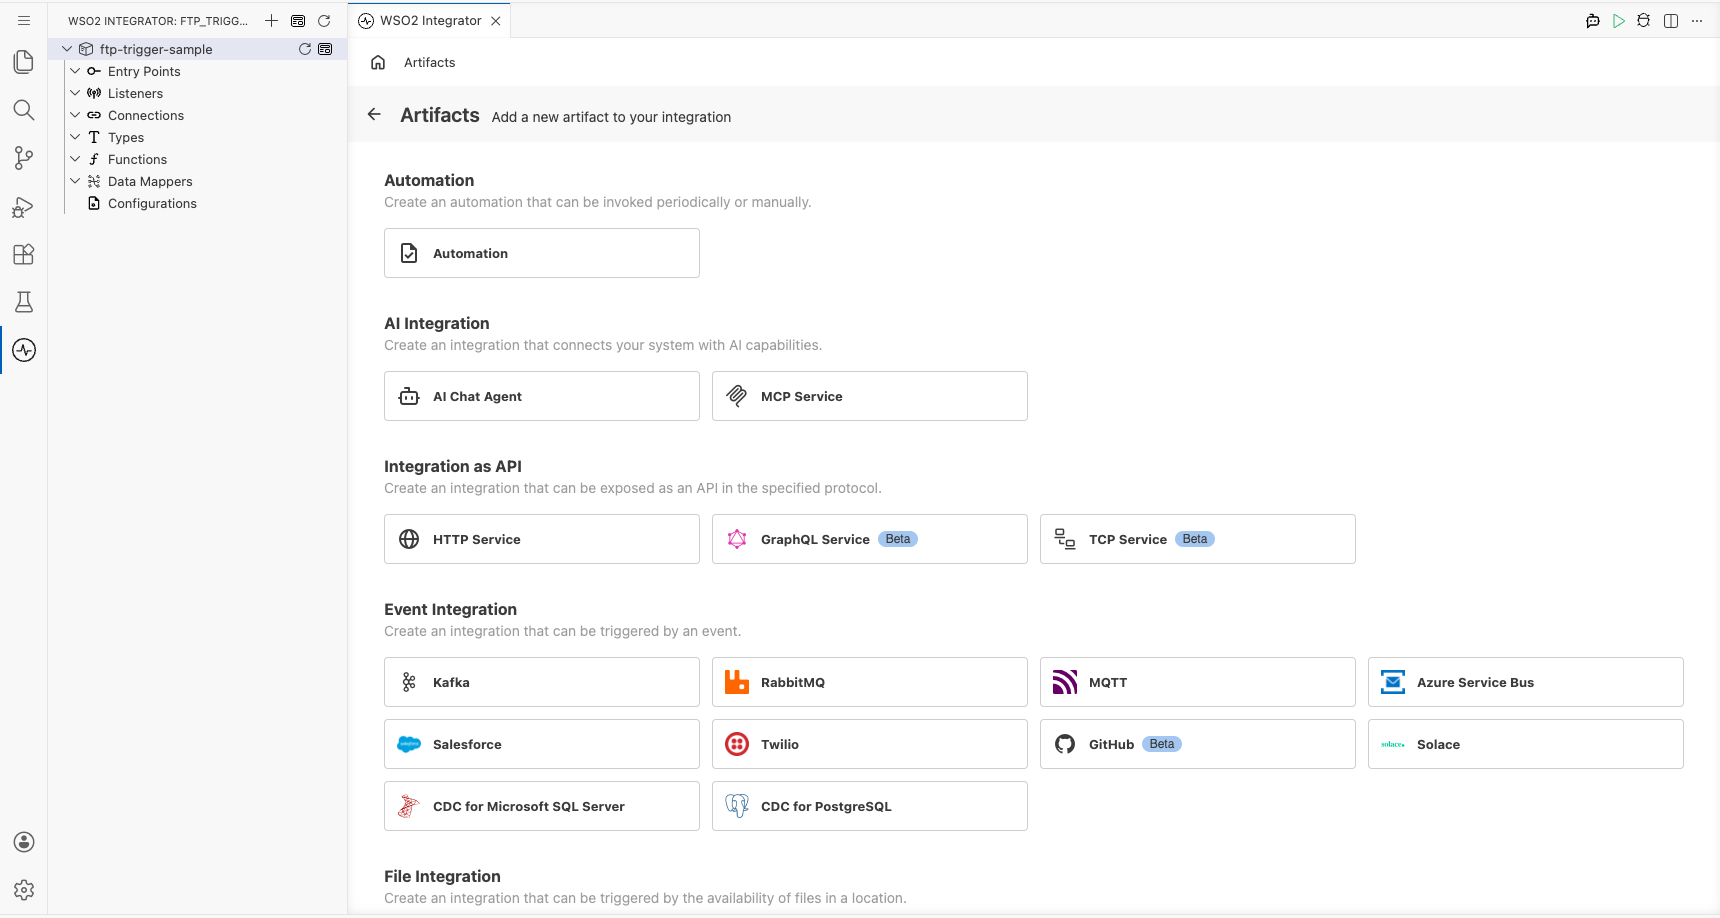
- Select + Add Artifact on the canvas toolbar.
- Under Automation, select the Automation tile.
- Select Create. No additional configuration is needed.
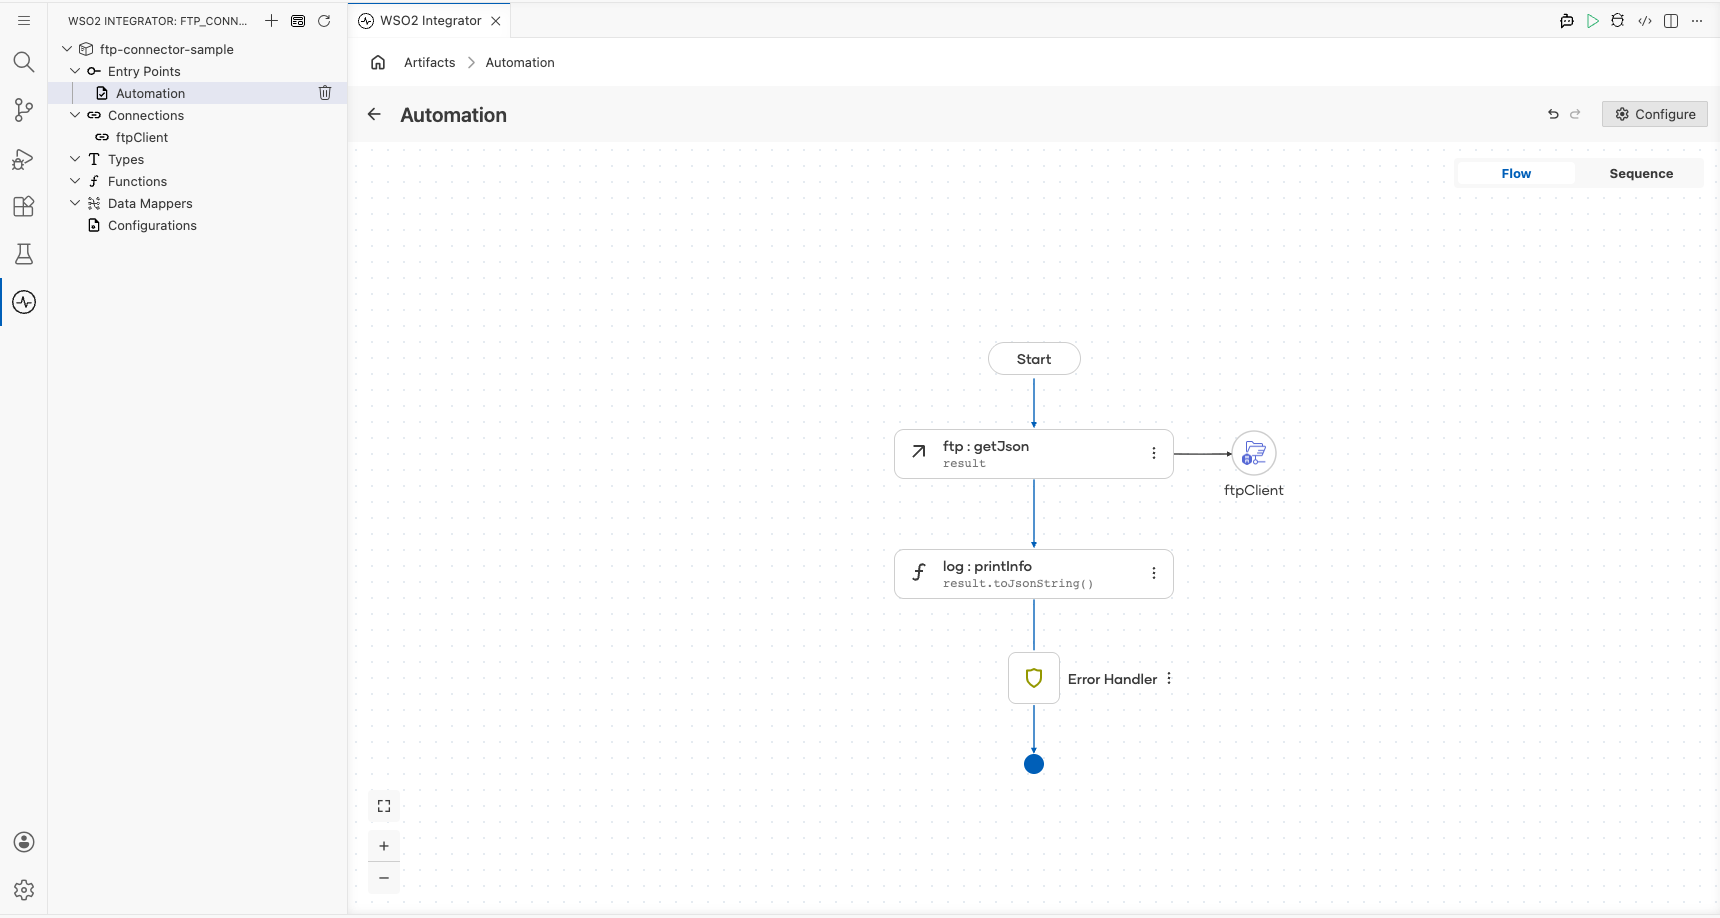
The main automation entry point appears in the sidebar under Entry Points, and the canvas switches to the Automation flow editor showing a Start node.
Step 6: Select the getJson operation and configure its parameters
- Select the + button on the canvas between Start and Error Handler.
- In the right-side node panel, expand Connections → ftpClient.
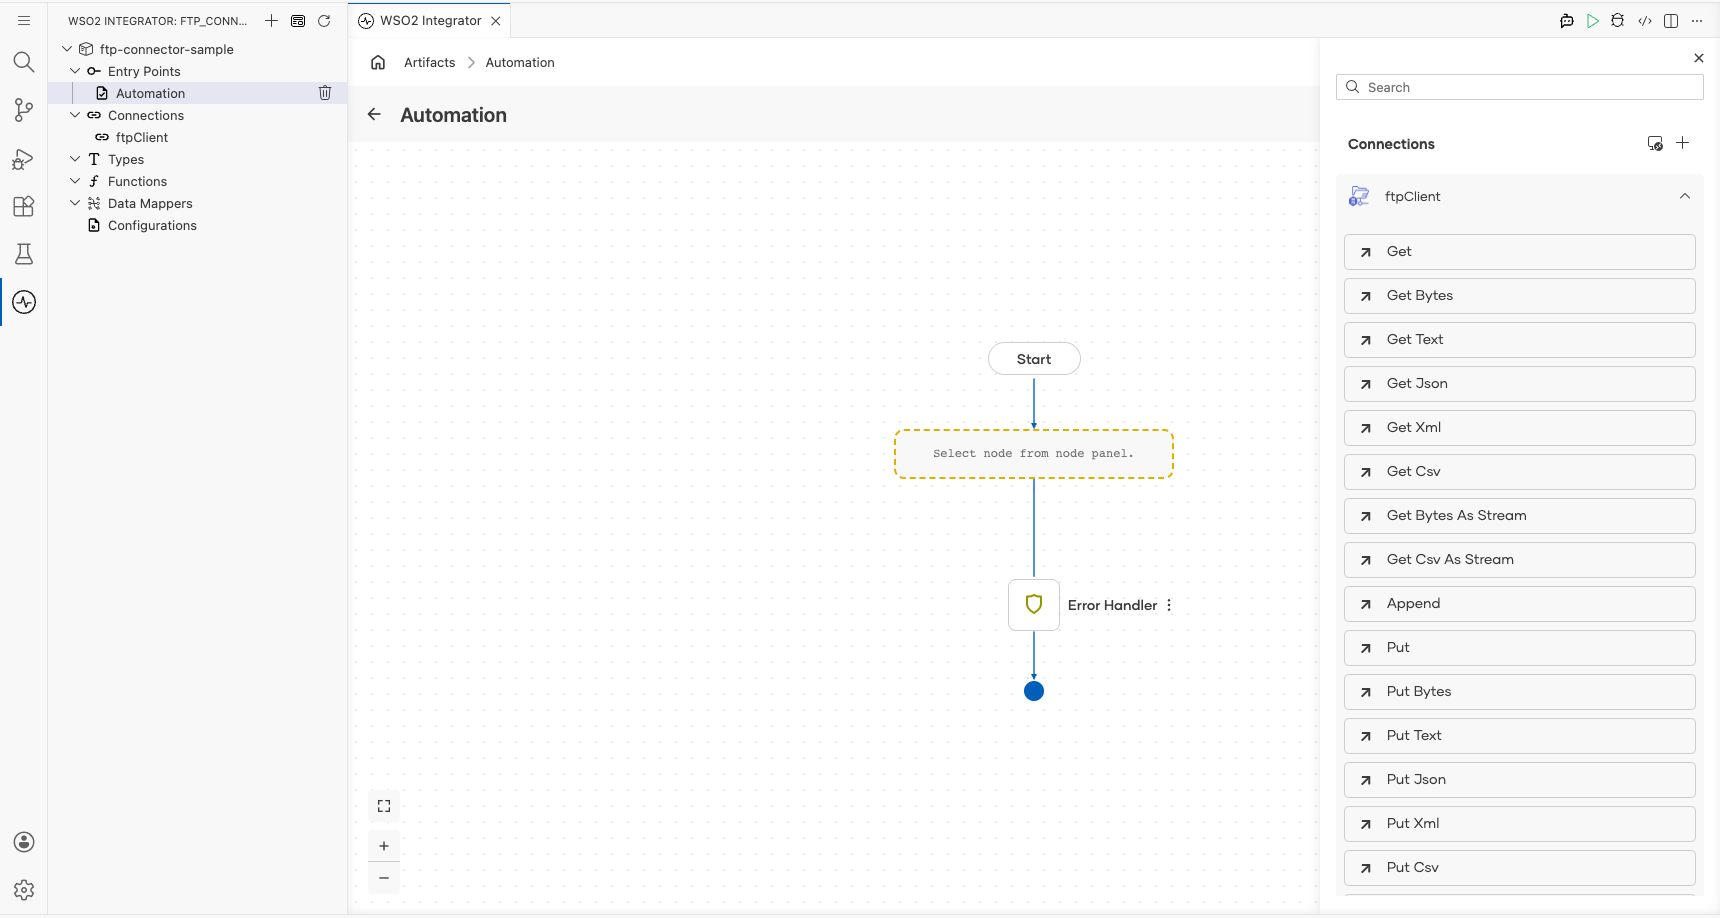
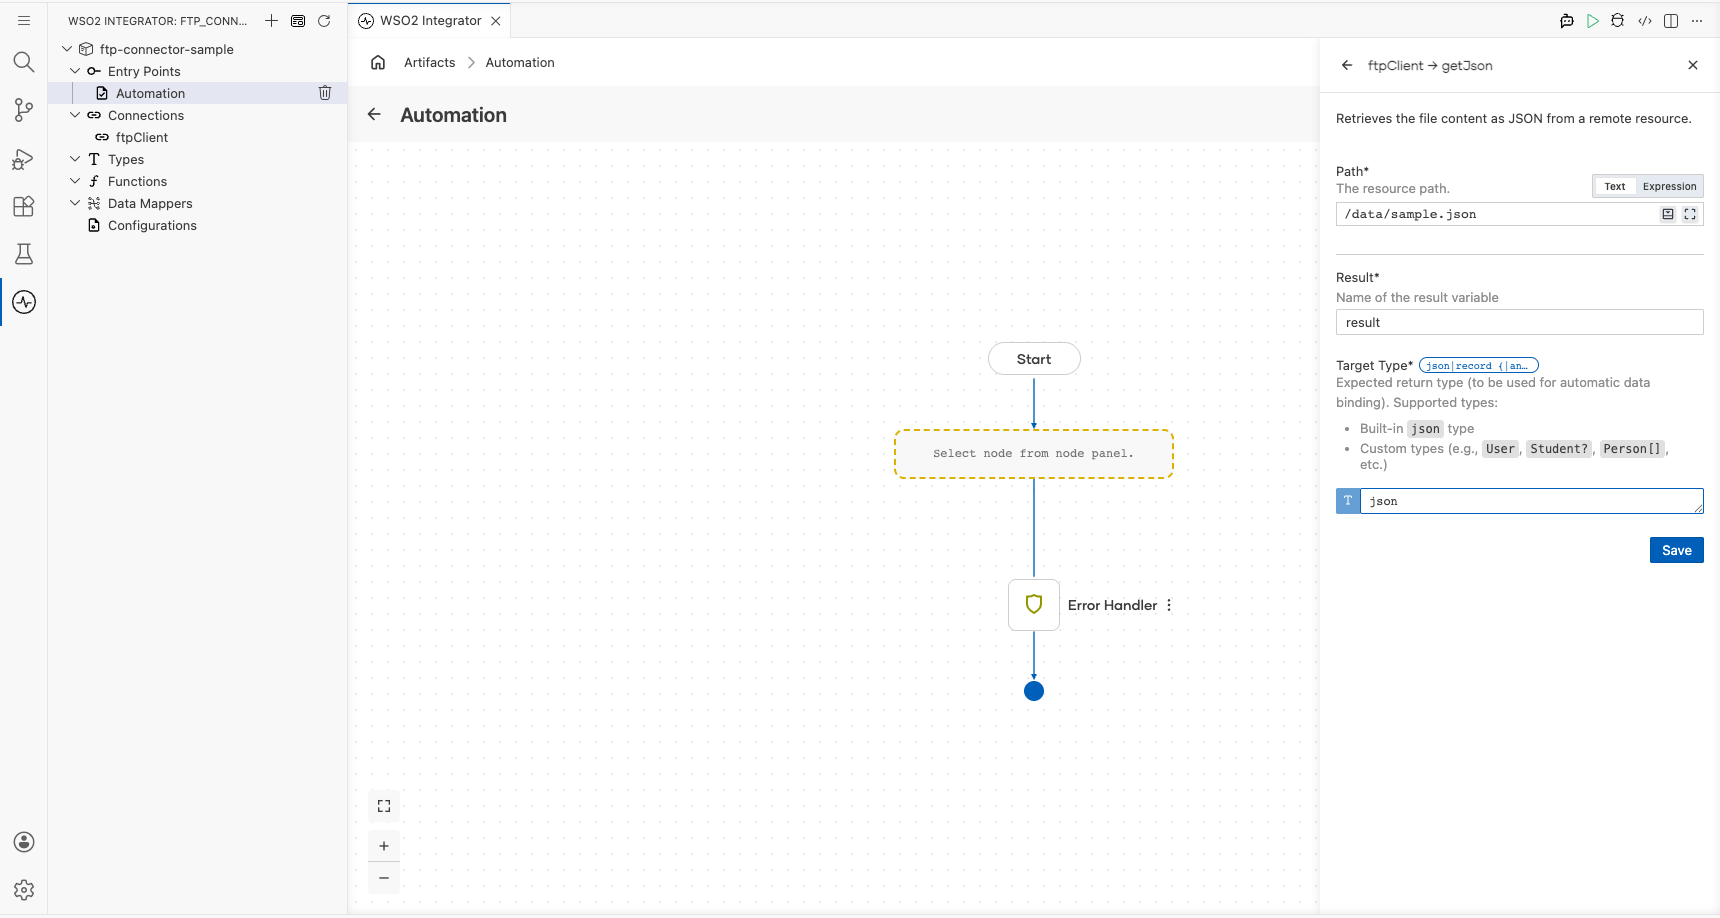
- Select Get Json and fill in the operation form:
- Path : Location of the JSON file on the FTP server (for example,
/data/sample.json) - Result : Name of the variable that stores the returned value (for example,
data) - Target Type : The expected return type (
json)
- Select Save.
Step 7: Add a log statement to inspect the result
-
To log the retrieved JSON, select the + below the Get Json node and choose Log Info from the Logging section in the side panel.
-
Select expression and enter the log statement using the result variable name you set in Step 6:
data.toJsonString().
WSO2 Integrator renders the log:printInfo node in the flow canvas.
Try it yourself
Try this sample in WSO2 Integration Platform.

FTP Trigger Example
What you'll build
This integration listens for file creation events on a remote FTP/SFTP server and processes each new file through a configurable handler. When a new file arrives at the monitored path, the onFileCsv handler fires and logs the file metadata using log:printInfo. The overall flow runs from the FTP listener through the handler to the log output.
Architecture
Prerequisites
- Access to a running FTP or SFTP server (hostname, port, credentials, and a monitored directory path)
Setting up the FTP integration
New to WSO2 Integrator? Follow the Create a New Integration guide to set up your integration first, then return here to add the trigger.
Configuring the FTP listener
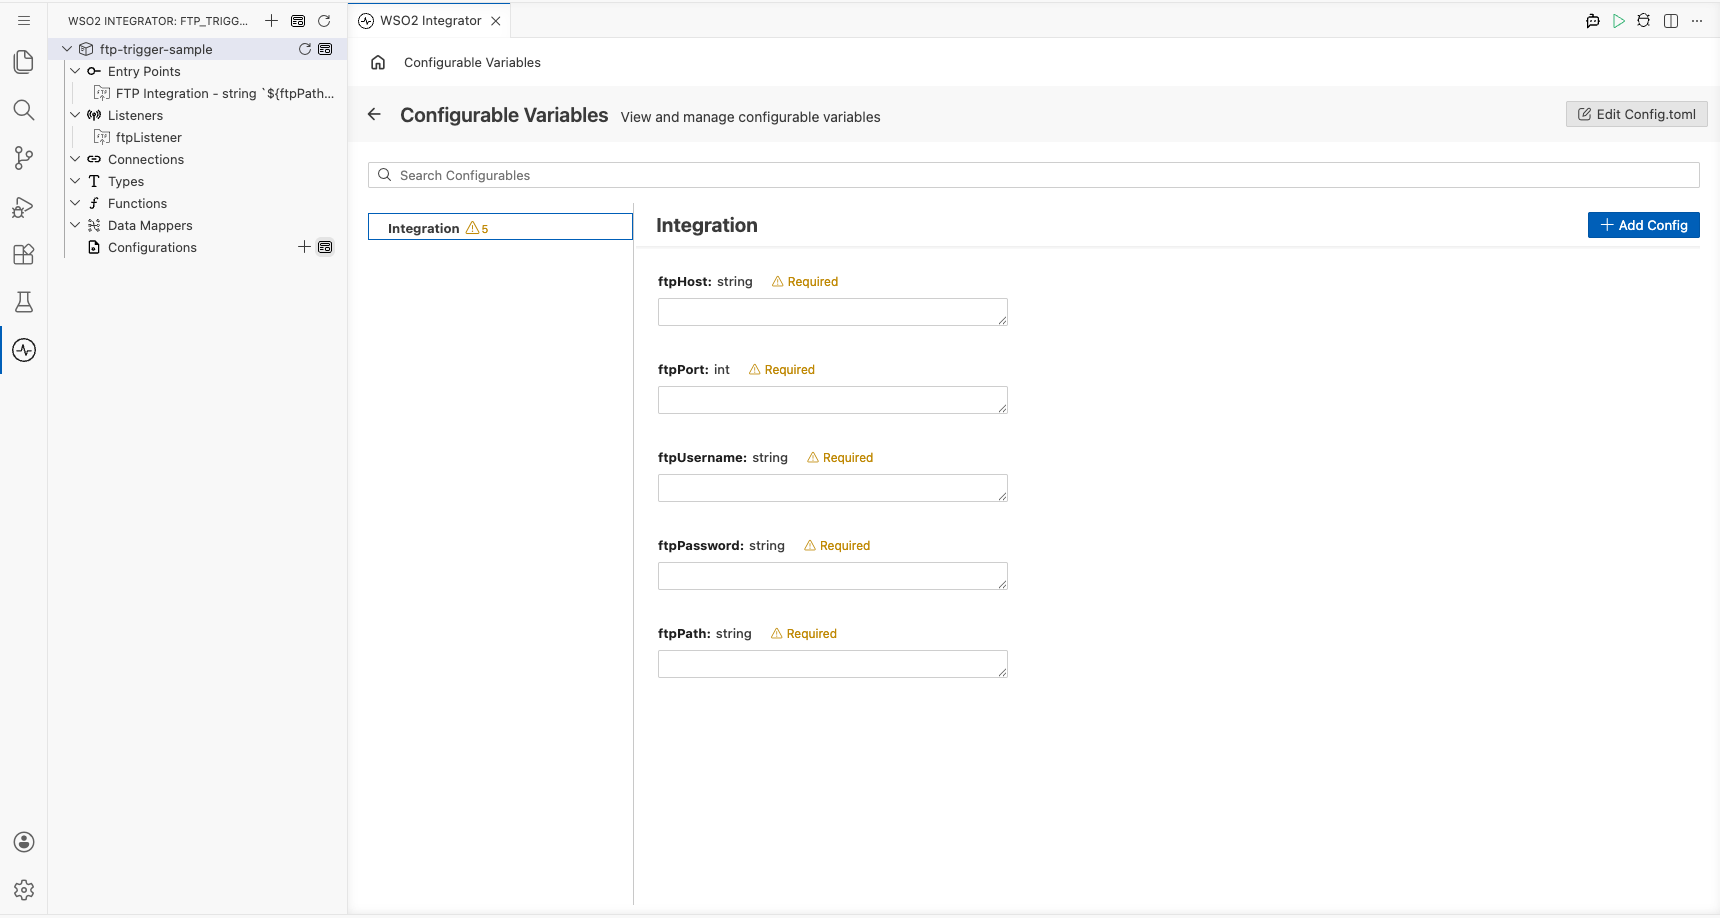
Step 1: Create configurable variables
In the left panel, select Configurations. In the Configurable Variables panel, select + Add Config and create each configuration listed below.
- ftpHost (string) : Hostname or IP address of the FTP/SFTP server
- ftpPort (int) : Port number used to connect to the server
- ftpUsername (string) : Authentication username
- ftpPassword (string) : Authentication password
- ftpPath (string) : Directory path on the server to monitor for new files
For string fields, enter the Variable Name and Default Value, then select Save. The configurable chip appears in the field.
For the Port Number, create the ftpPort configurable variable and use integer type.
Adding the FTP trigger
Step 2: Open the Artifacts palette and select the FTP trigger
Select Add Artifact to open the Artifacts palette. Navigate to the File Integration category and locate the FTP/SFTP trigger card.
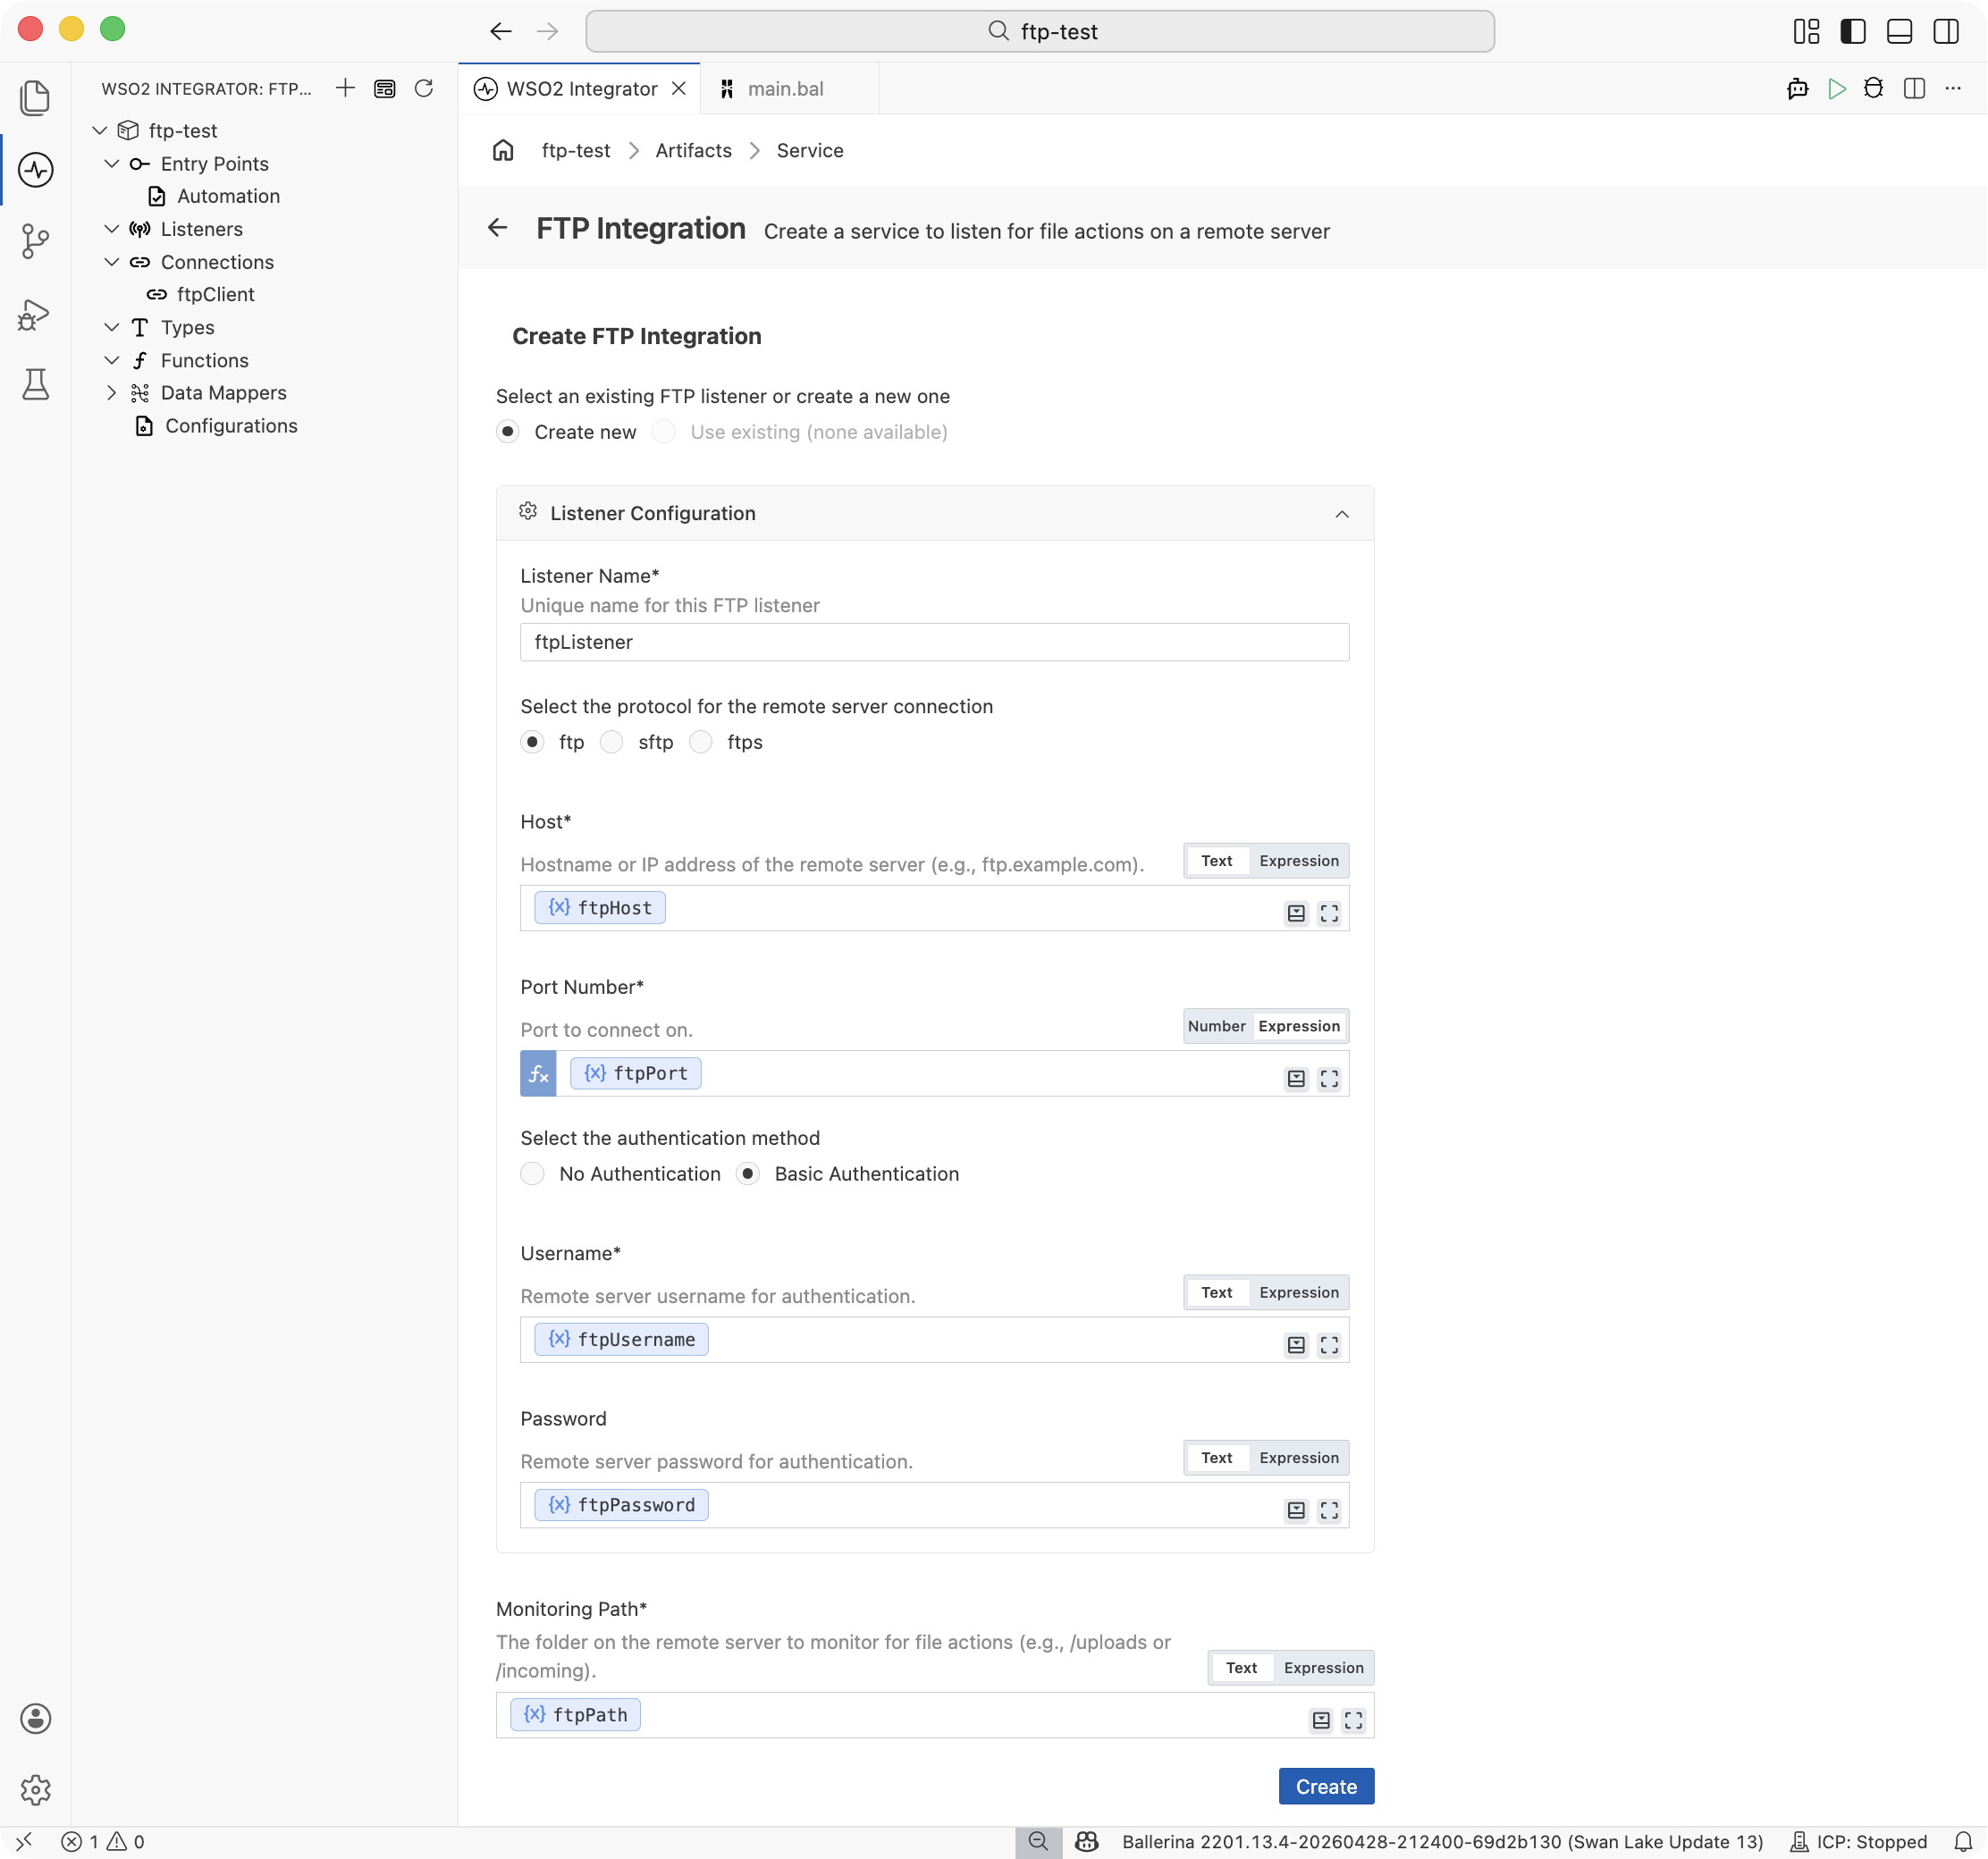
Step 3: Bind listener parameters to configurable variables
Select the FTP/SFTP trigger card to open the trigger configuration form. Bind each listener parameter to the created configurable variables using the Helper Panel:
- Host : Hostname or IP address of the FTP/SFTP server (for example,
ftpHost) - Port Number : Port used to connect to the FTP/SFTP server (for example,
ftpPort) - Username : Authentication username for the FTP/SFTP server (for example,
ftpUsername) - Password : Authentication password for the FTP/SFTP server (for example,
ftpPassword) - Monitoring Path : Directory path on the server to monitor for new files (for example,
ftpPath)
Leave Authentication set to Basic Authentication and Protocol set to ftp.
For SFTP, set Protocol to sftp, change the port to 22, and use the SFTP authentication form (private key or password) in place of Basic Authentication.
Step 4: Create the trigger
Select Create to generate the integration service and listener.
Setting configuration values
Step 5: Set actual values for your configurations
In the left panel, select Configurations again, and in the Configurable Variables panel, set a value for each configuration created above:
- ftpHost (string) : Hostname or IP address of the FTP/SFTP server
- ftpPort (int) : Port number used to connect to the server
- ftpUsername (string) : Authentication username
- ftpPassword (string) : Authentication password
- ftpPath (string) : Directory path on the server to monitor for new files
Handling FTP events
Step 6: Add a file handler
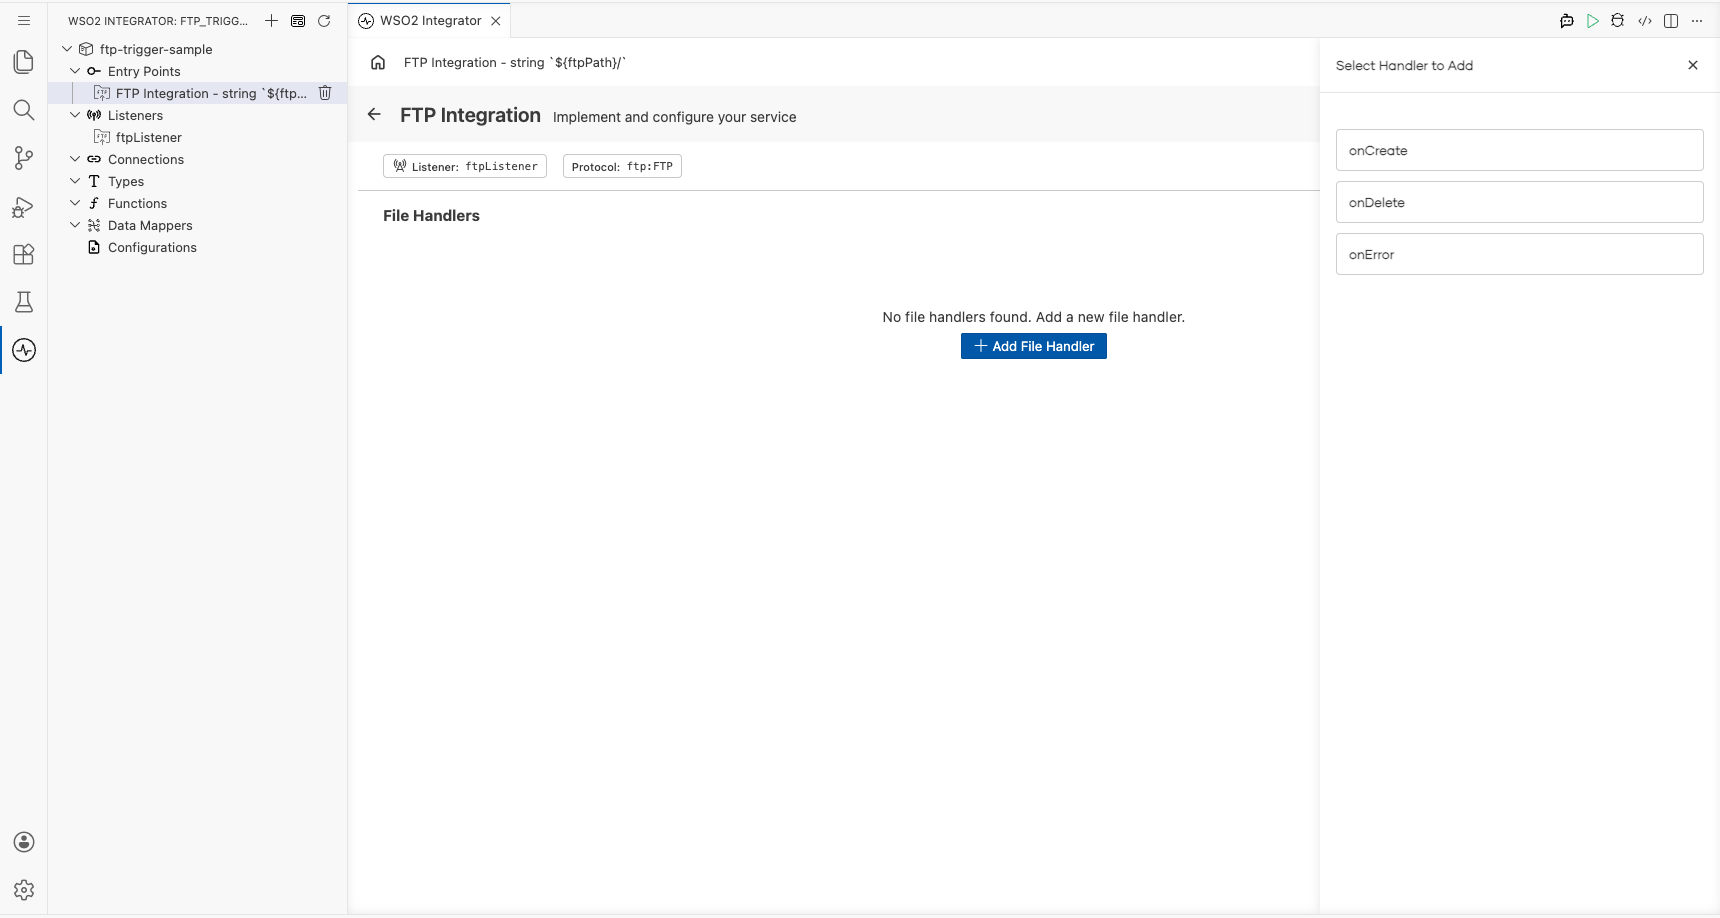
Return to the FTP Integration service view. The service shows a File Handlers section with no handlers registered yet. Select + Add File Handler. A Select Handler to Add side panel opens on the right, listing the available handler types:
onCreate: triggered when a new file is created or detectedonDelete: triggered when a file is deletedonError: invoked by the runtime as a fall-through when content cannot be bound to the typed parameter of a format-specific handler (for example, malformed JSON). UnlikeonCreateandonDelete, this is not a server-side event. It is a binding-failure callback.
The Visual Designer groups handlers by event category. onCreate generates one of onFile / onFileText / onFileJson / onFileXml / onFileCsv based on the File Format you choose; onDelete generates onFileDelete. onError is independent of file format and complements any of the above.
Step 7: Configure the onCreate handler
Select onCreate to open the New On Create Handler Configuration panel. Set the handler options:
- File Format : Select
CSVso the handler parses file content as rows of string arrays - After File Processing → Success : Set to
Movewith destination/tmp/success - After File Processing → Error : Set to
Movewith destination/tmp/error
These paths drive the @ftp:FunctionConfig annotation's afterProcess (Success) and afterError (Error) actions. See Trigger Reference for the full annotation surface.
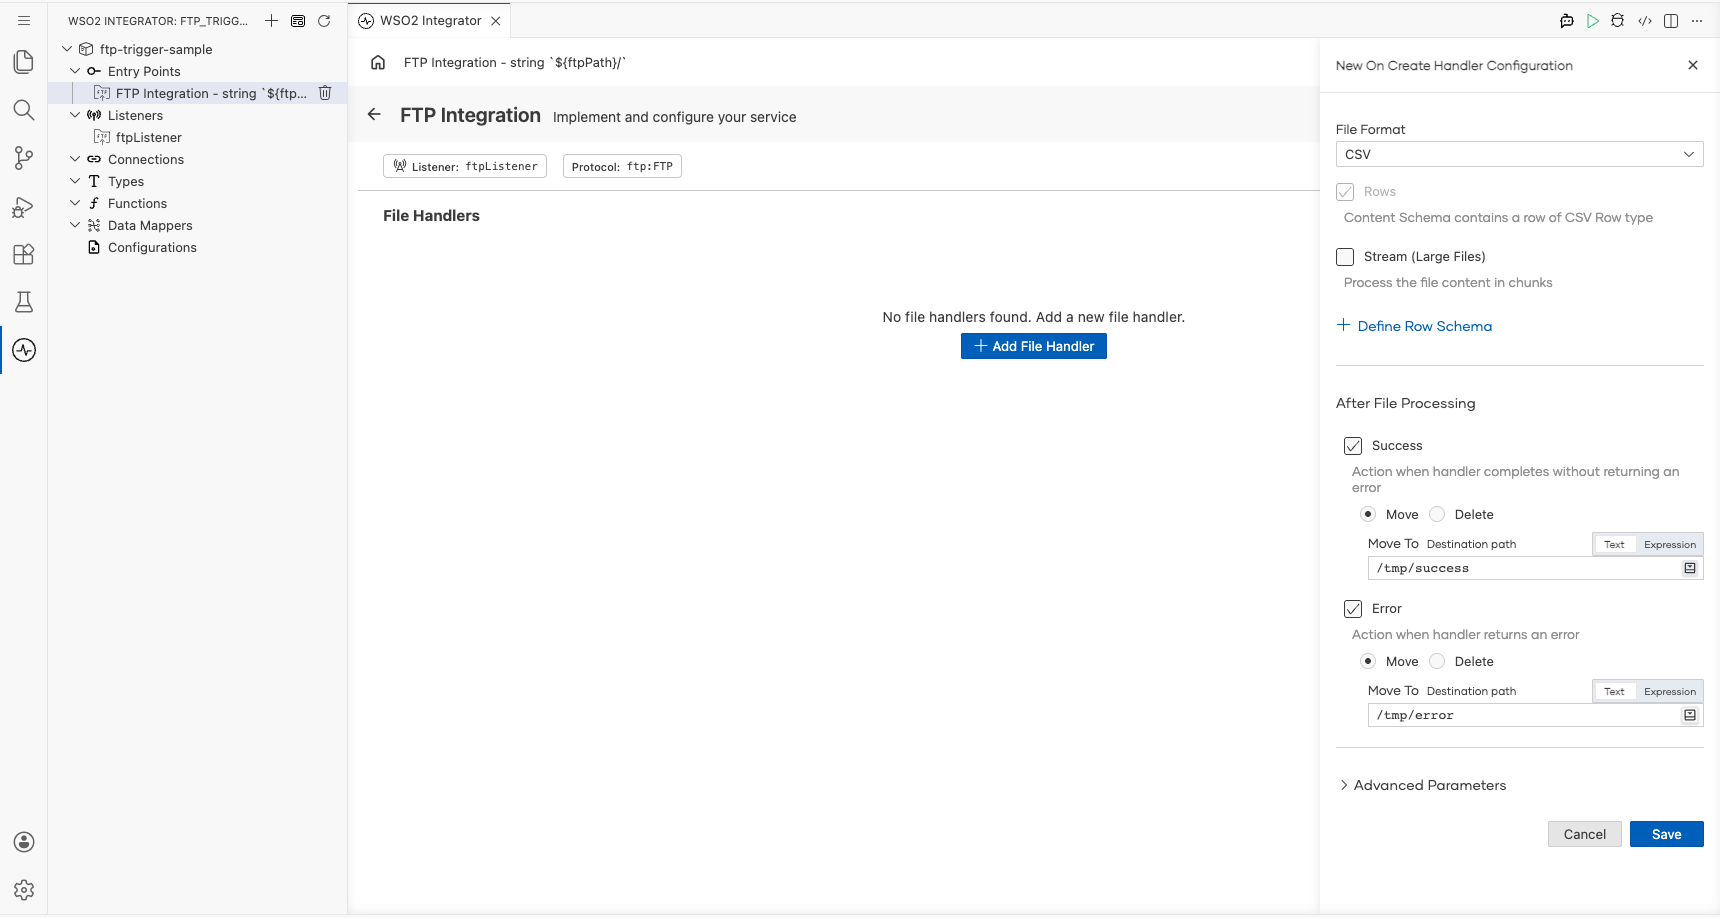
Select Save to register the onFileCsv handler on the service.
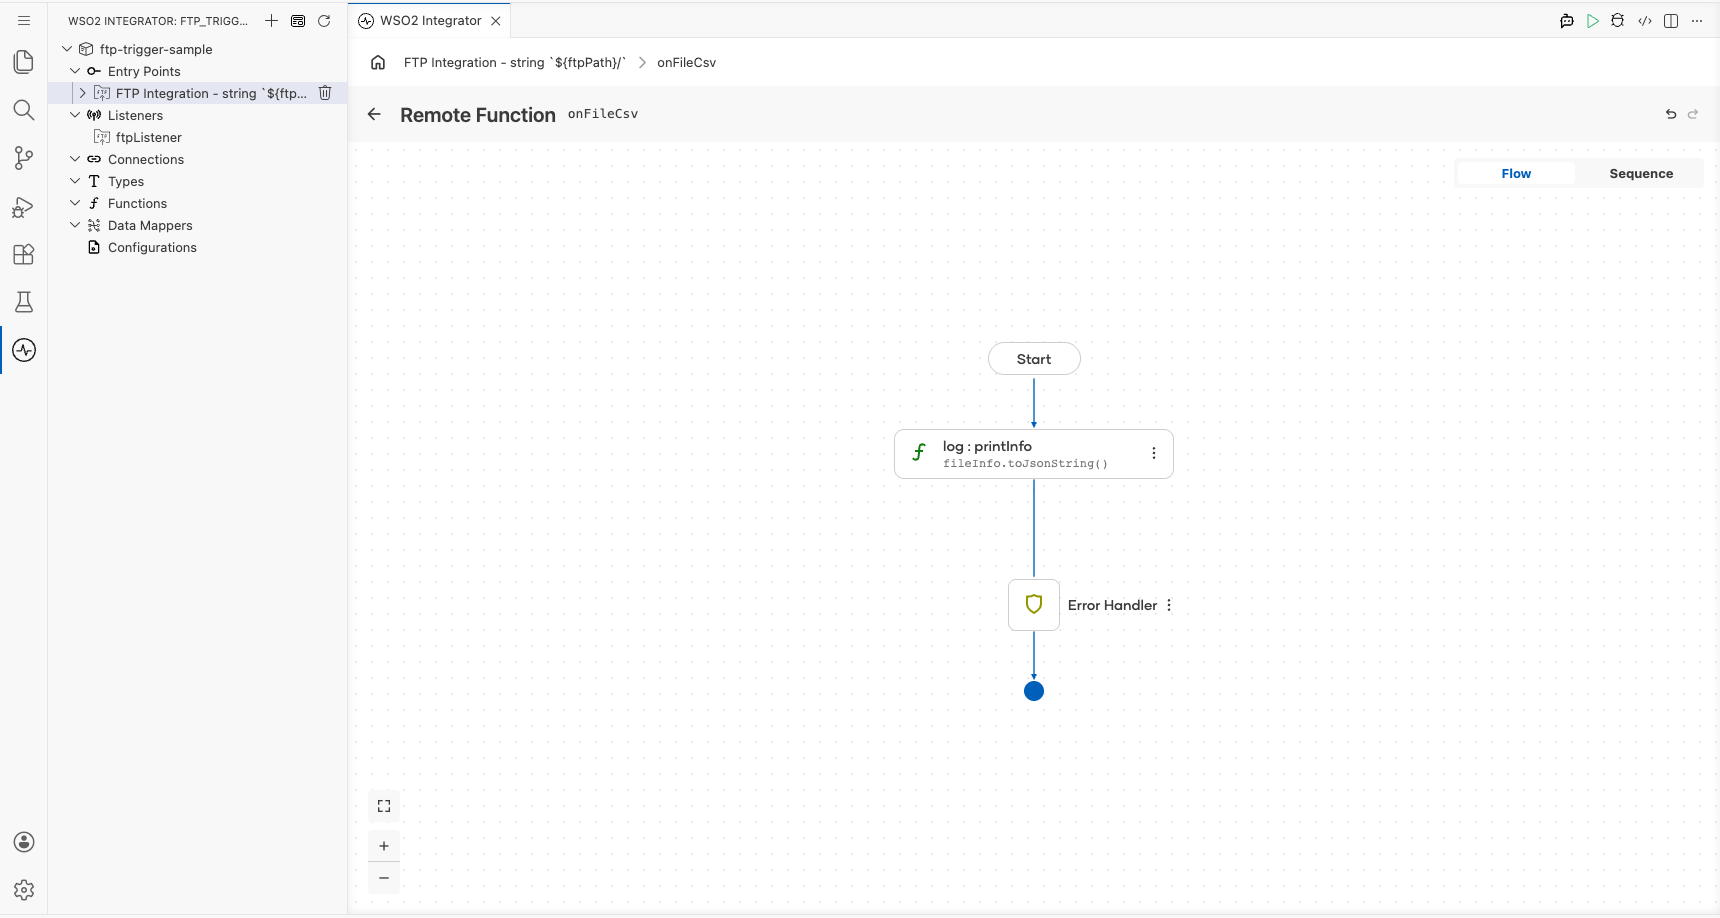
Step 8: Add a log statement to the handler
After the handler is saved, WSO2 Integrator opens the onFileCsv flow canvas. The handler receives the parsed CSV content alongside an ftp:FileInfo record named fileInfo describing the source file (path, name, size, timestamps, and attributes).
-
To log the file metadata, select the + inside the handler flow and choose Log Info from the Logging section in the side panel.
-
Select expression and enter the log statement using the
fileInforecord:fileInfo.toJsonString().
WSO2 Integrator renders the log:printInfo node in the flow canvas.
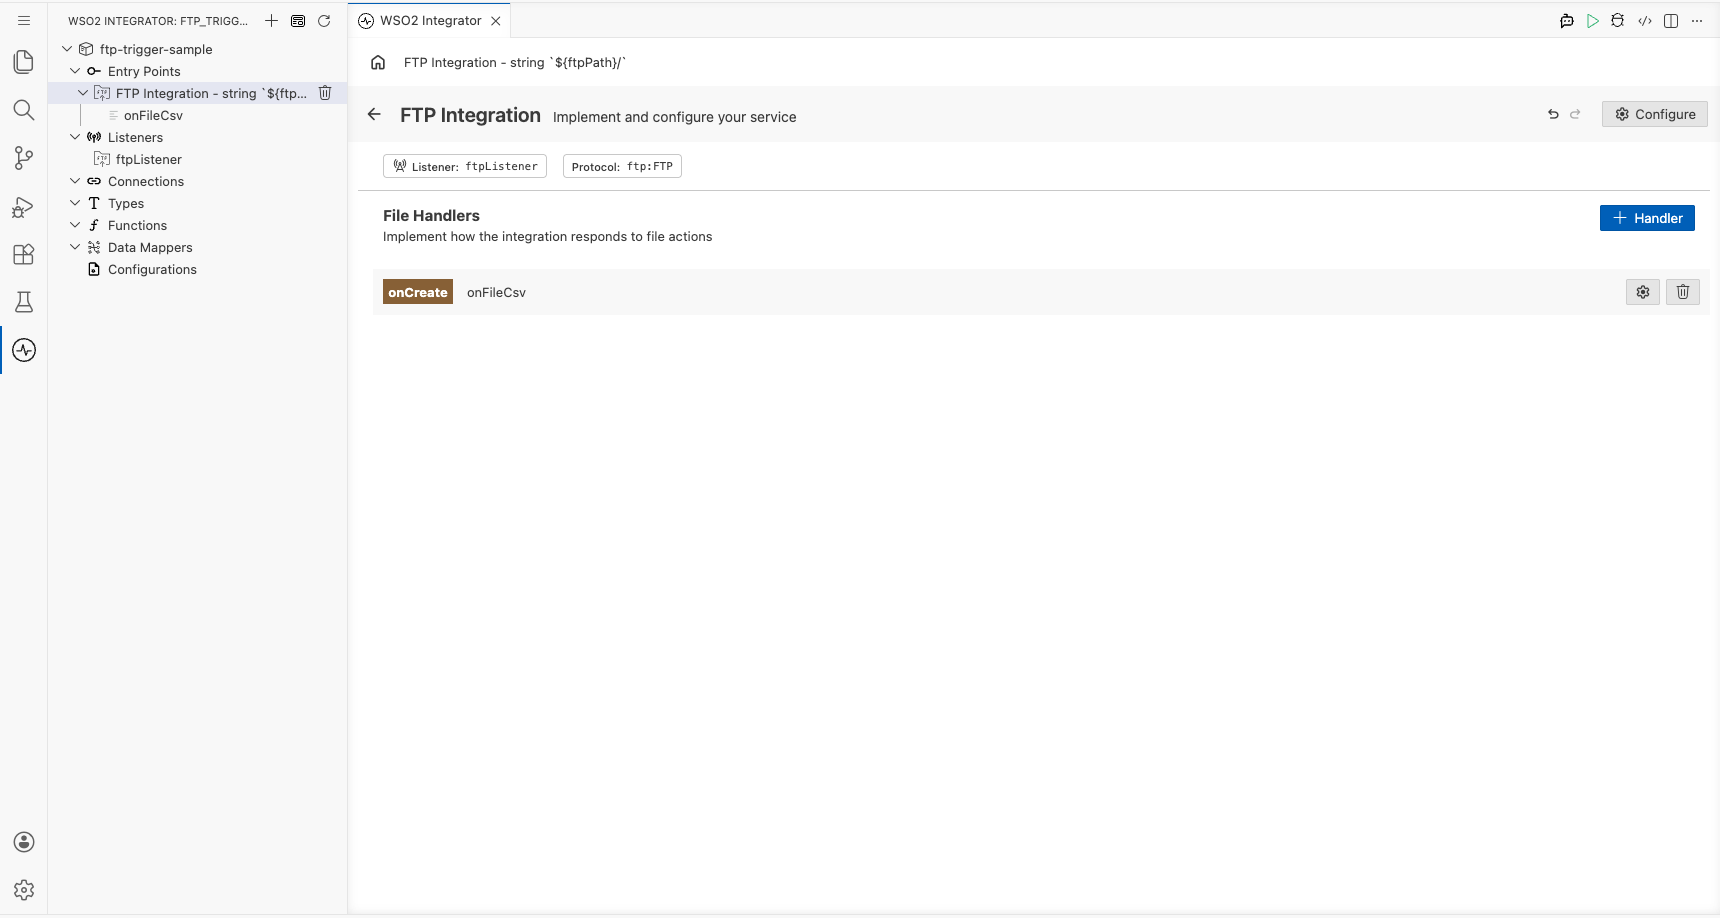
Step 9: Verify the final service view
Navigate back to the FTP Integration service view. The File Handlers section now displays the registered onFileCsv handler row, showing the handler type tag (onCreate) alongside the function name.
Running the integration
Select Run Integration in the WSO2 Integrator toolbar to start the integration. To fire a test event, use one of the following approaches:
- WSO2 Integrator FTP client template: Use the built-in FTP client integration template to upload a CSV file to the monitored path programmatically.
- Native FTP CLI: Use an FTP command-line client (for example,
ftporlftp) to connect to the server and upload a CSV file to the monitored directory. - FTP client application: Use a graphical FTP client such as FileZilla to upload a CSV file to the monitored path on the server.
When a new CSV file appears at the monitored FTP path, the onFileCsv handler fires. The file metadata (name, size, path, and last modified time) is logged to the console via log:printInfo, and the source file is moved to /tmp/success on completion.
Try it yourself
Try this sample in WSO2 Integration Platform.
More code examples
The FTP connector provides practical examples illustrating usage in various scenarios. Explore these examples, covering FTP file transfer and file-processing use cases.
- COVID-19 stat publisher - Process files from an FTP location and publish extracted COVID-19 statistics.