Example
Table of Contents
MQTT Example
What you'll build
Build a WSO2 Integrator automation that connects to an MQTT broker and publishes a message to a configured topic. The integration uses configurable variables for the broker URI, client ID, and topic, making it easy to adapt to different environments.
Operations used:
- Publish : Sends a message with a byte-encoded payload to a specified MQTT broker topic
Architecture
Prerequisites
- A running MQTT broker accessible at a known URI
Setting up the MQTT integration
New to WSO2 Integrator? Follow the Create a New Integration guide to set up your integration first, then return here to add the connector.
Adding the MQTT connector
Add the MQTT connector connection to provide broker connectivity.
Step 1: Open the Add connection panel
Select Add Connection (the + button in the Connections section) on the integration canvas to open the connector palette.
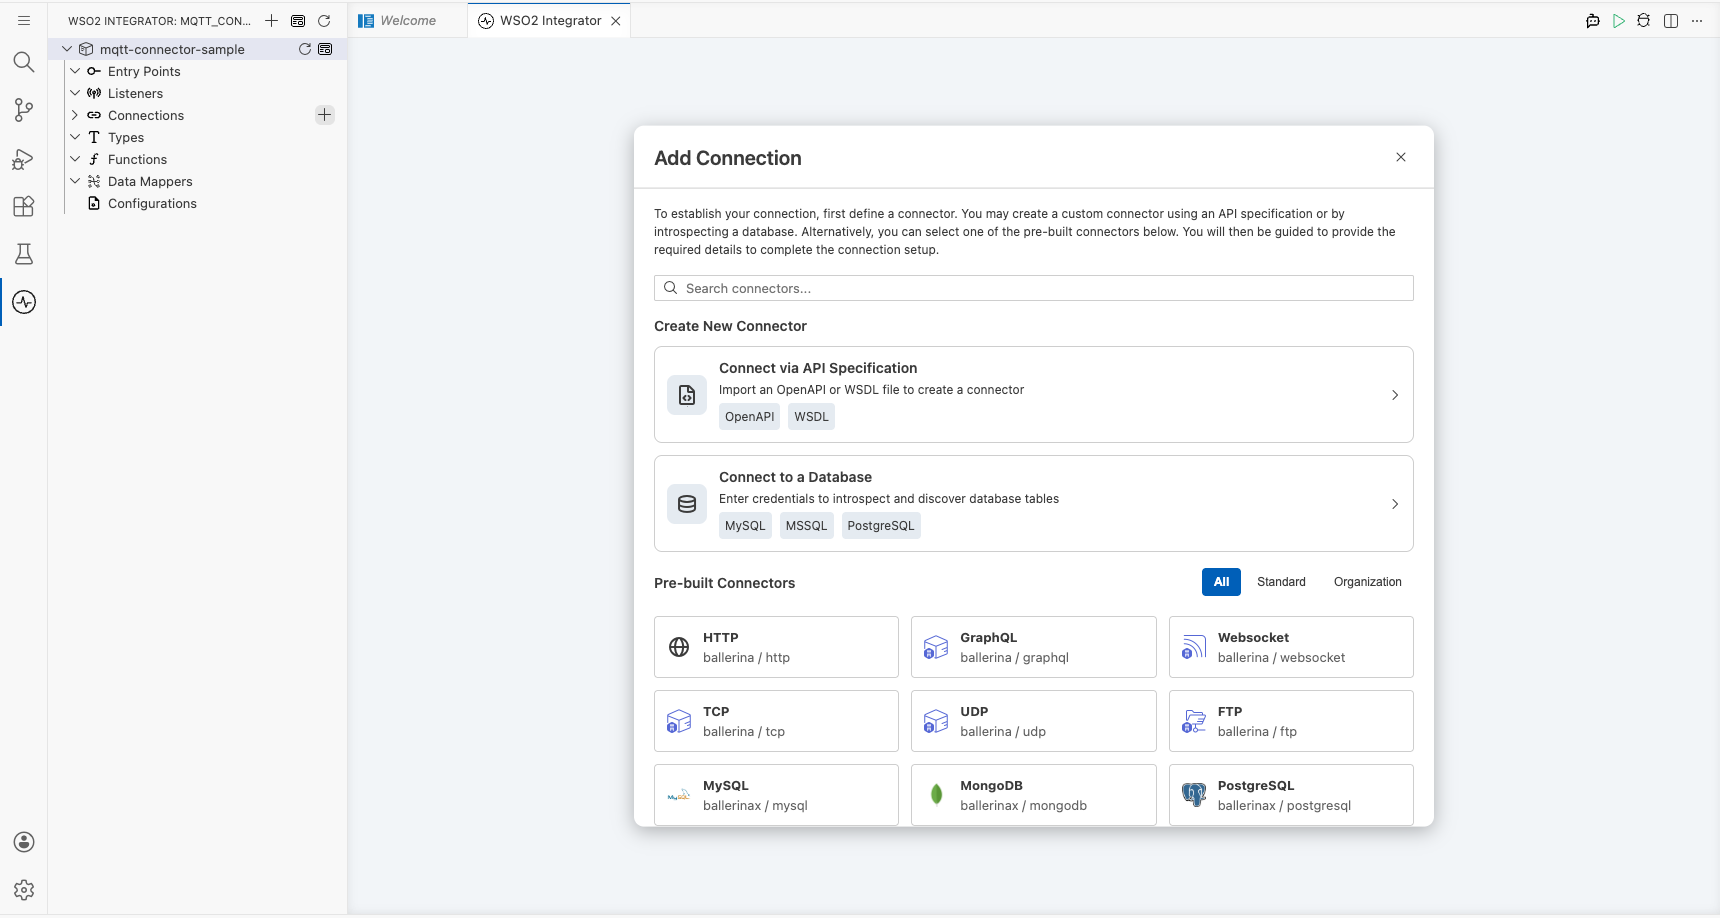
Step 2: Select the MQTT connector
- In the Search connectors... box, enter
mqtt. - Select MQTT Client (the
ballerinax/mqttconnector: choose Client, not Caller) to open the connection form.
Configuring the MQTT connection
Step 3: Fill in connection parameters
Enter the following connection parameters, binding each to a configurable variable:
- Server Uri : The MQTT broker URI (bound to a configurable variable)
- Client Id : A unique identifier for this MQTT client (bound to a configurable variable)
- Connection Name : The name used to reference this connection on the canvas
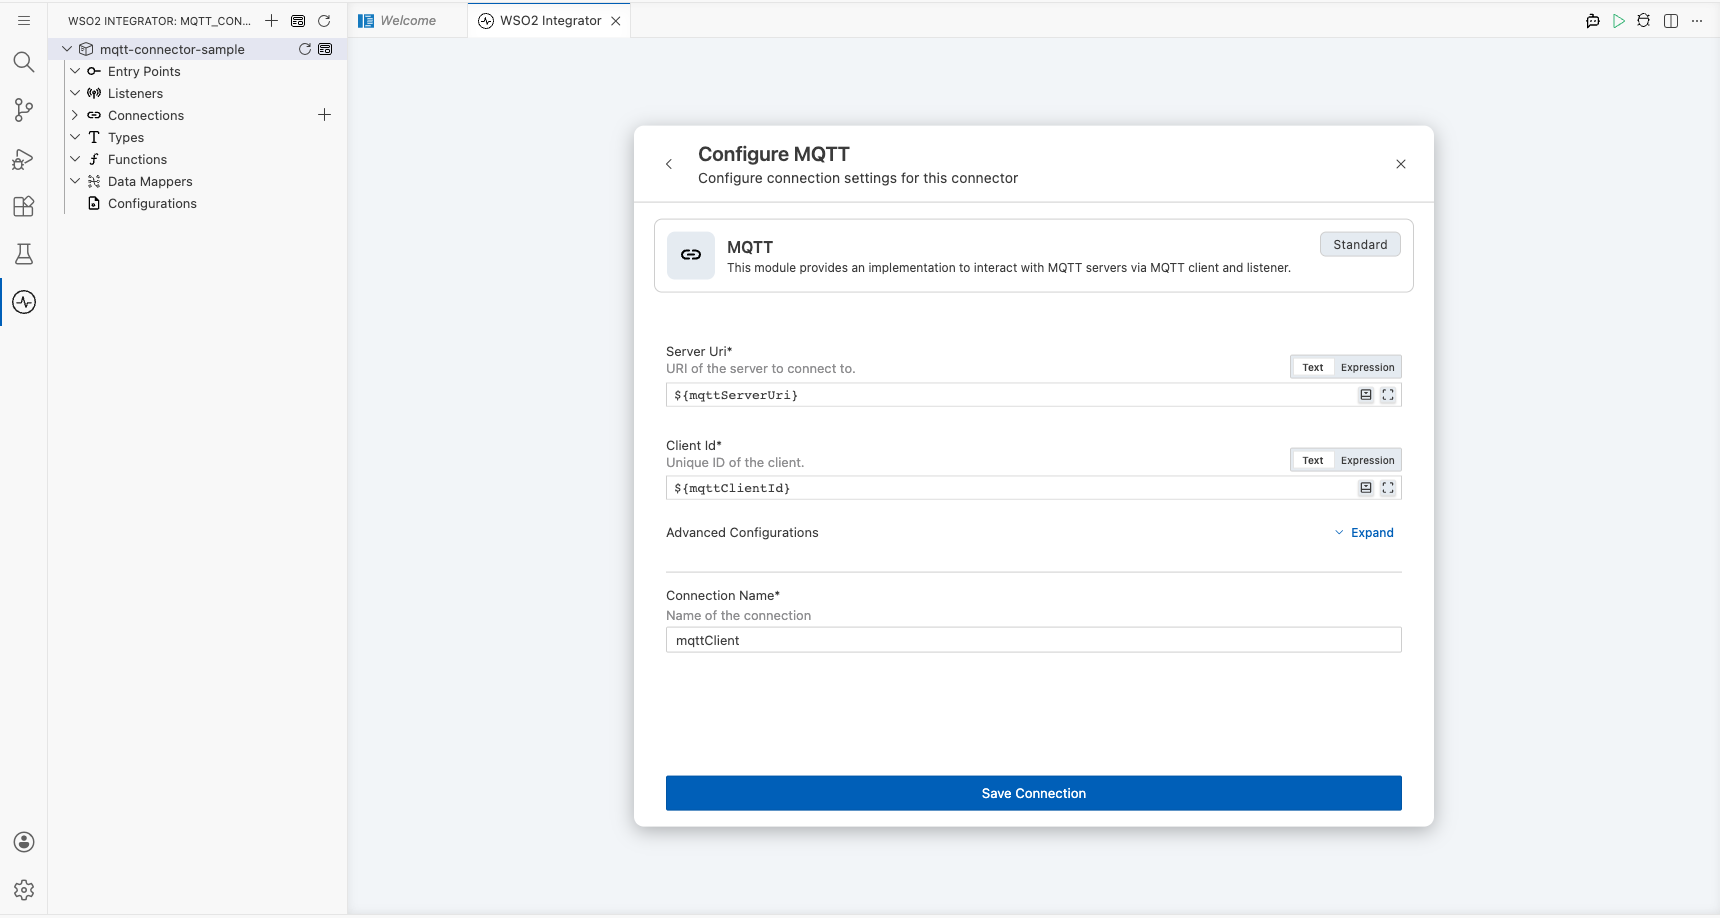
Step 4: Save the connection
Select Save Connection to persist the connection. The mqttClient connection node appears on the design canvas.
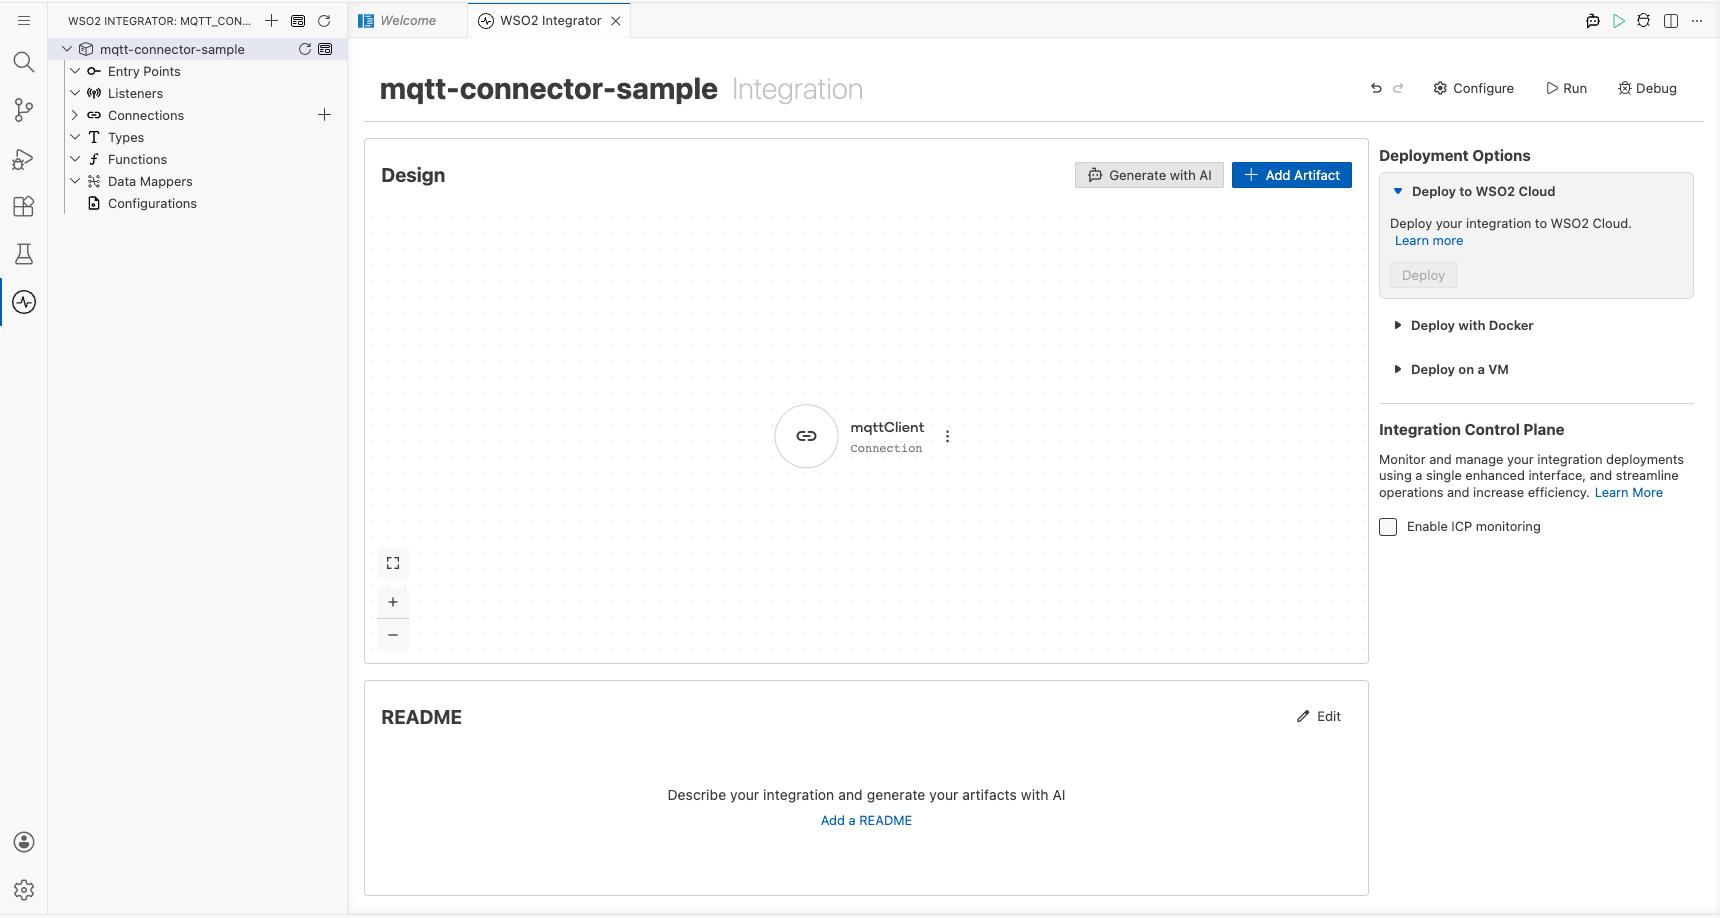
Step 5: Set actual values for your configurables
In the left panel, select Configurations and set a value for each configurable listed below:
- mqttServerUri (string) : The full URI of your MQTT broker (for example,
tcp://your-broker-host:1883) - mqttClientId (string) : A unique client identifier for this connection (for example,
"mqtt-client-01") - mqttTopic (string) : The topic to publish messages to (for example,
"test/topic")
Configuring the MQTT Publish operation
Step 6: Add an Automation entry point
In the left sidebar under Entry Points, select Add Entry Point (+), then select Automation. Select Create to create the automation with default configuration. The automation canvas opens showing a Start node and an Error Handler node.
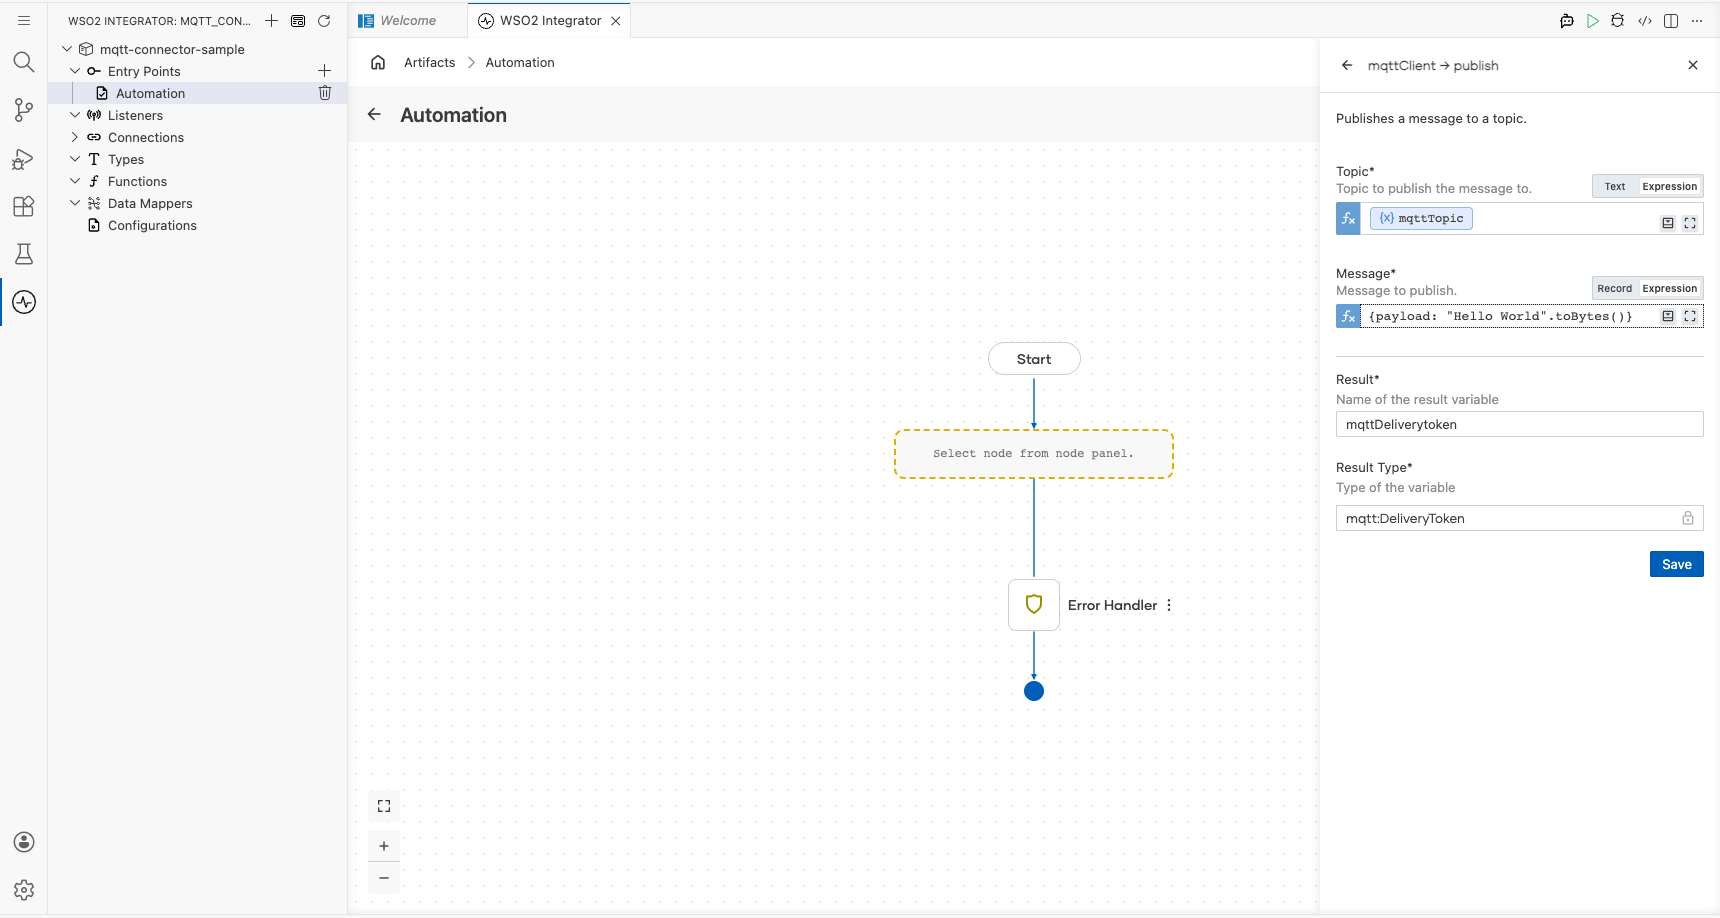
Step 7: Select and configure the Publish operation
- Select the + button between the Start node and the Error Handler node to open the node panel.
- In the Connections section of the node panel, select mqttClient to expand it.
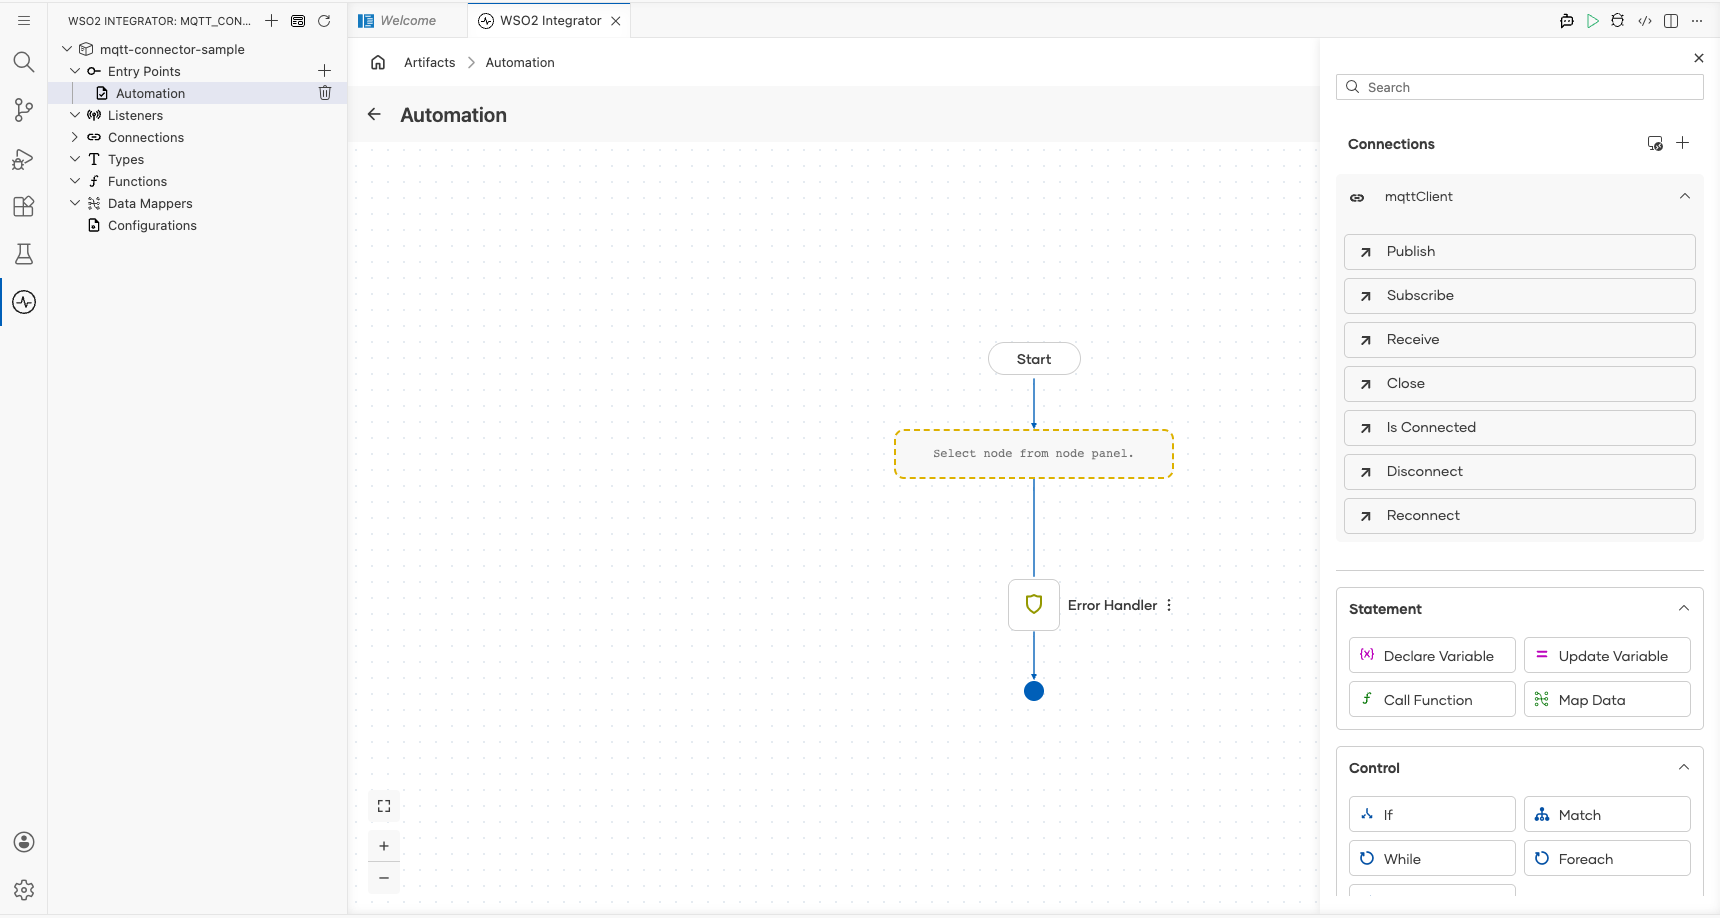
- Select Publish from the operations list to open the publish operation form.
- Configure the following fields:
- Topic : Set to expression mode and bind to the
mqttTopicconfigurable variable - Message : Set to expression mode and enter
{payload: "Hello World".toBytes()}to create anmqtt:Messagerecord with a byte-encoded payload - Result : Leave the default value
mqttDeliverytoken(typemqtt:DeliveryToken)
- Topic : Set to expression mode and bind to the
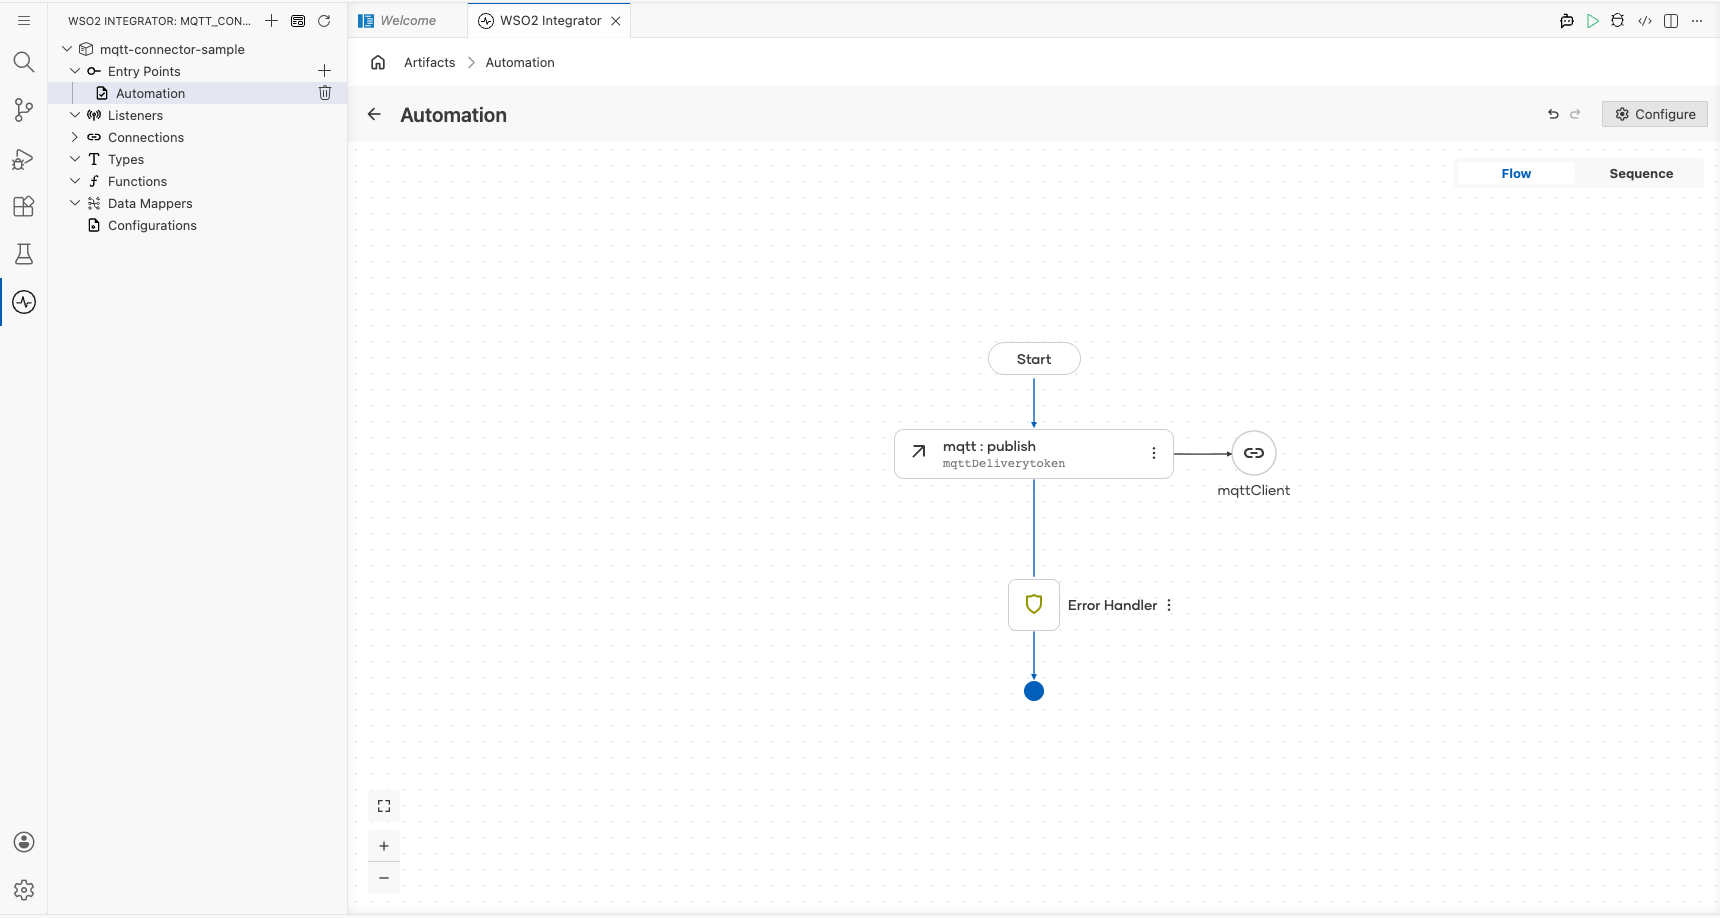
Select Save to add the publish step to the automation flow.
Try it yourself
Try this sample in WSO2 Integration Platform.

MQTT Trigger Example
What you'll build
This integration connects to an MQTT broker, subscribes to a topic, and handles incoming messages using the onMessage event handler. When a message arrives, the MQTT listener receives the mqtt:Message payload and logs it using log:printInfo. The overall flow follows a listener → handler → log pattern.
Architecture
Prerequisites
- Access to an MQTT broker (for example, Eclipse Mosquitto).
- A topic to subscribe to (for example,
sensors/temperature).
Setting up the MQTT integration
New to WSO2 Integrator? Follow the Create a New Integration guide to set up your integration first, then return here to add the trigger.
Adding the MQTT trigger
Step 1: Open the artifacts palette and select the MQTT trigger
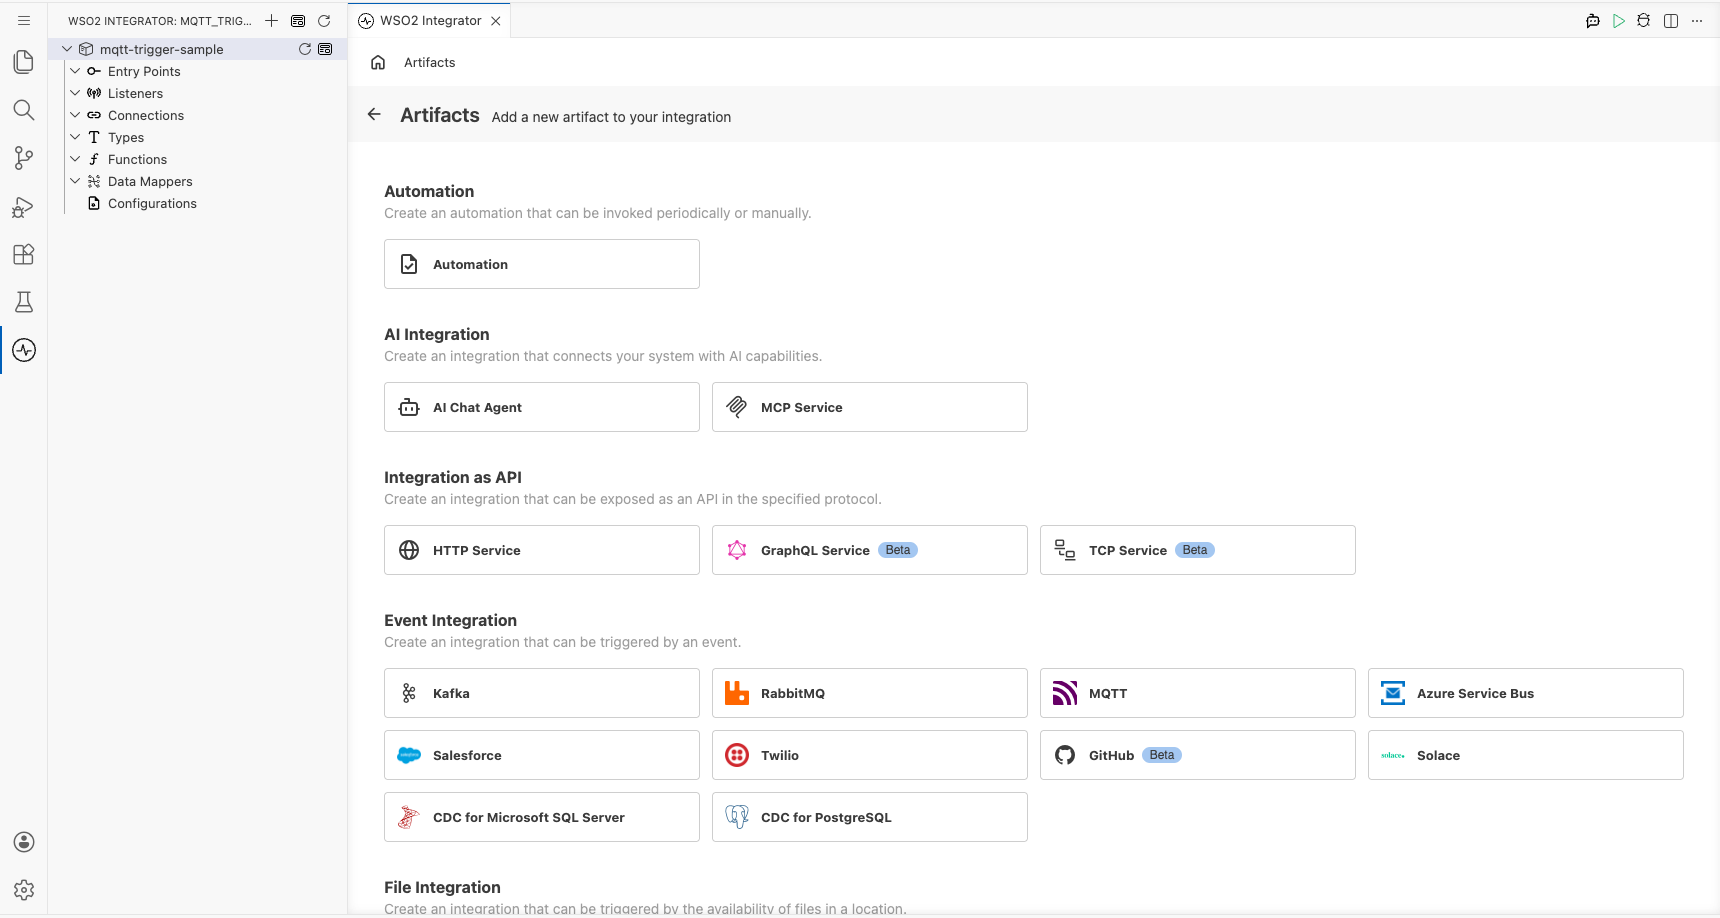
Select Add Artifact in the WSO2 Integrator panel. In the artifacts palette, expand the Event Integration category and locate the MQTT trigger card.
Configuring the MQTT listener
Step 2: Bind listener parameters to configurable variables
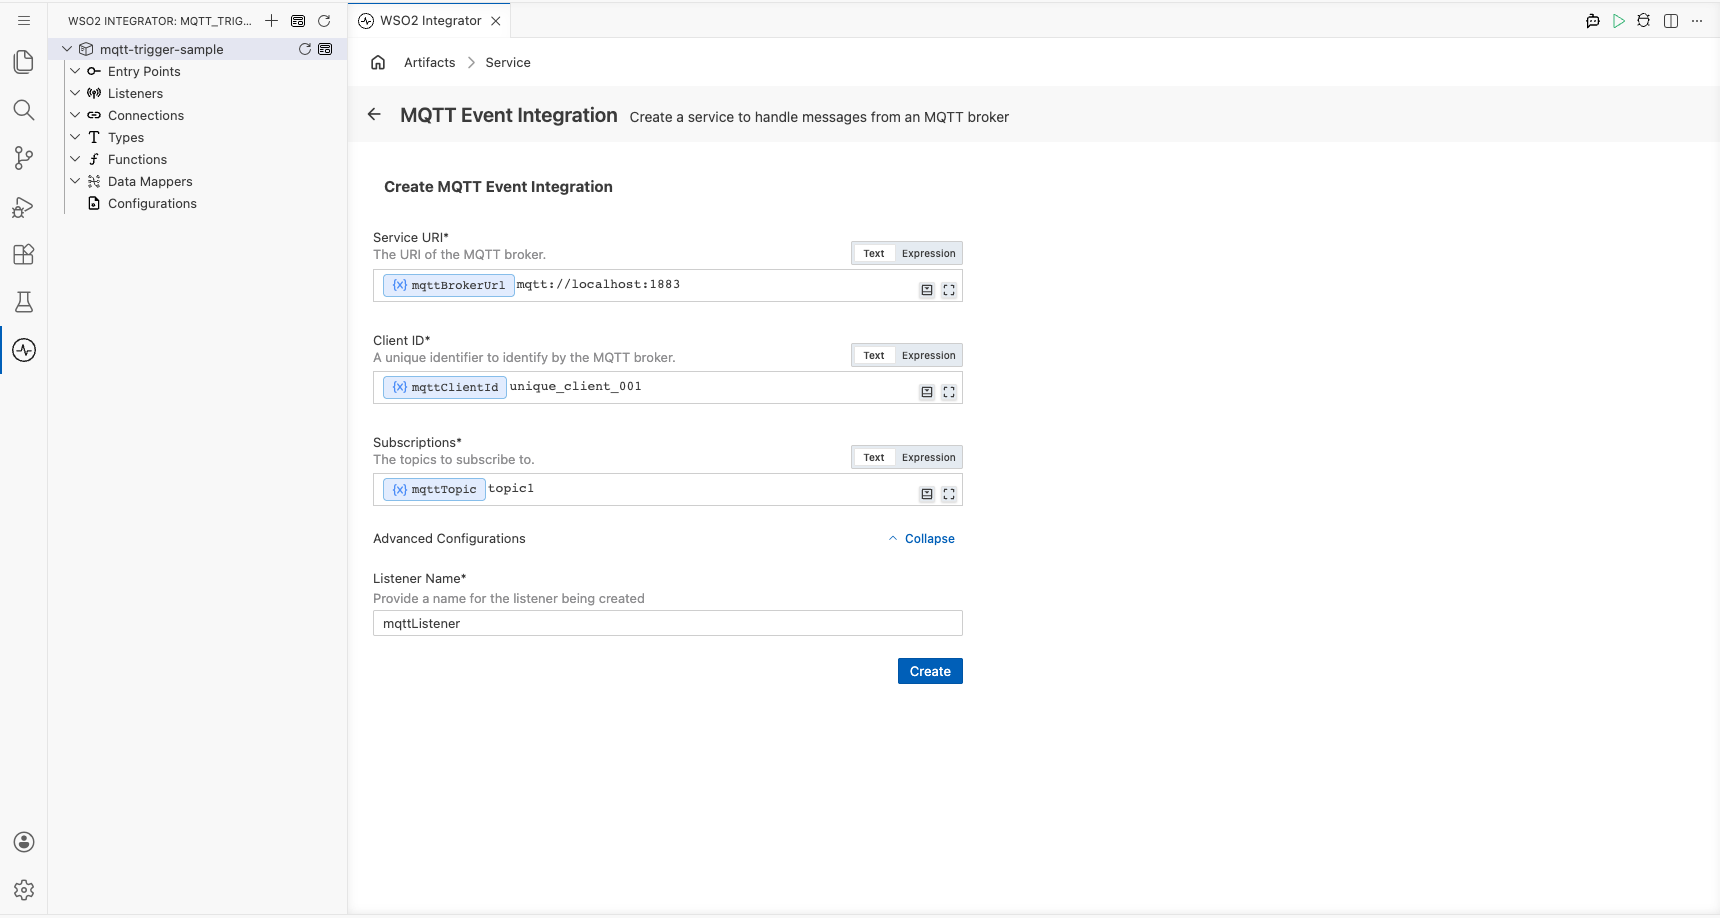
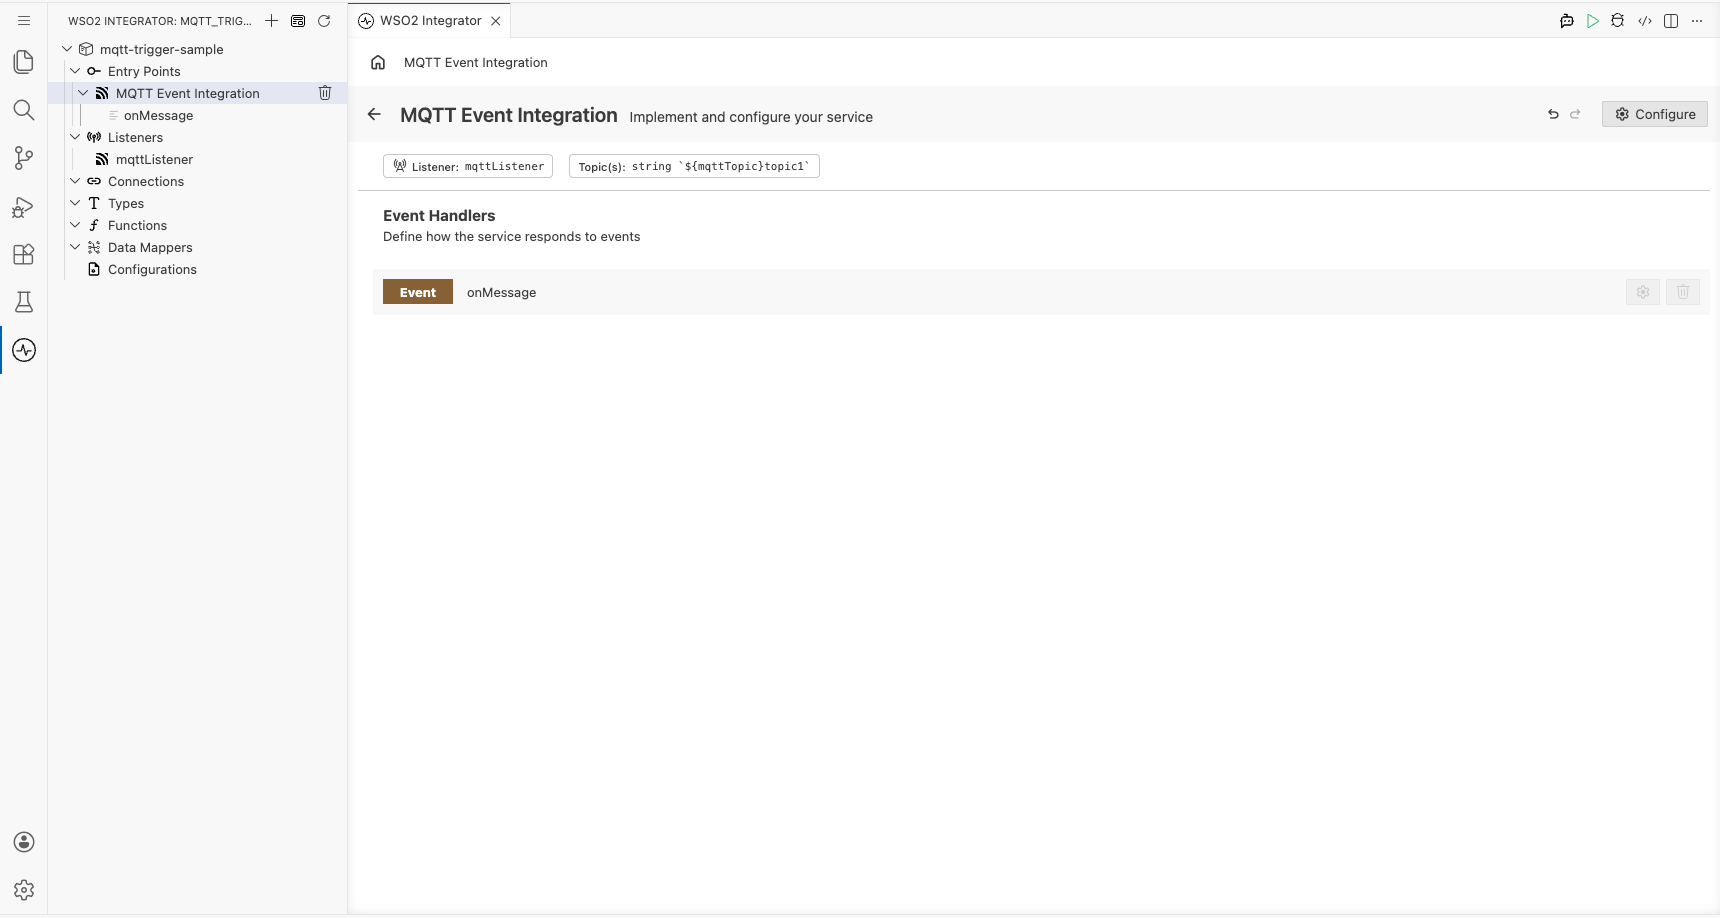
Select the MQTT card to open the Create MQTT Event Integration form. Bind each required field to a configurable variable using the Configurables tab in the helper panel:
- Service URI : Full URI of the MQTT broker
- Client ID : Unique identifier for this client
- Subscriptions : Topic(s) to subscribe to
For each field, select the helper panel icon, go to the Configurables tab, select + New Configurable, enter the variable name and type string, then select Save. The configurable badge ({x}) appears in the field once bound. The listener name under Advanced Configurations is automatically set to mqttListener.
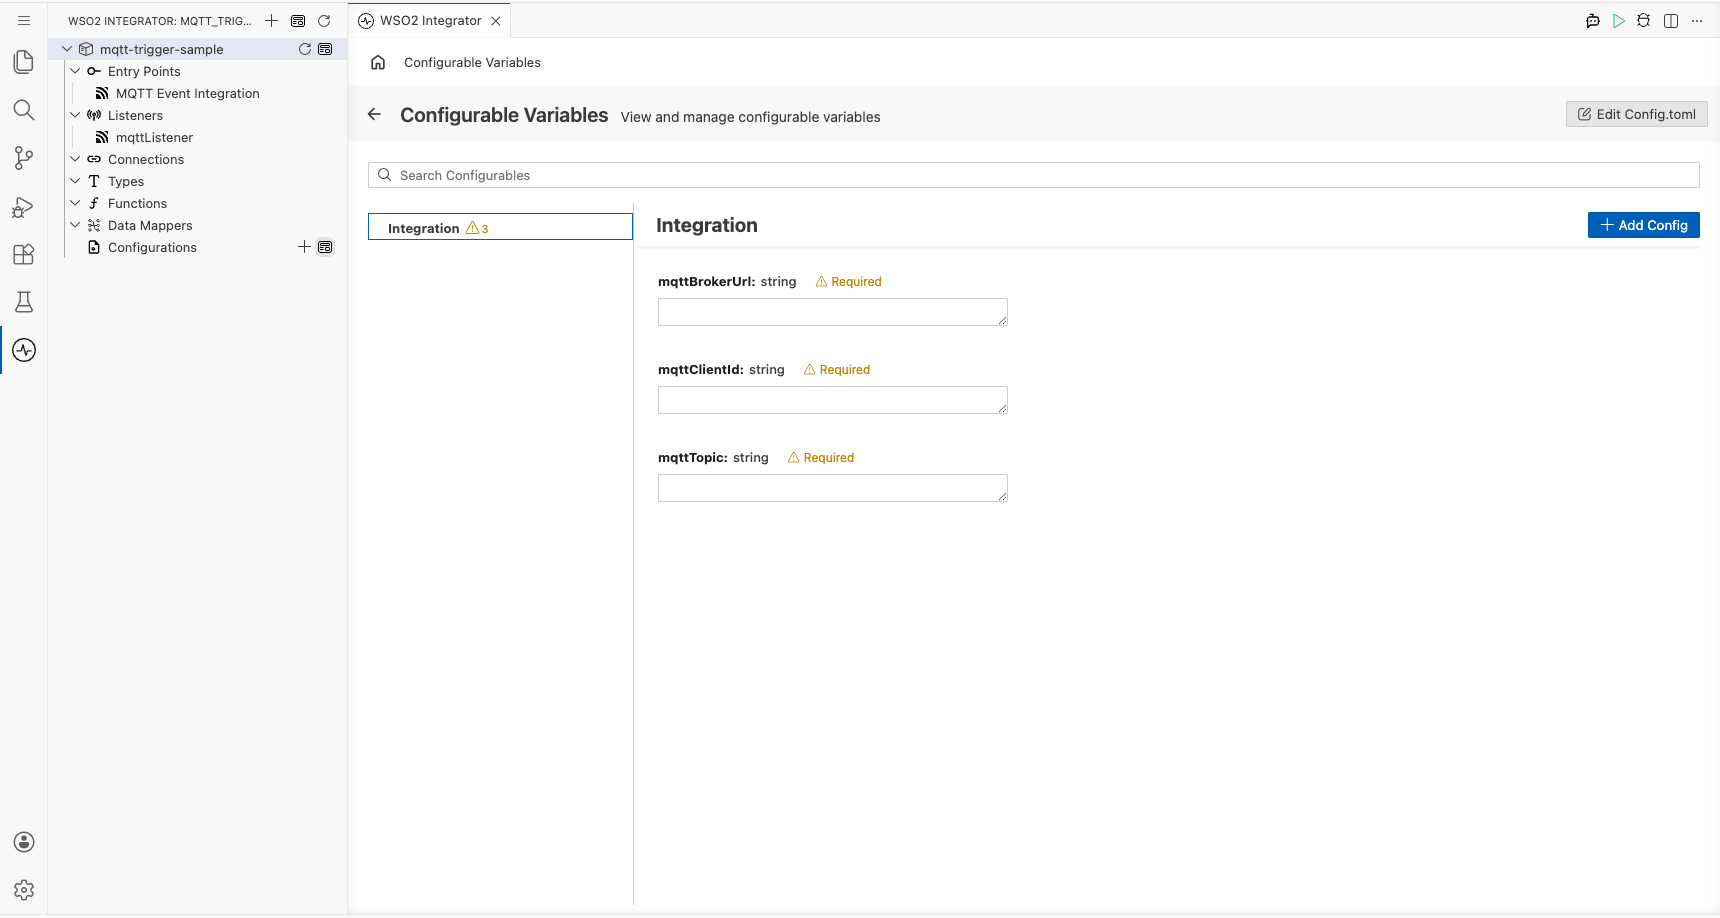
Step 3: Set actual values for your configurations
In the left panel, select Configurations to open the Configurations panel. You'll see the three newly created configurations (mqttBrokerUrl, mqttClientId, and mqttTopic) all marked Required with empty value fields. Supply the actual runtime values for each configuration before running the integration:
- mqttBrokerUrl (string) : The full URI of your MQTT broker
- mqttClientId (string) : A unique client identifier for this integration
- mqttTopic (string) : The topic to subscribe to
Step 4: Create the listener
Select Create to register the listener and generate the service scaffold.
Handling MQTT events
Step 5: Add the onMessage event handler
Navigate back to the MQTT Event Integration service view by selecting the entry in the left panel. Under Event Handlers, select + Add Handler.
Note: The
onMessagehandler uses the library-definedmqtt:Messagetype as its payload parameter. The MQTT trigger provides the message structure directly through theballerina/mqttmodule; no custom type schema is required.
Step 6: Add a log statement to the handler
Select the + icon in the flow chart, and in the side panel that opens, choose Log Info from the Logging section, then enter message.toJsonString() as the message.
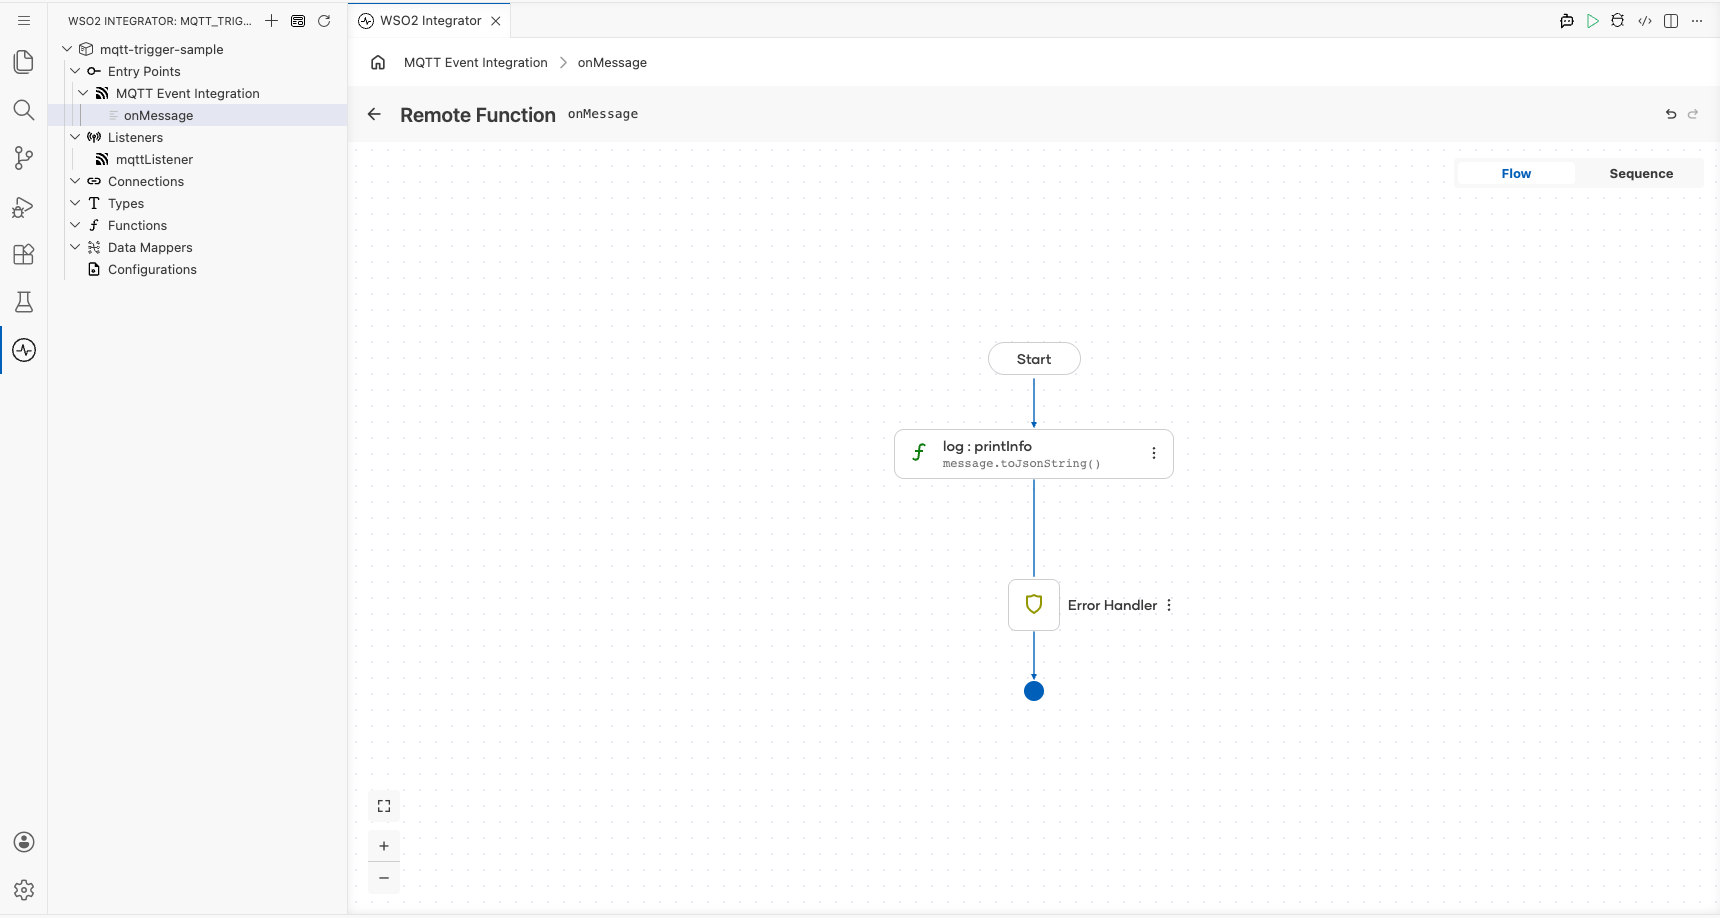
Step 7: Confirm the handler registration
Return to the MQTT Event Integration service view. The Event Handlers list now shows the registered onMessage handler row, confirming the integration is fully configured.
Running the integration
Select Run Integration in the toolbar to start the integration.
To fire a test event, use one of the following approaches:
- WSO2 Integrator MQTT producer template: Use a built-in MQTT producer integration in WSO2 Integrator to publish a test message to the same topic and broker.
- Mosquitto CLI: Run
mosquitto_pub -h <broker-host> -t sensors/temperature -m '{"temp":22.5}'from a terminal with the Mosquitto client installed. - Broker web console: If your broker provides a management UI (for example, HiveMQ's web client), use it to publish a message directly to the subscribed topic.
Once a message is published, the console prints a JSON representation of the mqtt:Message record, for example:
{"topic":"sensors/temperature","payload":"eyJ0ZW1wIjoyMi41fQ==","qos":"AT_MOST_ONCE","retain":false}
Tip: The
payloadfield is Base64-encoded. Decode it to read the original message content.
Try it yourself
Try this sample in WSO2 Integration Platform.
More code examples
The MQTT connector provides practical examples illustrating usage in various scenarios. Explore these examples, covering MQTT publish-subscribe messaging and IoT-style event flows.
- Temperature sensor: Implement a temperature sensor scenario using MQTT topics and message publishing.