Example
What you'll build
Build a WSO2 Integrator integration that sends a UTF-8 text frame to a WebSocket server using the ballerinax/websocket connector. The integration uses an Automation entry point to trigger the message send, with the WebSocket server URL stored as a configurable variable to avoid hard-coded values.
Operations used:
- writeTextMessage : Sends a text message to a WebSocket server connection.
Architecture
Prerequisites
- A running WebSocket server reachable at a known URL (e.g.,
ws://your-websocket-server/chat).
Setting up the WebSocket integration
New to WSO2 Integrator? Follow the Create a New Integration guide to set up your integration first, then return here to add the connector.
Adding the WebSocket connector
Step 1: Open the Add Connection palette
In the WSO2 Integrator explorer panel, expand your project and select the + button next to Connections to open the Add Connection palette.
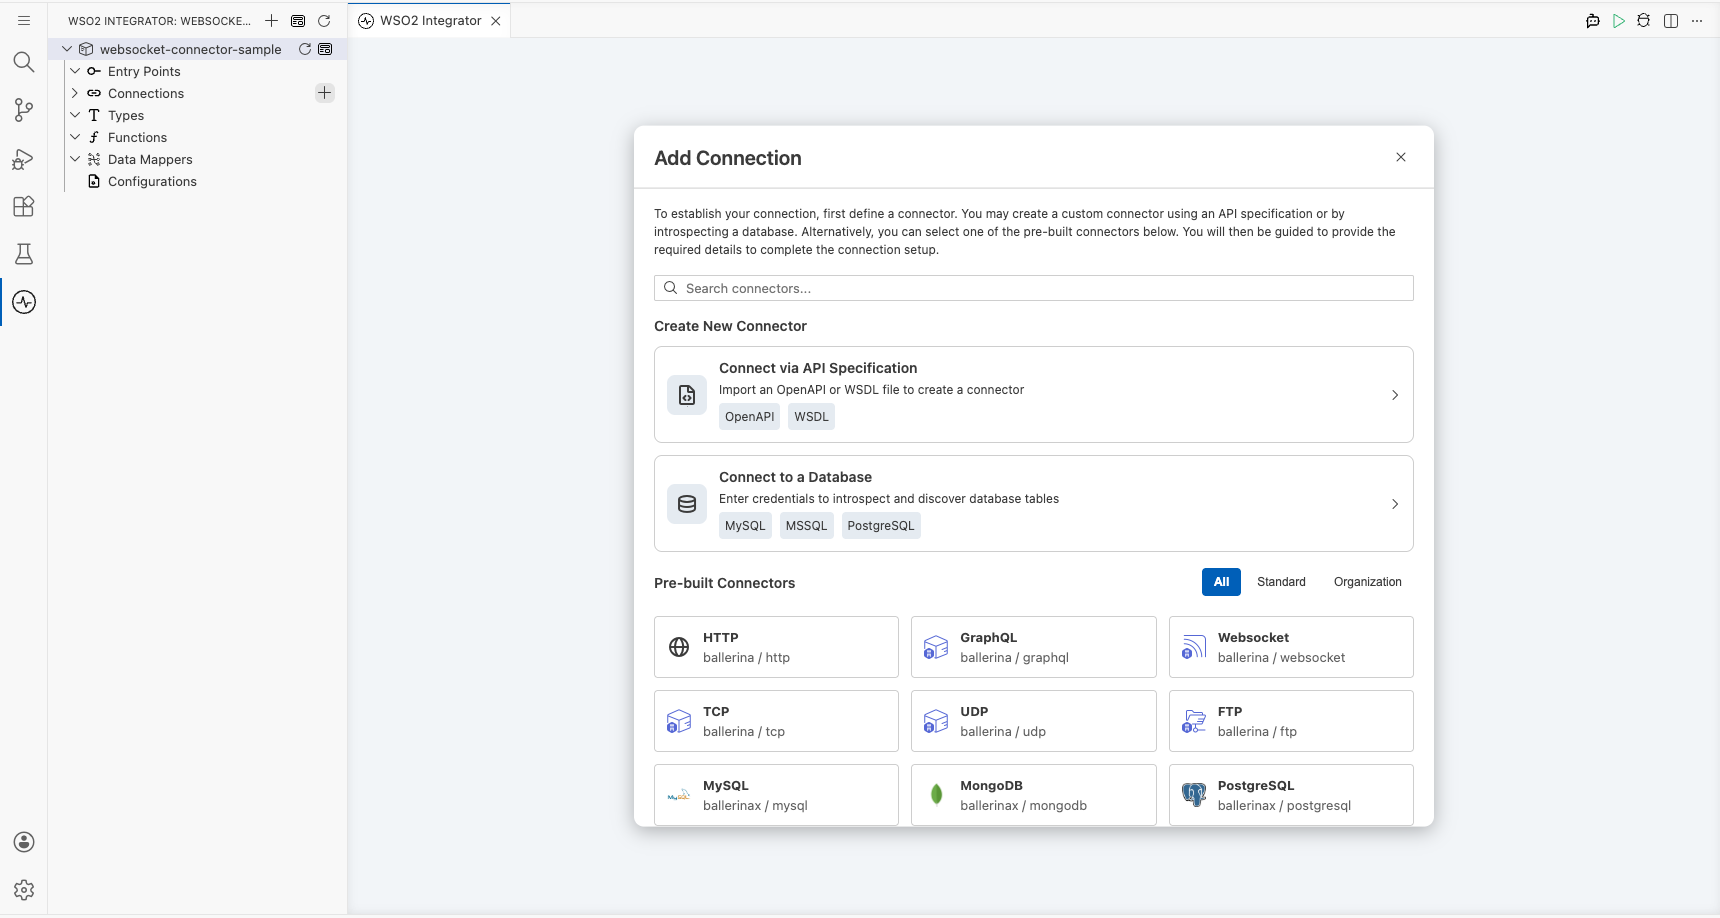
Step 2: Select the WebSocket connector
- In the search box, enter
websocket. - Select the Websocket card (
ballerinax/websocket), the WebSocket client connector.
Configuring the WebSocket connection
Step 3: Fill in the connection parameters
In the Configure Websocket form, bind the required field to a configurable variable:
- connectionName : Leave the pre-populated value
websocketClientas-is. - url : Select the configurable helper, add a new configurable named
websocketServiceUrlof typestring, and confirm the field is bound to that variable.
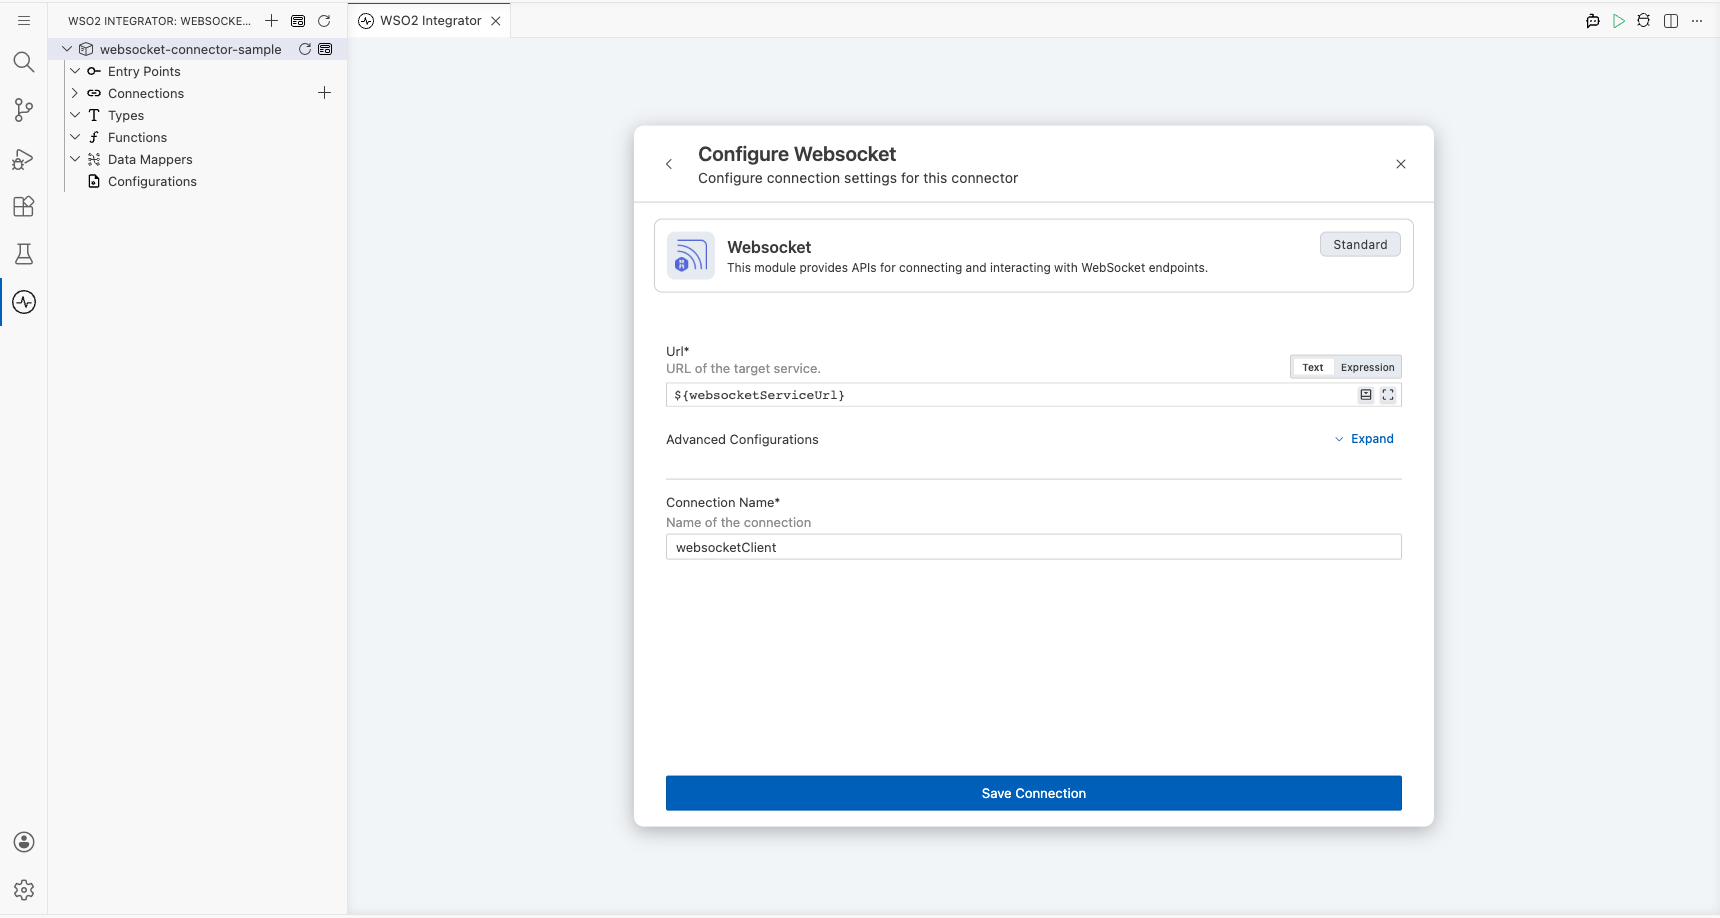
Step 4: Save the connection
Select Save Connection to persist the connection. Confirm that websocketClient now appears in the Connections panel.
Step 5: Set actual values for your configurables
- In the left panel, select Configurations.
- Set a value for each configurable listed below.
- websocketServiceUrl (string) : The full WebSocket server URL to connect to (e.g.,
ws://your-websocket-server/chat).
Configuring the WebSocket writeTextMessage operation
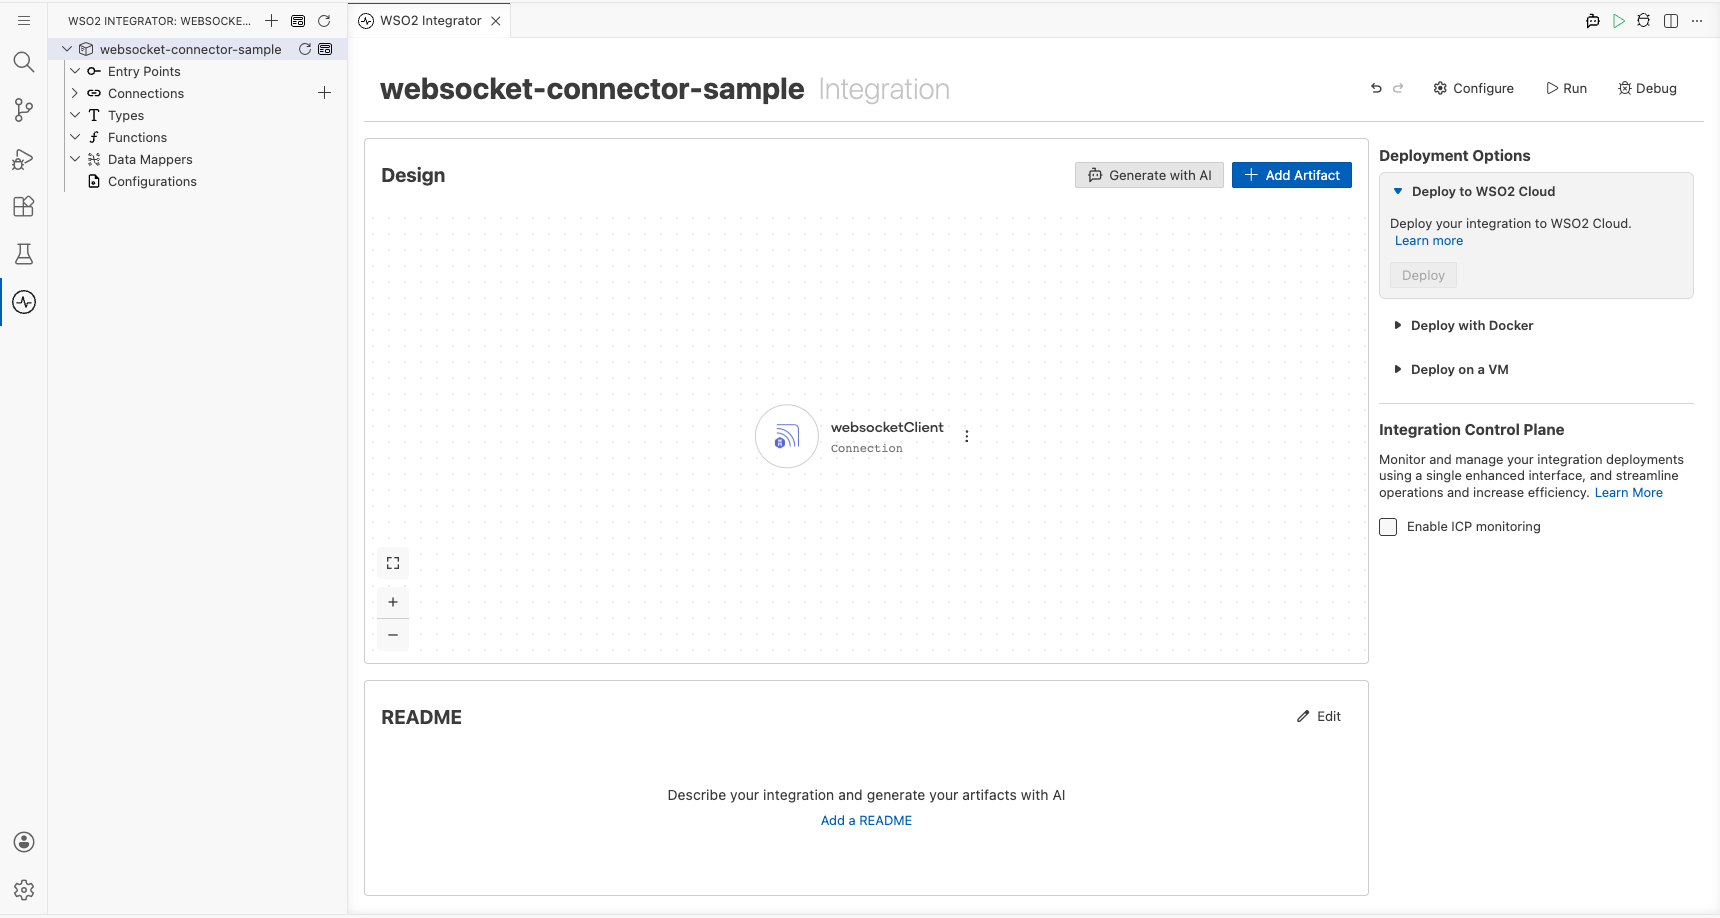
Step 6: Add an Automation entry point
In the WSO2 Integrator explorer, select Add Artifact, choose Automation from the artifact type list, leave the default name (main), and select Create. The Automation canvas opens showing Start → (empty drop zone) → Error Handler.
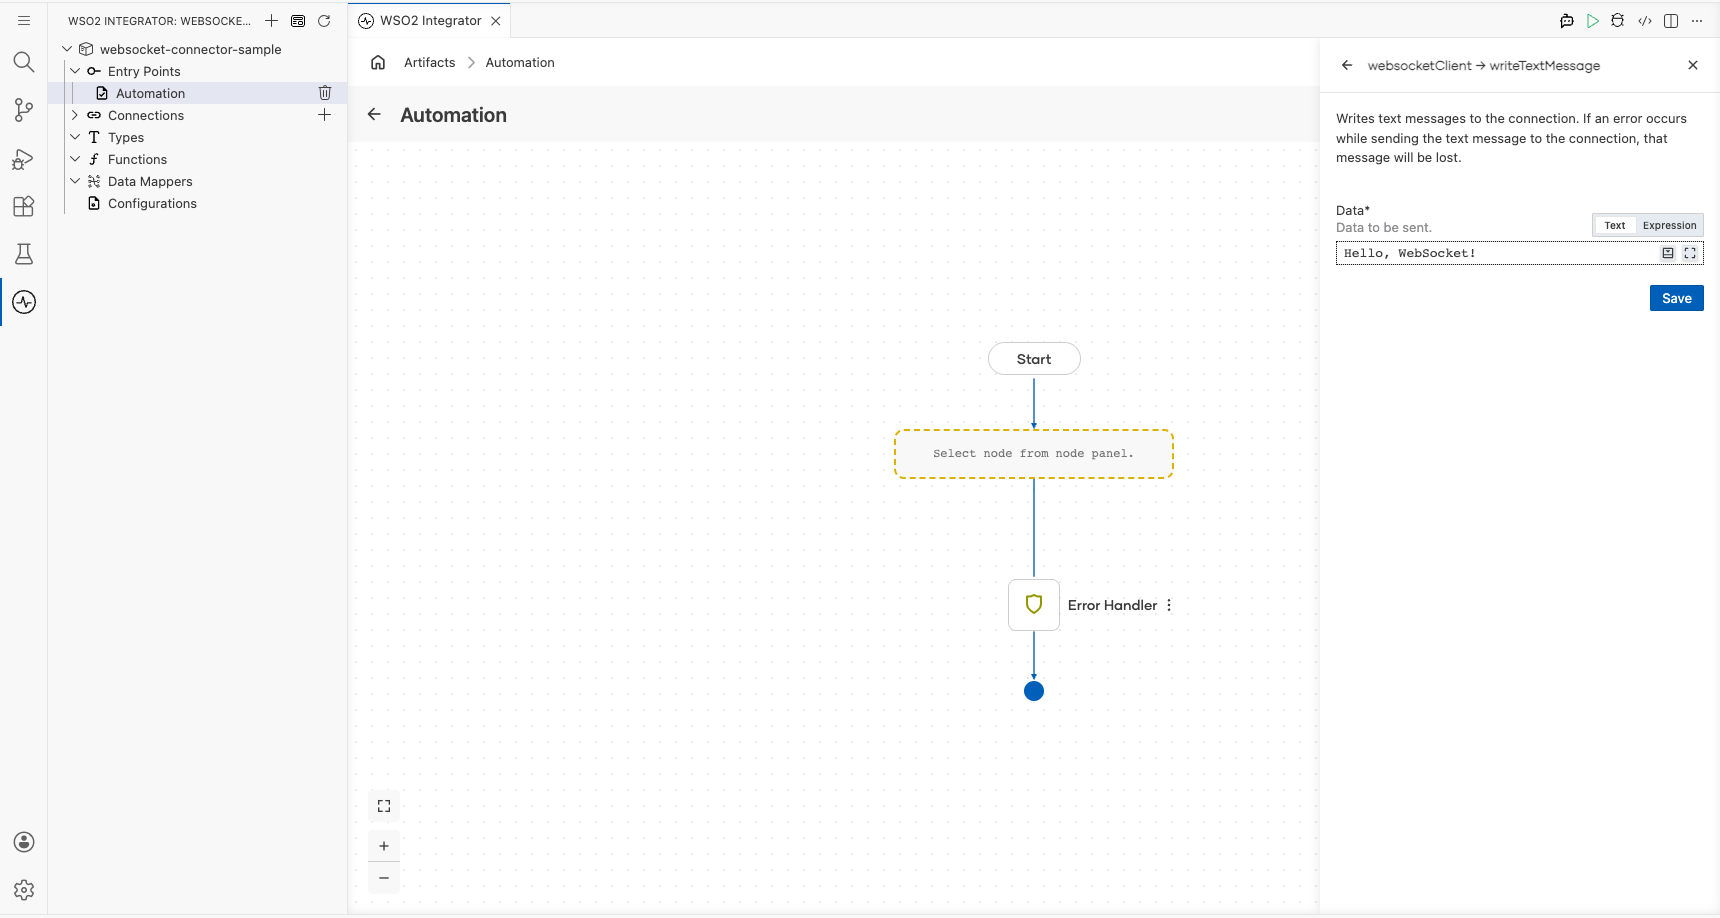
Step 7: Select and configure the writeTextMessage operation
- On the Automation canvas, select the empty placeholder between Start and Error Handler to open the node panel.
- Under Connections, expand websocketClient to reveal its available operations.
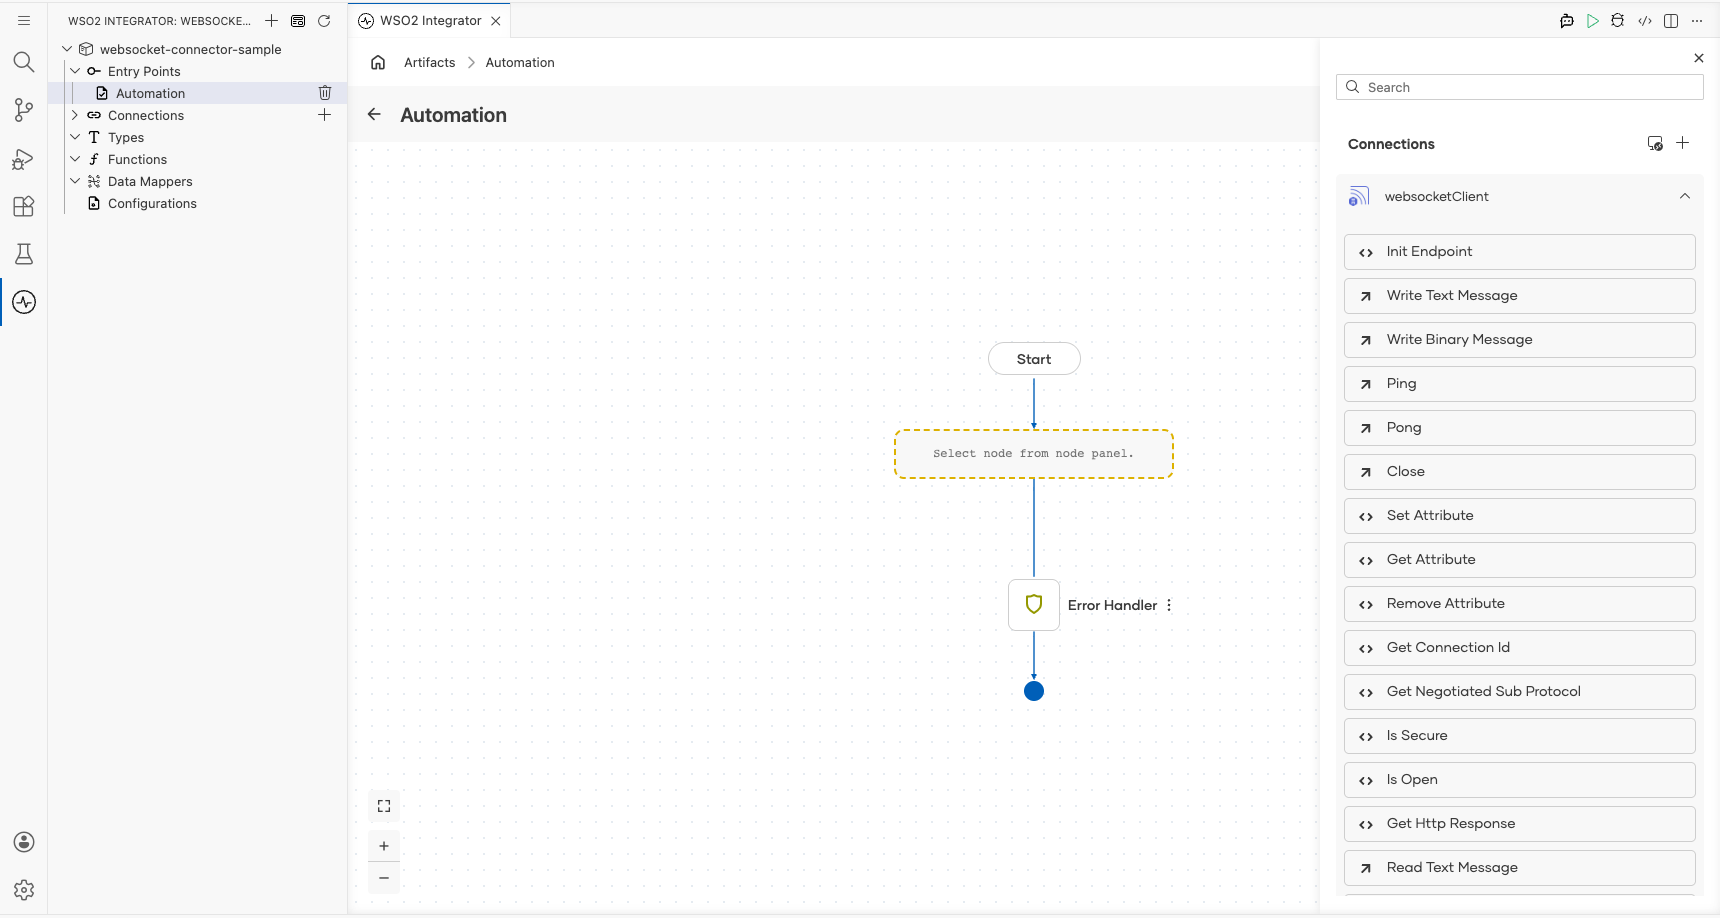
- Select Write Text Message (
writeTextMessage) from the operations list and fill in the parameter:
- data : The text message to send to the WebSocket server, e.g.,
"Hello, WebSocket!".
- Select Save to add the step to the Automation flow.

Try it yourself
Try this sample in WSO2 Integration Platform.

More code examples
The WebSocket connector provides practical examples illustrating usage in various scenarios. Explore these examples, covering WebSocket services, clients, and real-time messaging use cases.
-
Chat application: Build a real-time chat application using WebSocket client and service interactions.
-
Taxi service management: Implement a taxi-service management scenario with real-time WebSocket communication.
-
Tic-tac-toe: Create an interactive tic-tac-toe game using bidirectional WebSocket messaging.