Example
What you'll build
Build an automation that connects to the AWS Marketplace Metering Service and submits usage records for AWS Marketplace sellers. The integration uses configurable variables for AWS credentials and calls batchMeterUsage to report metering data in a single request.
Operations used:
- Batch Meter Usage : Submits usage records for multiple customers in a single call
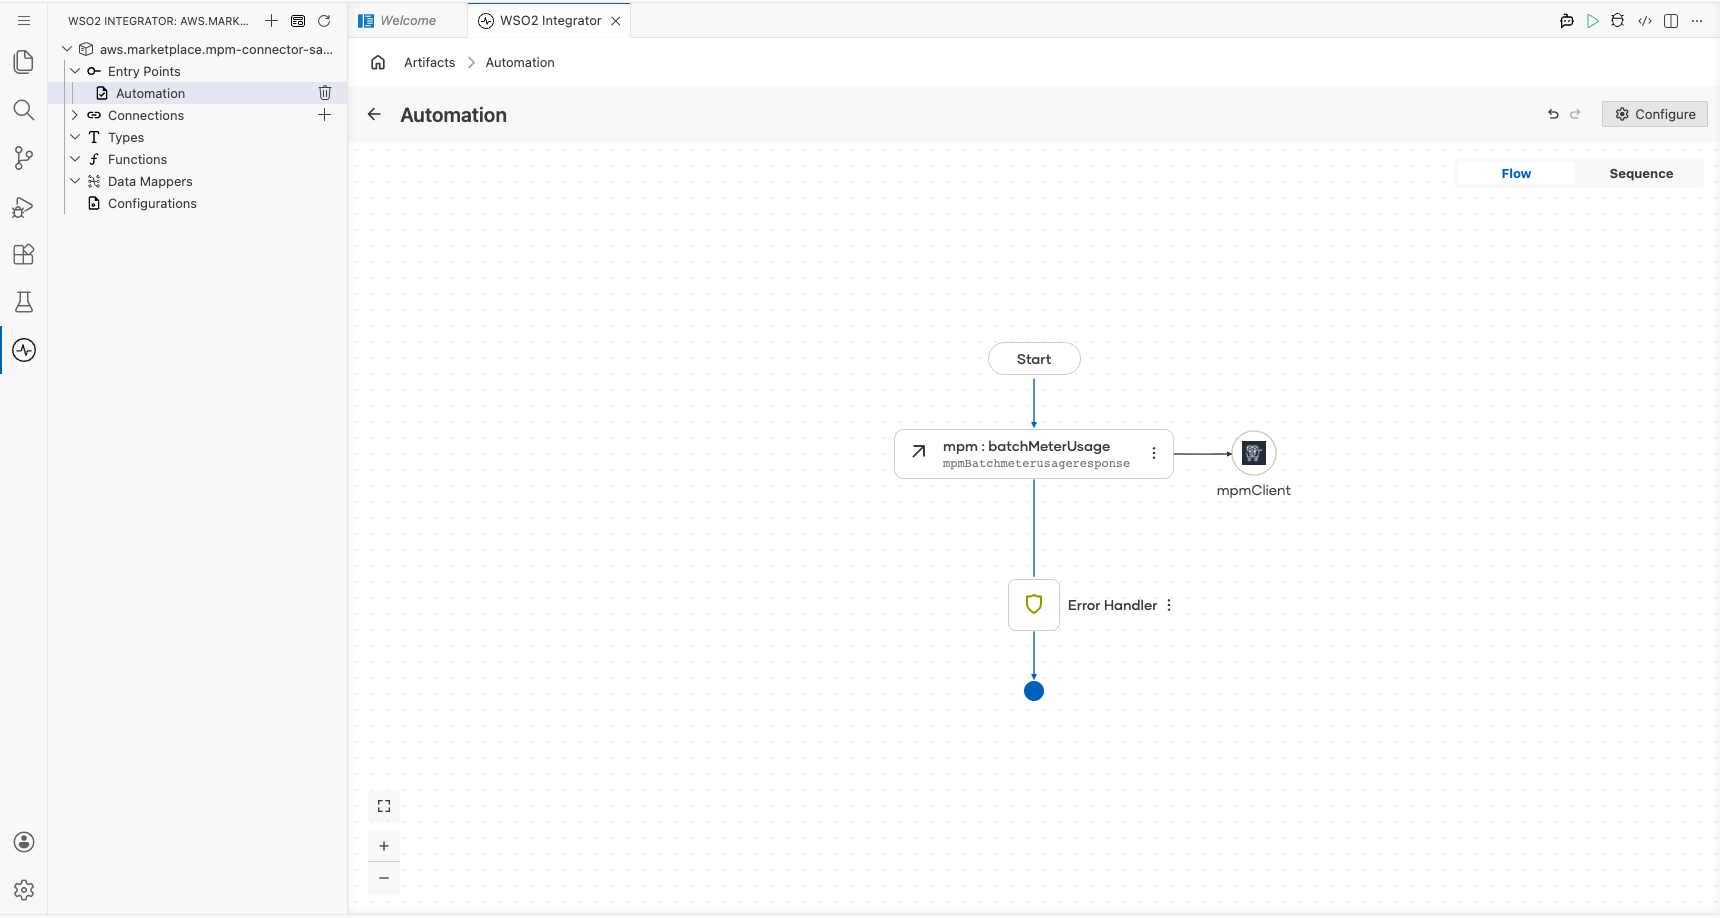
Architecture
Prerequisites
- An AWS account with
accessKeyIdandsecretAccessKeythat have Marketplace Metering permissions - A registered AWS Marketplace product with a valid product code
Setting up the MPM integration
New to WSO2 Integrator? Follow the Create a New Integration guide to set up your integration first, then return here to add the connector.
Adding the MPM connector
Step 1: Open the add connection palette
In the left sidebar, hover over the Connections section and select the Add Connection button that appears in the toolbar. The connector palette opens with a search field at the top.
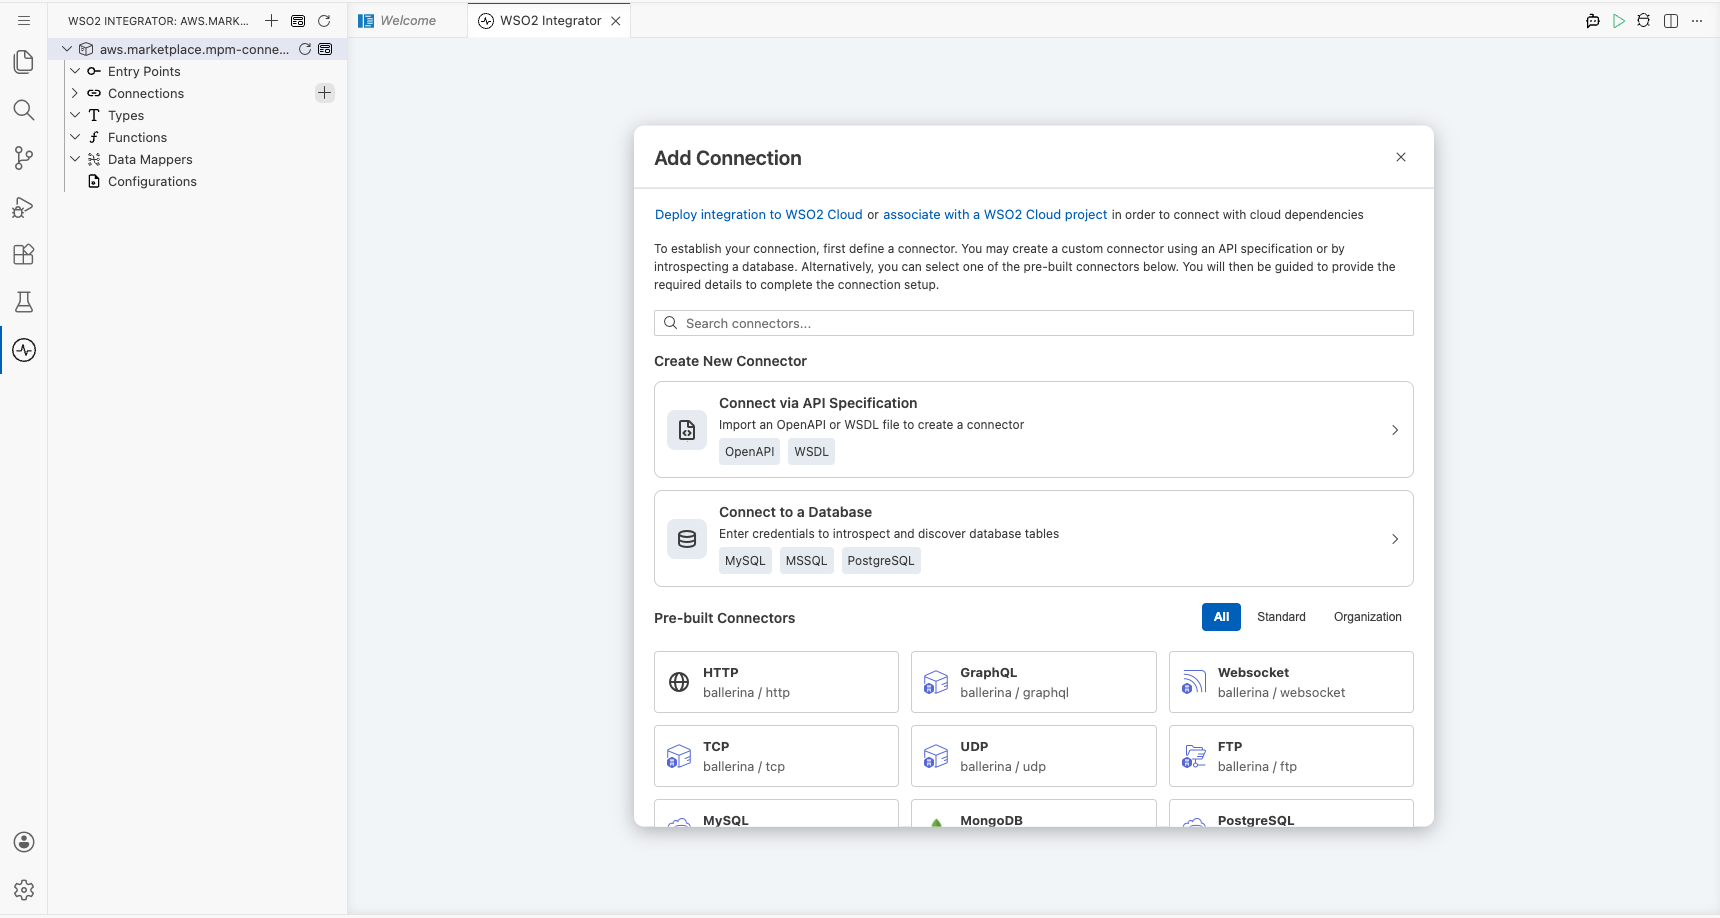
Step 2: Search and select the connector
Enter aws.marketplace.mpm in the search field and select the Mpm connector card. The Configure Mpm form opens.
Configuring the MPM connection
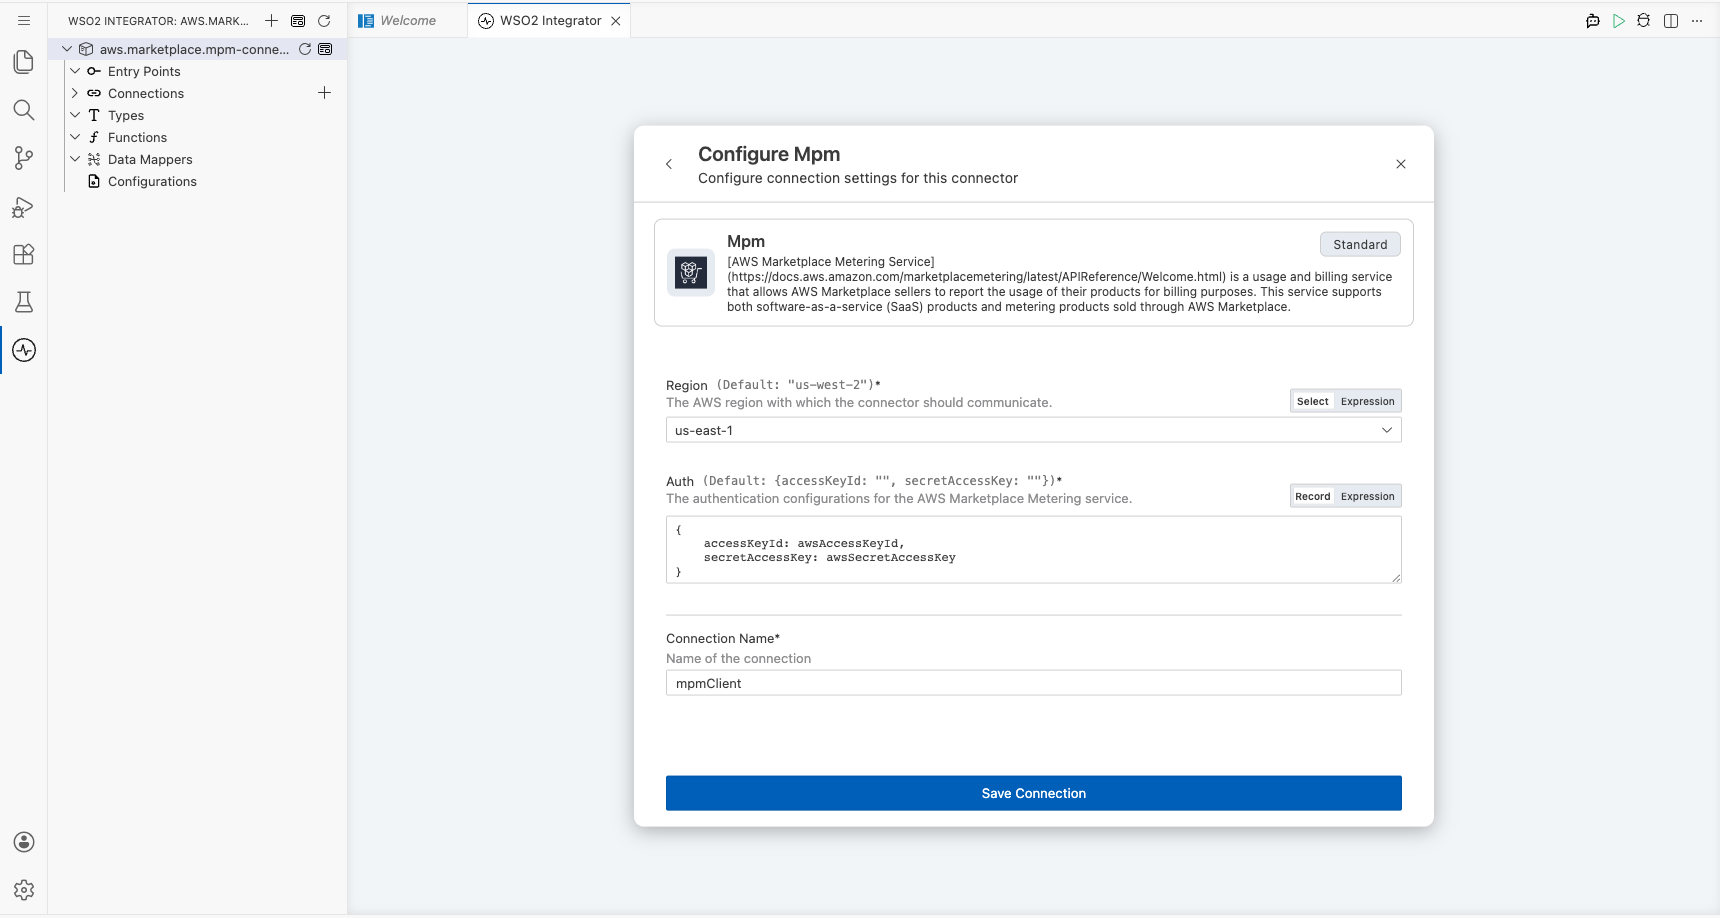
Step 3: Fill in the connection parameters
In the Configure Mpm form, bind each field to a configurable variable so credentials aren't hardcoded.
- Select the Region dropdown and choose the AWS region where your Marketplace product is registered.
- Select the Auth field to open the Record Configuration panel, then use the Configurables tab to create
awsAccessKeyId(string) andawsSecretAccessKey(string) configurable variables and reference them in the auth record. - Leave Connection Name as
mpmClientor enter a preferred name.
- region : The AWS region where your Marketplace product is registered
- auth : An
AuthConfigrecord containingaccessKeyIdandsecretAccessKey, each bound to a configurable variable
Step 4: Save the connection
Select Save Connection to persist the connection. The mpmClient connection node appears on the canvas.

Step 5: Set actual values for your configurables
- In the left panel, select Configurations.
- Set a value for each configurable listed below.
- awsAccessKeyId (string) : Your AWS access key ID with Marketplace Metering permissions
- awsSecretAccessKey (string) : Your AWS secret access key with Marketplace Metering permissions
Configuring the MPM batch meter usage operation
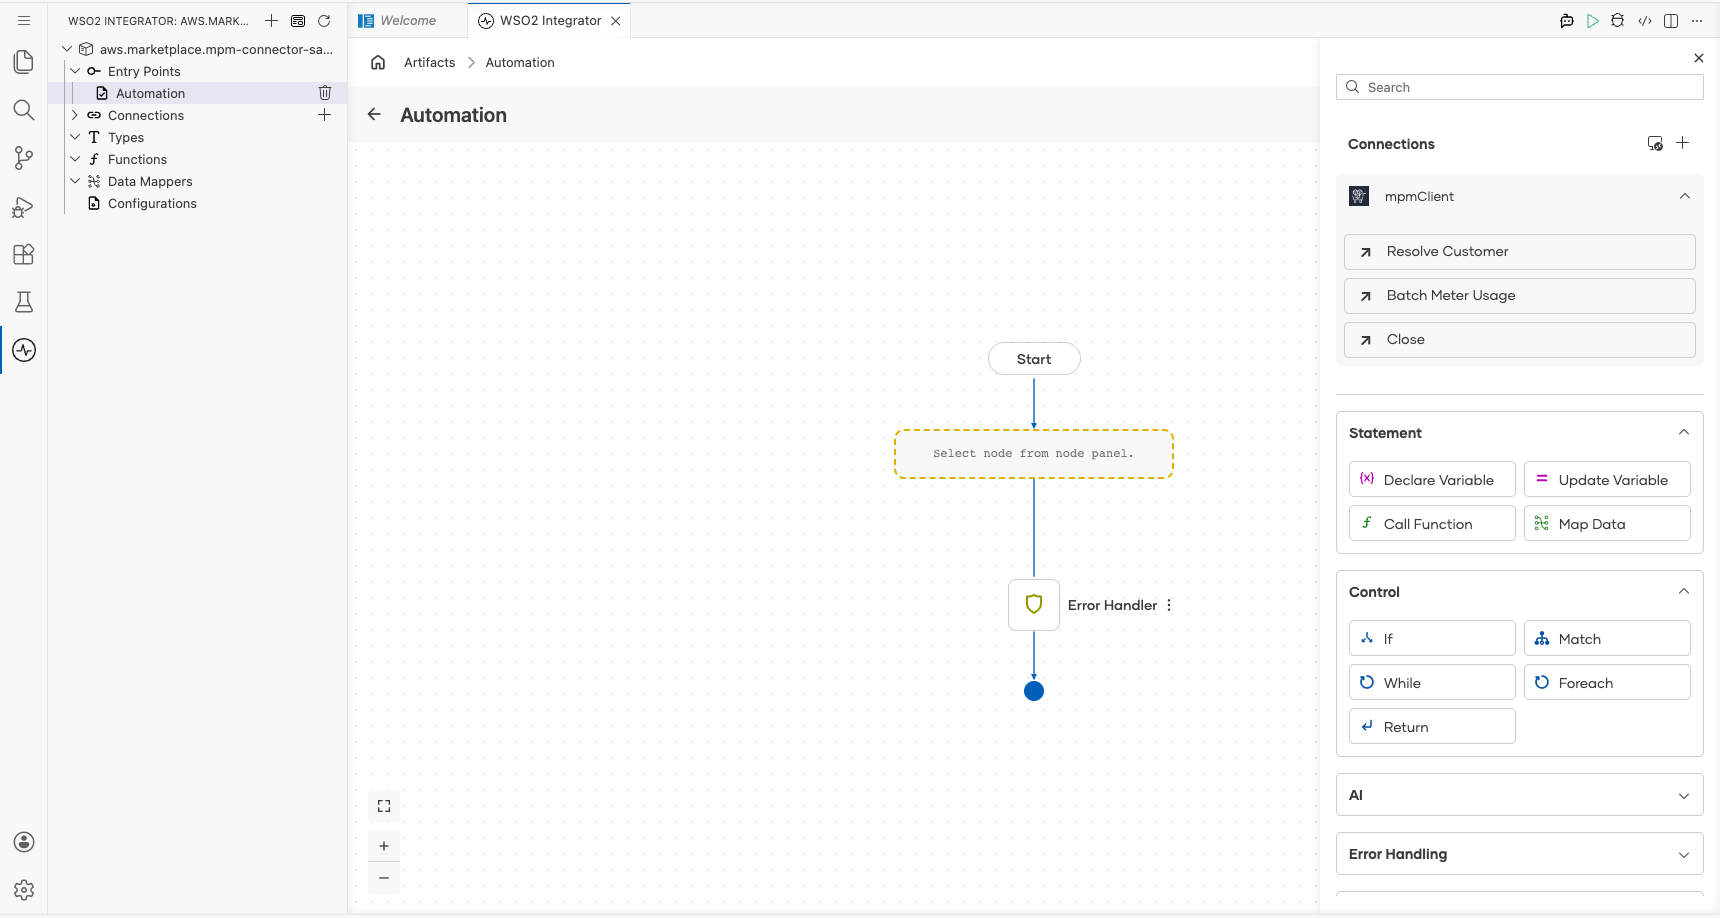
Step 6: Add an automation entry point
Select + Add Artifact on the canvas toolbar and select Automation from the artifact palette. In the Create New Automation panel, select Create. A main Automation entry point appears under Entry Points and the canvas switches to the Automation flow view.
Step 7: Select the operation and configure its parameters
- Select the + button inside the Automation flow canvas (between Start and Error Handler) to open the node panel.
- Under Connections → mpmClient, select Batch Meter Usage to open the operation form.
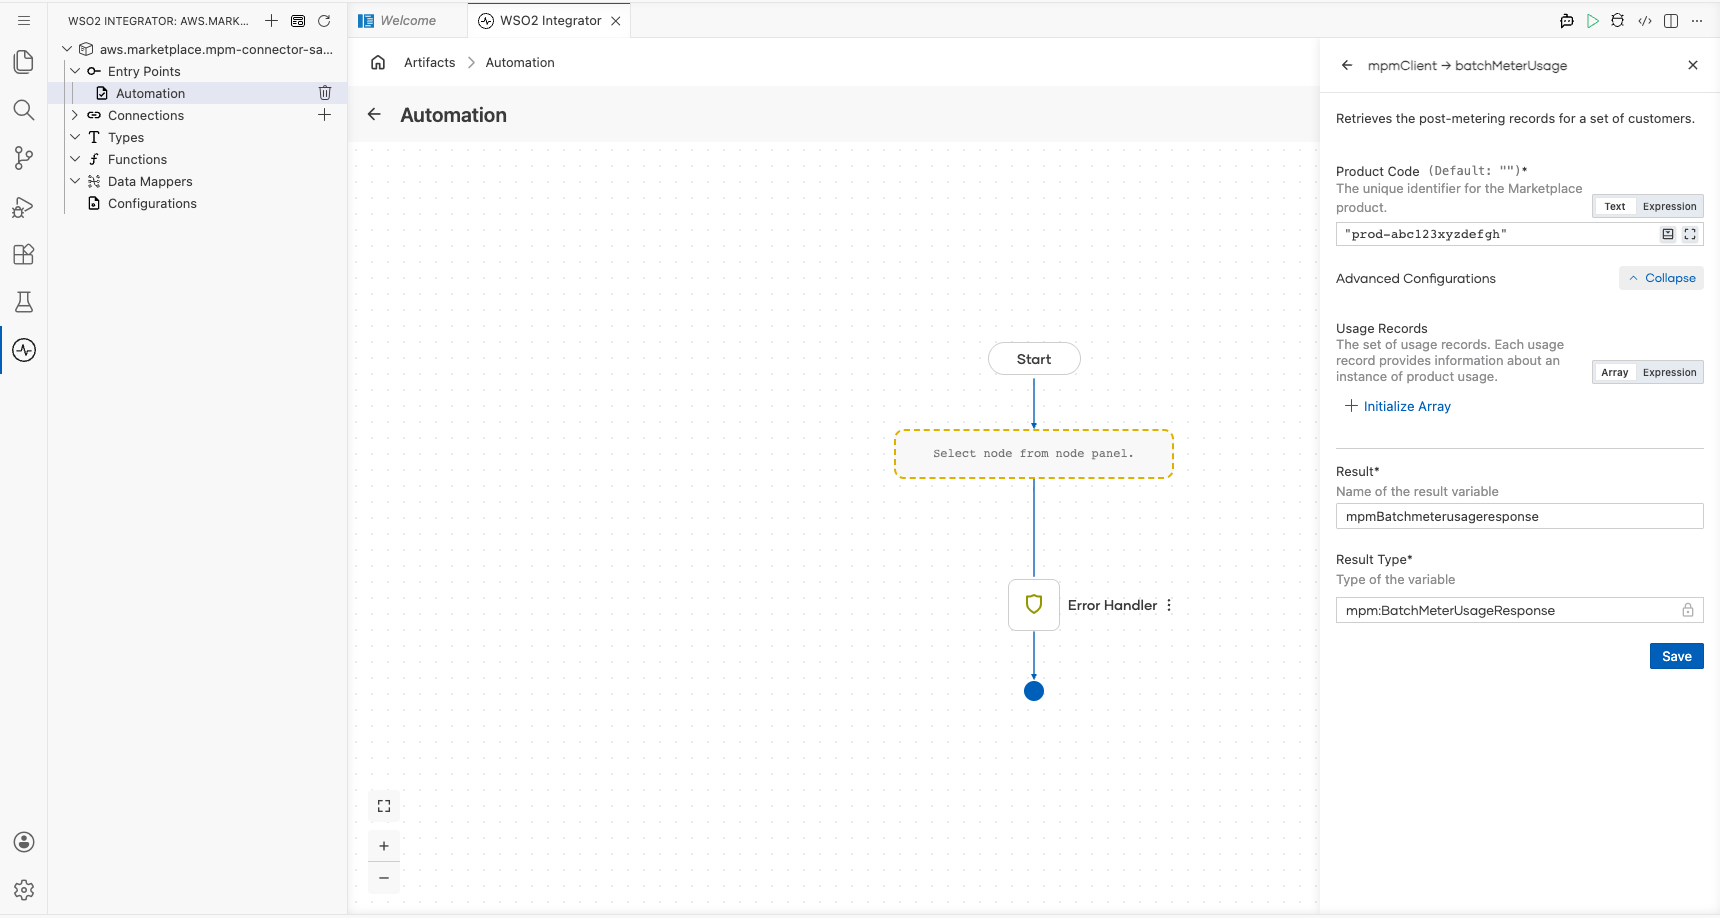
Configure the following parameters:
- productCode : Your 15-character AWS Marketplace product code (for example,
"prod-abc123xyzdefgh") - usageRecords : Select Initialize Array to add usage records; each record requires
customerId,dimension,quantity, andtimestamp - Result : Auto-generated variable name
mpmBatchmeterusageresponseof typempm:BatchMeterUsageResponse
Select Save to add the operation to the flow.
Try it yourself
Try this sample in WSO2 Integration Platform.
