Example
What you'll build
Build a WSO2 Integrator automation that publishes a message to an AWS Simple Notification Service (SNS) topic using the ballerinax/aws.sns connector. The integration connects to SNS using AWS credentials stored as configurable variables, then publishes a message to a specified topic ARN.
Operations used:
- Publish : Publishes a message to an SNS topic ARN, phone number, or mobile endpoint
Architecture
Prerequisites
- An AWS account with SNS access and an existing SNS topic
- AWS credentials: Access Key ID, Secret Access Key, optional Security Token, and Region
Setting up the AWS SNS integration
New to WSO2 Integrator? Follow the Create a New Integration guide to set up your integration first, then return here to add the connector.
Adding the AWS SNS connector
Step 1: Open the connector palette
In the left sidebar under your project, expand Connections and select the + icon to open the connector palette.
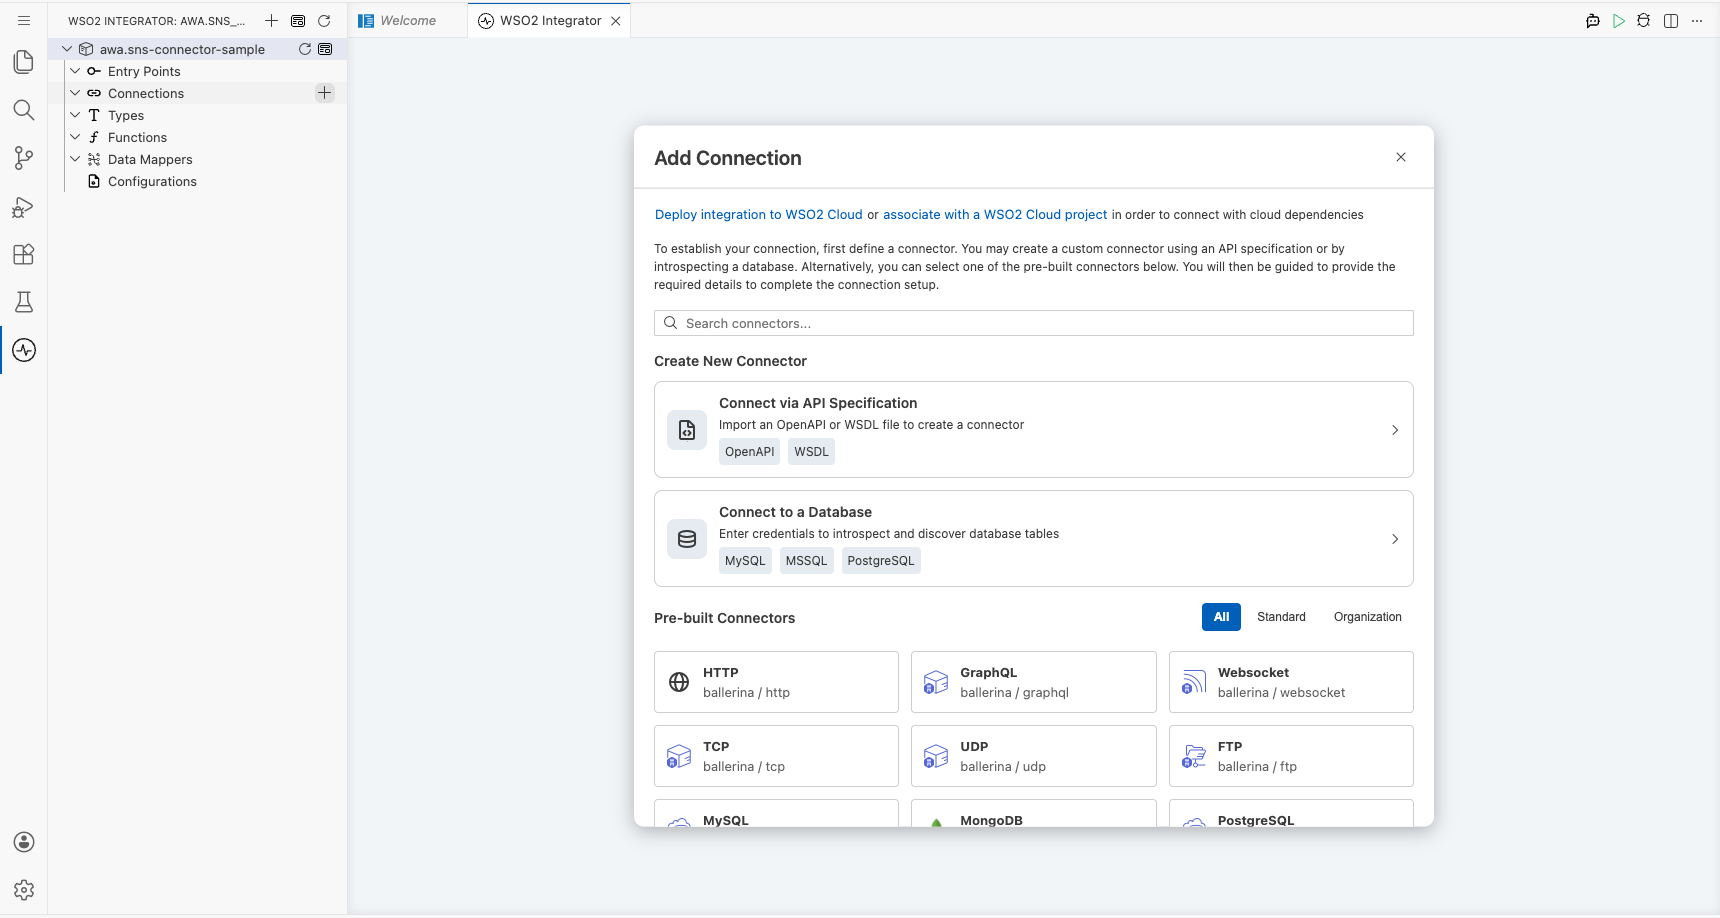
Configuring the AWS SNS connection
Step 2: Search for and select the AWS SNS connector
- In the connector palette search box, enter
aws.snsto filter the list. - Select ballerinax/aws.sns from the results to open the New Connection form.
Step 3: Fill in the connection parameters
Fill in the following fields, binding each to a configurable variable:
- connectionName : Name for this connection instance (
snsClient) - accessKeyId : Your AWS access key ID, bound to a configurable variable
- secretAccessKey : Your AWS secret access key, bound to a configurable variable
- securityToken : Optional AWS security token, bound to a configurable variable
- region : AWS region where your SNS topic resides, bound to a configurable variable
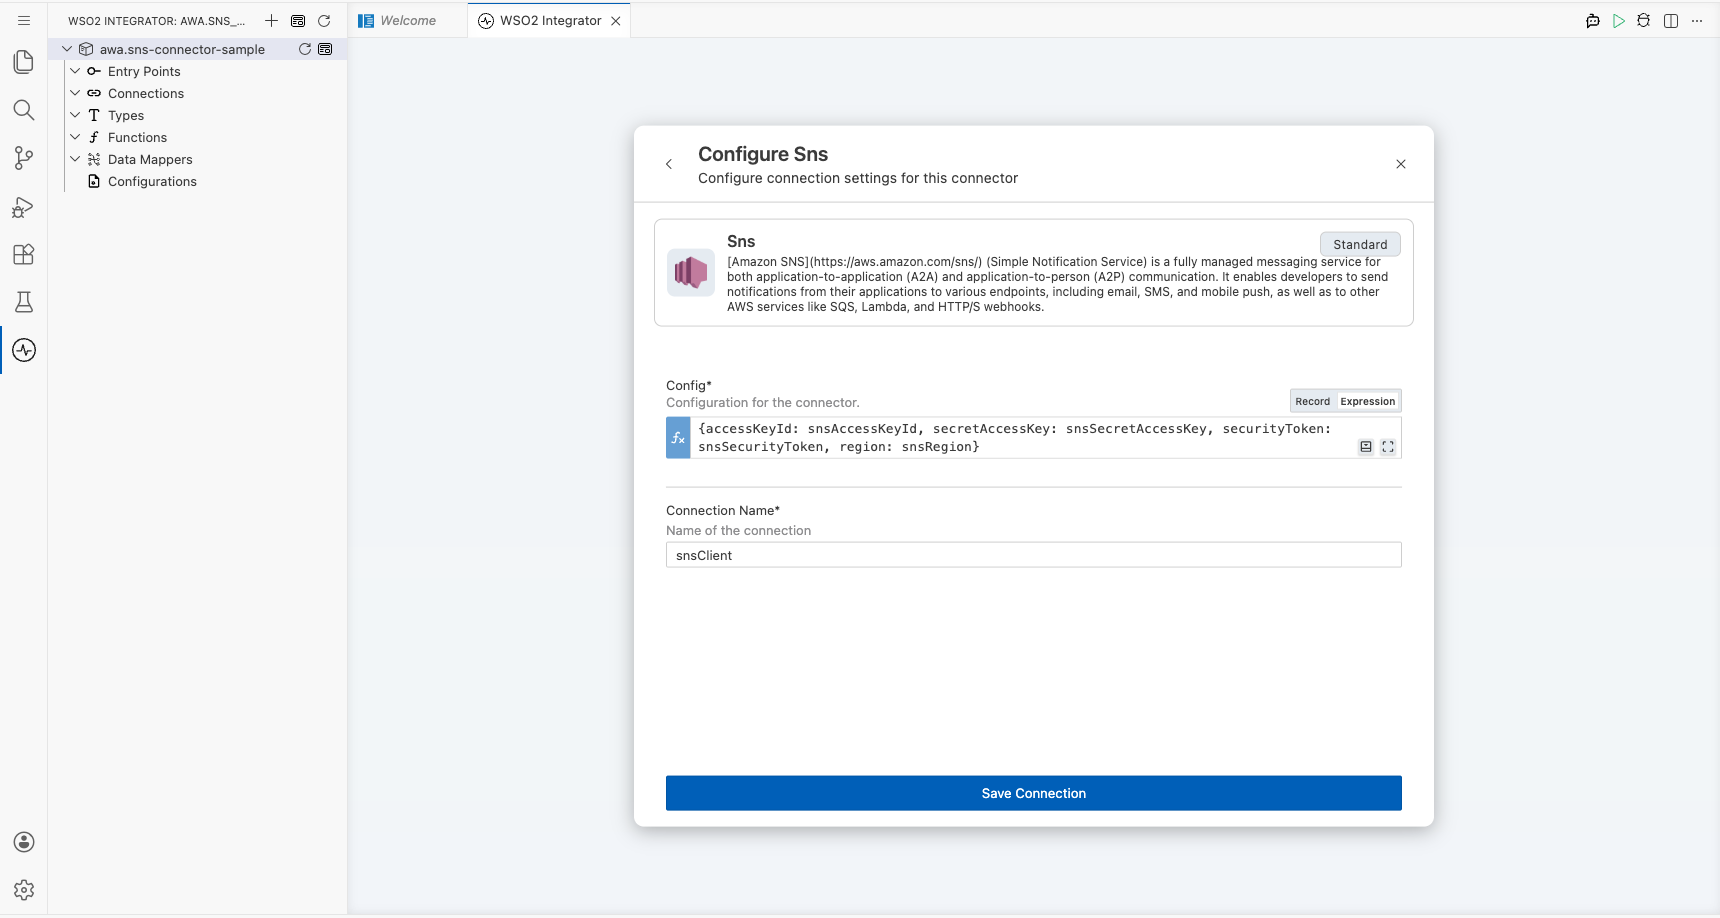
Step 4: Save the connection
Select Save Connection. The snsClient connection node appears on the design canvas and is listed under Connections in the left sidebar.
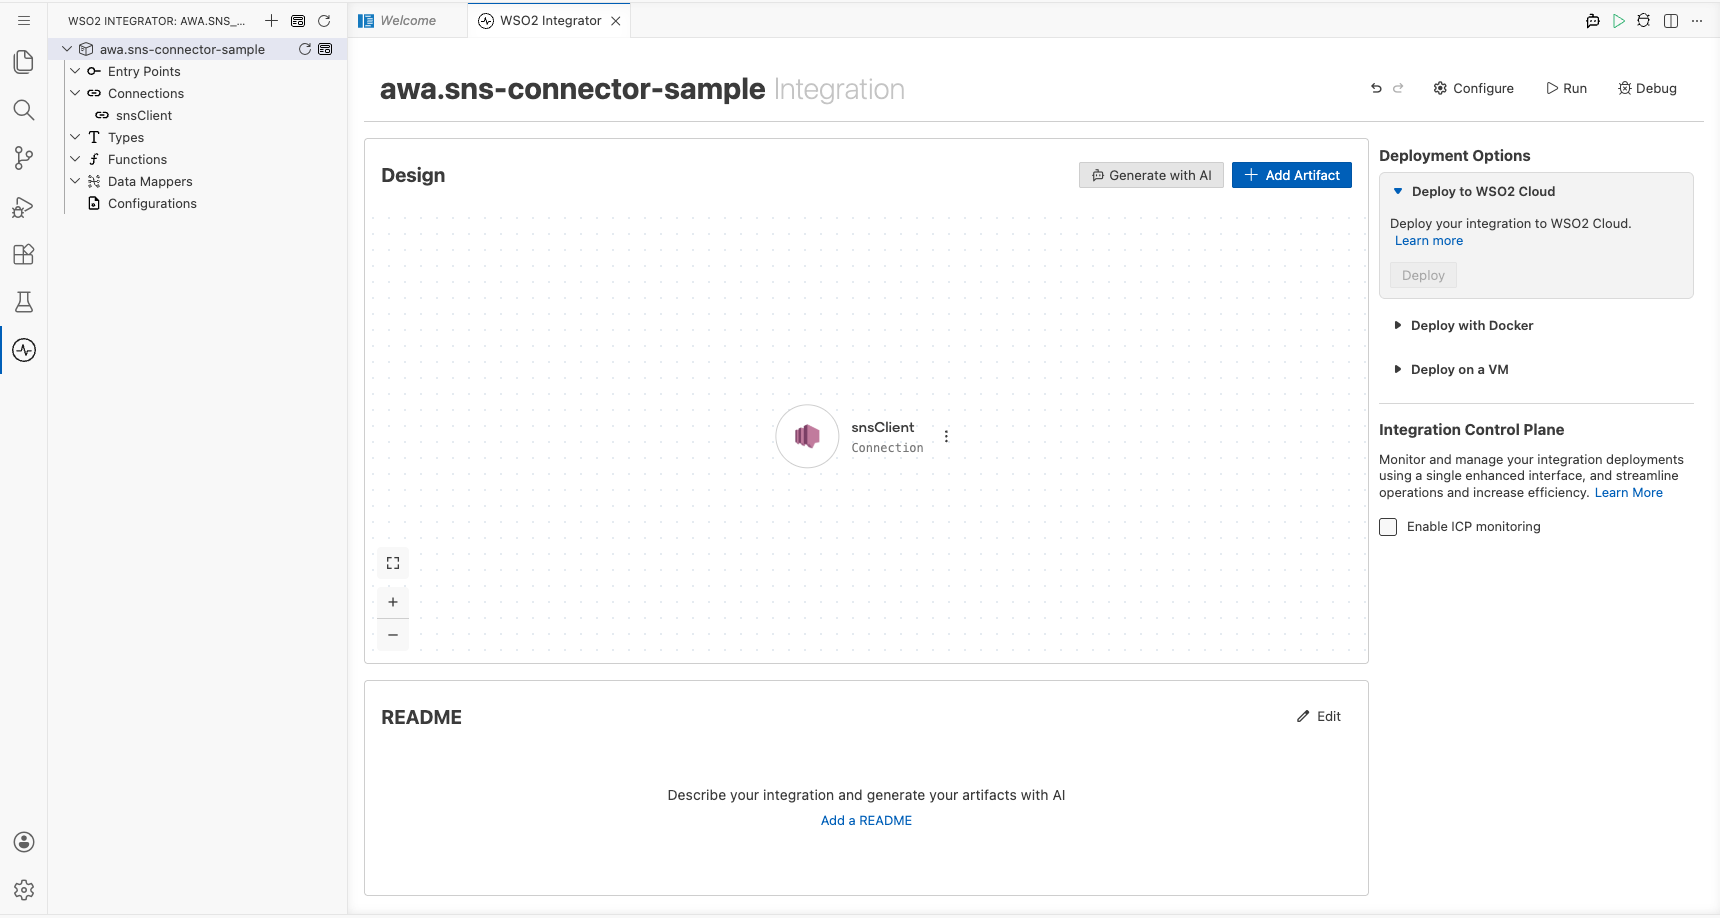
Step 5: Set actual values for your configurables
- In the left panel, select Configurations.
- Set a value for each configurable listed below.
- snsAccessKeyId (string) : Your AWS access key ID
- snsSecretAccessKey (string) : Your AWS secret access key
- snsSecurityToken (string) : Your AWS security token (required for temporary credentials)
- snsRegion (string) : The AWS region where your SNS topic is located (for example,
us-east-1)
Configuring the AWS SNS publish operation
Step 6: Add an automation entry point
- In the WSO2 Integrator panel toolbar, select Add Artifact.
- Select Automation from the artifact type list.
- In the Create New Automation dialog, select Create.
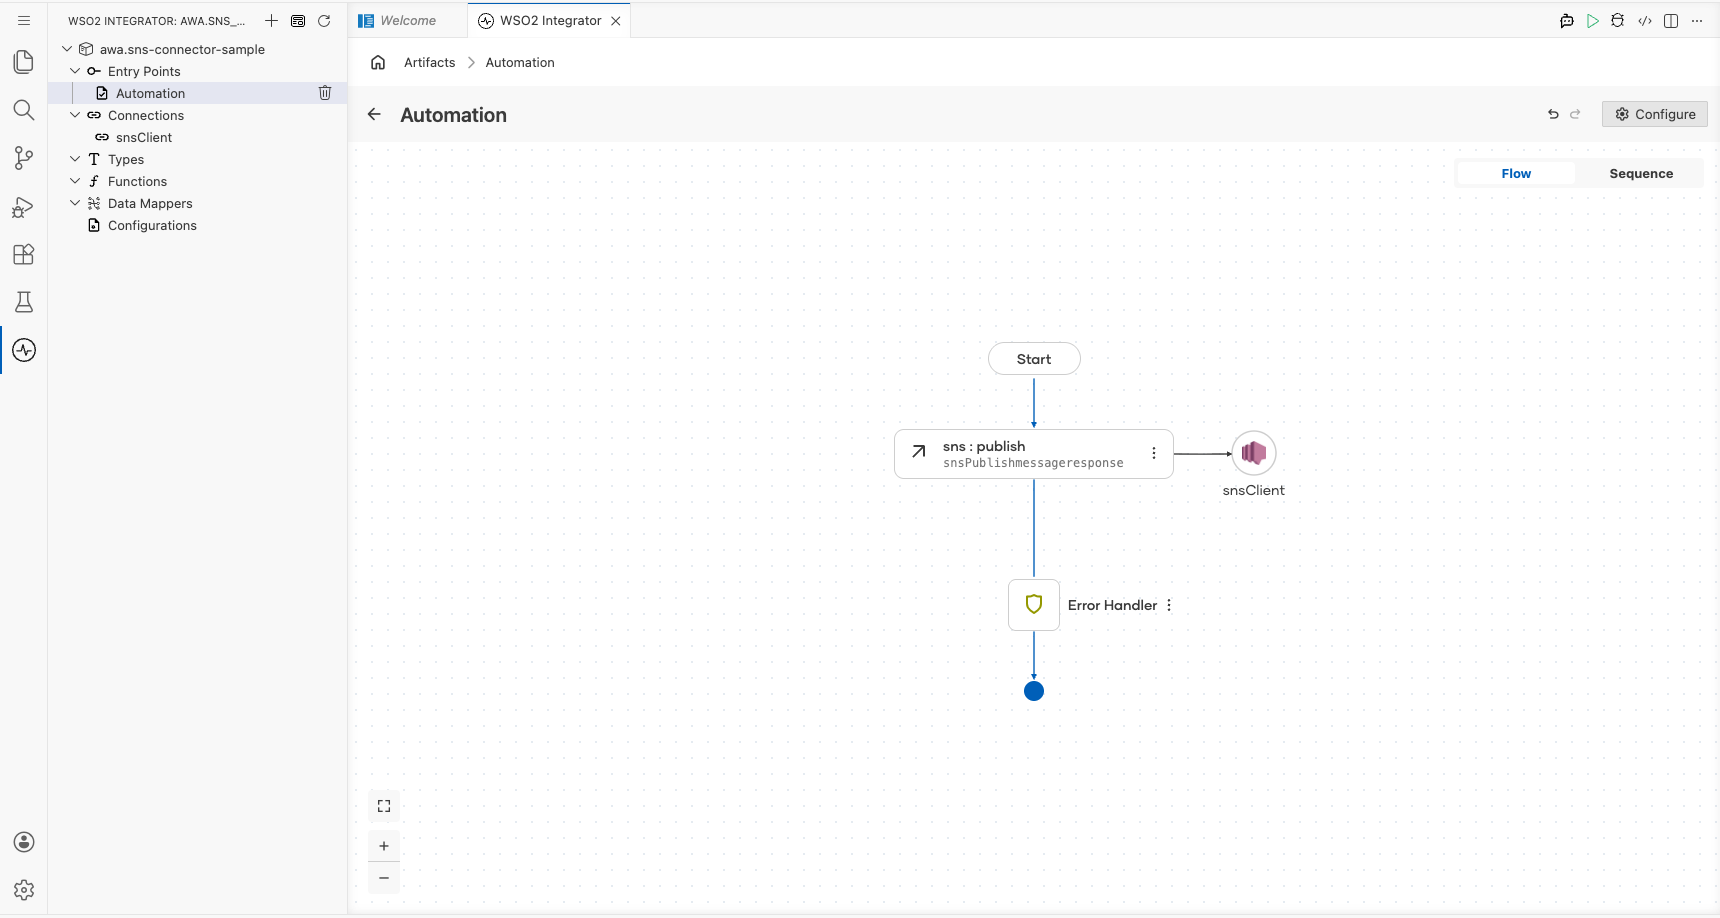
The automation flow canvas opens with a Start node and an Error Handler node pre-placed.
Step 7: Select and configure the publish operation
Select the + button between the Start node and the Error Handler node to open the node selection panel. Under Connections, expand snsClient to view all available operations.
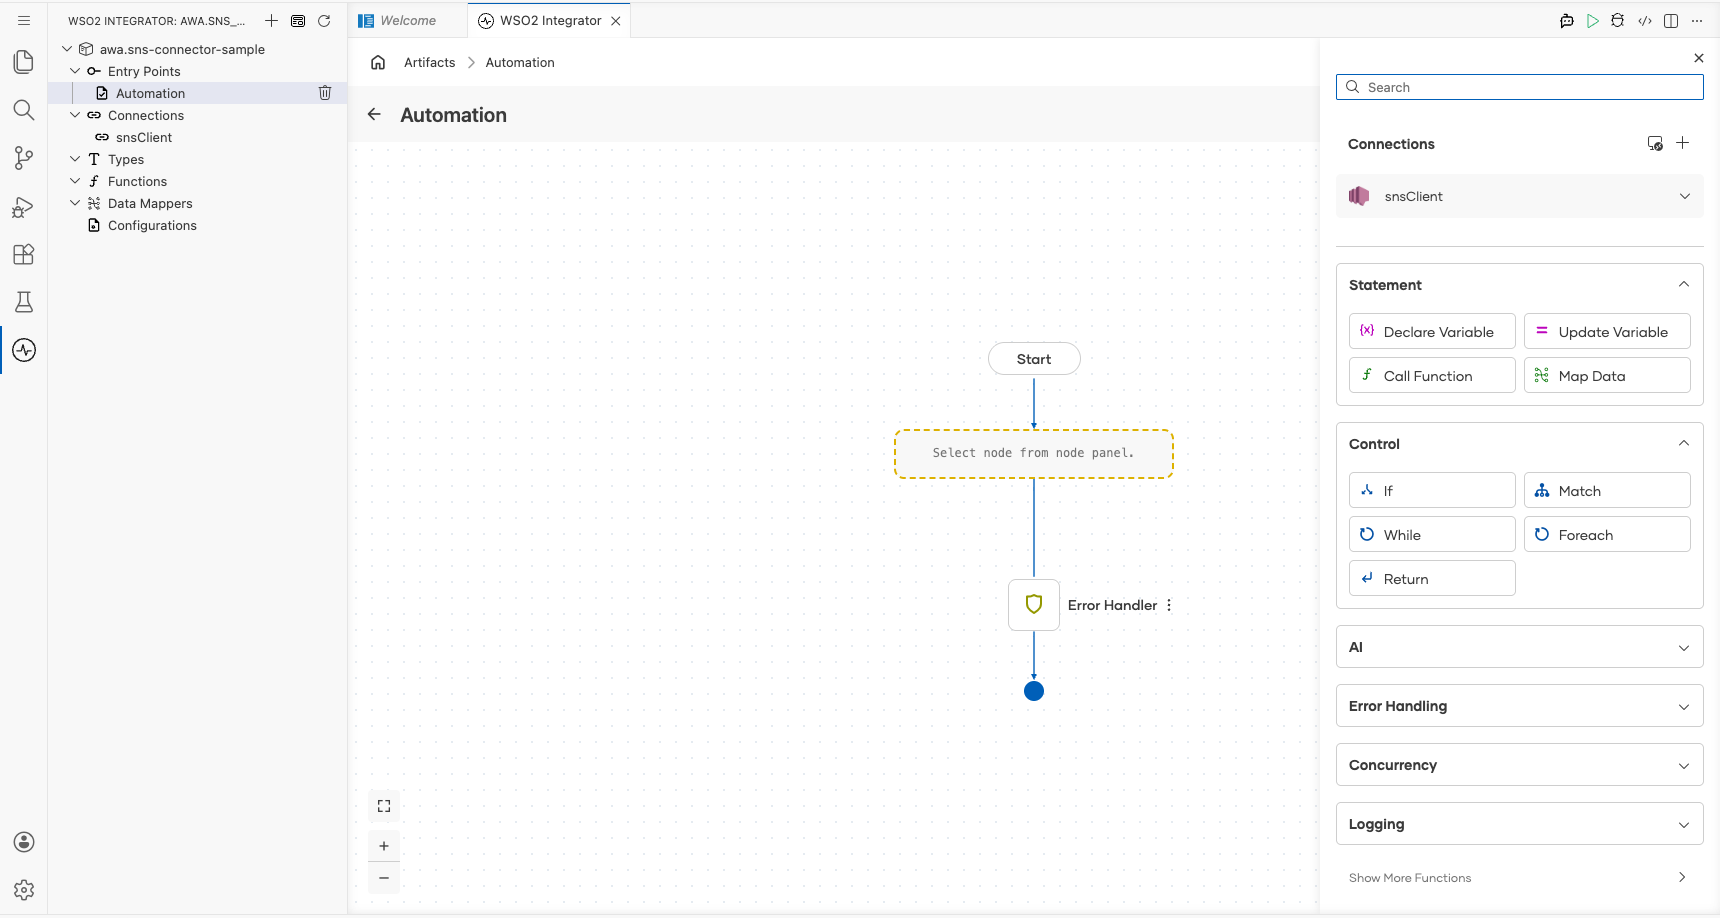
Select Publish to open the configuration form, then fill in the following fields:
- Target : The SNS topic ARN to publish to (for example,
"arn:aws:sns:us-east-1:123456789012:MyTopic") - Message : The message body to publish (for example,
"Hello from WSO2 Integrator!") - Target Type : Leave as
TOPIC(default) for publishing to a topic - Result variable : Auto-generated variable that stores the
sns:PublishMessageResponse

Select Save. The publish node is added to the flow canvas, connected to snsClient.
Try it yourself
Try this sample in WSO2 Integration Platform.
