Setup Guide
This guide walks you through creating an Amazon Redshift cluster and obtaining the JDBC connection URL required to use the AWS Redshift connector.
Prerequisites
- An active AWS account. If you do not have one, sign up for a free account.
Step 1: Log in to the AWS Console
Access the AWS Management Console.
Step 2: Navigate to Amazon Redshift and create a cluster
-
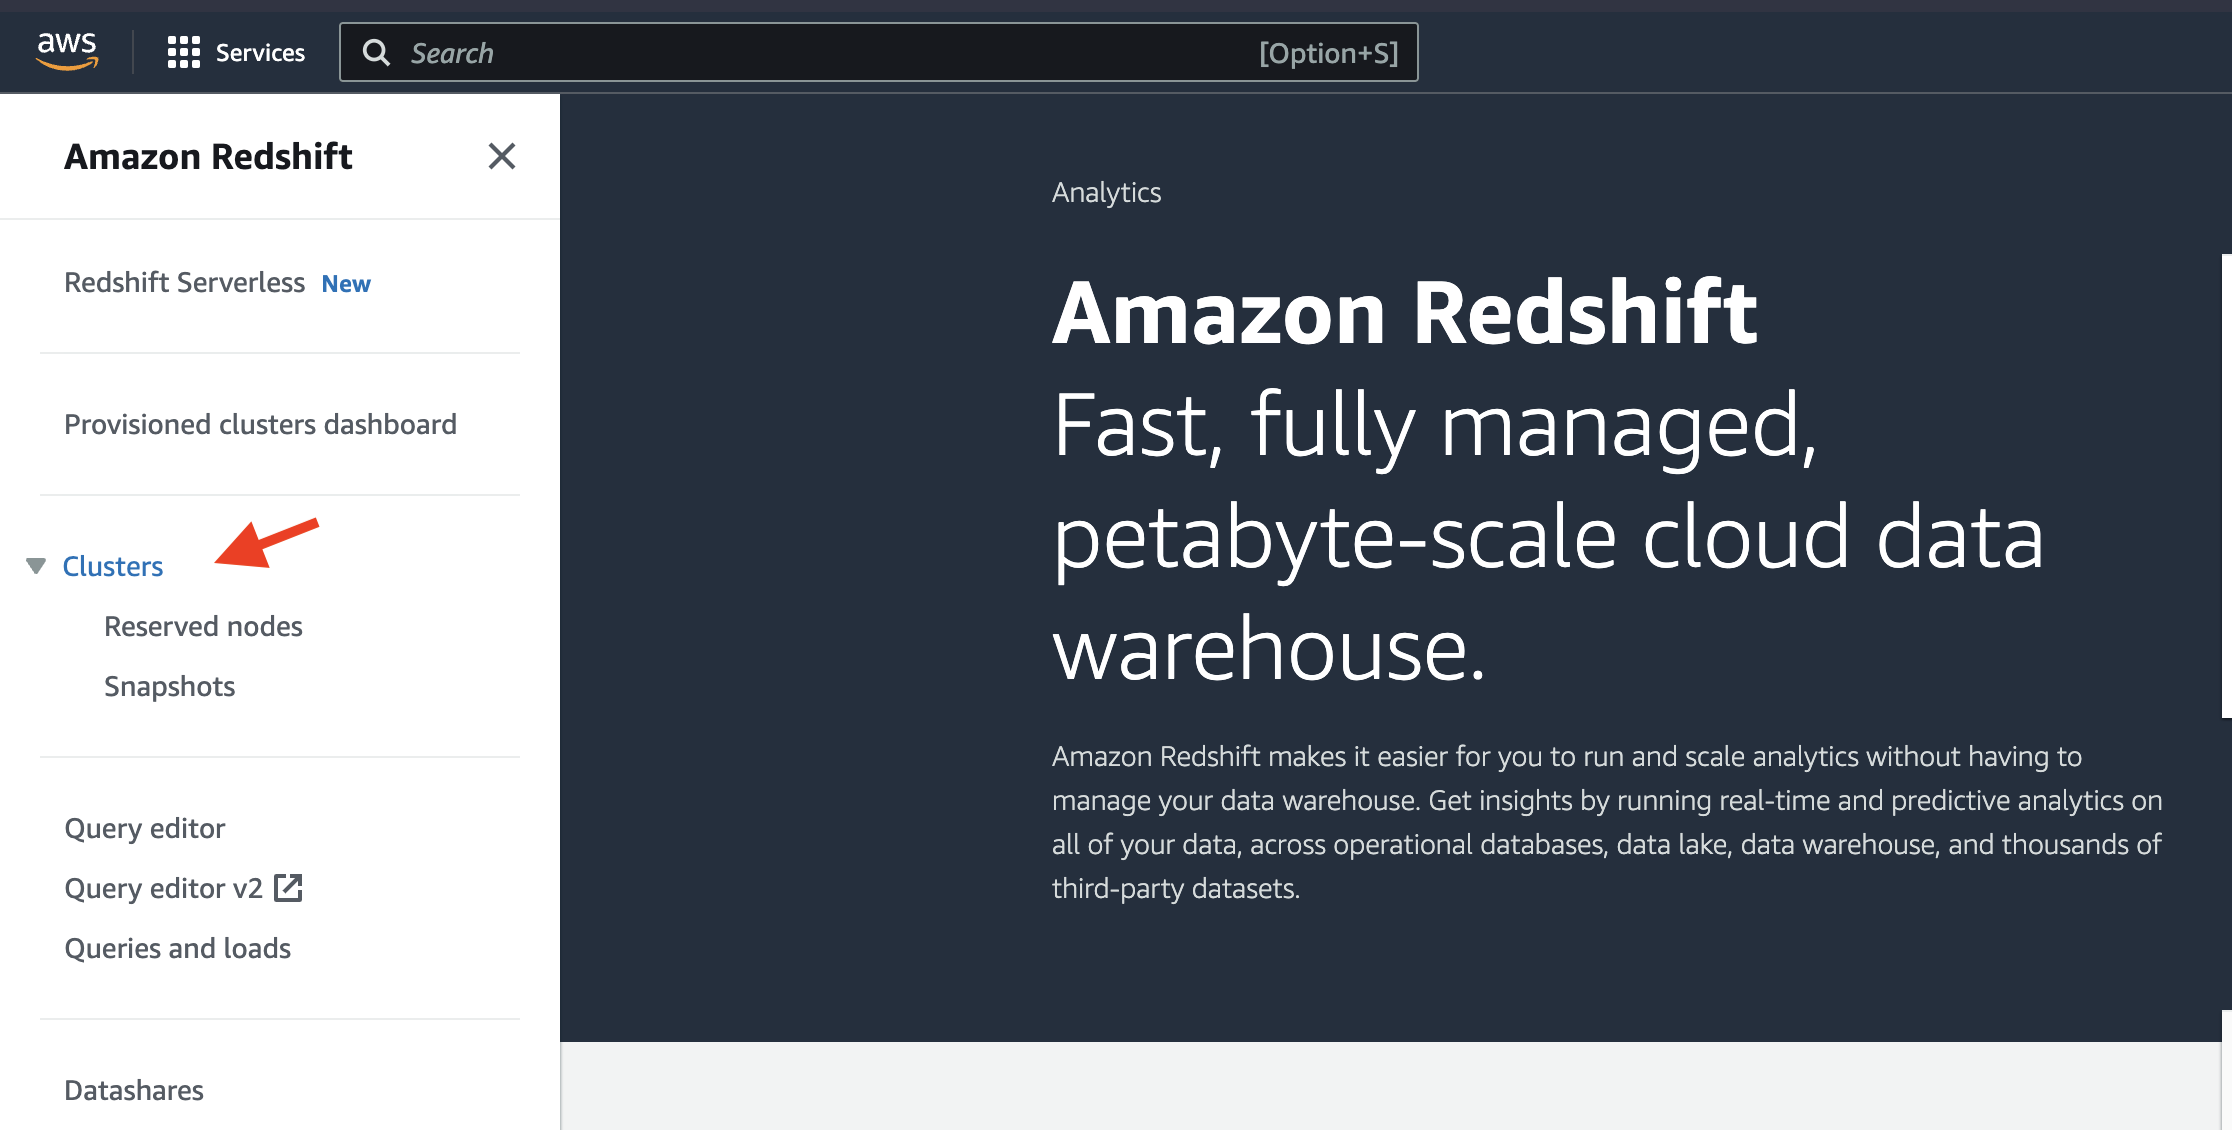
In the AWS Management Console, search for Redshift in the services search bar and select it.
-
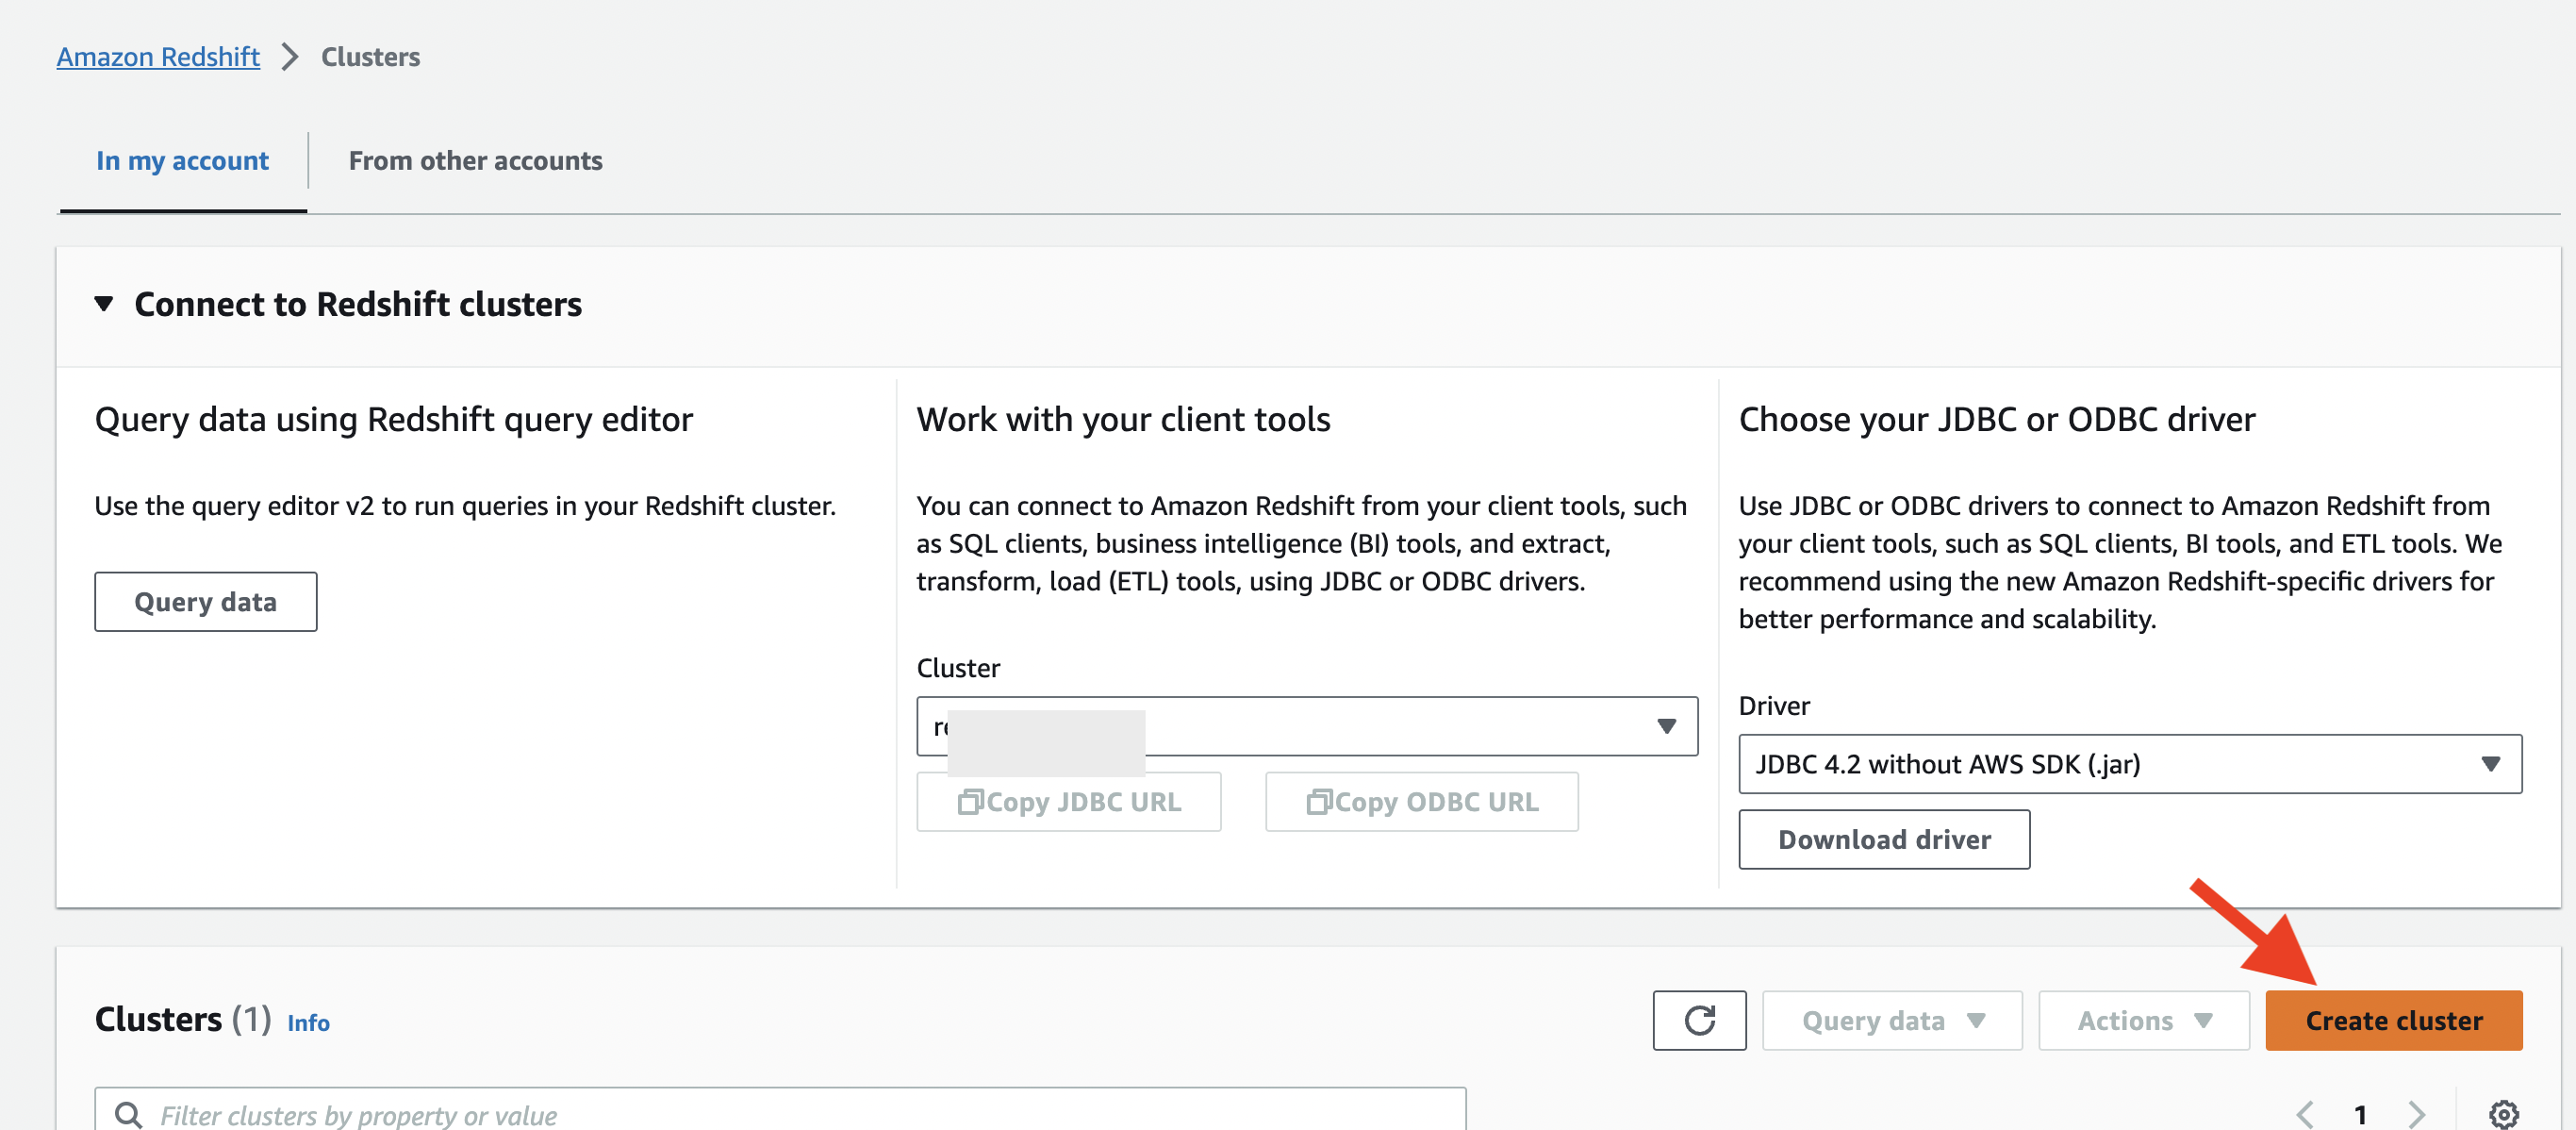
Select Create cluster to start creating a new cluster.
Step 3: Configure cluster settings
-
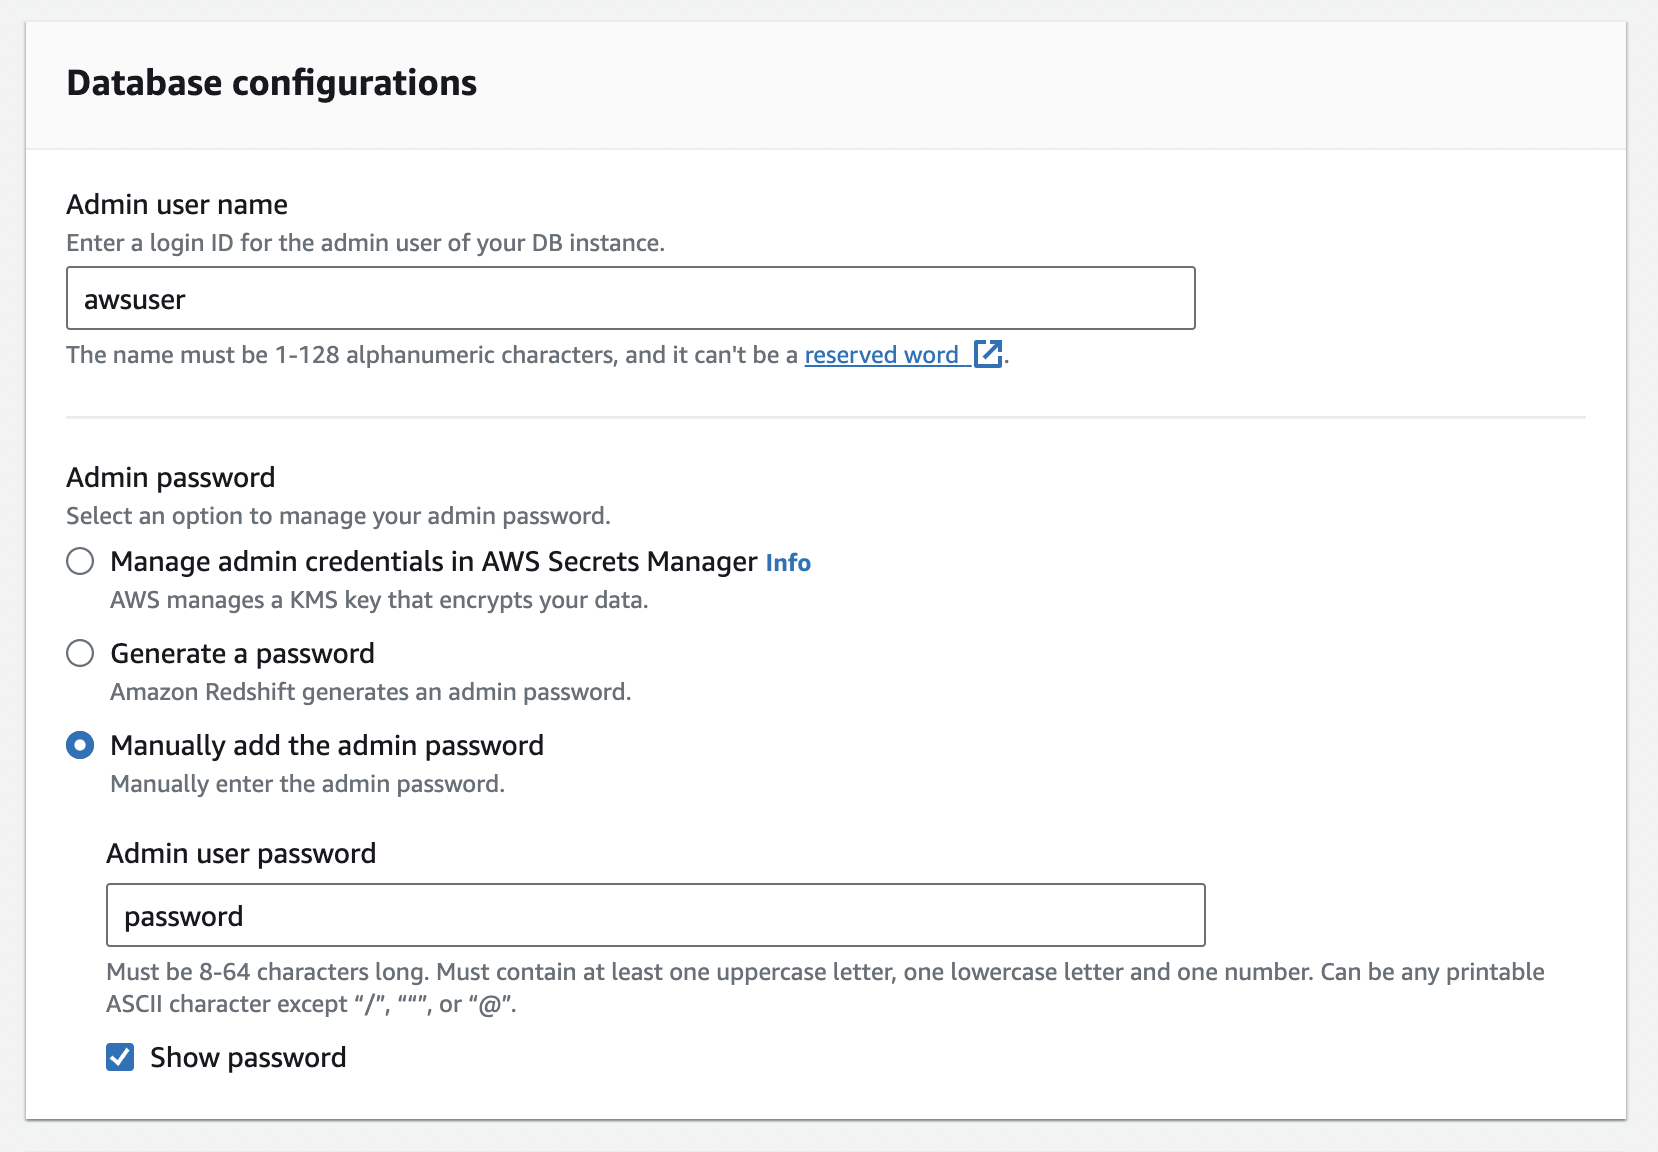
Configure the cluster identifier, database name, and credentials.

-
Configure security groups to control inbound and outbound traffic to your Redshift cluster.

-
Record the username and password you set during cluster configuration — you will need them to authenticate.
-
Review your settings and select Create cluster.
Store the admin username and password securely. Do not commit them to source control. Use Ballerina's configurable feature and a Config.toml file to supply them at runtime.
Step 4: Wait for cluster availability
-
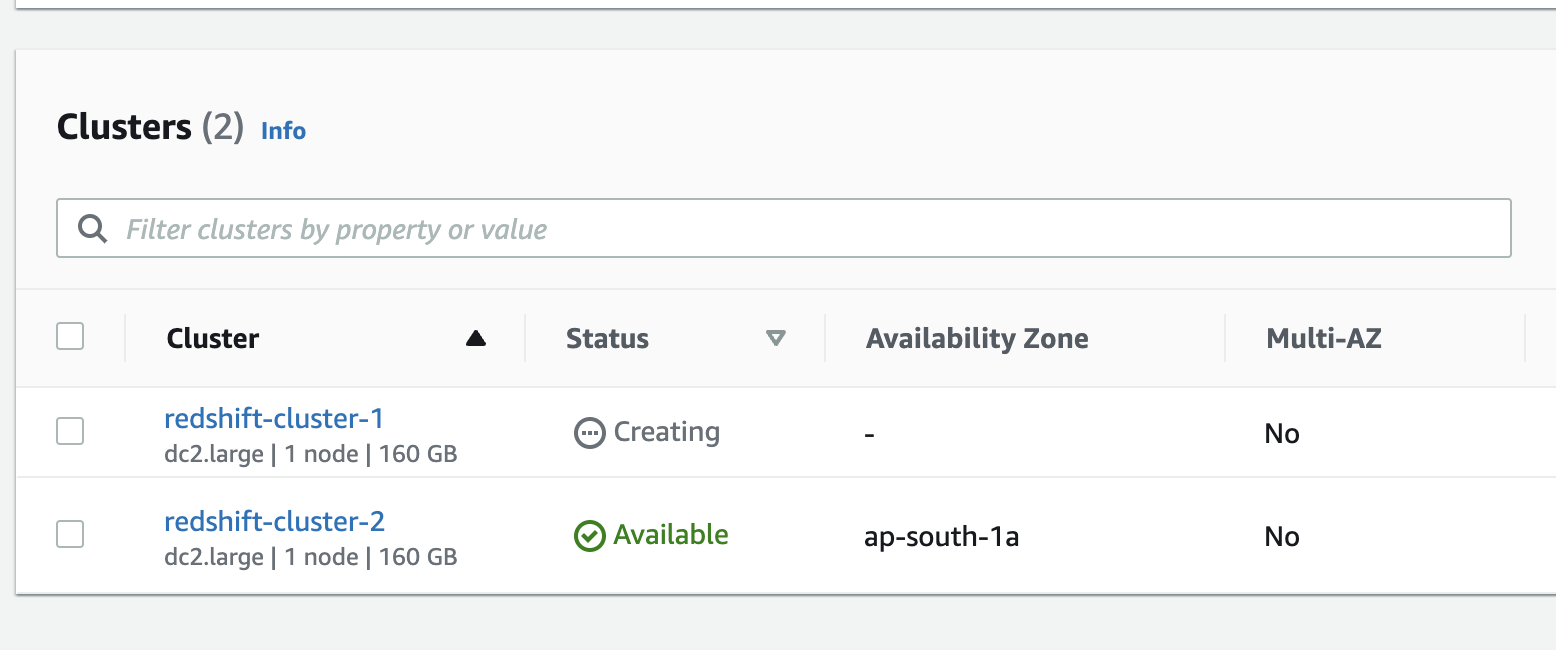
Monitor the cluster status in the AWS Console until it shows as Available.
-
Once the cluster is available, copy the JDBC URL from the cluster details. It follows this format:
jdbc:redshift://<cluster-endpoint>:5439/<database-name>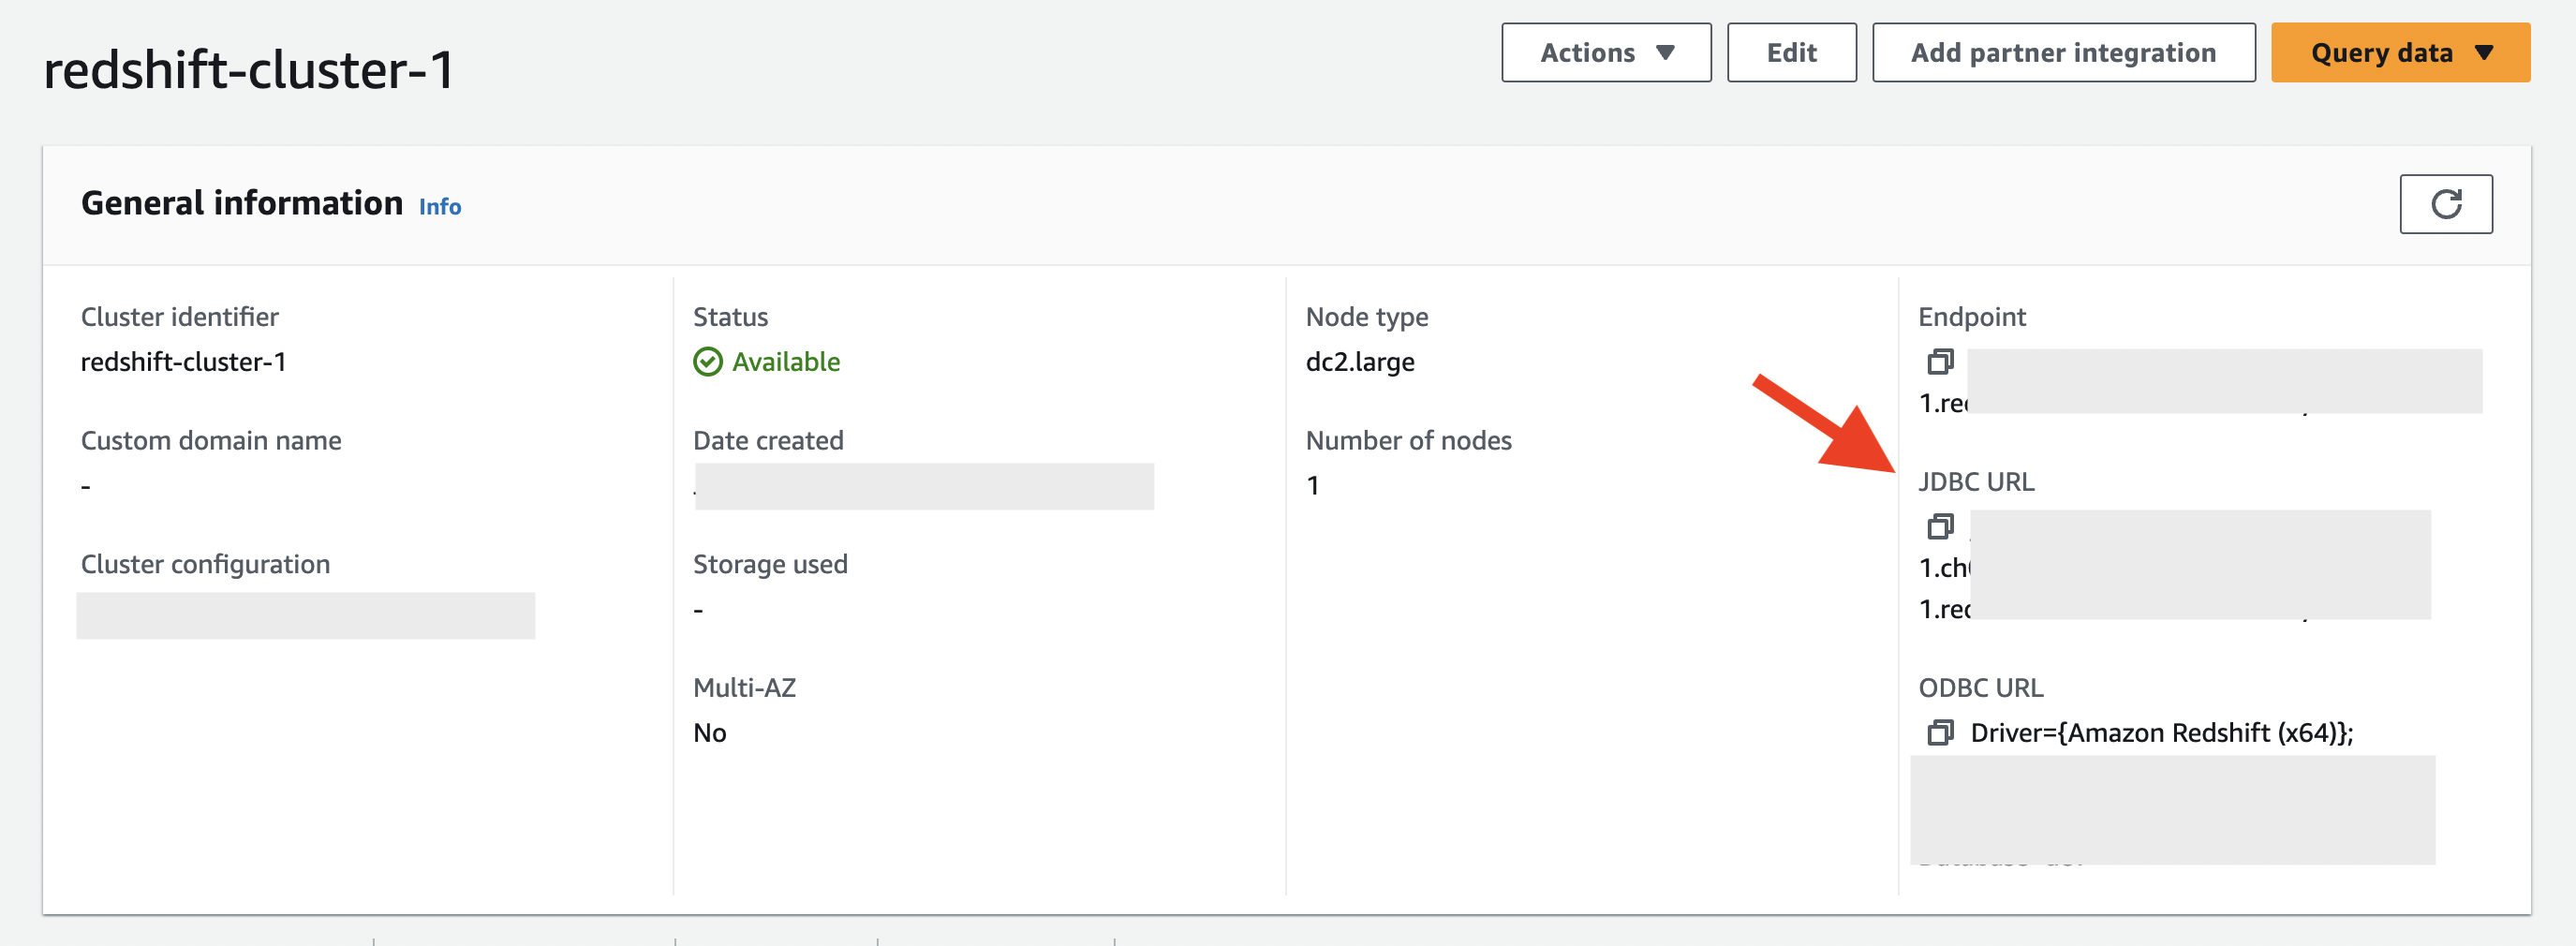
Cluster creation may take several minutes. The JDBC URL is only available after the cluster status becomes Available.