Example
What you'll build
Build a low-code integration using the ballerinax/java.jdbc connector in WSO2 Integrator that connects to a relational database and executes a SQL INSERT statement. You'll configure a JDBC connection with Configurable variables and run the execute operation from an Automation entry point.
Operations used:
- Execute: executes an INSERT, UPDATE, or DELETE SQL statement and returns an execution result
Architecture
Prerequisites
- A running relational database (MySQL, PostgreSQL, MSSQL, H2, or similar) with a JDBC-compatible driver
- JDBC connection URL, database username, and database password
Setting up the Java JDBC integration
New to WSO2 Integrator? Follow the Create a New Integration guide to set up your integration first, then return here to add the connector.
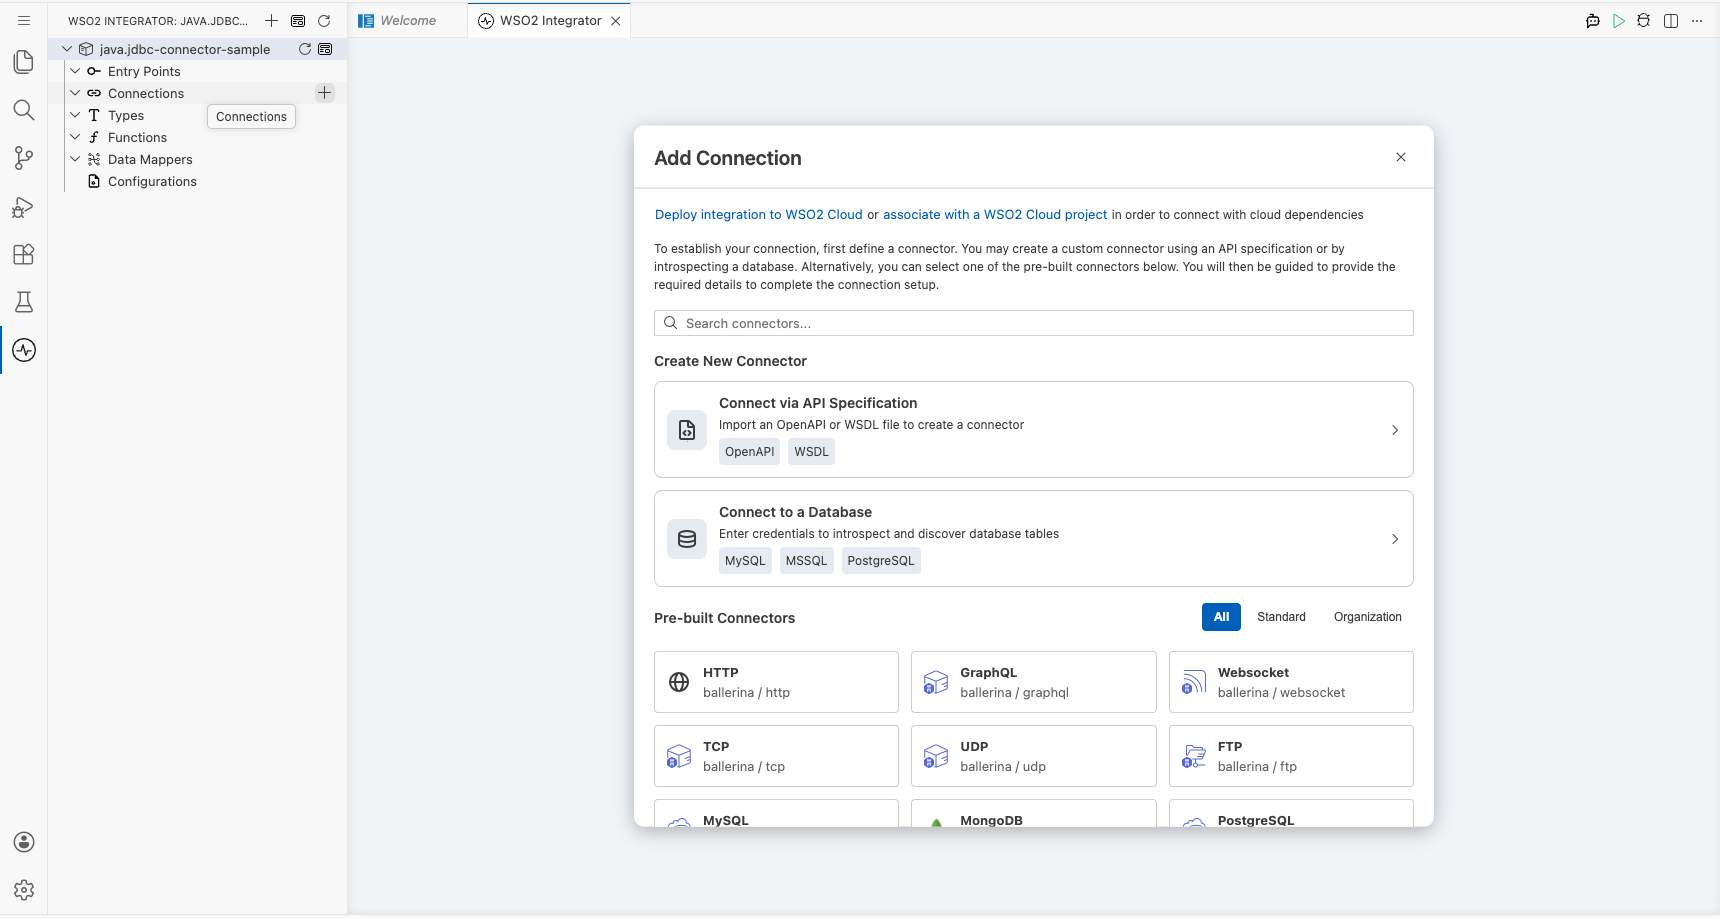
Adding the Java JDBC connector
Step 1: Open the connector palette and search for the JDBC connector
- On the integration canvas, click + Add Connection to open the connector palette.
- In the search panel, type
jdbc. - Select Jdbc (
ballerinax/java.jdbc) from the results.
Configuring the Java JDBC connection
Step 2: Bind all connection parameters to configurable variables
After selecting the connector, the Configure Jdbc form opens. Bind each field to a Configurable variable so no literal credentials are stored in source code:
- url: the JDBC connection string (e.g.,
jdbcUrlof typestring) - user: the database username (e.g.,
dbUserof typestring; found under Advanced Configurations) - password: the database password (e.g.,
dbPasswordof typestring; found under Advanced Configurations) - Connection name: set to
jdbcClient
For each field, click the field textbox, open the Configurables tab in the helper panel, click New Configurable, enter the variable name and type, and click Save.
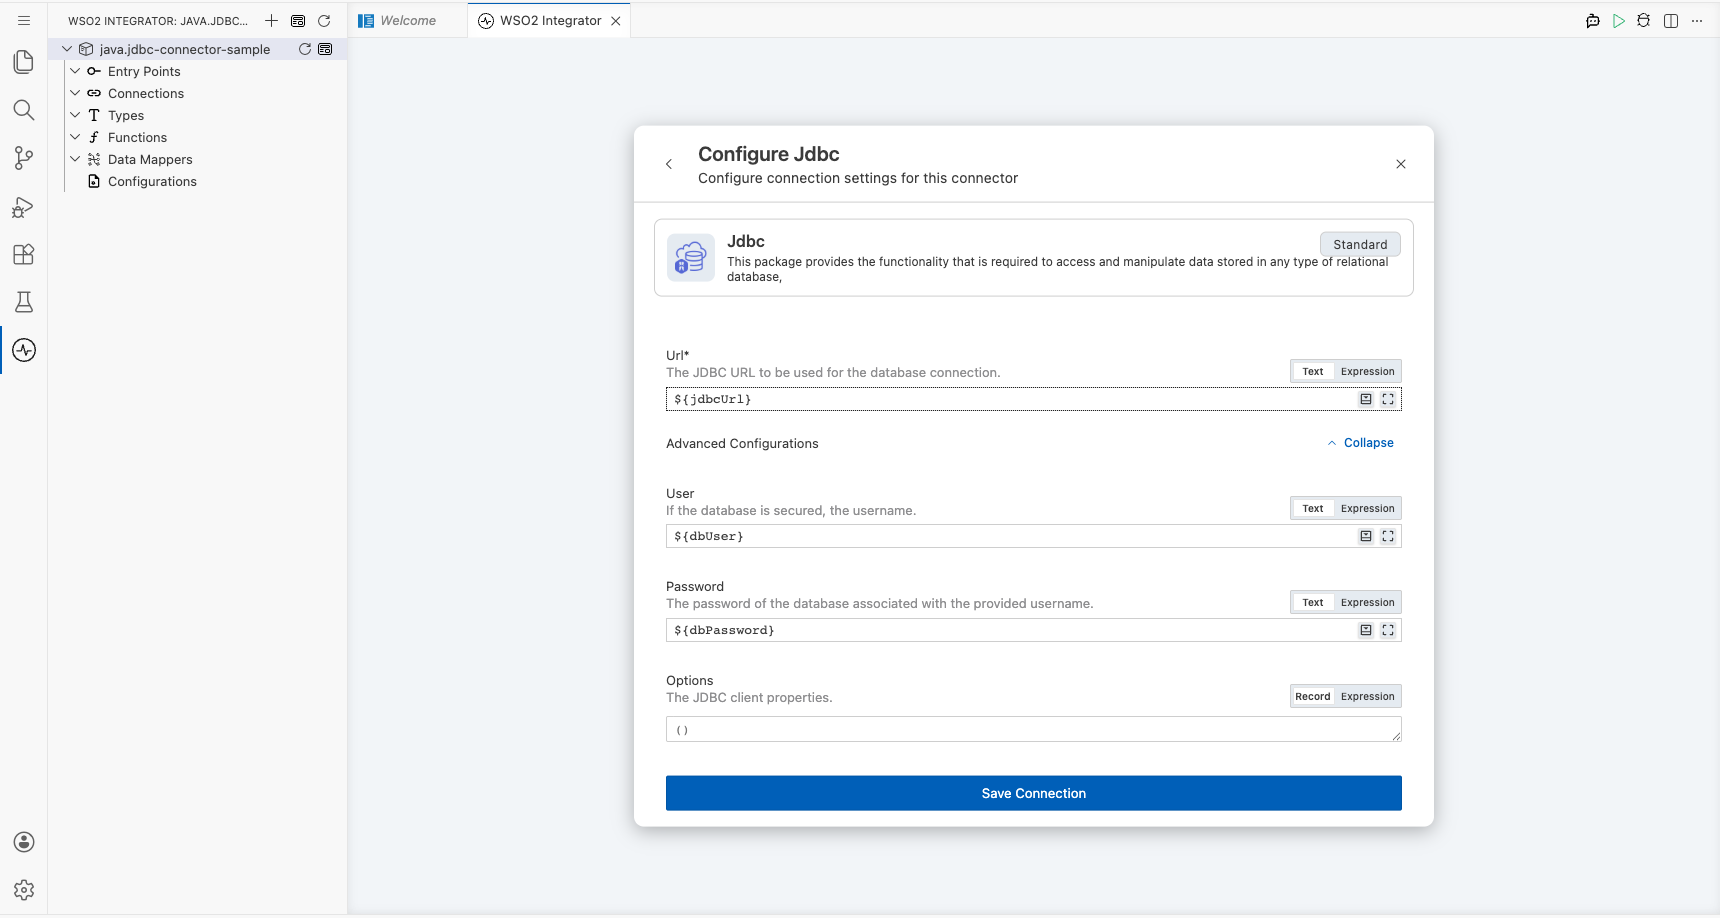
Step 3: Save the connection
Click Save Connection. The jdbcClient connection node appears on the canvas.
Step 4: Set actual values for your configurables
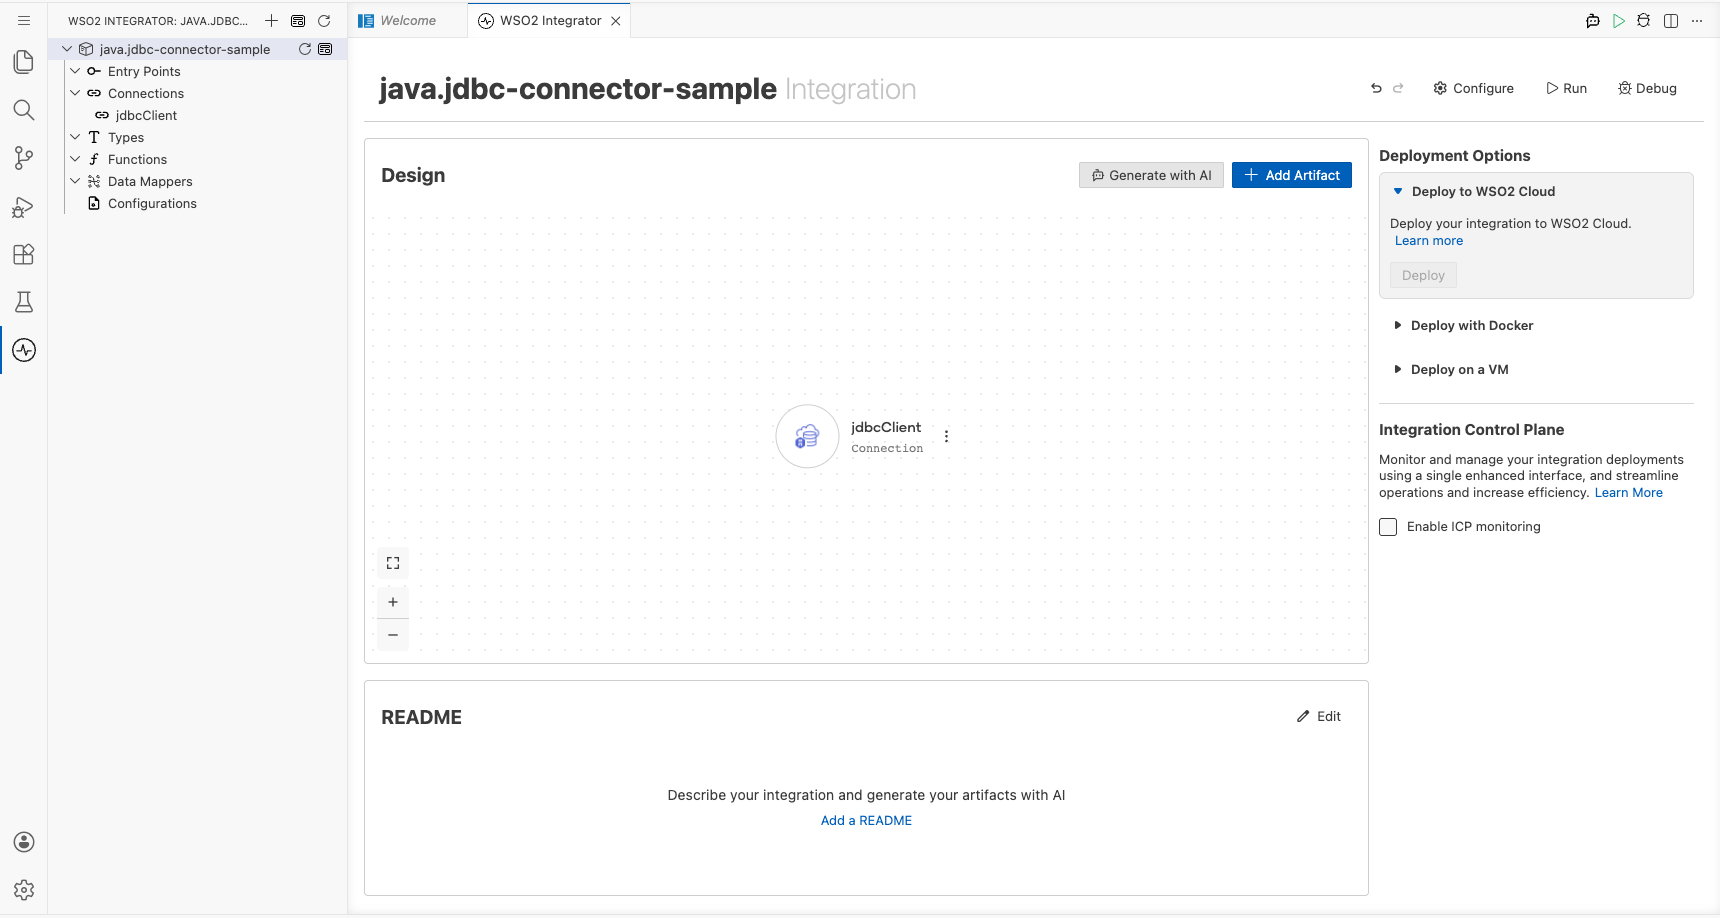
- In the left panel of WSO2 Integrator, click Configurations (at the bottom of the project tree, under Data Mappers).
- Set a value for each configurable listed below:
- jdbcUrl: string : your full JDBC connection URL
- dbUser: string : your database username
- dbPassword: string : your database password
Configuring the Java JDBC execute operation
Step 5: Add an automation entry point
- Click + Add Artifact on the canvas toolbar.
- Select Automation from the artifact type list.
- Leave defaults and click Create.
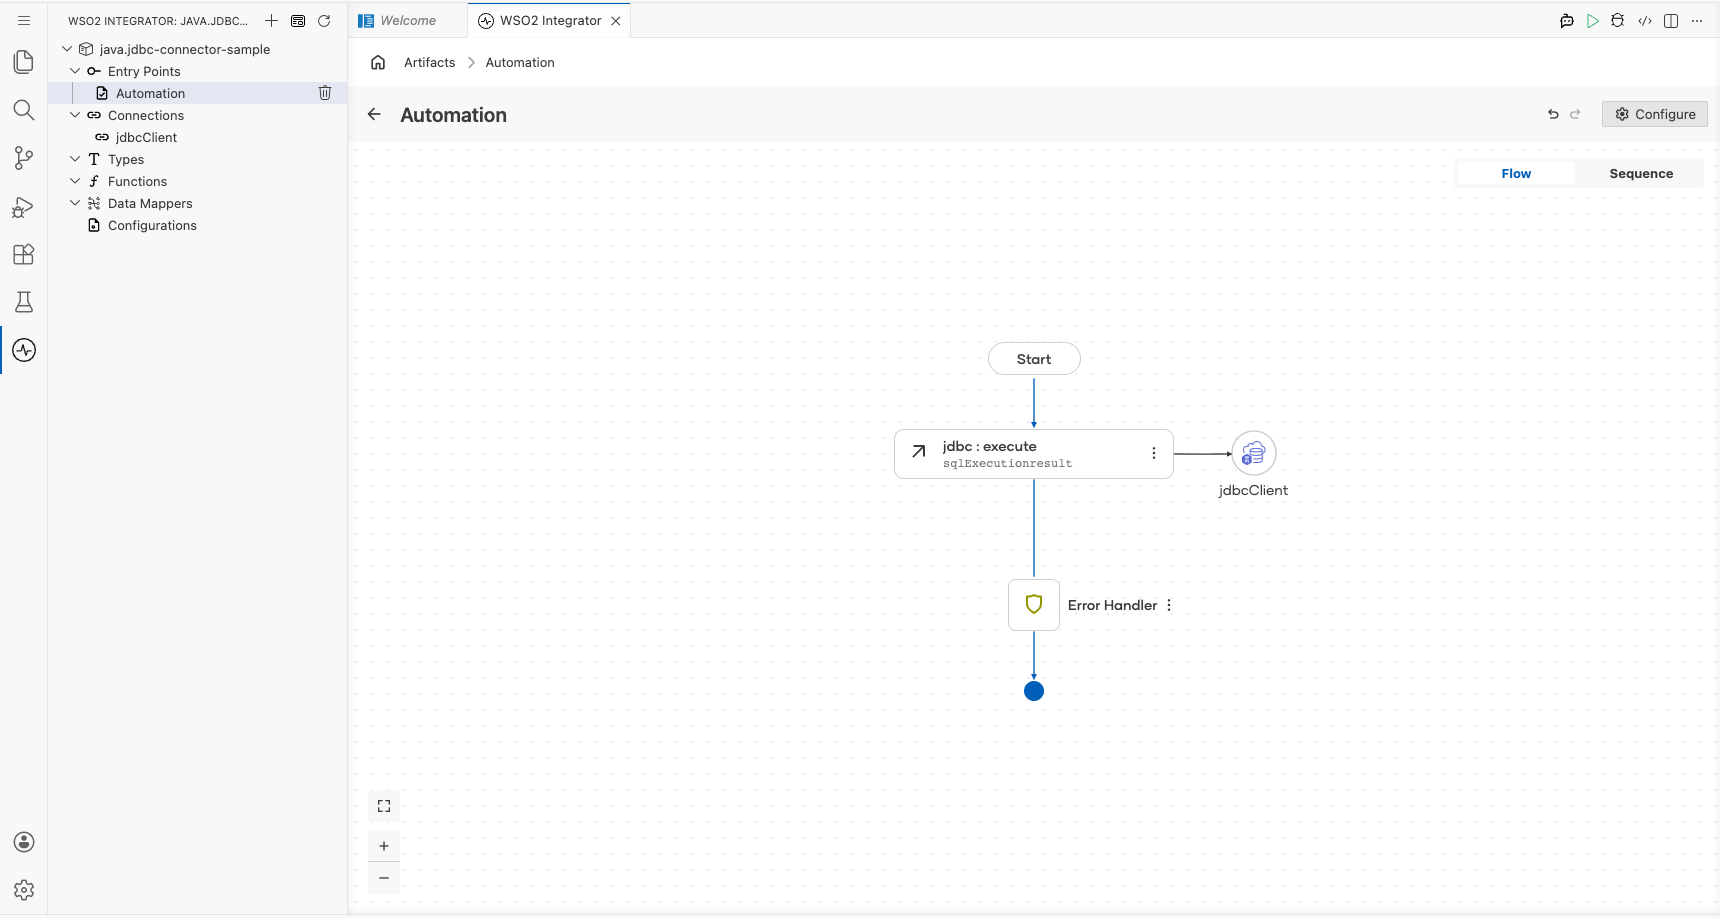
The Automation flow opens in the canvas editor with a Start node and an Error Handler block created automatically.
Step 6: Select and configure the execute operation
- In the Automation flow canvas, click the + node (between Start and Error Handler) to open the node selection panel.
- In the Connections section, click jdbcClient to expand it and reveal available operations.
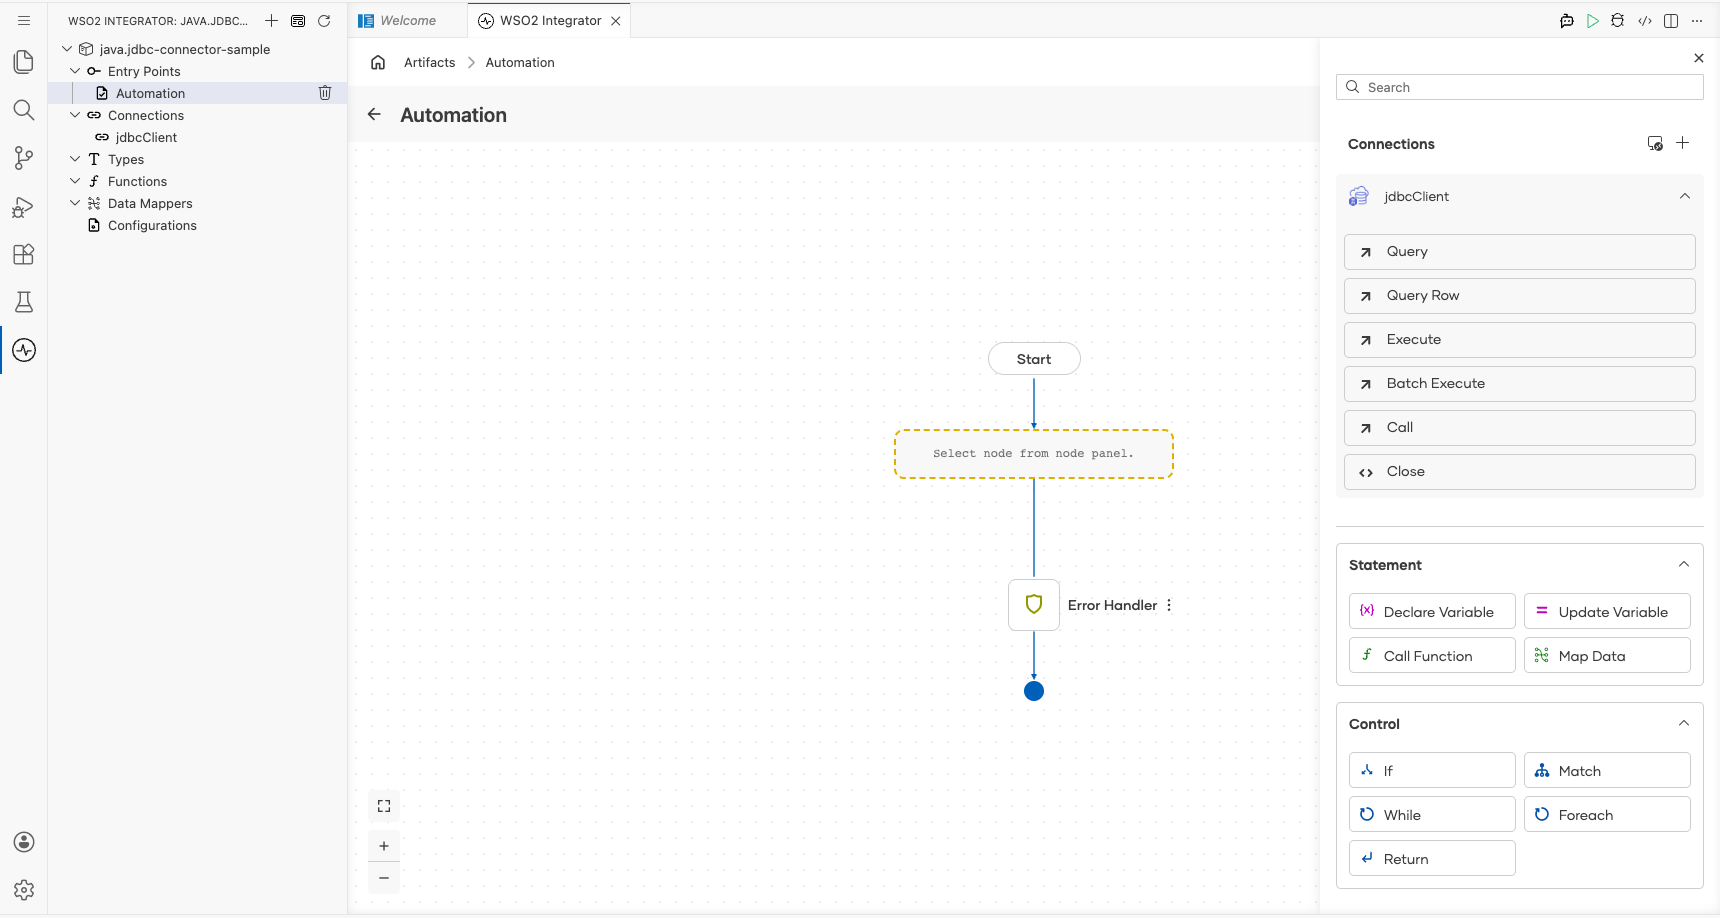
- Click Execute to open the configuration panel, then fill in the following parameters:
- SQL query: the parameterized SQL statement to execute (for example, an INSERT targeting your target table)
- Result: the variable name for the execution result (default:
sqlExecutionresult) - Result type:
sql:ExecutionResult(auto-filled)
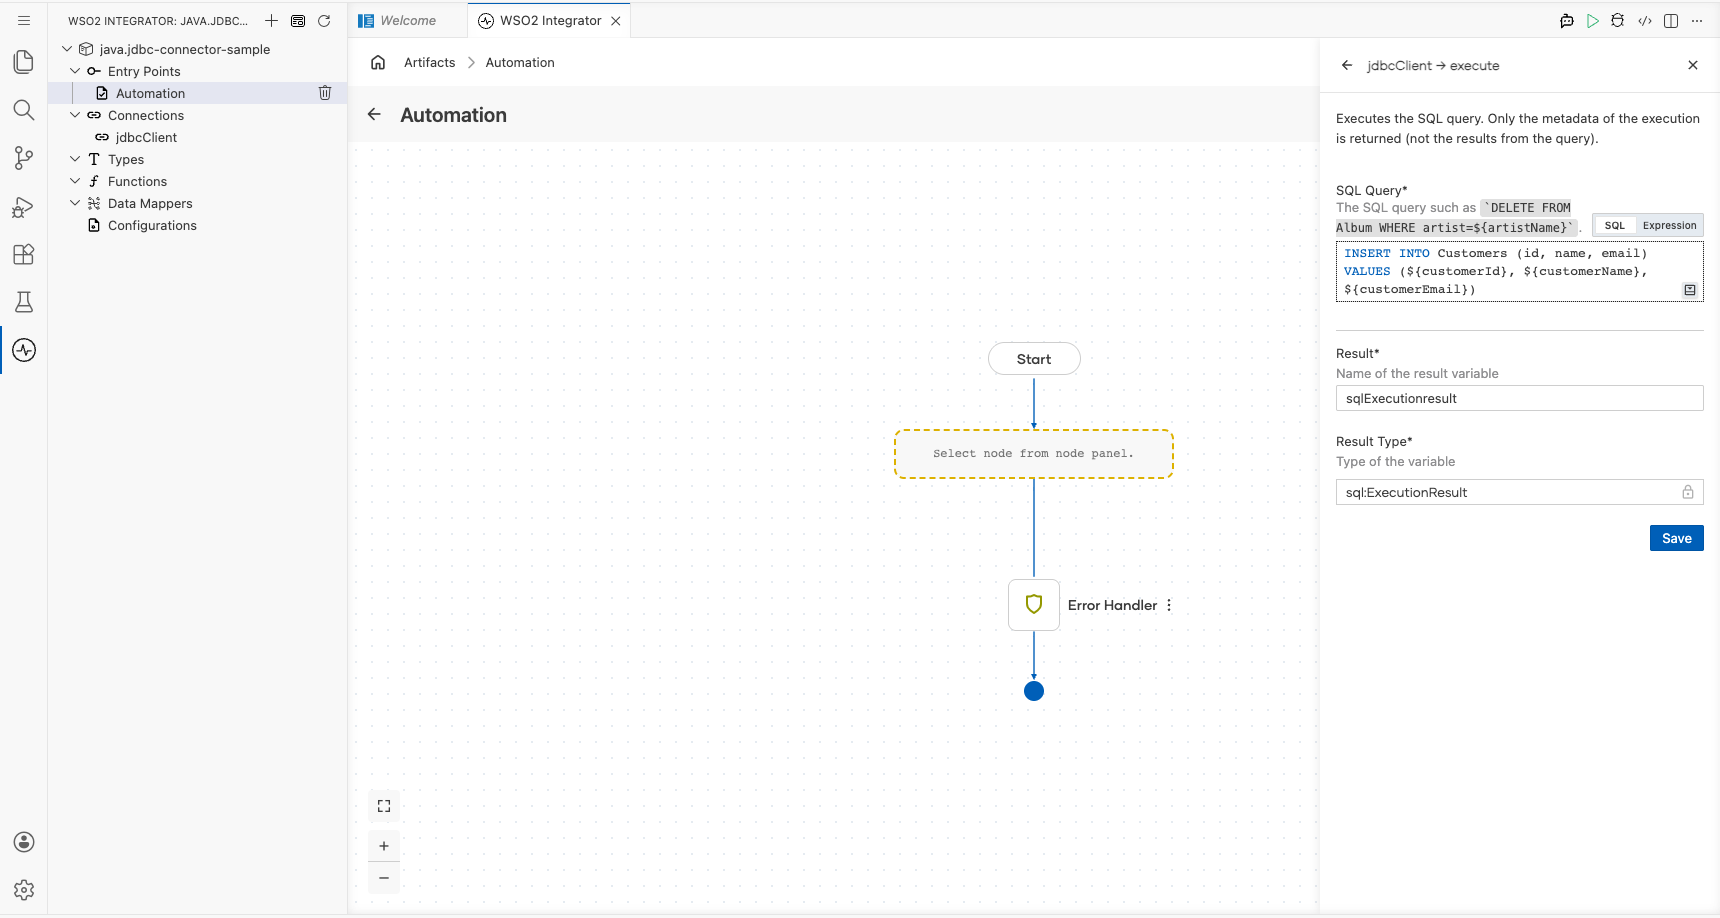
- Click Save. The
jdbc : executenode appears in the Automation flow.
Try it yourself
Try this sample in WSO2 Integration Platform.
