Setup Guide
This guide walks you through setting up a MongoDB instance and obtaining the connection string required to use the MongoDB connector.
Prerequisites
- A MongoDB instance (v3.6 or later). You can use MongoDB Atlas for a cloud-hosted instance or install MongoDB Community Edition locally.
Step 1: Set up a MongoDB server locally
- Download and install MongoDB Community Edition from the MongoDB download center.
- Follow the installation instructions for your operating system to start the MongoDB server.
This guide uses MongoDB Community Edition. The Enterprise Edition can also be used.
Step 2: Set up a MongoDB Atlas cluster
If you prefer a cloud-hosted instance:
-
Sign up for a free account at MongoDB Atlas.
-
Follow the Atlas documentation to create a new cluster.
-
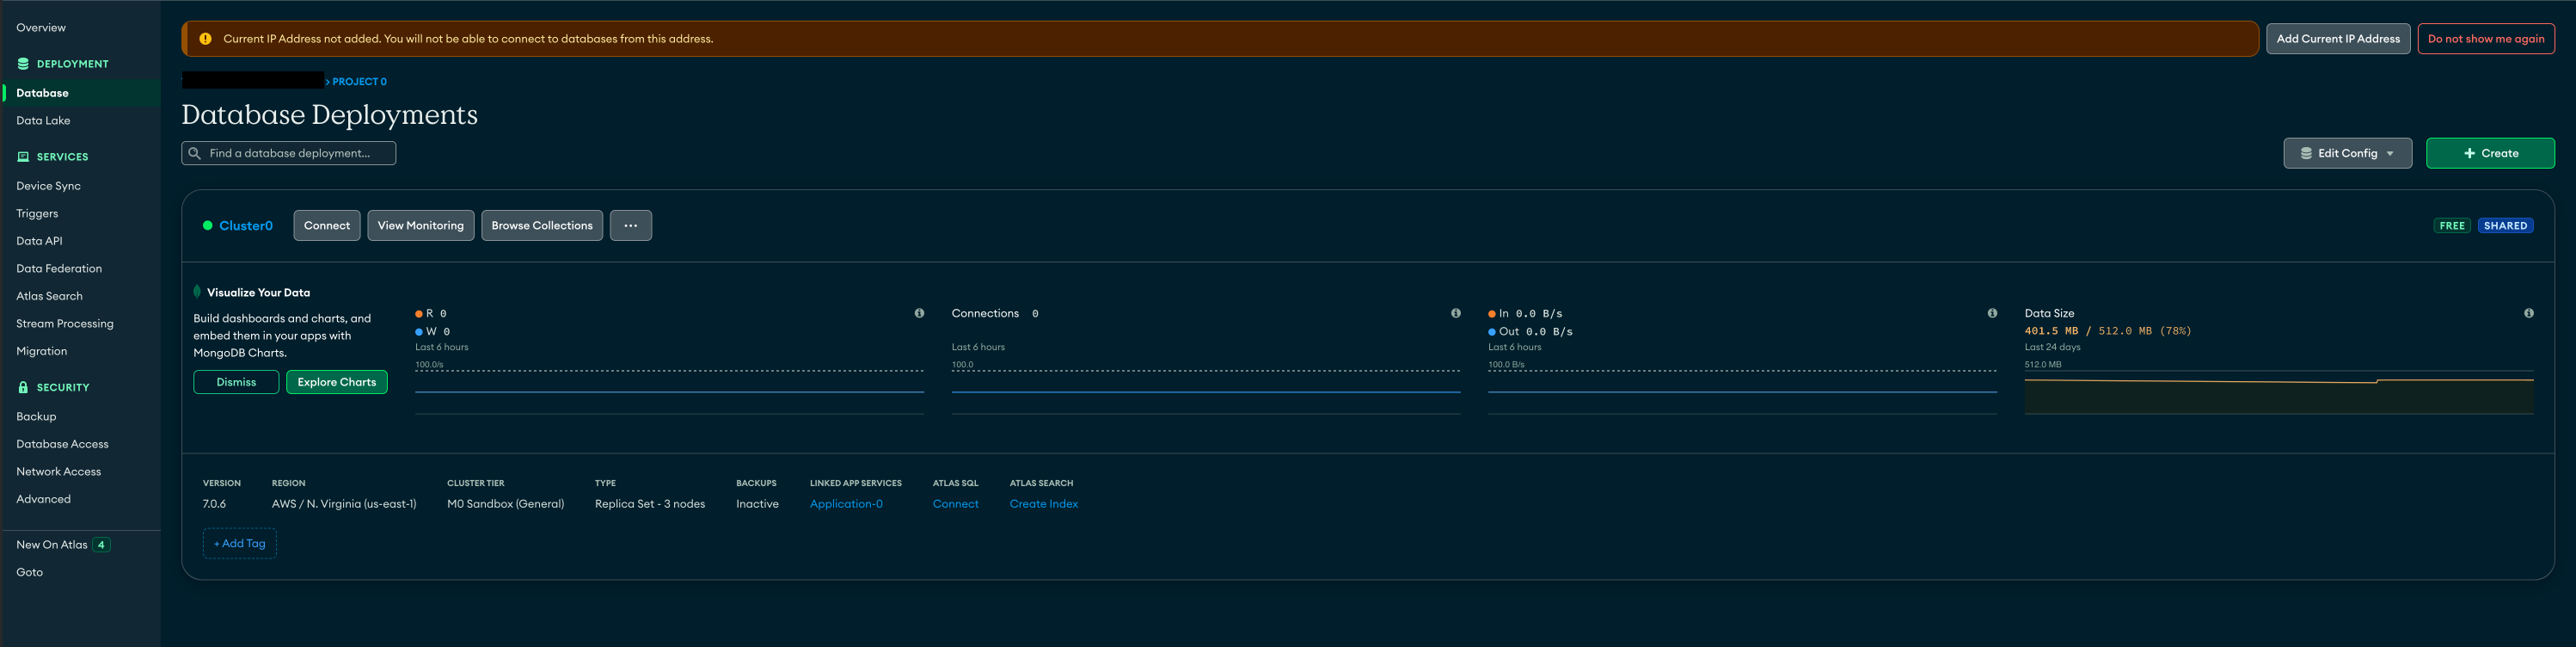
Navigate to your MongoDB Atlas cluster.
-
Select Database from the left navigation pane under the Deployment section and select Connect to open the connection instructions.
-
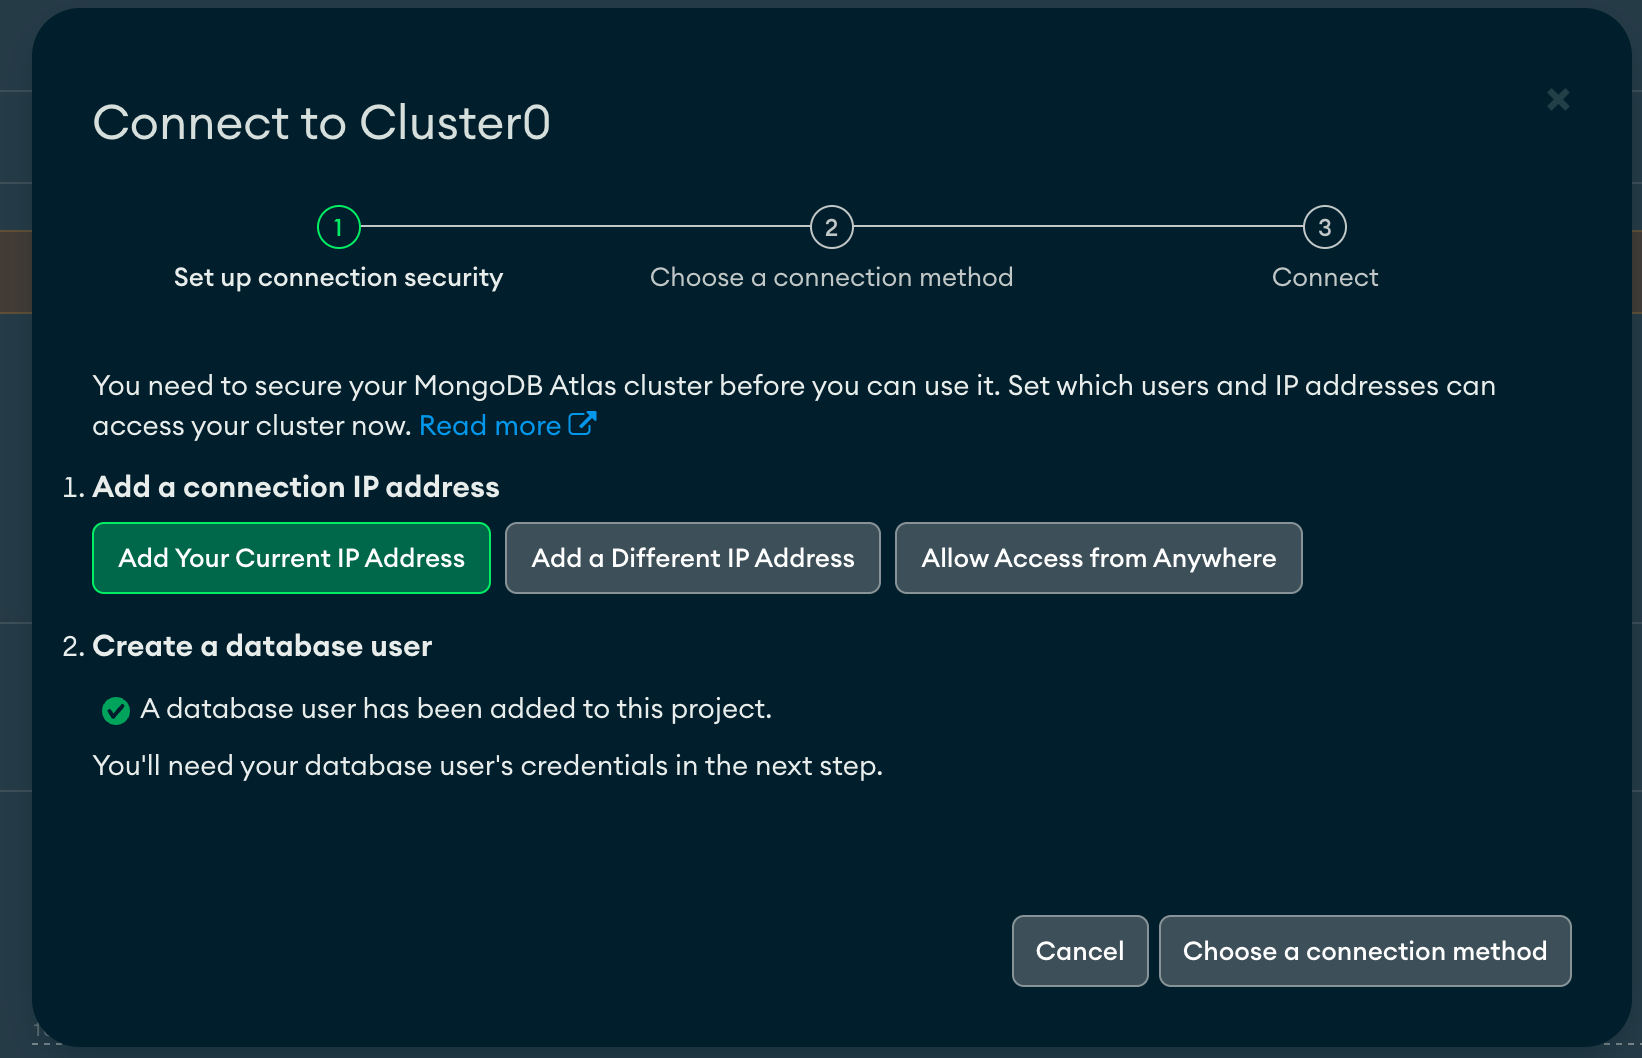
Add your IP address to the IP access list, or select Allow access from anywhere to allow all IP addresses.
-
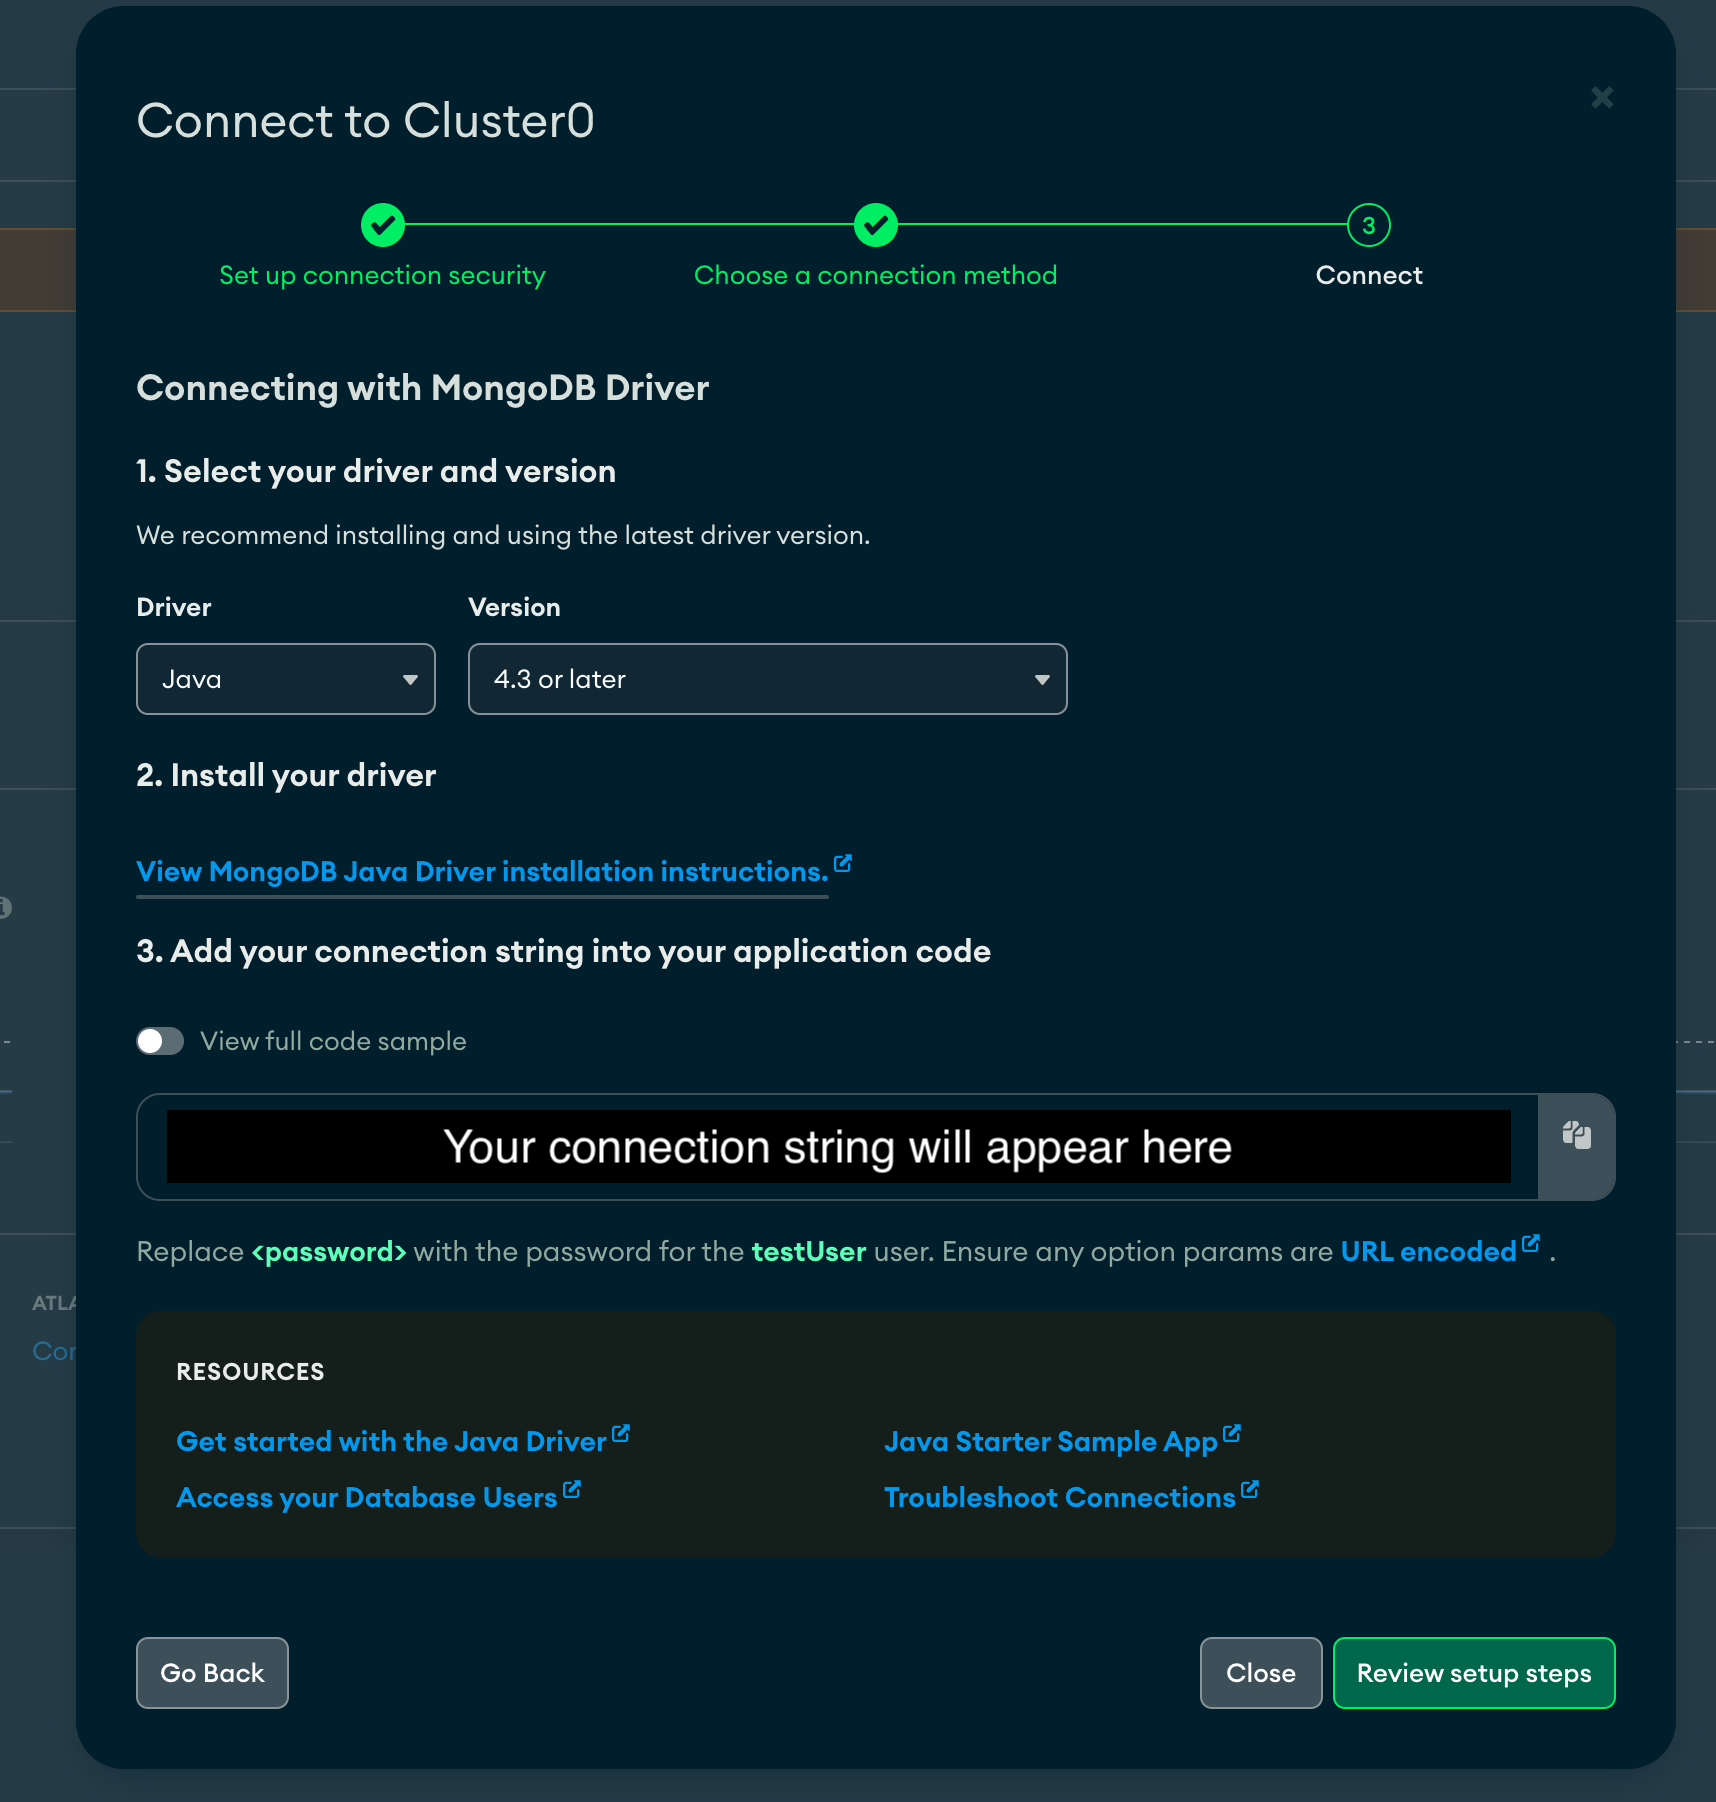
Select Choose a connection method and select Drivers under Connect your application to find the connection string.
Allowing access from all IP addresses (0.0.0.0/0) is suitable for development only. In production, restrict access to specific IP addresses or CIDR ranges.
Step 3: Get the connection string
For MongoDB Atlas, copy the connection string from the Drivers connection method page. It follows this format:
mongodb+srv://<username>:<password>@<cluster-host>/?retryWrites=true&w=majority
Replace <username> and <password> with your database user credentials.
For local MongoDB, the default connection string is:
mongodb://localhost:27017
If authentication is enabled:
mongodb://myUser:myPassword@localhost:27017/?authSource=admin
Store the connection string securely. Use Ballerina's configurable feature and a Config.toml file to supply it at runtime.