Example
What you'll build
Build a WSO2 Integrator automation that connects to a MongoDB server and retrieves a database handle using the getDatabase operation on mongodbClient. The integration uses configurable variables to keep credentials out of source code, and runs on a scheduled Automation entry point.
Operations used:
- Get Database retrieves a
mongodb:Databasehandle from the connected MongoDB server
Architecture
Prerequisites
- A running MongoDB server reachable from your host
- MongoDB credentials (username, password, and authentication database name)
Setting up the MongoDB integration
New to WSO2 Integrator? Follow the Create a new integration guide to set up your integration first, then return here to add the connector.
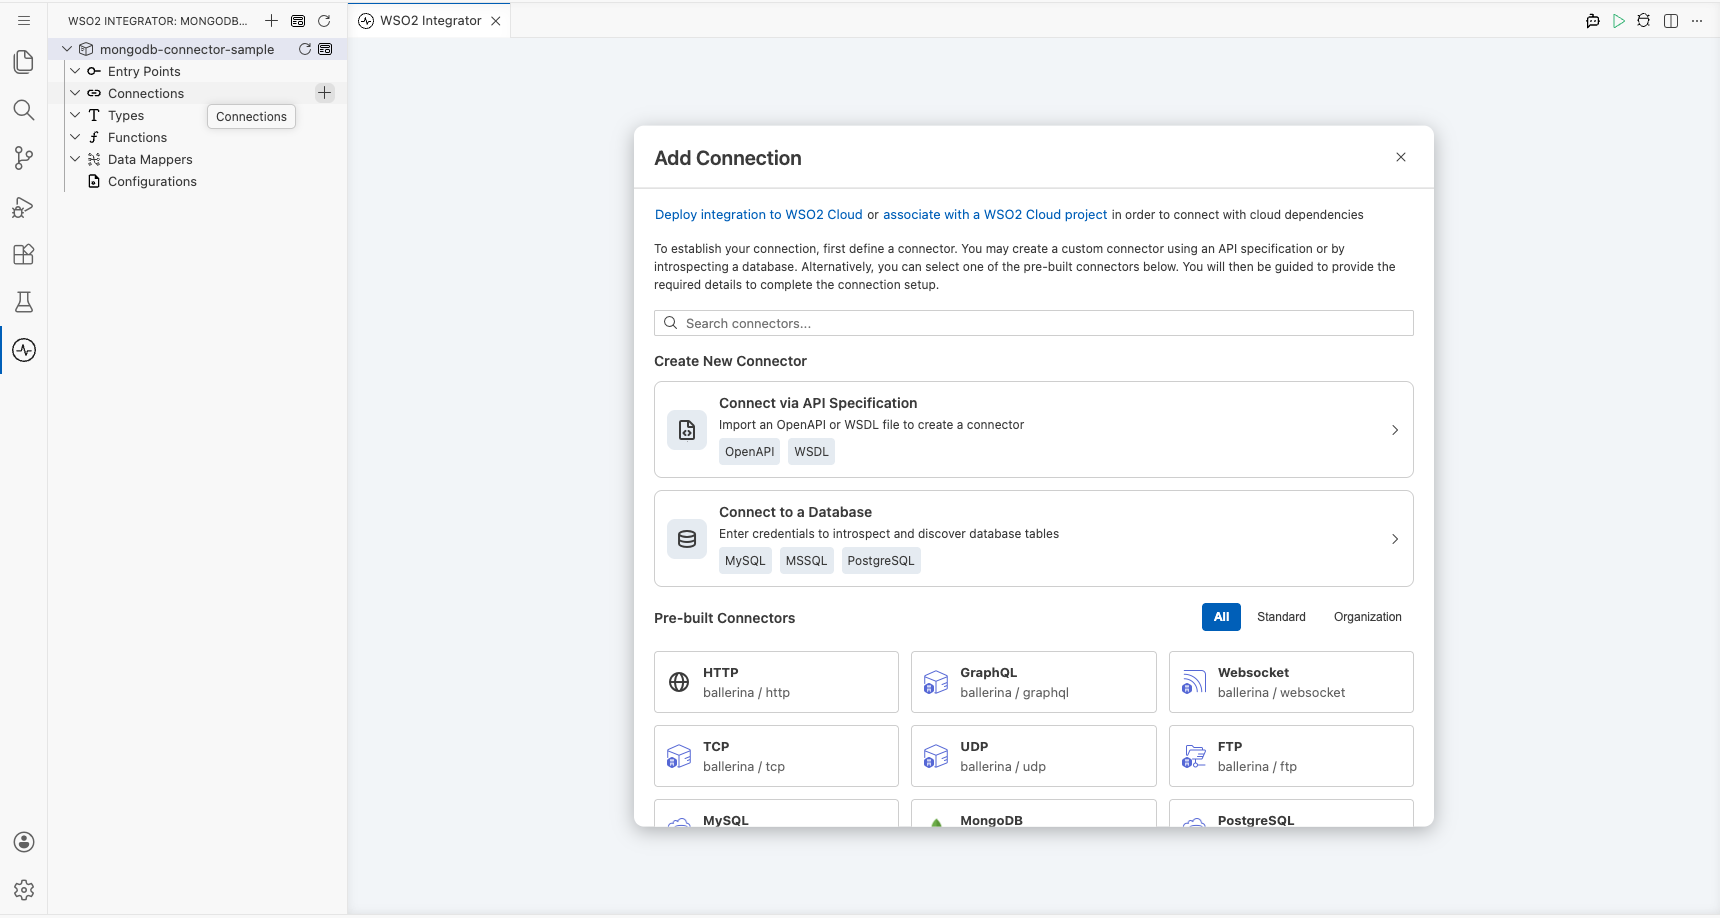
Adding the MongoDB connector
Open the connector palette and search for MongoDB
- On the main canvas, click + Add Connection to open the connector palette.
- Type MongoDB in the search box.
- Select the MongoDB card (
ballerinax/mongodb).
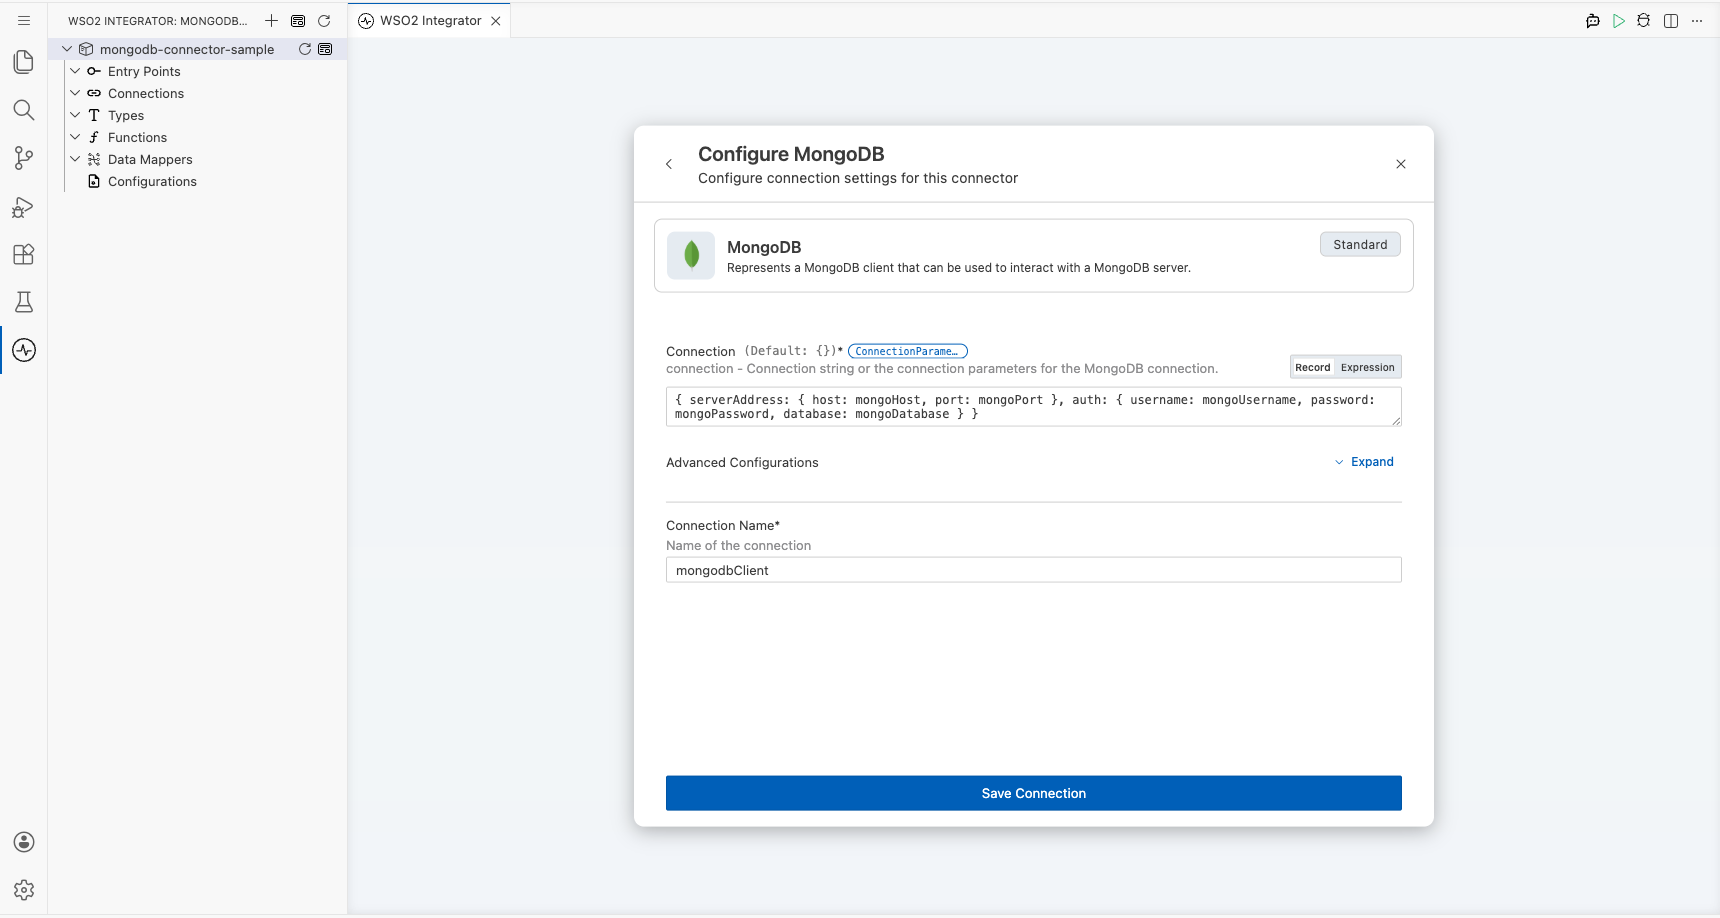
Configuring the MongoDB connection
Fill in the connection parameters
In the Configure MongoDB panel, bind each field to a configurable variable using Expression mode in the Connection textbox. For each parameter listed below:
- Open the helper panel beside the field and go to the Configurables tab.
- Select an existing configurable or click + New Configurable.
- Supply a camelCase name and the appropriate type, then click Save. The configurable is injected into the field.
- serverAddress.host: MongoDB server hostname or IP address, bound to a
stringconfigurable namedmongoHost - serverAddress.port: MongoDB server port number, bound to an
intconfigurable namedmongoPort - auth.username: Database username, bound to a
stringconfigurable namedmongoUsername - auth.password: Database password, bound to a
stringconfigurable namedmongoPassword - auth.database: Authentication database name (typically
admin), bound to astringconfigurable namedmongoDatabase
After creating all five configurables, set Connection Name to mongodbClient.
If you already have a complete MongoDB connection URI (mongodb://... or mongodb+srv://...), you can paste it directly into the Connection field as a single string instead of binding the individual sub-fields. See the Setup guide for how to obtain that URI.
The walkthrough above uses password-based authentication. The three password records share the username, password, and database field shape, but each has a distinct, read-only authMechanism.
Pick BasicAuthCredential for PLAIN, ScramSha1AuthCredential for SCRAM-SHA-1, or ScramSha256AuthCredential for SCRAM-SHA-256 (the default mechanism on modern MongoDB servers). The connector dispatches on the authMechanism constant, so the record type you choose determines the wire-level mechanism.
For X.509 client-certificate or GSSAPI/Kerberos authentication, use X509Credential or GssApiCredential instead. See Authentication credentials for the field shapes.
Save the connection
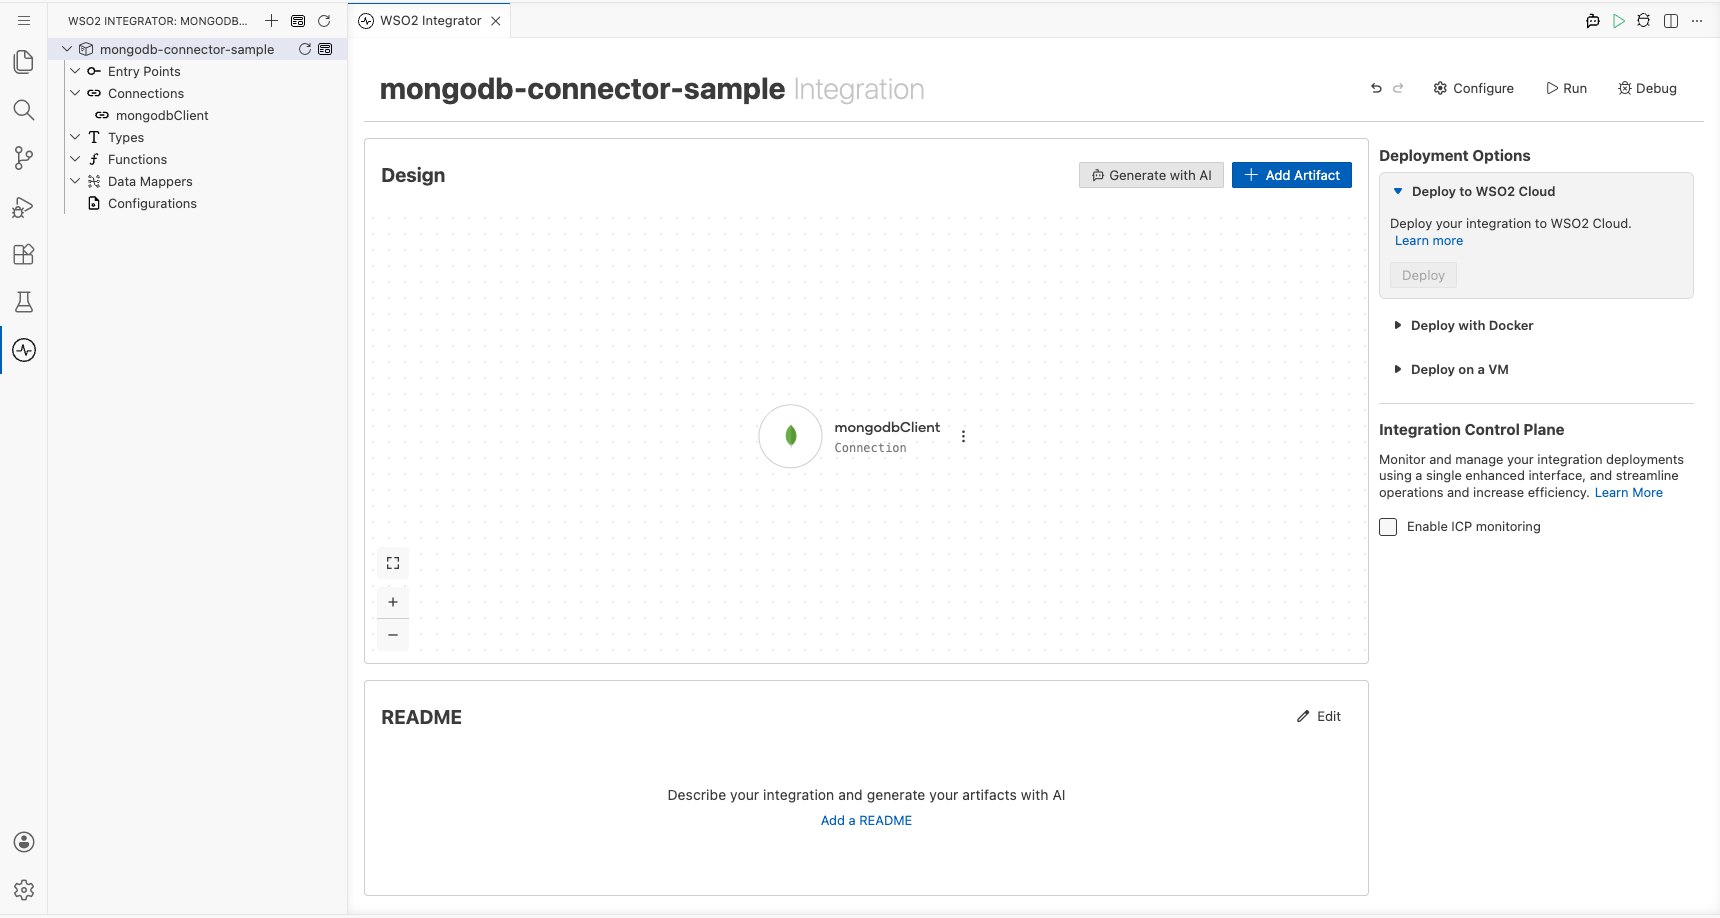
Click Save Connection to persist the connection. The mongodbClient node appears in the Connections section of the left sidebar and on the canvas.
Set actual values for your configurables
- In the left panel, click Configurations.
- Set a value for each configurable listed below.
- mongoHost: hostname or IP of your MongoDB server (
string) - mongoPort: port your MongoDB server listens on (
int) - mongoUsername: username for MongoDB authentication (
string) - mongoPassword: password for MongoDB authentication (
string) - mongoDatabase: name of the authentication database (
string)
Configuring the MongoDB get database operation
Add an automation entry point
- On the main canvas, click + Add Artifact.
- Choose Automation under the Automation heading.
- Leave all defaults and click Create.
The automation flow canvas opens, showing a Start node and an Error Handler node with an empty step slot between them.
Select and configure the get database operation
- Click the + button between the Start and Error Handler nodes in the flow.
- Under Connections, expand mongodbClient to reveal available operations.

- Click Get Database to open its configuration form, then fill in the following parameters:
- Database Name: name of the MongoDB database to retrieve (for example,
"hrdb") - Result: variable name for the returned
mongodb:Databasehandle (for example,mongodbDatabase)
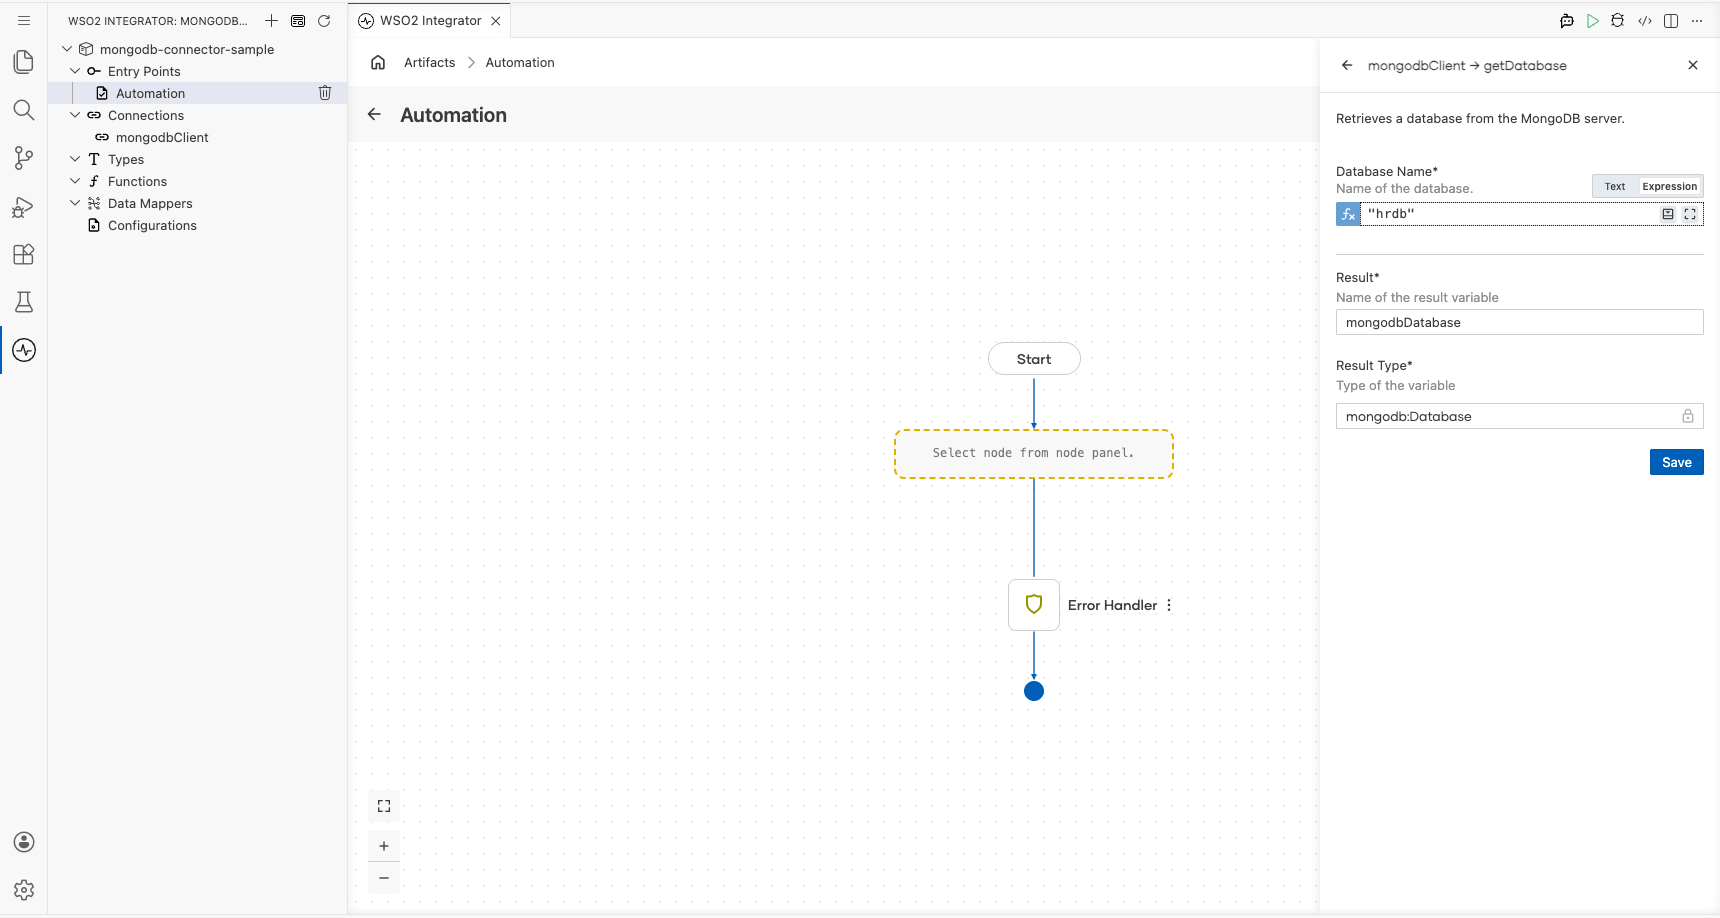
- Click Save. The node is added to the flow.

Try it yourself
Try this sample in WSO2 Integration Platform.

More code examples
The MongoDB connector provides practical examples illustrating usage in various scenarios. Explore these examples covering common MongoDB operations.
- Movie database - Implement a movie database using MongoDB.
- Order management system - Implement an order management system using MongoDB.