Example
Build a WSO2 Integrator automation that connects to a MySQL database using configurable connection parameters and executes an INSERT SQL statement. The integration uses the MySQL connector to insert a record into a database table safely, without hardcoding credentials in source code.
Operations used:
- Execute: Runs a parameterized SQL INSERT statement against the connected MySQL database and returns an execution result.
Architecture
- A running MySQL database instance with a table to insert records into.
- MySQL database credentials (host, user, password, database name, and port).
Set up the MySQL integration
Follow the Create a new integration guide to set up your integration first, then return here to add the connector.
Add the MySQL connector
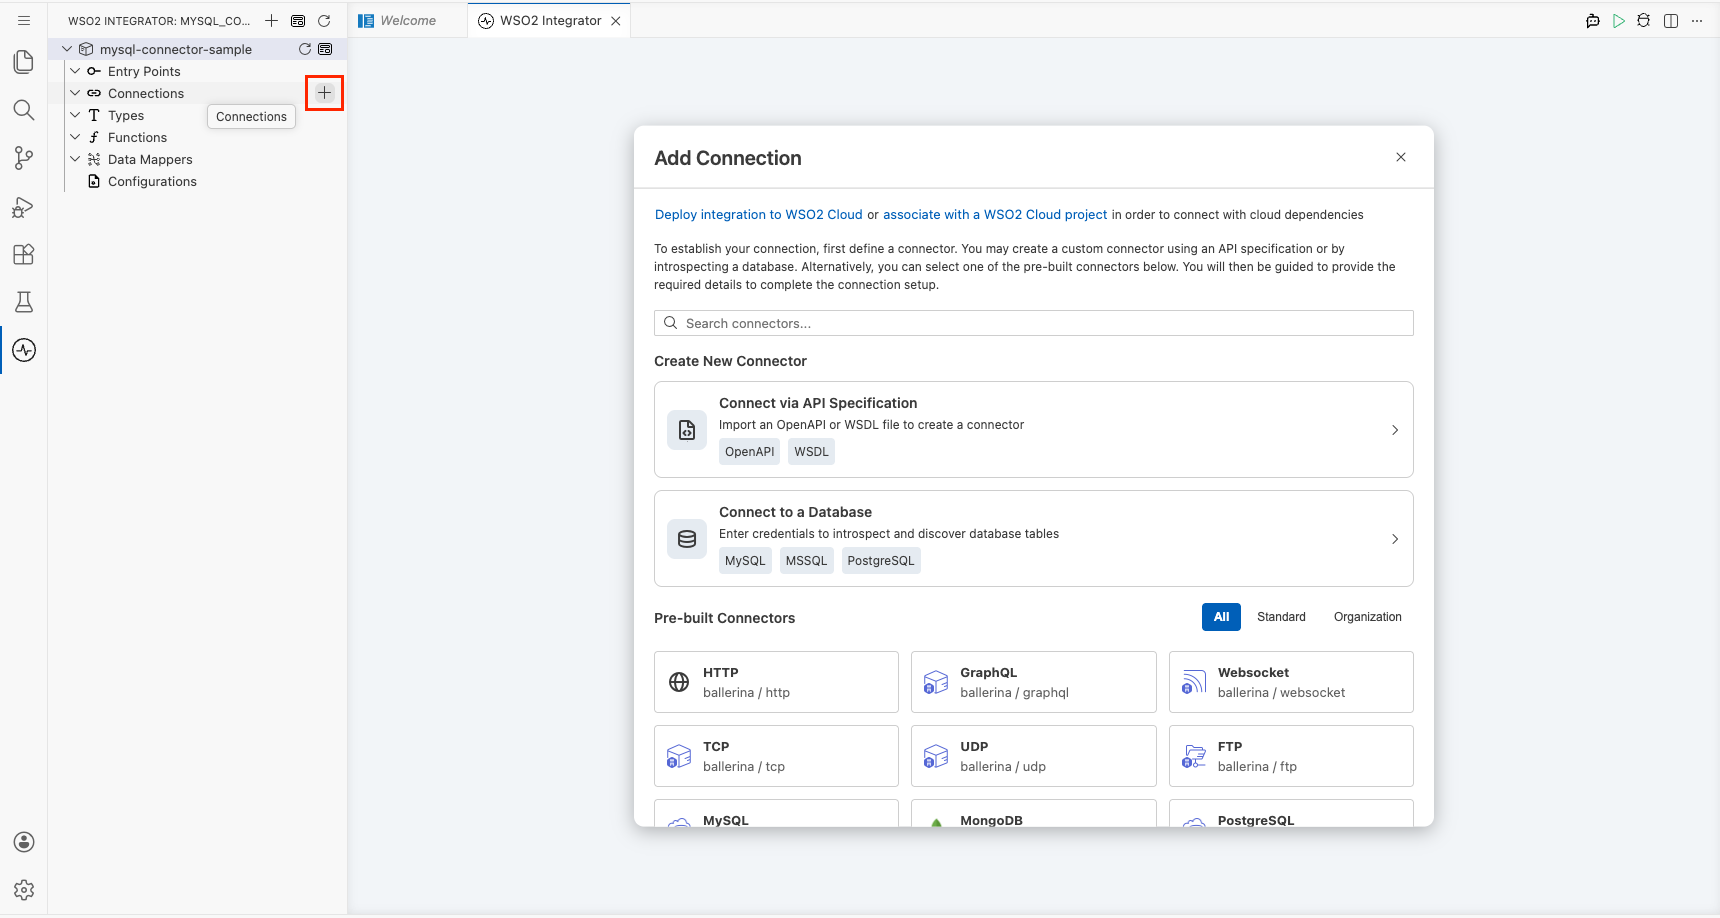
Open the connector palette and select the MySQL connector
- On the canvas, click + Add Connection to open the connector palette.
- In the palette search box, enter MySQL.
- Select the MySQL card to open the Configure MySQL form.
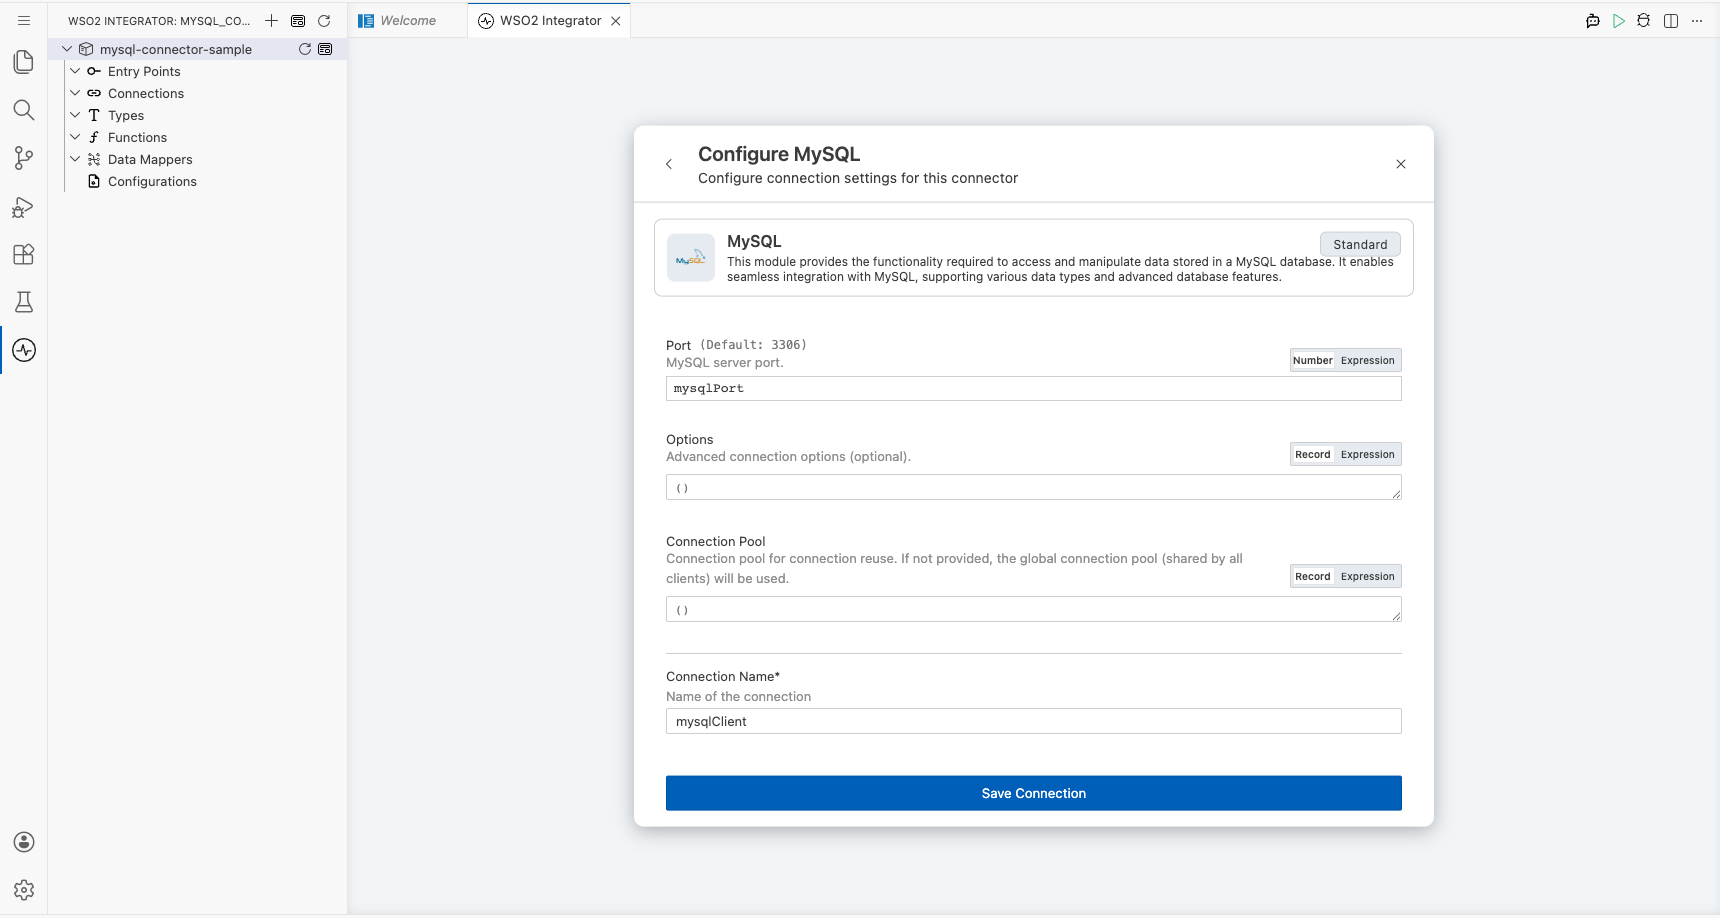
Configure the MySQL connection
Fill in the MySQL connection parameters
In the Configure MySQL form, expand Advanced Configurations to reveal all connection fields. Use the Configurables tab in the helper panel to bind each field to a configurable variable, keeping credentials out of source code. For each parameter listed below:
- Open the helper panel beside the field and go to the Configurables tab.
- Select an existing configurable or click + New Configurable.
- Supply a camelCase name and the appropriate type, then click Save. The configurable is injected into the field.
- host: MySQL server hostname, bound to a
stringconfigurable namedmysqlHost. - user: Database username, bound to a
string?configurable namedmysqlUser. - password: Database user password, bound to a
string?configurable namedmysqlPassword. - database: Database name to connect to, bound to a
string?configurable namedmysqlDatabase. - port: MySQL server port, bound to an
intconfigurable namedmysqlPort.
After creating all five configurables, set Connection Name to mysqlClient.
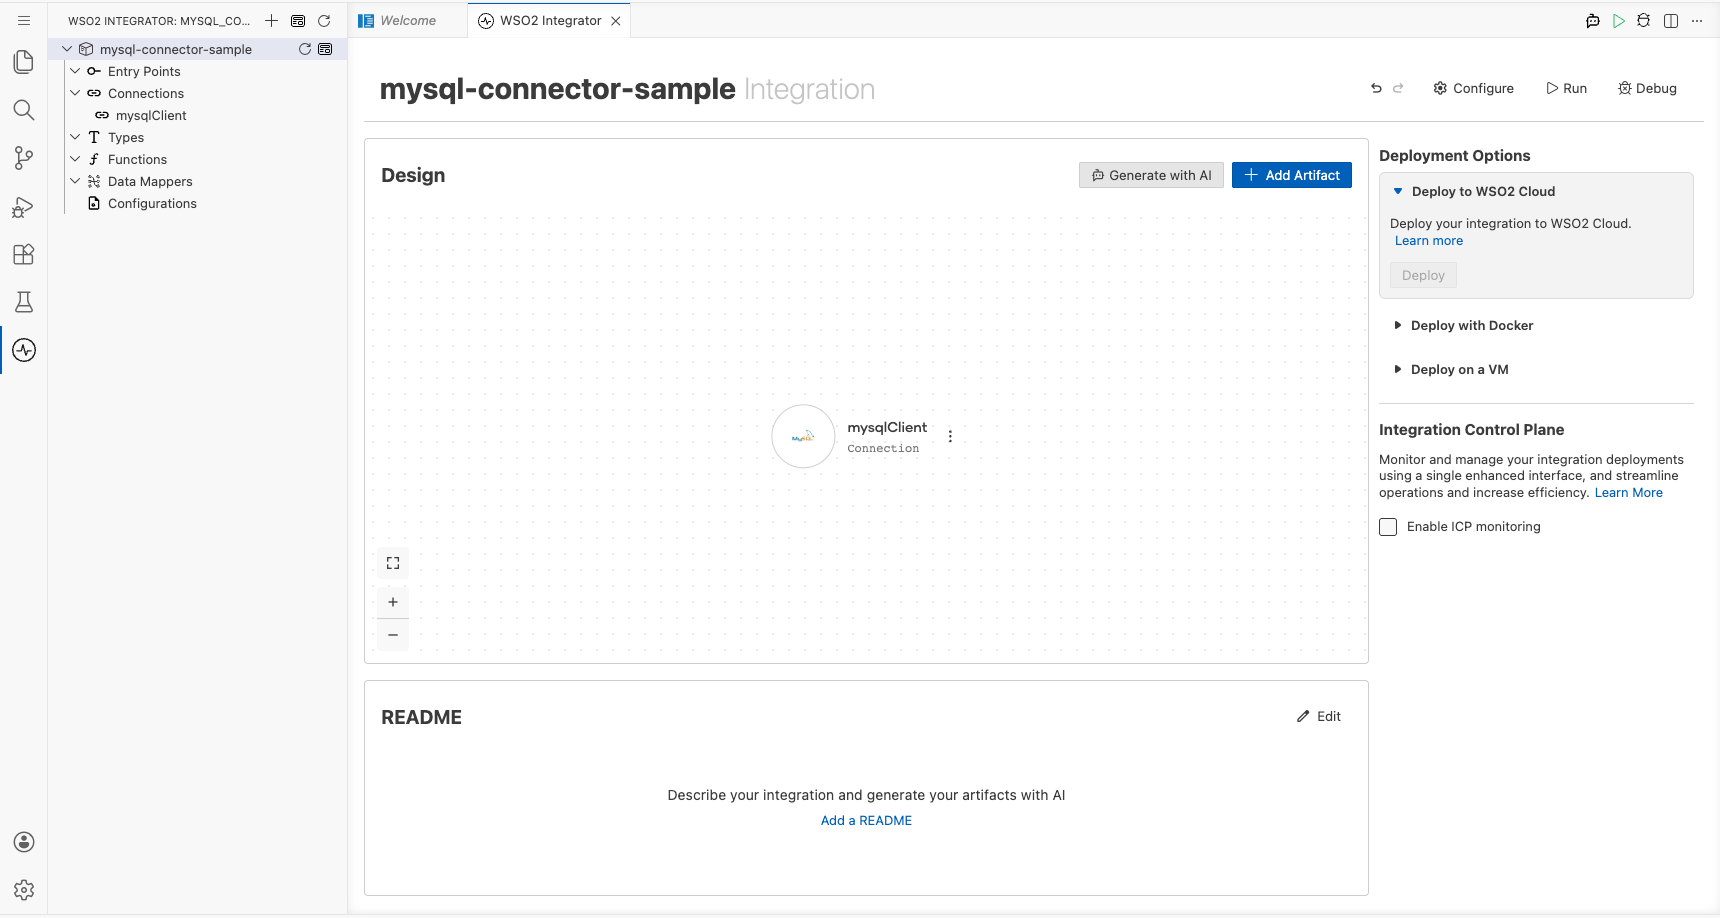
Save the MySQL connection
Select Save Connection to save the connector. The canvas returns to the integration overview and mysqlClient is now visible under Connections in the left-hand project tree.
Set actual values for your configurables
- In the left panel, click Configurations.
- Set a value for each configurable listed below.
- mysqlHost: Hostname or IP address of your MySQL server (
string). - mysqlUser: Database username (
string?). - mysqlPassword: Database user password (
string?). - mysqlDatabase: Name of the database to connect to (
string?). - mysqlPort: Port number your MySQL server listens on (
int).
Configure the MySQL execute operation
Add an automation entry point
- Click + Add Artifact on the canvas toolbar.
- Under Automation, select the Automation tile.
- Click Create. No additional configuration is needed.
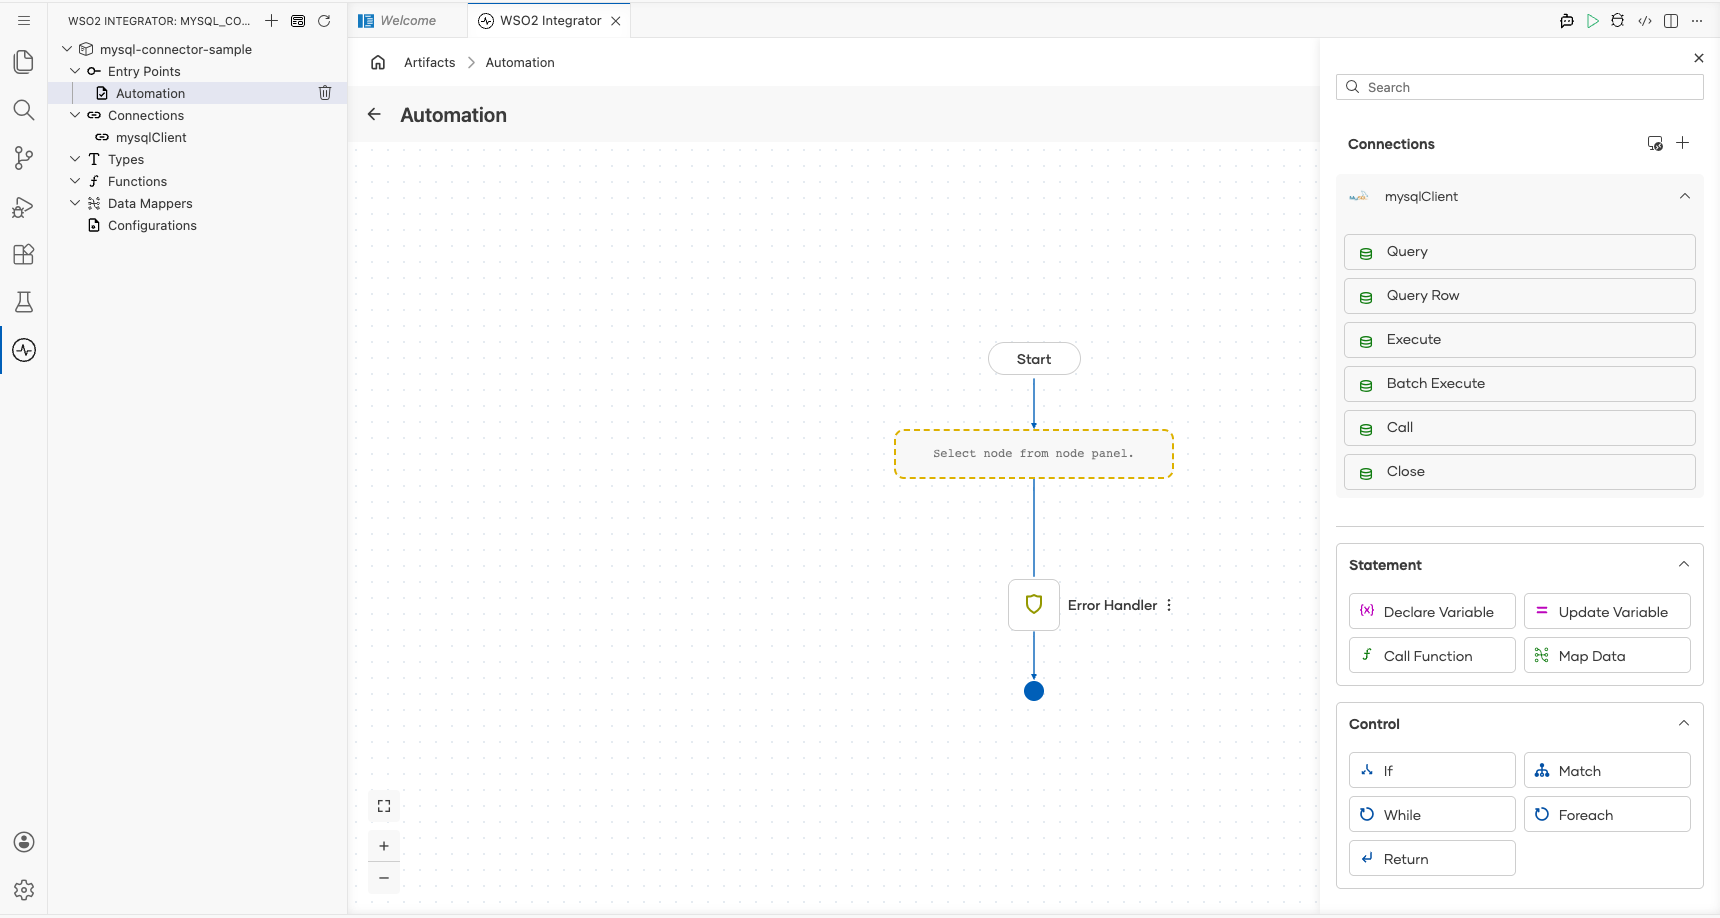
The automation flow canvas opens, showing a Start node and an Error Handler node with an empty step slot between them.
Select the empty step placeholder in the flow to open the step addition panel. In the right-hand panel, locate the Connections section, select mysqlClient to expand its available operations, and then select Execute.
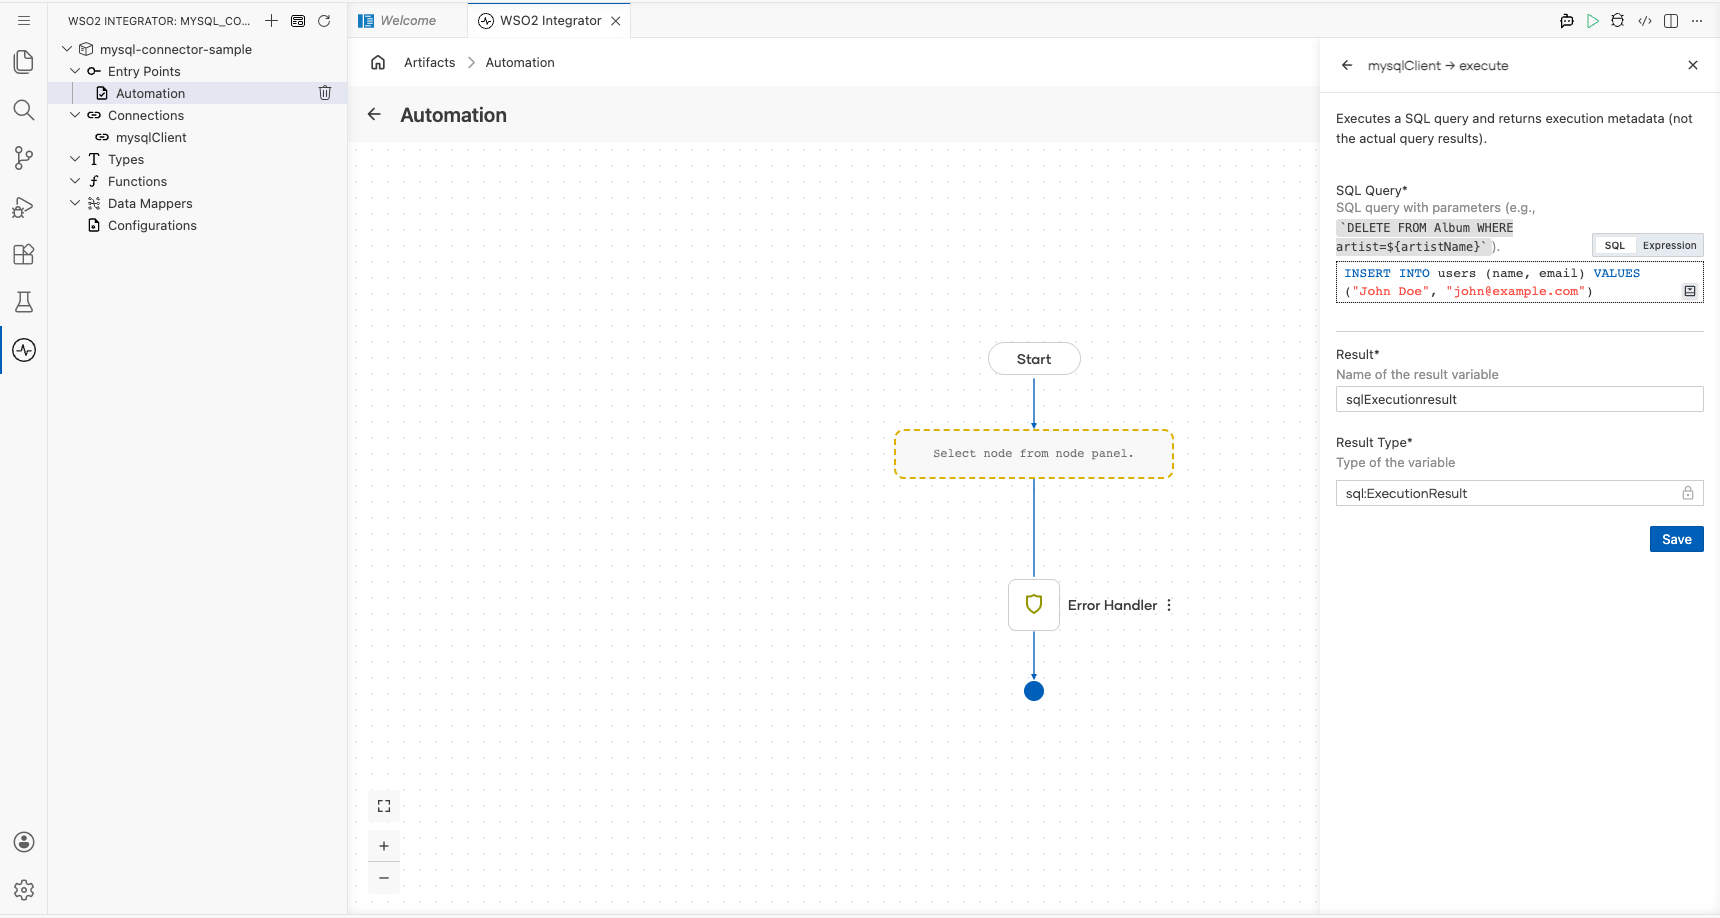
Configure the execute operation parameters and save
Fill in the operation fields, then select Save to add the step to the automation flow.
- sqlQuery: A parameterized SQL INSERT statement to execute. Use backtick-templated parameters so values are bound safely (no string concatenation). For example:
`INSERT INTO users (name, email) VALUES (${name}, ${email})`, wherenameandemailare Ballerina variables (for example, bound to inputs of the automation). - result: Variable that holds the returned
sql:ExecutionResult. Pre-filled assqlExecutionresult.
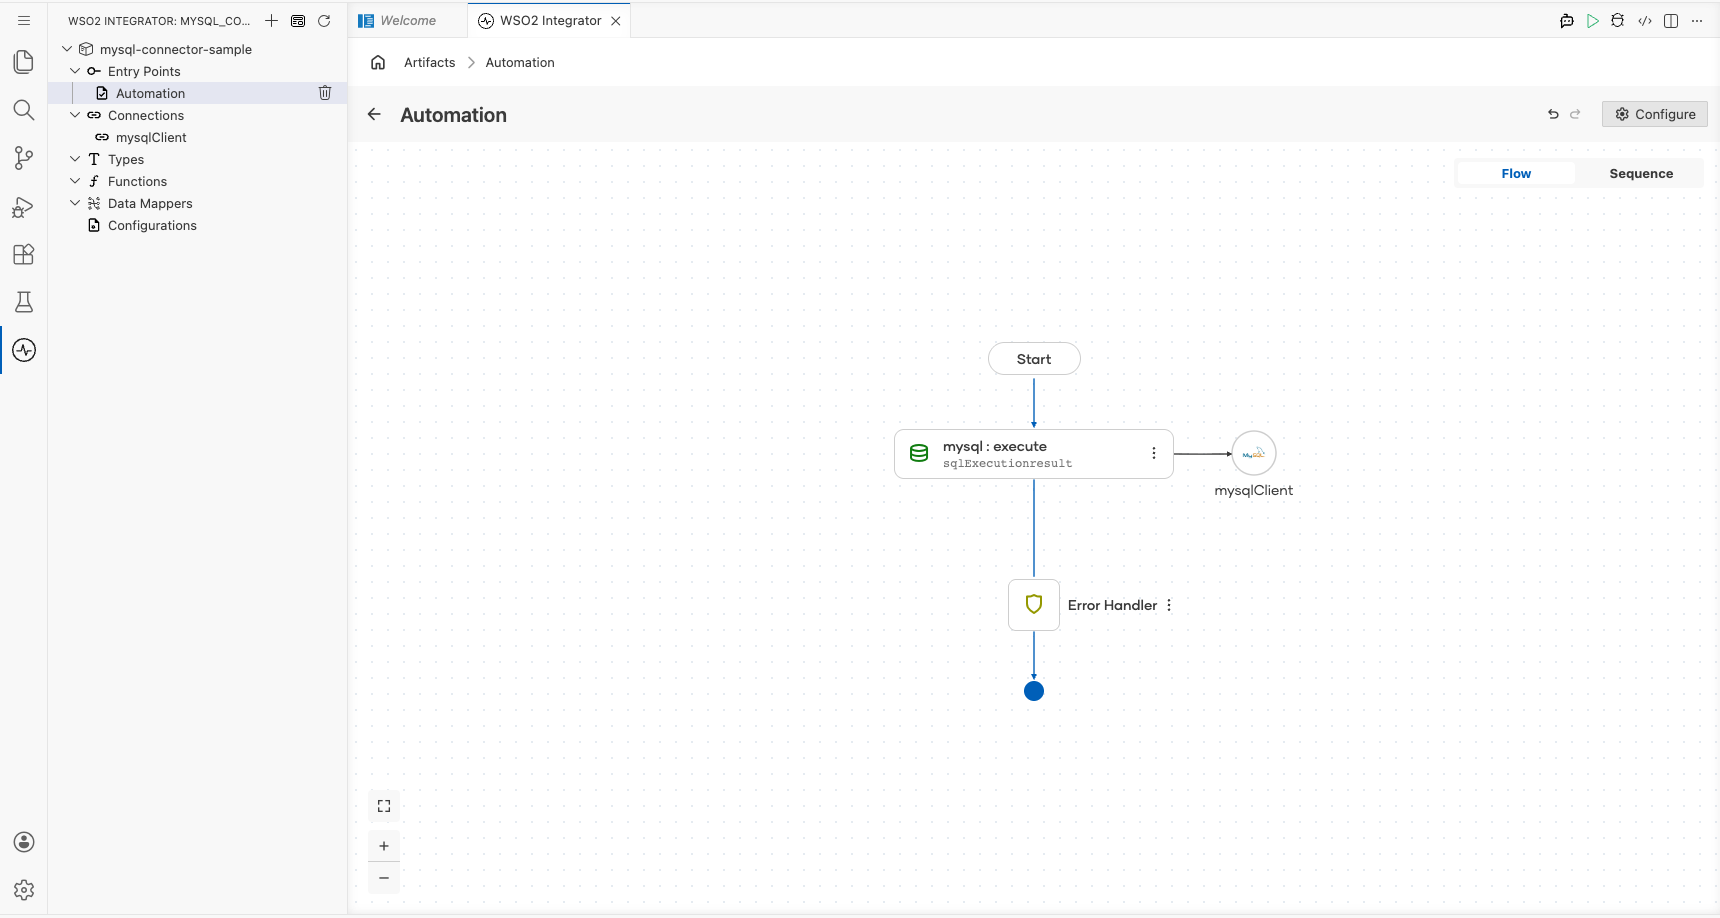
The automation flow now contains a single execute step between Start and Error Handler.
Try it yourself
Try this sample in WSO2 Integration Platform.
