Example
What you'll build
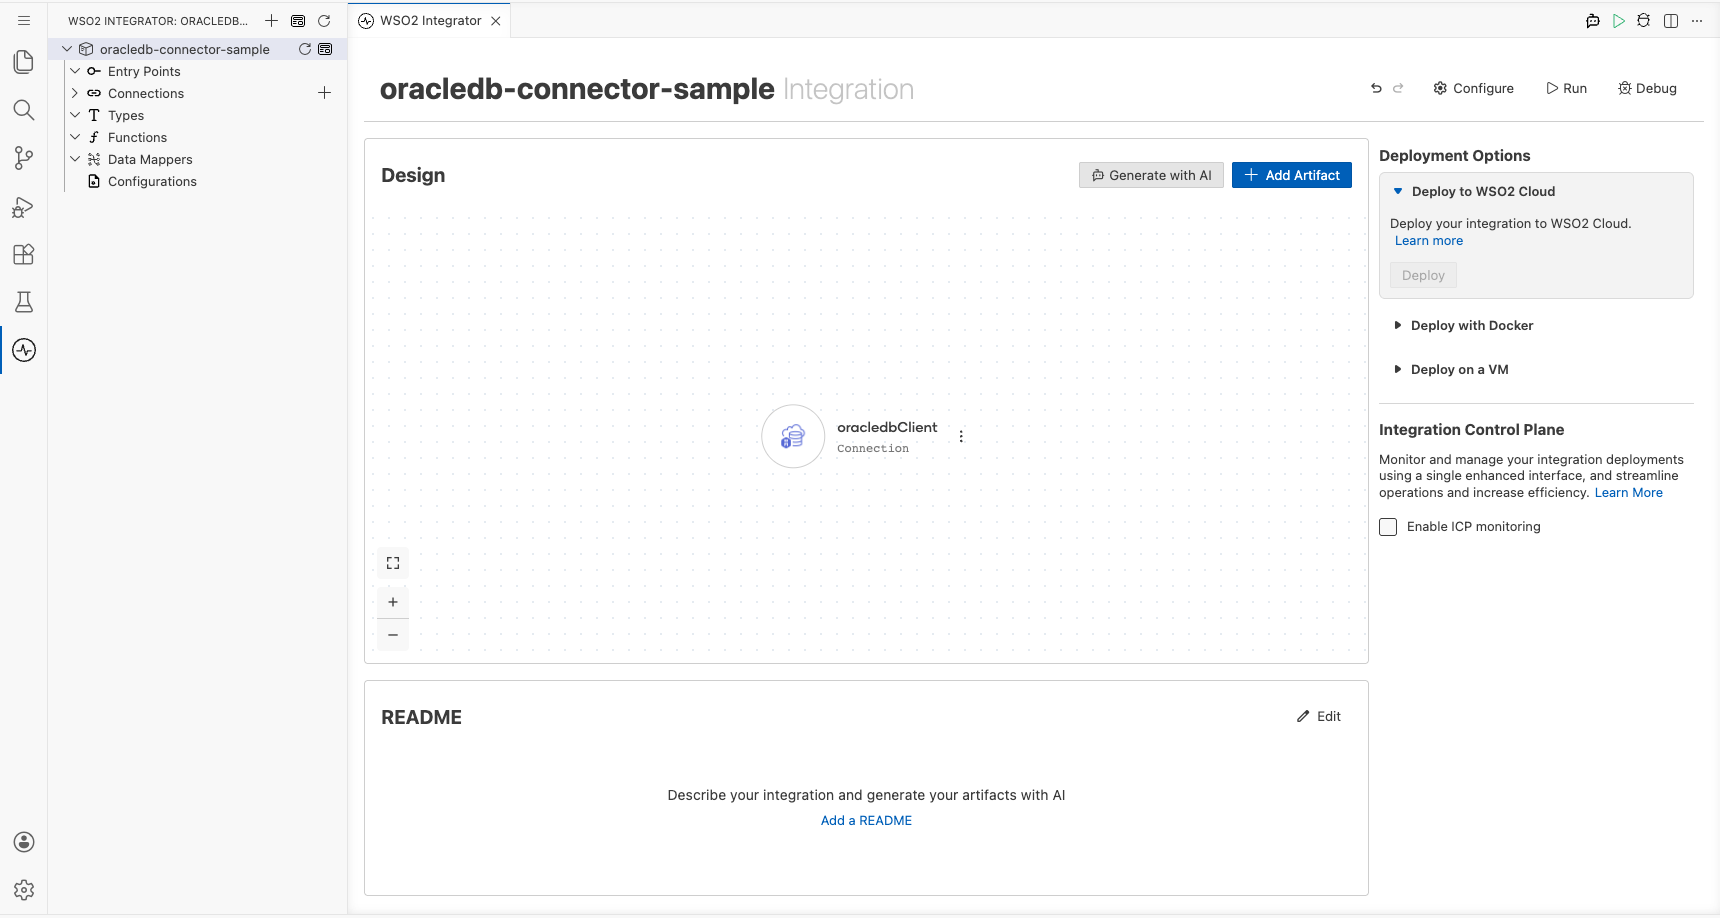
Build an Oracle Database integration using the OracleDB connector in WSO2 Integrator's low-code canvas. The integration establishes an Oracle DB connection with configurable variables and executes a SQL INSERT statement to add a record to a database table.
Operations used:
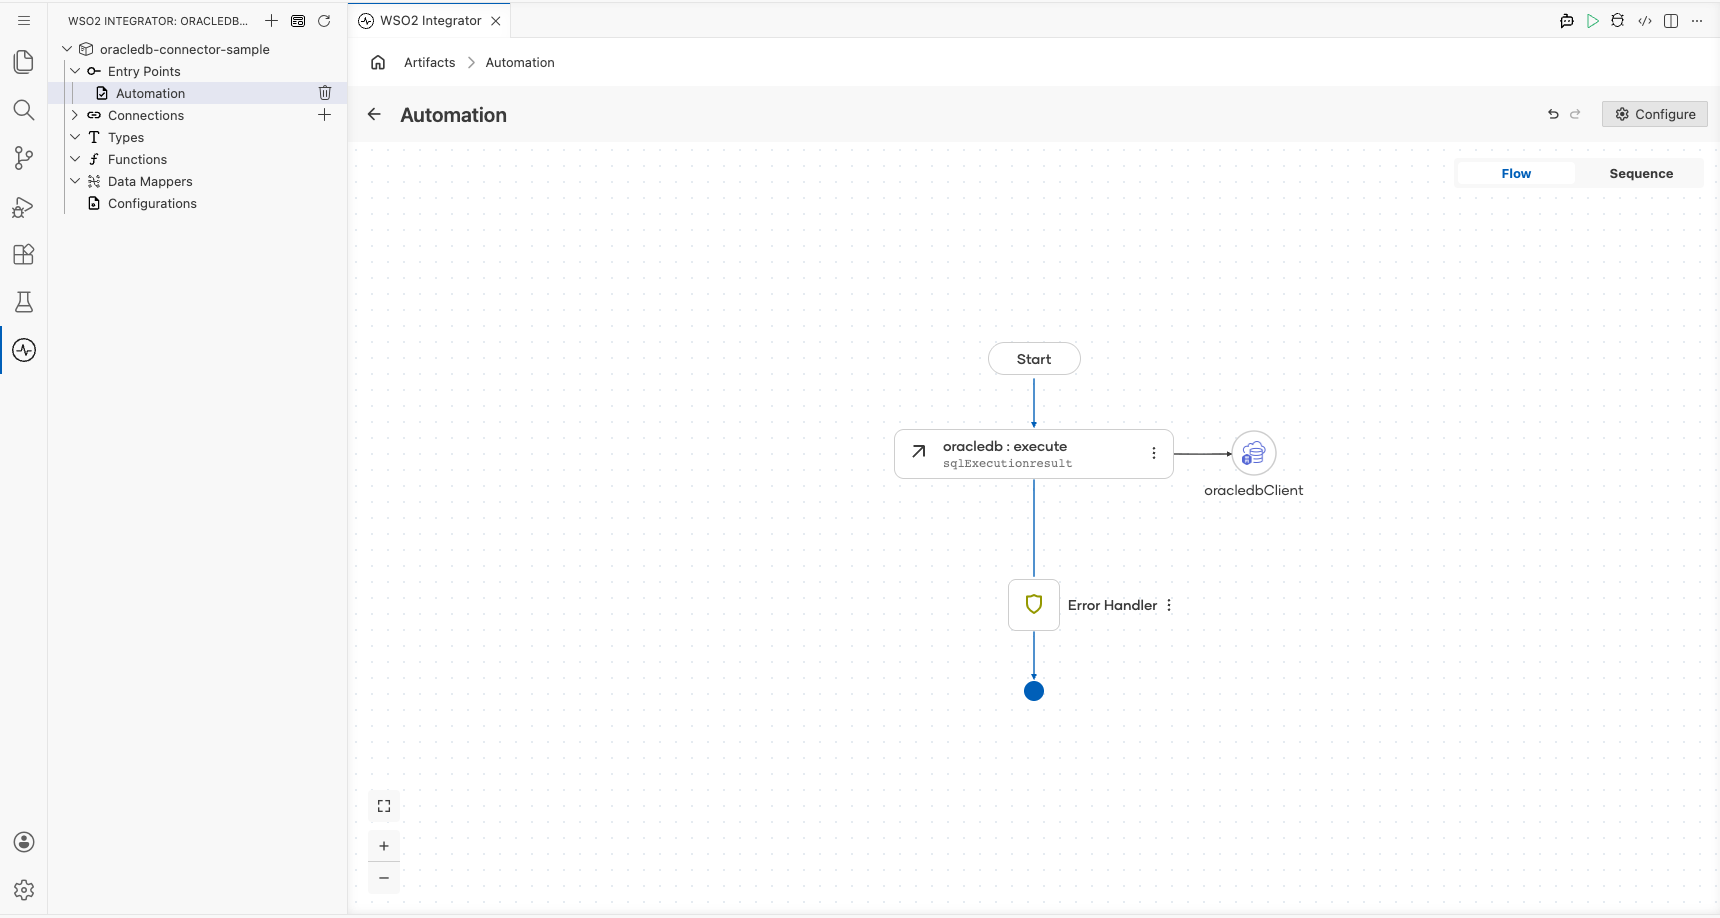
- execute: Runs a SQL INSERT statement against the Oracle Database and returns an execution result.
Architecture
Prerequisites
- An Oracle Database instance accessible from the integration runtime.
Setting up the OracleDB integration
New to WSO2 Integrator? Follow the Create a New Integration guide to set up your integration first, then return here to add the connector.
Adding the OracleDB connector
Step 1: Open the add connection palette
On the canvas, click + Add Connection (or the + button in the Connections panel) to open the Add Connection palette, which shows available connectors.
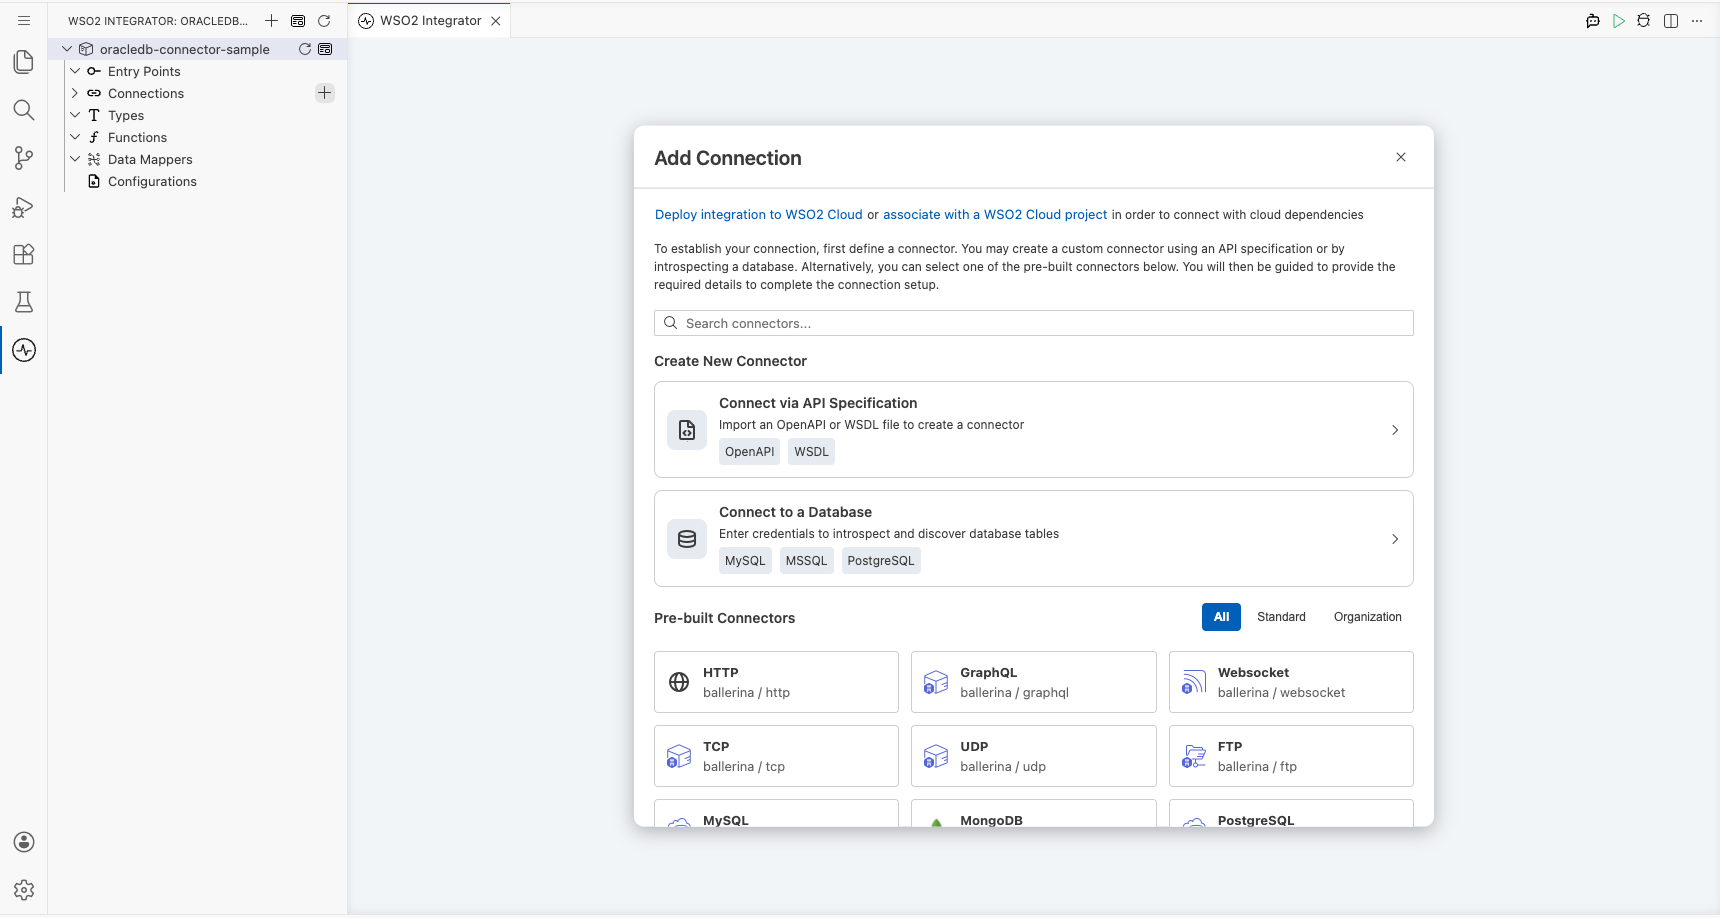
Step 2: Search for and select the OracleDB connector
- In the search box, type
oracledband press Enter. - Select ballerinax/oracledb from the results.
Configuring the OracleDB connection
Step 3: Bind connection parameters to configurable variables
In the Configure OracleDB dialog, scroll down to the Advanced Configurations section and expand it. Bind each of the following fields to a Configurable variable so values can be supplied at runtime:
- host : The Oracle Database server hostname, bound to a string configurable
- port : The Oracle Database port number, bound to an int configurable
- user : The database username, bound to a string configurable
- password : The database password, bound to a string configurable
- database : The target database/service name, bound to a string configurable

Step 4: Save the connection
- Scroll to the top of the dialog and verify the Connection Name is set to
oracledbClient. - Click Save: the dialog closes and the
oracledbClientconnection node appears on the canvas.
Step 5: Set actual values for your configurables
- In the left panel, click Configurations (at the bottom of the project tree, under Data Mappers).
- Set a value for each configurable listed below:
- oracleHost : string : hostname or IP address of your Oracle Database server
- oraclePort : int : port on which Oracle Database listens (commonly 1521)
- oracleDatabase : string : Oracle service name or SID (for example,
ORCL) - oracleUser : string : database username
- oraclePassword : string : database password
Configuring the OracleDB execute operation
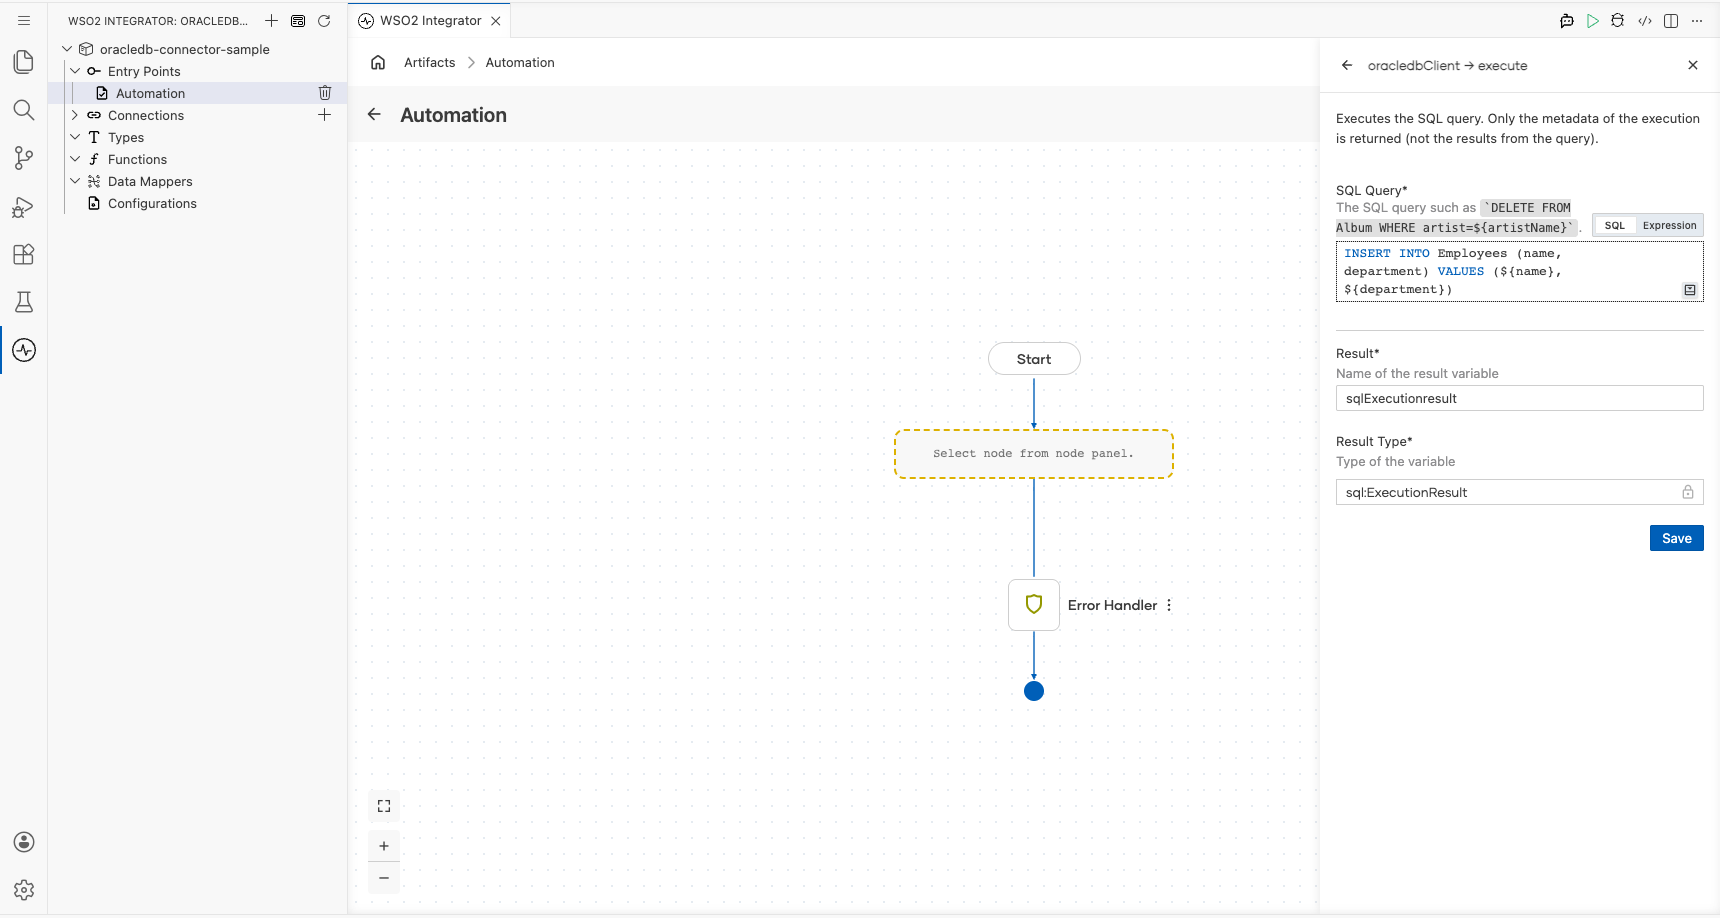
Step 6: Add an automation entry point and expand the connection node
- On the canvas, click + Add Entry Point (or the + button in the Entry Points panel).
- Select Automation from the entry point types: an Automation flow is added with Start and End nodes.
- Click the + button between Start and End to open the step panel.
- Expand oracledbClient in the connections list to see all available operations.

Step 7: Select and configure the execute operation
Under oracledbClient, click execute to open the Execute operation form, then fill in the fields:
- SQL Query : The SQL statement to run against the database (for example, an INSERT into the Employees table)
- Result Variable Name : The variable that stores the execution result (for example,
sqlExecutionresult) - Result Type : The type of the result variable (for example,
sql:ExecutionResult)
Click Save.
Try it yourself
Try this sample in WSO2 Integration Platform.
