Example
What you'll build
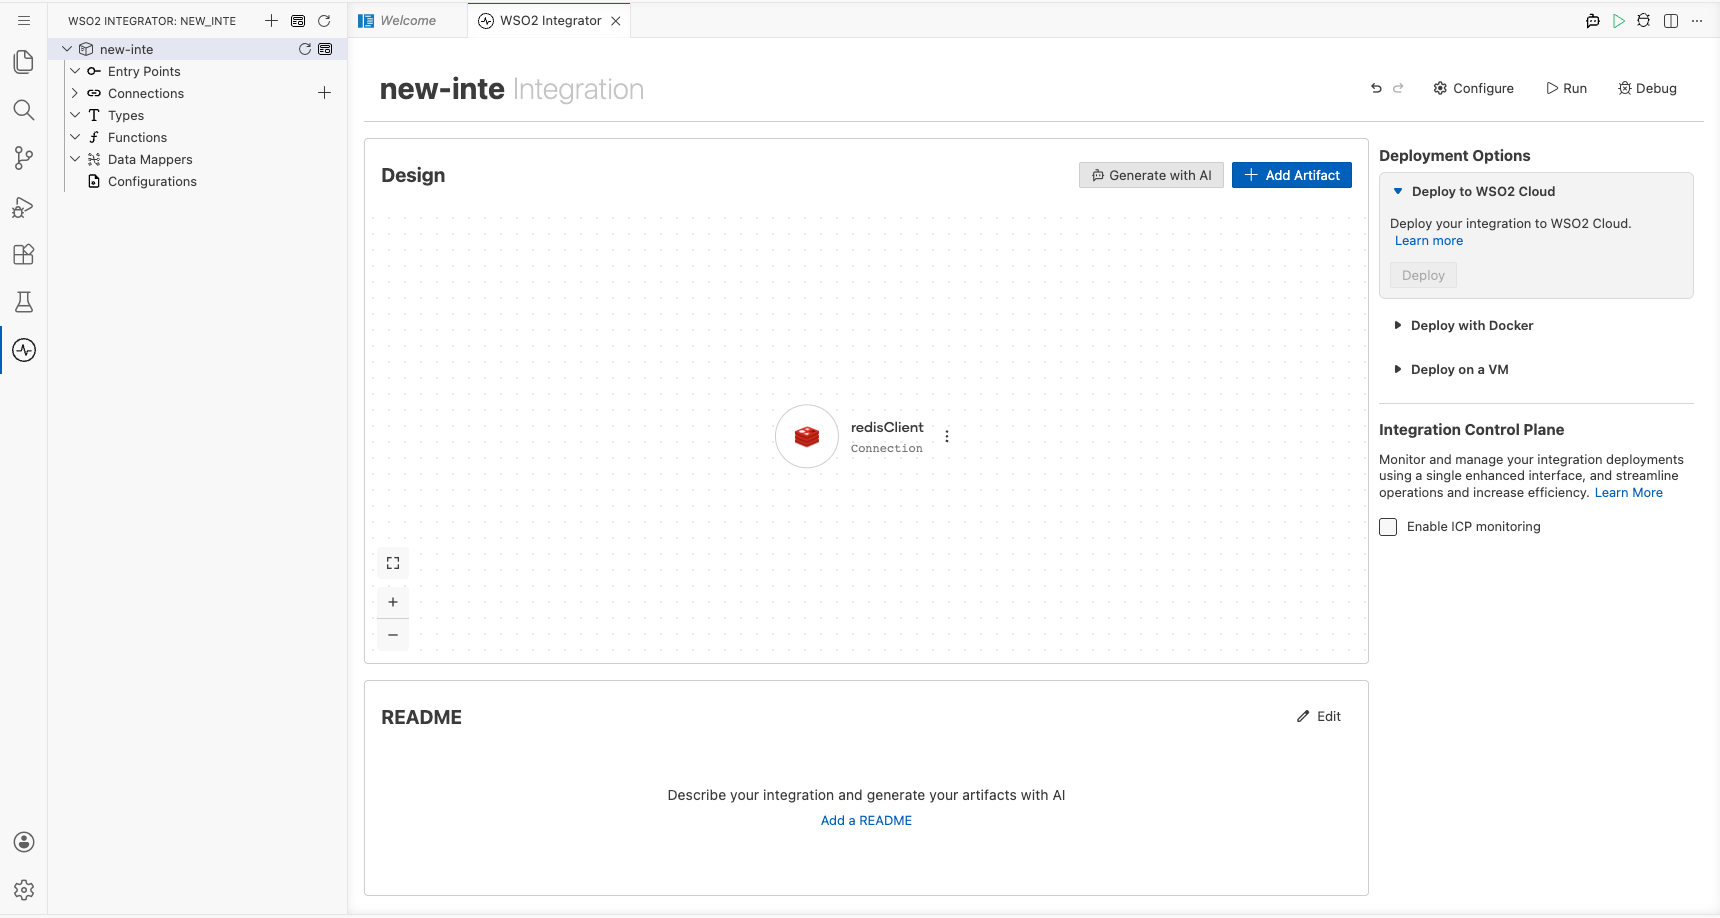
This integration demonstrates how to connect to a Redis data store using the ballerinax/redis connector and perform a set operation to write a key-value pair. The workflow uses an Automation trigger to execute the Redis write on a scheduled basis, making it suitable for scenarios such as cache warming, periodic state updates, or scheduled data seeding. The complete flow runs from the Automation trigger through the Redis connector's set operation to the Redis data store.
Operations used:
set: writes a string value at the specified key in the Redis data store, creating or overwriting the entry
Architecture
Prerequisites
- A running Redis server accessible at the configured host and port.
- Redis server credentials if authentication is enabled (used for the
redisConnectionUriconfigurable).
Setting up the Redis integration
New to WSO2 Integrator? Follow the Create a New Integration guide to set up your project first, then return here to add the connector.
Adding the Redis connector
Step 1: Open the connector palette and select the Redis connector
- In the left sidebar, click + Add Connection to open the connector palette.
- Type "redis" in the search field to filter the connector list, or scroll down in the Pre-built Connectors section to find Redis.
- Click the Redis (
ballerinax/redis) connector card to open its connection configuration form.

Configuring the Redis connection
Step 2: Bind Redis connection parameters to configurable variables
This example uses the Connection URI approach to configure the Redis client in a single URI string. The connector also accepts separate host, port, username, and password fields via the ConnectionParams form. See the Action Reference for both forms.
Click Expand under "Advanced Configurations" to reveal all connection parameters. For each parameter listed below:
- Open the helper panel beside the field and go to the Configurables tab.
- Click + New Configurable.
- Enter the configurable name and type given below, then click Save. The configurable is injected into the field.
Bind these three fields to configurables. You set their actual values in Step 4.
connection: bind to a configurable namedredisConnectionUri(typestring), which holds the full Redis connection URI, including the host, port, and authentication.connectionPooling: bind to a configurable namedredisConnectionPooling(typeboolean), which controls whether connection pooling is enabled for the Redis client.isClusterConnection: bind to a configurable namedredisIsClusterConnection(typeboolean), which indicates whether the connection targets a Redis cluster rather than a single standalone node.
If your Redis server requires TLS, expand the secureSocket field as well. See the Action Reference for its sub-fields.
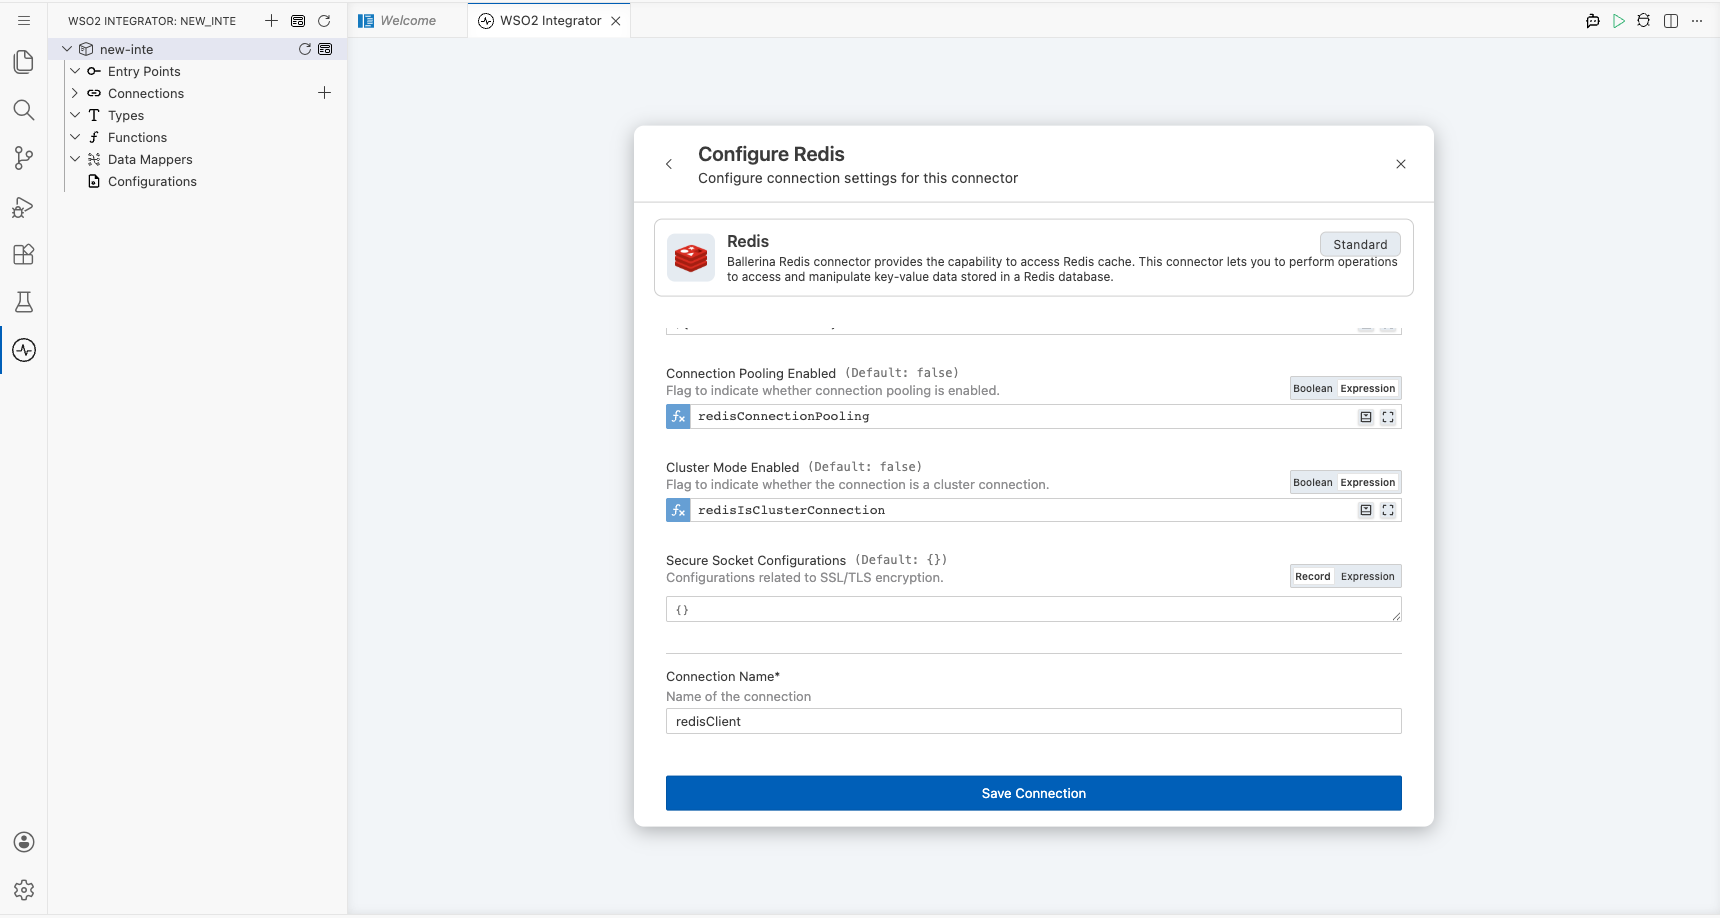
Step 3: Save the Redis connection
Click Save Connection to persist the Redis connection configuration. The Redis connector entry (redisClient) appears on the design canvas, confirming the connection was successfully created.
Step 4: Set actual values for your configurables
- In the left panel, click Configurations.
- Set a value for each configurable listed below.
redisConnectionUri(string): the full Redis connection URI for your server, e.g.redis://localhost:6379(orrediss://user:password@host:portfor TLS)redisConnectionPooling(boolean): set totrueto enable connection pooling, orfalseto disable itredisIsClusterConnection(boolean): set totrueif connecting to a Redis cluster, orfalsefor a standalone server
Configuring the Redis set operation
Step 5: Add an automation trigger
- In the left sidebar, hover over Entry Points and click the Add Entry Point button (+ icon).
- In the artifact picker, click Automation to add a new Automation entry point.
- In the Automation creation form, click Create to confirm with default settings. The Automation is added to the canvas and its flow view opens automatically.
Step 6: Select the set operation and configure its parameters
- Inside the Automation flow canvas, click the + add-step button (the dashed placeholder node labelled "Select node from node panel") to open the step-addition panel on the right.
- In the right-side panel under Connections, locate the redisClient entry and click it to expand the full list of available Redis operations.
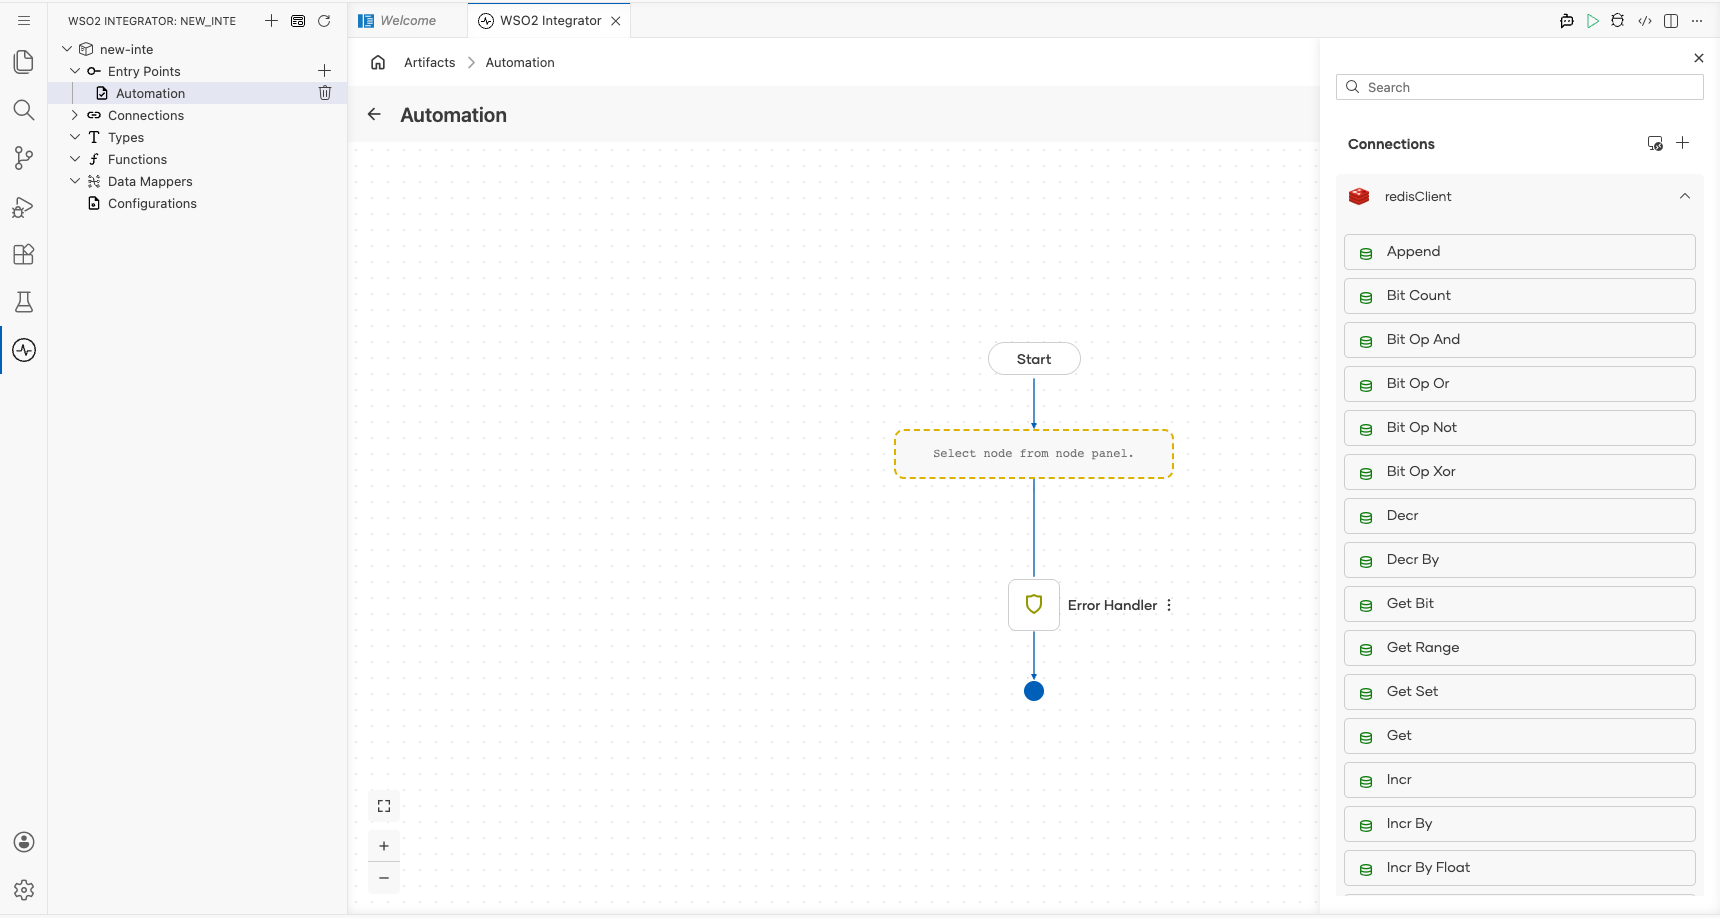
- Scroll down in the operations list and click Set to open its configuration panel.
- Fill in the operation fields.
key: the Redis key to write; identifies the entry in the data storevalue: the string value to store at the specified keyresult: variable that holds the operation's return value (for example,setResult)
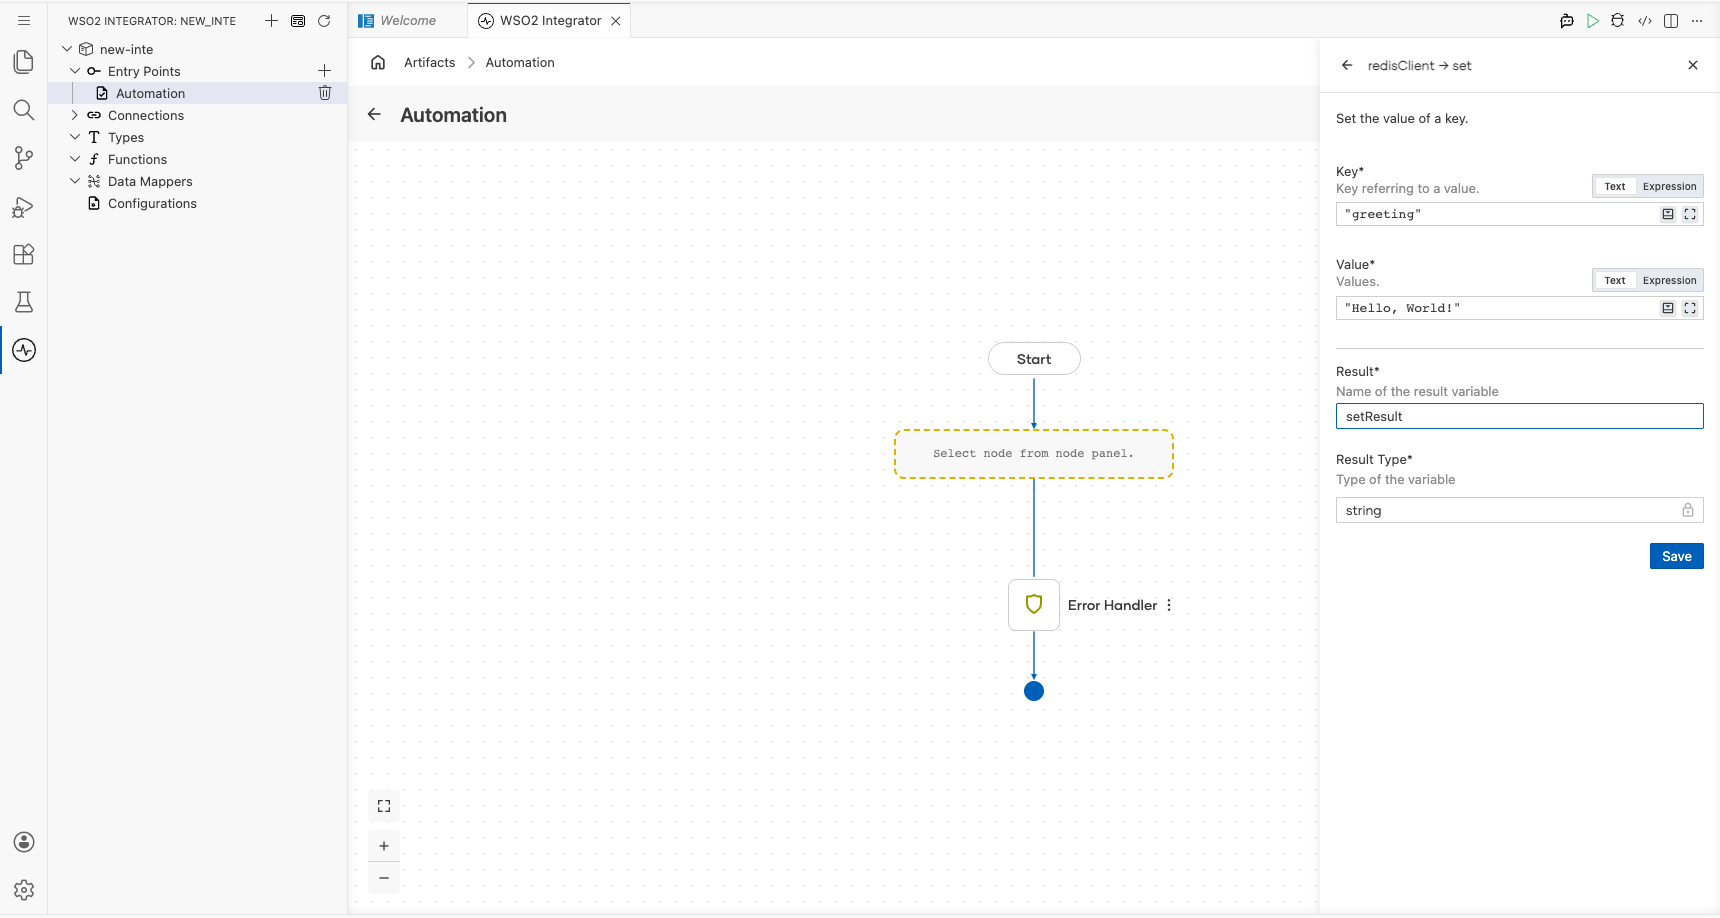
- Click Save to confirm the
setoperation configuration.
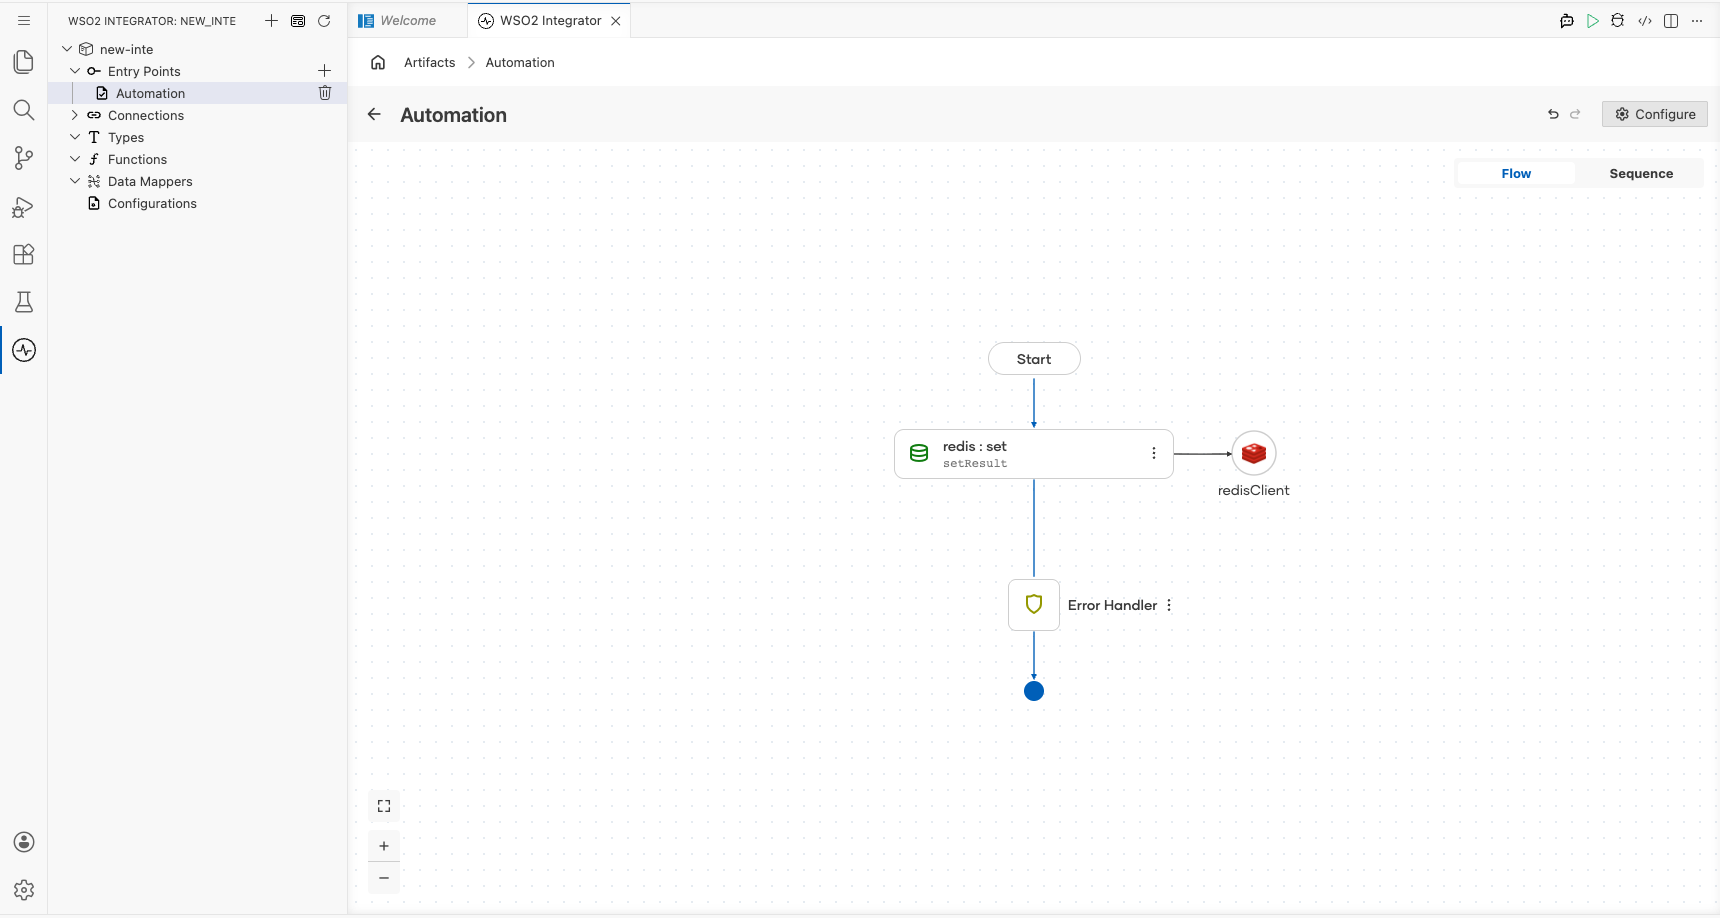
Step 7: Verify the completed canvas flow
After saving the set operation, the Automation canvas displays the complete integration flow: Start → redis : set (setResult) → redisClient → Error Handler → End. Confirm all nodes are connected with no error indicators before running the integration.
Try it yourself

More code examples
The Redis connector provides practical examples illustrating usage in various scenarios. Explore these examples covering common Redis operations.
-
Cache management - Implement caching using Redis to improve application performance.
-
Session management - Use Redis to manage user sessions efficiently.
-
Rate limiting - Implement rate limiting for API endpoints using Redis.