Example
What you'll build
This example builds an automation that connects to Ardoq and lists every workspace in your organization. The automation calls the List Workspaces operation and logs the result.
Operations used:
- List Workspaces : Retrieves the workspaces visible to the authenticated user.
Architecture
Prerequisites
- An Ardoq API token. See the connector's Setup Guide.
Setting up the Ardoq integration
New to WSO2 Integrator? Follow the Create a New Integration guide to set up your integration first, then return here to add the connector.
Adding the Ardoq connector
Step 1: Open the connector palette
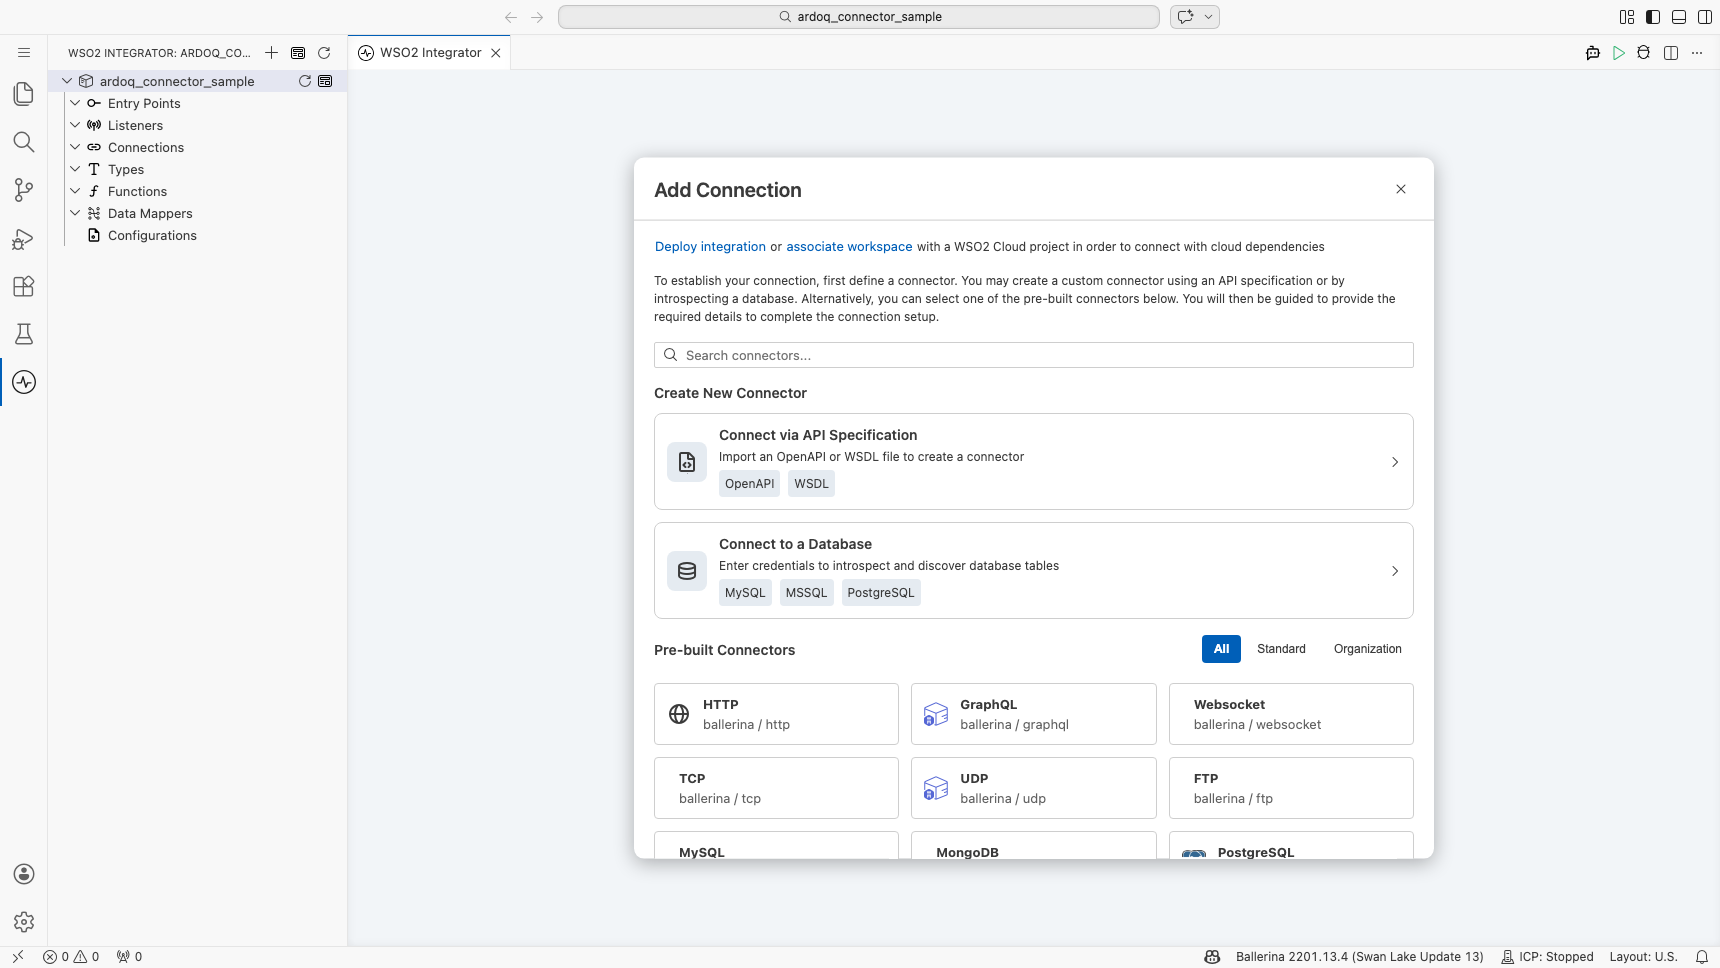
Select Add Connection in the Connections section.
Step 2: Select the Ardoq connector
Enter "ardoq" in the search box to filter the connector list, then select the Ardoq connector card (ballerinax/ardoq) to open its connection configuration form.
Configuring the Ardoq connection
Step 3: Bind the connection parameters to configurable variables
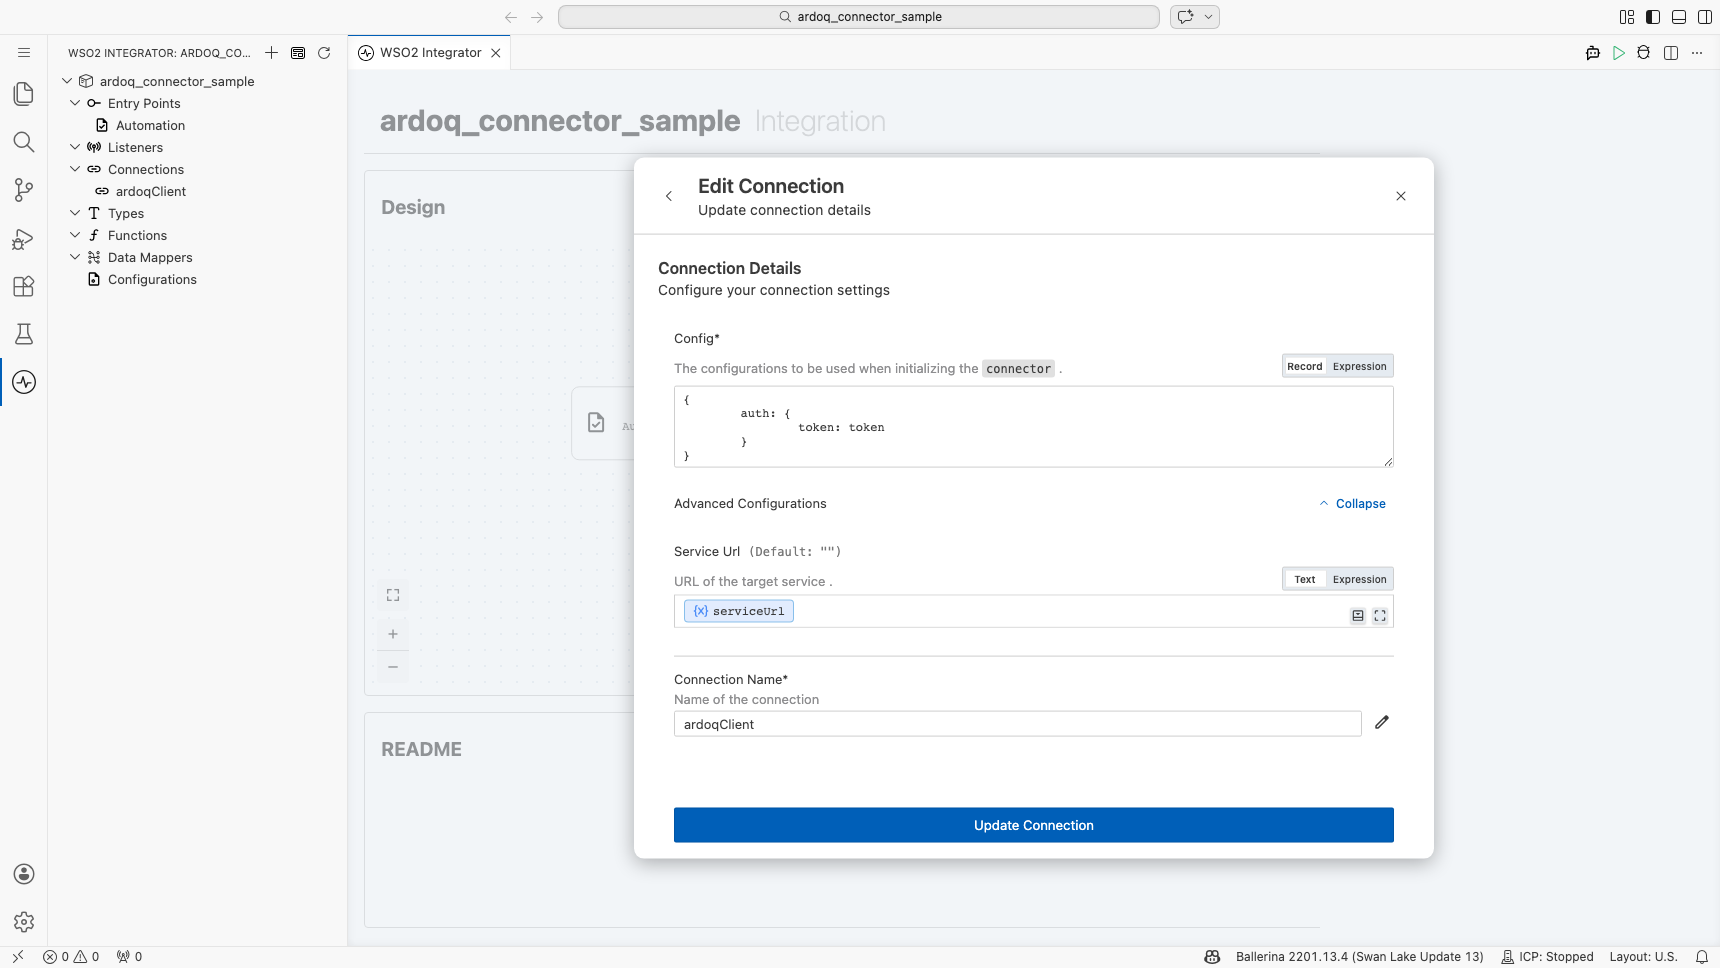
Bind the required connection field to a configurable variable.
- Token : The Ardoq API token used to authenticate every request.
- Service URL : The base URL of the Ardoq API. Defaults to
https://app.ardoq.com/api/v2; override it if your organization uses a dedicated Ardoq subdomain.
Step 4: Save the connection
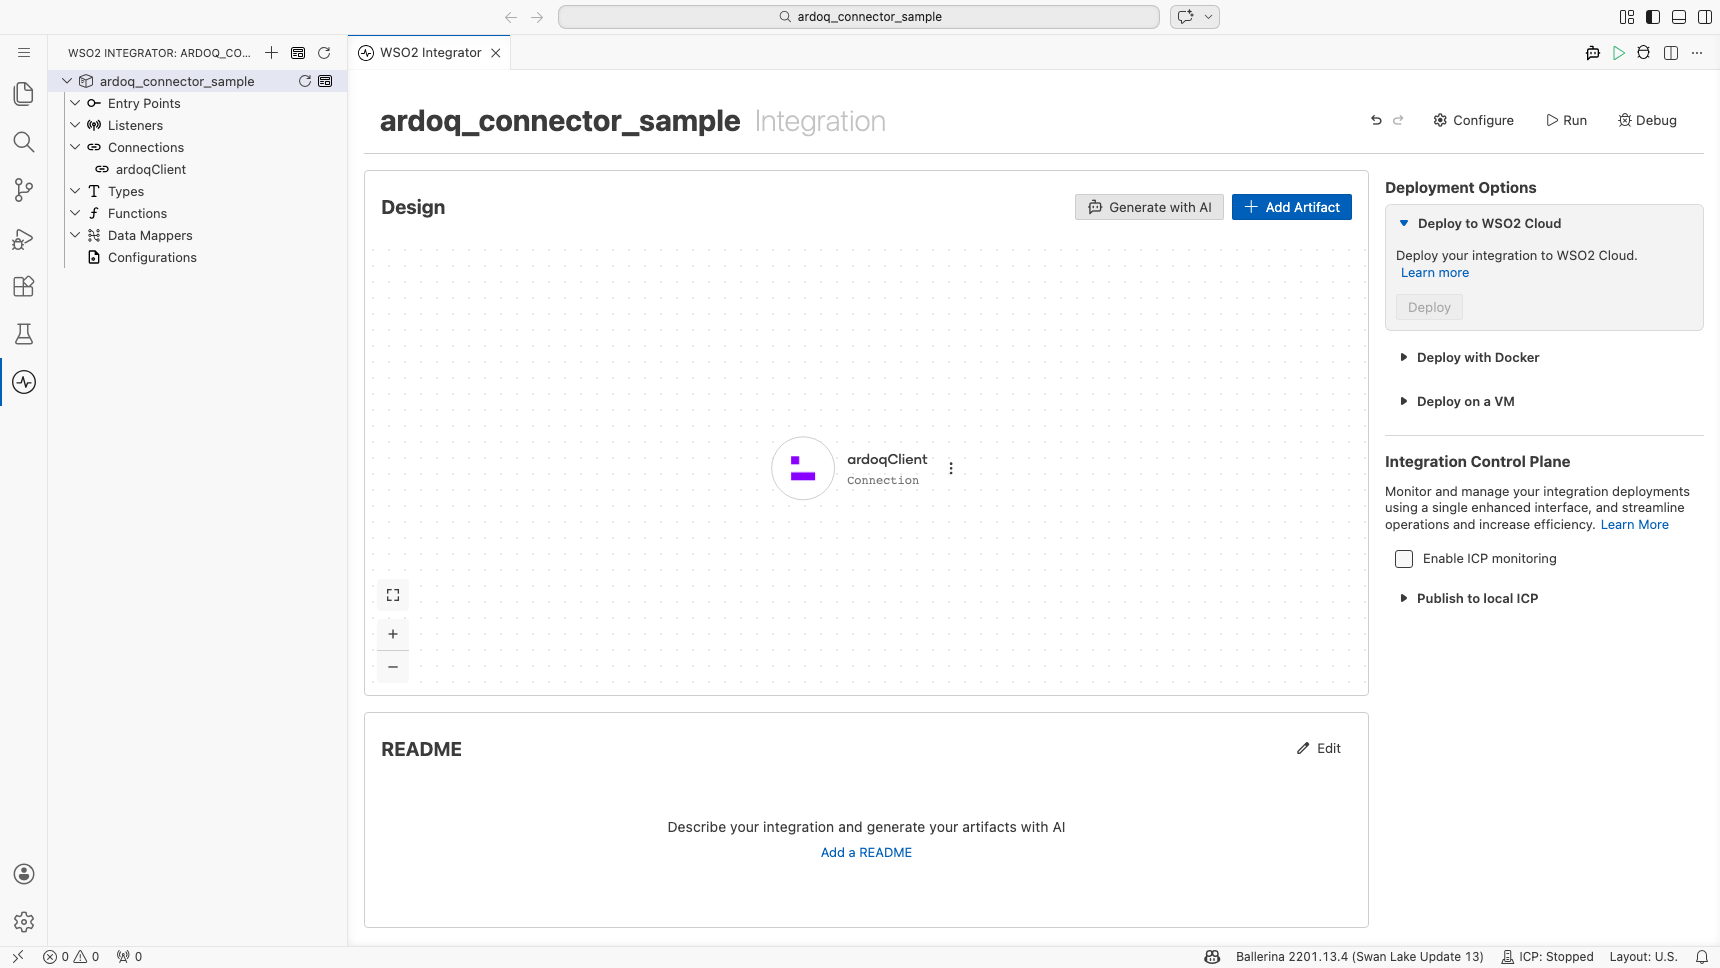
Select Save and verify that the connection appears in the Connections section.
Step 5: Set actual values for your configurables
- Select Configurations at the bottom of the project tree under Data Mappers.
- Enter a value for each configurable listed below before you run the integration.
- token (
string) : Your Ardoq API token. - serviceUrl (
string) : The base URL of the Ardoq API. Defaults tohttps://app.ardoq.com/api/v2.
Configuring the Ardoq List Workspaces operation
Step 6: Add an automation entry point
- In the low-code canvas, select Add Artifact in the Design section.
- Select Automation in the artifact selection panel.
- Accept the default schedule settings and select Create to add the automation to the canvas.
Step 7: Expand the Ardoq connection and select the List Workspaces operation
- In the automation flow body on the canvas, select the + (Add Step) button between the Start and Error Handler nodes to open the step-addition panel.
- Under Connections in the step panel, select the ardoqClient connection node to expand it and reveal all available Ardoq API operations.
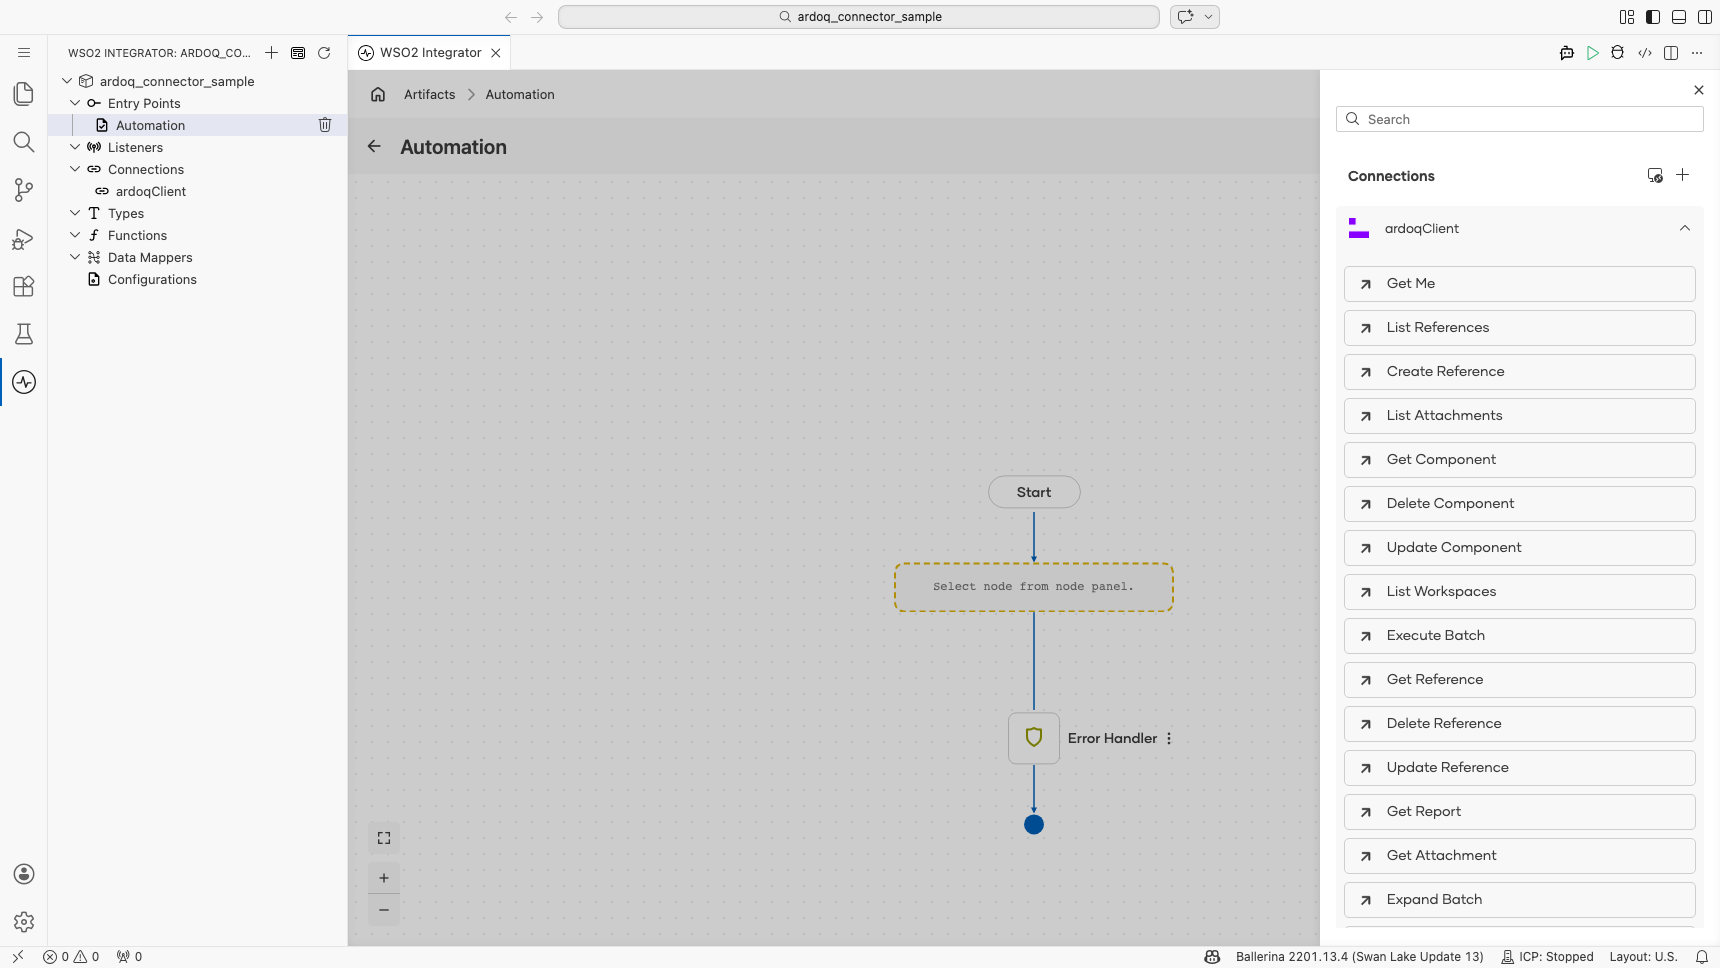
- Select List Workspaces from the list. This operation has no required parameters, so only the result variable needs a name.
- Result : The name of the variable that holds the returned workspaces.
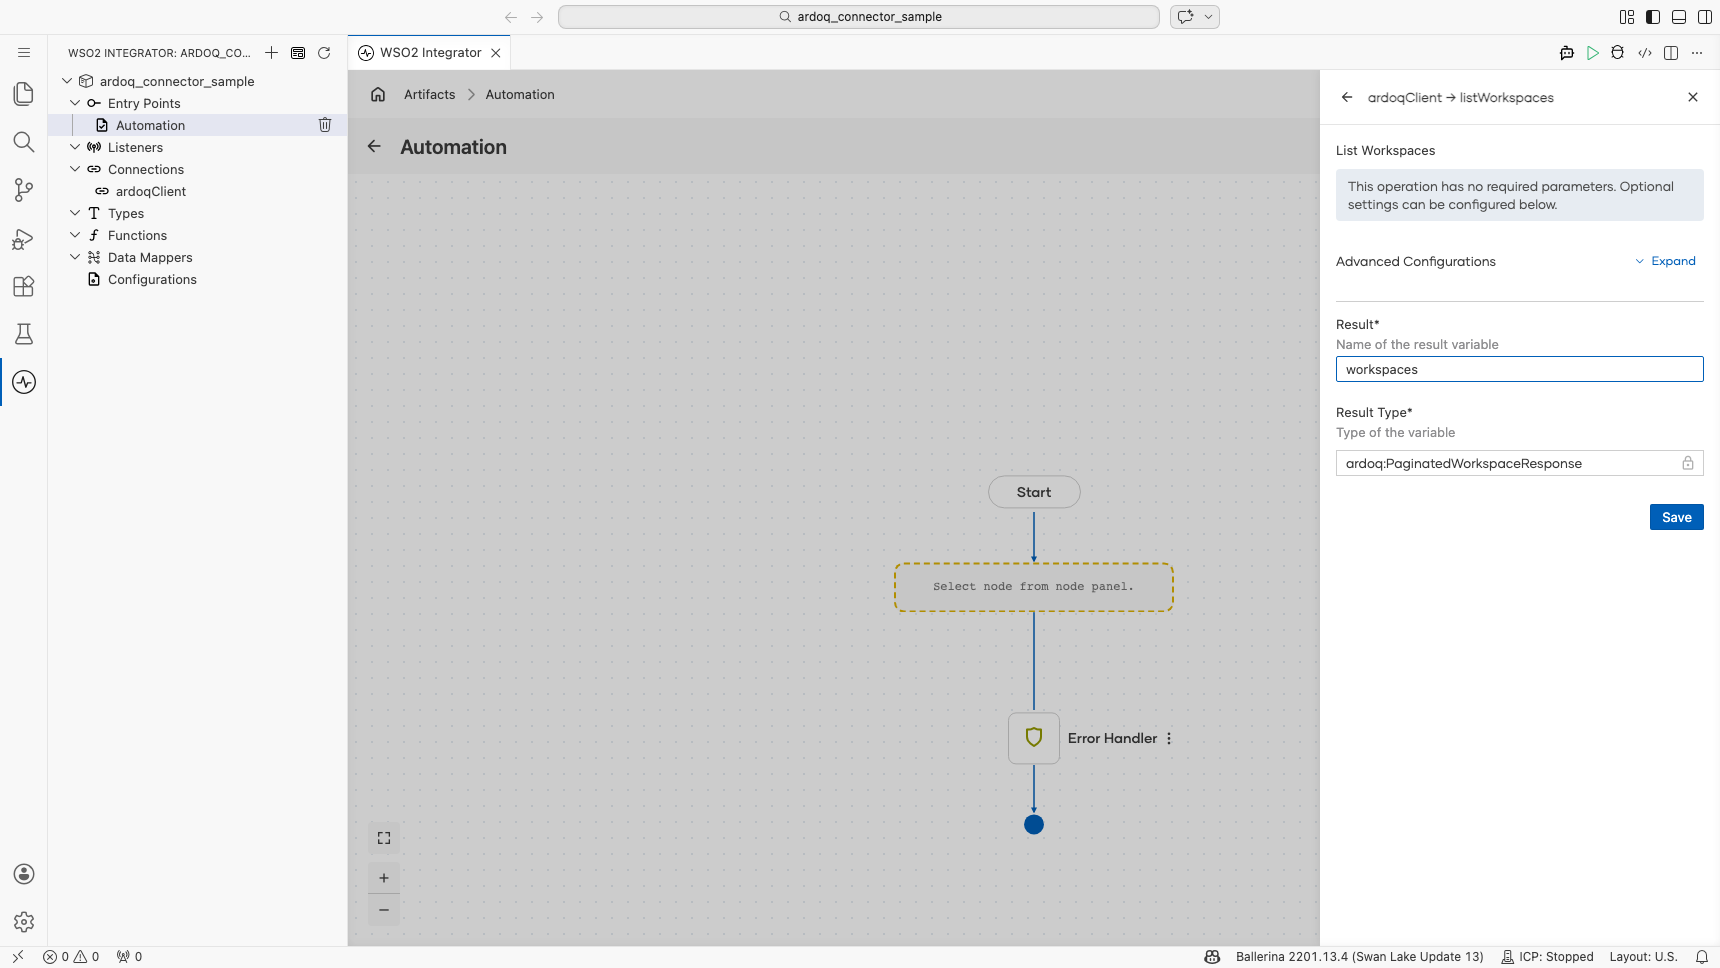
- Select Save to add the Ardoq operation step to the automation flow.
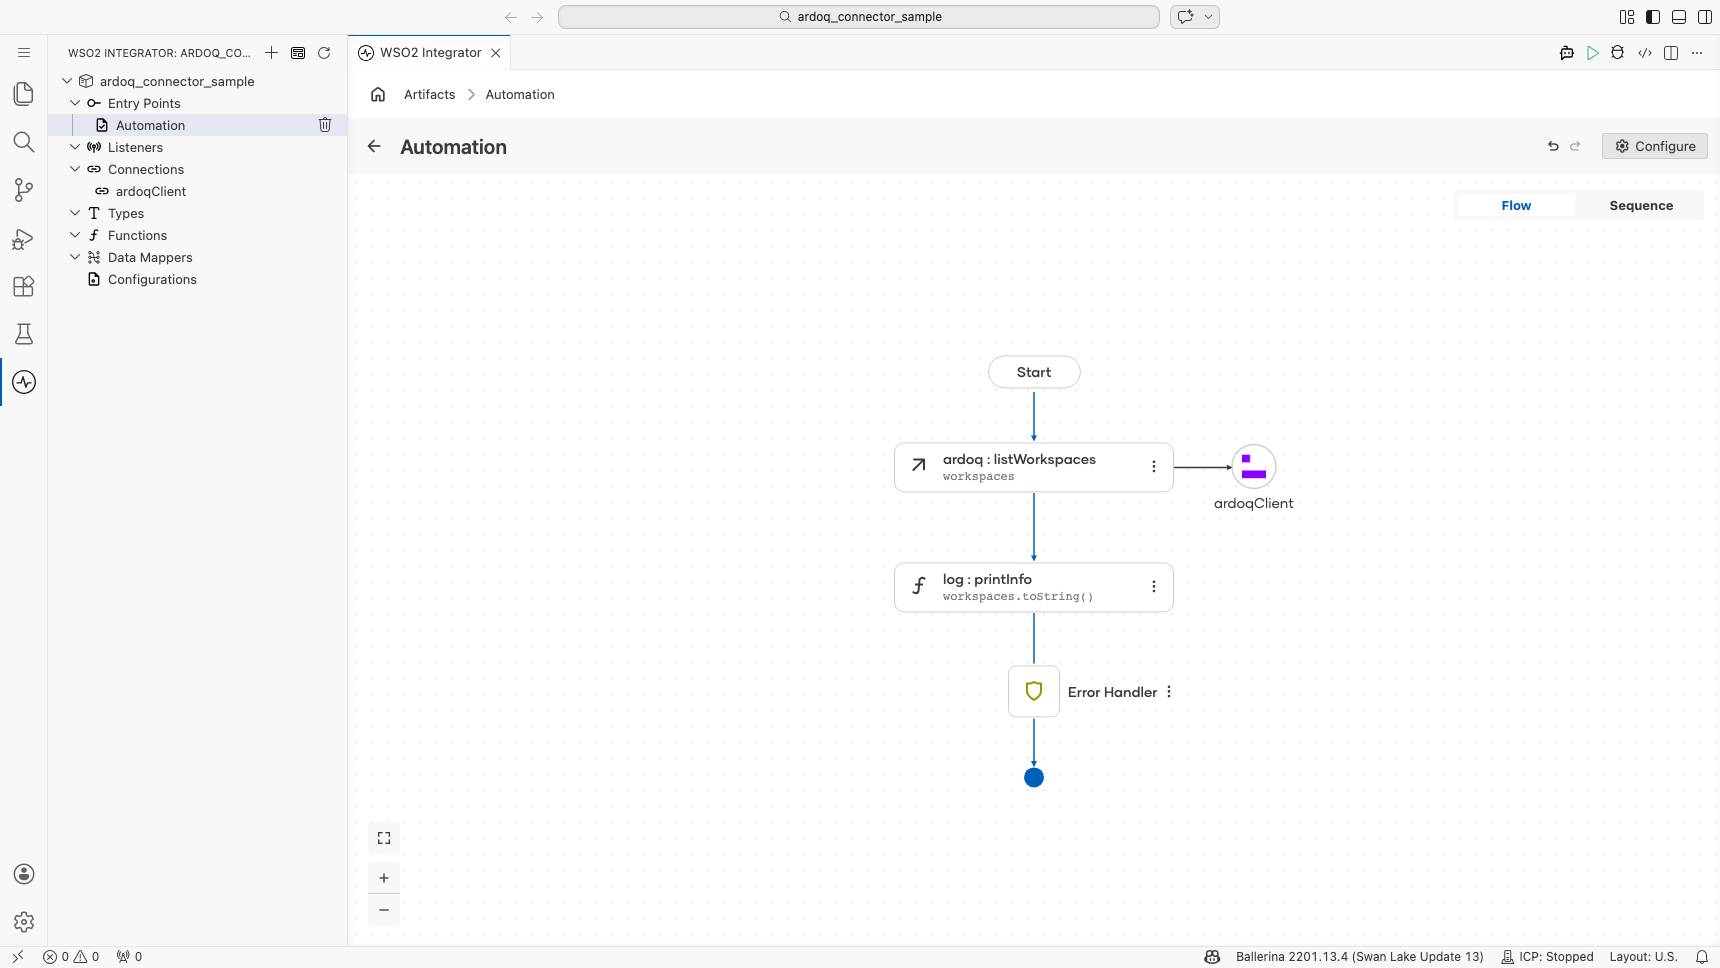
Step 8: Log the List Workspaces result
Add a log action for the returned value, then return to the visual flow.
Try it yourself
Try this sample in WSO2 Integration Platform.

More code examples
The Ardoq connector offers practical examples illustrating its use in various scenarios.
Explore these examples, covering the following use cases:
- Application dependency mapping: Find a workspace by name, discover its model types, create two application components, and link them with a dependency reference.
- Report results export: Find a report by name, fetch its definition to show the configured columns, then run the report and print the results in tabular format.