Example
Table of contents
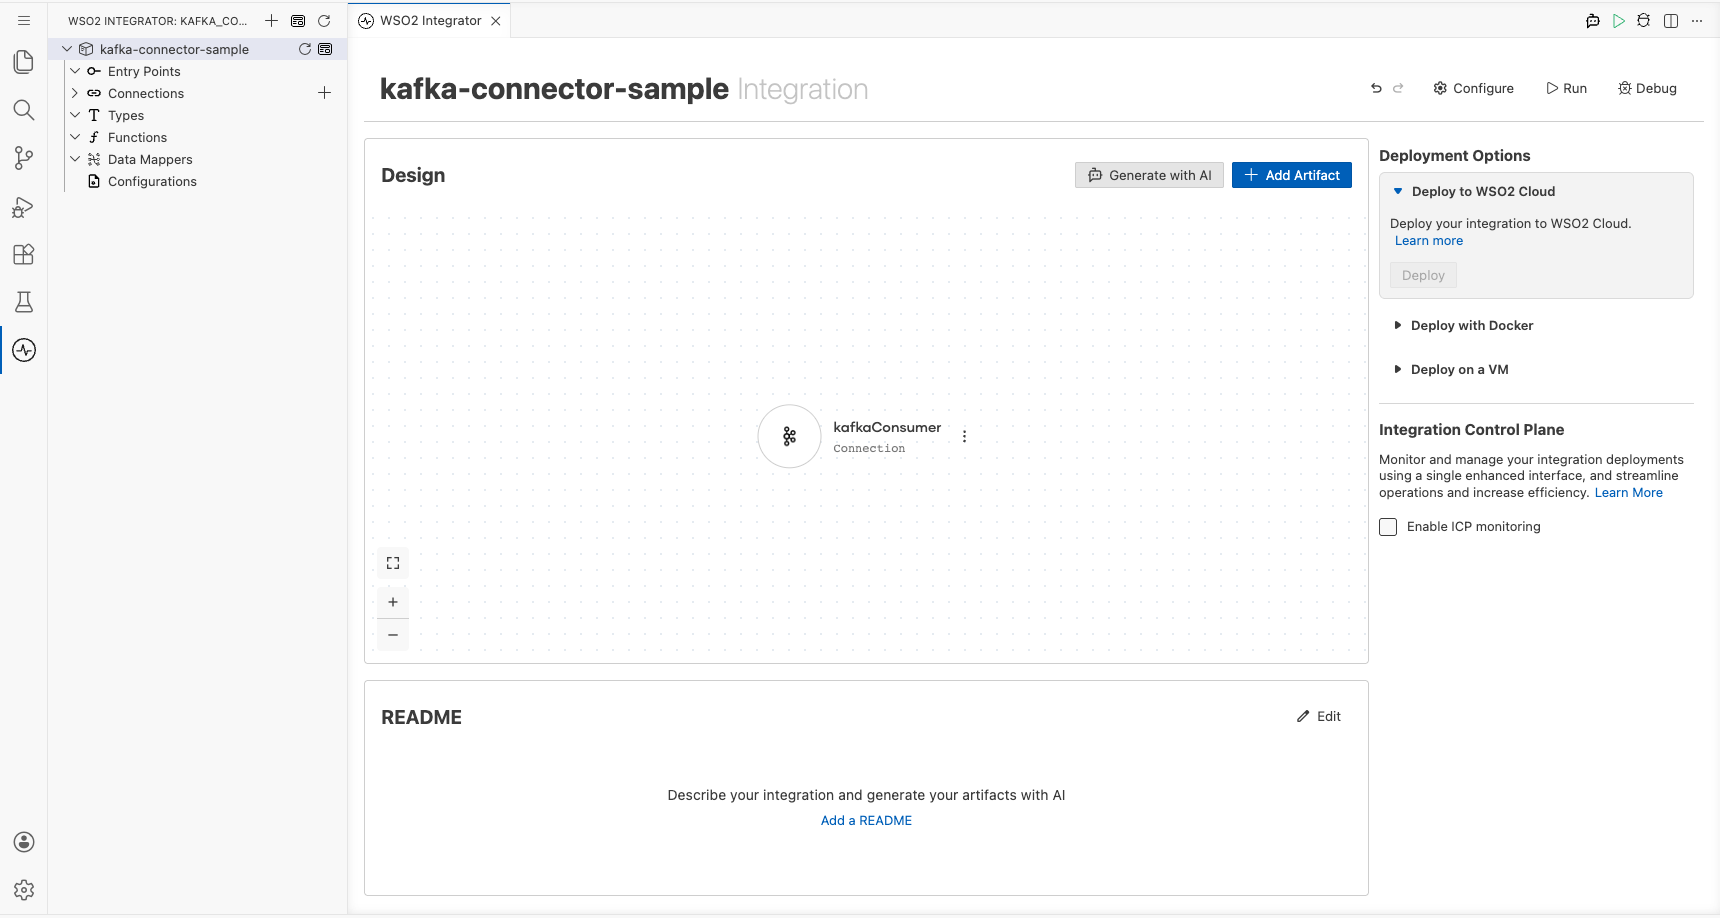
Kafka producer example
What you'll build
Build a Kafka producer integration that publishes a message to the orders Kafka topic on every run. The integration uses an Automation entry point to trigger the message send automatically.
Operations used:
- Send : Publishes a producer record (topic and value) to a specified Kafka topic
Architecture
Prerequisites
- A running Kafka broker with the bootstrap servers address ready
Setting up the Kafka producer integration
New to WSO2 Integrator? Follow the Create a New Integration guide to set up your integration first, then return here to add the connector.
Adding the Kafka producer connector
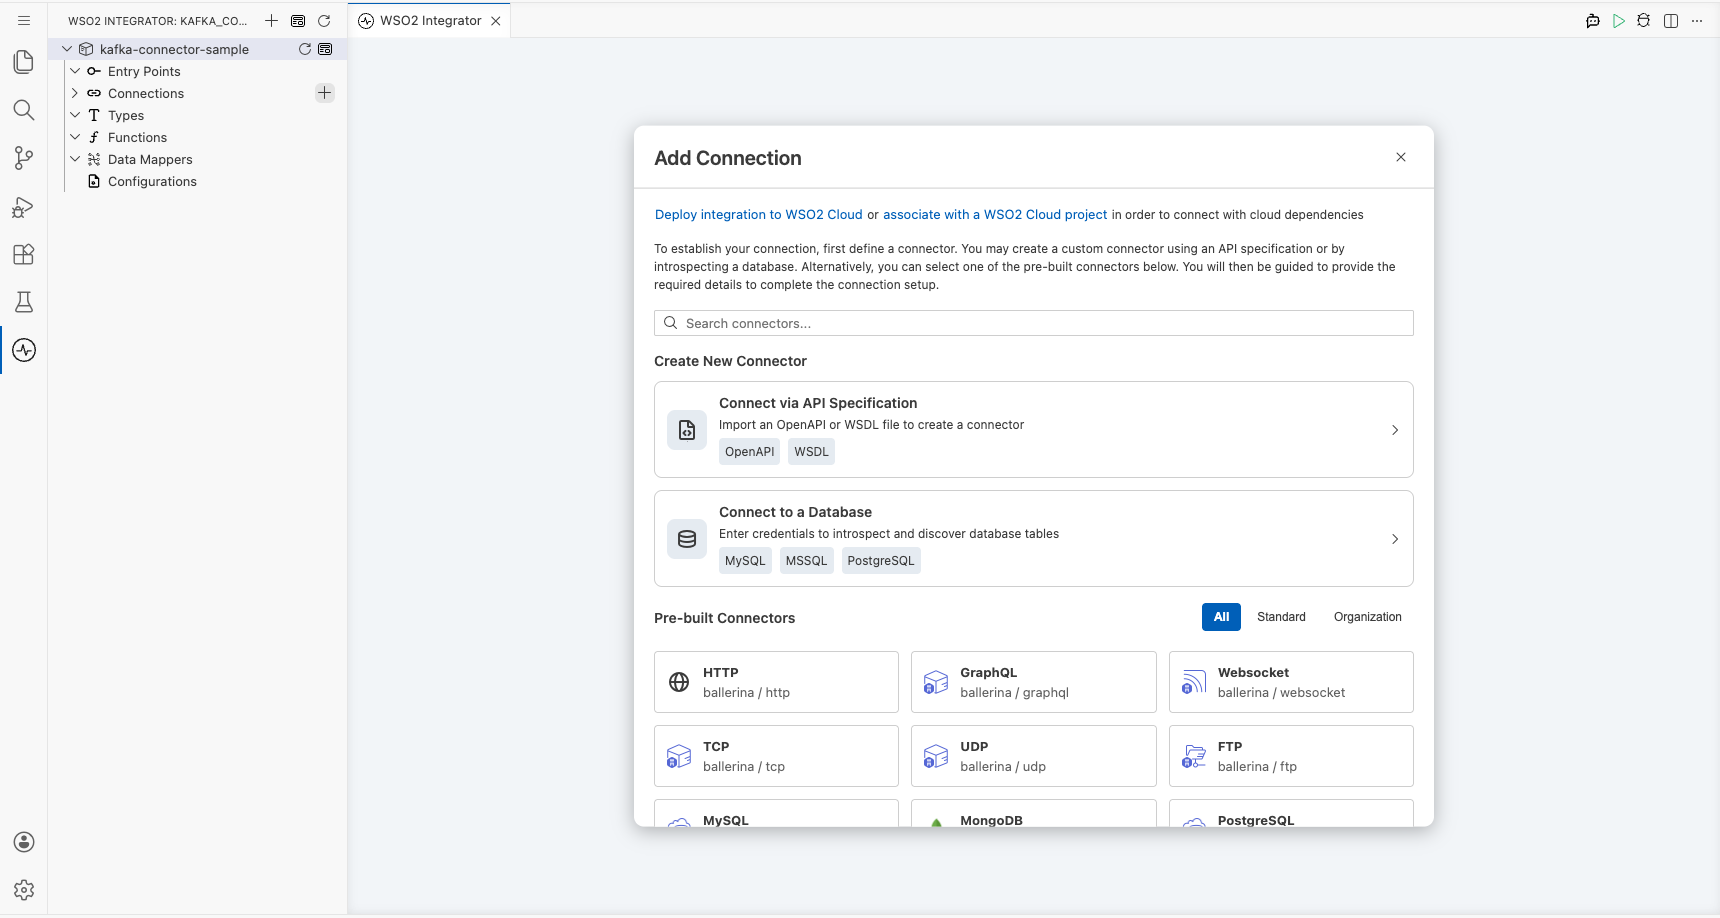
Select Add Connection from the low-code canvas to open the connector palette.
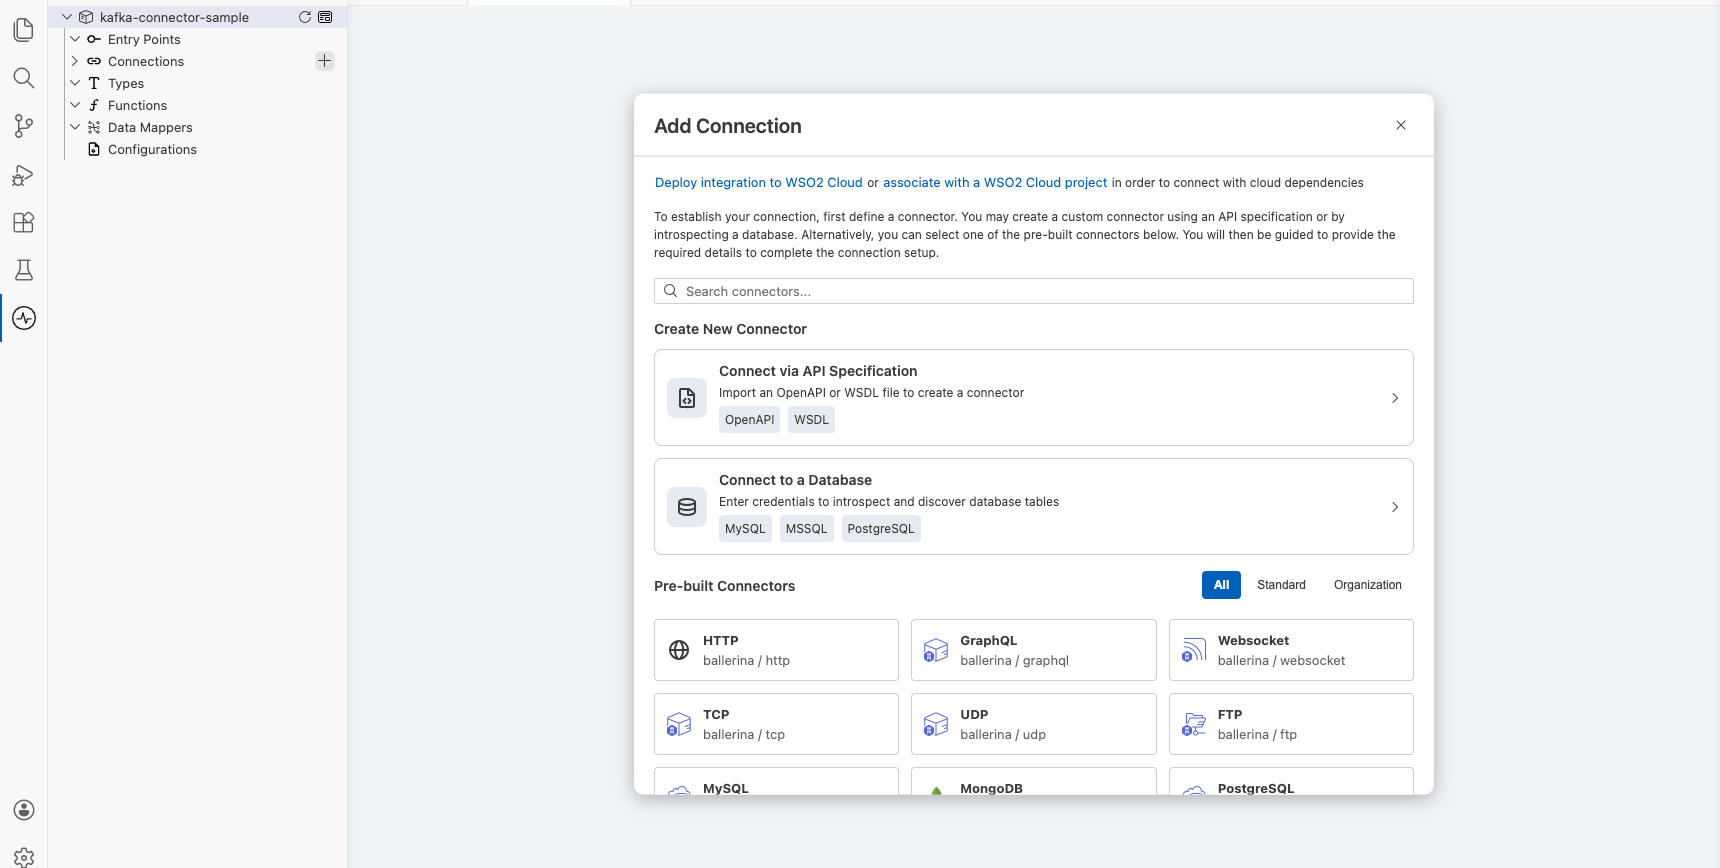
Step 1: Search for and select the Kafka producer connector
- Enter
kafkain the search box. - Select Kafka Producer from the results to open the Configure Kafka Producer form.
Configuring the Kafka producer connection
Step 2: Bind connection parameters to configurable variables
Bind the bootstrap servers field to a configurable variable rather than entering a hardcoded value.
- Bootstrap Servers : The Kafka broker address, bound to a configurable variable
- Connection Name : A unique name identifying this connection on the canvas
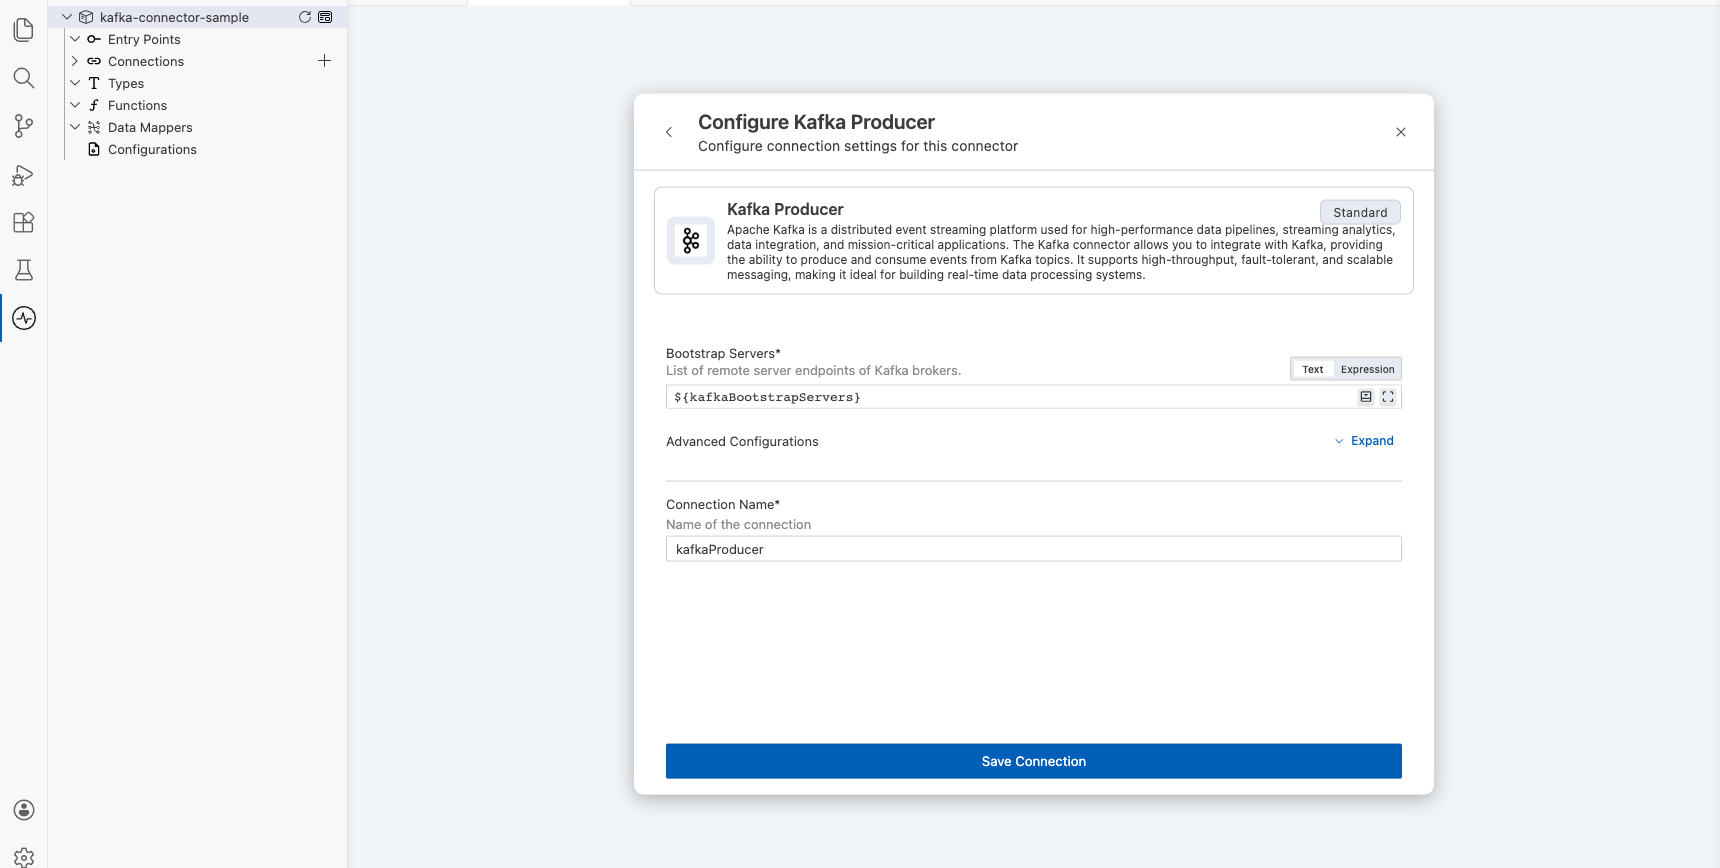
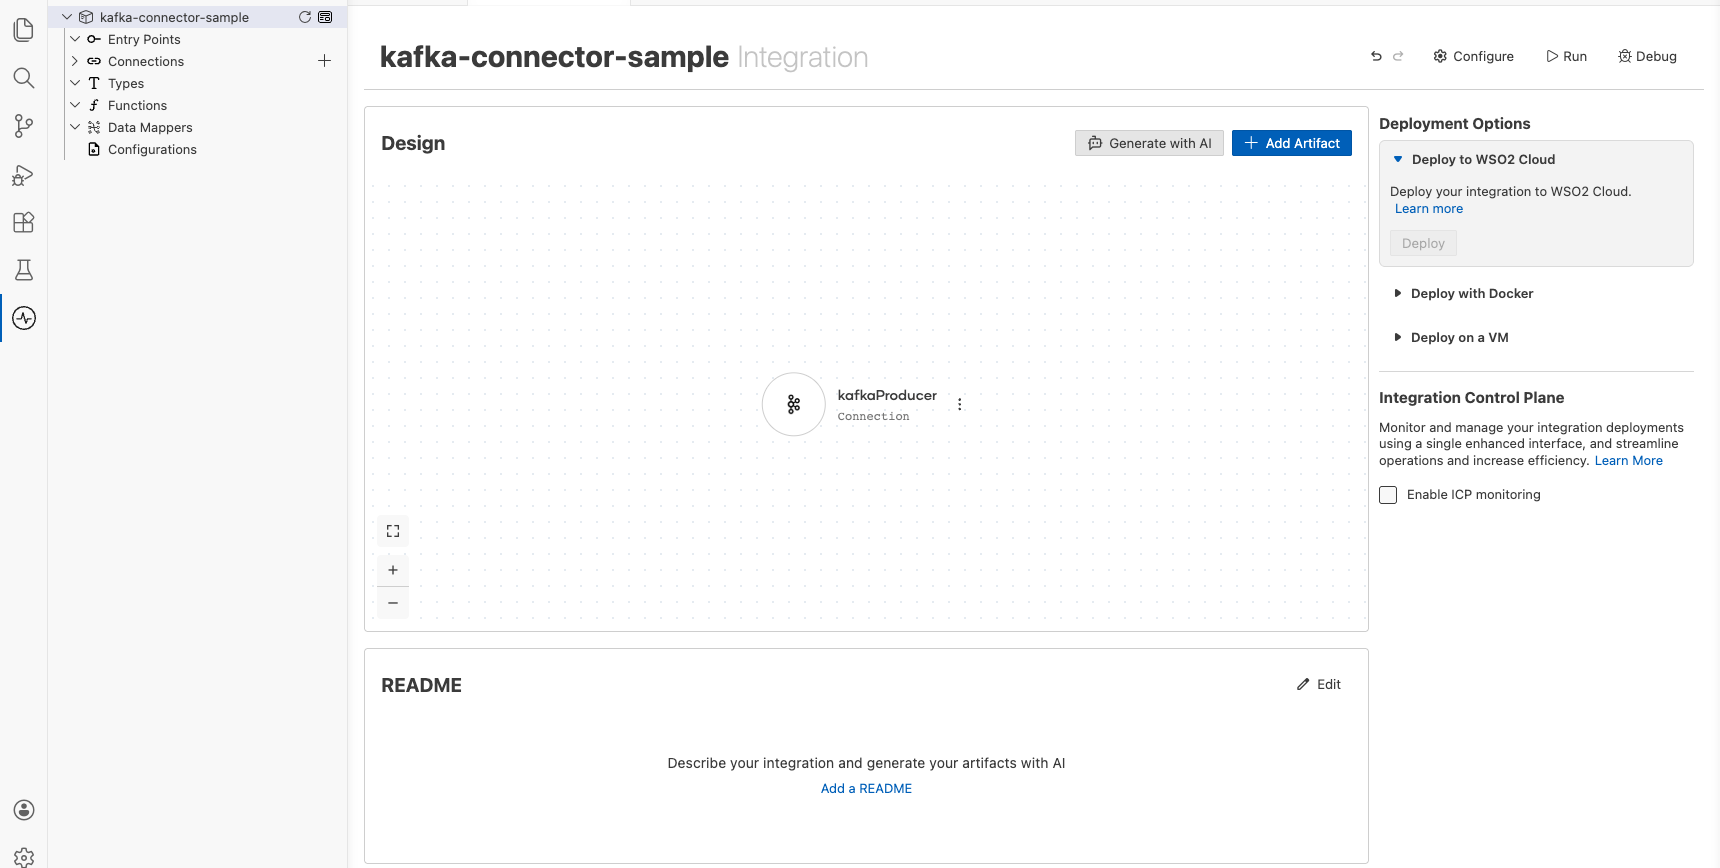
Step 3: Save the connection
Select Save on the connection form. The canvas updates to show the kafkaProducer connection node.
Step 4: Set actual values for your configurables
- In the left panel, select Configurations.
- Set a value for each configurable listed below.
- kafkaBootstrapServers (string) : The bootstrap servers address of your running Kafka broker (for example,
broker-host:9092)
Configuring the Kafka producer send operation
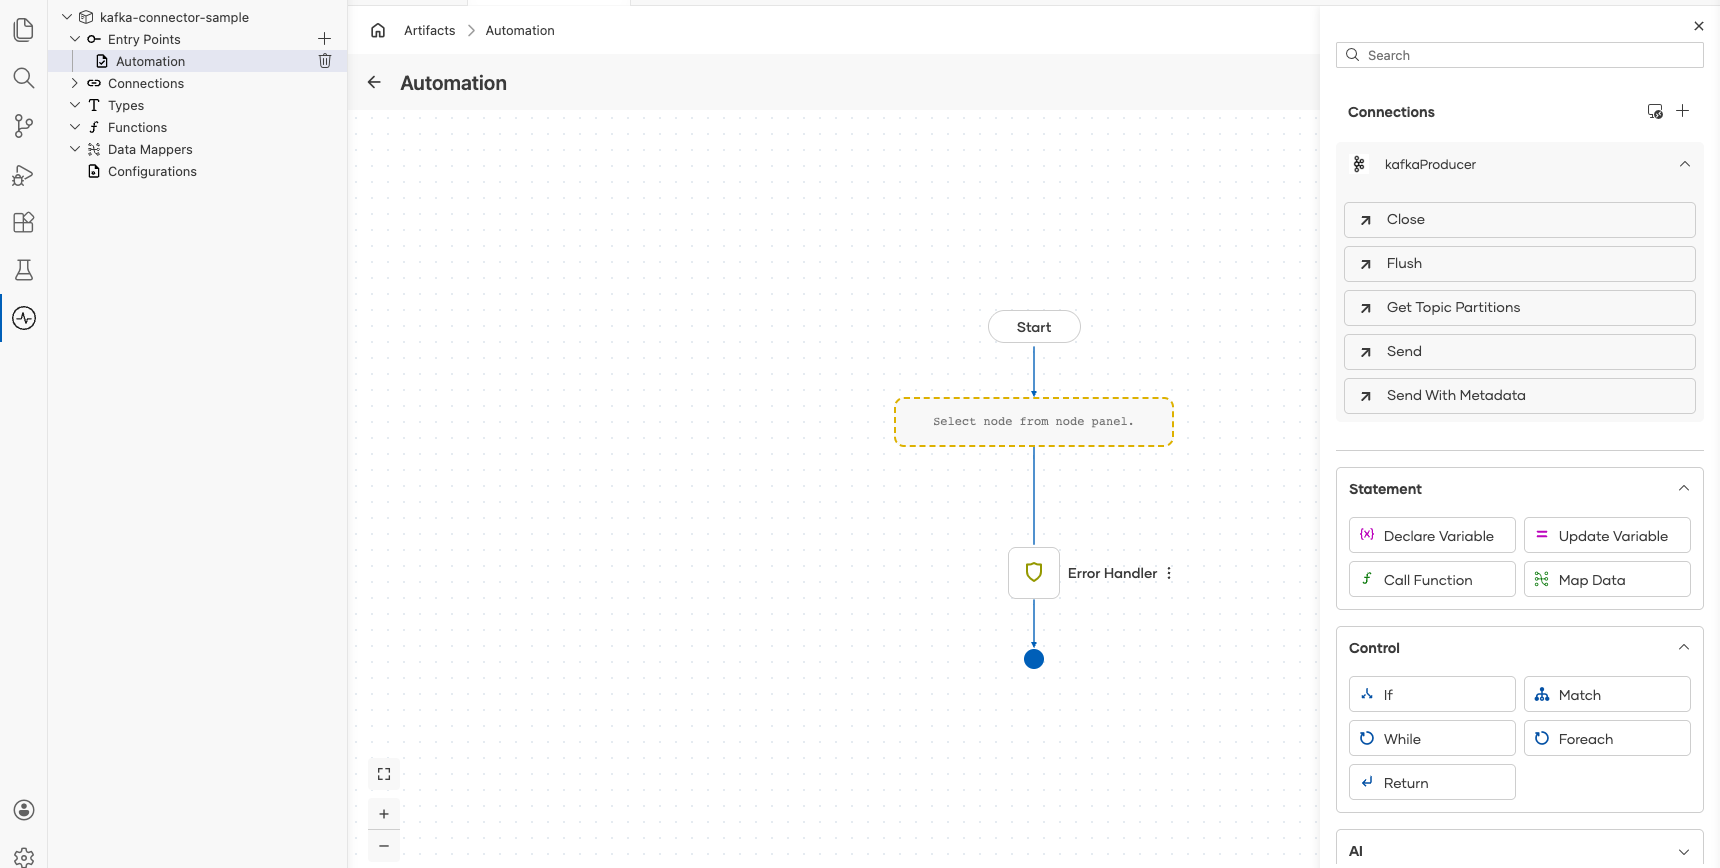
Step 5: Add an automation entry point
- In the left panel under Entry Points, select + (Add Entry Point).
- Under Automation, select Automation.
- In the Create New Automation dialog, accept the default settings and select Create.
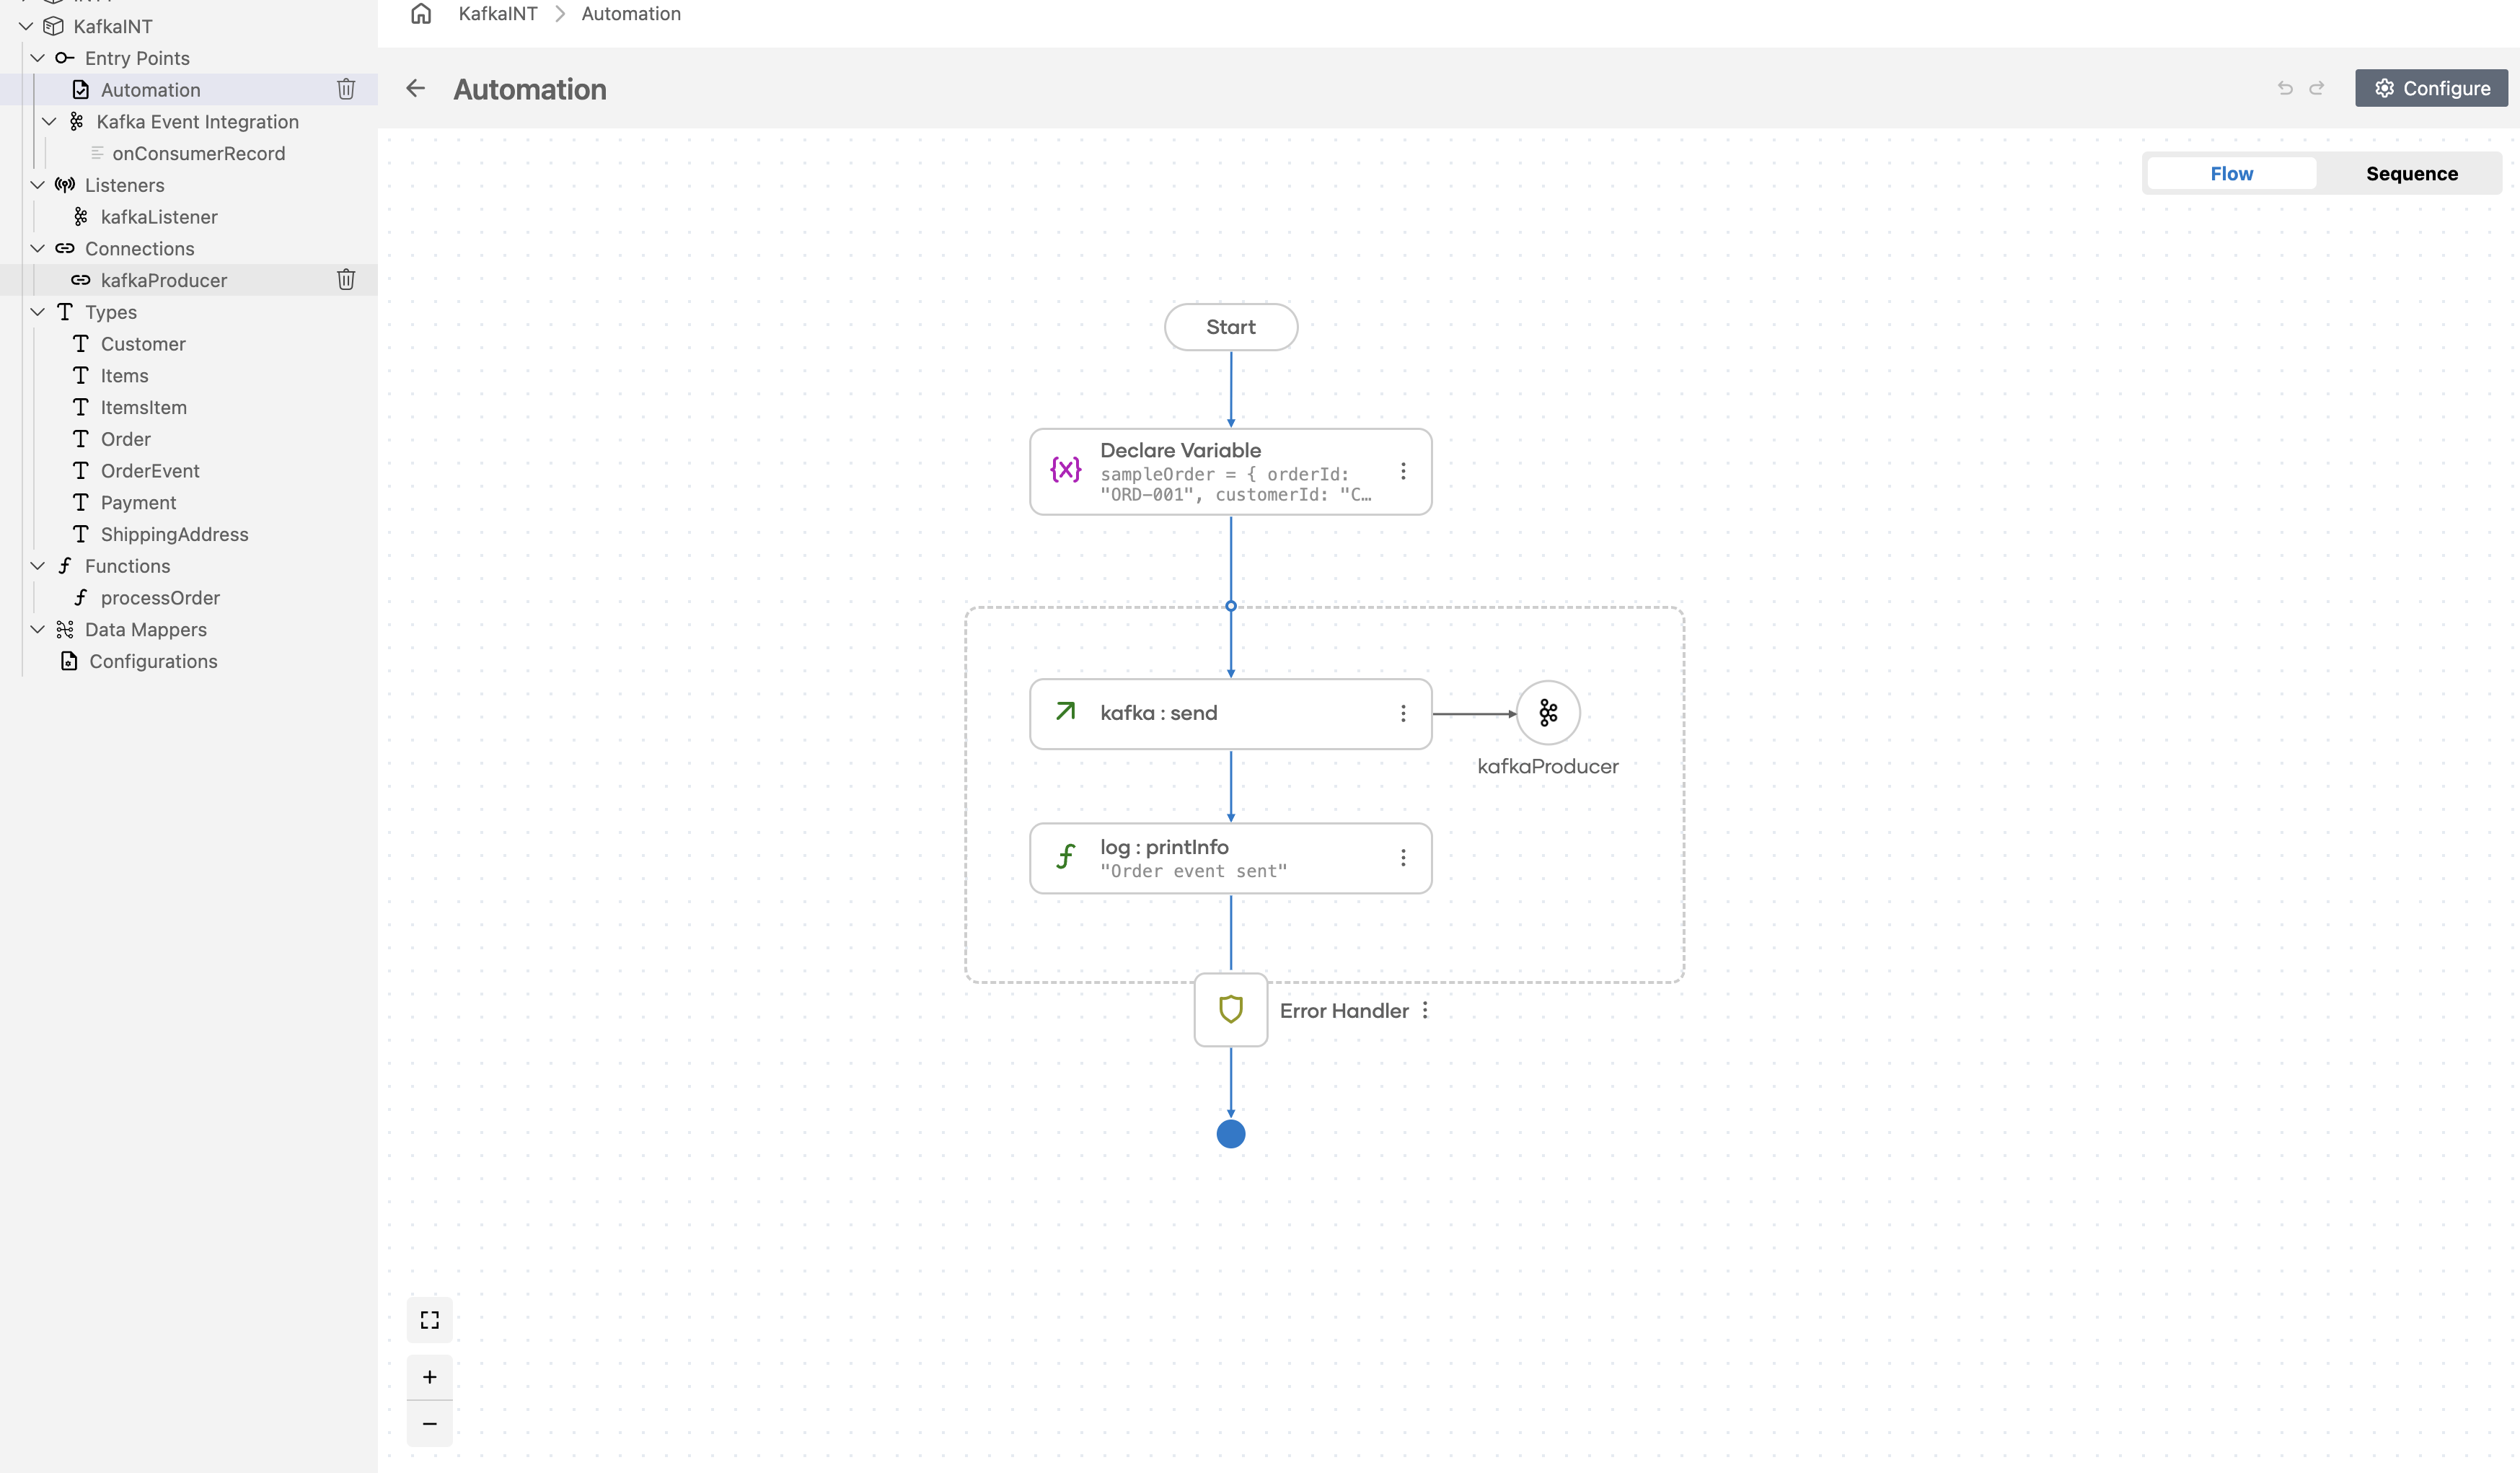
The canvas switches to the Automation flow view, showing a Start node, an Error Handler node, and an End node.
Step 6: Select and configure the send operation
Select the + drop zone between Start and Error Handler on the canvas to open the Add Step panel. Expand the kafkaProducer connection to reveal all available operations.
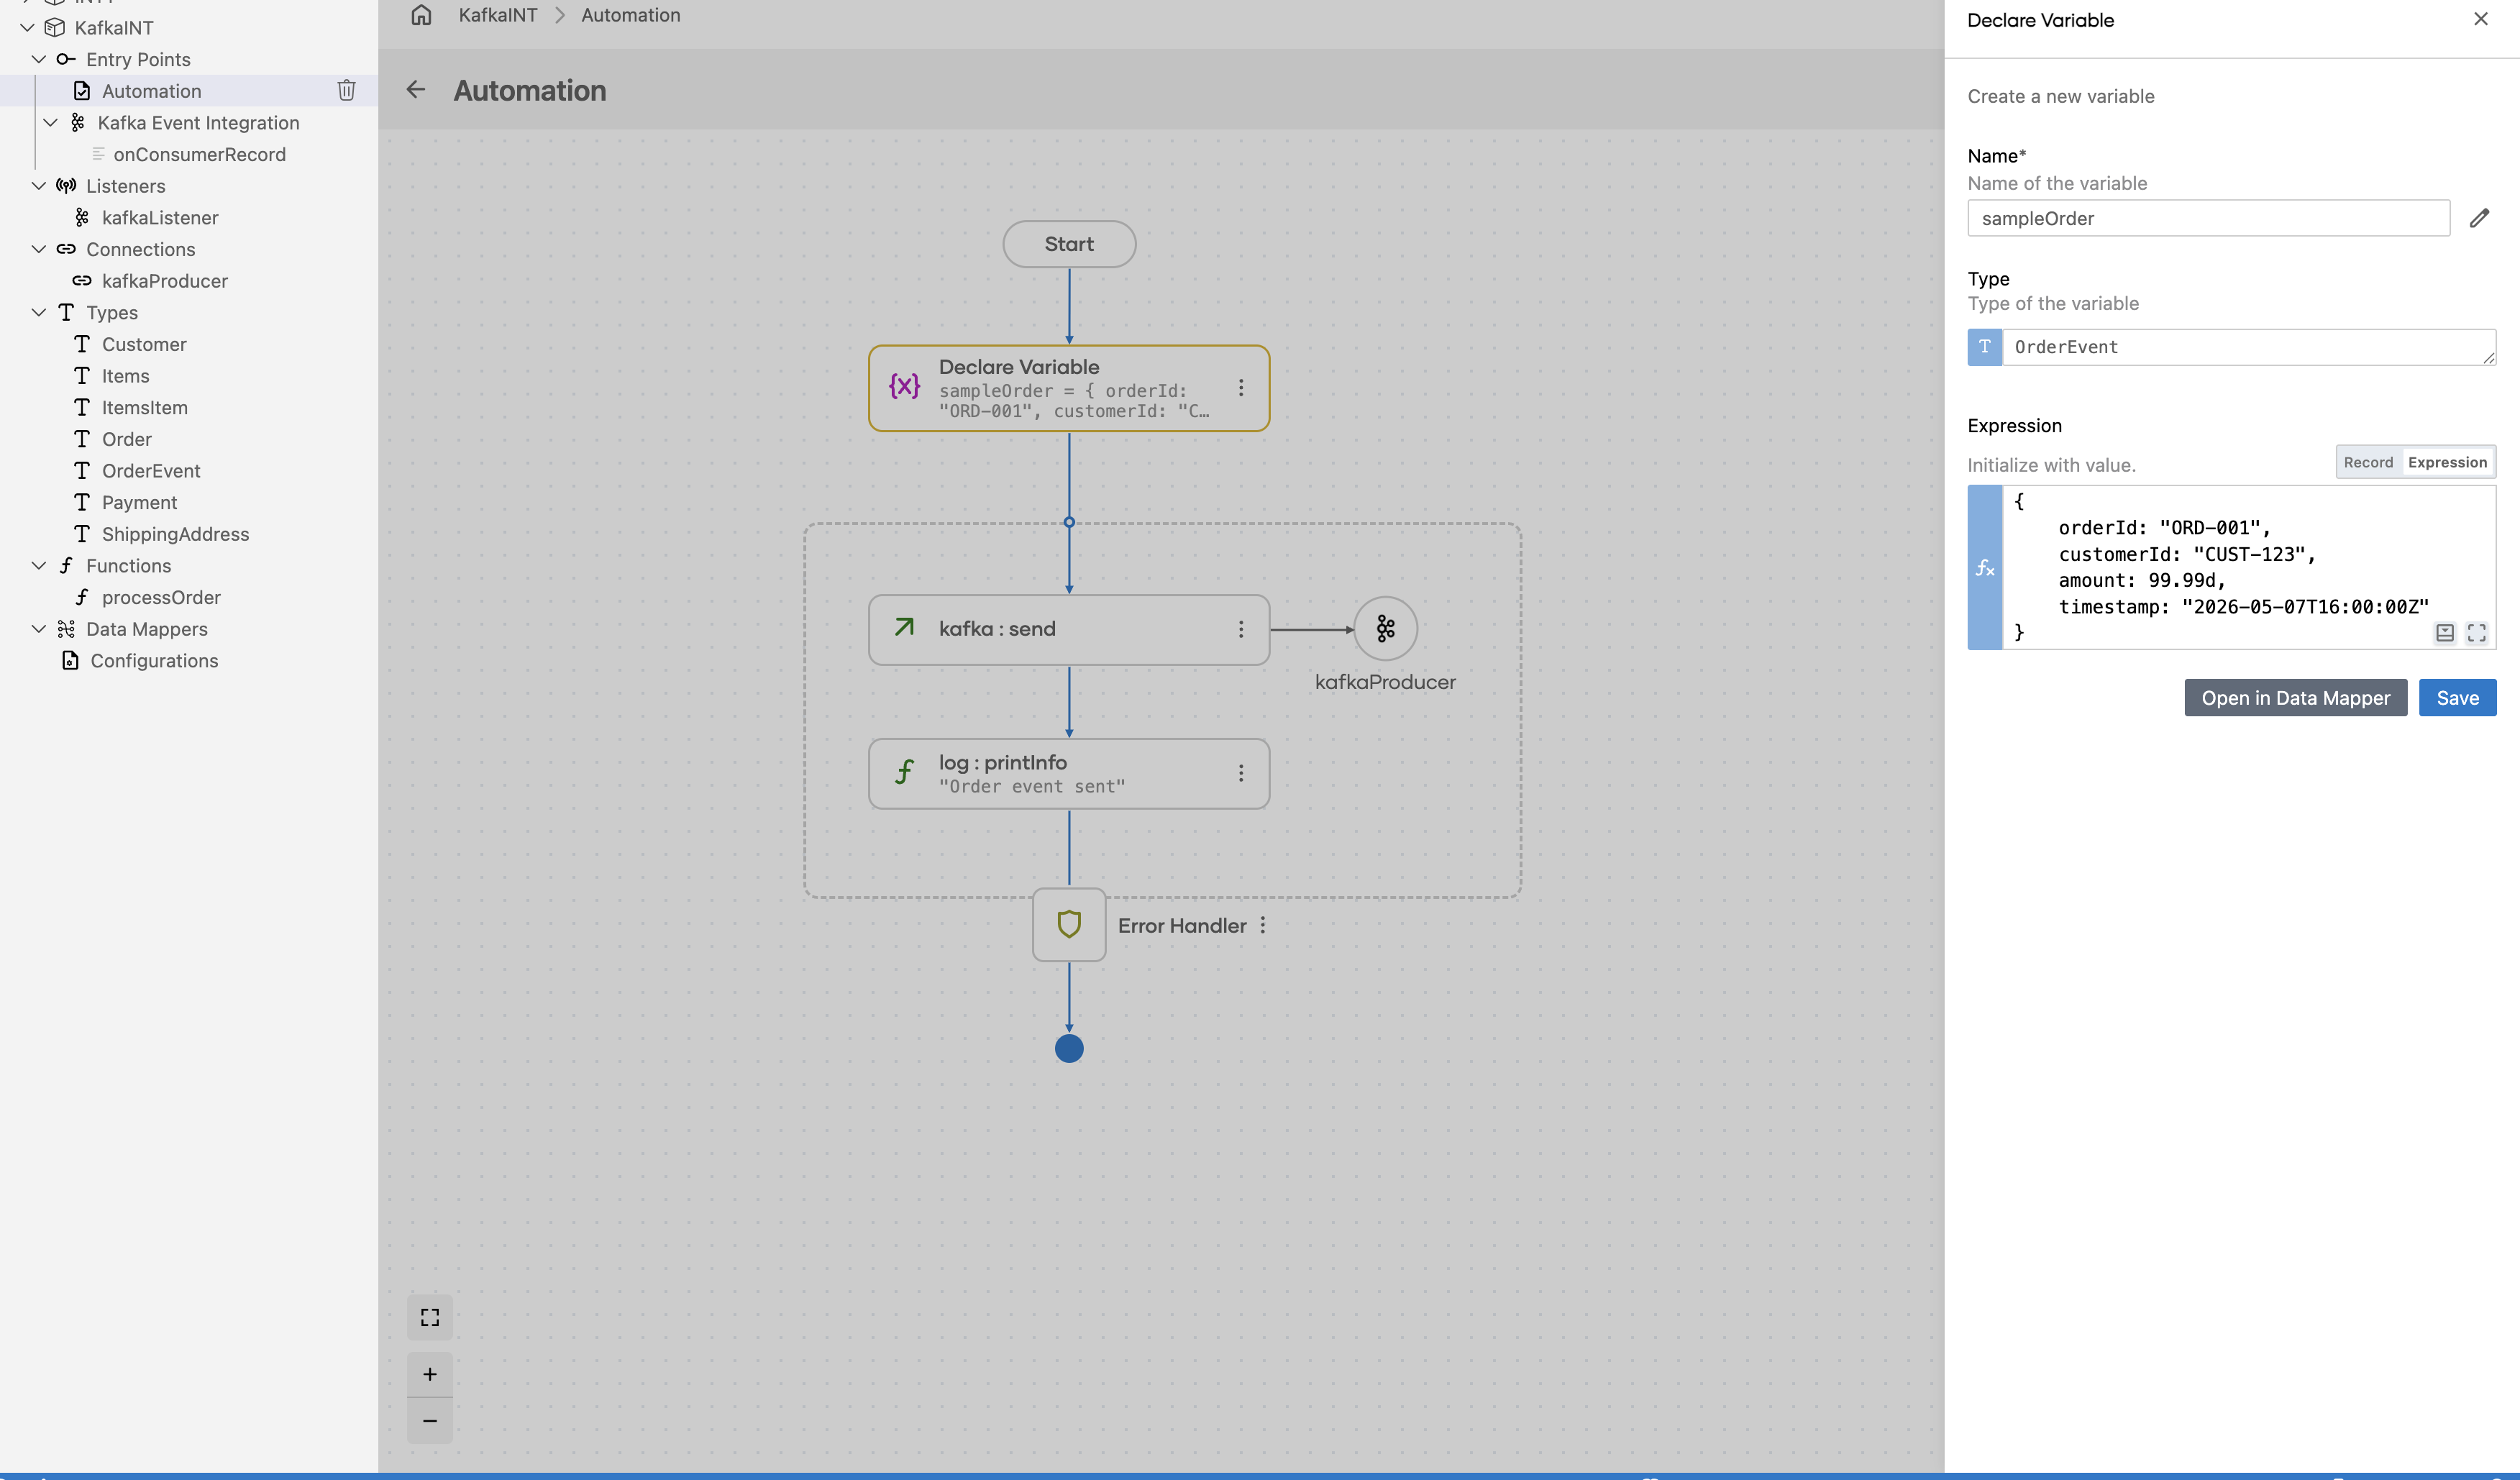
Select Send to open the kafkaProducer → send configuration form, then configure the Producer Record field with the following values:
- topic : The Kafka topic to publish to (
"orders") - value : The message payload as a byte array
Select Save. The kafka : send node is added to the Automation flow.
Try it yourself
Try this sample in WSO2 Integration Platform.

More code examples
The following example shows how to use the Ballerina kafka connector to produce and consume messages using an Apache Kafka message broker.
- Order manager: A simple order management system that uses Kafka to process orders.
- Word count calculator: A word count calculator that reads messages from a Kafka topic and counts the occurrences of each word.
- Twitter filter: A Twitter filter that reads tweets from a Kafka topic and filters them based on certain criteria.
- Stock trading analyzer: This example demonstrates a simulated stock trading system built using Kafka and Ballerina.
- Banking transaction processor: A banking transaction processor that processes banking transactions using Kafka. It illustrates how banking transactions can be published and consumed in real time, while also integrating with Confluent Schema Registry to manage message schemas between the producer and consumer.
Kafka consumer example
What you'll build
Build a Kafka Consumer integration using the WSO2 Integrator low-code canvas with the ballerinax/kafka connector. The integration creates an Automation that polls a Kafka broker for messages on every trigger cycle and stores the consumed records for further processing.
Operations used:
- Poll : Polls the Kafka broker for available messages and returns consumed records as a typed array
Architecture
Prerequisites
- A running Kafka broker reachable from your integration environment
Setting up the Kafka integration
New to WSO2 Integrator? Follow the Create a New Integration guide to set up your integration first, then return here to add the connector.
Adding the Kafka connector
Step 1: Open the add connection palette
Select Connections in the project tree, then select the + icon next to Connections to open the Add Connection palette.
Step 2: Search for and select the Kafka connector
- Enter
kafkain the search field. - Select the Kafka connector tile to open the connection configuration form.
Configuring the Kafka connection
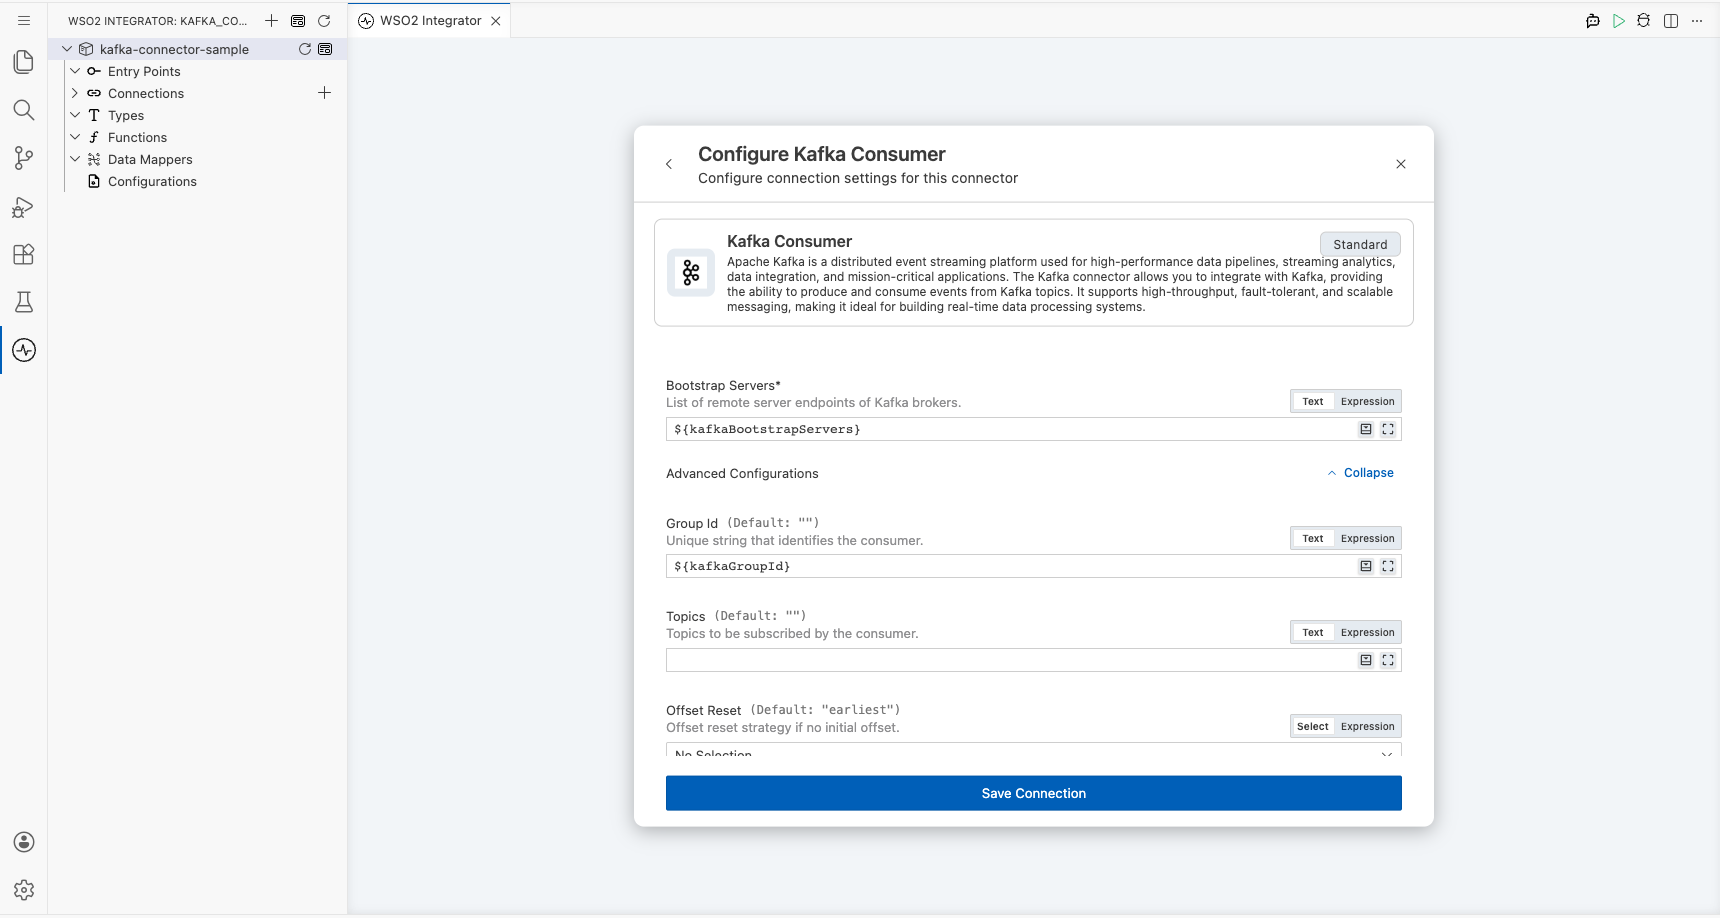
Step 3: Fill in the connection parameters
Set the Connection Name to kafkaConsumer, then bind each parameter to a configurable variable using the helper panel.
- bootstrapServers : The Kafka broker address used to bootstrap the consumer connection
- groupId : The consumer group ID that identifies this consumer within a group
- clientId : A unique identifier for this Kafka client instance
Step 4: Save the connection
Select Save to persist the connection. The kafkaConsumer connection node appears on the Connections canvas.
Step 5: Set actual values for your configurables
In the left panel, select Configurations, then set a value for each configurable listed below.
- kafkaBootstrapServers (string) : The address of your Kafka broker (for example,
broker-host:9092) - kafkaGroupId (string) : The consumer group ID for this integration (for example,
my-consumer-group) - kafkaClientId (string) : A unique client identifier for this consumer (for example,
my-kafka-client)
Configuring the Kafka poll operation
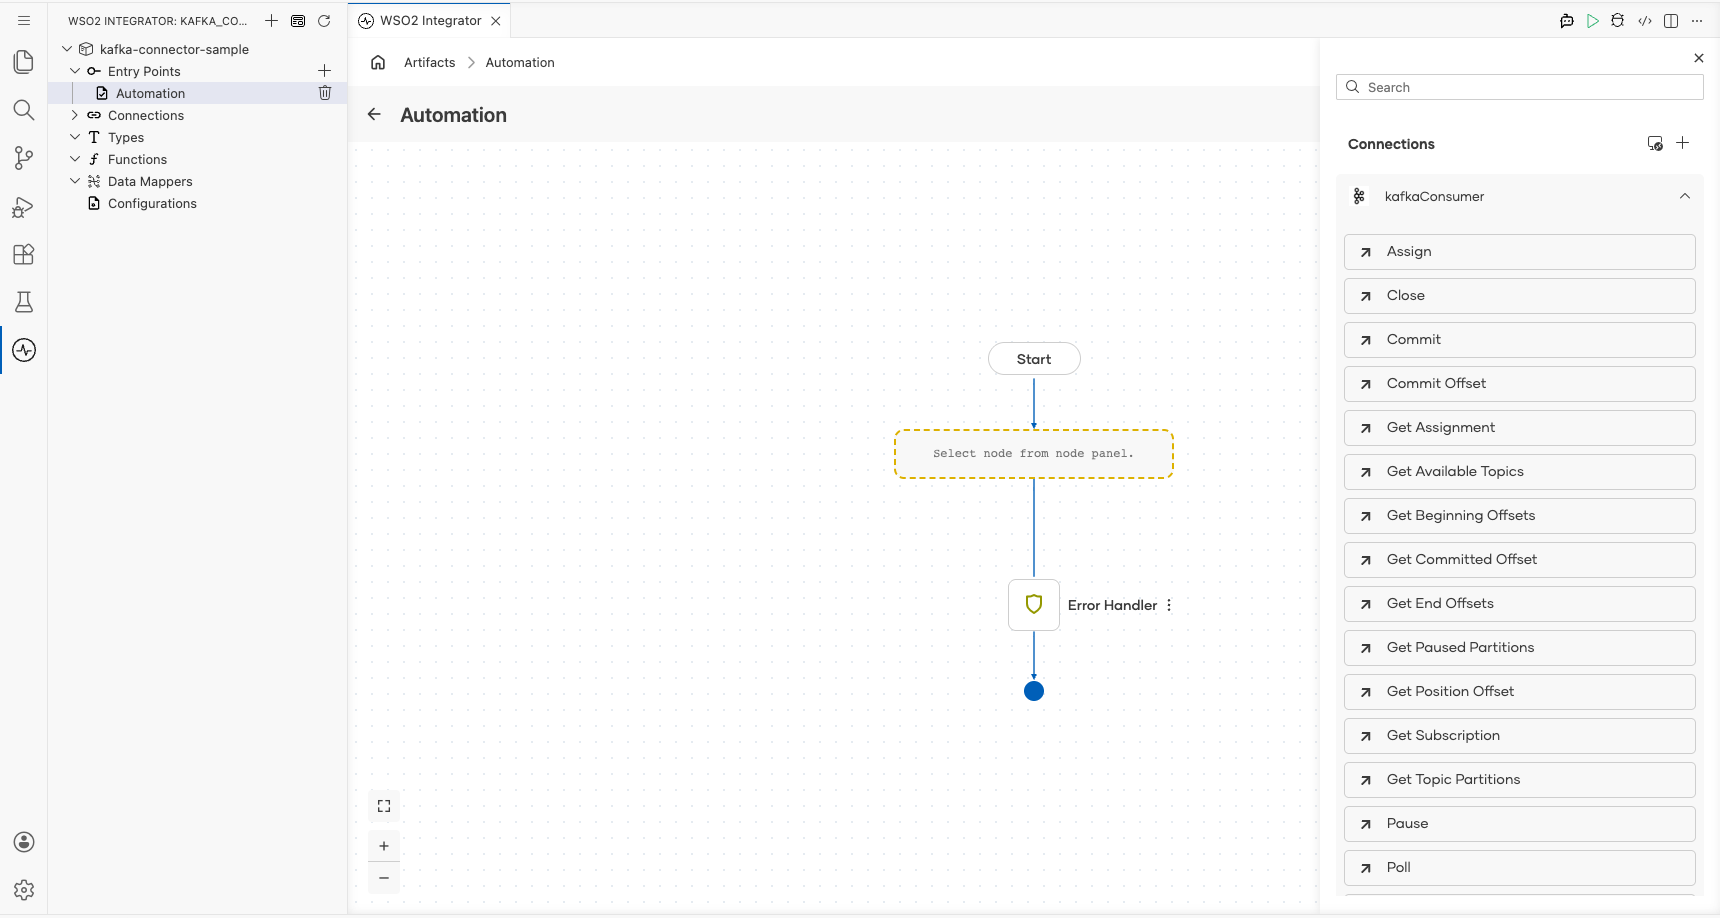
Step 6: Add an automation entry point
- In the left panel under Entry Points, select + (Add Entry Point).
- Under Automation, select Automation.
- In the Create New Automation dialog, accept the default settings and select Create.
The canvas switches to the Automation flow view, showing a Start node, an Error Handler node, and an End node.
Step 7: Select and configure the poll operation
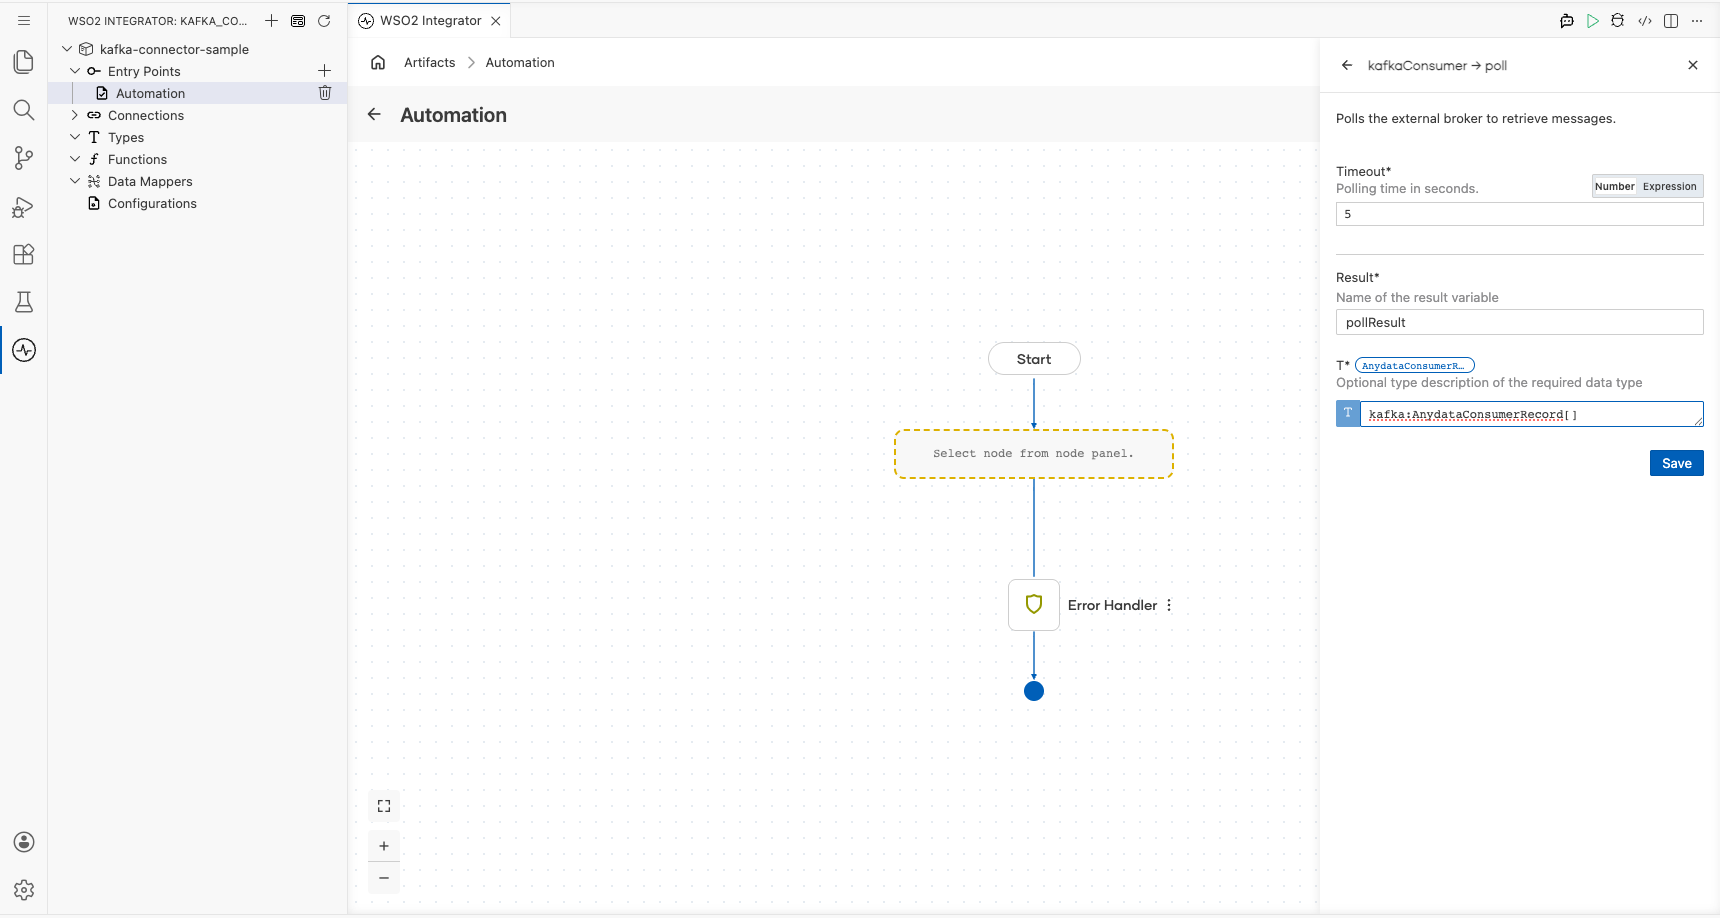
Select the + button on the flow connector between Start and the placeholder node to open the node panel. Under Connections, select kafkaConsumer to expand its operations list, then select Poll.
Fill in the Poll operation fields:
- Timeout : Polling time in seconds; enter
5 - Result : Name of the variable that holds the consumed records; enter
pollResult - T : Type descriptor for the returned records; enter
kafka:AnydataConsumerRecord[]
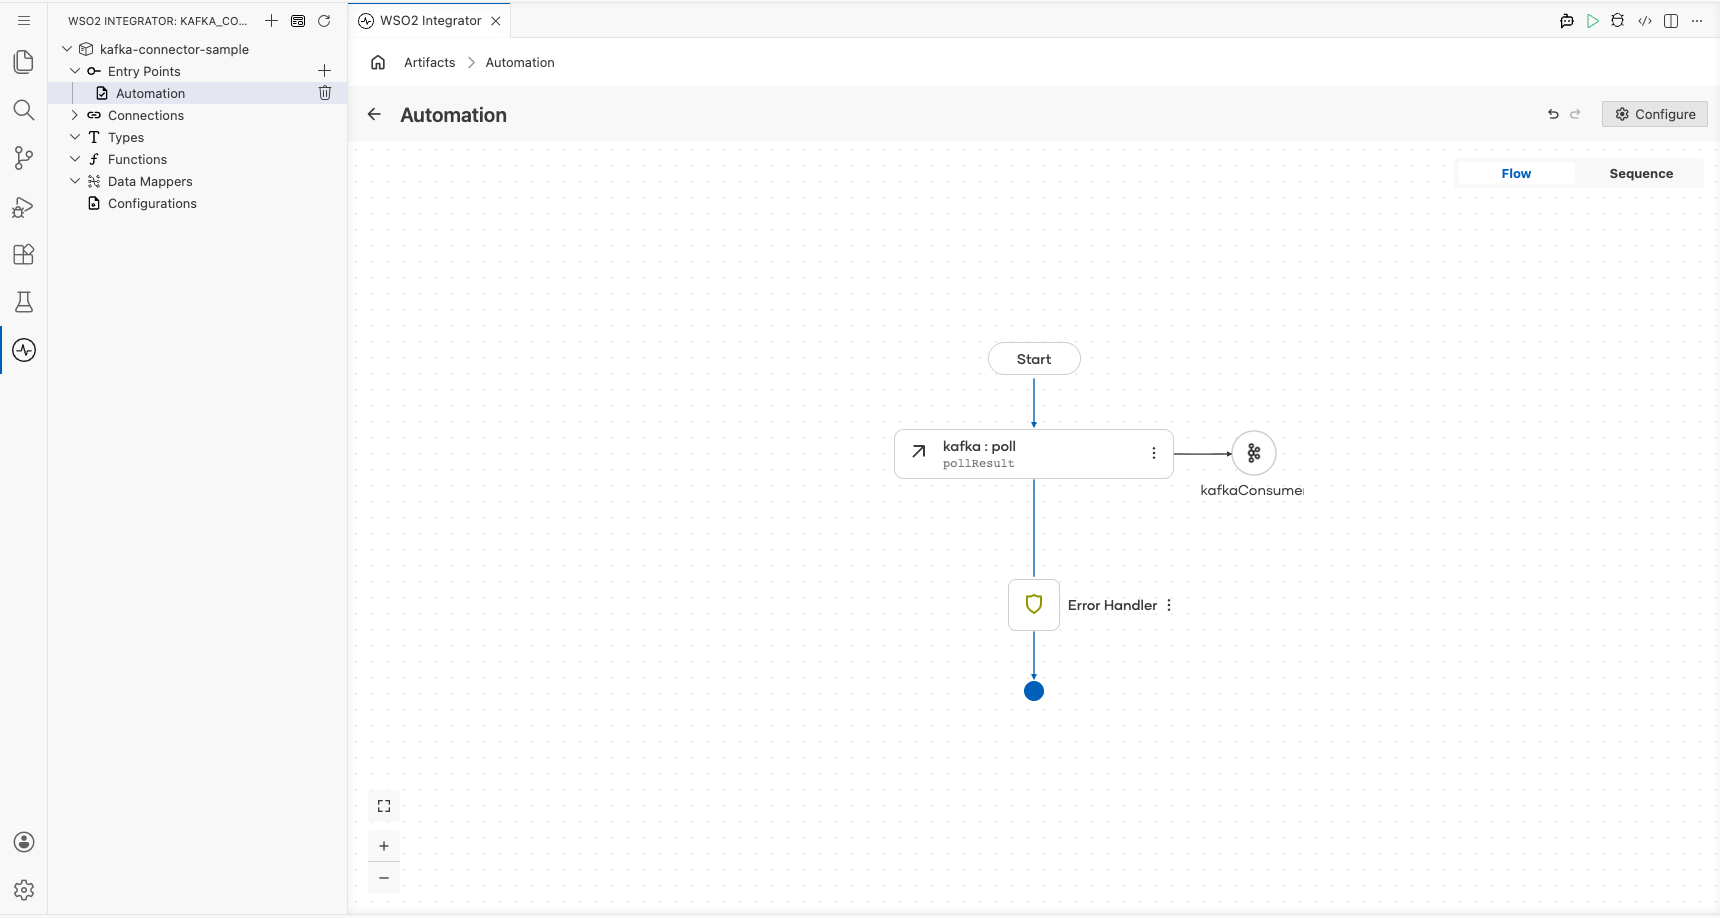
Select Save. The canvas updates to show the complete Automation flow with Start → kafka : poll → Error Handler → End.
Try it yourself
Try this sample in WSO2 Integration Platform.
More code examples
The following example shows how to use the Ballerina kafka connector to produce and consume messages using an Apache Kafka message broker.
- Order manager: A simple order management system that uses Kafka to process orders.
- Word count calculator: A word count calculator that reads messages from a Kafka topic and counts the occurrences of each word.
- Twitter filter: A Twitter filter that reads tweets from a Kafka topic and filters them based on certain criteria.
- Stock trading analyzer: This example demonstrates a simulated stock trading system built using Kafka and Ballerina.
- Banking transaction processor: A banking transaction processor that processes banking transactions using Kafka. It illustrates how banking transactions can be published and consumed in real time, while also integrating with Confluent Schema Registry to manage message schemas between the producer and consumer.
Kafka Trigger Example
What you'll build
This integration listens for messages published to a Kafka topic by a Kafka producer and receives them through a ballerinax/kafka trigger listener bound to a configurable bootstrap server and topic. When a new consumer record arrives, the onConsumerRecord handler fires and logs the full payload to the console as a JSON string using log:printInfo(messages.toJsonString()). The end-to-end flow: Kafka listener → onConsumerRecord handler → log is assembled entirely on the WSO2 Integrator low-code canvas.
Architecture
Prerequisites
- A running Apache Kafka broker accessible at the configured bootstrap server address.
- A Kafka topic created and ready to receive messages (e.g.,
test-topic). - A Kafka producer or CLI tool such as
kafka-console-produceravailable to publish test messages.
Setting up the Kafka integration
New to WSO2 Integrator? Follow the Create a New Integration guide to set up your integration first, then return here to add the trigger.
Adding the Kafka trigger
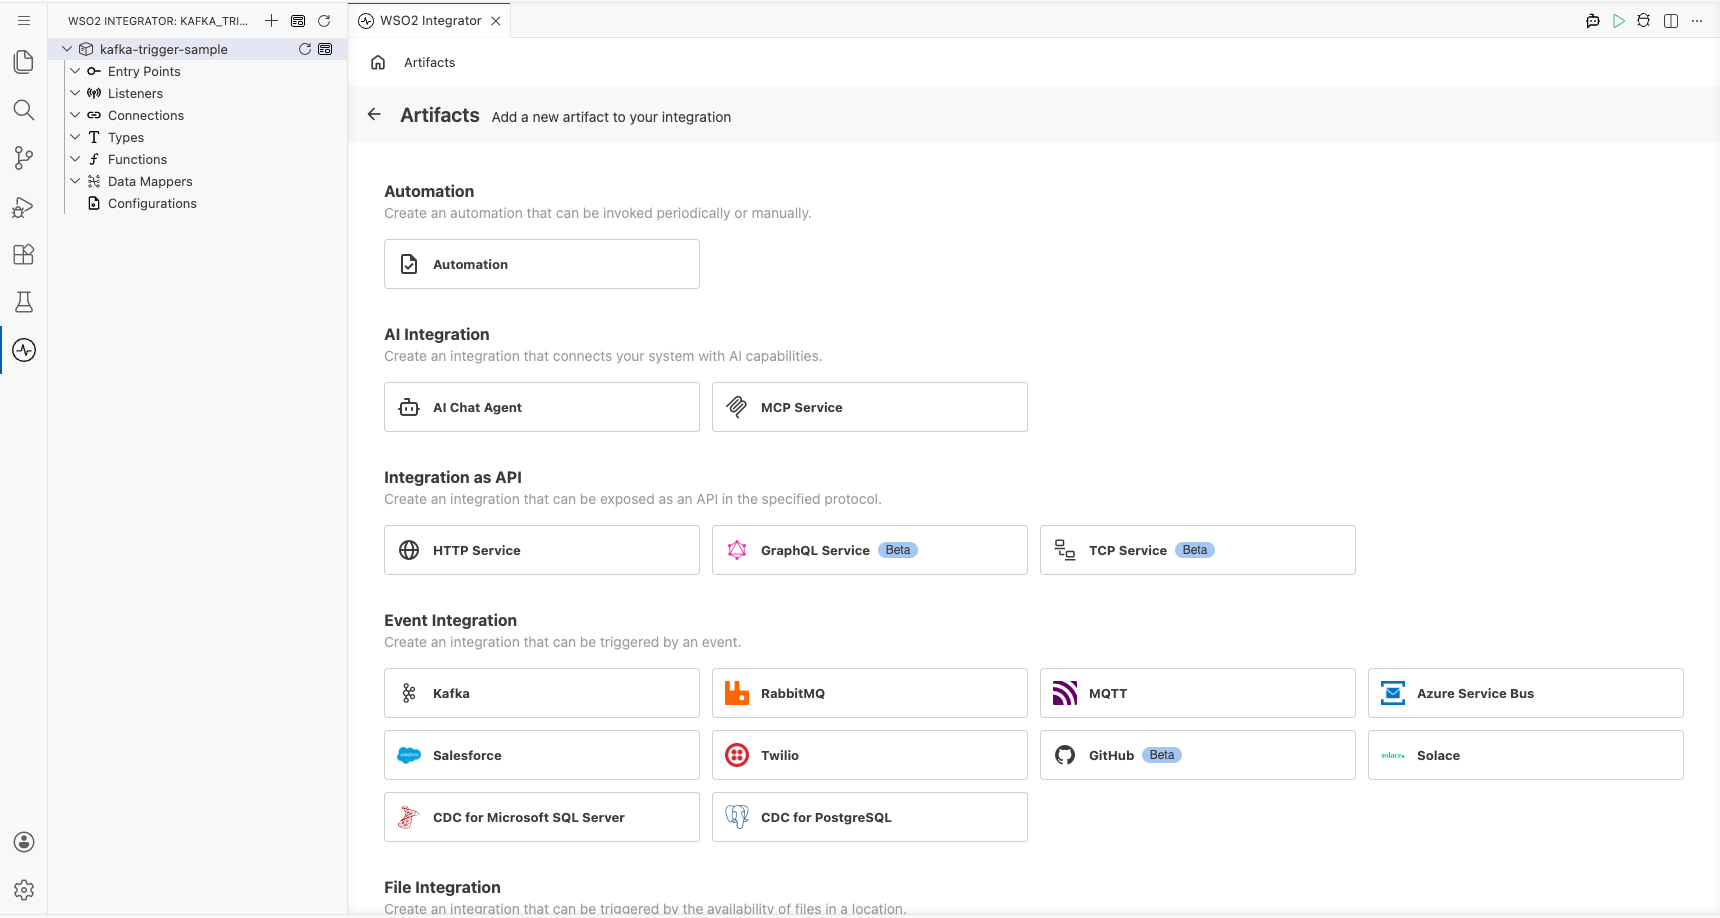
Step 1: Open the Artifacts palette and select the Kafka trigger
- Select + Add Artifact on the canvas to open the Artifacts palette.
- In the Event Integration category, locate and select the Kafka card.
Configuring the Kafka listener
Step 2: Bind Kafka listener parameters to configuration variables
For each required listener parameter field, open the inline helper, select the Configurables tab, select + New Configurable, enter a camelCase variable name and the appropriate type (configurable string), and select Save. The value is automatically injected into the field. Repeat for every field listed below:
- Bootstrap Servers : The Kafka broker address(es) the listener connects to. Bound to a
configurable stringvariable. - Topic(s) : The Kafka topic name(s) the listener subscribes to for incoming messages. Bound to a
configurable stringvariable.
Leave the Listener Name field under Advanced Configurations at its default value (e.g., kafkaListener). For enum-typed fields, select the appropriate value directly from the dropdown; no configurable variable is needed. For boolean fields, select the value directly from the dropdown.
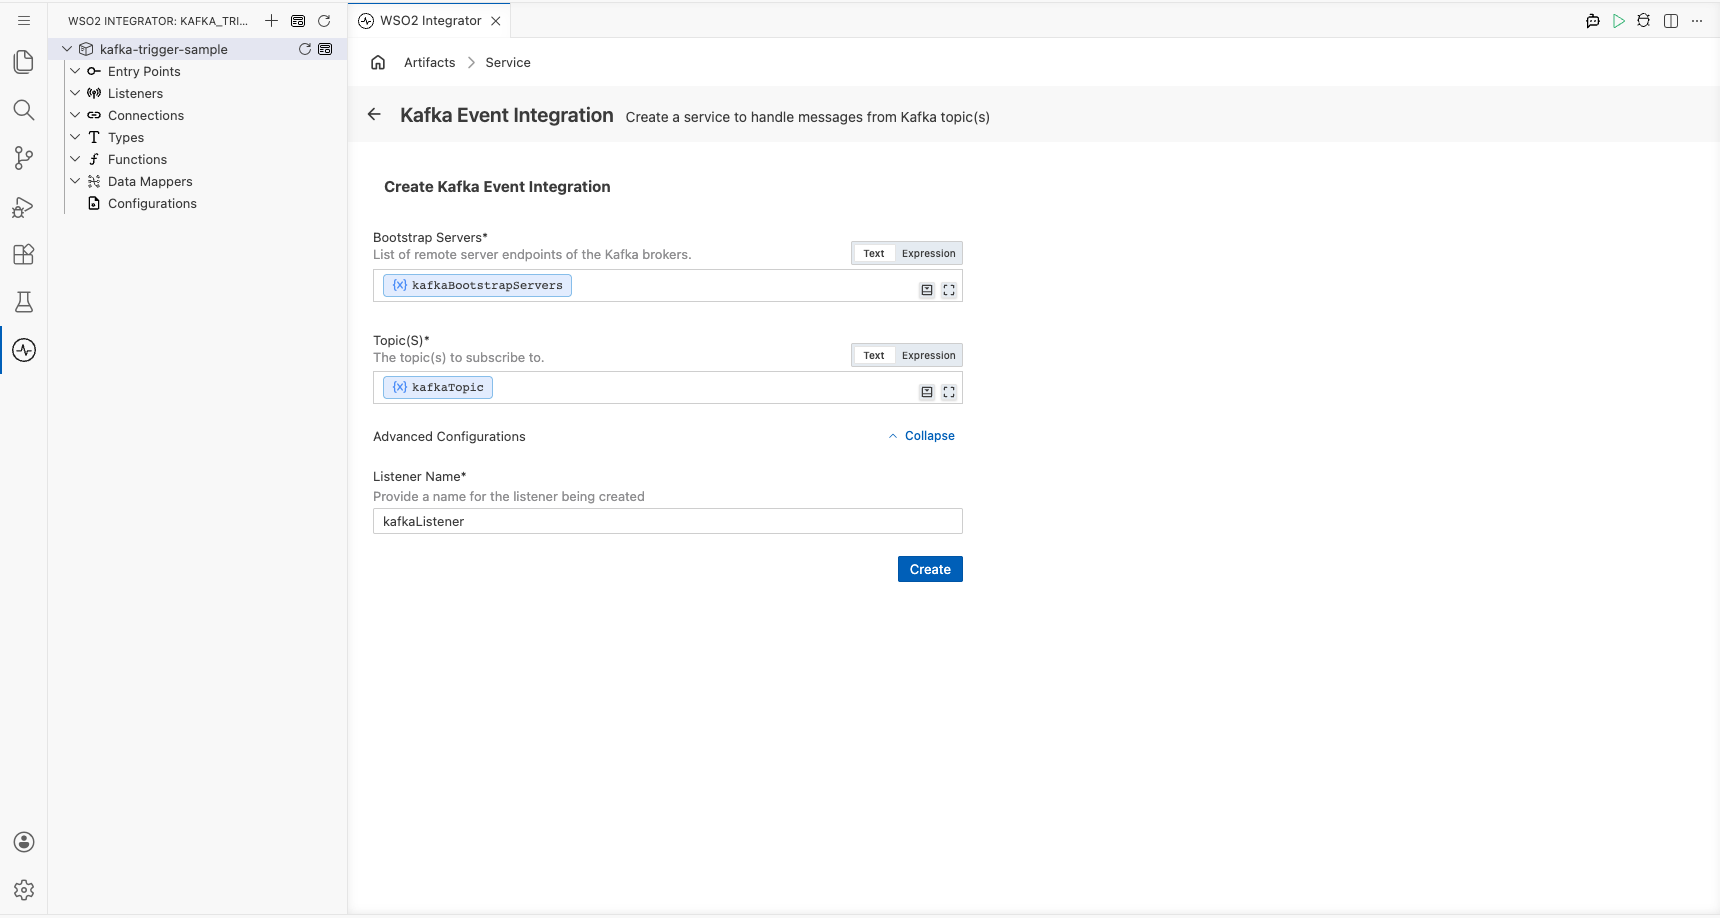
Step 3: Select Create to register the listener and open the Service view
Select Create at the bottom of the trigger configuration form. The Kafka listener chip is auto-created and appears in the Service view; no separate listener setup step is required.
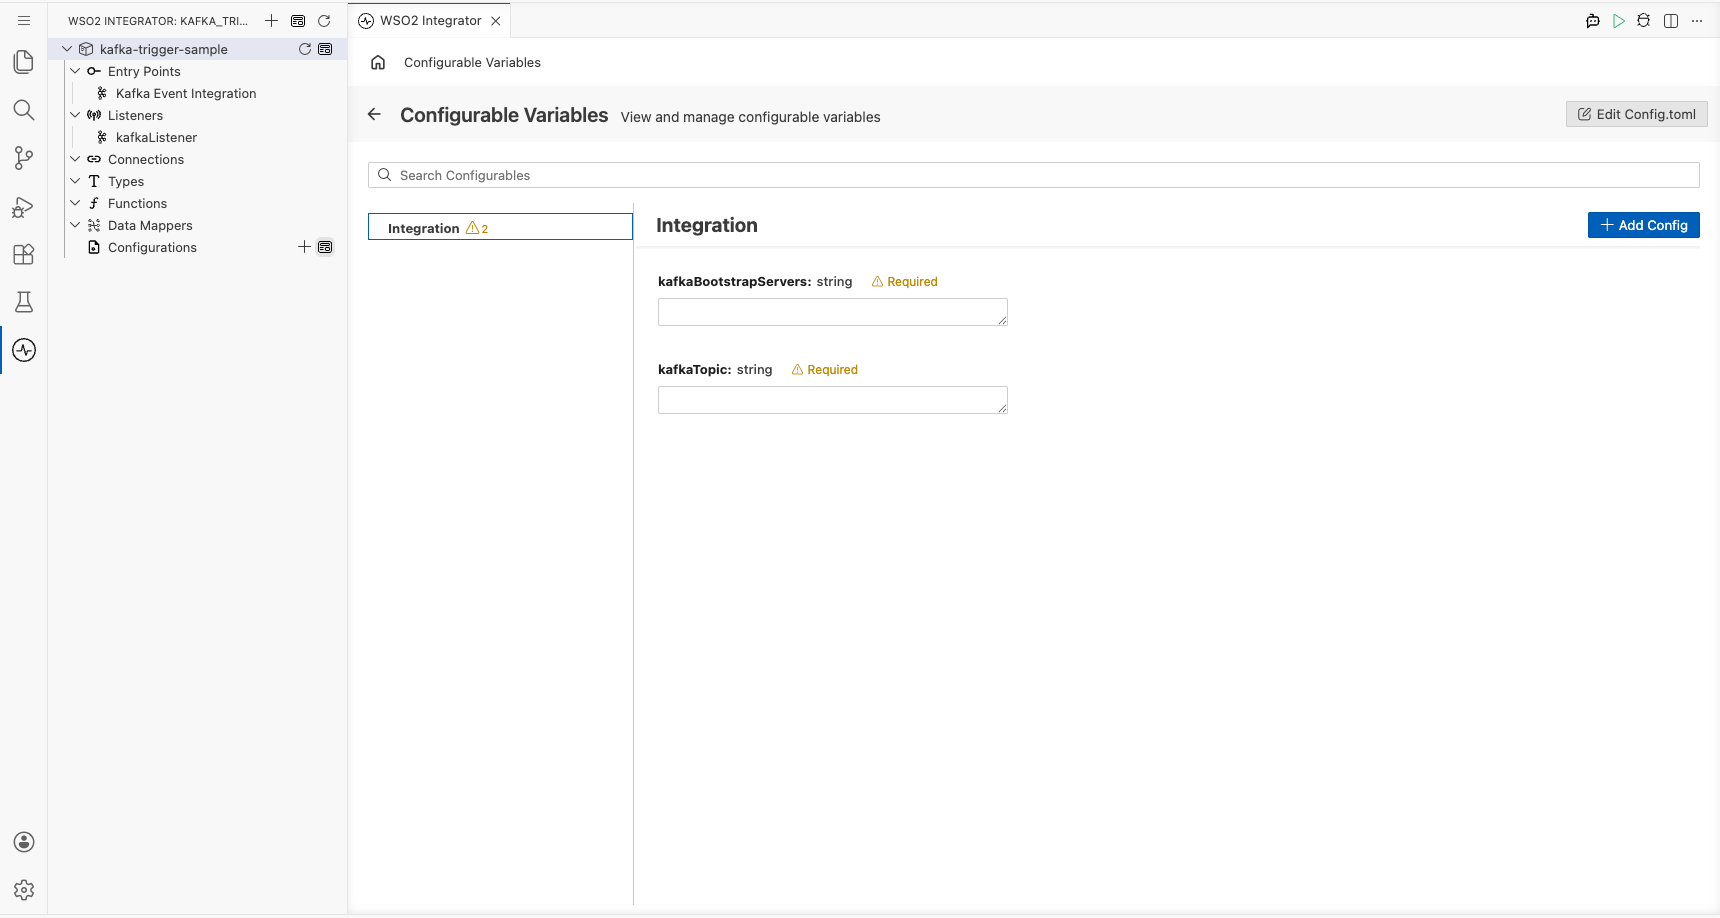
Step 4: Set actual values for your configurations
Before running the integration, provide real values for the configurations you created. In the left panel of WSO2 Integrator, select Configurations (at the bottom of the project tree, under Data Mappers). This opens the Configurations panel where you can set a value for each configuration:
- kafkaBootstrapServers (string) : The hostname and port of your Kafka broker.
- kafkaTopic (string) : The name of the Kafka topic to subscribe to, e.g.
test-topic.
Handling Kafka events
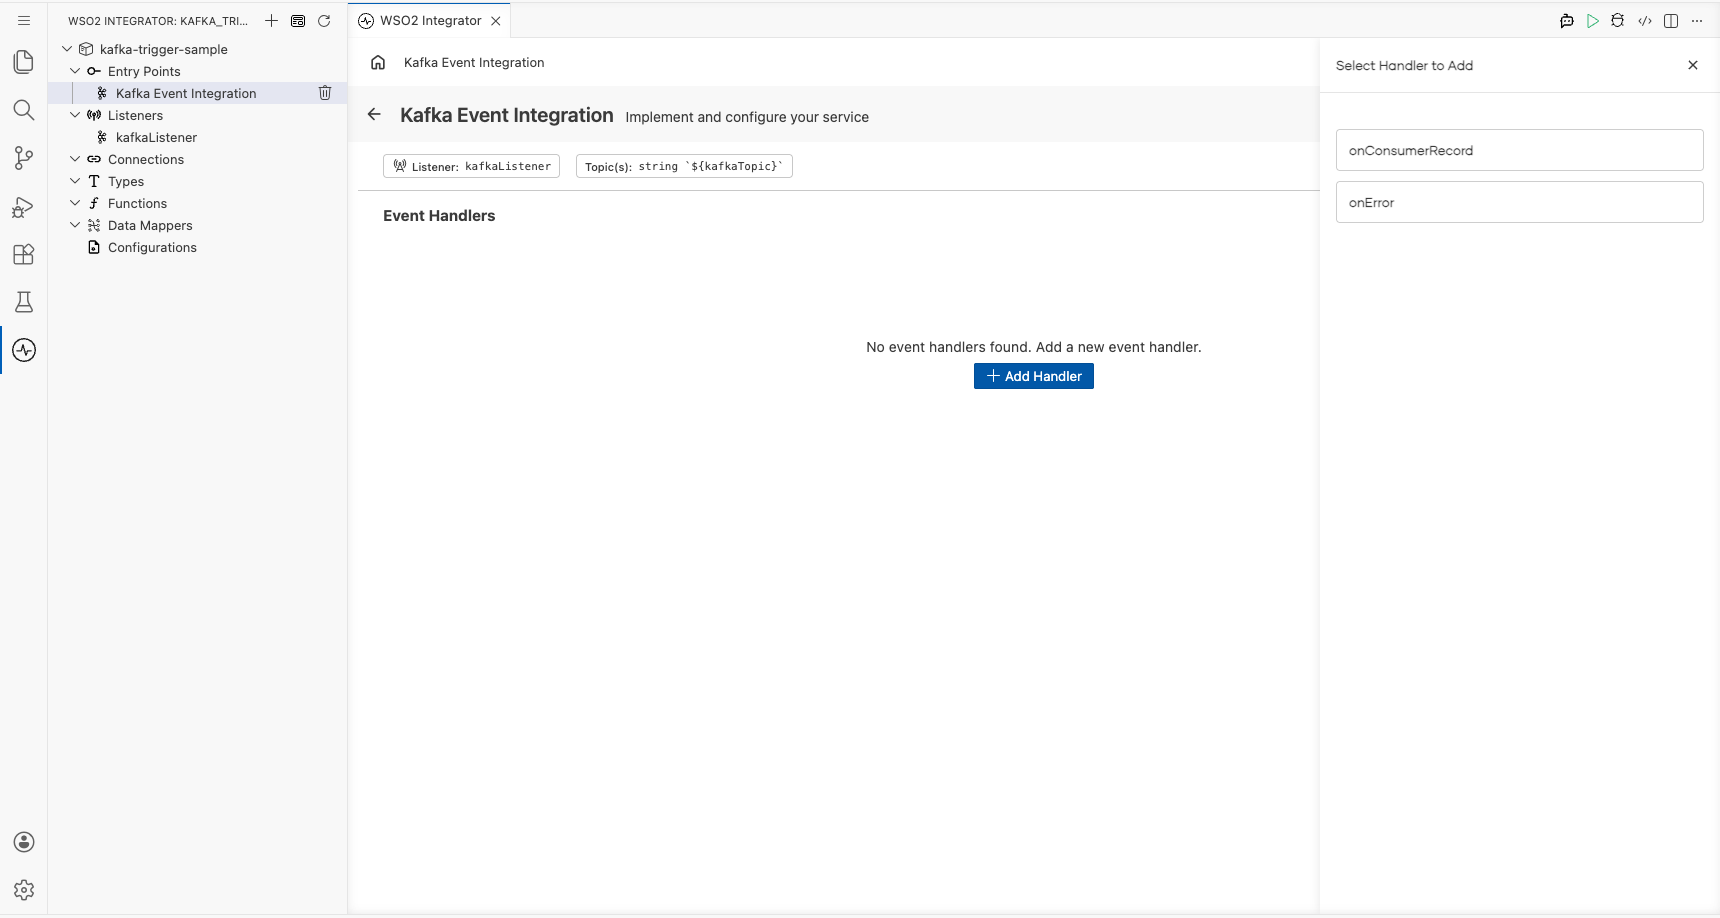
Step 5: Open the Add Handler side panel
- In the Service view, select + Add Handler on the right of the Event Handlers section.
- The Select Handler to Add side panel opens, listing the available Kafka handler options including
onConsumerRecordandonError.
Step 6: Select the onConsumerRecord handler and define the message payload type
- In the side panel, select onConsumerRecord to open the Message Handler Configuration panel.
- In the Message Configuration field, select Define Value. The Define Value modal opens.
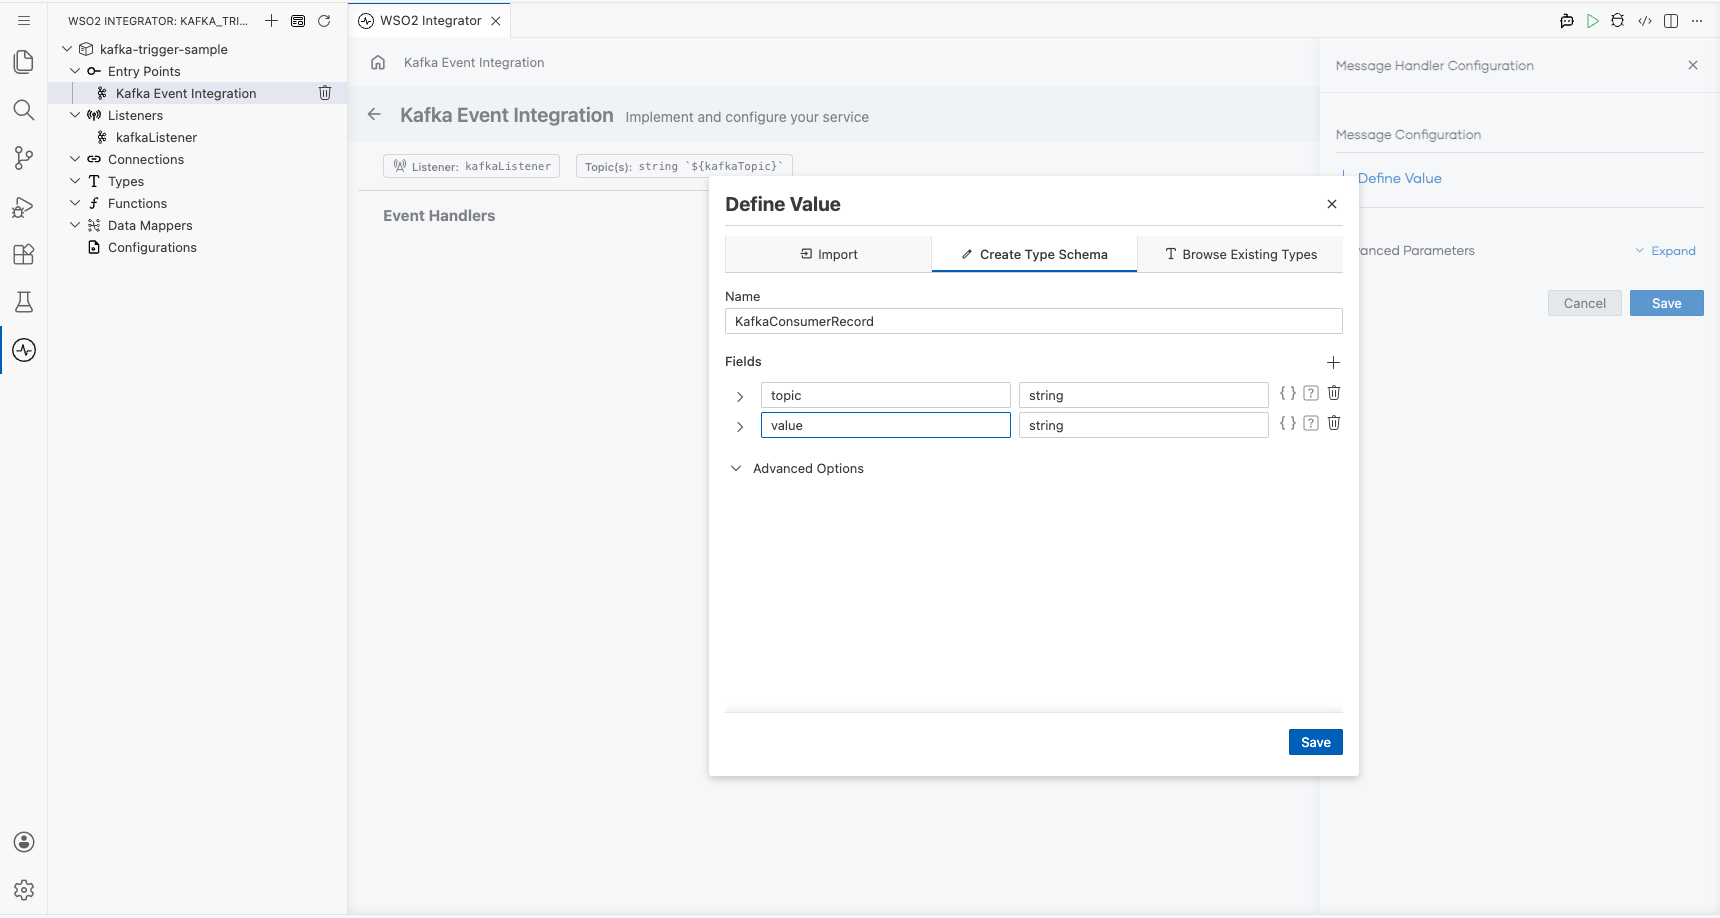
- Select the Create Type Schema tab and enter the unique PascalCase record name
KafkaConsumerRecordin the Name field. - Select the + icon next to Fields to add each payload field, entering a field name and a type for every field, for example:
topic(string) andvalue(string). - Select Save to create the record type and bind it to the handler.
Step 7: Save the handler configuration and add a log statement to the flow
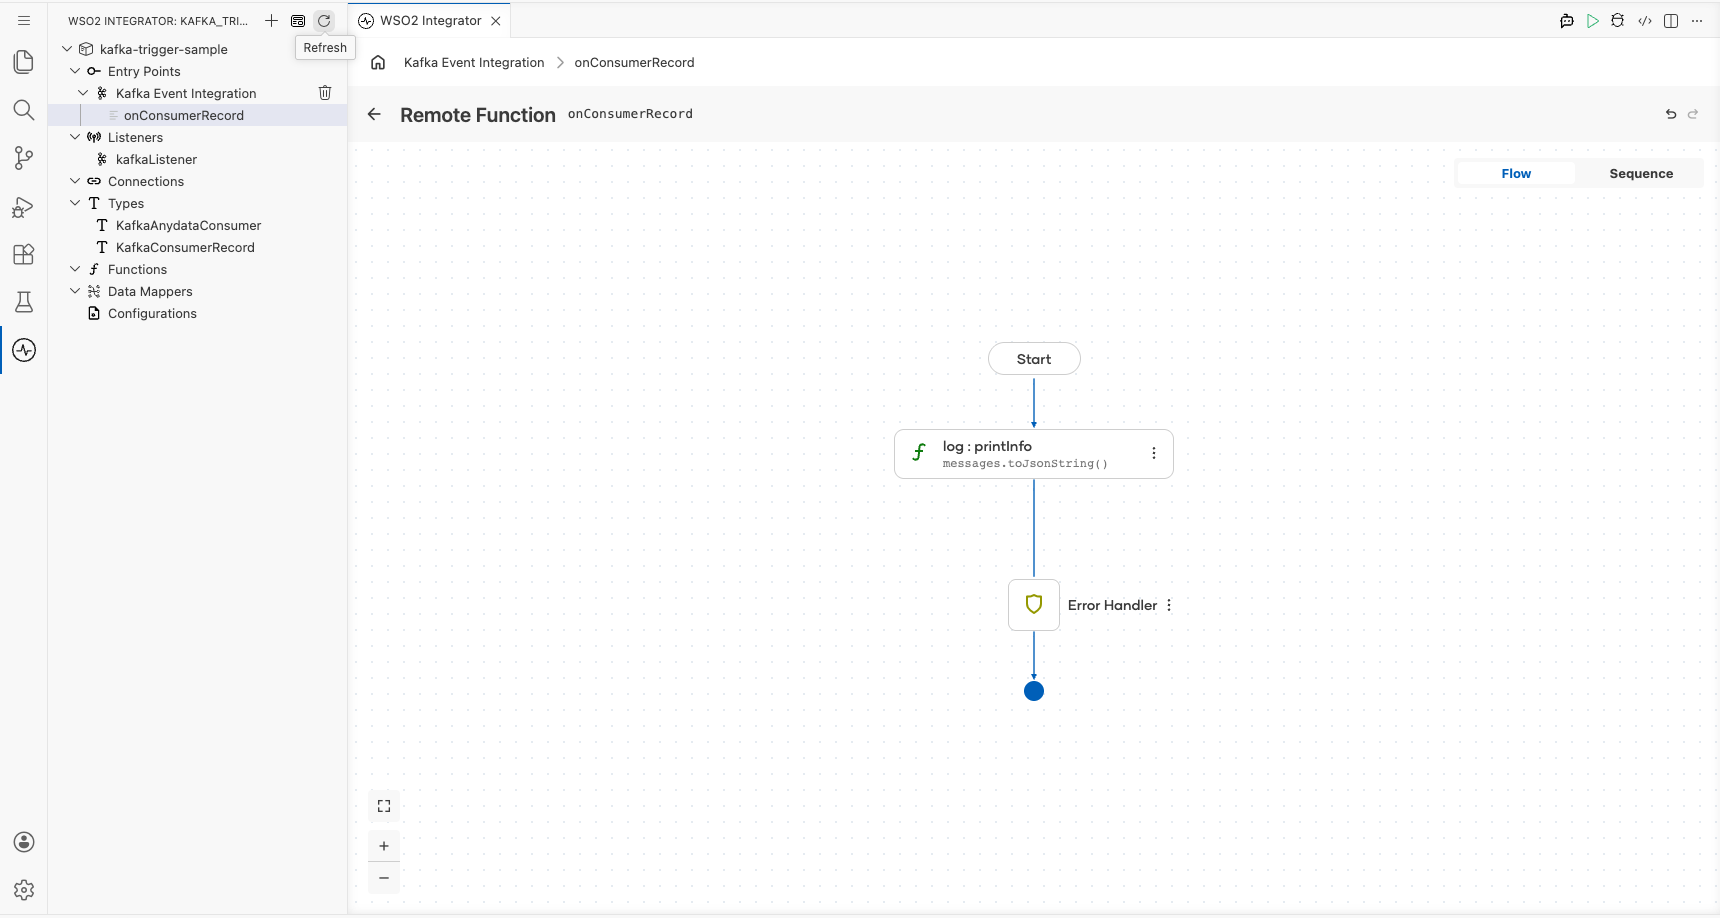
- Select Save on the Message Handler Configuration panel. The flow canvas for the
onConsumerRecordhandler opens. - In the handler body, add a
log:printInfo(messages.toJsonString())step using the canvas. - Verify the
log:printInfonode appears between Start and Error Handler on the canvas.
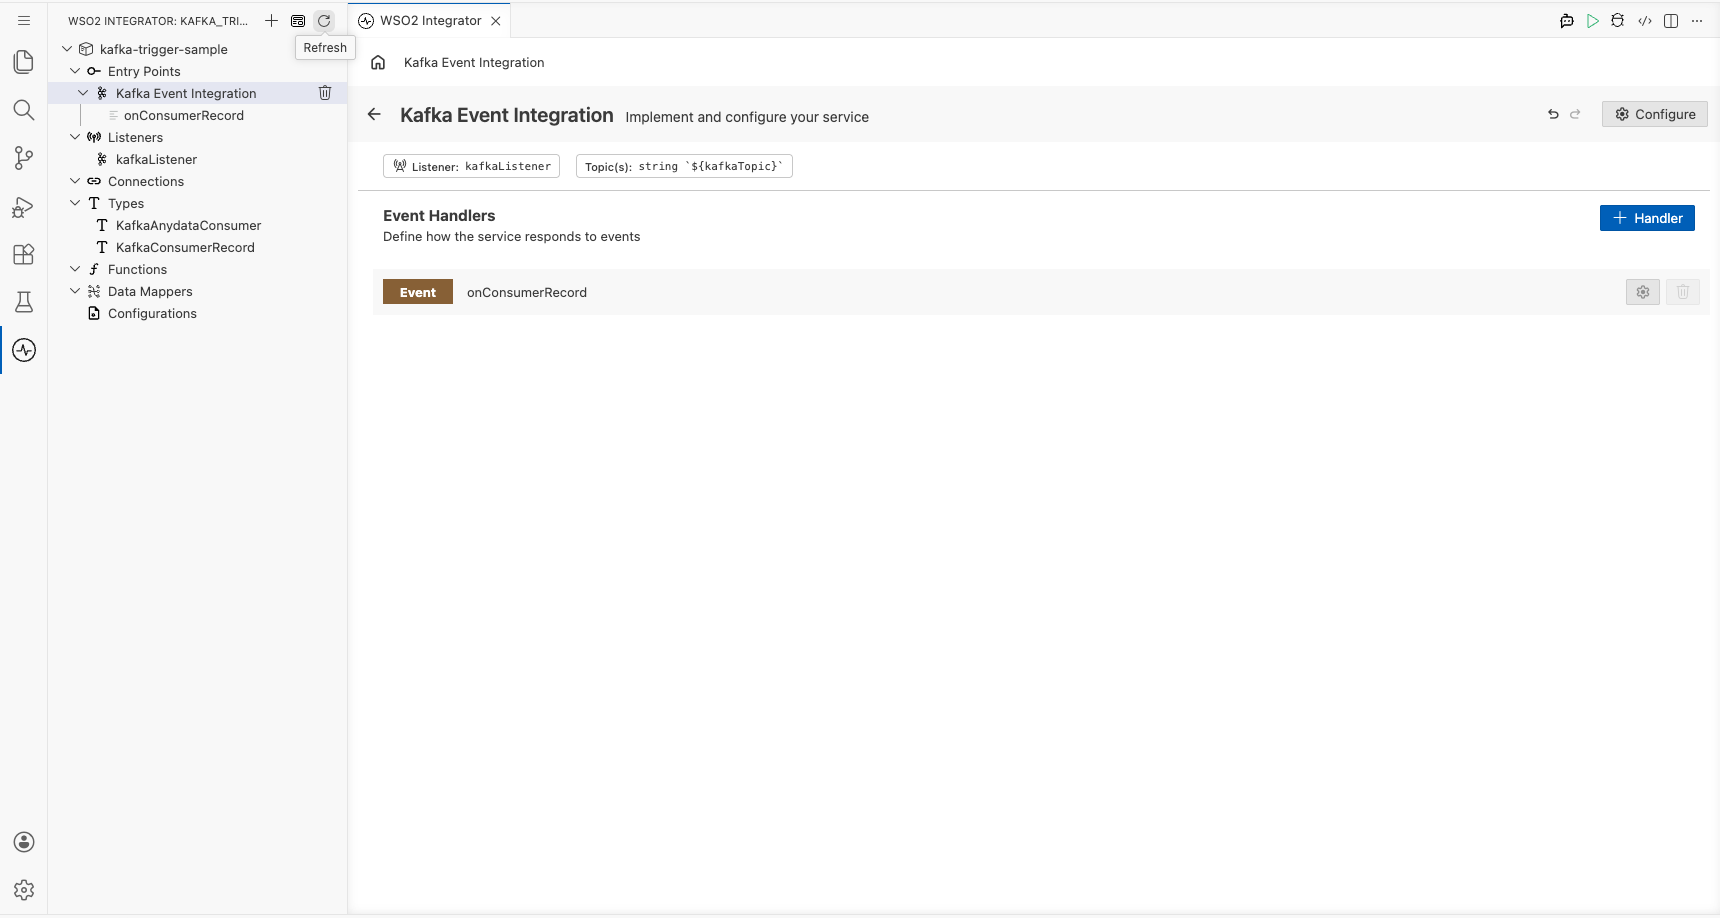
Step 8: Confirm the handler is registered in the Service view
Select the back arrow in the canvas header (or re-select the Kafka trigger service in the project tree) to return to the Service view. The Event Handlers list now shows the registered Event onConsumerRecord handler row.
Running the integration
Step 9: Run the integration and trigger a test Kafka event
- In the WSO2 Integrator panel, select Run to start the integration and wait for the Kafka listener to connect to the broker.
- Trigger a test consumer record using one of the following methods:
- A separate WSO2 Integrator Kafka Producer integration assembled from the same low-code canvas (recommended: use the
ballerinax/kafkaproducer template to publish a message to the same topic). - The Kafka CLI producer: run
kafka-console-producer.shtargeting your broker and topic, then enter a message and press Enter. - The Kafka web console (e.g., Confluent Control Center or Kafdrop) if available in your environment, navigate to the topic and produce a message manually.
- Observe the integration's log output. The consumer record payload JSON should appear in the console as printed by
log:printInfo.