Example
What you'll build
This integration uses the ballerinax/alfresco connector to connect WSO2 Integrator with Alfresco Content Services, enabling automated document and content management operations. The workflow adds a scheduled Automation entry point that periodically calls the Alfresco createNode operation to create a new document node inside a specified parent folder in the Alfresco repository.
Operations used:
- createNode : Creates a new document or folder node inside a specified parent folder in the Alfresco Content Services repository
Architecture
Prerequisites
- A running Alfresco Content Services instance accessible from the integration environment (Community Edition or Enterprise Edition).
- Valid Alfresco credentials (username and password) with permission to create nodes in the target repository.
- The target parent folder's node ID (a UUID) from the Alfresco repository, obtainable from the Alfresco Share URL or REST API.
Setting up the Alfresco integration
New to WSO2 Integrator? Follow the Create a New Integration guide to set up your integration first, then return here to add the connector.
Adding the Alfresco connector
Step 1: Open the connector palette
Select the + Add Connection button in the Connections section of the low-code canvas sidebar to open the connector search palette.
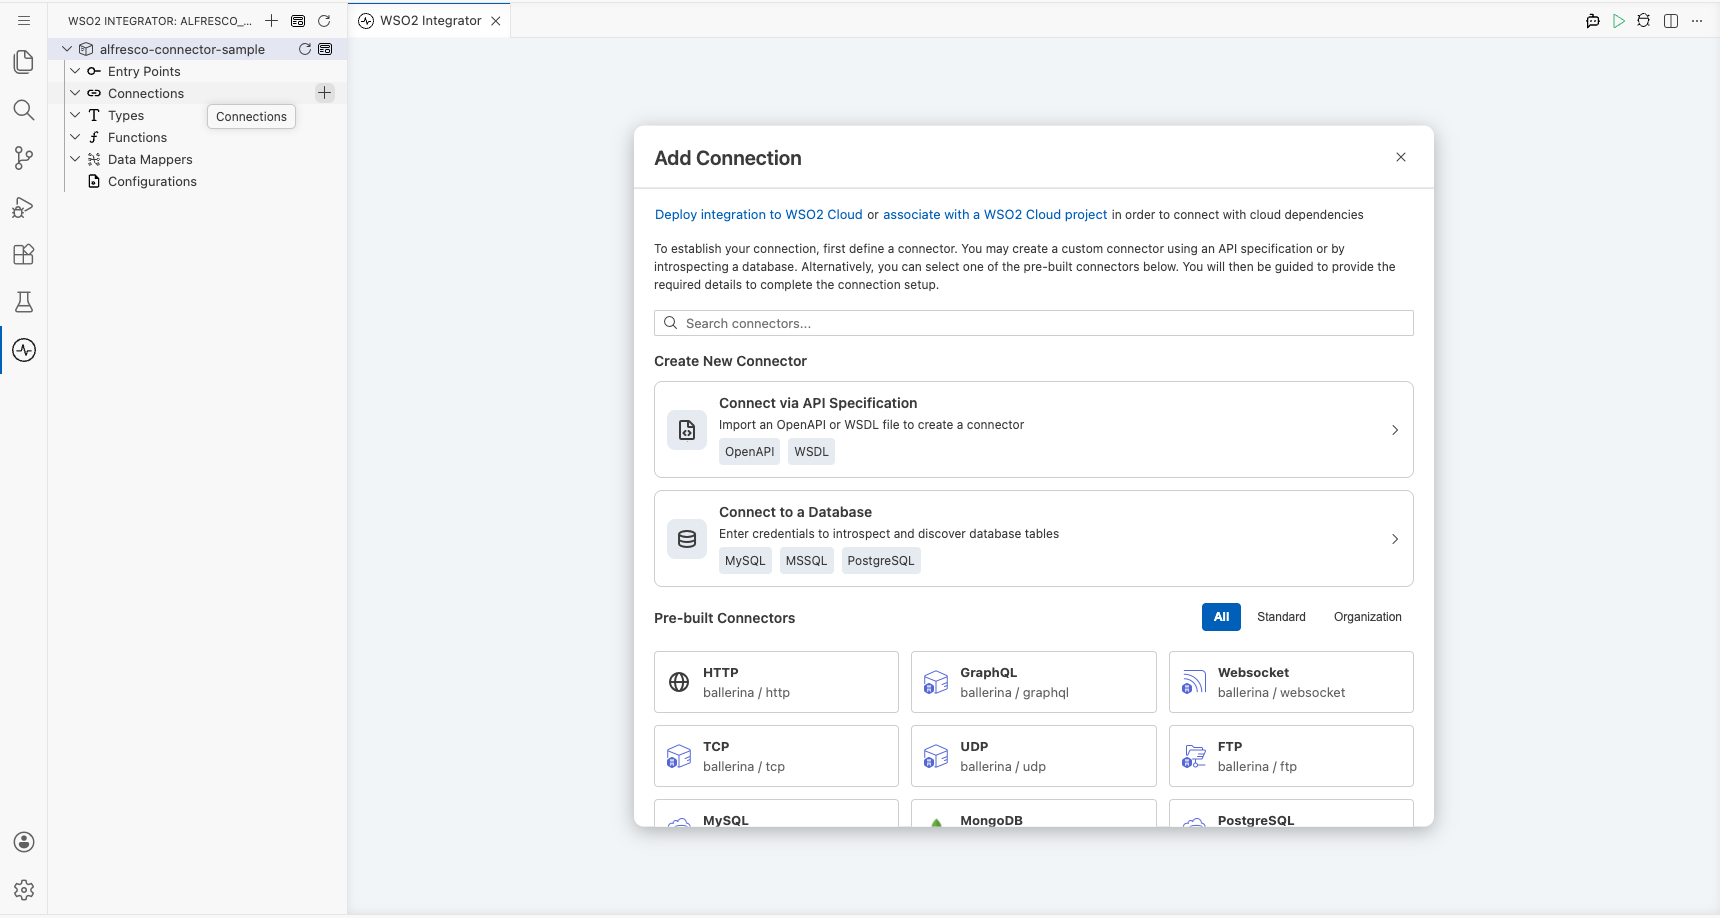
Step 2: Search for and select the Alfresco connector
- Enter "alfresco" in the palette search box to filter the connector list.
- Locate the Alfresco connector card (
ballerinax/alfresco) in the results. - Select the connector card to open the Alfresco connection configuration form.
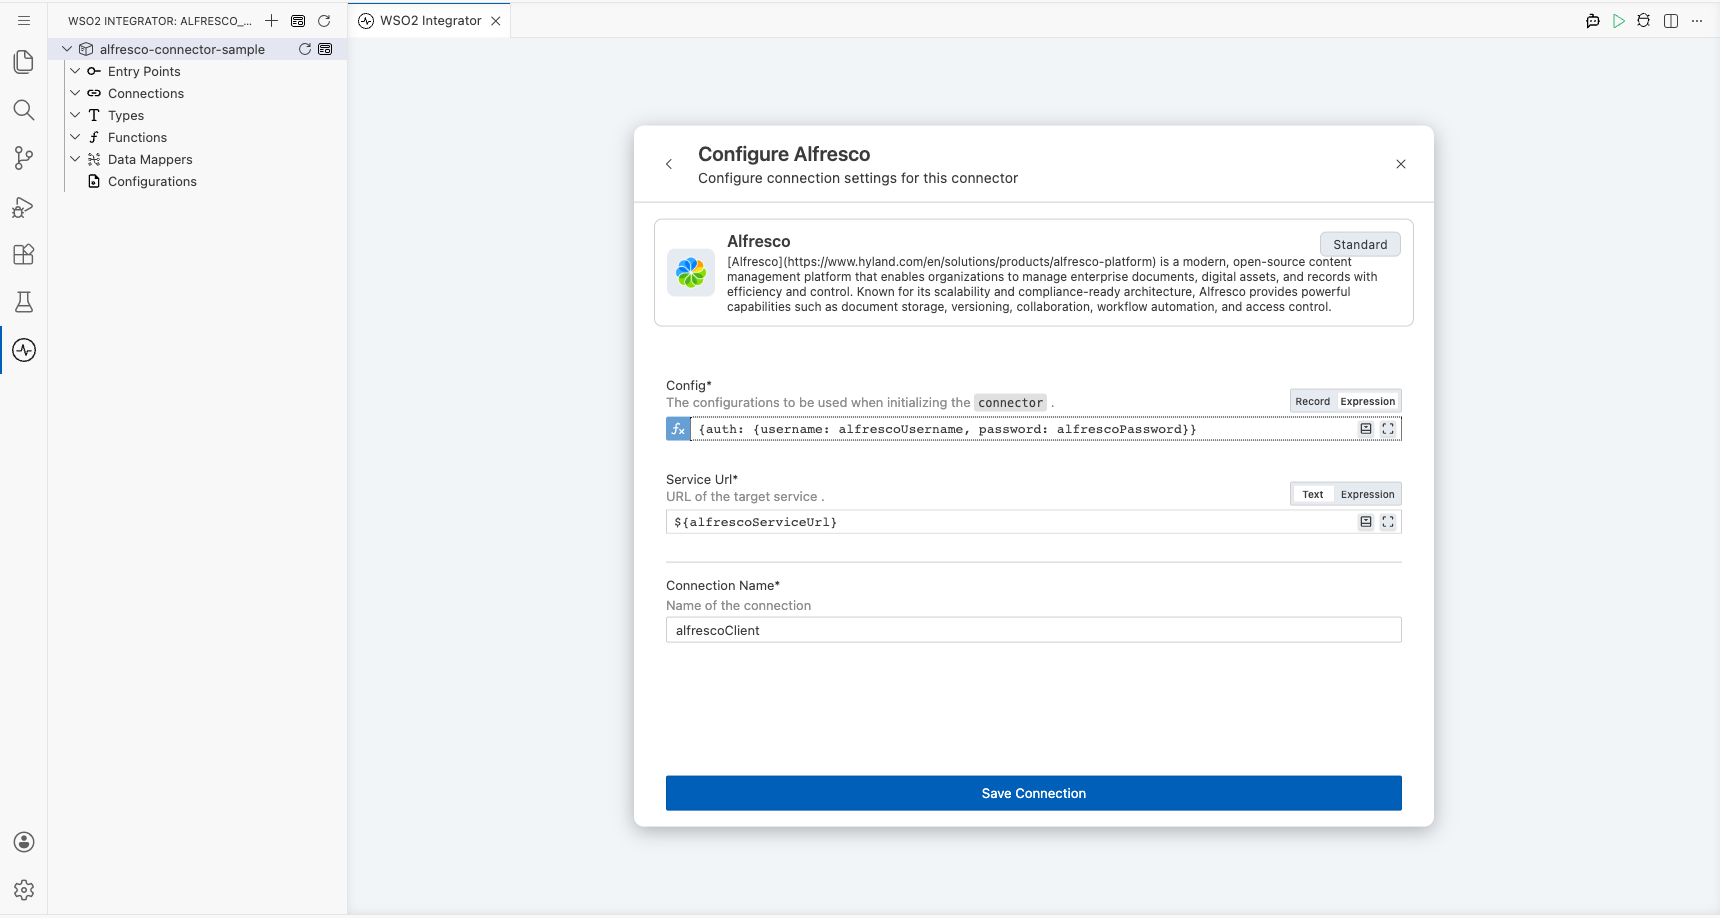
Configuring the Alfresco connection
Step 3: Bind Alfresco connection parameters to configurables
For each connection field, open the helper panel, navigate to the Configurables tab, select + New Configurable, enter the variable name and type, and select Save to auto-inject the configurable into the field. Repeat for every non-boolean field:
- Config : The
ConnectionConfigrecord containing authentication credentials, configured as an expression referencing thealfrescoUsernameandalfrescoPasswordconfigurables - Service Url : The base URL of your Alfresco Content Services instance
- Connection Name : The identifier for this connection instance
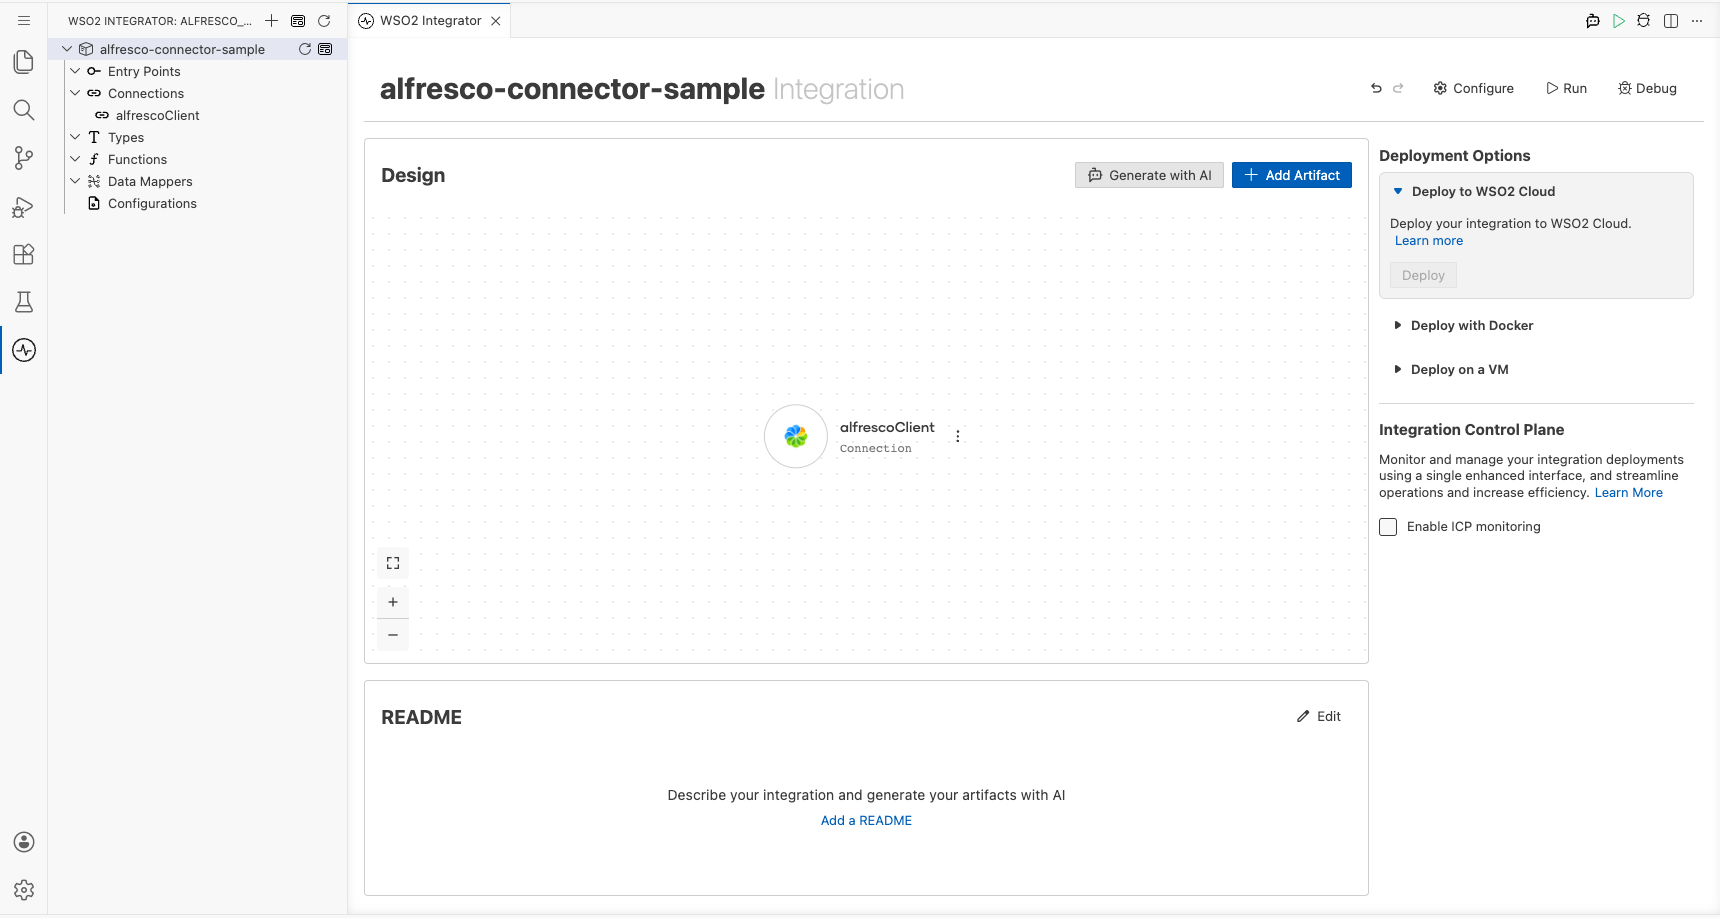
Step 4: Save the Alfresco connection
Select Save to persist the connection configuration. The Alfresco connector node now appears in the Connections panel on the low-code canvas.
Step 5: Set actual values for your configurables
- In the left panel of WSO2 Integrator, select Configurations (listed at the bottom of the project tree, under Data Mappers).
- Set a value for each configurable listed below.
- alfrescoServiceUrl (string) : The full base URL of your Alfresco instance
- alfrescoUsername (string) : Your Alfresco login username
- alfrescoPassword (string) : Your Alfresco login password
- alfrescoParentNodeId (string) : The UUID of the parent folder where the new node will be created
Configuring the Alfresco createNode operation
Step 6: Add an automation entry point
- In the low-code canvas, select + Add Entry Point to add a new Automation entry point.
- Accept the default trigger interval or set a suitable schedule.
- Select Create to confirm the automation and view its flow body on the canvas.
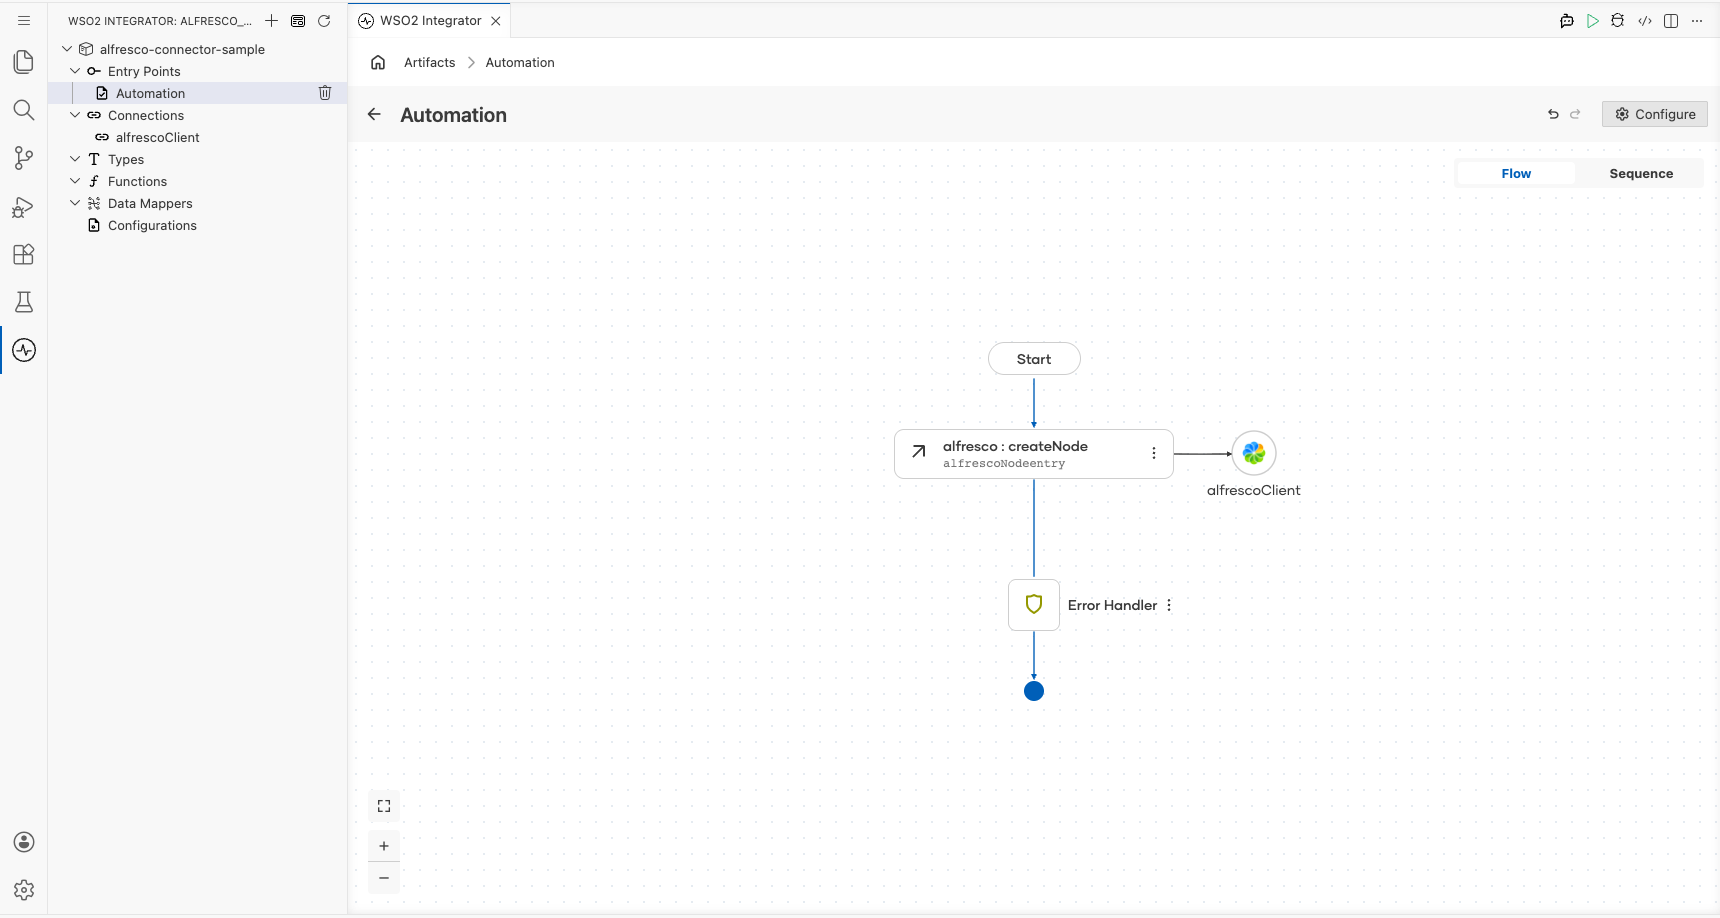
Step 7: Select and configure the createNode operation
- Inside the automation flow body, select the + (Add Step) button between the Start and End nodes to open the step-addition panel.
- Under Connections in the step panel, expand the alfrescoClient connection node to reveal all available Alfresco operations.

- Select createNode from the list of operations, then fill in the operation fields:
- Node Id : The configurable variable
alfrescoParentNodeIdreferencing the parent folder's node UUID - Payload : The
NodeBodyCreaterecord containingname(set to"IntegrationTestDocument") andnodeType(set to"cm:content"for a document) - Result : The output variable that holds the created node response
- Select Save to add the
createNodestep to the automation flow.
Try it yourself
Try this sample in WSO2 Integration Platform.

More code examples
The ballerinax/alfresco connector provides practical examples illustrating usage in various scenarios. Explore these examples, covering the following use cases:
- Upload a Document: Create a new file in Alfresco and upload content to it under a specific folder or path.
- Download a Document: Retrieve a document stored in Alfresco.