Get started with AI Workspace
AI Workspace lets you manage the AI Gateways and large language model (LLM) providers your applications call. It's the control plane that configures those gateways and providers, then deploys the configuration to the gateway.
Overview
This guide walks you through:
- Part 1: Deploy AI Workspace
- Part 2: Connect an AI Gateway
- Part 3: Configure an LLM provider
- Part 4: Run your first prompt
By the end, you'll have a local AI Workspace deployment managing an AI Gateway connected to an LLM provider. You'll send a real chat completion request through the resulting endpoint.
It's written for platform engineers, developers, and anyone evaluating a self-hosted AI governance layer. No prior WSO2 API Platform experience is required. For optional background on the concepts this guide uses, see:
Prerequisites
- Install Docker with the Compose plugin, or another Compose-compatible container runtime such as Podman.
- Free up ports 9643 and 9243 on your machine. If either one is taken, see Change the ports AI Workspace uses.
- Install
curl,unzip, andopenssl. On macOS and most Linux distributions,opensslis already installed. - An API key from an LLM provider. This guide uses Mistral AI as the worked example, but any of the seven built-in providers works. Sign up with your chosen provider and generate a key before Part 3.
This guide shows commands with docker compose. If you use Podman or another Compose-compatible runtime, run the equivalent Compose command instead, such as podman compose up -d.
Part 1: Deploy AI Workspace
This part downloads AI Workspace, runs its setup script, starts the stack with Docker Compose, confirms you can sign in, and previews the first-run tour.
Step 1: Download AI Workspace
Run this command in your terminal to download and unzip AI Workspace:
curl -sLO https://github.com/wso2/api-platform/releases/download/portals/ai-workspace/v1.0.0/wso2apip-ai-workspace-1.0.0.zip && \
unzip wso2apip-ai-workspace-1.0.0.zip
Then move into the extracted directory:
This directory contains the Docker Compose file, configuration templates, database schema scripts, and the setup script you run next.
Step 2: Run the setup script
Run the script once before the first start. The stack never auto-generates keys or certificates. If something a service needs is missing, that service fails closed with a descriptive error rather than starting with a weaker default.
The script prompts for the admin username and password. Press Enter at each prompt to accept admin and a randomly generated password. It provisions:
| Artifact | Location | Purpose |
|---|---|---|
| Transport Layer Security (TLS) certificate | resources/certificates/cert.pem and key.pem |
Self-signed HTTPS pair shared by the services |
| RS256 JSON Web Token (JWT) signing keypair | resources/keys/jwt_private.pem and jwt_public.pem |
The Platform API signs login tokens with the private key, and verifies them with the public key too. The API Portal also verifies them with the public key. There's no shared hash-based message authentication code (HMAC) secret |
| At-rest encryption key | resources/keys/encryption.key |
The Platform API's 32-byte key for encrypting stored secrets, such as LLM provider API keys. Retain it: losing or changing it makes previously-encrypted data unreadable |
| API Portal encryption key | resources/keys/api-portal-encryption.key |
Encrypts the API Portal's subscription and webhook secrets at rest. Provisioned alongside the others even if you don't run the API Portal. Retain it for the same reason |
| API Portal session secret | resources/keys/api-portal-session-secret |
Signs API Portal session cookies. Rotating it only signs users out. Also provisioned regardless of whether you run the API Portal |
| Admin credentials | api-platform.env |
The username and bcrypt password hash used for sign-in |
| Compose defaults | .env |
COMPOSE_PROFILES, which decides the services a plain docker compose up starts, and COMPOSE_PROJECT_NAME, which namespaces this copy's containers, networks, and volumes |
Save the printed password
It's shown exactly once, and only its bcrypt hash is stored afterward. To set a new one, delete both APIP_CP_ADMIN_USERNAME and APIP_CP_ADMIN_PASSWORD_HASH from api-platform.env and rerun ./scripts/setup.sh. Deleting only one of the two leaves a username with no matching hash, so the setup script stops with an error. Delete both together.
Don't delete or edit COMPOSE_PROJECT_NAME
The project name is pinned on the first run and never changes afterward, not on a rerun and not under any flag. The stack's data lives in volumes prefixed with it, so a different name starts the stack with an empty database. To choose the name yourself, set COMPOSE_PROJECT_NAME in the environment for the first run.
Rerunning ./scripts/setup.sh later is safe. See Rerun the setup script for the flags that change what it does.
Running on Windows
Use the PowerShell setup script instead. It takes the same flags and provisions the same files:
Step 3: Start AI Workspace
This starts two containers: platform-api (the backend, on port 9243) and ai-workspace (the user interface (UI) and backend-for-frontend, on port 9643). The ai-workspace container waits for platform-api to report healthy before it starts.
Port 9243 or 9643 already taken?
If the start command fails with a port binding error, identify what's already listening on the default ports:
# Windows PowerShell
Get-NetTCPConnection -State Listen -LocalPort 9643,9243 | Select-Object LocalAddress, LocalPort, OwningProcess
Stop the conflicting service, or remap the host-side ports: mapping in docker-compose.yaml. If you remap the Platform API's port, also make the matching configs/config.toml change so the gateway setup commands in Part 2 carry the new port: see Change the ports AI Workspace uses. Use the new number wherever this guide shows 9243 or 9643, such as the health checks in Step 4 and the sign-in URL in Step 5.
Step 4: Verify the installation
Confirm both services report healthy:
The -k flag skips certificate verification, which is fine here because the setup script's certificate is self-signed. Don't carry -k into a production script against a certificate you expect to be trusted.
Each command returns {"status":"ok"}. If either fails, check docker compose ps for the container's status and docker compose logs for details.
Step 5: Sign in to AI Workspace
Open https://localhost:9643 in your browser.
Your browser warns that the connection isn't private. This is expected, because the certificate setup.sh generated is self-signed. Click Advanced, then Proceed, to continue.
Sign in with the Username and Password fields, using the admin credentials setup.sh printed in Step 2:
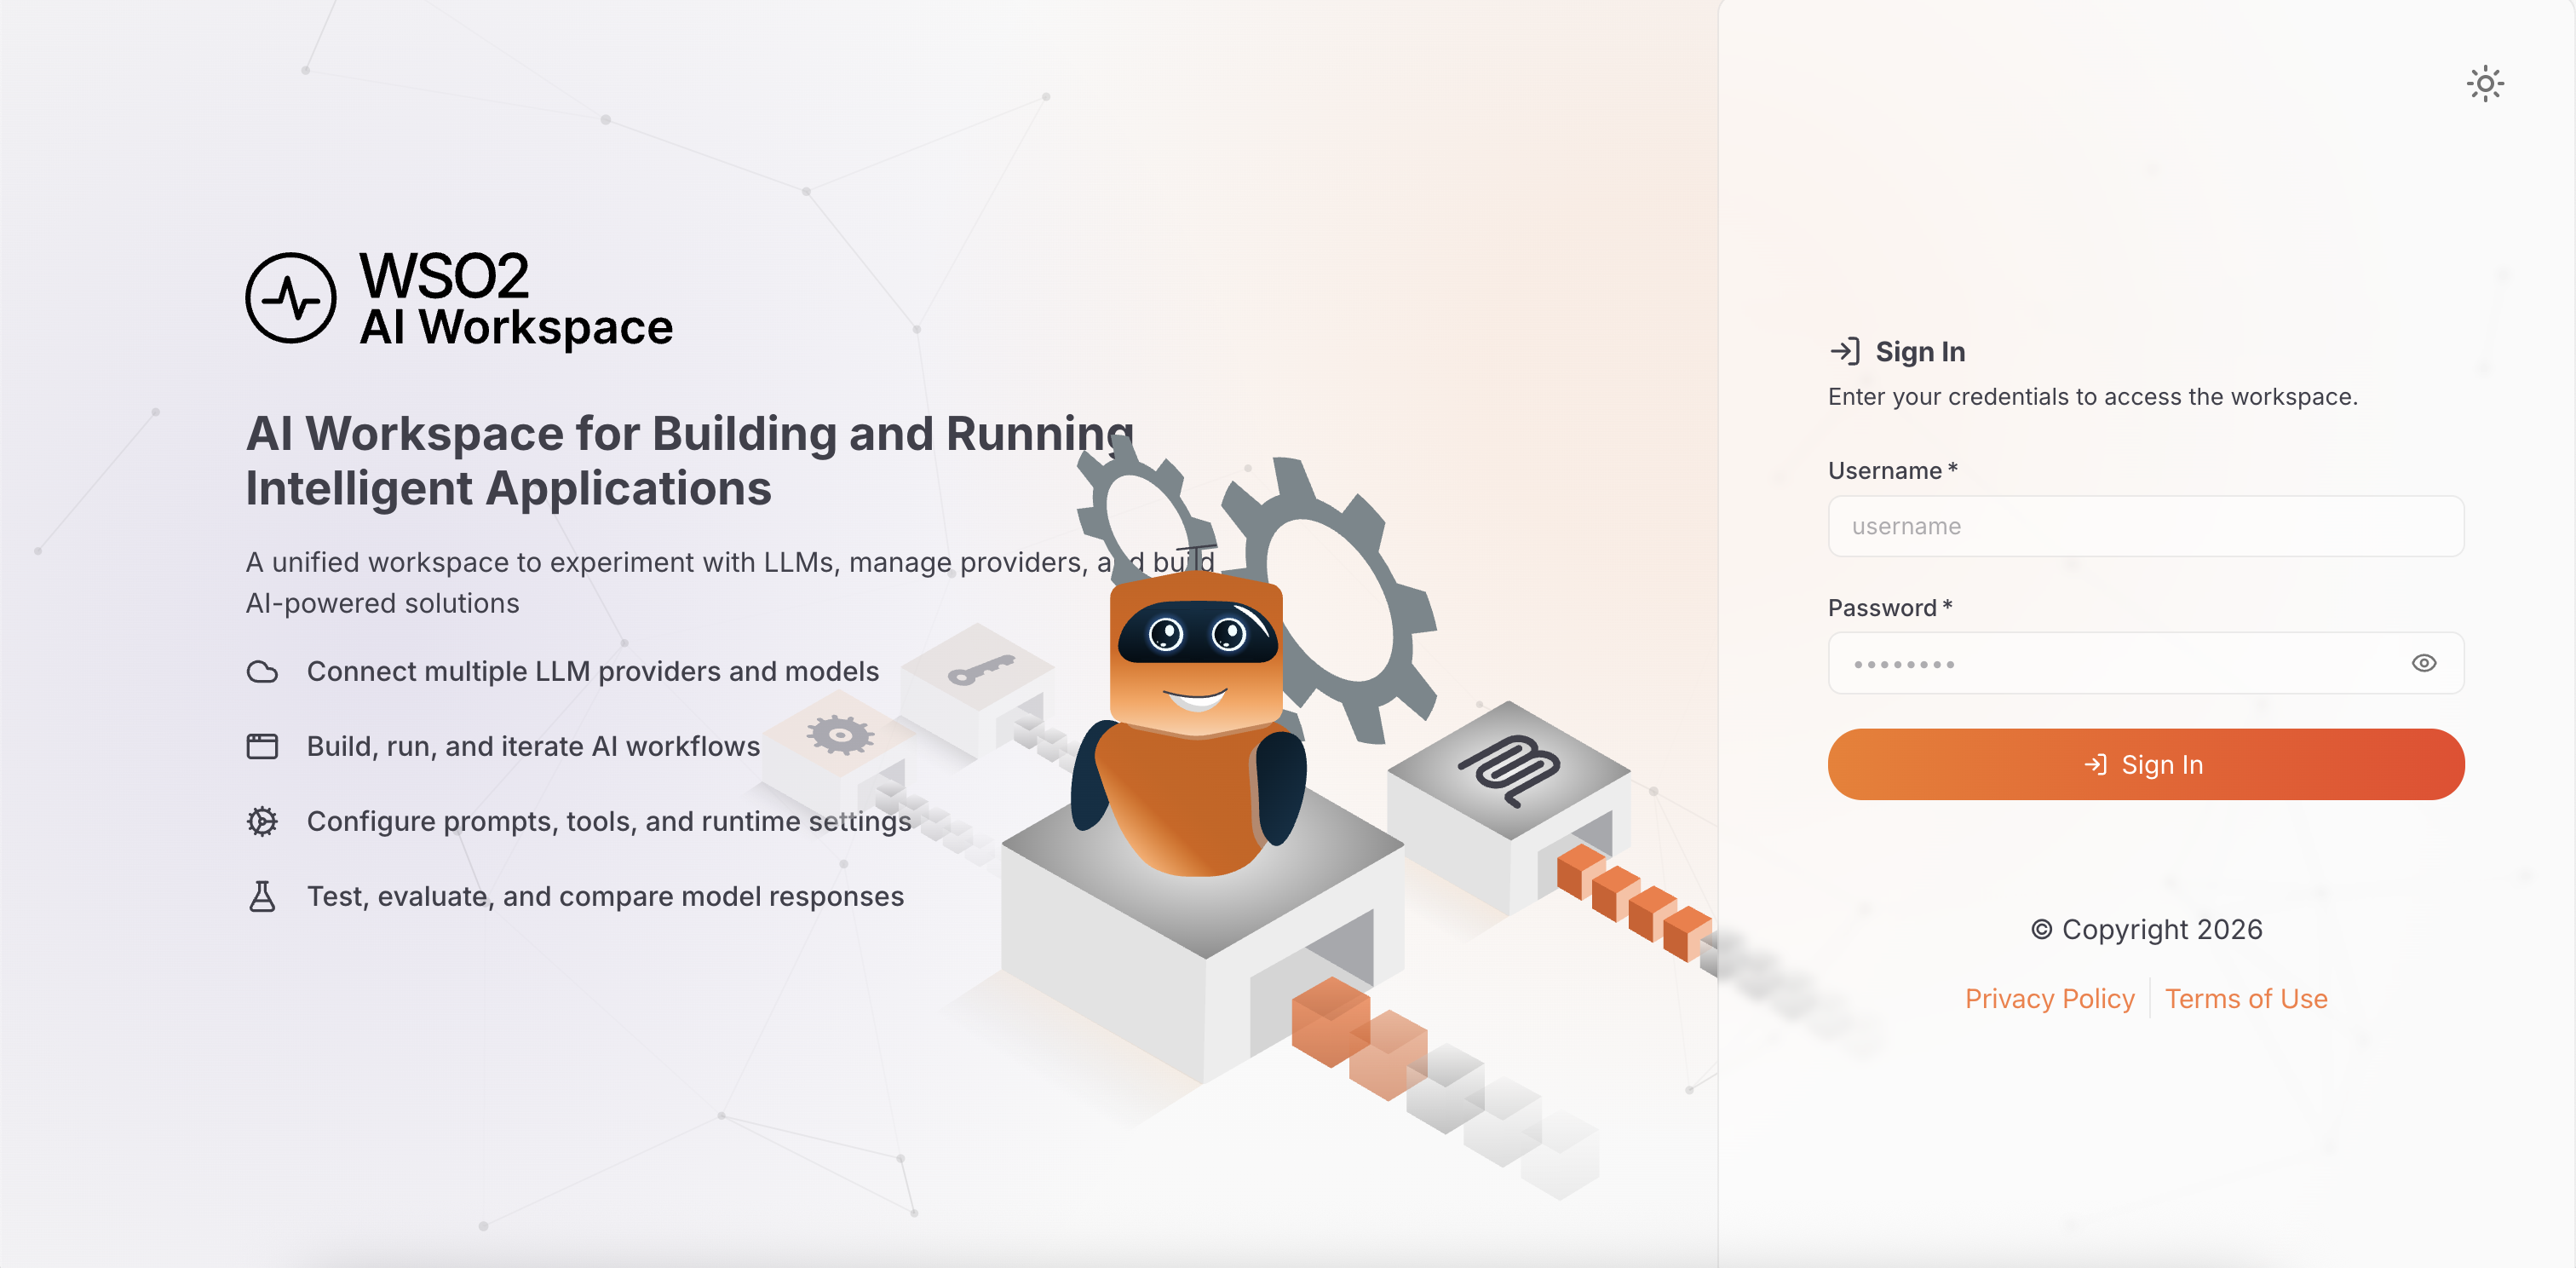
This file-based sign-in is intended for trying out AI Workspace, not for production or shared use. It supports a single organization with a static, manually managed user list. Before you share this instance with a team, connect an identity provider instead. See Authentication in AI Workspace.
Step 6: Take the first-run tour
On first sign-in, AI Workspace opens on a Quick Start page. A short tour introduces LLM providers and Model Context Protocol (MCP) proxies.
Click Got it to dismiss the tour. The page then asks What would you like to set up first? and offers three starting points:
- Expose My LLM Providers Securely (Recommended)
- Manage AI Gateways
- Publish my MCP servers securely
Each is a guided version of the steps this guide walks through by hand, with a What you'll do preview before you commit to one. The tour looks like this:
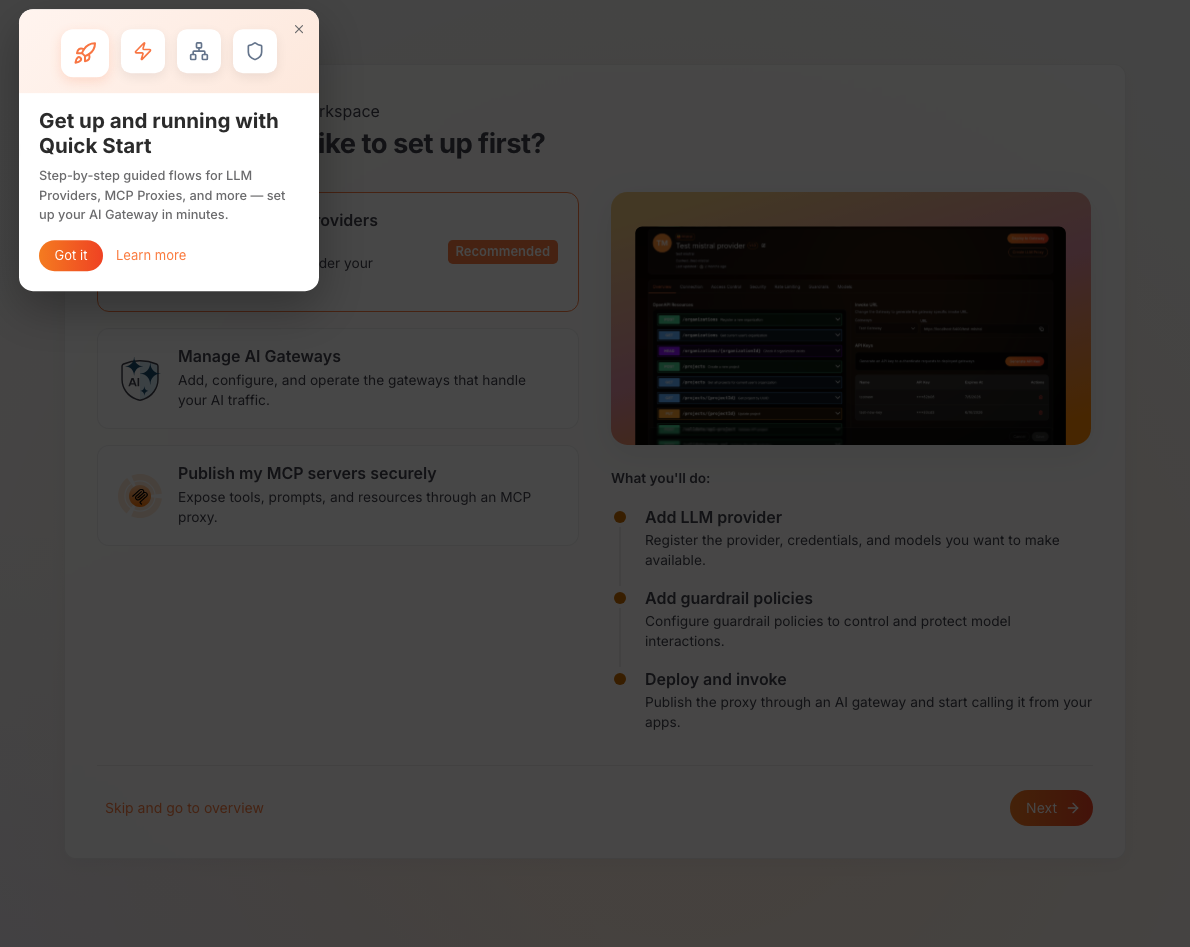
This guide doesn't follow the wizard directly. It walks through the same underlying steps with enough detail to explain what each screen and field does. Click Skip and go to overview if you'd rather open the Overview page instead.
Part 2: Connect an AI Gateway
An AI Gateway is the runtime that routes requests to LLM providers. You need at least one connected and active before you can send a real request. This part registers a gateway in AI Workspace, then installs and starts its runtime so it shows a status of Active.
Step 7: Register the gateway
- Navigate to AI Gateways in the left navigation menu.
- Click Add AI Gateway.
-
Fill in the gateway details:
- Gateway Version: leave this at its default selection.
- Name: a unique name, for example
local-test-gateway. - Description: optional.
- URL: the address the gateway is reachable at once it's running, for example
https://localhost:8443. AI Workspace uses this to build the Invoke URL you'll call from your own terminal in Part 4. Use an address your terminal can actually reach, nothost.docker.internal. That hostname only resolves from inside a container, not from your host machine.
-
Click Add Gateway.
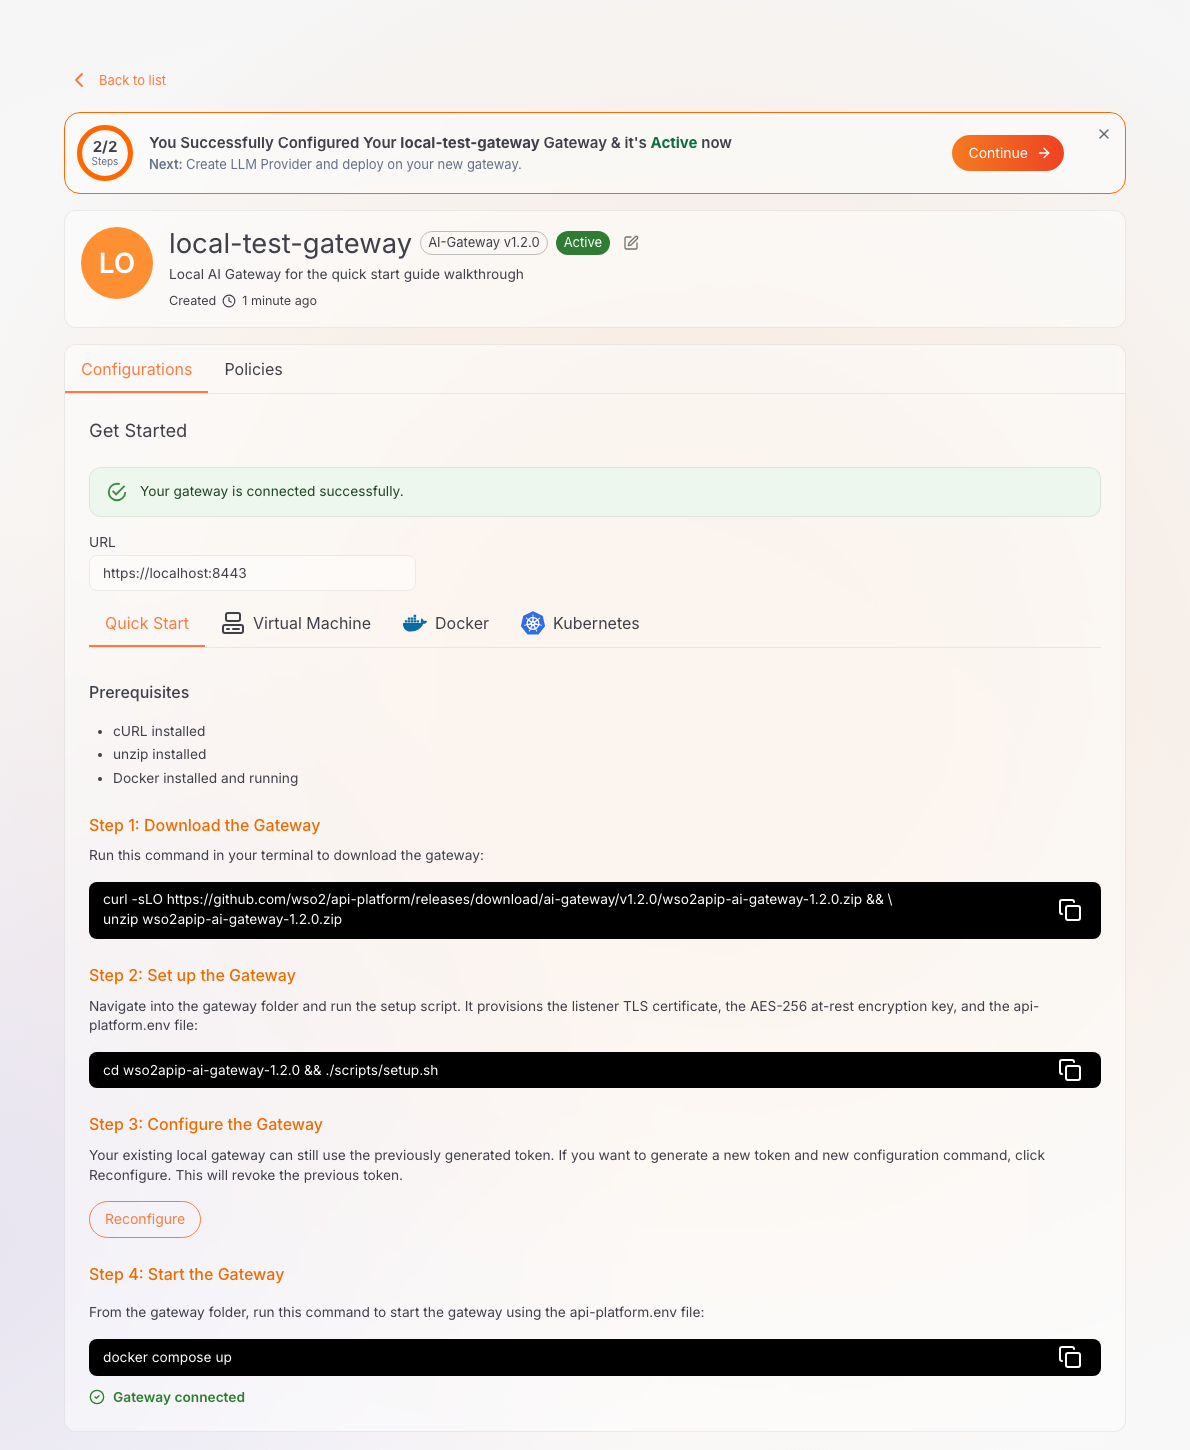
AI Workspace creates the gateway with a status of Inactive and opens a Get Started section. This section carries the gateway installation commands for four methods:
- Quick Start
- Virtual Machine
- Docker
- Kubernetes
Its Configure the gateway command includes a single-use registration token. This guide uses Quick Start. For the other methods, see Set up an AI Gateway.
The registration token is issued once
In Step 8, copy the Configure the gateway command with its Copy button so you capture the token with it. If you lose the token, click Reconfigure on the gateway's page to issue a new one. Reconfiguring revokes the previous token.
Step 8: Install and start the gateway runtime
-
Download the gateway:
-
Set up the gateway. This one-time script provisions the Advanced Encryption Standard (AES)-256 at-rest encryption key, the gateway's HTTPS listener certificate, the gateway-controller admin credentials, and
api-platform.env. Like AI Workspace, the gateway fails closed if any of these is missing. The admin password is printed once. Copy it: it authenticates directly to the gateway controller, which this guide doesn't use again. -
Configure the gateway. In the Get Started section, click the Copy button on the Configure the gateway command, then run it from the gateway directory. It appends the Platform API address and your single-use registration token to
api-platform.env:cat >> api-platform.env << 'ENVFILE' APIP_GW_CONTROLLER_CONTROLPLANE_HOST=host.docker.internal:9243 APIP_GW_CONTROLLER_CONTROLPLANE_TOKEN=<your-gateway-token> ENVFILEThe command you copy has your real token in place of
<your-gateway-token>. The control plane host is a barehost:port, with no scheme. Unlike the earlier warning abouthost.docker.internal, this is the reverse direction: the gateway container reaches out to the Platform API on your host machine. That's exactly what that hostname is for.Running on Windows
The heredoc above (
<< 'ENVFILE') doesn't work in PowerShell. Either run this step from Git Bash or WSL, or openapi-platform.envin a text editor and add the two lines directly. -
Start the gateway. It runs in the foreground, so use a second terminal for the rest of this guide, or add
-dto start it in the background.
Give the gateway a few seconds to start and register itself. Back in AI Workspace, the gateway's status changes from Inactive to Active:
Part 3: Configure an LLM provider
An LLM provider connects AI Workspace to an AI service platform, such as OpenAI, Anthropic, or Mistral AI. This part creates a provider, allows a model, deploys the provider to your gateway, and generates an API key.
Step 9: Configure an LLM provider
This section configures Mistral AI as a worked example. The same steps apply to any of the seven built-in providers.
- Navigate to LLM Providers in the left navigation menu, then click Create Provider.
- Select a provider tile. The built-in options are Anthropic, AWS Bedrock, Azure AI Foundry, Azure OpenAI, Gemini, Mistral, and OpenAI. Select Mistral.
-
Fill in the provider form:
- Name: for example,
Mistral Provider. - Version: pre-filled, for example
v1.0. - Description: optional.
- Context: the URL path segment this provider is reachable under, for example
/mistral. - API Key: your Mistral AI API key. Mistral's endpoint URL is pre-configured automatically.
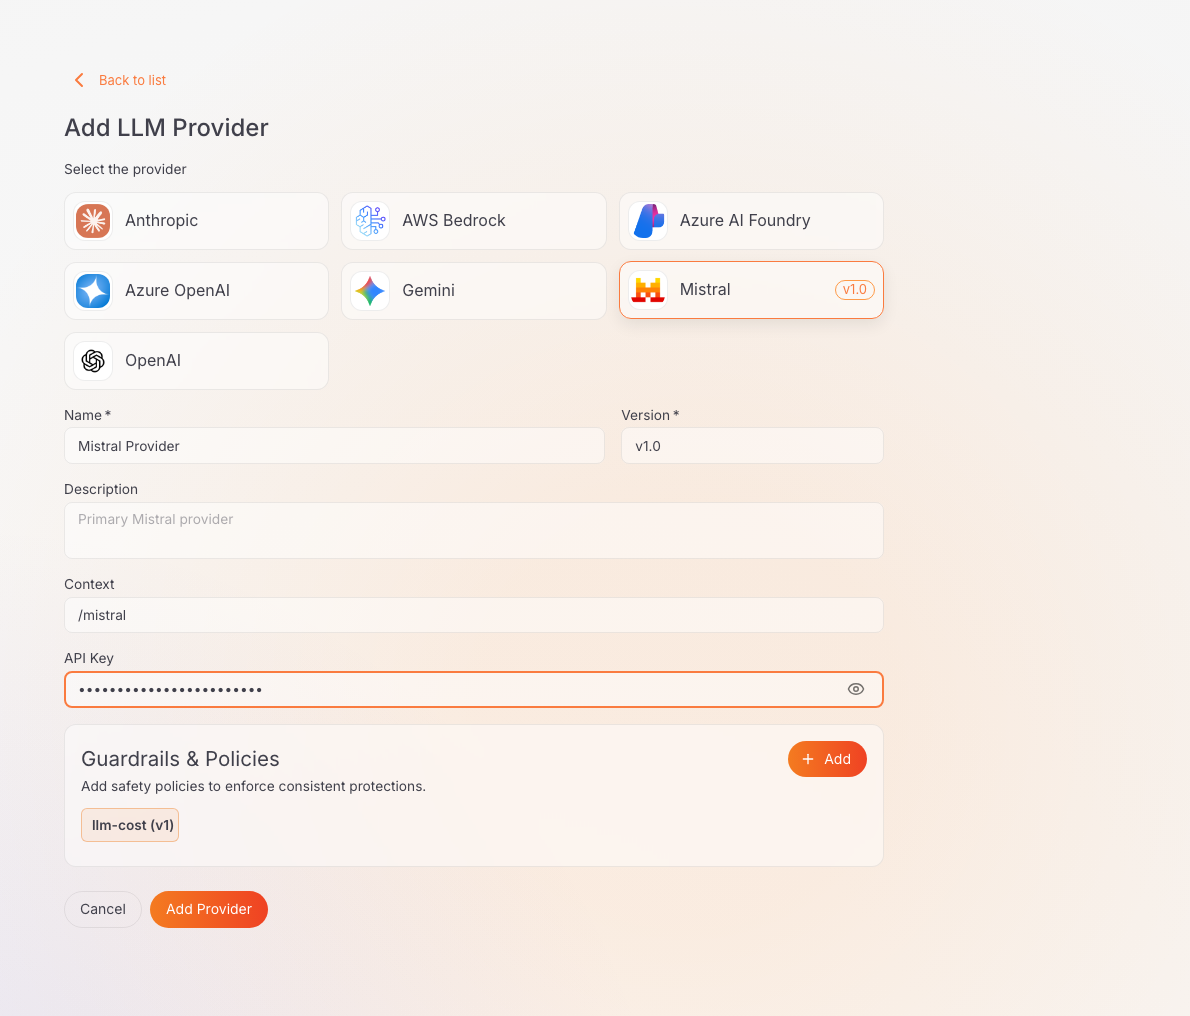
The Guardrails & Policies panel pre-selects a suggested
llm-costguardrail. Leave it, remove it, or add more later from the provider's Guardrails & Policies tab. See Policies overview. - Name: for example,
-
Click Add Provider.
AI Workspace encrypts the API key before storing it. The plaintext value is never saved. See Secrets management for how that works. AI Workspace also imports the provider's OpenAPI specification automatically. It shows a progress tracker with three remaining steps: Add Guardrails, Deploy to Gateway, and Consume LLM Provider. For other providers, including the Azure OpenAI, Azure AI Foundry, and AWS Bedrock fields, see Configure an LLM provider.
Step 10: Add a model
The provider's Models tab lists the models available through it.
- On the provider's page, click the Models tab.
-
Confirm
mistral-small-latestis already listed as a chip. Mistral ships with a few common models available by default. To add a different model instead, type its ID into the input field and press Enter to add it as a chip. -
Click Save.
Step 11: Deploy the provider to your gateway
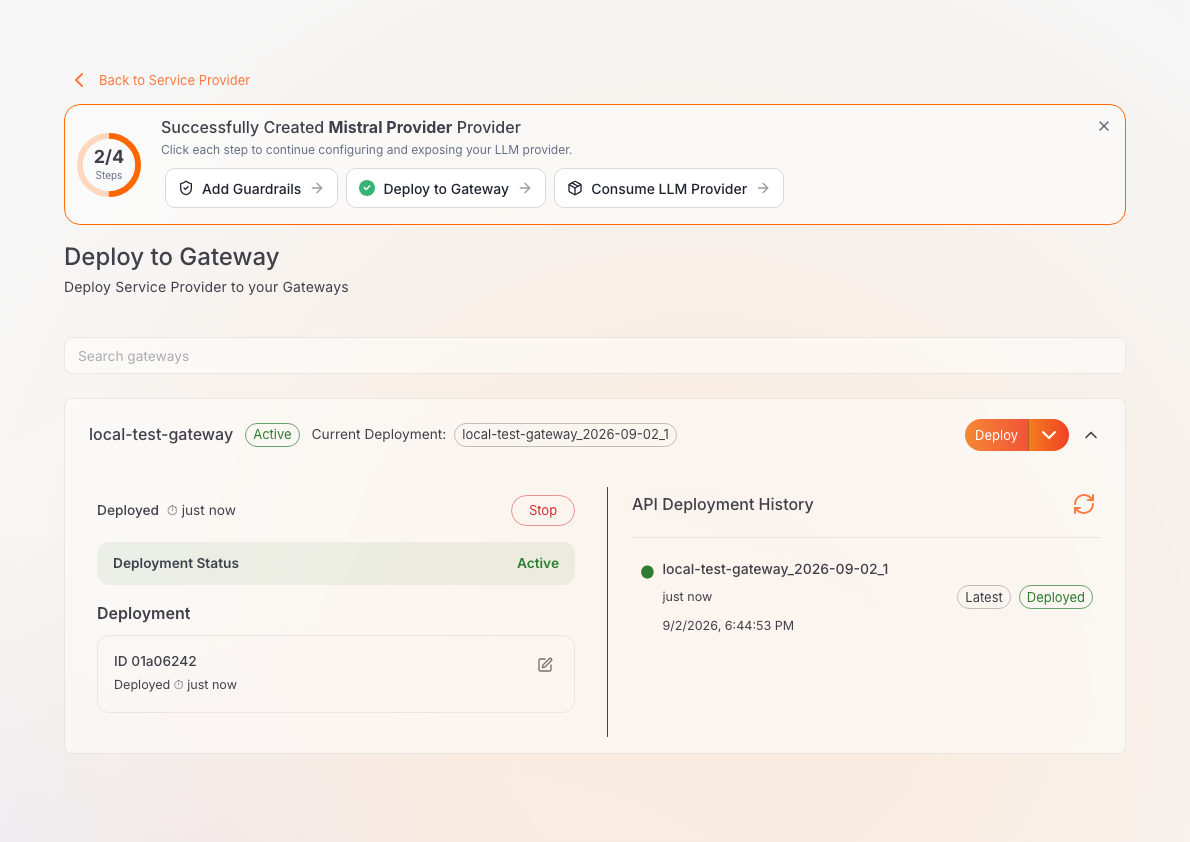
- On the provider's page, click Deploy to Gateway in the top right corner. This opens a dedicated deployment page listing your gateways.
- Confirm the gateway from Part 2 shows a status of Active, then click Deploy next to it.
The deployment status changes to Active within a few seconds, without needing to refresh the page:
Step 12: Generate an API key
The API Keys section on the provider's Overview tab only appears once the provider is deployed to at least one gateway. You won't see it before this point.
- Go back to the provider's Overview tab.
- Under Invoke URL, select your gateway from the Gateways dropdown and copy the URL shown, for example
https://localhost:8443/mistral. - Under API Keys, click Generate API Key.
-
Enter a Key Name, for example
quickstart-test-key, and click Generate.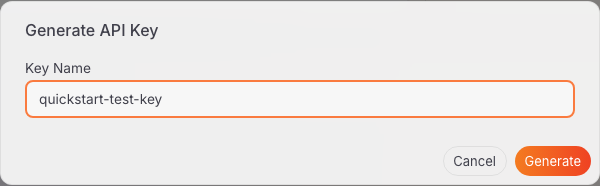
Copy the key
An API key is displayed only once, in a dialog that also shows a ready-to-run curl command using one of the provider's models. Store the key securely immediately. You can't retrieve it again, though you can always generate a new one.
Part 4: Run your first prompt
This part sends a real chat completion request through your deployed provider and confirms the response.
All requests to the gateway authenticate with the X-API-Key header by default. This is the same header named on the provider's Security tab. Mistral AI exposes an OpenAI-compatible API at /v1, so append that to the Invoke URL to reach the chat completions resource.
The following example assumes the Mistral AI provider from Part 3. If you configured a different kind of provider instead, this exact request path and body don't apply. Anthropic, Gemini, Azure OpenAI, and Azure AI Foundry each use their own native request shape. See Invoke providers and proxies via SDKs for the equivalent call. AWS Bedrock isn't covered there; check your model's Bedrock API documentation for the request format.
curl -X POST "<INVOKE_URL>/v1/chat/completions" \
  -H "Content-Type: application/json" \
  -H "X-API-Key: <YOUR_GENERATED_API_KEY>" \
  -d '{
    "model": "mistral-small-latest",
    "messages": [
      { "role": "user", "content": "Say hello in exactly five words." }
    ]
  }'
A successful response returns 200 OK with a chat completion:
{
  "id": "7e22aefb0dac4c3ba1080d34ad8a3da5",
  "object": "chat.completion",
  "created": 1786112464,
  "model": "mistral-small-latest",
  "choices": [
    {
      "index": 0,
      "finish_reason": "stop",
      "message": {
        "role": "assistant",
        "content": "Hello there, how are you?"
      }
    }
  ],
  "usage": { "prompt_tokens": 10, "completion_tokens": 9, "total_tokens": 19 }
}
Your response's id, created timestamp, and content differ. That's expected. What matters is a 200 status and a choices array with a real model reply.
At this point, you have a local AI Workspace deployment managing an AI Gateway connected to Mistral AI. You just sent a real chat completion through that gateway with a key you generated yourself. AI Workspace, the AI Gateway, and the upstream provider all worked together to complete that request.
Verify everything works end to end
To confirm every piece is in place:
- Both AI Workspace containers (
platform-apiandai-workspace) report healthy. - You can sign in to the AI Workspace UI with the admin credentials
setup.shgenerated. - An AI Gateway is registered and shows a status of Active.
- An LLM provider is configured with at least one model on its Models tab.
- The provider is deployed to your gateway, with a deployment status of Active.
- A generated API key successfully authenticates a real chat completion request through the gateway.
Stopping AI Workspace
When you're done, you have two options, from the directory you extracted in Step 1:
Keep data and configuration
This stops the containers but preserves the platform-api-data volume. Every gateway, provider, and proxy you configured is still there when you run docker compose up -d again.
Delete data for a fresh start
This also removes the platform-api-data volume, so the next start begins with no gateways, providers, or proxies configured. api-platform.env isn't part of that volume, so your admin credentials survive unchanged. To also get a new admin password, delete APIP_CP_ADMIN_USERNAME and APIP_CP_ADMIN_PASSWORD_HASH from api-platform.env first, then rerun ./scripts/setup.sh.
The AI Gateway you connected in Part 2 is a separate Docker Compose stack, in its own directory. Stop it the same way, from there.
Next steps
- Manage an LLM provider: configure connection, access control, security, rate limiting, and guardrails for the provider you just created
- Configure an App LLM Proxy: add an application-specific endpoint on top of a provider, with its own guardrails and access rules
- Manage an App LLM Proxy: configure provider settings, resources, security, and guardrails for an existing proxy
- Invoke providers and proxies via SDKs: call your deployed endpoint from the OpenAI, Anthropic, Gemini, Mistral, Azure OpenAI (including Azure AI Foundry), or LangChain software development kits (SDKs)
- MCP Proxies overview: govern access to a Model Context Protocol (MCP) server through the same gateway
- GenAI applications: group API keys under a named application for usage visibility and governance
- Change the ports AI Workspace uses: remap the default
9643and9243ports - Connect a database to the Platform API: move off the default SQLite store to PostgreSQL or SQL Server for production
- Authentication in AI Workspace: connect an identity provider before sharing this instance with a team
- Configure inbound authentication: change the header name your applications use to call a provider or proxy
- AI Workspace CI/CD overview: manage providers and proxies as version-controlled files with the
apcommand-line interface (CLI) - Production deployment overview: take this deployment to a virtual machine or Kubernetes, with high availability and hardening
- Troubleshoot AI Workspace: fixes for the most common setup problems