Expose a multi-step API workflow as an MCP tool
Overview
A REST API can be given to an AI agent as one MCP tool per endpoint. That's manageable for a small API. It gets harder to rely on as the API grows, and it falls short whenever the calls have to happen in a particular order.
- The order of the calls has nowhere to live. It survives only in the prompt you wrote for the agent, so you can't version it, test it, or review it.
- The tool list fills up. Every tool's schema is sent to the model on every request, and similar tools compete, so the model picks the wrong one or calls them out of order.
- A half-finished sequence becomes the agent's problem. The reservation succeeds, the order fails, and stock is held for an order that was never created.
The alternative: describe the sequence once as a workflow, and give the agent a single tool that runs it.
In this guide, you build one tool called place_an_order that runs three calls
in order:
| Step | Call | Description |
|---|---|---|
| 1 | Check stock for the SKU | No point reserving what isn't there |
| 2 | Reserve the quantity | Holds the stock while the order is created |
| 3 | Create the order | Needs the reservation identifier from step 2 |
The agent makes one call and never sees the three.
To build it, you:
- Take three APIs and describe an ordering sequence over them in an Arazzo specification.
- Generate an MCP server from that specification.
- Expose that server through AI Workspace as a governed MCP proxy.
Learning objectives
By the end of this guide, you understand:
- Why a call sequence is better described once, as a workflow, than left for an agent to work out each time.
- How Arazzo syntax passes values between steps and decides when a step runs.
- Why one workflow becomes exactly one MCP tool, and where that tool's description and input schema come from.
- What the gateway adds once the proxy is deployed: authentication, policies and observability.
Prerequisites
- The APIs the workflow calls, and their OpenAPI definitions.
- Docker, to build and run the generated server.
arazzo-mcp-gen, from the releases page.- Access to AI Workspace with the Admin or Developer role.
- An AI Gateway you have set up and that shows Active.
Step 1: Describe the sequence in Arazzo
Create a folder holding your OpenAPI definitions and one Arazzo file.
The Arazzo file names the APIs, declares the inputs the sequence takes, and lists the steps that run:
arazzo: "1.0.0"

info:
  title: Place an Order
  summary: Check stock, reserve it, and create the order.
  version: "1.0.0"

sourceDescriptions:
  - name: inventoryApi
    url: inventory-openapi.yaml
    type: openapi
  - name: reservationsApi
    url: reservations-openapi.yaml
    type: openapi
  - name: ordersApi
    url: orders-openapi.yaml
    type: openapi

workflows:
  - workflowId: placeAnOrder
    summary: Check stock for a SKU, reserve it, and create an order.
    description: >
      Use this when a customer wants to buy a product. Provide the SKU, the
      quantity, and the customer identifier. The workflow returns the order
      identifier and its status, or ends without ordering if stock is short.
    inputs:
      type: object
      required: [sku, quantity, customerId]
      properties:
        sku:
          type: string
          description: The product identifier to order.
        quantity:
          type: integer
          description: How many units the customer wants.
        customerId:
          type: string
          description: The customer placing the order.

    steps:
      - stepId: checkAvailability
        description: Check how many units are in stock.
        operationId: checkStock
        parameters:
          - name: sku
            in: path
            value: $inputs.sku
        successCriteria:
          - condition: $statusCode == 200
        outputs:
          available: $response.body#/available
        onSuccess:
          - name: enoughStockSoReserve
            type: goto
            stepId: reserveStock
            criteria:
              - context: $response.body
                condition: $.available >= 1
                type: jsonpath

      - stepId: reserveStock
        description: Reserve the requested quantity.
        operationId: reserveStock
        requestBody:
          contentType: application/json
          payload:
            sku: $inputs.sku
            quantity: $inputs.quantity
        successCriteria:
          - condition: $statusCode == 201
        outputs:
          reservationId: $response.body#/reservationId

      - stepId: createOrder
        description: Create the order against the reservation.
        operationId: createOrder
        requestBody:
          contentType: application/json
          payload:
            reservationId: $steps.reserveStock.outputs.reservationId
            customerId: $inputs.customerId
        successCriteria:
          - condition: $statusCode == 201
        outputs:
          orderId: $response.body#/orderId
          status: $response.body#/status

    outputs:
      orderId: $steps.createOrder.outputs.orderId
      status: $steps.createOrder.outputs.status
Each step in steps names an operation by its operationId, says what counts as
success, and captures the values later steps need.
Three syntax patterns pass data and direct execution between steps:
$inputs.skupasses a caller-supplied value into a step.$steps.reserveStock.outputs.reservationIdpasses a value from an earlier step into a later one. This is what the agent no longer has to track.onSuccesswith agotomoves forward only when the condition holds. If stock is short, the workflow ends without reserving or ordering.
Validate before generating anything:
Tip
The workflow's summary and description become the tool description an AI
model reads when it chooses a tool. Write them as guidance to a colleague.
Step 2: Generate the MCP server
This produces mcp_server.py, a Dockerfile, and a built Docker image. Each
workflow becomes one tool, so placeAnOrder becomes place_an_order.
Step 3: Run the MCP server
Confirm it answers:
curl -X POST http://localhost:5000/mcp \
  -H 'Content-Type: application/json' \
  -H 'Accept: application/json, text/event-stream' \
  -d '{"jsonrpc":"2.0","id":1,"method":"initialize","params":{"protocolVersion":"2025-06-18","capabilities":{},"clientInfo":{"name":"probe","version":"1.0"}}}'
The server must be reachable from the internet
AI Workspace connects to this URL to fetch the tool list, and the gateway
calls it at runtime, so a server on localhost won't work.
To give it a public address, deploy the image on Choreo. See
Develop a service with Docker.
Step 4: Create the MCP proxy
- In AI Workspace, click MCP > MCP Proxies in the left navigation menu.
- Click Create MCP Proxy.
-
Enter your MCP server URL, ending in
/mcp. AI Workspace connects to it and lists the tools it finds. Wait forplace_an_orderto appear before continuing.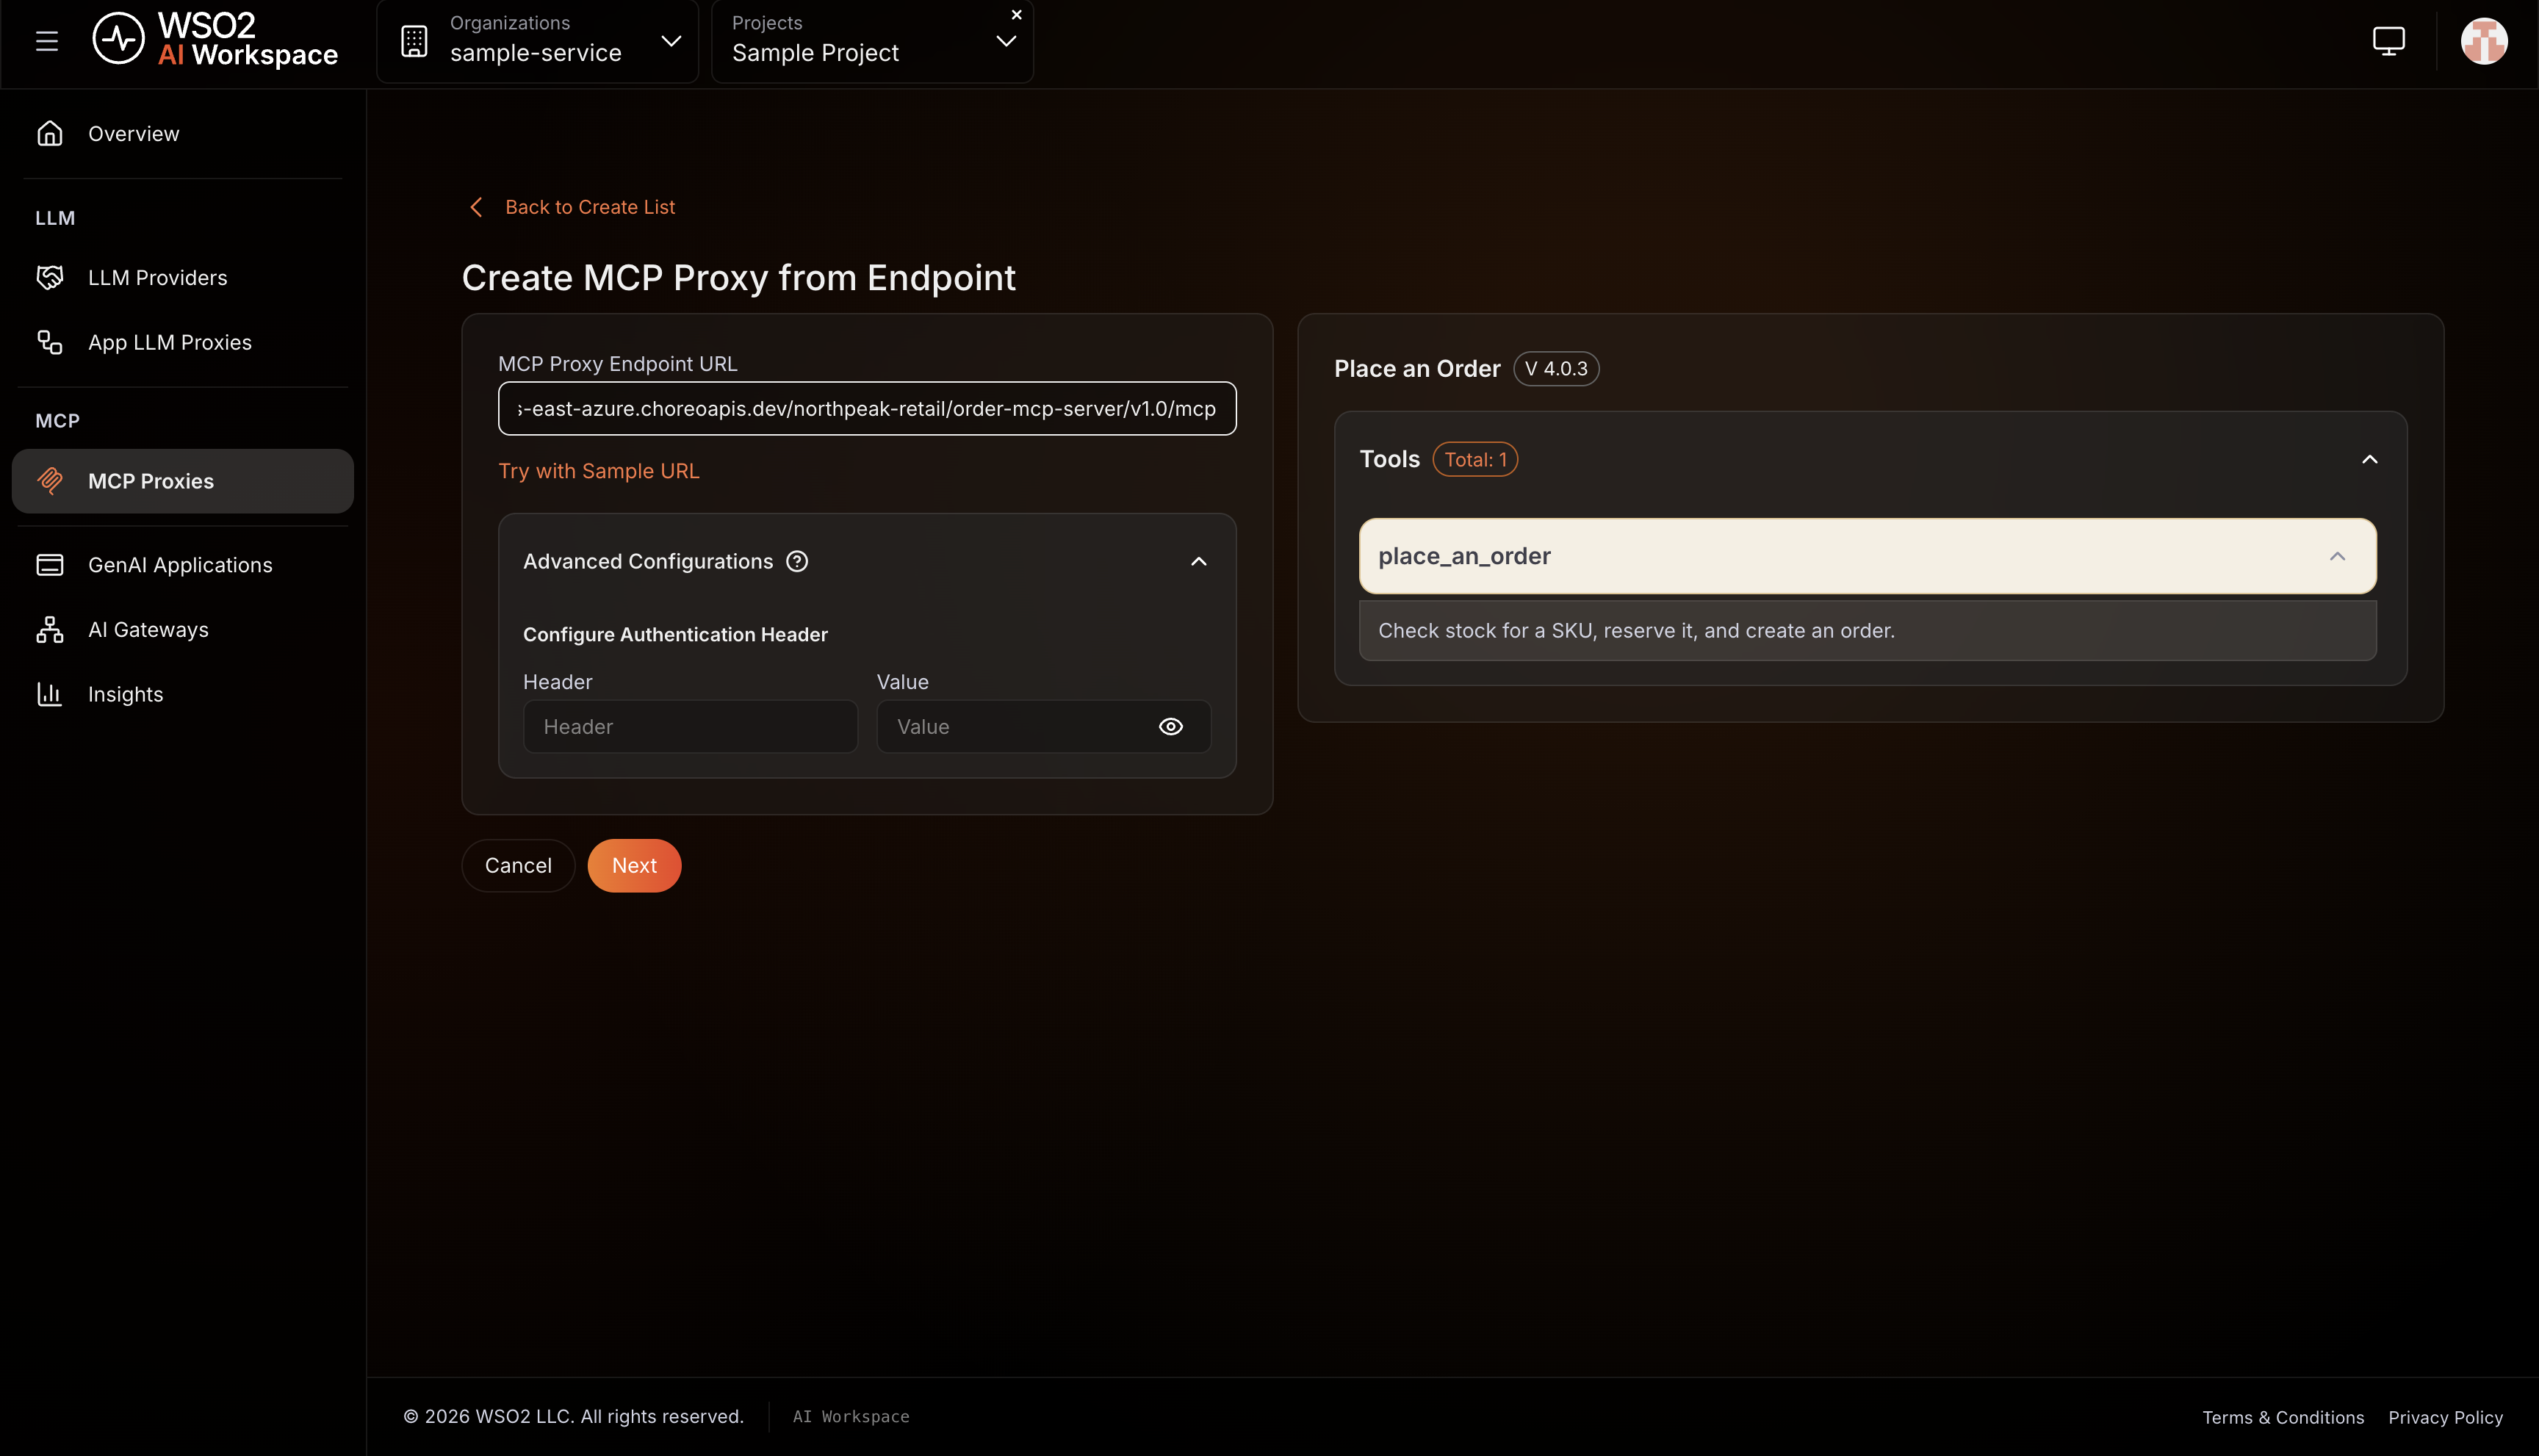
If your MCP server requires credentials, enter them under Advanced Configurations before this step. AI Workspace uses them to fetch the tools.
-
Click Next.
-
Fill in the proxy details:
Field What to enter Name A name for the proxy, such as Place an OrderVersion Pre-filled, editable Description What the proxy exposes Context The base path for the proxy endpoint Target Filled in from the URL you entered 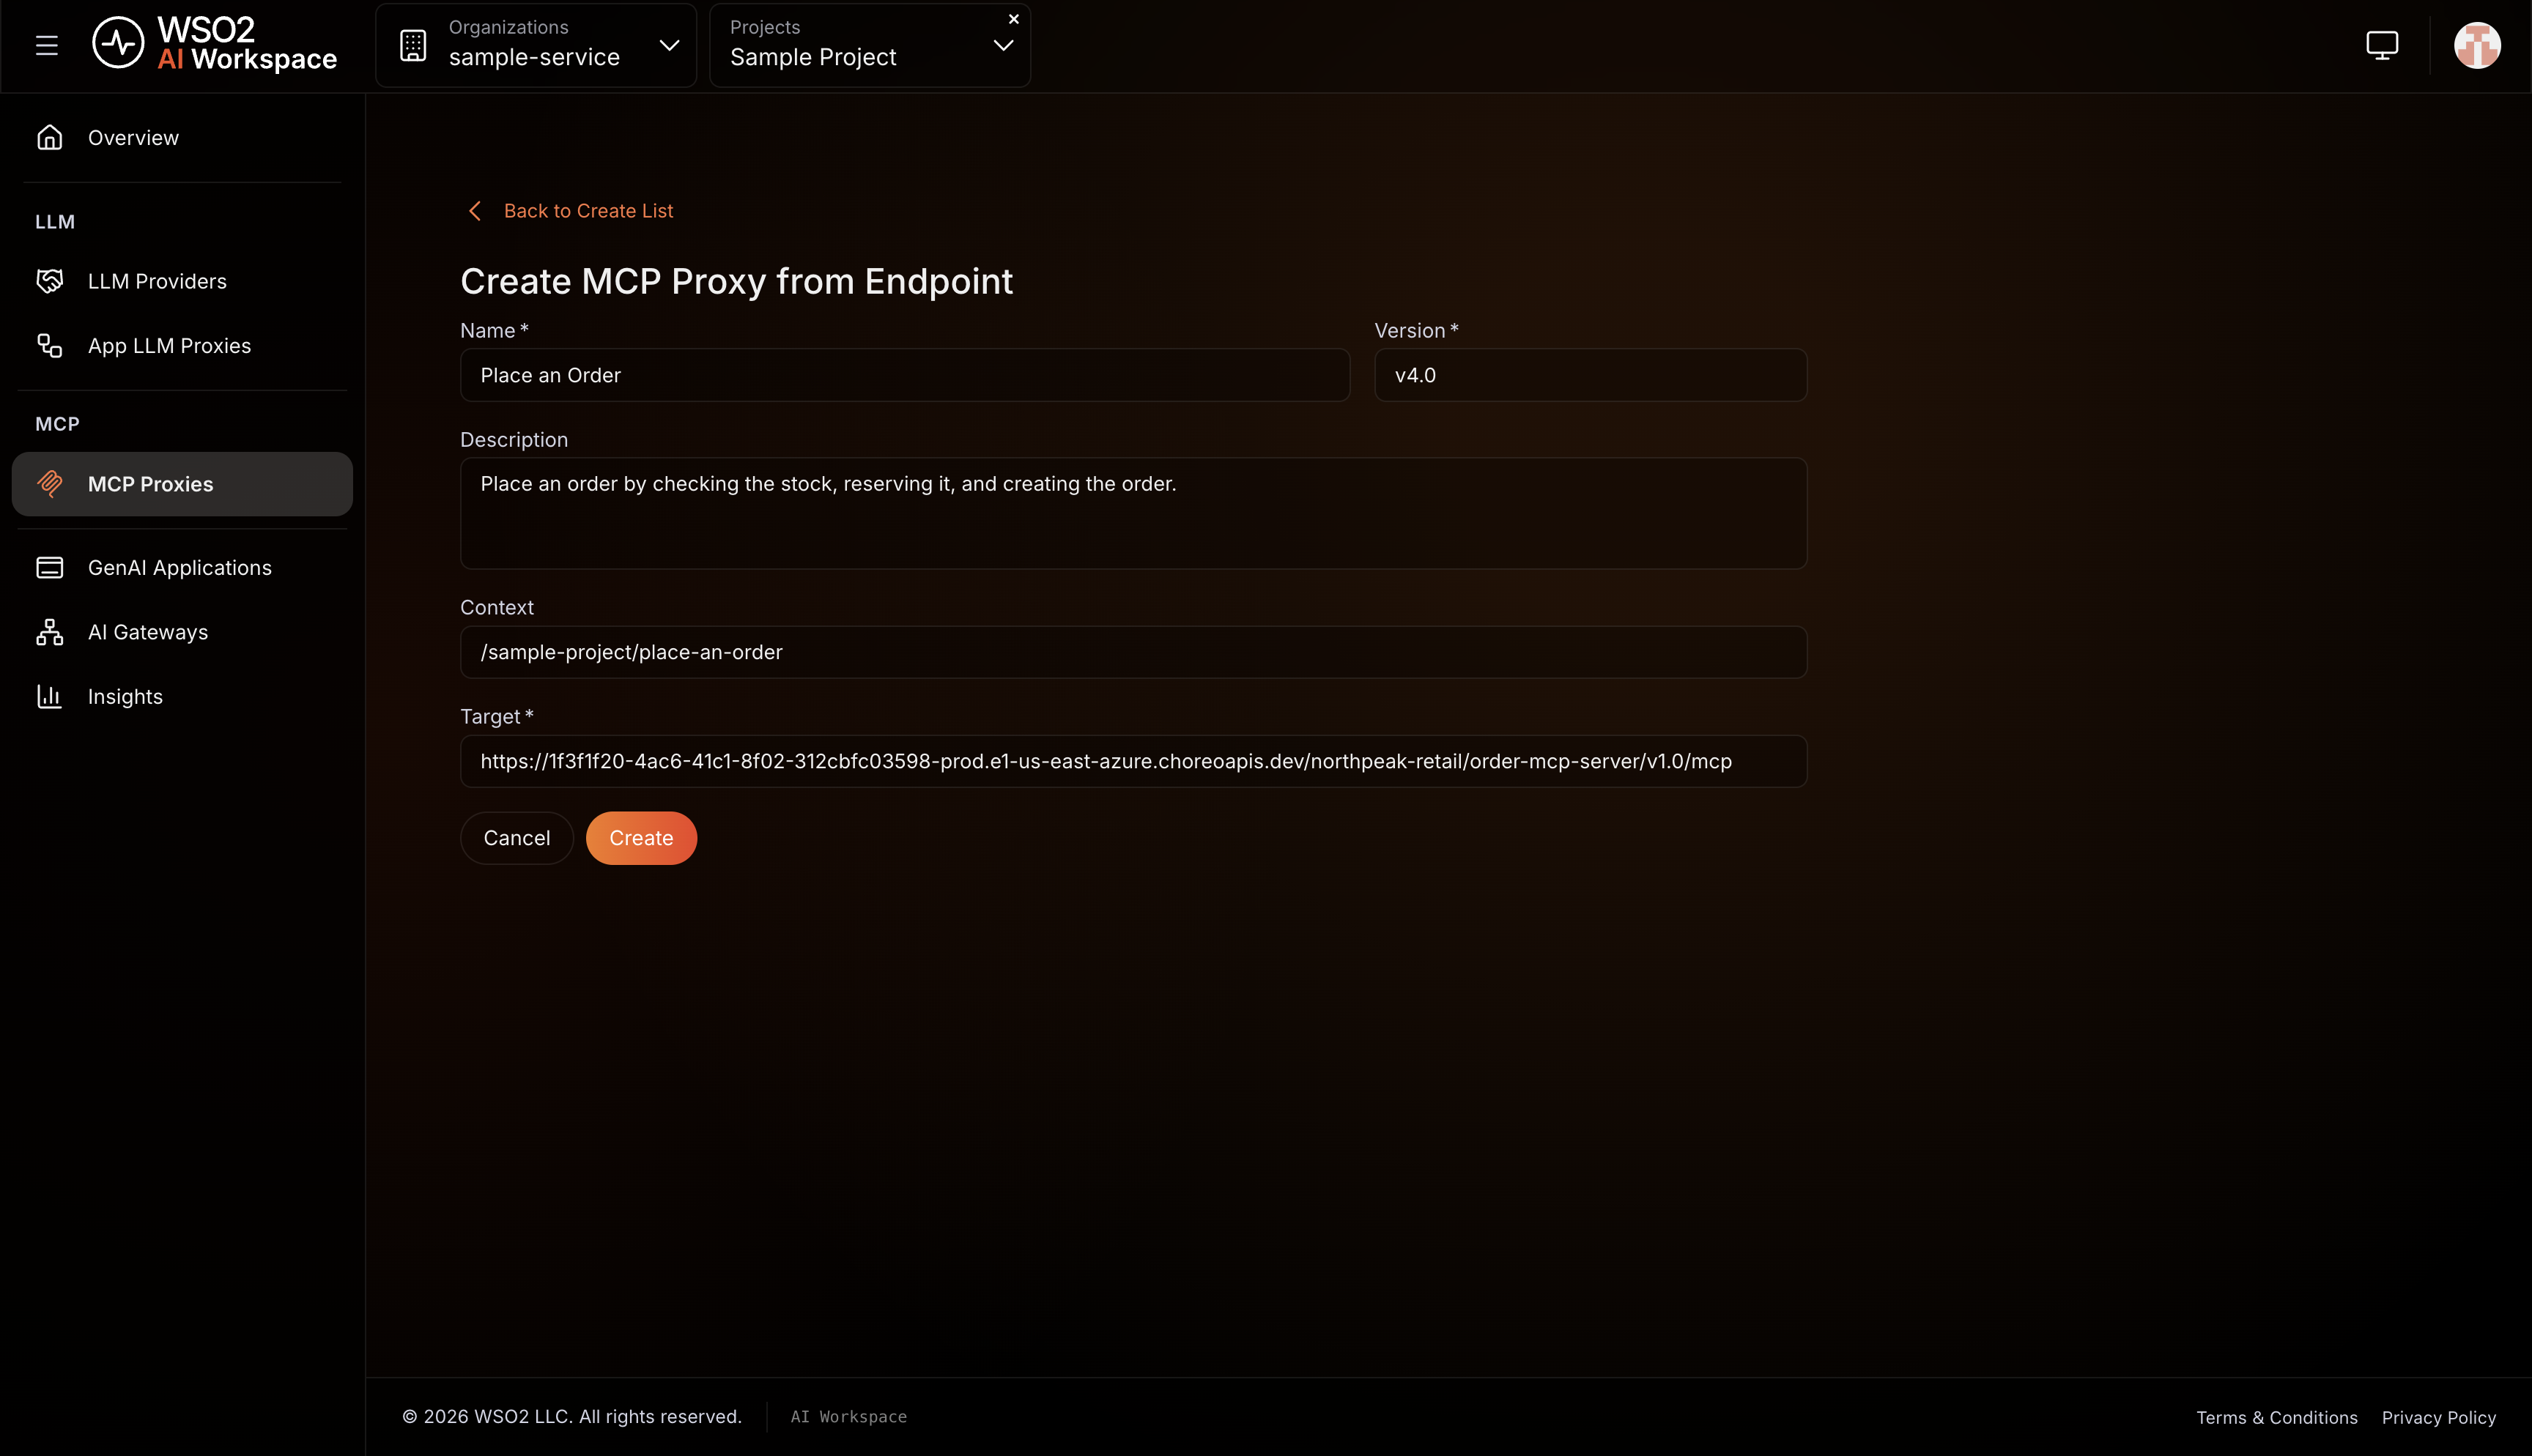
-
Click Create.
Step 5: Check the tool
The proxy's Overview tab lists the capabilities it exposes. One tool,
place_an_order, with the description you wrote in the workflow. Click
View Schema to see the inputs it takes.
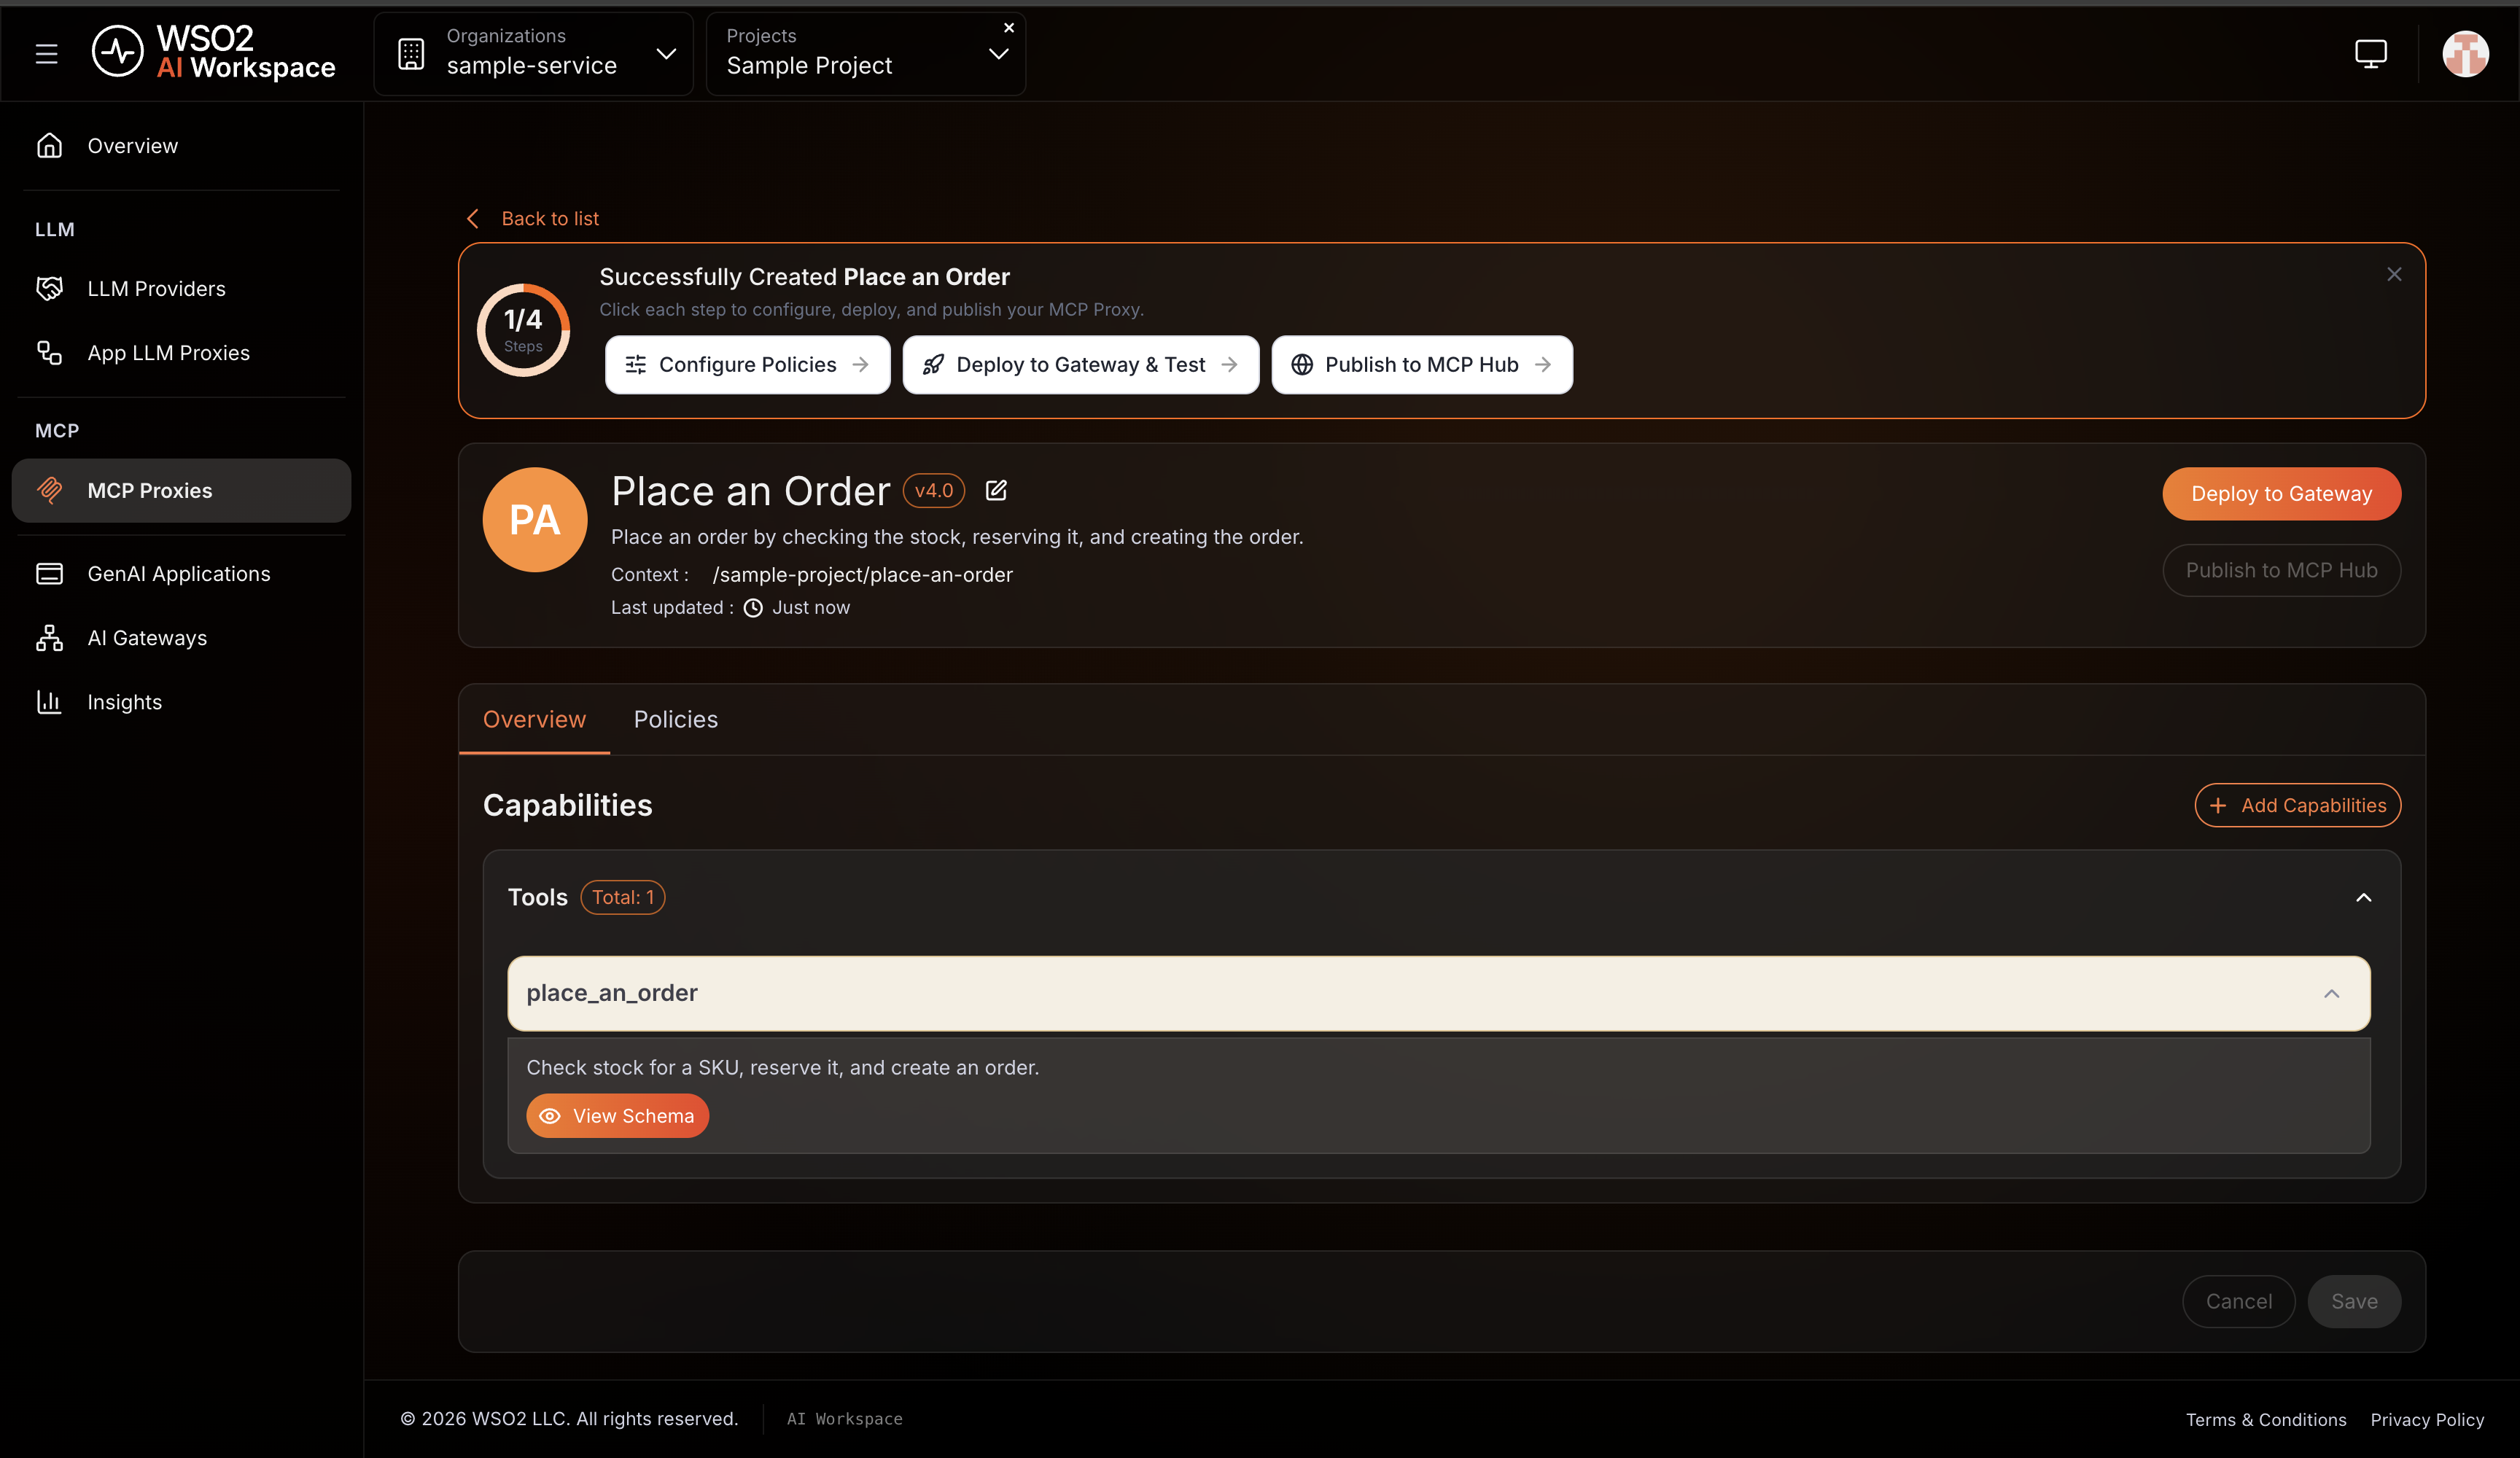
Nothing here is typed into a form. The tool, its description and its schema all come from the Arazzo specification.
Step 6: Deploy the proxy to a gateway
A proxy isn't reachable until you deploy it.
- Click Deploy to Gateway on the proxy page.
- Find the gateway you want, and click Deploy.
- Expand the gateway card to confirm the Deployment Status is Active.
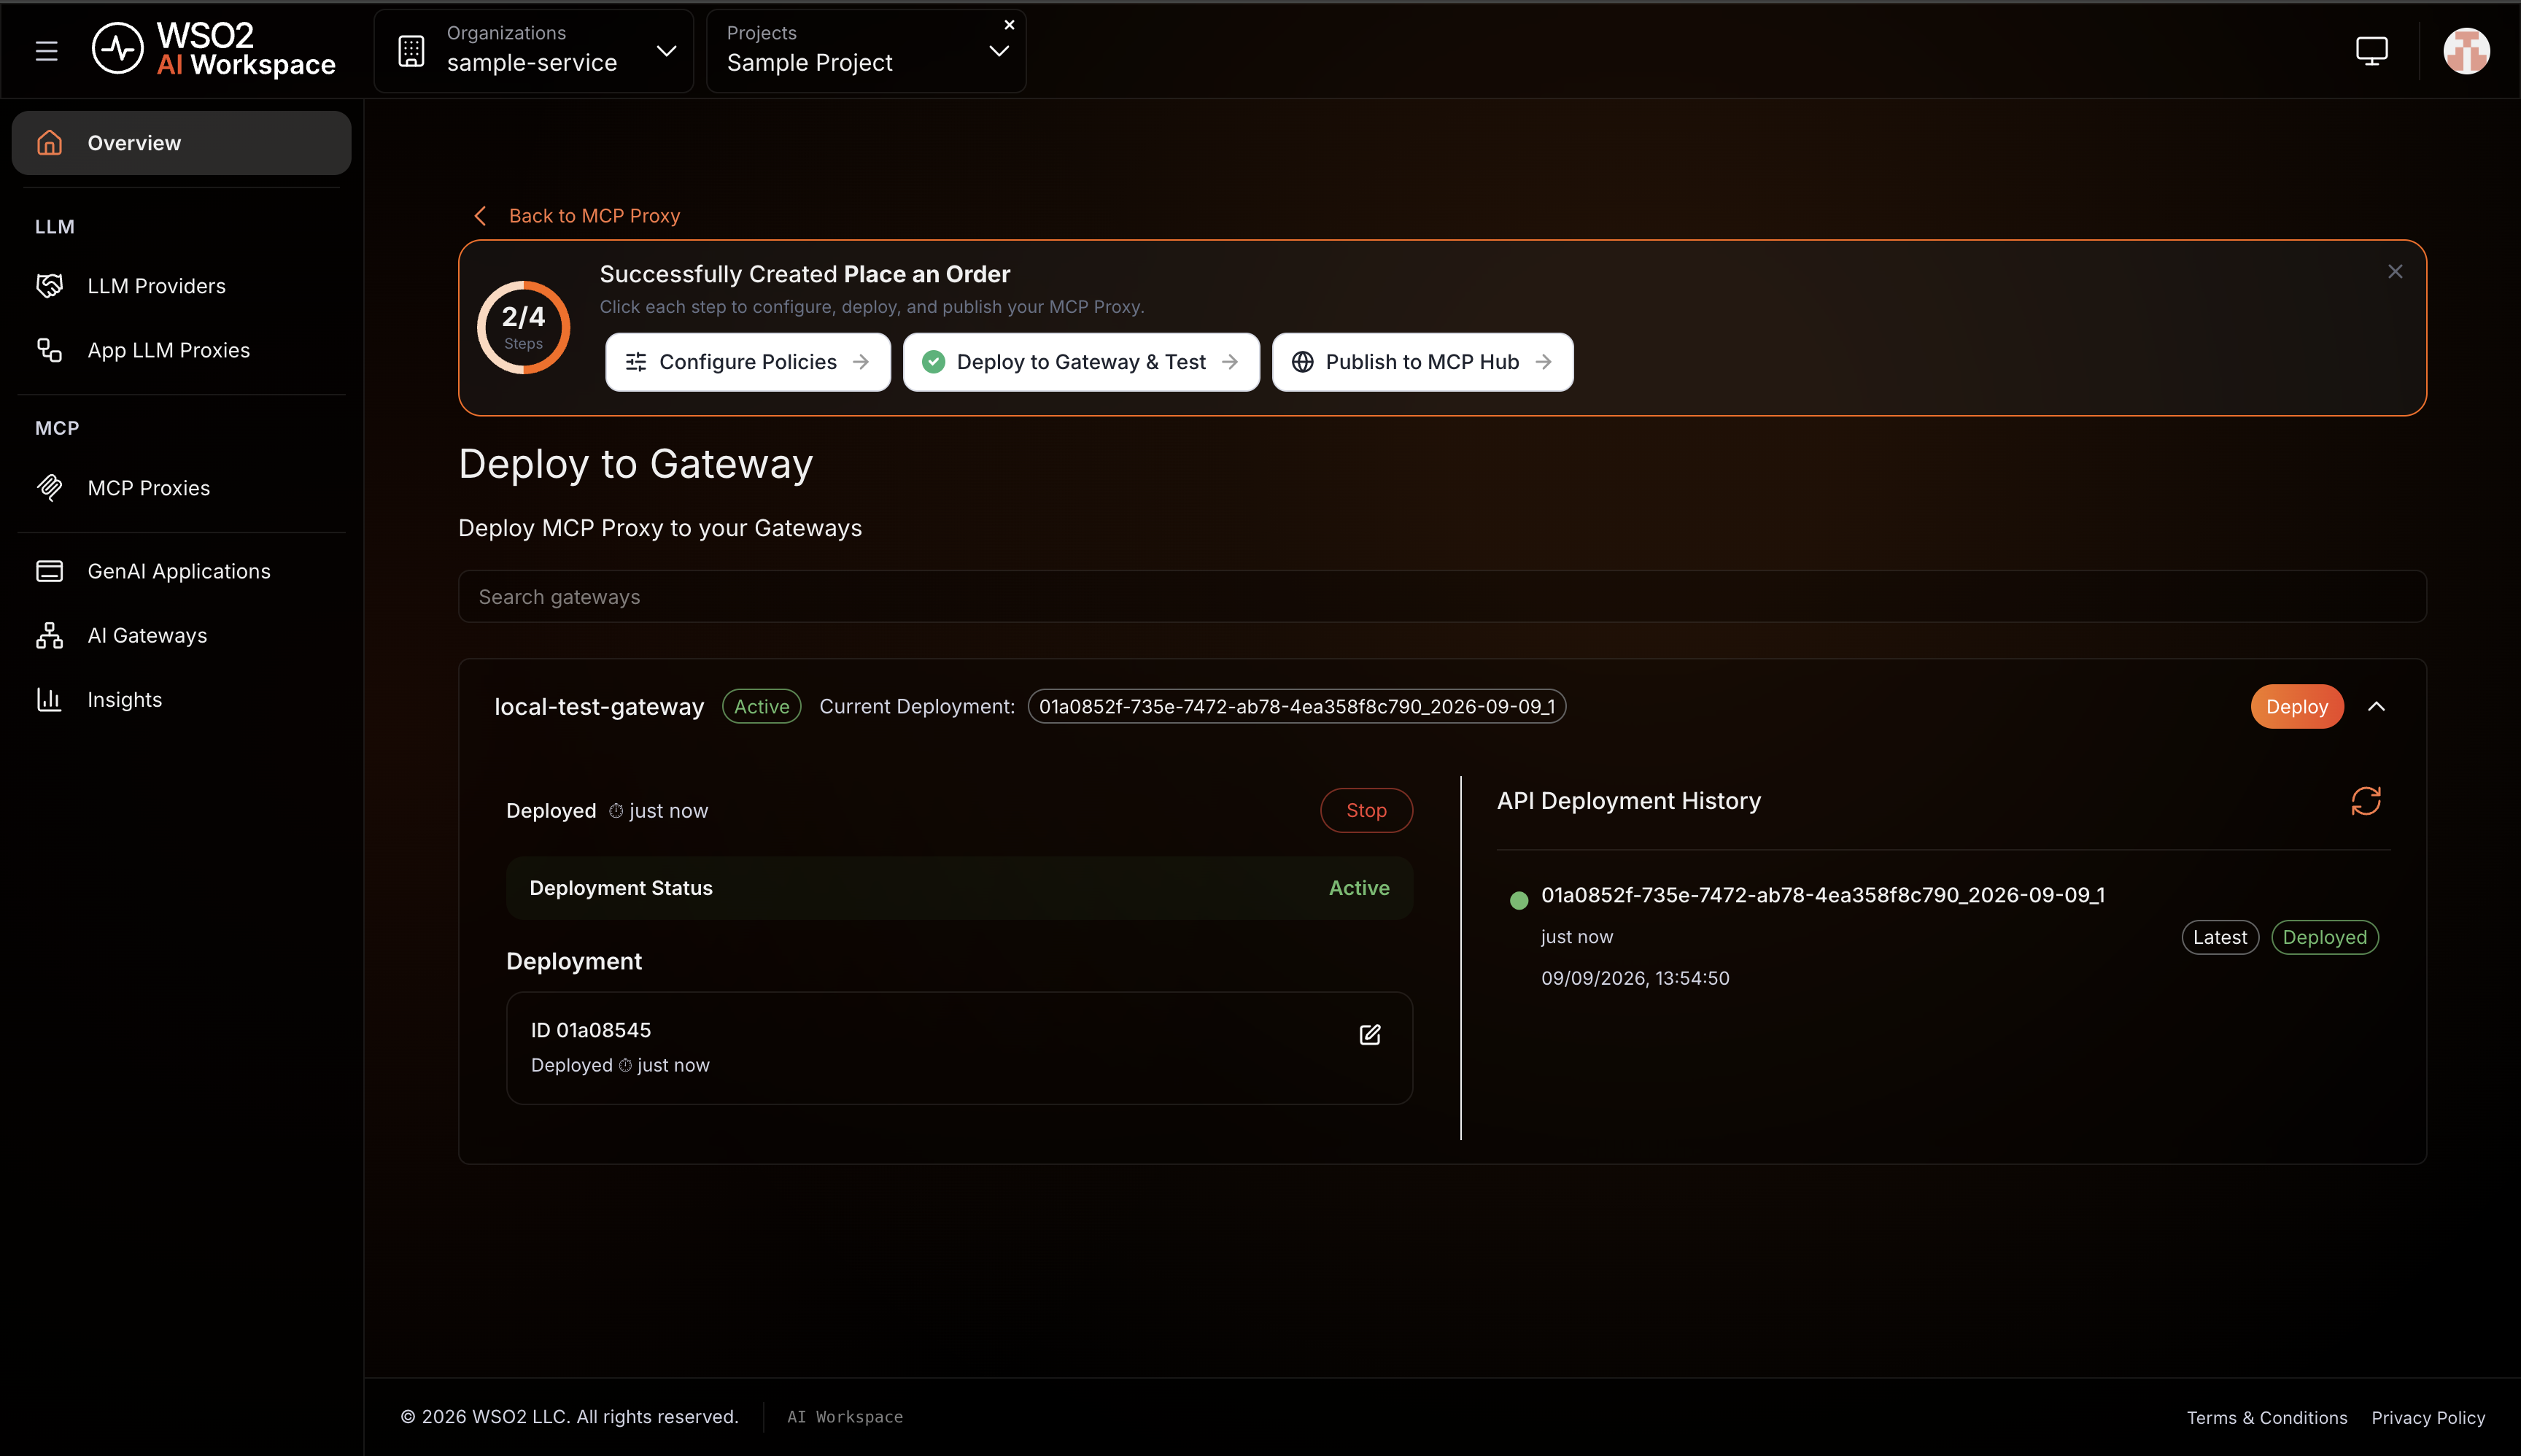
The proxy endpoint follows this format:
That endpoint is what an AI agent connects to. Every call passes through the gateway, where authentication, policies and observability apply, before the workflow runs its three API calls.
Step 7: Call the tool through the gateway
Ask the gateway endpoint what tools it exposes:
curl -sk -X POST https://{gateway-host}/{proxy-context}/mcp \
  -H 'Content-Type: application/json' \
  -H 'Accept: application/json, text/event-stream' \
  -d '{"jsonrpc":"2.0","id":1,"method":"tools/list"}'
The command returns one tool named place_an_order, with sku, quantity, and
customerId as its required inputs. The schema comes from the Arazzo
specification.
You can also test it from the Developer Portal. Publish the proxy to the MCP Hub, open it there, and use the MCP Playground to connect and run the tool.
The proxy has no authentication until you add it
A newly created proxy accepts any caller. Use the Policies tab to apply authentication and access control before exposing it to anything real.
Troubleshooting
| Issue | Resolution |
|---|---|
| AI Workspace can't fetch the tool list | The URL must end in /mcp and be reachable from the internet. A localhost address won't work. If the server needs credentials, set them under Advanced Configurations. |
arazzo-mcp-gen reports an unresolved operation |
An operationId in the workflow doesn't match any operation in the referenced OpenAPI definition. |
| A later step receives an empty value | The earlier step's outputs block doesn't capture the field, or the JSON pointer doesn't match the response body. |
| The tool runs but returns no outputs | A step didn't reach its API. Check that the servers URL in each OpenAPI definition is reachable from inside the container. |
| The proxy exists but calls fail | The proxy isn't deployed to a gateway. Deploying is a separate step from creating. |
| The workflow ends without creating an order | Expected when stock is short. The onSuccess condition stops the sequence. |
macOS blocks arazzo-mcp-gen |
The released binaries aren't signed. Run xattr -d com.apple.quarantine arazzo-mcp-gen. |
Next steps
- Apply policies to the proxy. Use the Policies tab for access control, authorization and rewrite policies.
- Add more workflows. Each one becomes another tool.
Try the sample
The companion sample runs this setup locally using a self-hosted gateway, so you can generate an MCP server from an Arazzo workflow and call it through a gateway without a cloud account.