Build an AI agent that reacts to WebSocket notifications
Overview
This guide continues from Build a WebSocket-based real-time notification system. It connects a Python agent to that guide's Stock Notifications API, and for any tick that crosses an alert threshold, asks Gemini which of a small set of tools to call in response, then actually calls it through a governed MCP proxy. Below-threshold ticks never reach the LLM at all.
By the end, you'll have a running agent that autonomously chooses between logging a watch note, raising an alert, or escalating for human follow-up. You'll use WSO2 API Platform Cloud for the WebSocket API, and AI Workspace for the MCP Proxy and LLM Provider.
Note
This guide assumes you've already completed Build a WebSocket-based real-time notification system and have your Stock Notifications API deployed. Publishing it and finding its wss:// invoke URL happen in step 5.
Learning objectives
- Connect an AI agent to a WebSocket notification stream in WSO2 API Platform Cloud and an MCP proxy in AI Workspace.
- Use a threshold check to decide when a notification is worth an LLM call, keeping routine ticks cheap and silent.
- Discover an MCP proxy's tools at startup instead of hardcoding them, so adding a tool to the server doesn't require an agent code change.
- Route every reasoning call through a governed LLM provider instead of calling the model service directly.
- Deploy an MCP proxy and an LLM provider to an AI gateway.
Key concepts
Before you start, here are the WSO2 API Platform terms this guide adds to the ones from the previous guide.
AI Workspace is where you create and manage the MCP Proxy and LLM Provider an AI agent calls. You open it from WSO2 API Platform by clicking AI Workspace in the header.
An AI gateway is the runtime that executes AI Workspace's MCP Proxies and LLM Providers. You install and start it yourself (Docker, a VM, or Kubernetes), then connect it to AI Workspace with a registration token. Nothing you create in AI Workspace is callable until it's deployed to an active AI gateway.
An MCP proxy is a governed endpoint AI Workspace creates in front of a server that speaks the Model Context Protocol. It runs on an AI gateway, the same way a WebSocket API proxy runs on WSO2 API Platform Cloud Gateway.
An LLM provider connects a third-party model service, such as Google Gemini, to AI Workspace, and stores its API key so your agent never holds it directly. Your agent calls the provider's own invoke URL instead of calling Gemini directly.
A tool is a single function the agent can choose to call. In this guide, log_watch, send_alert, or escalate are the tools used, each with a name, a description, and a schema for its arguments, discovered from the MCP proxy.
Prerequisites
- The guide Build a WebSocket-based real-time notification system completed, with the Stock Notifications API deployed.
- A WSO2 API Platform Cloud account (the same one from the previous guide). You open AI Workspace from it.
- An AI gateway set up in AI Workspace and showing as Active. See Set up an AI Gateway.
- A Google AI API key from Google AI Studio, which the LLM provider uses to call the Gemini API on your behalf.
- Node.js and npm, to install and run the tool server.
- Python 3.9 or later, and pip.
- A place to deploy a small MCP server publicly, same as the notification backend in the previous guide.
Architecture
                    wss://.../stock-notifications-api
Python Agent <----------------------------------------- WebSocket API proxy
     |                                                    (WSO2 API Platform Cloud)
     |
     |--- https:// ---> MCP proxy -----> tools-server (your public URL)
     |                       |
     `--- https:// ---> LLM provider --> Gemini API
                              |
                        AI gateway (AI Workspace)
The agent holds three separate connections: it listens on the WebSocket API proxy for notifications, and for any that cross the threshold, it calls the LLM provider to decide on a tool and the MCP proxy to actually run it. The WebSocket API proxy is the one you created in the previous guide. The MCP Proxy and LLM Provider are in AI Workspace, both running on the same AI gateway.
Step 1: Set up the tool server
Before you create the MCP proxy, you need a running server that speaks the Model Context Protocol, reachable over the public internet. This guide uses a small server exposing three tools: log_watch, send_alert, and escalate. Each one only prints a message and returns a status -- there's no real alerting or ticketing system behind them. The point is watching Gemini pick the right one, not what happens after.
- Get
tools-server/server.jsandpackage.jsonfrom the companion sample, into a project folder. - In that folder, run
npm install. - Deploy that folder to a host that gives you a public URL, the same way you deployed the notification backend in the previous guide. The host should run
node tools-server/server.js(ornpm run start:tools-server) as its start command.
Expected result: You have a public URL for the deployed server. You use it, followed by /mcp, in the next step.
Step 2: Create the MCP proxy
- Sign in to WSO2 API Platform, and click AI Workspace in the header. Choose an existing project, or create one.
- From the project home page, go to MCP Proxies from the left navigation bar, click + Create MCP Proxy.
-
Under MCP Proxy Endpoint URL, provide your tool server's URL, ending in
/mcp: -
Click Fetch Server Info, click Next, and specify the details as follows:
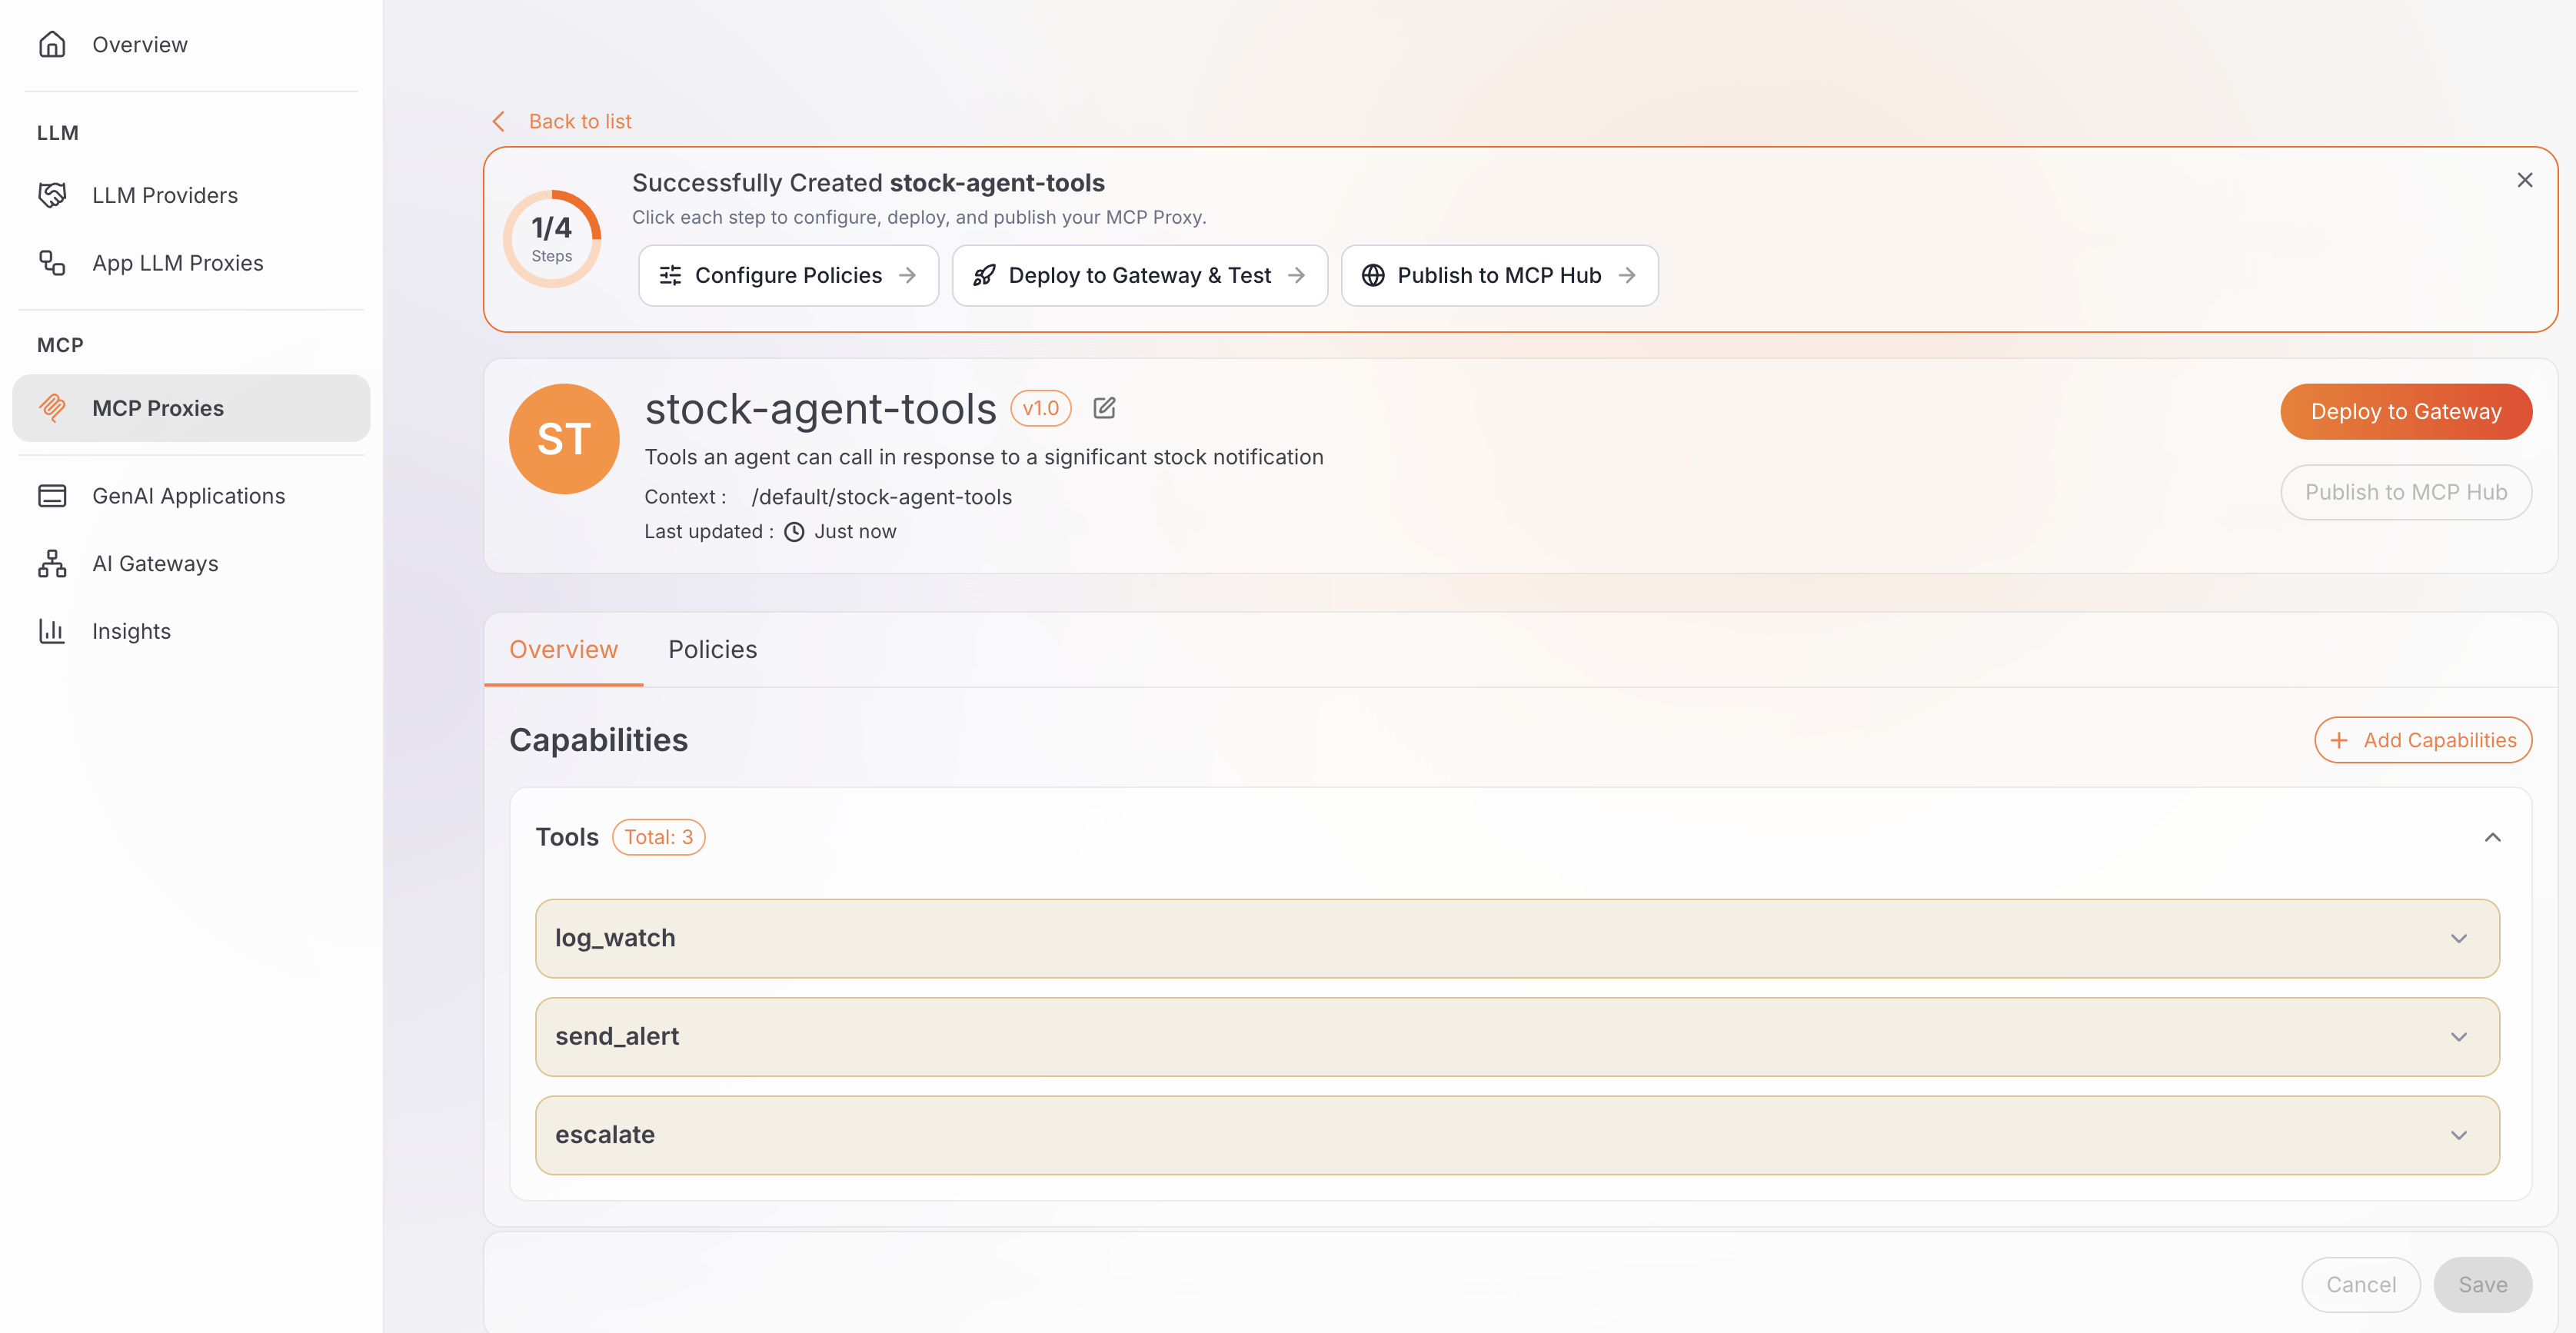
Field Value Name stock-agent-toolsContext /default/stock-agent-toolsVersion v1.0Description Tools an agent can call in response to a significant stock notification -
Click Create.
Expected result: AI Workspace connects to your tool server and creates the MCP proxy with three tools: log_watch, send_alert, and escalate, discovered directly from it.
Step 3: Deploy the MCP proxy
An MCP proxy isn't callable until you deploy it to an AI gateway.
- If your project doesn't already have an AI gateway showing as Active, set one up first. See Set up an AI Gateway. It walks you through registering a gateway in AI Workspace, then installing and starting the runtime with Docker, a VM, or Kubernetes.
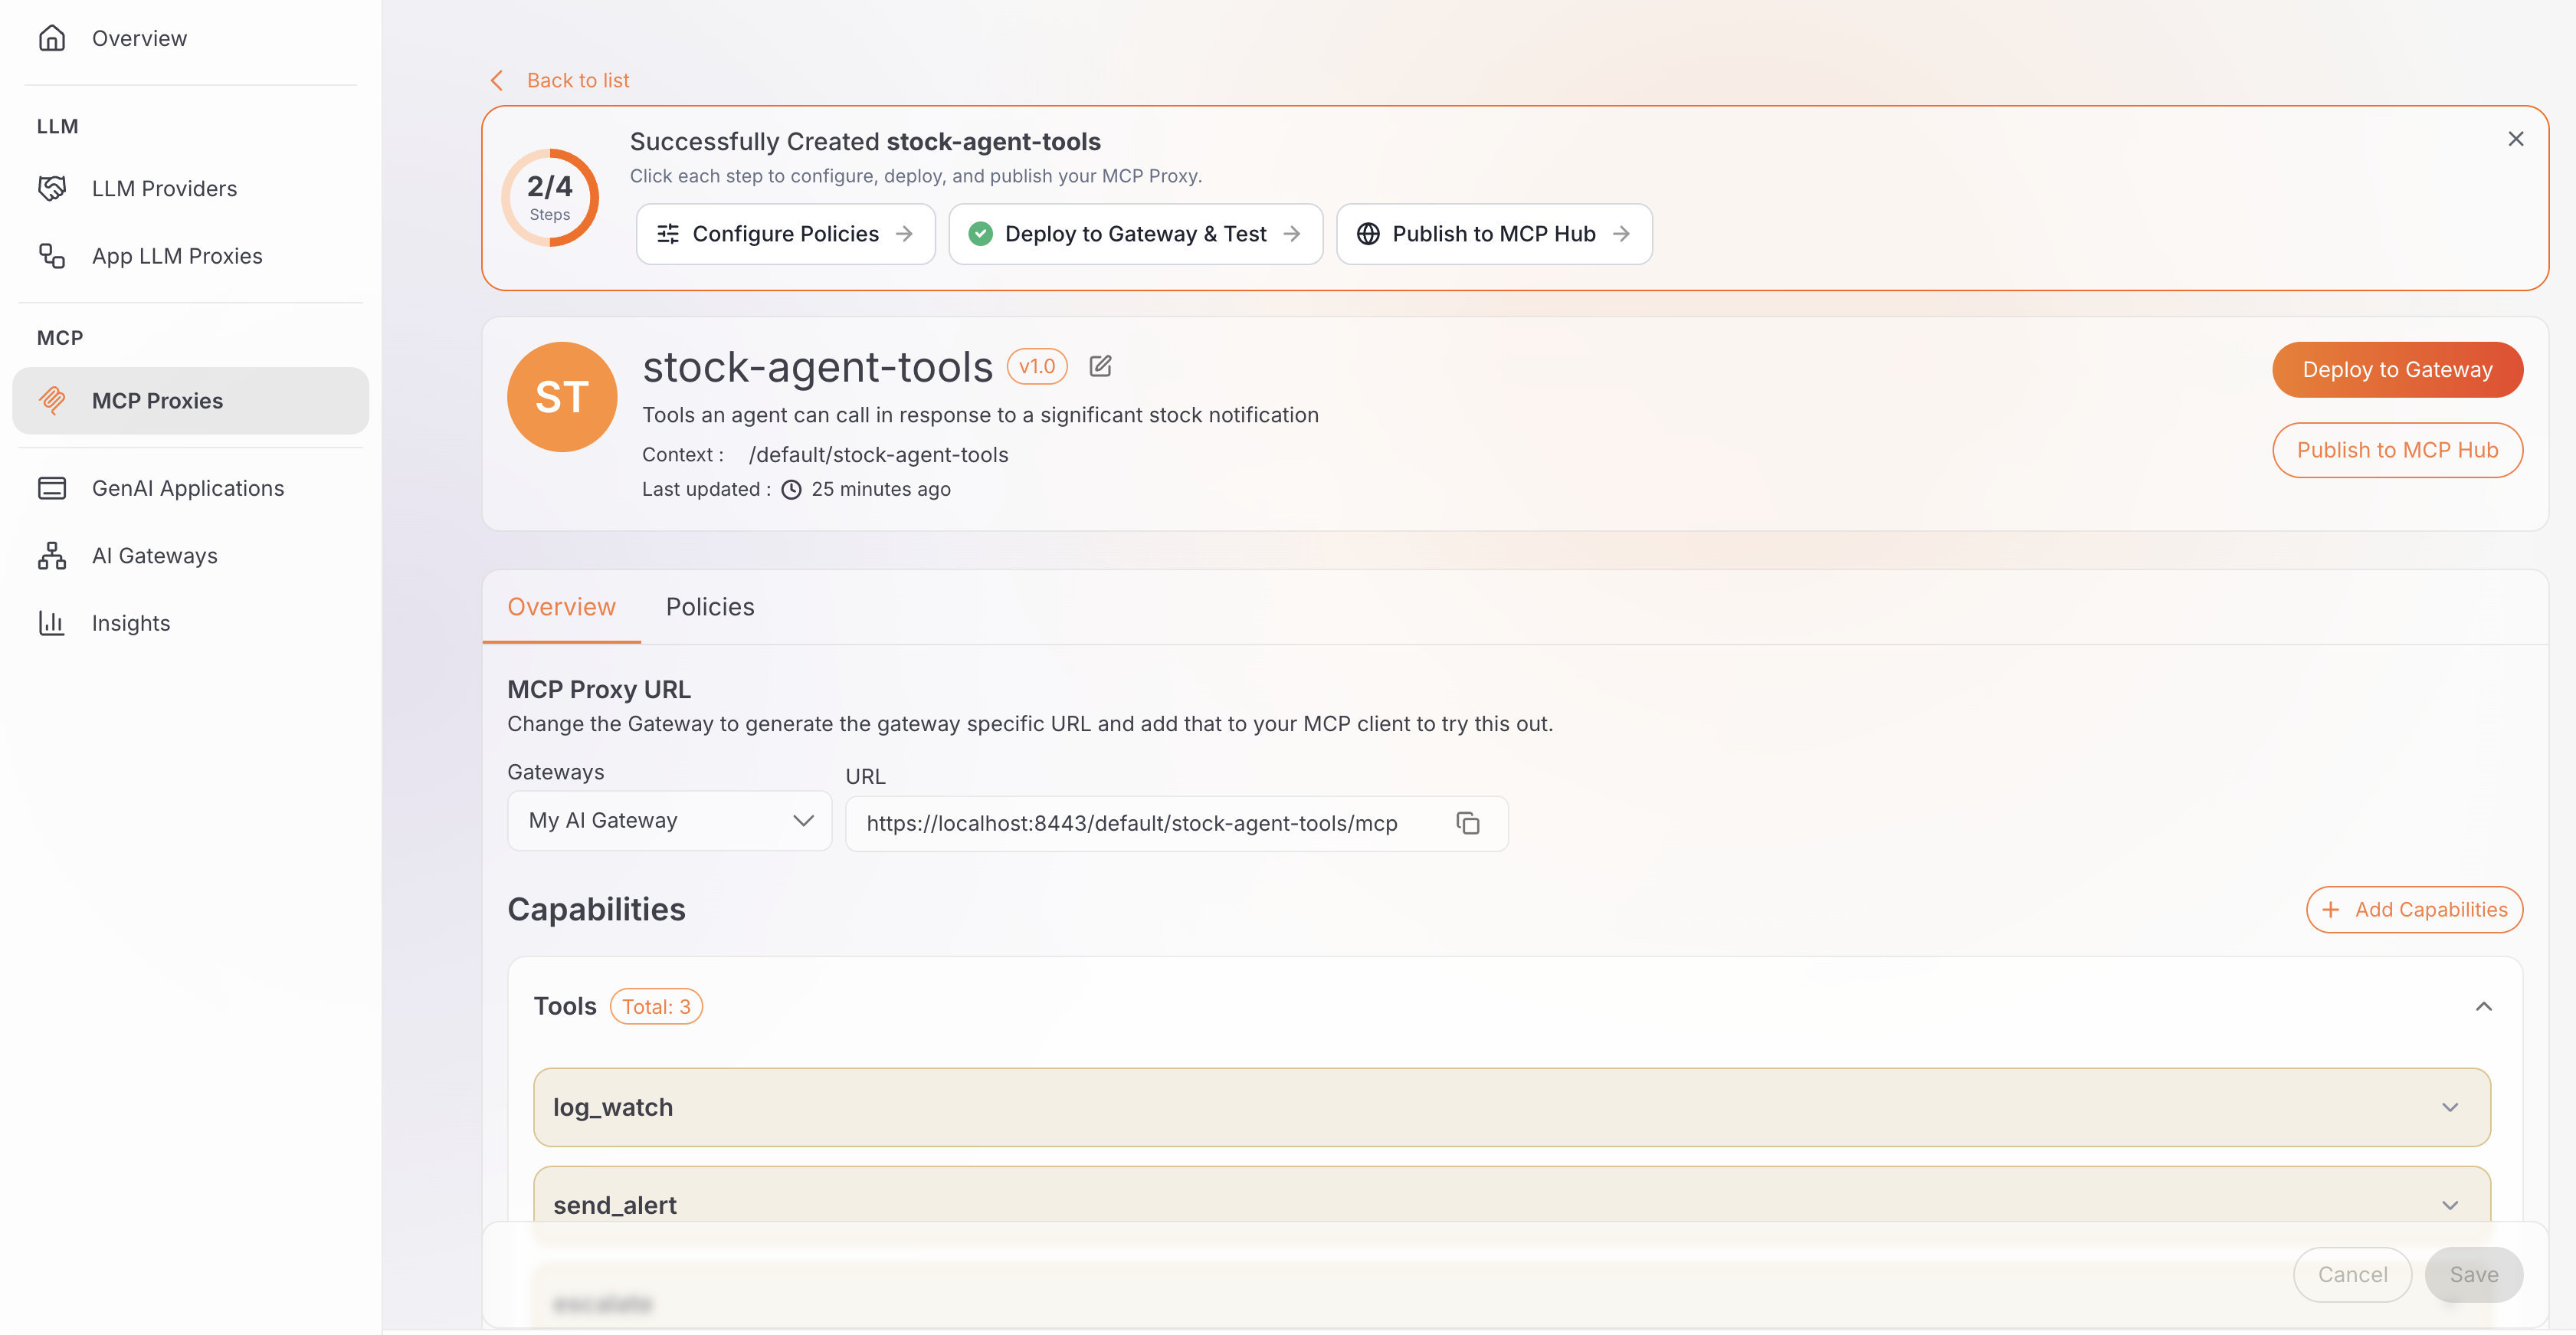
- On the MCP proxy's setup page, click Deploy to Gateway & Test.
- Find your gateway and click Deploy.
- Wait for the deployment status to show Active.
Expected result: The MCP proxy's deployment status shows Active. Select your gateway from the Gateways dropdown on the proxy's overview page to see its invoke URL, in the form https://<gateway-host>/<proxy-context>/mcp. Collect this URL. We'll call this MCP_URL.
Note
For production use, attach the MCP Authentication policy from the proxy's Policies tab. See Apply policies to an MCP proxy. This guide doesn't configure it, to keep agent.py simple.
Publishing the proxy to the MCP Hub is optional and only affects discoverability in your organization's MCP catalog. It doesn't change whether agent.py can call the proxy, so this guide skips it.
Step 4: Create the LLM provider for Gemini
This creates the governed endpoint your agent uses to call Gemini.
- Go to Google AI Studio and sign in with a Google account.
- Click Create API key, choose a project (or create one), and copy the key.
- In AI Workspace's left navigation menu, click LLM Providers, then + Add New Provider.
- Select Gemini from the provider list.
-
Specify the details as follows:
Field Value Name stock-agent-geminiVersion v1.0API Key the Google AI API key from step 2 -
Click Add Provider.
- Click Deploy to Gateway, select the same AI gateway from step 3, and click Deploy.
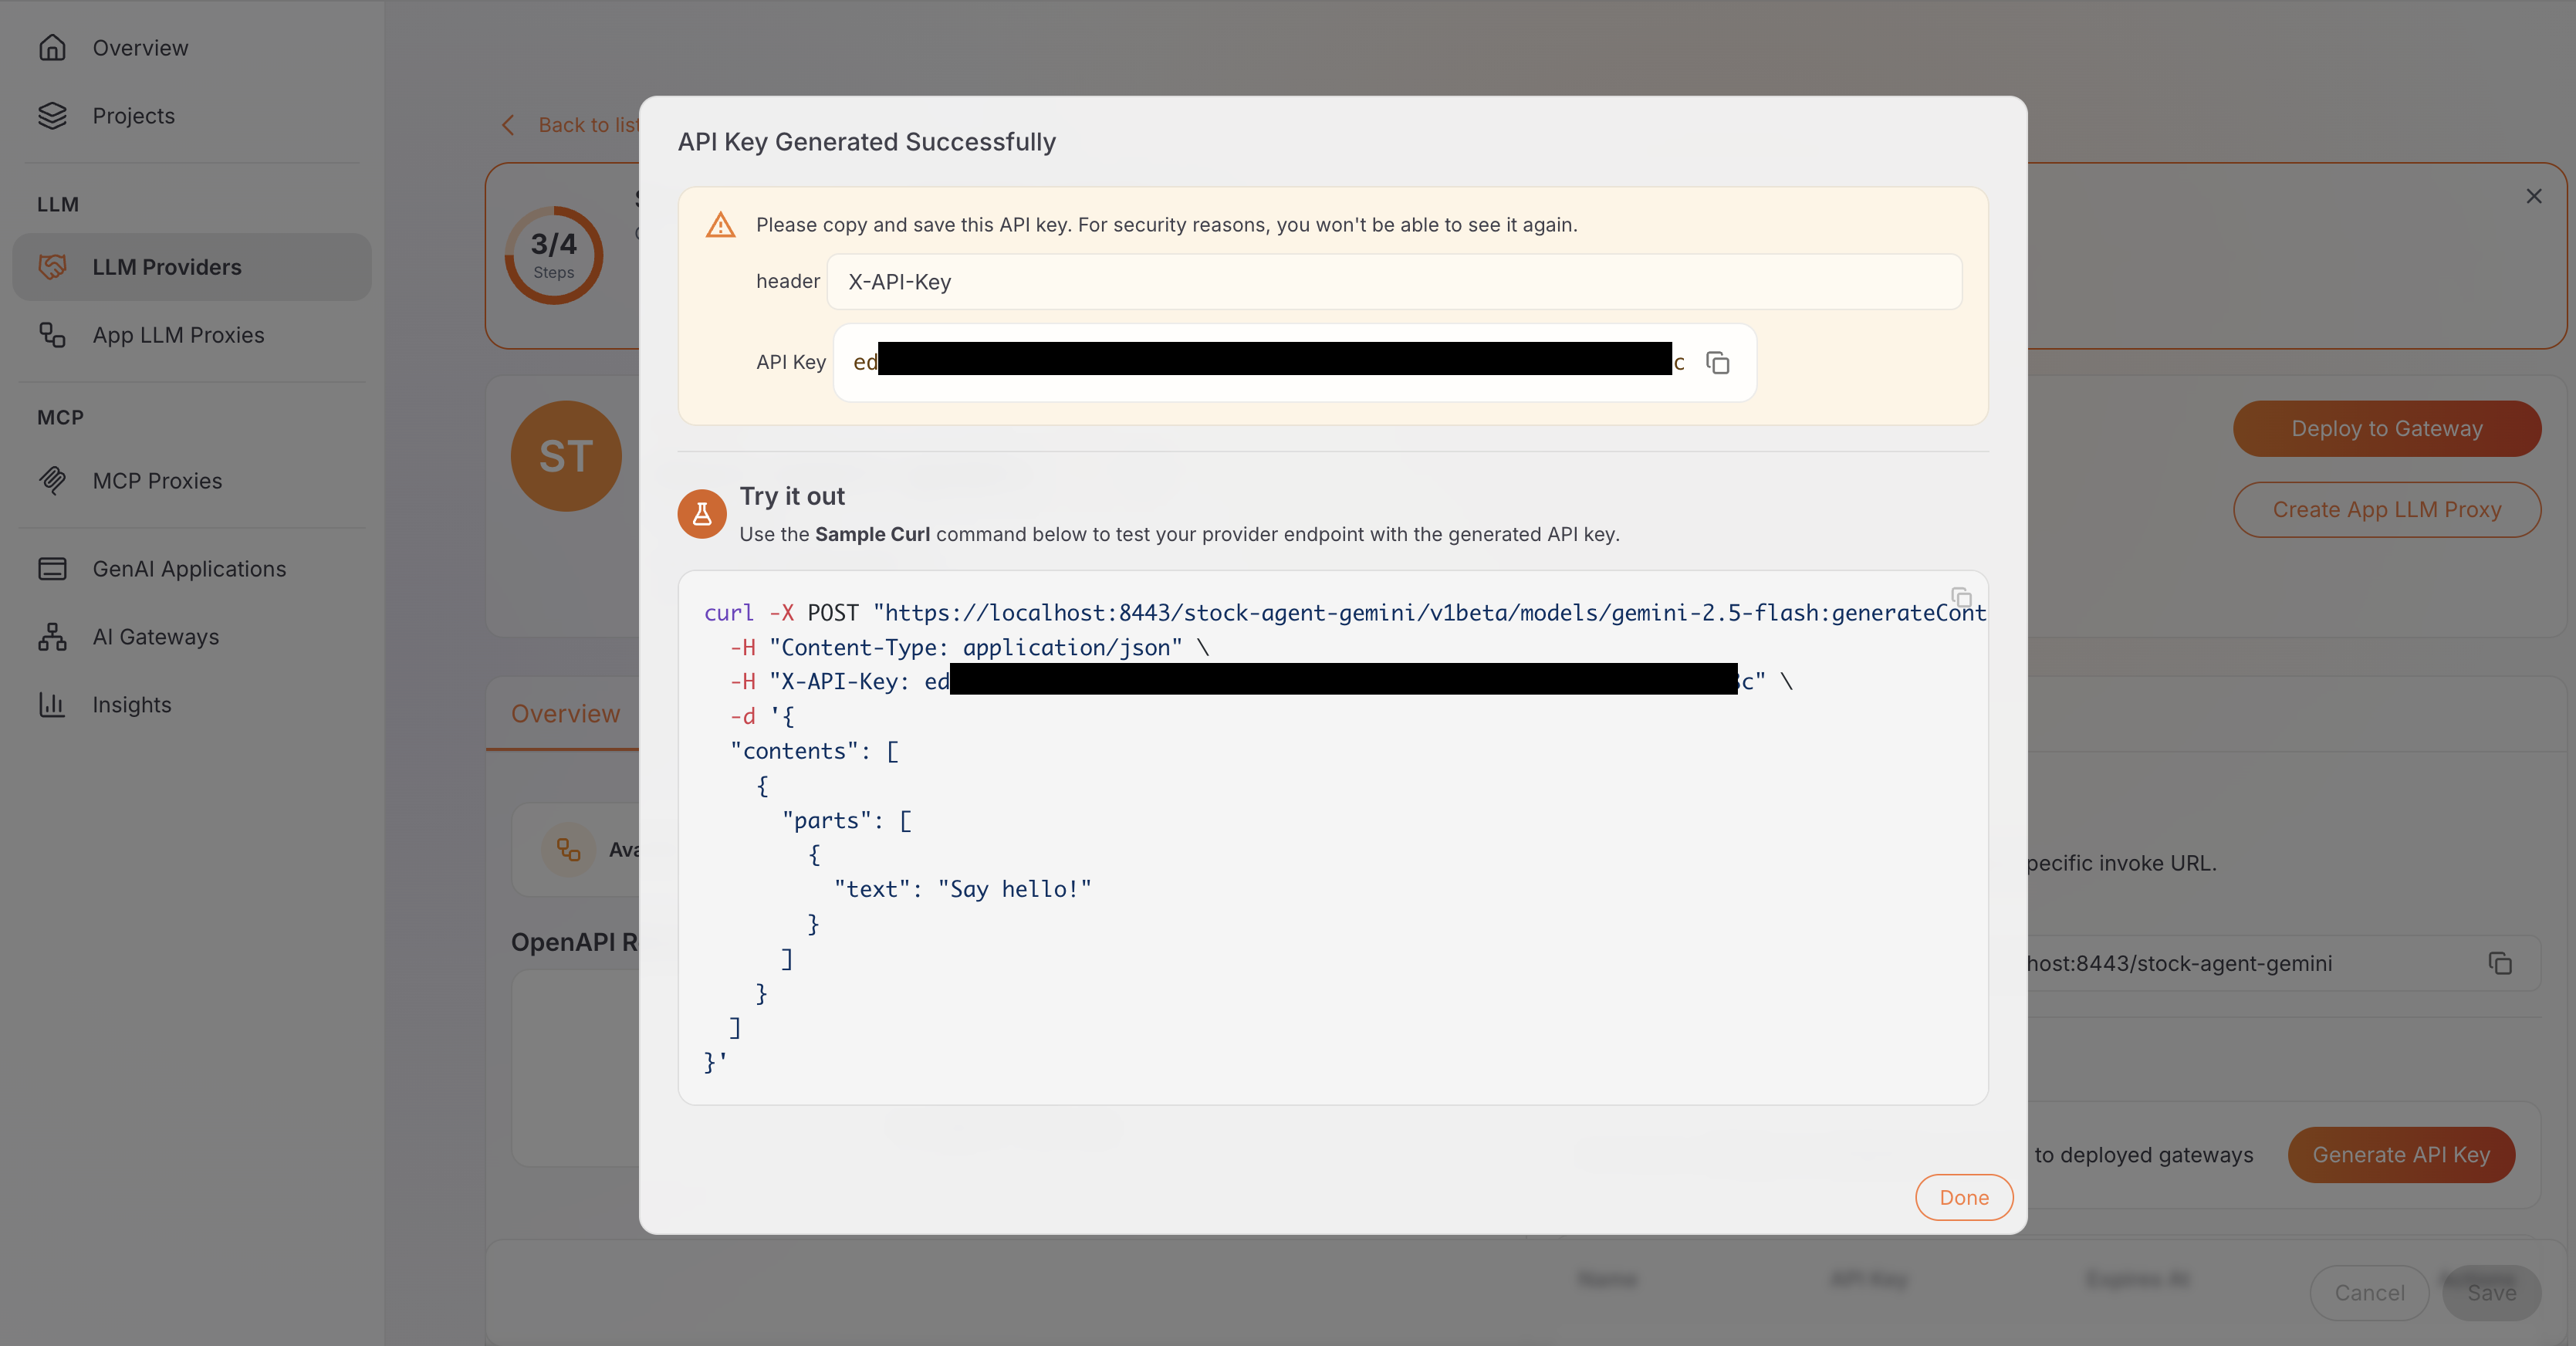
- Once deployed, click Generate API Key in the Overview page, and copy the key immediately. It's shown only once. Collect this key. We'll call this
LLM_API_KEY. - Note the Invoke URL shown in the same panel. Collect this URL. We'll call this
LLM_URL.
Expected result: You have an API key and an invoke URL for the LLM provider.
Step 5: Publish the WebSocket API and subscribe to it
The LLM provider authenticates with the API key from step 4. The WebSocket API uses an application, key, and access token from WSO2 API Platform Cloud, and it needs to be published before you can subscribe to it.
Publish the API, if you haven't already:
- In WSO2 API Platform Cloud, open the Stock Notifications API that you built in the previous guide.
- In the left navigation menu, click Manage, then Lifecycle, then click Publish, and confirm.
Subscribe and get the invoke URL:
- Sign in to the Developer Portal, a separate console from WSO2 API Platform Cloud.
- Click Applications, then + Create Application. Enter the name
stock-notification-agent, and click Create. - Inside the application, click Subscriptions, then + Add APIs, and subscribe to the Stock Notifications API on the Default plan.
- Click APIs, open the Stock Notifications API, and click Documentation. Copy the base URL shown there. We'll call this
STOCK_WS_URL.
Generate an access token:
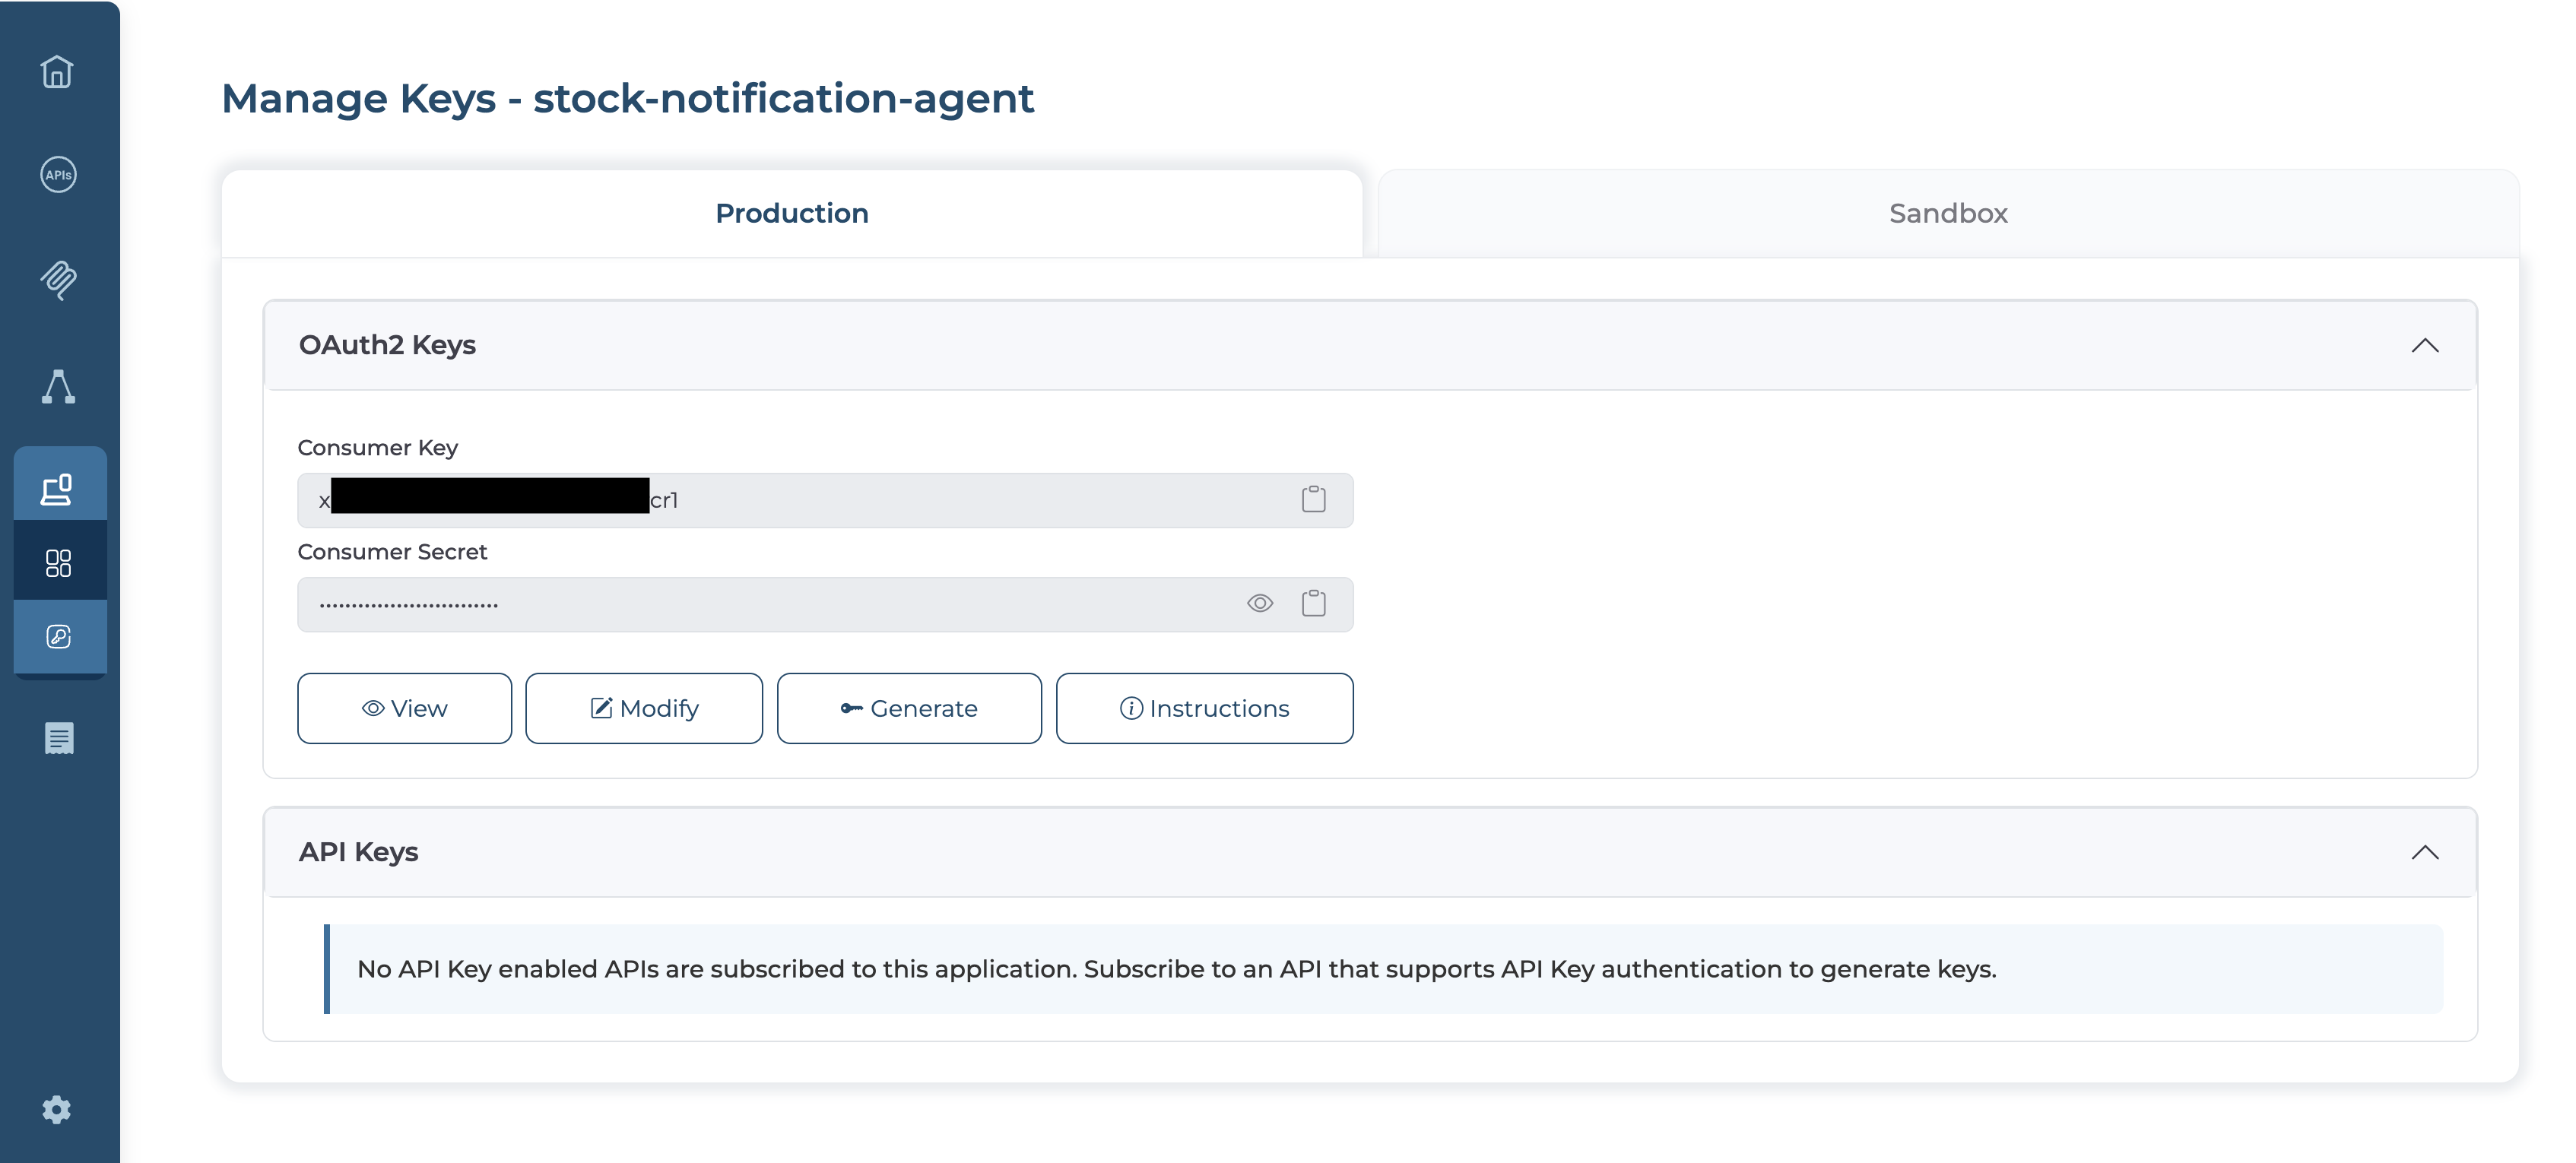
- Back in the application, click Manage Keys.
- Under OAuth2 Keys, click Generate to generate a consumer key and secret.
- Scroll to Access Token, click Generate, and copy the access token immediately. It won't be shown again. Collect this token. We'll call this
WS_ACCESS_TOKEN.
Expected result: You have the WebSocket API's invoke URL and an access token for it.
Step 6: Get and run agent.py
For every notification that crosses the threshold, the agent asks Gemini which tool to call and then calls it through the MCP proxy.
- Get
agent.pyandrequirements.txtfrom the companion sample into a project folder. - In that folder, run
pip install -r requirements.txt. -
Run it, substituting your actual URLs and credentials:
Expected result: The agent connects to the WebSocket stream and the MCP proxy, discovers the three tools, and starts printing a line for every notification, most skipped, with an occasional one triggering a Gemini decision and a tool result:
[agent] connected to wss://<your-stock-notifications-api-url>
[agent] CONTOSO 0.11% -- below threshold, skipping
[agent] ACME -0.95% -- below threshold, skipping
[agent] CONTOSO 1.78% at $210.38 -- threshold crossed, asking Gemini...
[agent] Gemini chose "log_watch" with arguments {'symbol': 'CONTOSO', 'note': 'Minor price change of 1.78% observed, price at $210.38.'}
[agent] tool result: {"status":"logged","symbol":"CONTOSO","note":"Minor price change of 1.78% observed, price at $210.38."}
Verify
Watch the terminal until a notification crosses the threshold, and confirm a tool result line prints for it.
Next steps
- Attach the MCP Authentication policy: Secure the MCP proxy before using this pattern for real notifications. See the note in step 3.
- Add a token-based rate limit to the LLM provider: Cap how much the agent can spend on reasoning calls, the same way you'd rate-limit any other API.
- Aggregate tools from multiple MCP servers: See Build an AI agent that uses aggregated MCP tools from multiple APIs for the pattern extended to several governed backends at once.
- Add more tools to the tool server: Anything you add is picked up automatically the next time the agent calls
list_tools().
Try the sample
The companion sample's agent.py is this exact guide's pattern. Plug in the URLs and credentials from steps 3 through 5 and run it against your own deployed WSO2 API Platform Cloud and AI Workspace resources.