Example
Table of Contents
Salesforce Example
What you'll build
Build a WSO2 Integrator automation that creates an Account record in Salesforce using the Salesforce connector. The integration connects to your Salesforce instance and submits a new Account sObject with name and industry fields. On success, it logs the creation response containing the new record's ID.
Operations used:
- create : Creates a new sObject record (Account) in Salesforce and returns a creation response with the record ID and success status.
Architecture
Prerequisites
- A Salesforce account with API access enabled
- Your Salesforce instance URL (e.g.,
https://yourorg.my.salesforce.com) - A Salesforce connected app access token
Setting up the Salesforce integration
New to WSO2 Integrator? Follow the Create a New Integration guide to set up your integration first, then return here to add the connector.
Adding the Salesforce connector
Step 1: Add the Salesforce connector
- In the left sidebar under your project, locate the Connections section.
- Select the + icon next to Connections (or select Add Connection).
- In the search field, enter
salesforce. - Select Salesforce from the results.

Configuring the Salesforce connection
Step 2: Fill in the Salesforce connection parameters
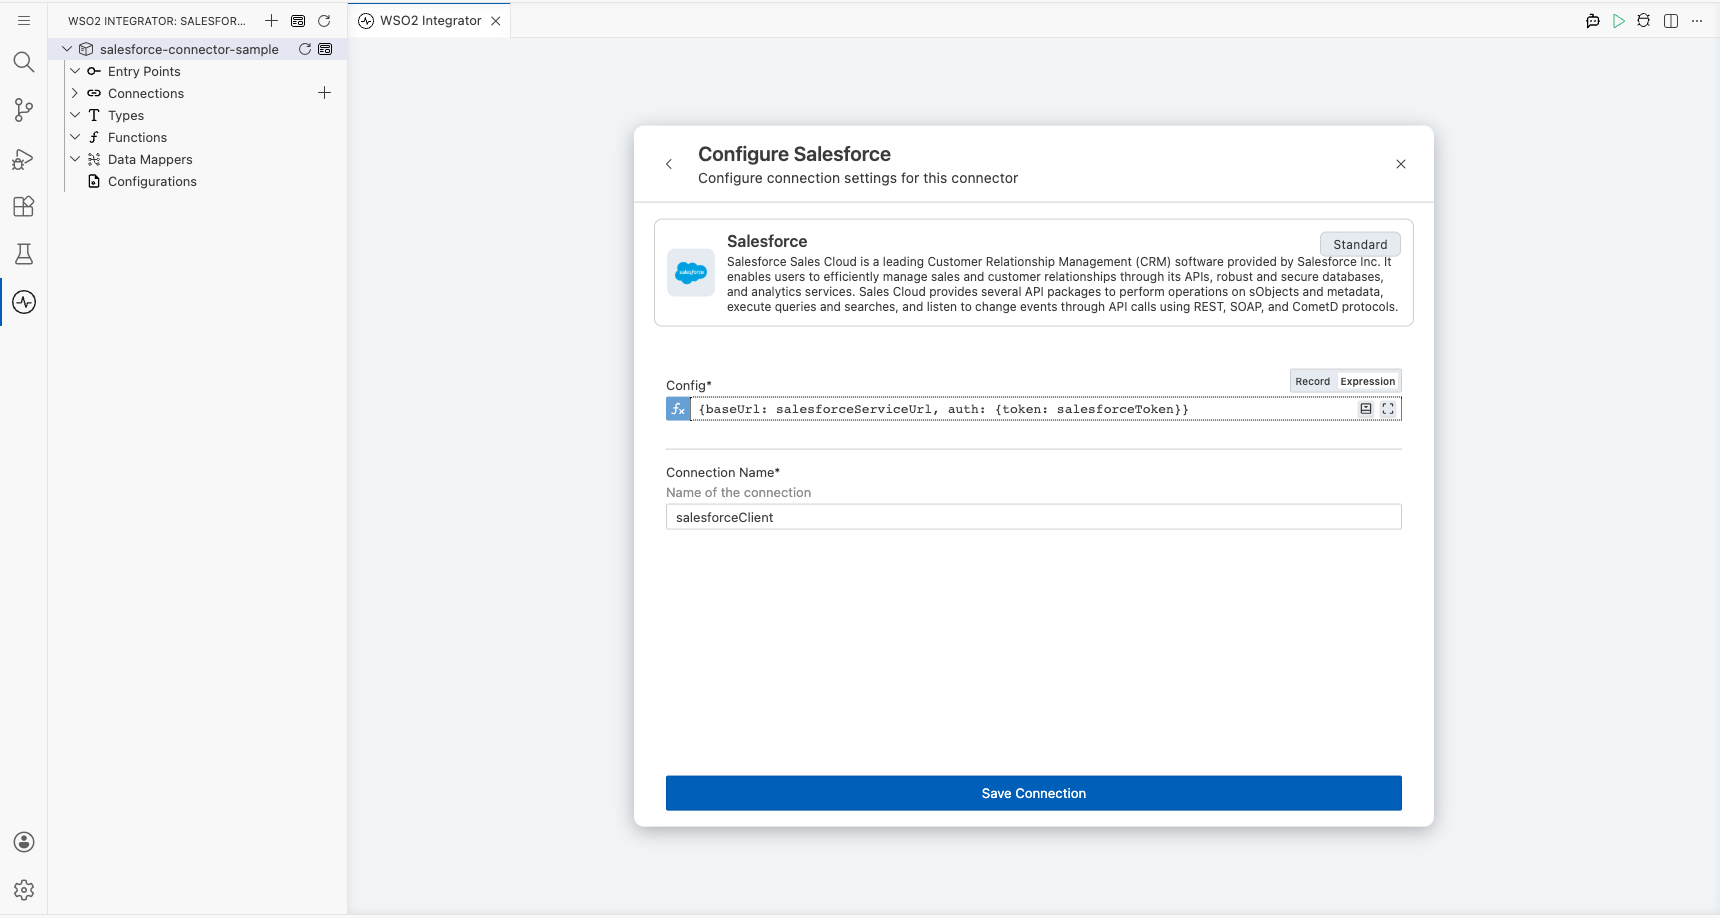
In the Configure Salesforce form, bind each field to a configurable variable so credentials aren't hardcoded.
- In the Config field, select the Expression tab to switch to expression mode.
- Enter the following expression, referencing the configurable variables you'll define:
{baseUrl: salesforceServiceUrl, auth: {token: salesforceToken}} - Confirm the Connection Name field shows
salesforceClient.
- Config : Full
salesforce:ConnectionConfigrecord expression referencingsalesforceServiceUrlandsalesforceToken - Connection Name : Logical name used to reference this connection on the canvas
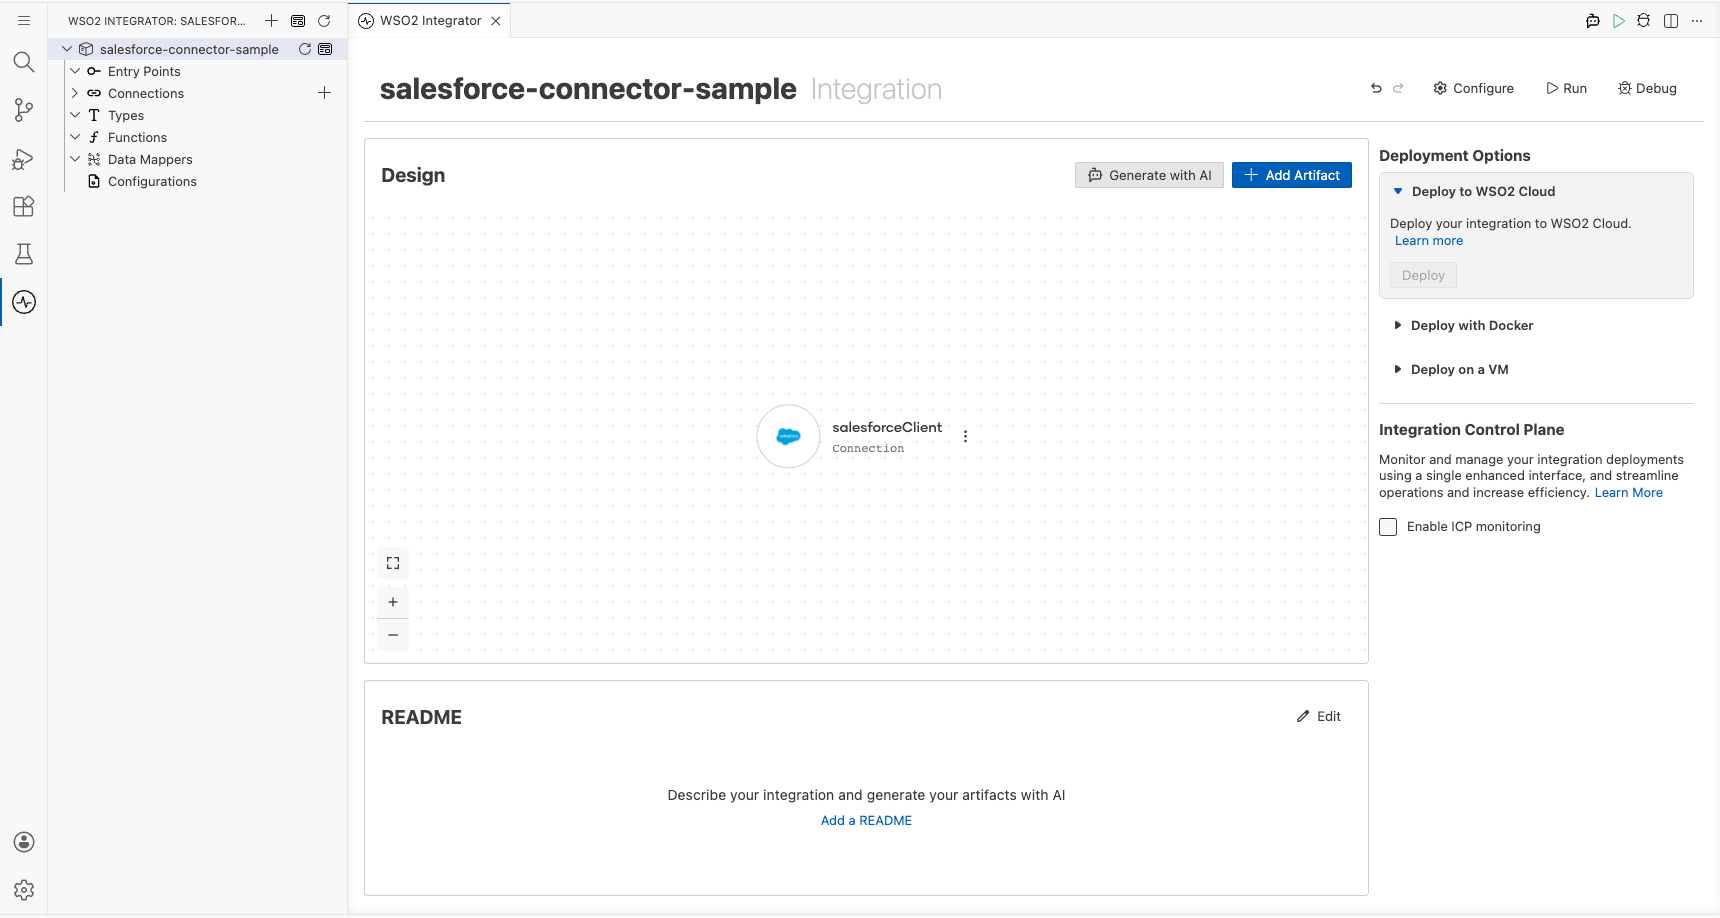
Step 3: Save the connection
Select Save Connection to persist the connection. The dialog closes and salesforceClient appears as a connection node on the canvas.
Step 4: Set actual values for your configurables
- In the left panel, select Configurations.
- Set a value for each configurable listed below.
- salesforceServiceUrl (string) : Your Salesforce instance URL (e.g.,
https://yourorg.my.salesforce.com) - salesforceToken (string) : Your Salesforce connected app access token
Configuring the Salesforce create operation
Step 5: Add an Automation entry point
- Select + Add Artifact on the canvas toolbar.
- In the Artifacts panel, select Automation.
- In the Create New Automation form, select Create.
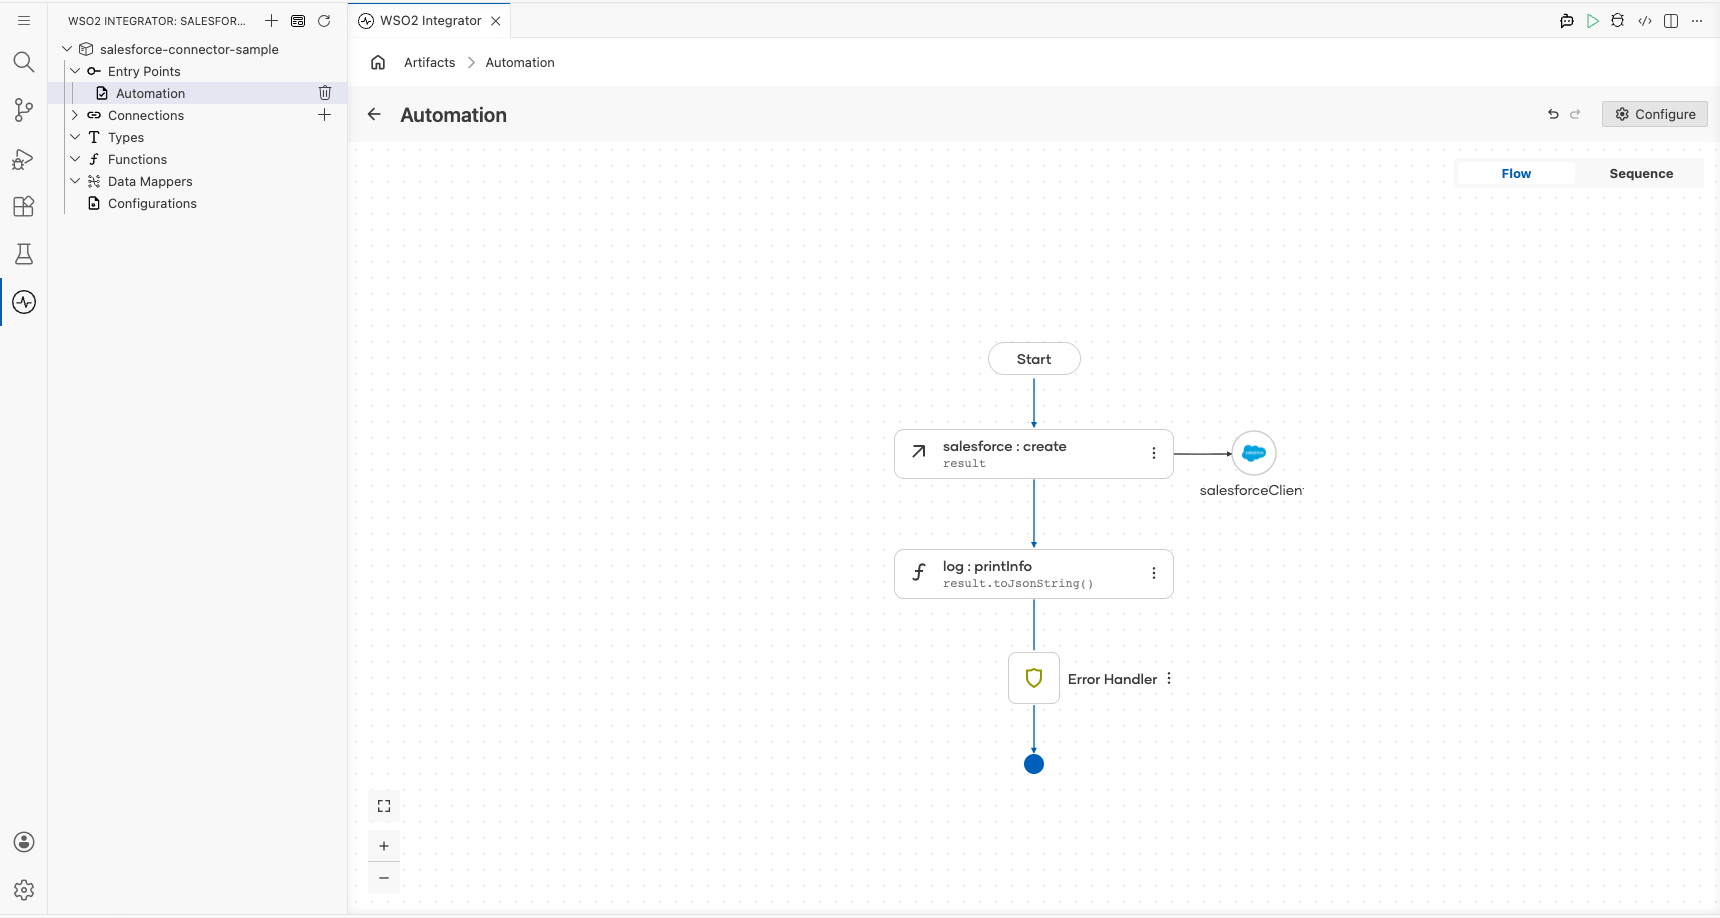
The Automation flow view opens showing a Start node and an Error Handler node.
Step 6: Select and configure the create operation
- Select the + button between the Start and Error Handler nodes to add a step.
- In the node panel, under Connections, expand salesforceClient to see its operations.
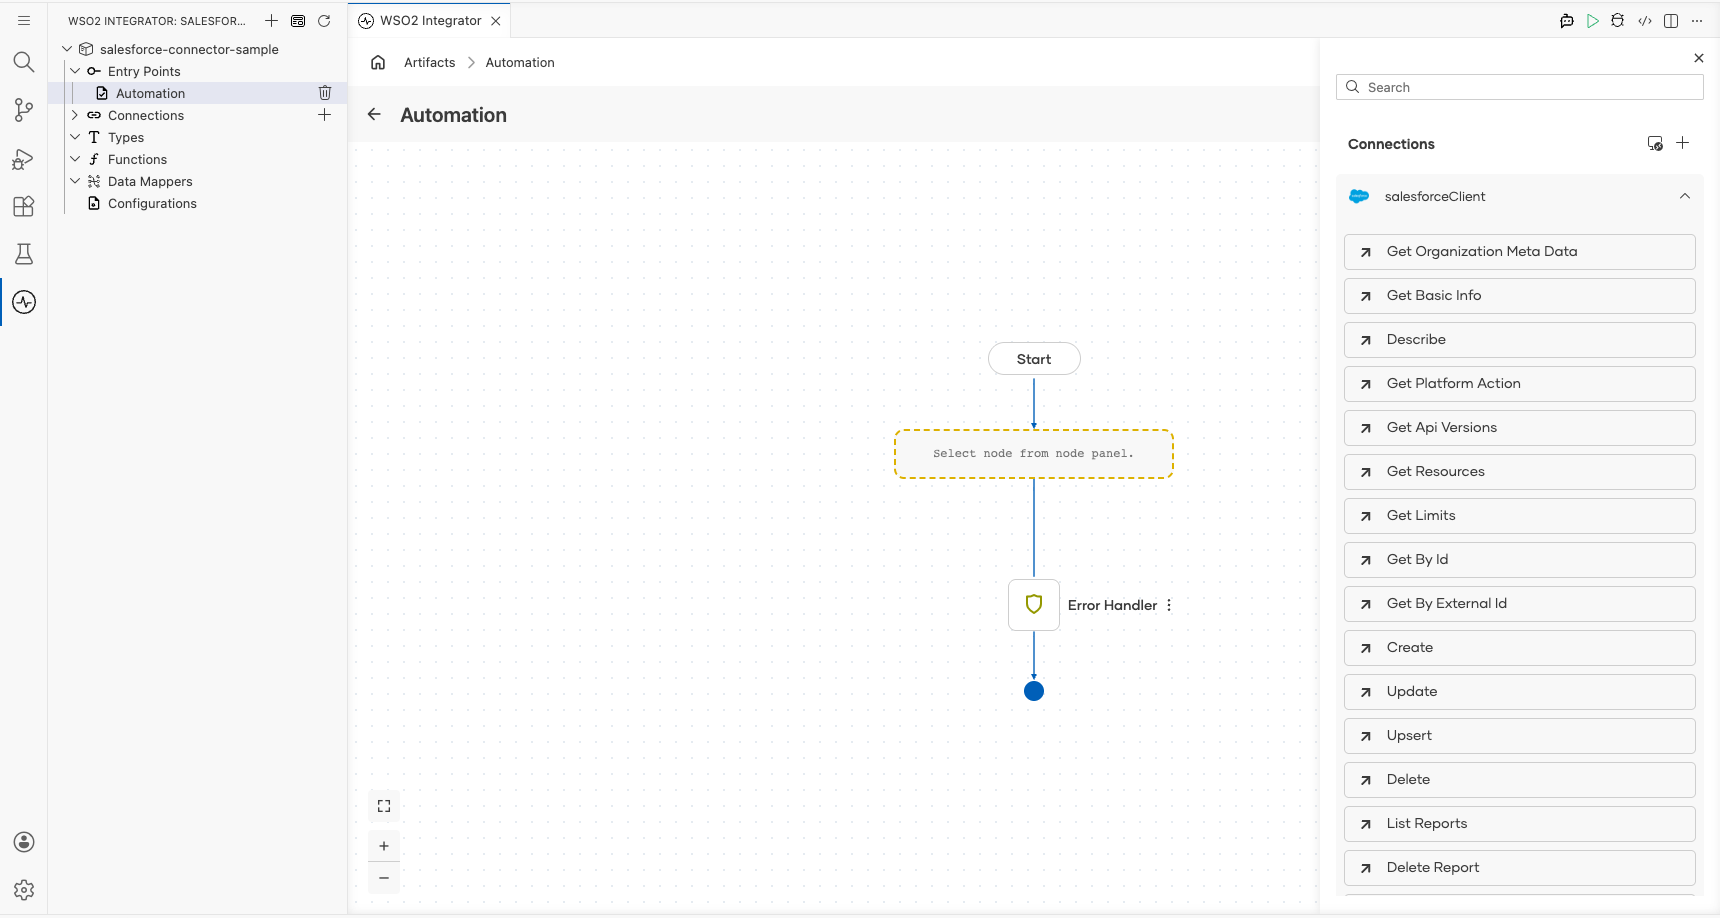
- Select Create from the list of operations.
- In the salesforceClient → create form, fill in the fields:
- S Object Name : Set to
"Account"(use expression mode) - S Object : Set to
{"Name": "Test Account", "Industry": "Technology"} - Result : Enter
resultas the variable name - Result Type : Auto-filled as
salesforce:CreationResponse
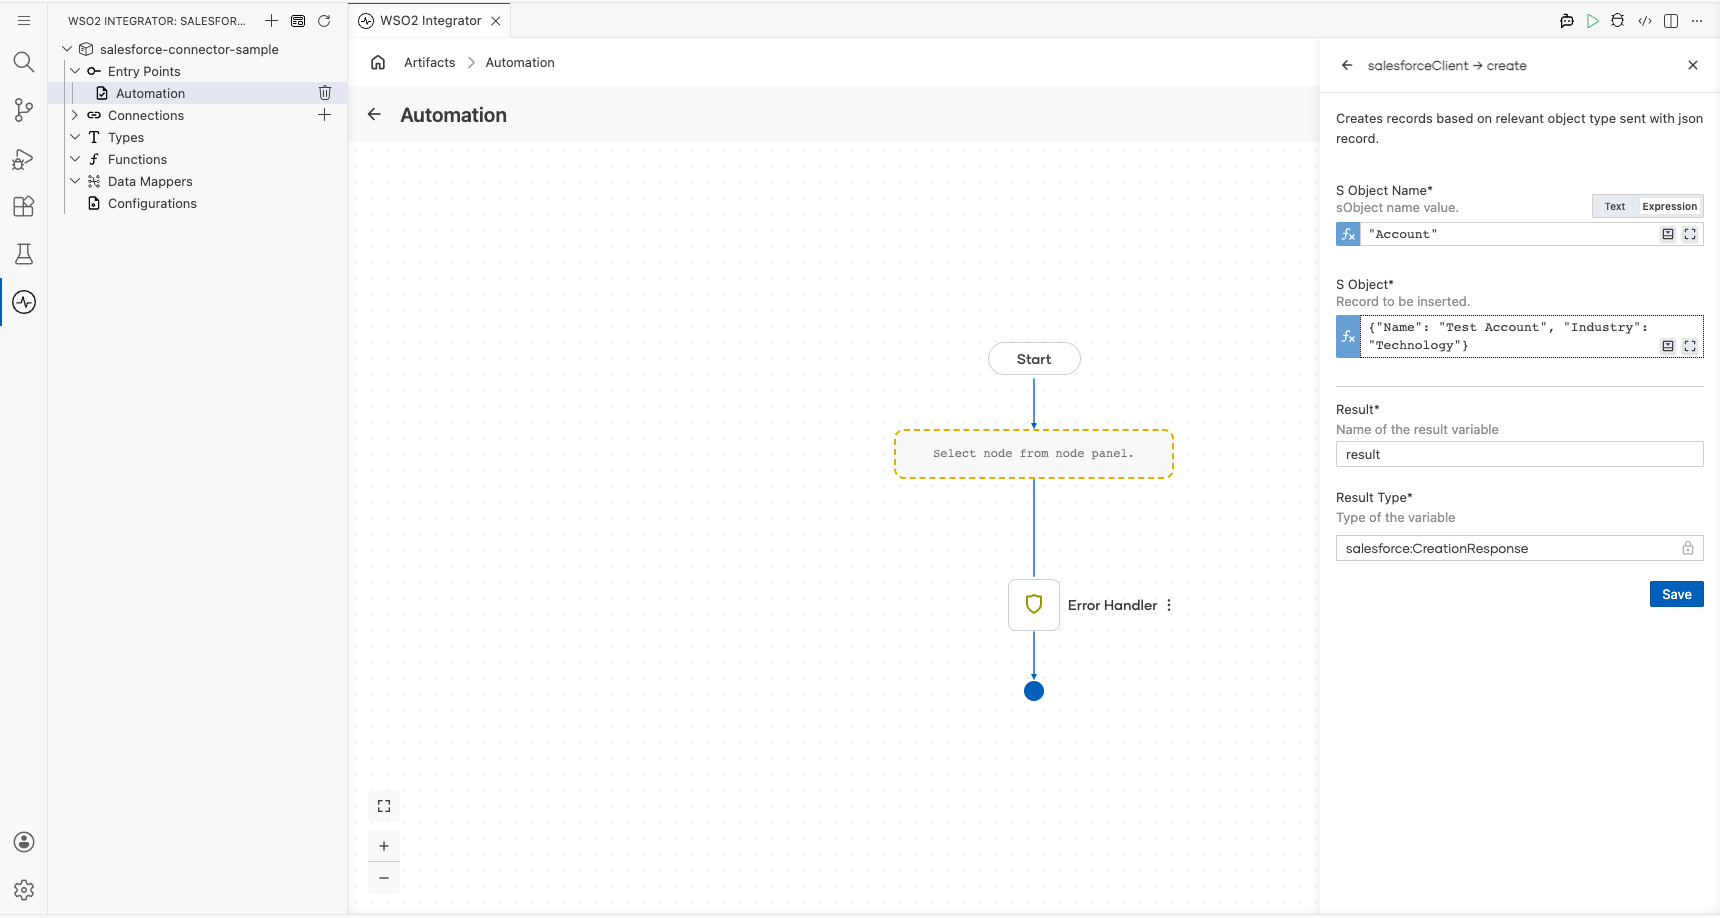
Select Save. The salesforce : create node now appears in the flow between Start and Error Handler.
Try it yourself
Try this sample in WSO2 Integration Platform.

More code examples
The salesforce connector provides practical examples illustrating usage in various scenarios. Explore these examples below, covering use cases like creating sObjects, retrieving records, and executing bulk operations.
-
Salesforce REST API use cases - How to employ the REST API of Salesforce to carry out various tasks.
-
Salesforce Bulk API use cases - How to employ Bulk API of Salesforce to execute Bulk jobs.
-
Salesforce Bulk v2 API use cases - How to employ Bulk v2 API to execute an ingest job.
-
Salesforce APEX REST API use cases - How to employ APEX REST API to create a case in Salesforce.
Salesforce Trigger Example
What you'll build
This integration listens for Salesforce platform events, including record creates, updates, deletes, and restores, using the Salesforce event listener in WSO2 Integrator. When a Salesforce user triggers a change, the listener receives the salesforce:EventData payload and passes it to the appropriate handler; each handler logs the event payload as a JSON string using log:printInfo.
Architecture
Prerequisites
- A Salesforce developer account with a connected app that has the required OAuth scopes (
api,refresh_token). - Your Salesforce username and password (with security token appended if required by your org).
Setting up the Salesforce Event Integration
New to WSO2 Integrator? Follow the Create a New Integration guide to set up your integration first, then return here to add the trigger.
Adding the Salesforce Event Integration trigger
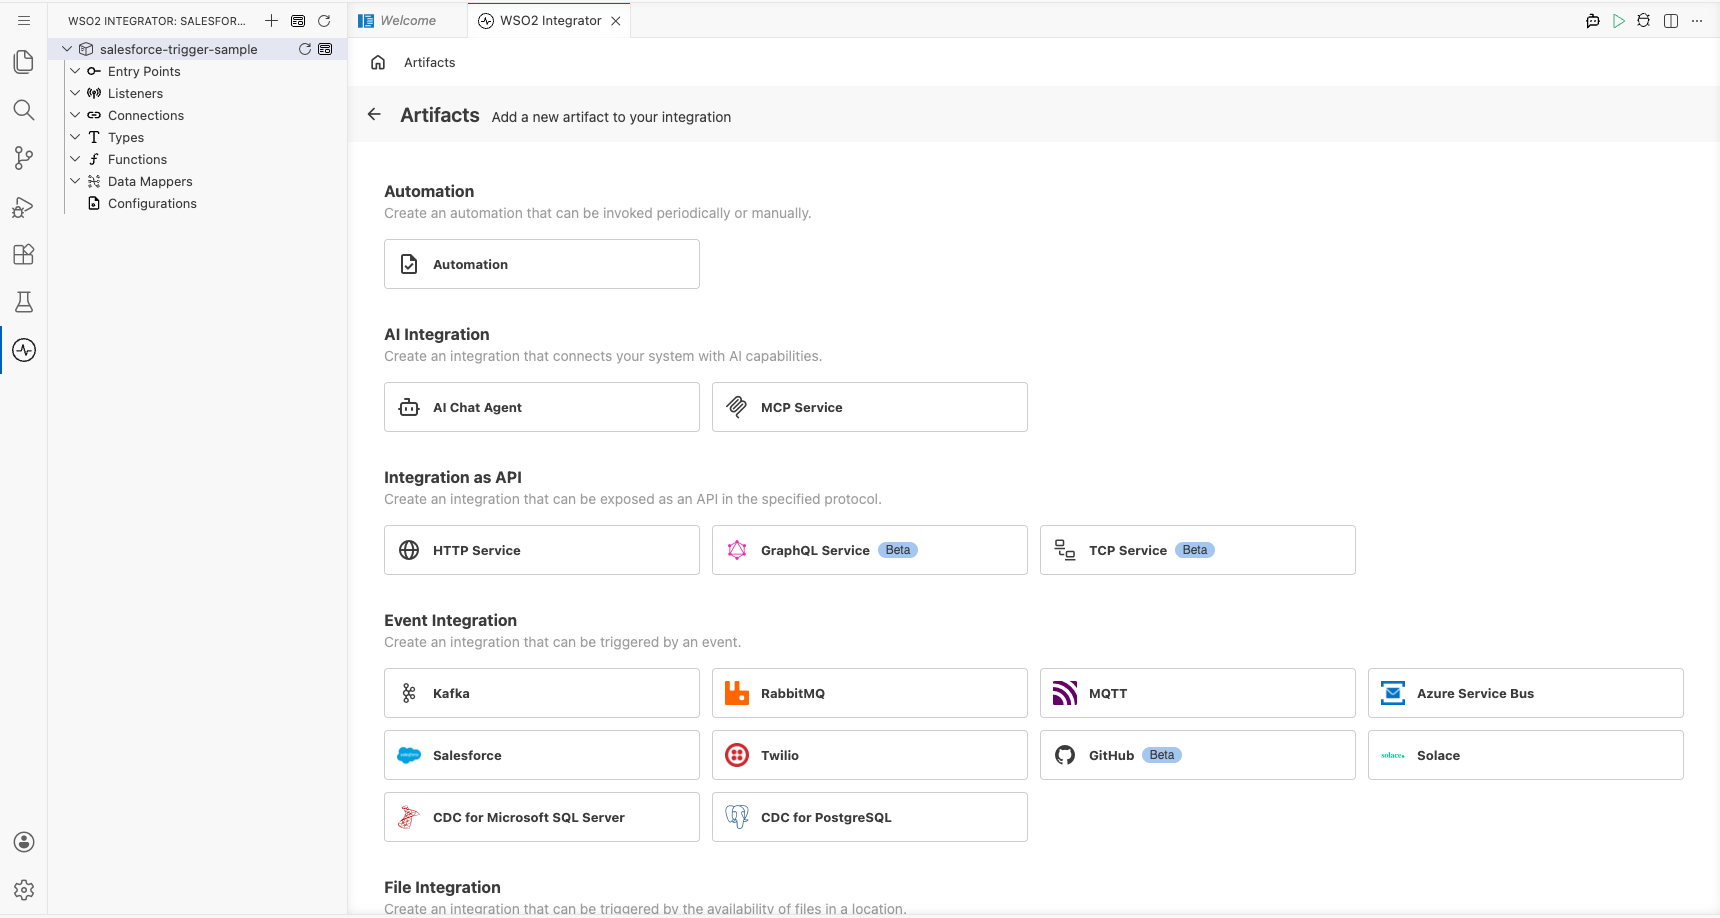
Step 1: Open the artifacts palette
Select + Add Artifact in the low-code canvas to open the Artifacts palette.
Configuring the Salesforce Event Integration listener
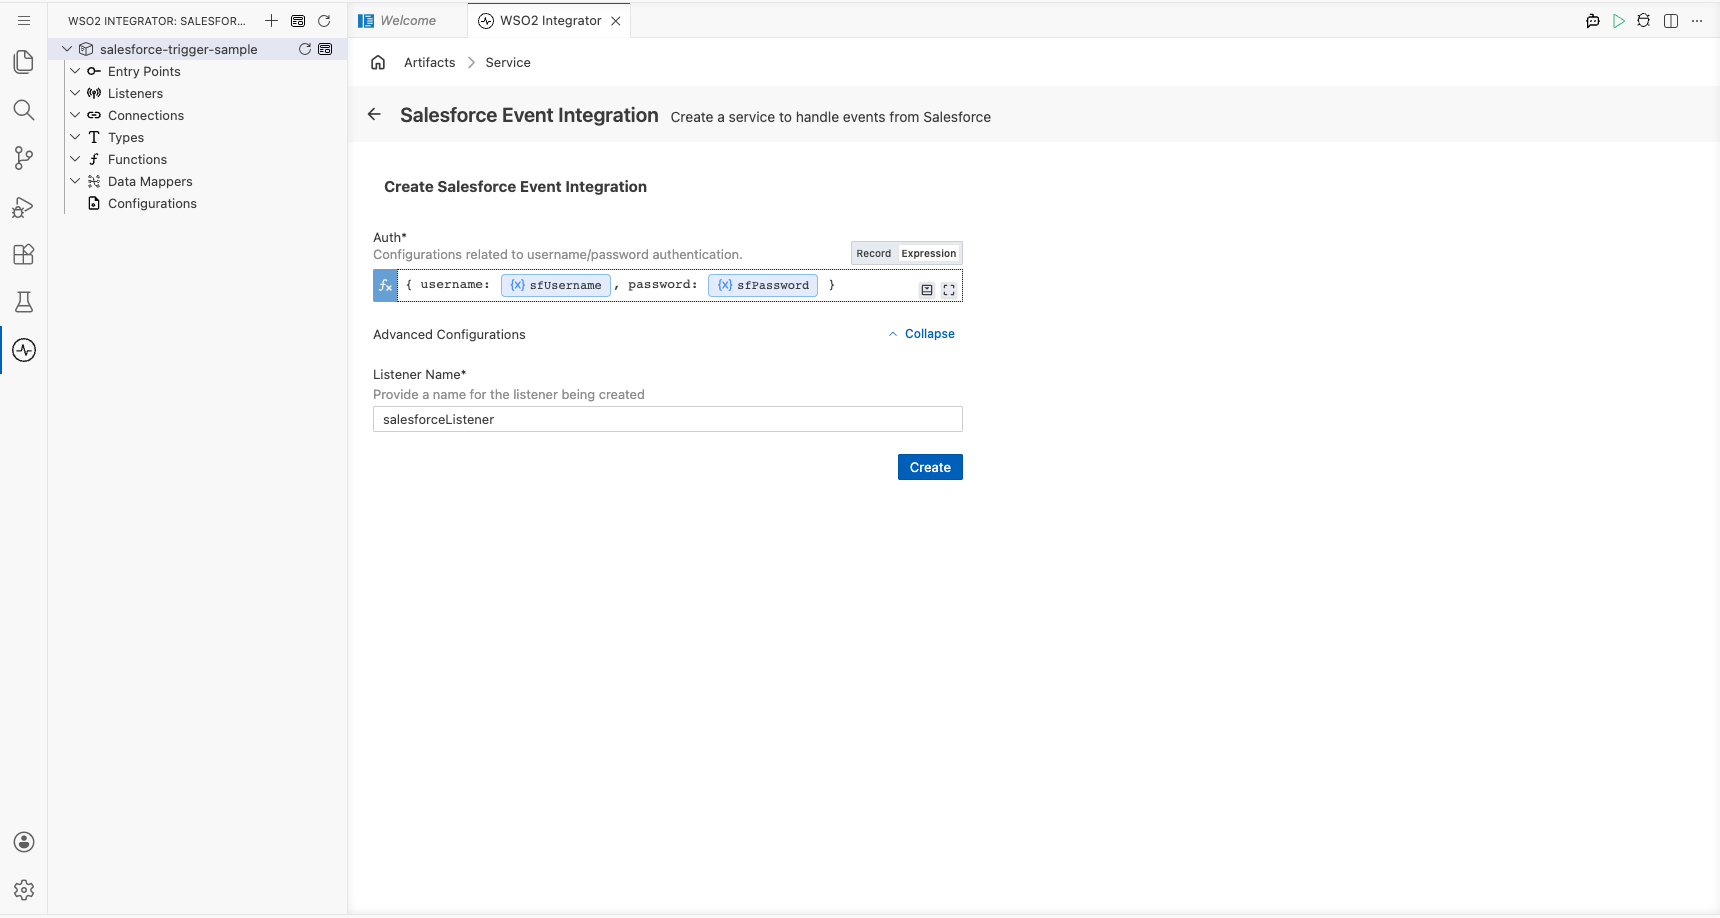
Step 2: Bind listener parameters to configuration variables
In the Create Salesforce Event Integration form, bind the Auth field to configurable variables so credentials aren't hard-coded:
-
Select the Open Helper Panel icon next to the Auth field.
-
In the Helper Panel, open the Configurables tab and select + Add.
-
Add
sfUsernamewith typestring, then select Save. -
Add
sfPasswordwith typestring, then select Save. -
Ensure the Auth field is in Expression mode and enter the following expression referencing the configurable variables:
{ username: sfUsername, password: sfPassword } -
Leave the Listener Name field as the default
salesforceListener.
- Auth : the
salesforce:CredentialsConfigrecord containing the Salesforce username and password used to authenticate the listener
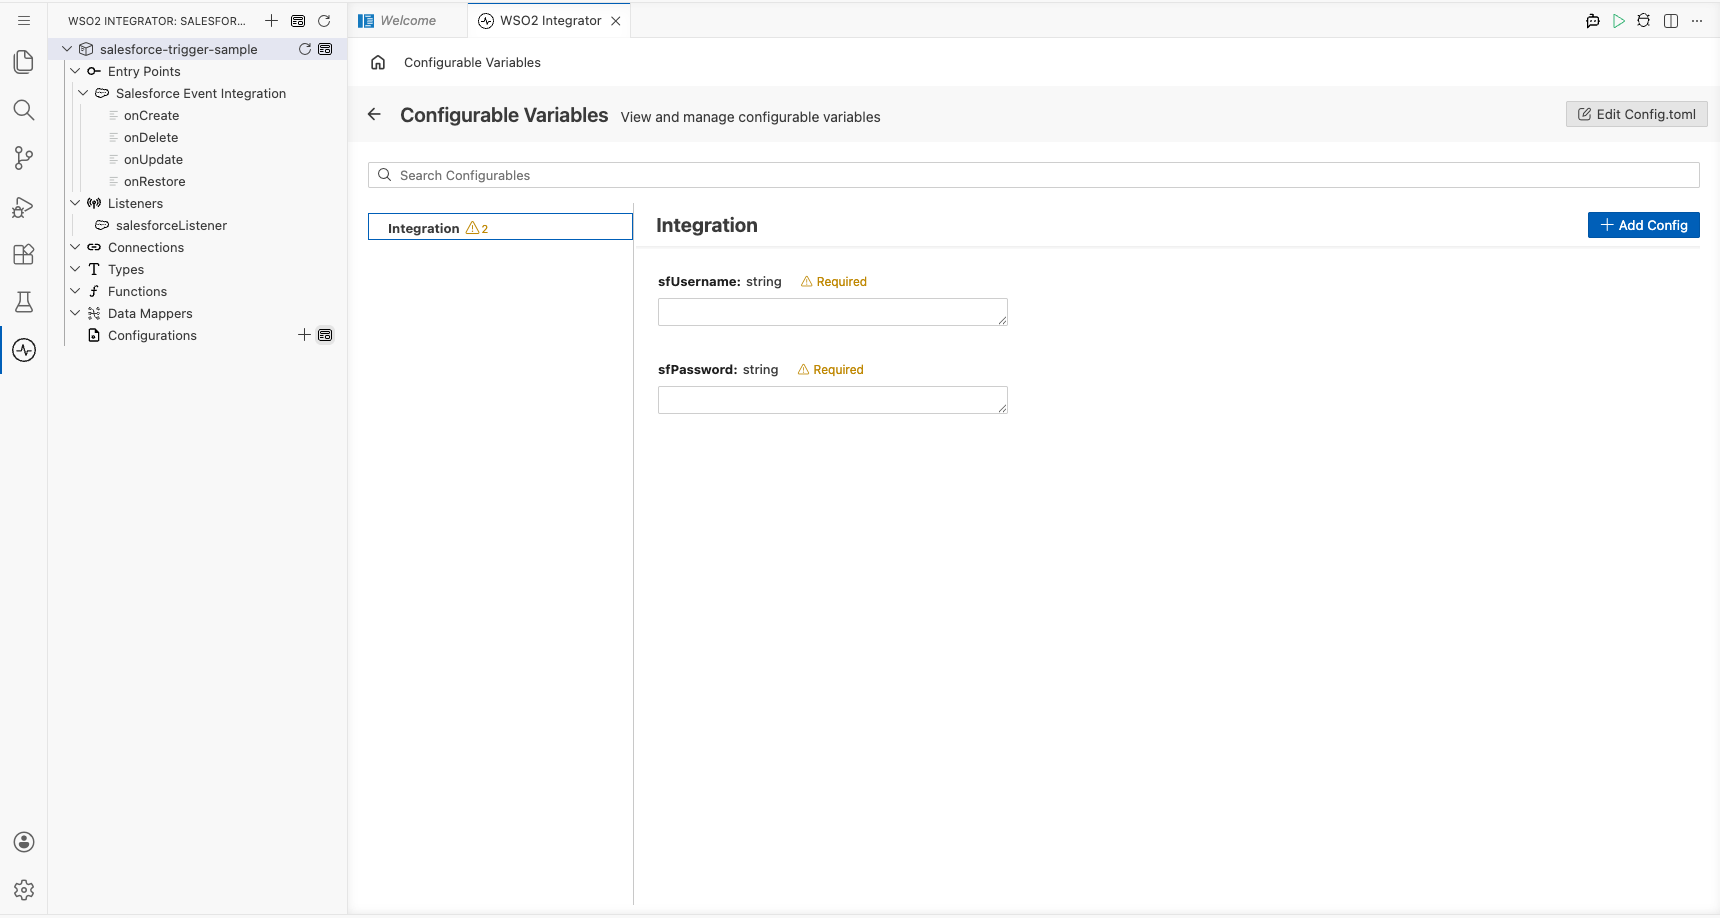
Step 3: Set actual values for your configurations
Select Configurations in the left panel to open the Configurations panel and enter a value for each configuration listed below:
- sfUsername (string) : Salesforce account username (for example,
[email protected]) - sfPassword (string) : Salesforce account password with security token appended if required
Step 4: Create the listener
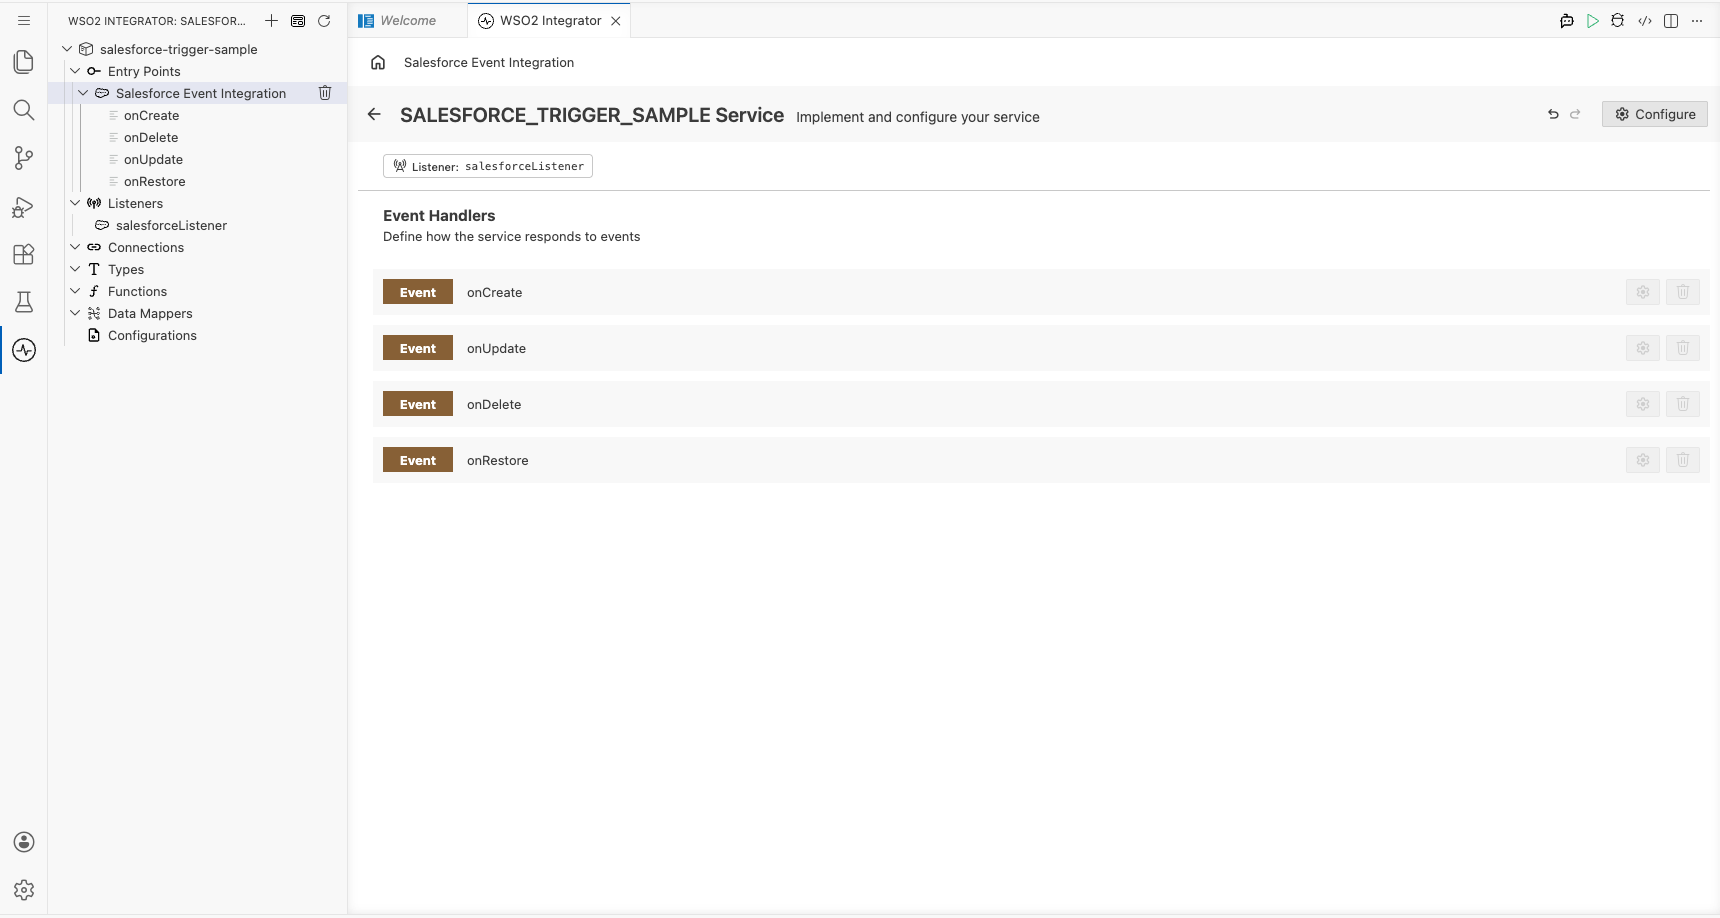
Select Create to submit the trigger configuration. WSO2 Integrator generates the service with all four auto-registered Salesforce event handlers.
Handling Salesforce Event Integration events
Step 5: Review auto-registered event handlers
Navigate to the Salesforce Event Integration service view in the left panel. Salesforce registers four event handlers automatically: no manual + Add Handler step is needed for this trigger:
- onCreate : Salesforce record created
- onUpdate : Salesforce record updated
- onDelete : Salesforce record deleted
- onRestore : Salesforce record restored
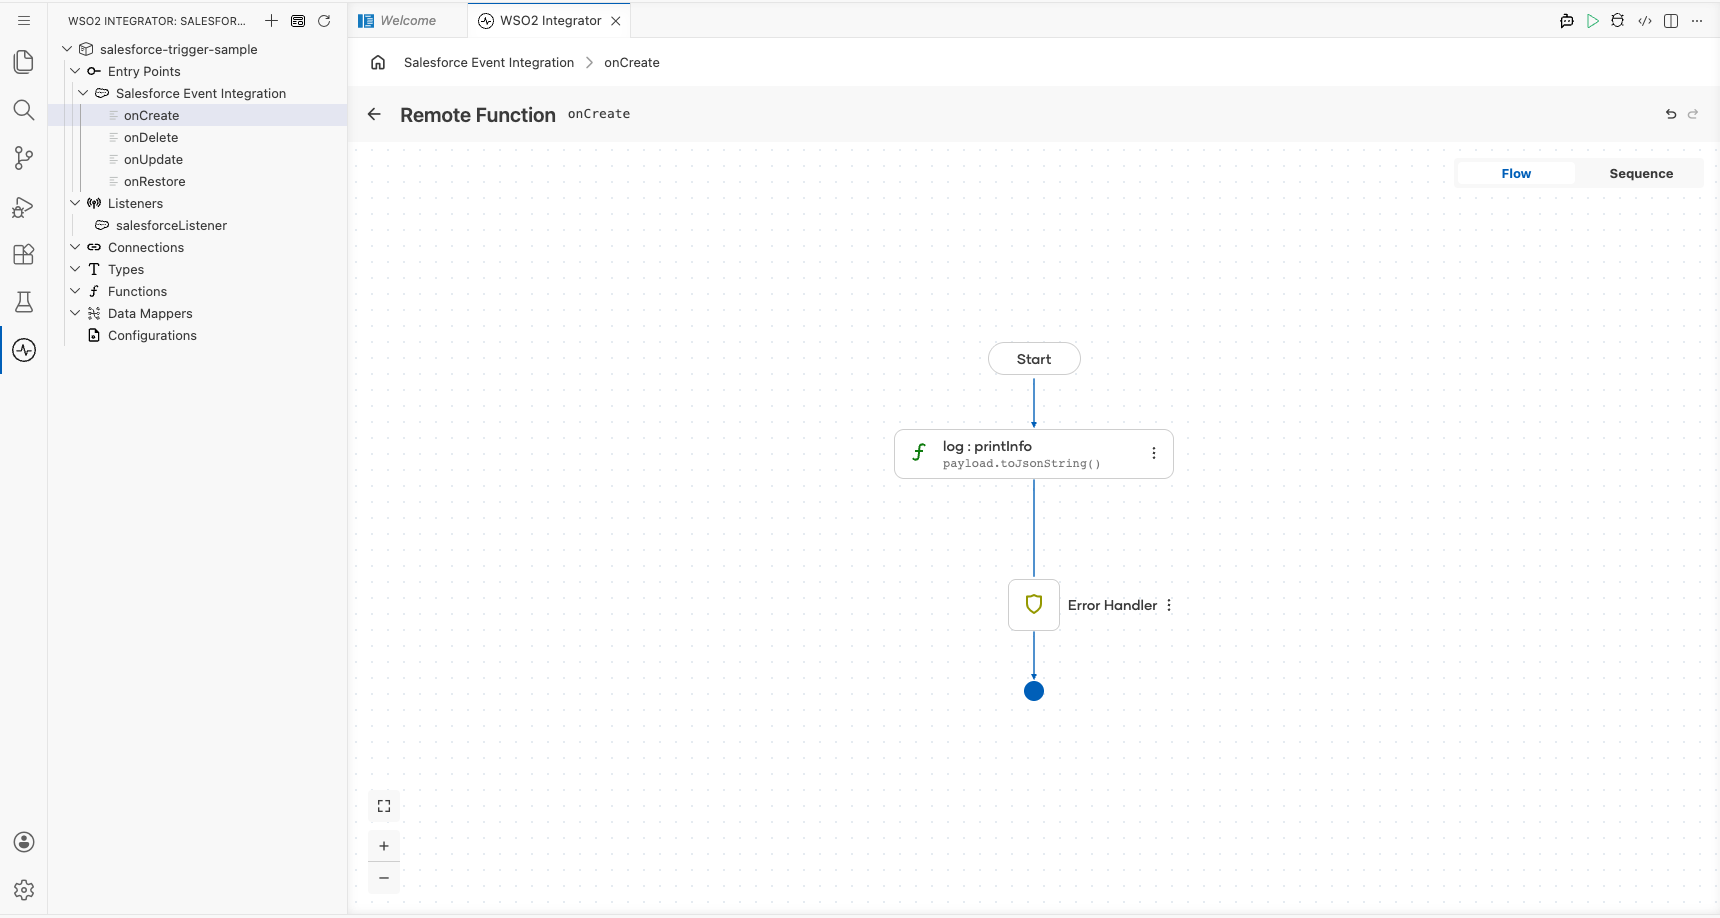
Step 6: Open the onCreate handler canvas
Select the onCreate row to open its flow canvas. The canvas shows the initial handler flow: a Start node connected to an Error Handler block. There's no Define Value modal for this trigger; the handler receives a pre-typed salesforce:EventData payload directly.
Step 7: Add a log step to the handler body
Select the + icon in the flow chart, and in the side panel that opens, choose Log Info from the Logging section, then enter payload.toJsonString() as the message.
Step 8: Confirm the registered handlers in the service view
Navigate back to Salesforce Event Integration in the left panel to confirm the complete service with all four registered handlers.

Running the integration
Run the integration from WSO2 Integrator and then trigger a Salesforce event to see the log output. Use one of the following approaches:
- Salesforce web console: Log in to your Salesforce org and create, update, delete, or restore a record. The platform event is published automatically, and the listener receives it.
- Salesforce REST API: Use the Salesforce REST API (for example, with
curlor Postman) to create or update a record via the/sobjects/endpoint, which fires the corresponding platform event. - Salesforce Data Loader: Use the Salesforce Data Loader tool to perform a bulk insert or update operation, which generates create or update events.
Once the event fires, the onCreate (or the appropriate event) handler logs the salesforce:EventData payload as a JSON string. Check the WSO2 Integrator console output to verify the log entry appears.
Try it yourself
Try this sample in WSO2 Integration Platform.