Example
What you'll build
This integration connects to a live Snowflake instance using the Snowflake connector on the WSO2 Integrator low-code canvas. It sets up an Automation entry point that executes a SQL query operation and captures the result stream, with connection credentials stored safely as Configurable variables.
Operations used:
- Query: executes a parameterized SQL query against a Snowflake database and returns results as a typed stream
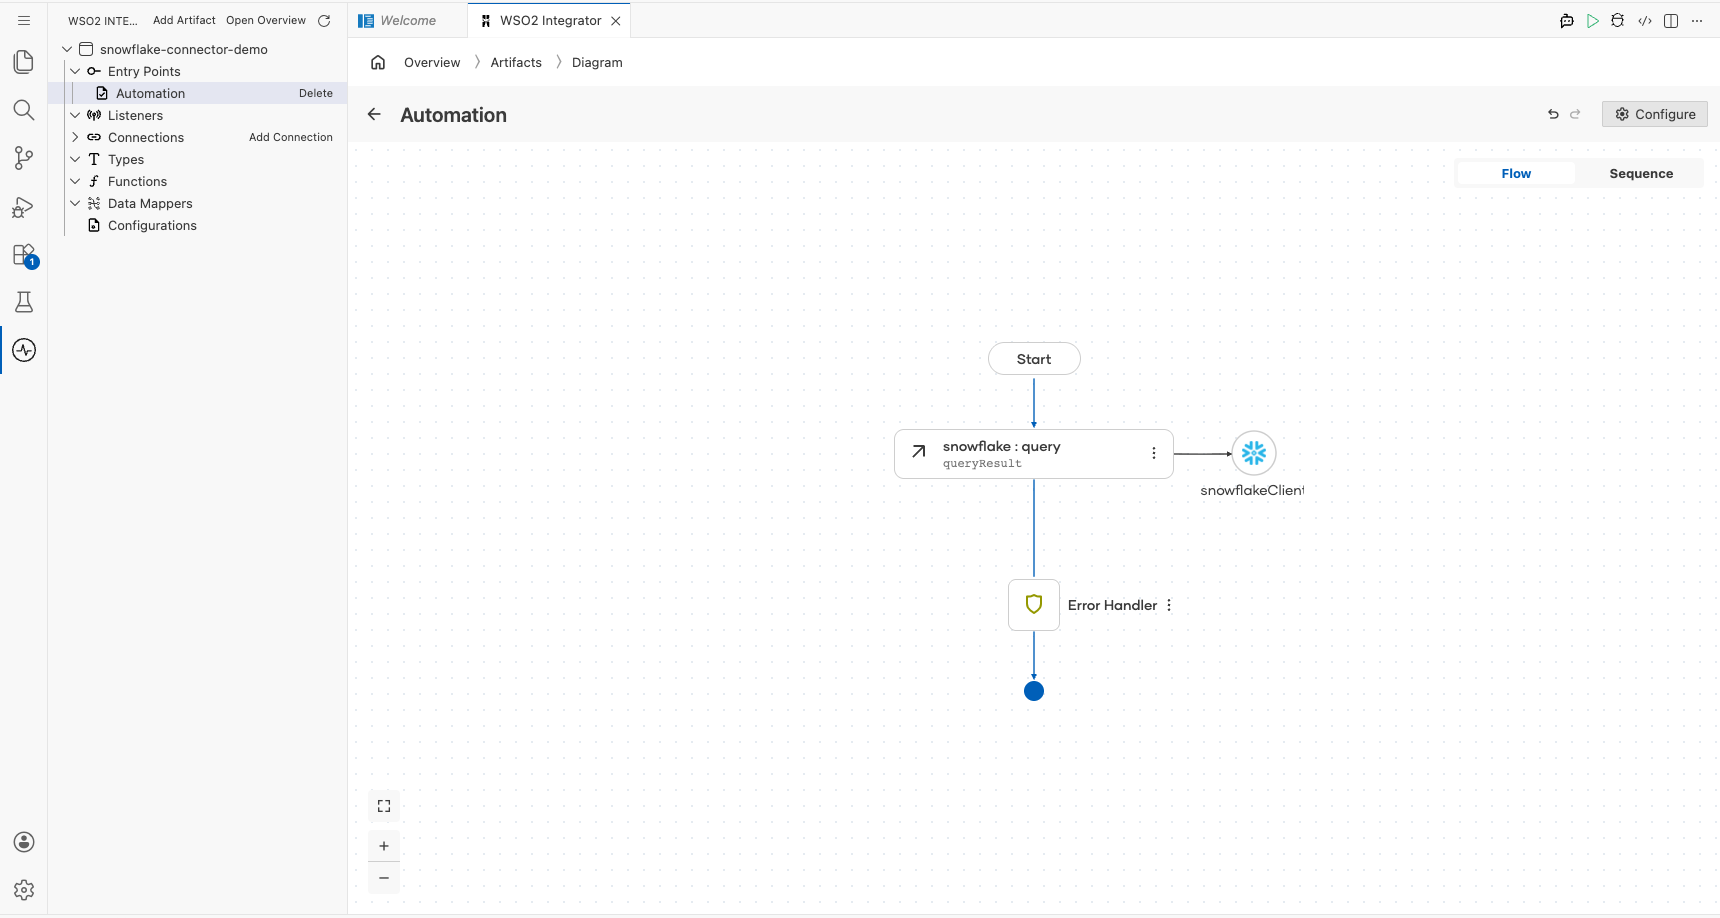
Architecture
Prerequisites
- A Snowflake account with a running warehouse, database, and schema
- Network access from your WSO2 Integrator host to
<account>.snowflakecomputing.com
Setting up the Snowflake integration
Set up a new WSO2 Integrator project by following the project creation guide before proceeding with the steps below.
Adding the Snowflake connector
Step 1: Open the add connection palette
On the low-code canvas, click + Add Connection (or the + icon in the Connections section of the left sidebar) to open the Add Connection palette, which shows a searchable grid of available connectors.
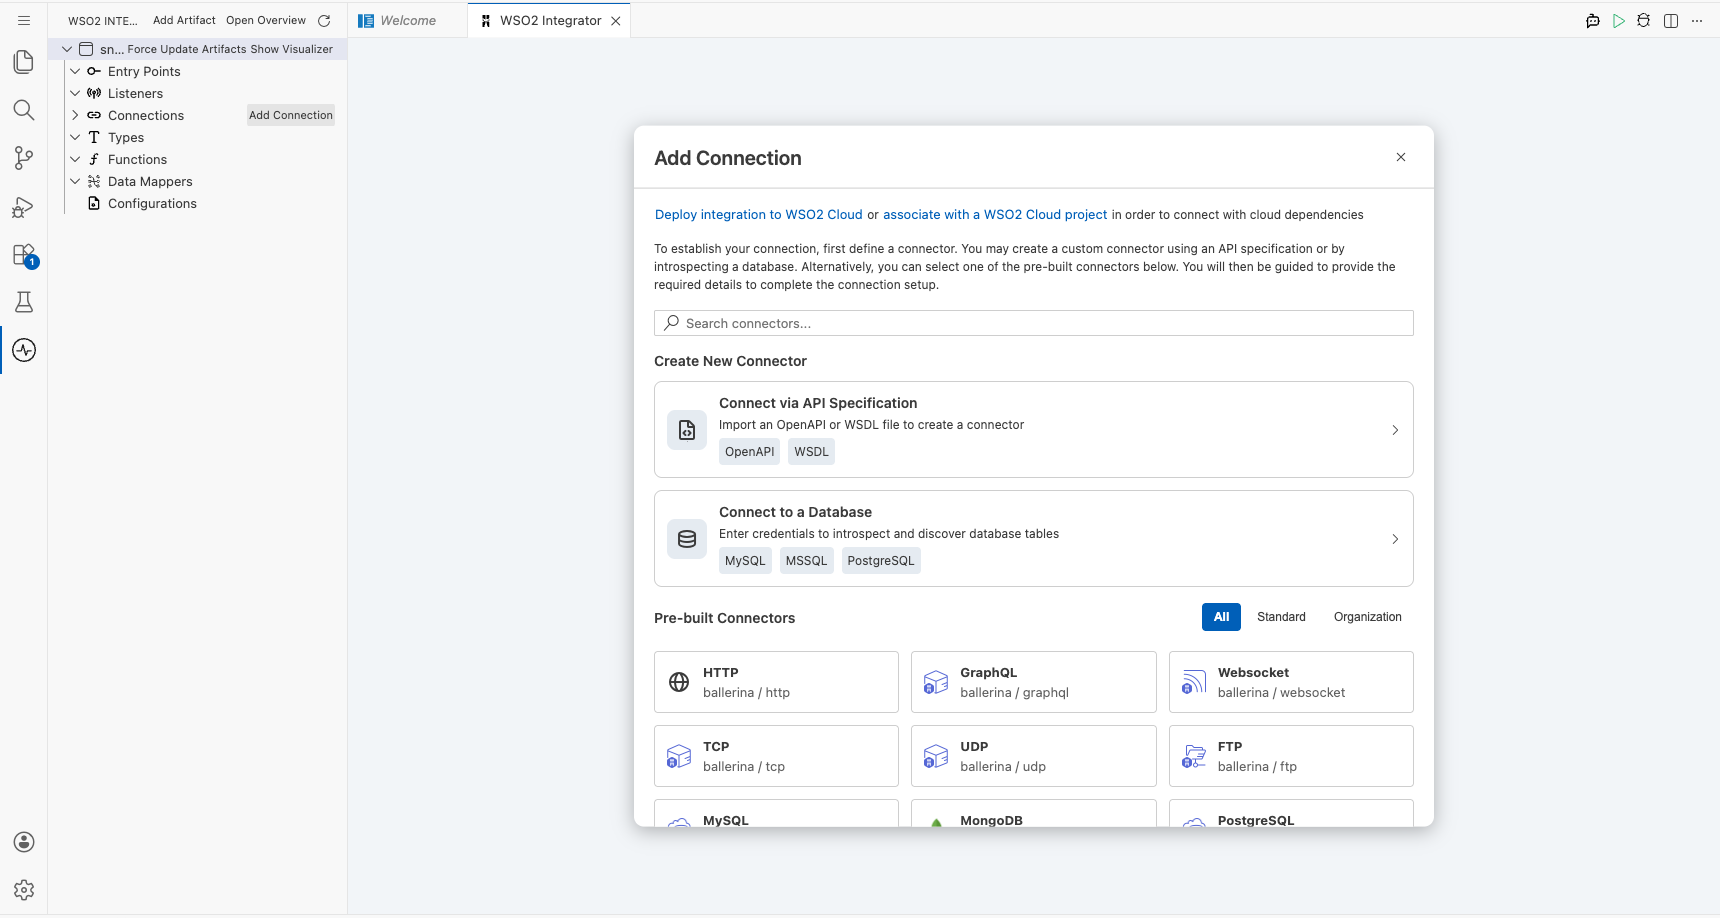
Step 2: Search for and select the Snowflake connector
In the palette search box, type snowflake to filter the results. Click the Snowflake connector card to open the connector variant picker, choose the Standard variant, and click Select to proceed to the connection configuration form.
Configuring the Snowflake connection
Step 3: Bind connection parameters to configurable variables
Fill in the connection form by binding each required field to a Configurable variable so that credentials are injected at runtime rather than hard-coded. For each field, click the Expression toggle to switch it to expression mode, then use the Configurables tab to create and assign a new variable.
- accountIdentifier: the Snowflake account identifier (for example,
orgname-accountname) - user: the Snowflake username
- password: the Snowflake account password
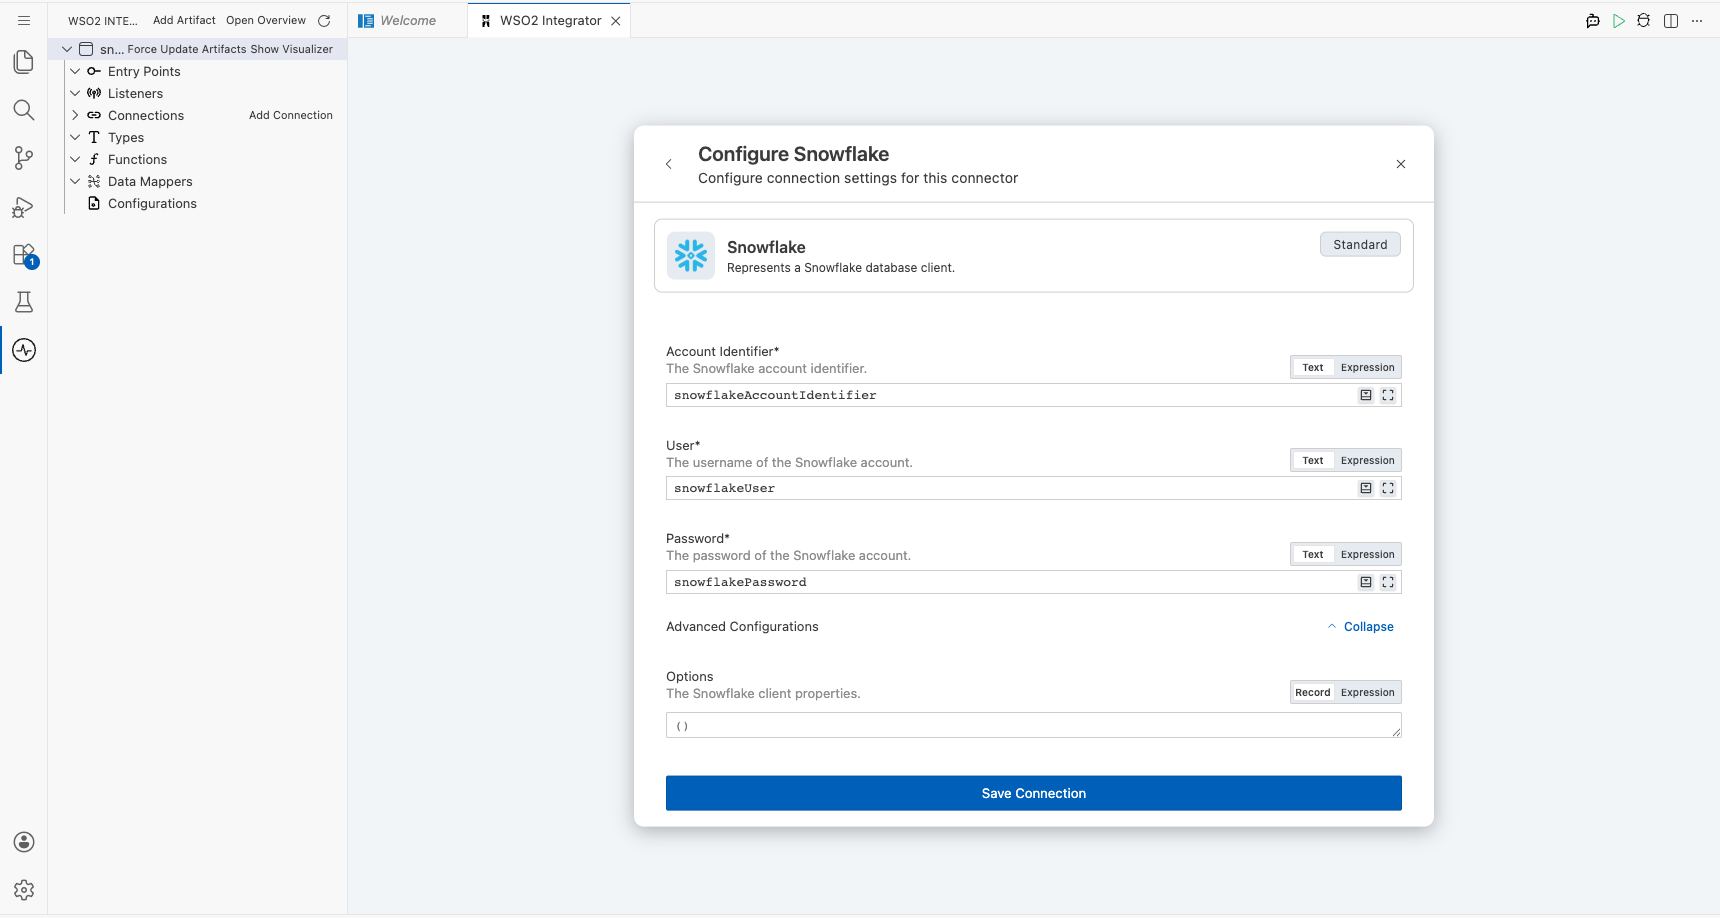
Step 4: Save the connection
Click Save at the bottom of the connection form. The canvas refreshes, and the new connection node, snowflakeClient, appears in the Connections section of the left sidebar and as a node on the canvas.

Step 5: Set actual values for your configurables
Click Configurations in the left panel of WSO2 Integrator (at the bottom of the project tree, under Data Mappers) to open the Configurations panel and supply runtime values for each variable created above.
- accountIdentifier: string: your Snowflake account identifier (for example,
myorg-myaccount) - user: string: your Snowflake username
- password: string: your Snowflake account password
Configuring the Snowflake query operation
Step 6: Add an automation entry point and open the flow editor
In the left sidebar, locate the Entry Points section, click + Add Entry Point, and select Automation. A new Automation node named main appears on the canvas. Click the node to open its flow editor, then click the + button between the Start and End nodes to add a new step.
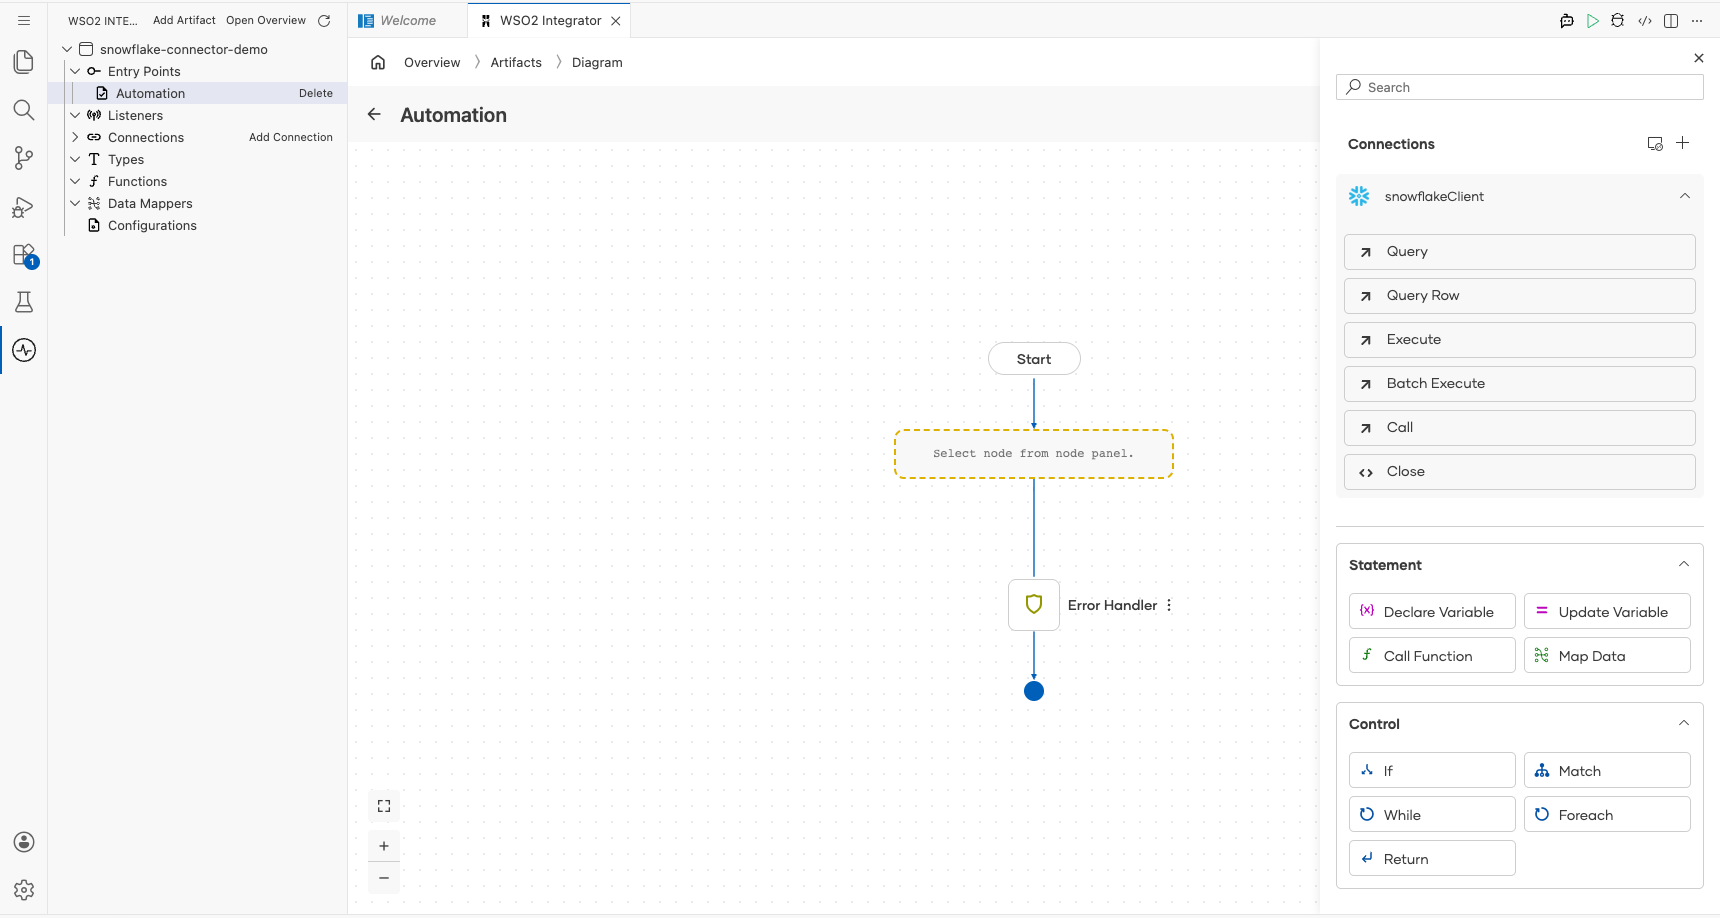
Step 7: Expand the Snowflake connector operations
In the Add Step panel, locate snowflakeClient under the Connections section and click it to expand the node and reveal all available operations, including Query, Query Row, Execute, Batch Execute, Call, and Close.
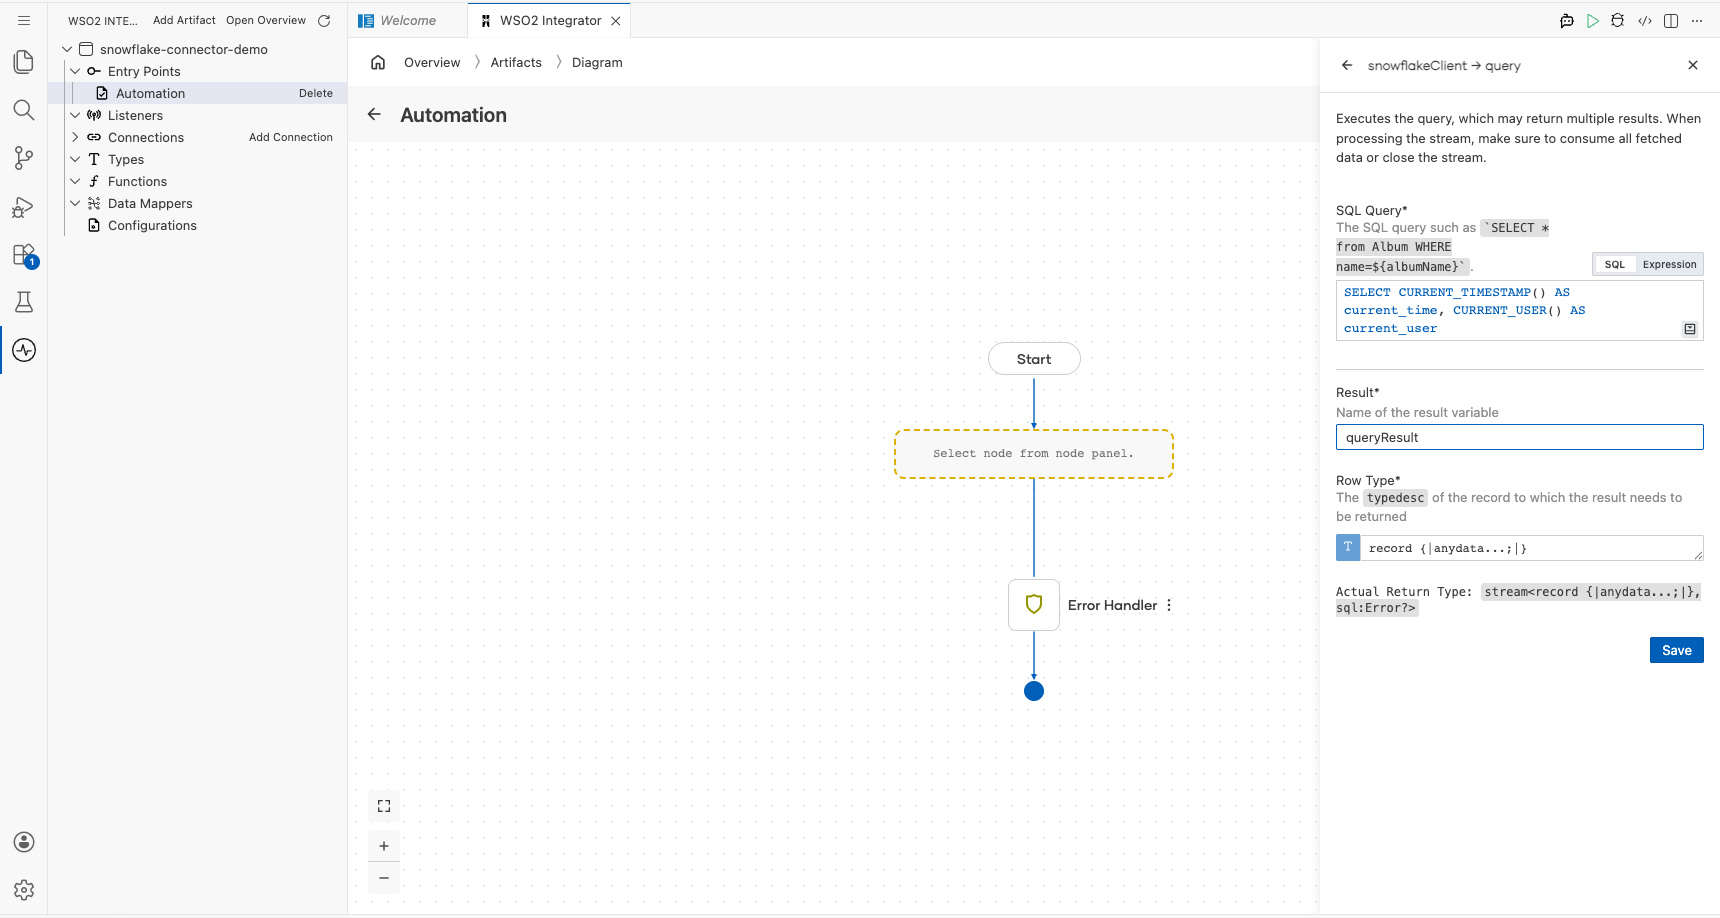
Step 8: Select and configure the query operation
Click Query to open the Query operation configuration form and fill in the fields as follows, then click Save to confirm.
- SQL Query: the parameterized SQL statement to execute (for example,
SELECT * FROM SNOWFLAKE_SAMPLE_DATA.TPCH_SF1.CUSTOMER LIMIT 10) - Result Variable: the name for the result stream variable (for example,
queryResult) - Row Type: the record type used for flexible column mapping (for example,
record {| anydata...; |})

More code examples
The following example shows how to use the Snowflake connector to create a table, insert data, and query data from the Snowflake database.
Employees Data Management Example - Manages employee data in a Snowflake database and exposes an HTTP service to interact with the database.