Example
GitHub Example
What you'll build
Build a WSO2 Integrator automation that connects to GitHub and programmatically opens an issue against any repository. The integration uses the ballerinax/github connector to authenticate with a personal access token and call the Create an issue operation.
Operations used:
- Create an issue : Opens a new GitHub issue on a specified repository with a title, body, and labels.
Architecture
Prerequisites
- A GitHub personal access token with
reposcope
Setting up the GitHub integration
New to WSO2 Integrator? Follow the Create a New Integration guide to set up your integration first, then return here to add the connector.
Adding the GitHub connector
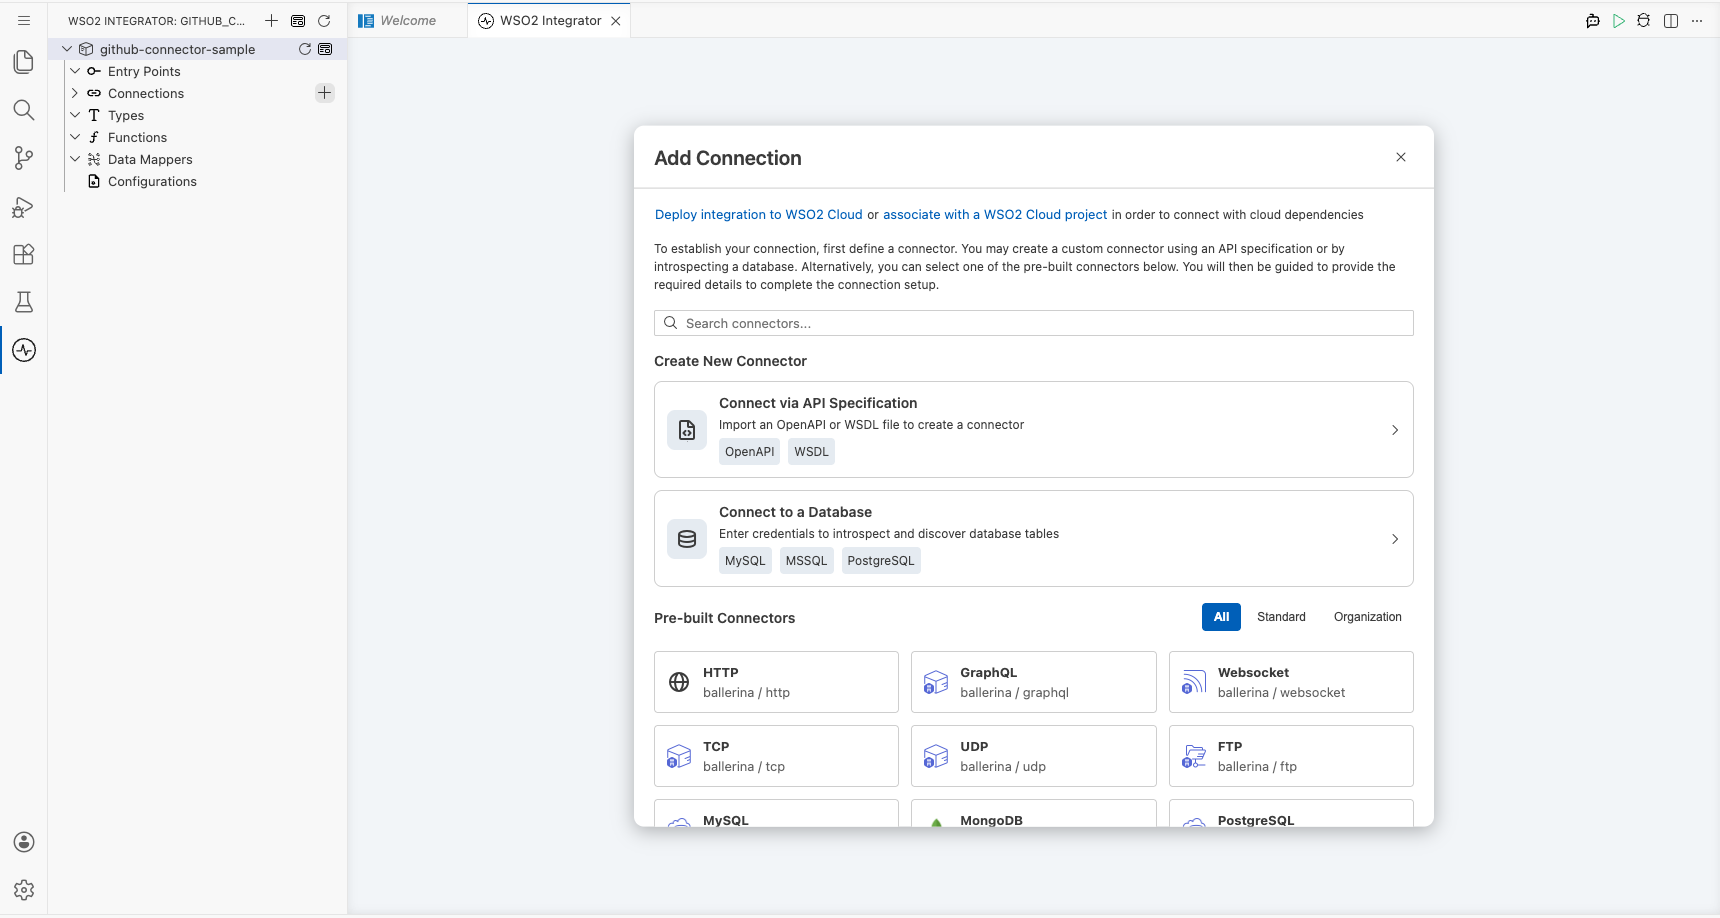
Step 1: Open the add connection palette
Select + Add Artifact on the Integration Design canvas. In the Artifacts panel, scroll to Other Artifacts and select Connection. The connector search palette appears with a search box and a grid of pre-built connectors.
Configuring the GitHub connection
Step 2: Fill in the connection parameters
Enter github in the search box to filter results, then select the GitHub connector card. In the connection configuration form, bind the connection fields to configurable variables:
- auth.token : Personal access token used to authenticate GitHub API requests
- Connection Name : Logical name for this connection (
githubClient)
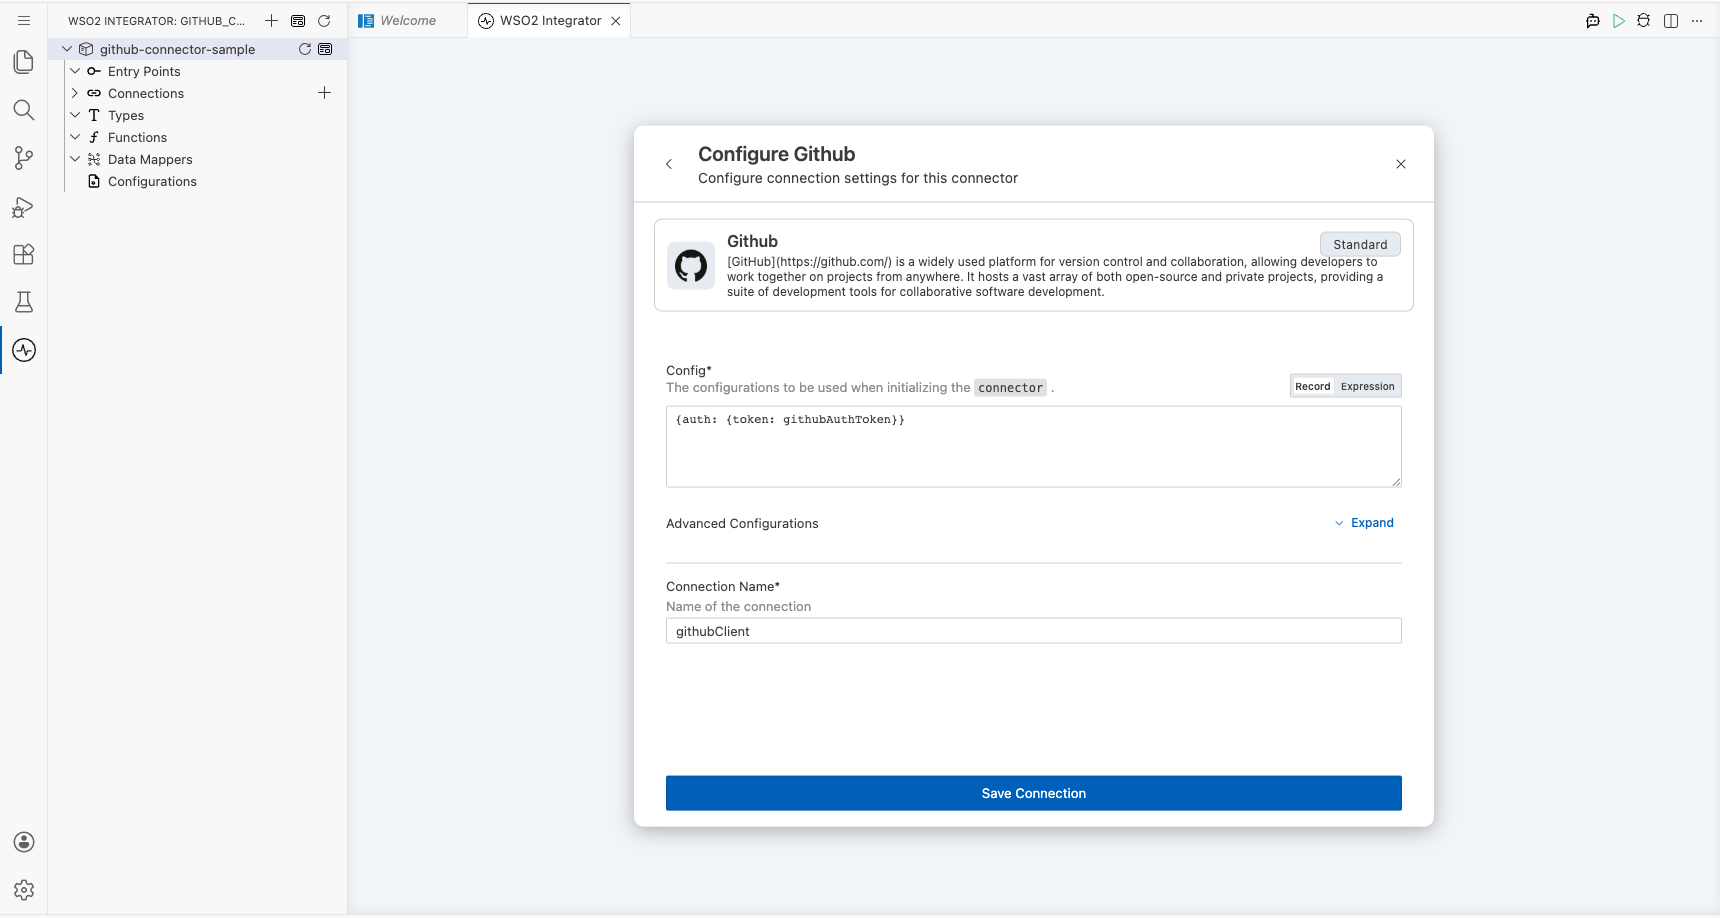
Step 3: Save the connection
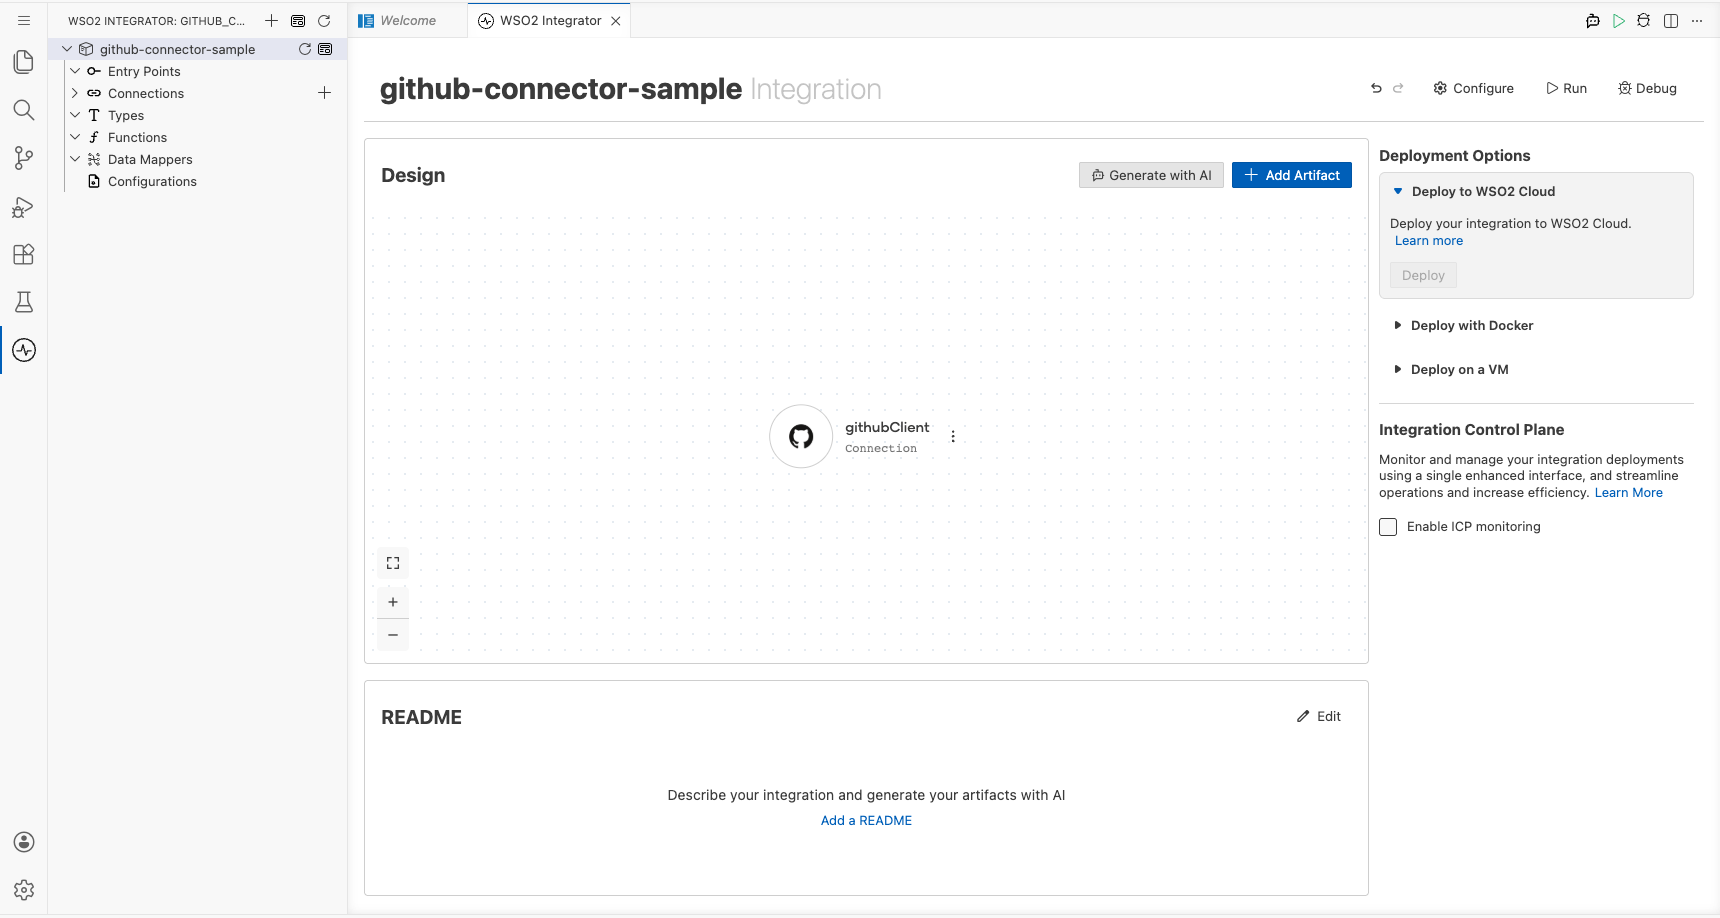
Select Save Connection. The form closes and the canvas reloads, showing the githubClient node.
Step 4: Set actual values for your configurables
- In the left panel, select Configurations.
- Set a value for each configurable listed below.
- githubAuthToken (string) : Your GitHub personal access token with
reposcope
Configuring the GitHub create an issue operation
Step 5: Add an automation entry point
- Select + Add Artifact on the Integration Design canvas.
- In the Artifacts panel, select Automation.
- In the Create New Automation form, leave the defaults and select Create.
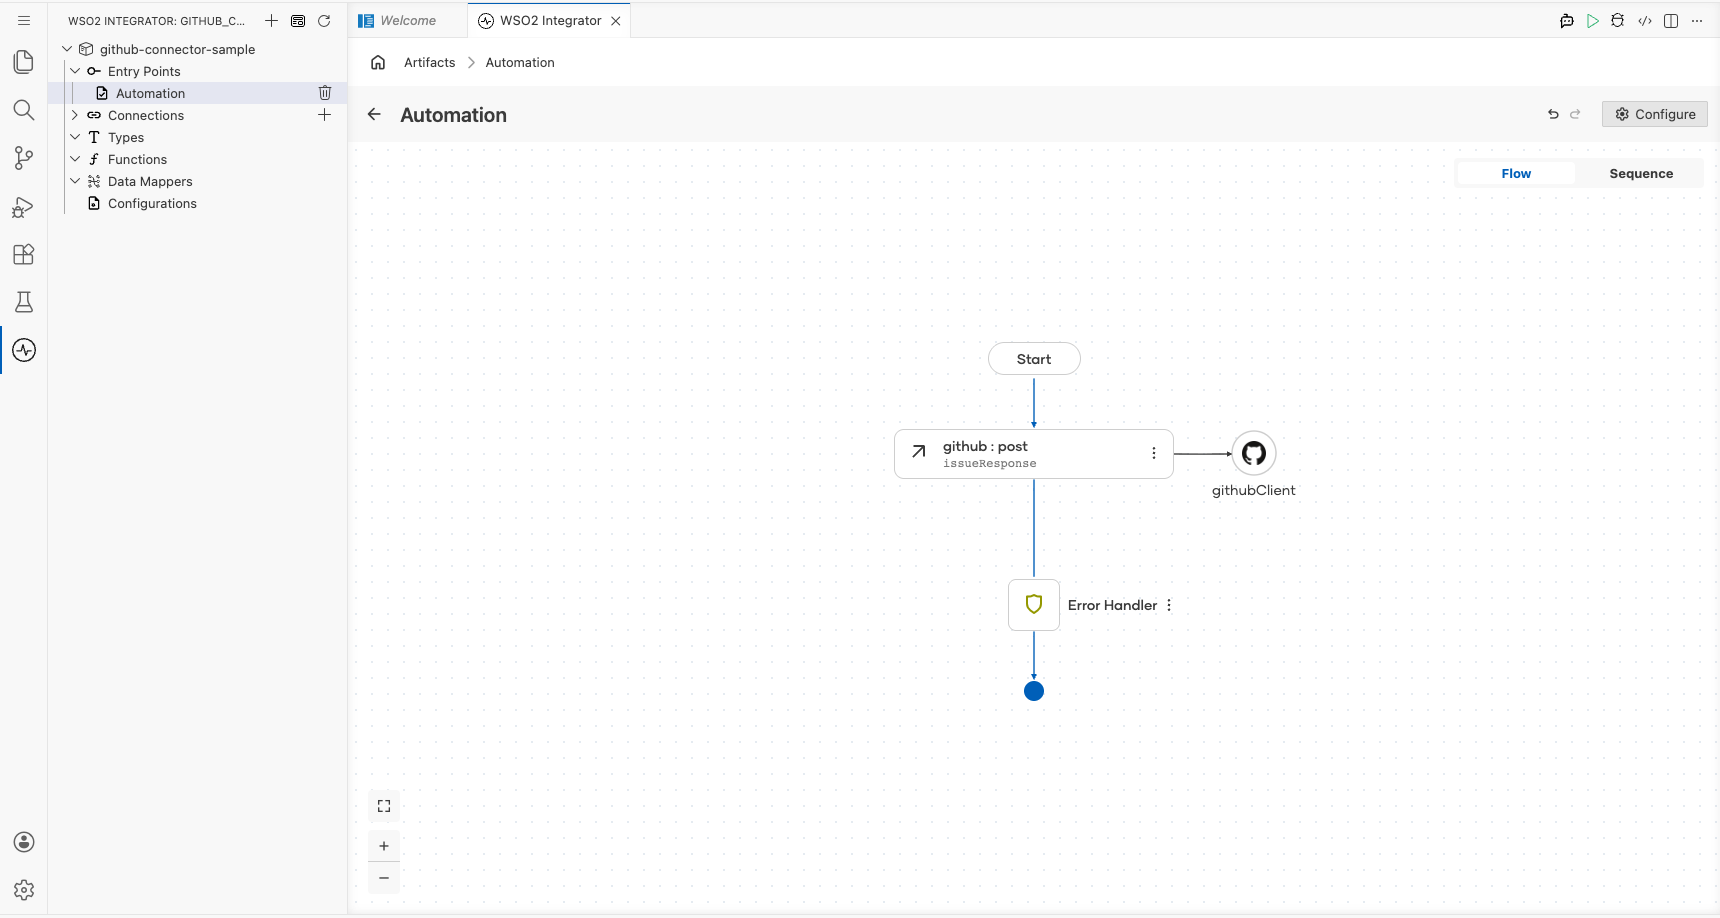
WSO2 Integrator creates a main automation under Entry Points and opens the Automation flow canvas.
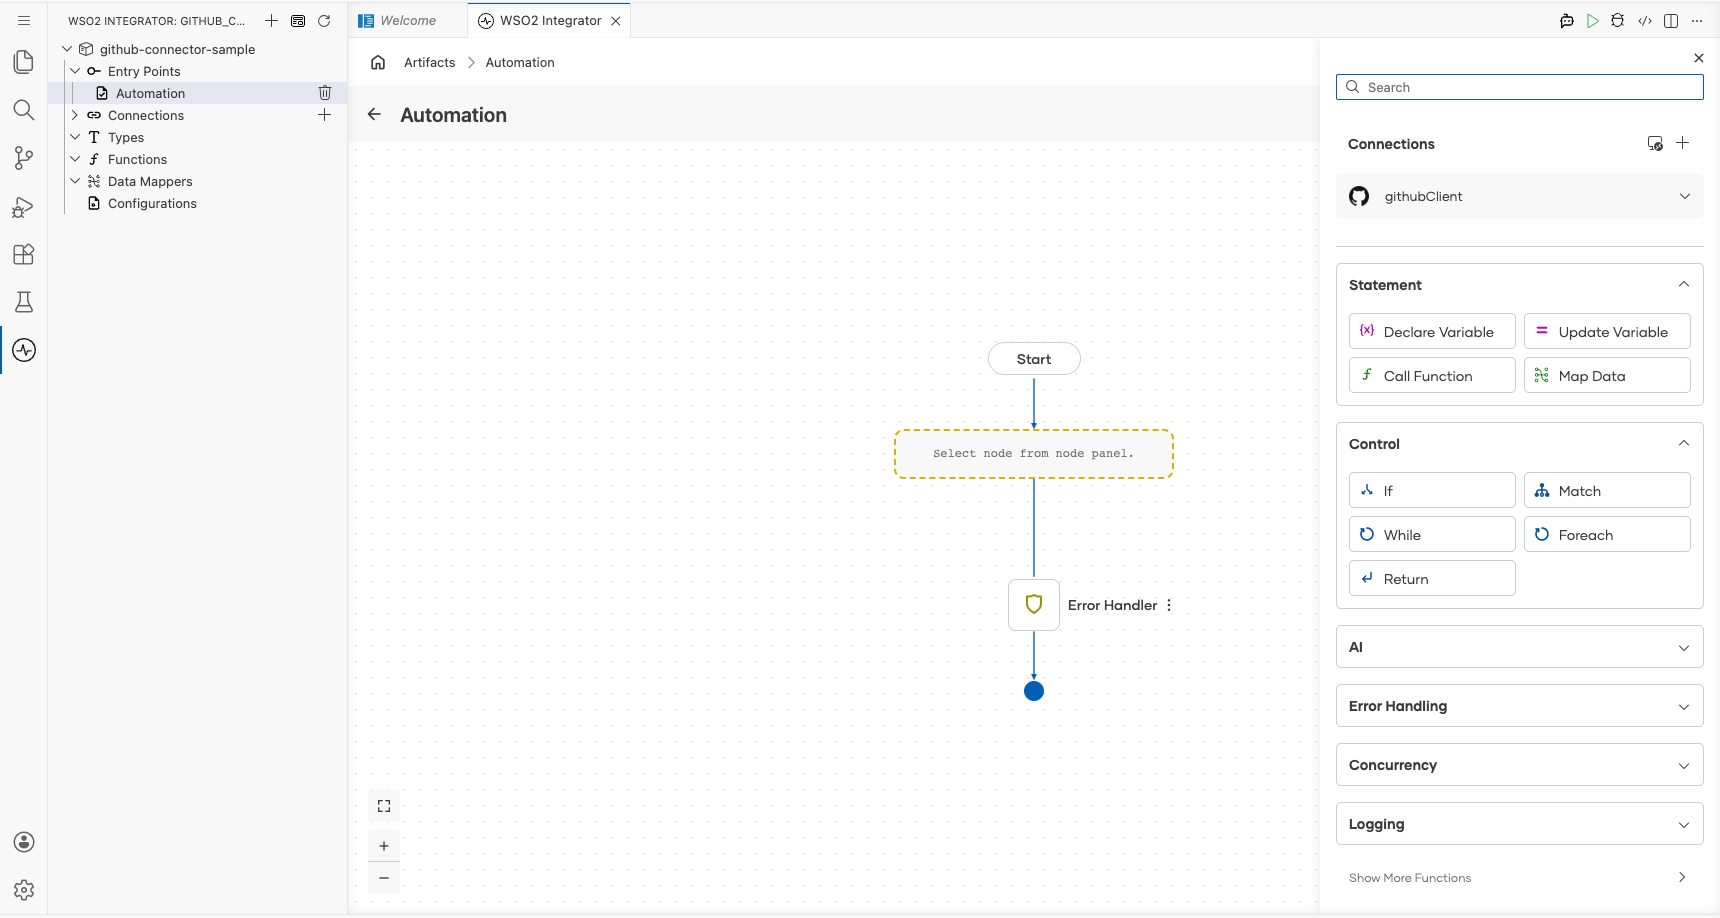
Step 6: Select the create an issue operation
On the Automation canvas, select the + between Start and Error Handler to open the node panel. Under the Connections section, expand githubClient to reveal all available operations.
Step 7: Configure the create an issue operation
Select Create an issue from the operations list and fill in all required fields in the configuration form:
- owner : Account owner of the repository (for example,
wso2) - repo : Repository name without the
.gitextension (for example,ballerina-library) - payload.title : Title of the GitHub issue
- payload.body : Body text and description for the issue
- payload.labels : Array of label names to apply to the issue
- Result : Variable to store the API response (
issueResponse)
Select Save to apply the configuration.

Try it yourself
Try this sample in WSO2 Integration Platform.

More code examples
The GitHub connector provides practical examples illustrating usage in various scenarios. Explore these examples, covering use cases like initializing a new project, creating issues, and managing pull requests.
-
Initialize a New GitHub Project - Create a new repository on GitHub, initialize it with a README file, and add collaborators to the repository.
-
Create and Assign an Issue in GitHub - Create a new issue on GitHub, assign it to a specific user, and add labels.
-
Create and Manage a PullRequest in GitHub - Create a pull request on GitHub, and request changes as necessary.
-
Star Ballerina-Platform Repositories - Fetch all repositories under the
ballerina-platformorganization on GitHub and star each of them
GitHub Trigger Example
What you'll build
This integration listens for GitHub issue events using the ballerinax/trigger.github package and the IssuesService event channel. When a GitHub user opens, closes, or modifies an issue, GitHub sends a webhook POST request to the listener, which routes the event to the appropriate handler. The onOpened handler receives the github:IssuesEvent payload and logs it as a JSON string using log:printInfo.
This example uses the ballerinax/trigger.github package, which is separate from the ballerinax/github REST API connector. Use ballerinax/github for calling GitHub APIs; use ballerinax/trigger.github for receiving GitHub webhook events.
Architecture
Prerequisites
- A GitHub repository with webhook configuration permissions
Setting up the GitHub integration
New to WSO2 Integrator? Follow the Create a New Integration guide to set up your integration first, then return here to add the trigger.
Adding the GitHub trigger
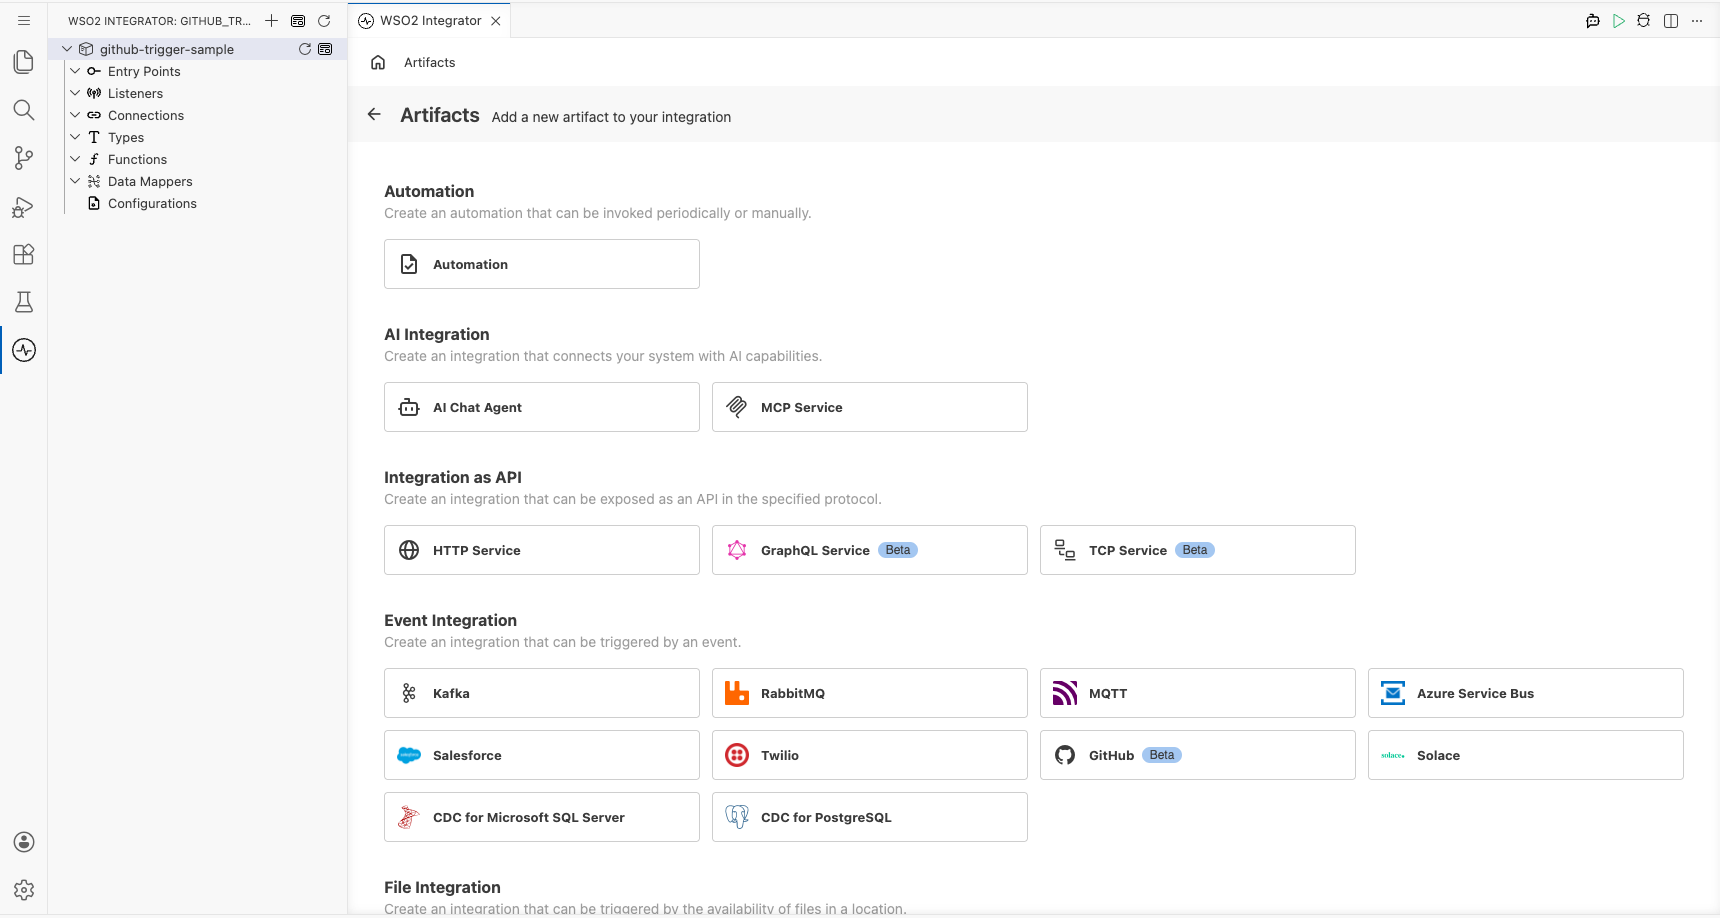
Step 1: Open the artifacts palette
Select Add Artifact to open the artifacts palette. Select the Event Integration category and locate the GitHub trigger card.
Configuring the GitHub listener
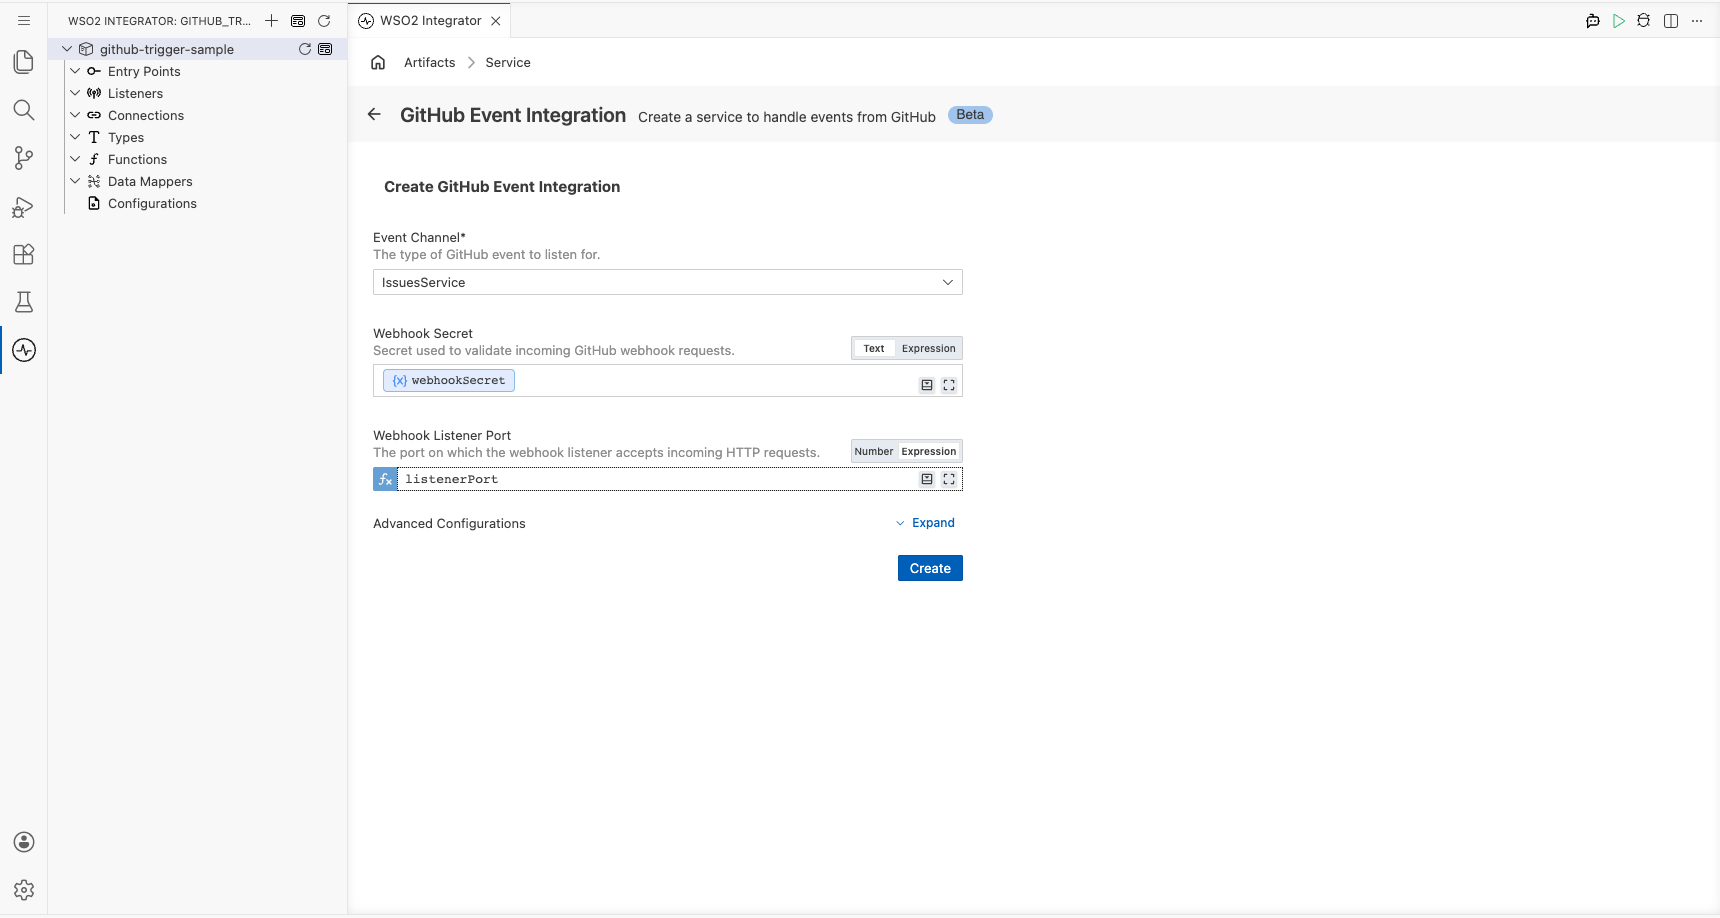
Step 2: Bind listener parameters to configurable variables
Select the GitHub card to open the Create GitHub Event Integration form. The Event Channel dropdown is pre-set to IssuesService. Bind the two required fields to configurable variables:
- webhookSecret : Secret token used to validate incoming GitHub webhook requests
- listenerPort : Port on which the webhook listener accepts incoming HTTP requests from GitHub
Step 3: Set actual values for your configurations
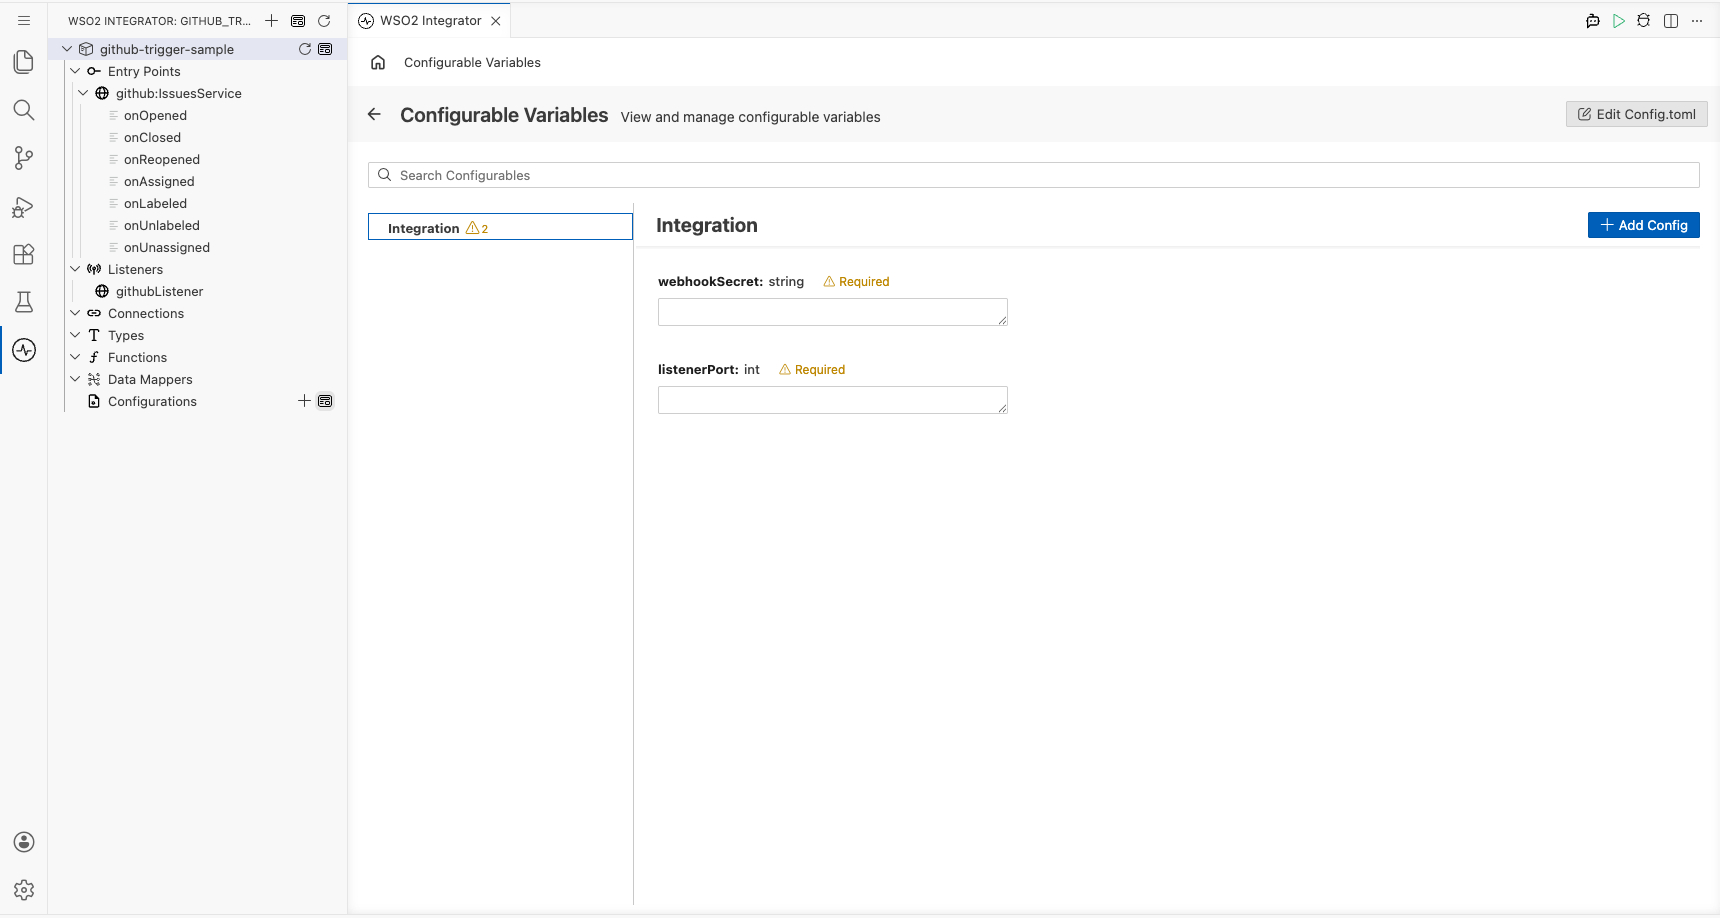
In the left panel, select Configurations to open the Configurations panel. Set a value for each configuration listed below:
- webhookSecret (string) : Secret token matching the value configured in your GitHub repository's webhook settings
- listenerPort (int) : Port number on which the webhook listener will accept incoming requests from GitHub
Step 4: Create the trigger
Select Create to submit the trigger configuration and generate the IssuesService listener.
Handling GitHub events
Step 5: Review auto-registered event handlers
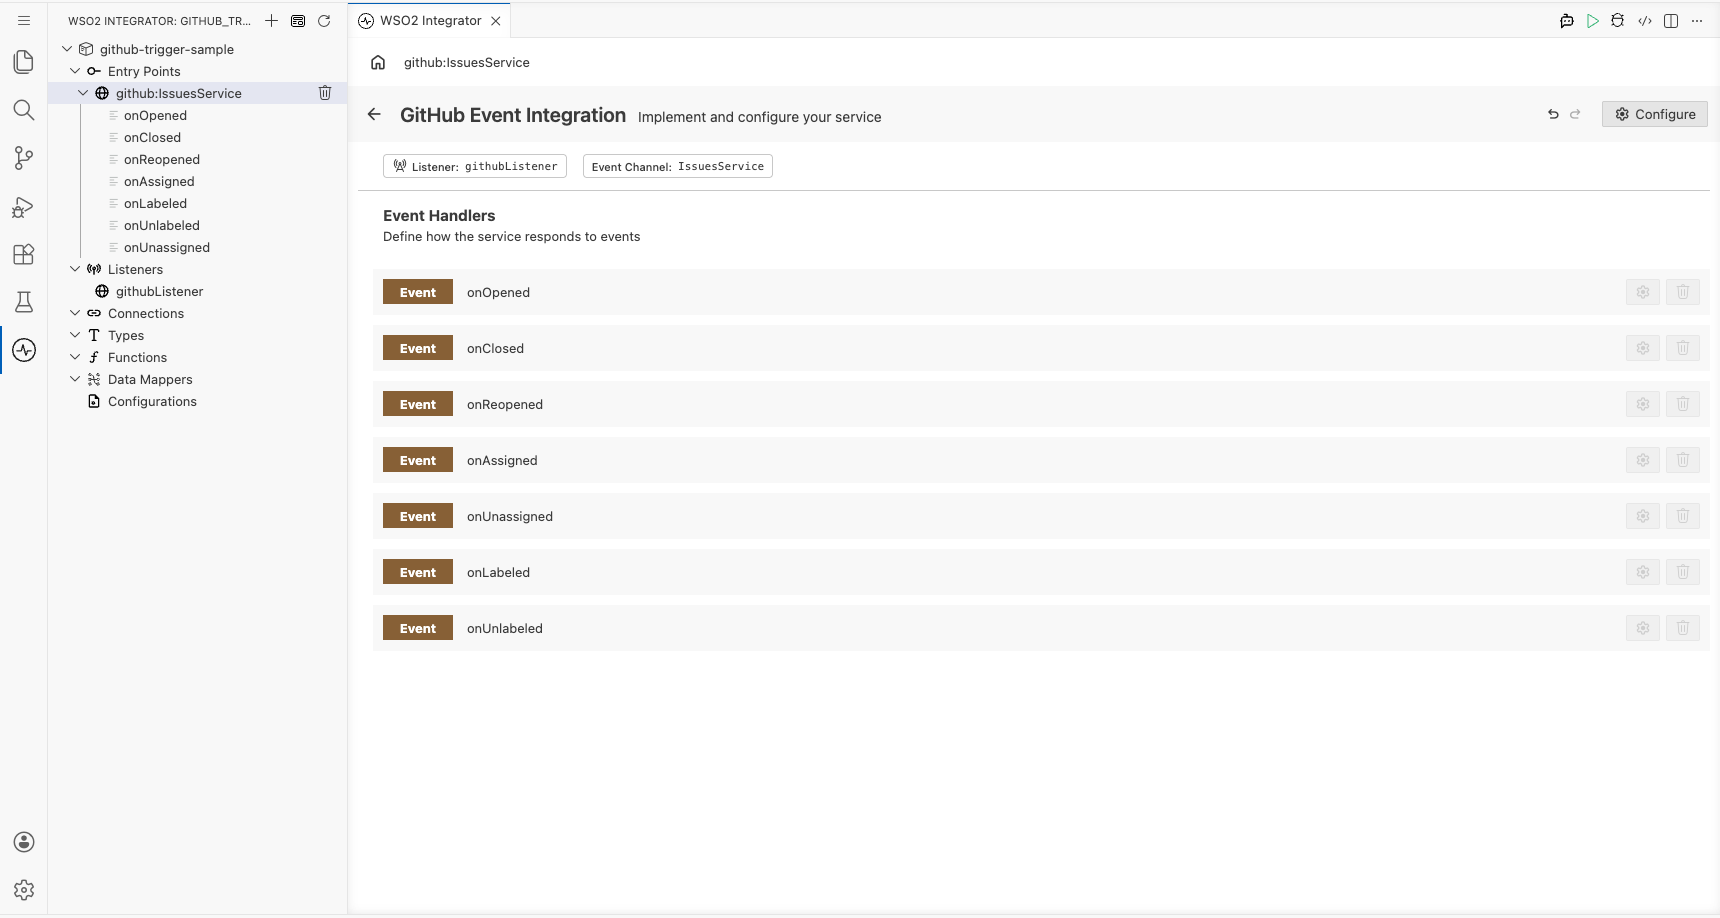
Navigate to the github:IssuesService service view. GitHub's IssuesService auto-registers all handlers when the event channel is selected: there's no separate Add Handler side panel for this trigger. The Event Handlers list includes:
onOpened: triggered when an issue is openedonClosed: triggered when an issue is closedonReopened: triggered when an issue is reopenedonAssigned,onUnassigned,onLabeled,onUnlabeled
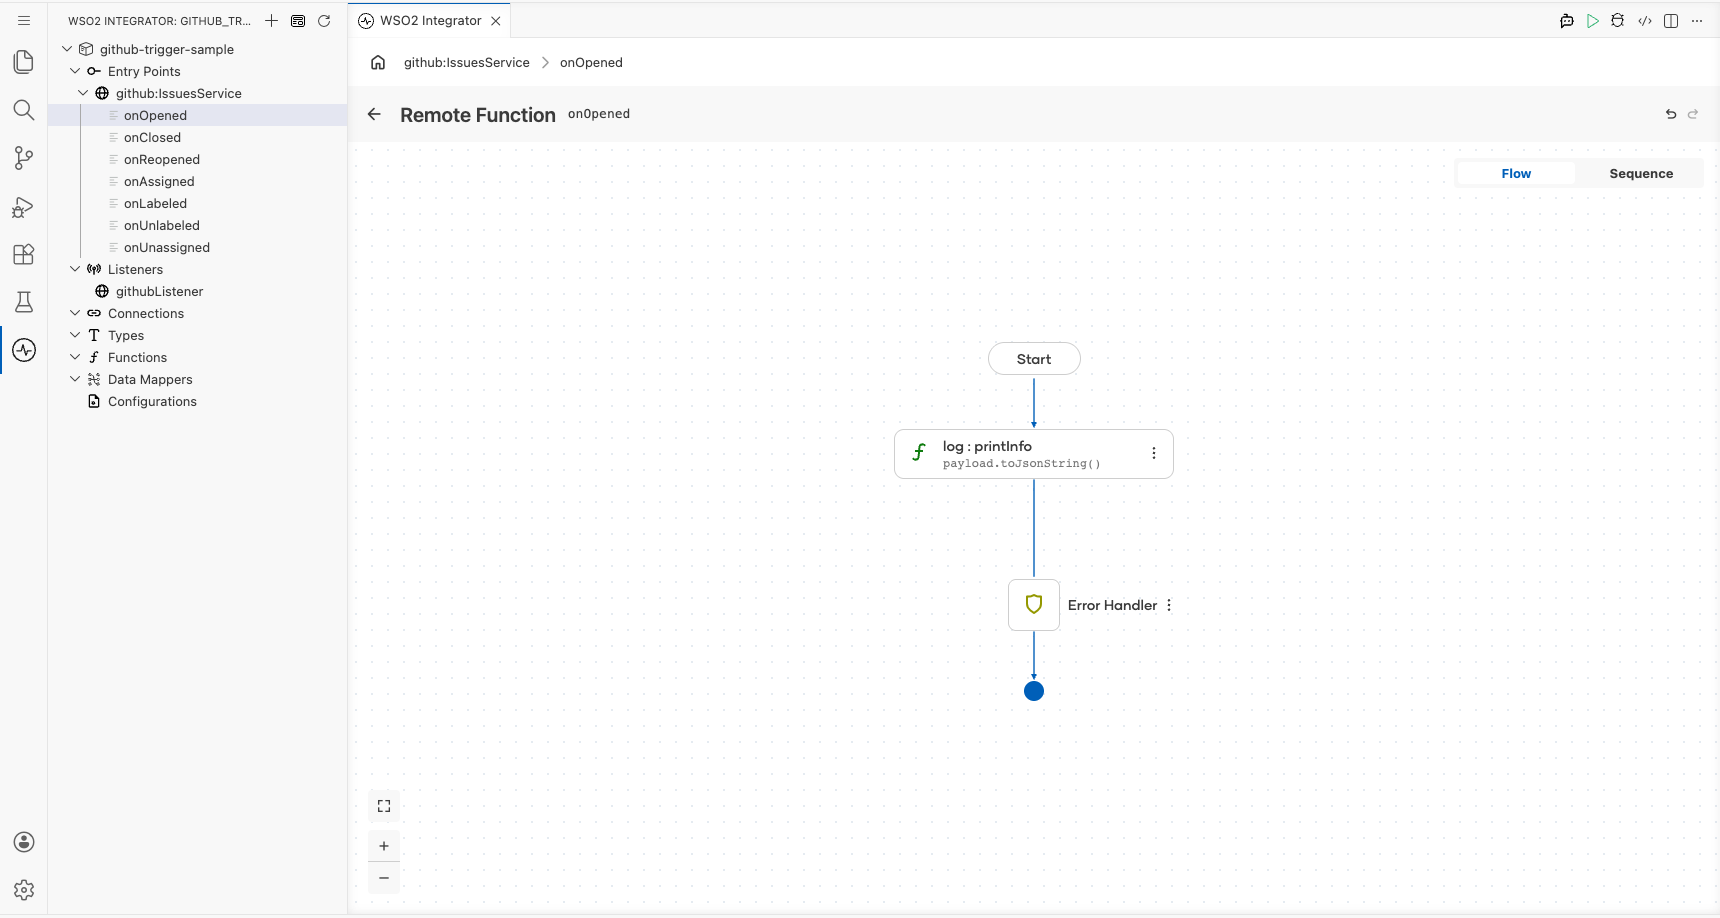
Step 6: Inspect the onOpened handler flow
Select the onOpened row to open its flow canvas. At this stage the handler body contains only the Start node and the Error Handler wrapper.
The github:IssuesEvent payload type is fixed by the IssuesService interface; you cannot change it. The type is provided by the ballerinax/trigger.github package and does not have a Define Value or Create Type Schema modal.
Step 7: Add the log statement
Select the + icon in the flow chart, and in the side panel that opens, choose Log Info from the Logging section, then enter payload.toJsonString() as the message.
Running the integration
Run the integration from WSO2 Integrator. Ensure your configurations are set before starting:
- webhookSecret : the same secret value configured in your GitHub repository's webhook settings
- listenerPort : the port on which the listener will accept incoming requests
To fire a test event, use one of the following approaches:
- GitHub repository webhook : In your GitHub repository, go to Settings → Webhooks and configure the webhook URL to point to your running listener with content type
application/jsonand the matching secret. Open or modify an issue in the repository to trigger a live webhook POST request. - GitHub CLI : Use
gh issue create(with the GitHub CLI) against your repository to open a new issue, which causes GitHub to dispatch theissues.openedevent to your configured webhook endpoint.
When an issue is opened, GitHub sends a POST request to the webhook URL. The onOpened handler receives the github:IssuesEvent payload and logs it via log:printInfo. Check the WSO2 Integrator console output to see the JSON payload.
Try it yourself
Try this sample in WSO2 Integration Platform.
What's next
- GitHub Webhooks: full reference for all event channels and handlers
- Setup Guide: create a GitHub Personal Access Token and configure a repository webhook
- Action Reference: full list of REST API operations and sample code